buttons Seat Leon 5D 2017 MEDIA SYSTEM PLUS - NAVI SYSTEM - NAVI SYSTEM PLUS
[x] Cancel search | Manufacturer: SEAT, Model Year: 2017, Model line: Leon 5D, Model: Seat Leon 5D 2017Pages: 104, PDF Size: 2.7 MB
Page 56 of 104
Audio and Media Mode
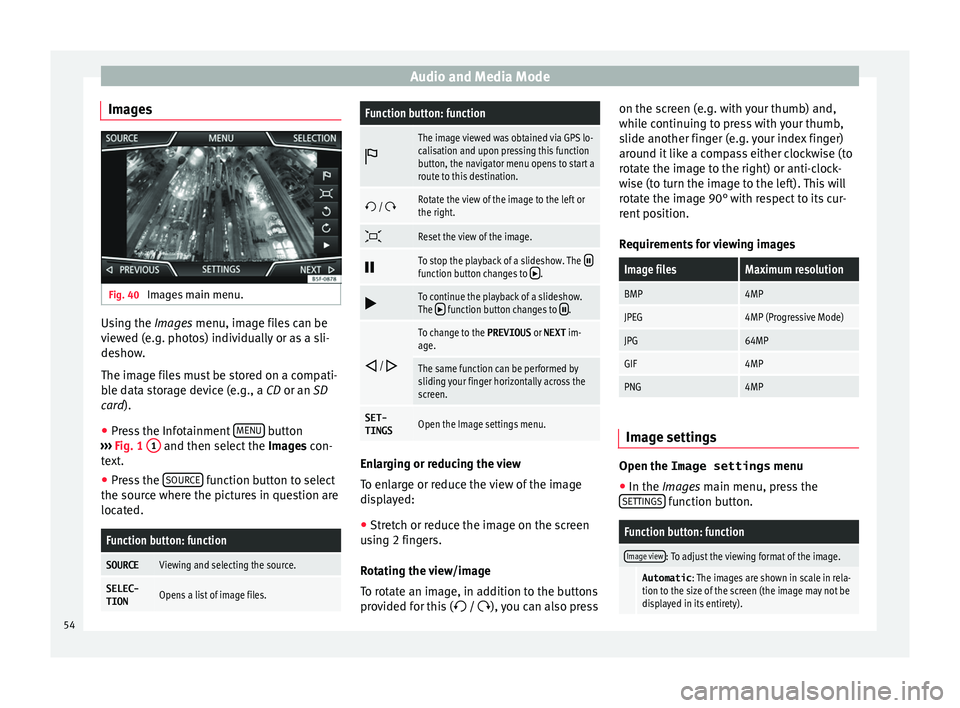
Images Fig. 40
Images main menu. Using the Ima
ge
s menu, image files can be
viewed (e.g. photos) individually or as a sli-
deshow.
The image files must be stored on a compati-
ble data storage device (e.g., a CD or an SD
card).
● Press the Infotainment MENU button
› ›
›
Fig. 1 1 and then select the
Imag
e s con-
text.
● Press the SOURCE function button to select
the sour c
e wher
e the pictures in question are
located.
Function button: function
SOURCEViewing and selecting the source.
SELEC-
TIONOpens a list of image files.
Function button: function
The image viewed was obtained via GPS lo-
calisation and upon pressing this function
button, the navigator menu opens to start a
route to this destination.
/ Rotate the view of the image to the left or
the right.
Reset the view of the image.
To stop the playback of a slideshow. The function button changes to .
To continue the playback of a slideshow.
The function button changes to .
/
To change to the PREVIOUS
or NEXT im-
age.
The same function can be performed by
sliding your finger horizontally across the
screen.
SET- TINGSOpen the Image settings menu. Enlarging or reducing the view
T
o en
l
arge or reduce the view of the image
displayed:
● Stretch or reduce the image on the screen
usin
g 2 fingers.
Rotating the view/image
To rotate an image, in addition to the buttons
provided for this ( / ), you can also press on the screen (e.g. with your thumb) and,
while c
ontinuing to press with your thumb,
slide another finger (e.g. your index finger)
around it like a compass either clockwise (to
rotate the image to the right) or anti-clock-
wise (to turn the image to the left). This will
rotate the image 90° with respect to its cur-
rent position.
Requirements for viewing images
Image filesMaximum resolution
BMP4MP
JPEG4MP (Progressive Mode)
JPG64MP
GIF4MP
PNG4MP Image settings
Open the Image settings
menu
● In the Ima ges main menu, press the
S ET
TINGS function button.
Function button: function
Image view: To adjust the viewing format of the image.
Automatic
: The images are shown in scale in rela-
tion to the size of the screen (the image may not be
displayed in its entirety). 54
Page 60 of 104
Navigation
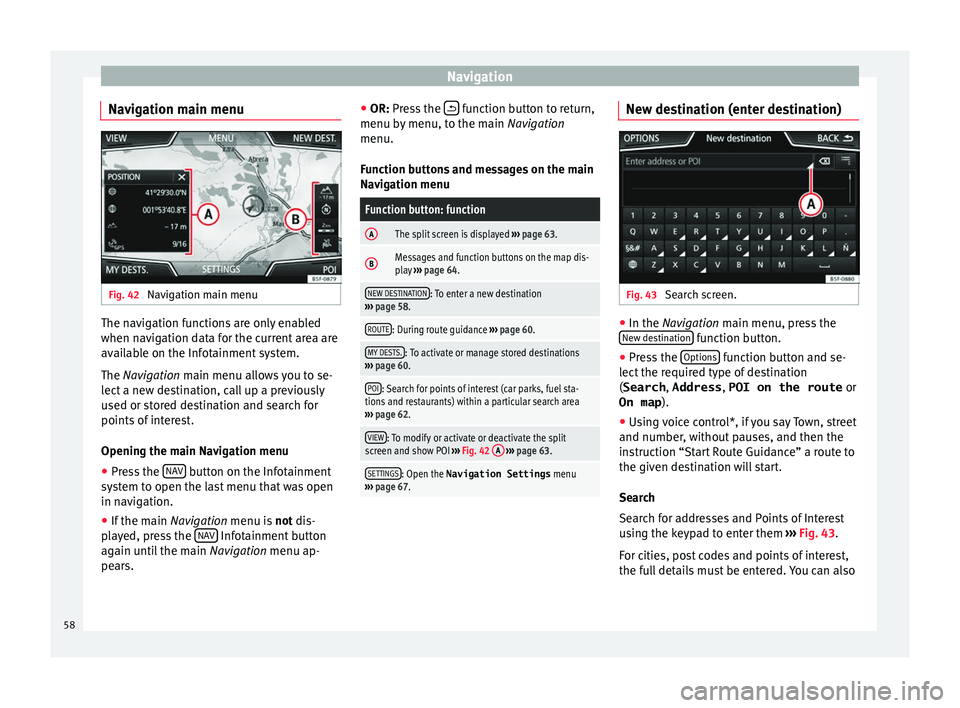
Navigation main menu Fig. 42
Navigation main menu The navigation functions are only enabled
when n
av
ig
ation data for the current area are
available on the Infotainment system.
The Navigation main menu allows you to se-
lect a new destination, call up a previously
used or stored destination and search for
points of interest.
Opening the main Navigation menu
● Press the NAV button on the Infotainment
sy s
t
em to open the last menu that was open
in navigation.
● If the main Navigation menu i
s not dis-
played, press the NAV Infotainment button
ag ain u
nti
l the main Navigation menu ap-
pears. ●
OR: Pres
s the function button to return,
menu b y
menu, t
o the main Navigation
menu.
Function buttons and messages on the main
Navigation menu
Function button: function
AThe split screen is displayed ››› page 63.
BMessages and function buttons on the map dis-
play ››› page 64.
NEW DESTINATION: To enter a new destination
››› page 58.
ROUTE: During route guidance ››› page 60.
MY DESTS.: To activate or manage stored destinations
››› page 60.
POI: Search for points of interest (car parks, fuel sta-
tions and restaurants) within a particular search area
››› page 62.
VIEW: To modify or activate or deactivate the split
screen and show POI ››› Fig. 42 A
››› page 63.
SETTINGS: Open the Navigation Settings menu
››› page 67. New destination (enter destination)
Fig. 43
Search screen. ●
In the Na vigation main menu, press the
New de s
tination function button.
● Press the Option
s function button and se-
l ect
the r
equired type of destination
(Search , Address , POI on the route or
On map ).
● Using voice control*, if you say Town, street
and number, without
pauses, and then the
instruction “Start Route Guidance” a route to
the given destination will start.
Search
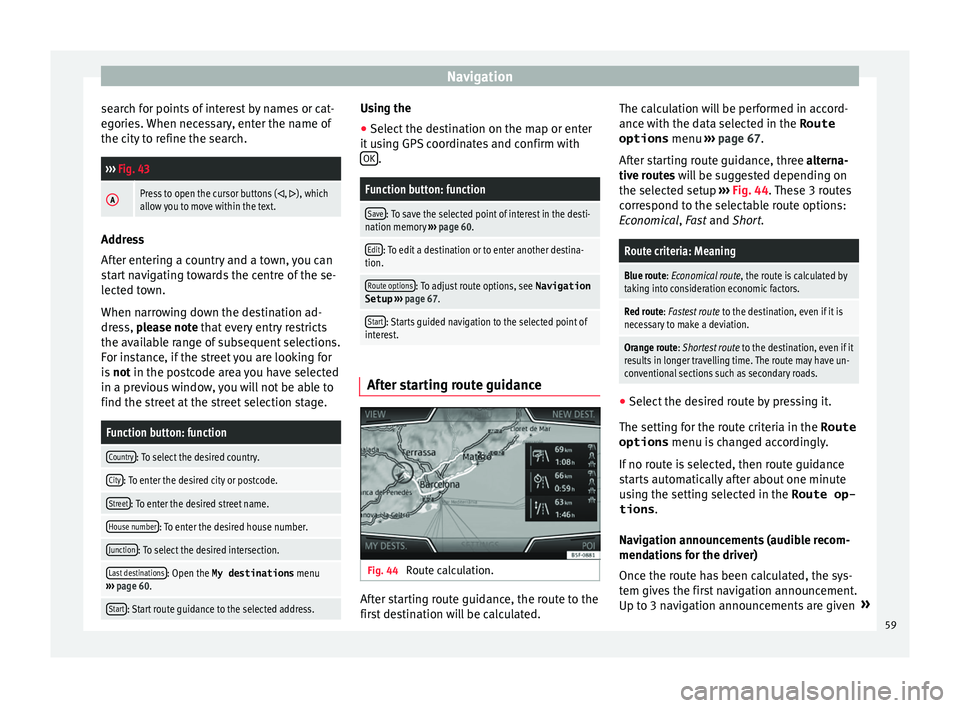
Search for addresses and Points of Interest
using the keypad to enter them ›››
Fig. 43.
For cities, post codes and points of interest,
the full details must be entered. You can also
58
Page 61 of 104
Navigation
search for points of interest by names or cat-
e g
orie
s. When necessary, enter the name of
the city to refine the search.
››› Fig. 43
APress to open the cursor buttons (, ), which
allow you to move within the text. Address
Aft
er ent
ering a country and a town, you can
start navigating towards the centre of the se-
lected town.
When narrowing down the destination ad-
dress, please note that every entry restricts
the available range of subsequent selections.
For instance, if the street you are looking for
is not in the postcode area you have selected
in a previous window, you will not be able to
find the street at the street selection stage.
Function button: function
Country: To select the desired country.
City: To enter the desired city or postcode.
Street: To enter the desired street name.
House number: To enter the desired house number.
Junction: To select the desired intersection.
Last destinations: Open the My destinations menu
››› page 60.
Start: Start route guidance to the selected address. Using the
● Select the destination on the map or enter
it u
s
ing GPS coordinates and confirm with
OK .
Function button: function
Save: To save the selected point of interest in the desti-
nation memory ››› page 60.
Edit: To edit a destination or to enter another destina-
tion.
Route options: To adjust route options, see Navigation
Setup ››› page 67.
Start: Starts guided navigation to the selected point of
interest. After starting route guidance
Fig. 44
Route calculation. After starting route guidance, the route to the
fir
s
t
destination will be calculated. The calculation will be performed in accord-
ance with the d
ata selected in the Route
options menu ››› page 67.
After starting route guidance, three alterna-
tive routes will be suggested depending on
the selected setup ››› Fig. 44. These 3 routes
correspond to the selectable route options:
Economical, Fast and Short.
Route criteria: Meaning
Blue route: Economical route, the route is calculated by taking into consideration economic factors.
Red route: Fastest route to the destination, even if it is
necessary to make a deviation.
Orange route: Shortest route to the destination, even if it
results in longer travelling time. The route may have un-
conventional sections such as secondary roads. ●
Select the desired route by pressing it.
The settin g f
or the r
oute criteria in the Route
options menu is changed accordingly.
If no route is selected, then route guidance
starts automatically after about one minute
using the setting selected in the Route op- tions .
Navigation announcements (audible recom-
mendations for the driver)
Once the route has been calculated, the sys-
tem gives the first navigation announcement.
Up to 3 navigation announcements are given »
59
Page 63 of 104
Navigation
● Pr e
s
s the My dests. function button in the
m ain
Na
vigation menu.
● Select the desired function button.
Store po
sition ,
R
out
e s ,
D
e
s tinations ,
La s
t
destinations or
Home a
d
dr ess .
St or
e po
sition
● By pressing the Store po
sition function but-
t on, the
v
ehicle's current position is stored
as a Flagged destination in the destina-
tion memory.
To permanently store the saved position as a
Flagged destination , it must be re-
named in the destination memory. Otherwise
the stored position will be overwritten the
next time a flagged destination is stored.
● Mark the Flagged destination in the
destin
ation memory.
● Press the Store function button.
The n ame c
an be c
hanged in the following in-
put window. Press the function button to
s t
or
e the destination.
Routes
In the Route mode, you can define various
destinations (final destination and stop-
overs).
The starting point of a route is always the
current vehicle position determined by the In-
fotainment system. The destination is the end point of a route.
Stopov
er destinations
are driven to before the destination.
● In the Navigation main menu, press the
My
Dests. function button.
● Press the R
out
e
s function button. The
r out
e
s stored previously will appear
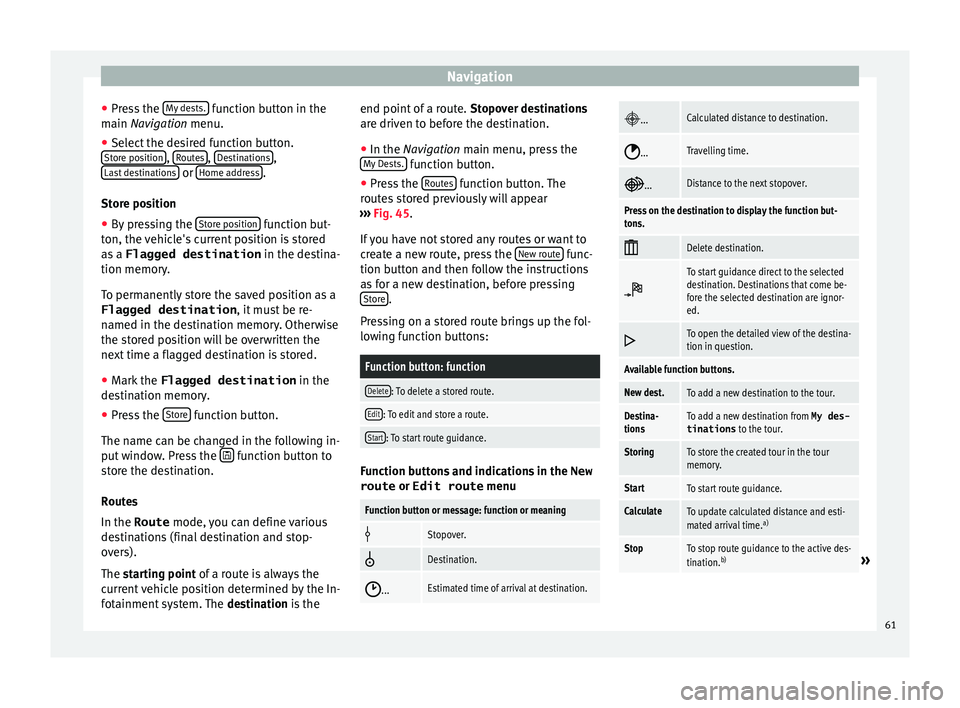
››› Fig. 45.
If you have not stored any routes or want to
create a new route, press the New route func-
tion b utt
on and then f
ollow the instructions
as for a new destination, before pressing Store .
Pr e
s
sing on a stored route brings up the fol-
lowing function buttons:
Function button: function
Delete: To delete a stored route.
Edit: To edit and store a route.
Start: To start route guidance. Function buttons and indications in the
New
route or Edit route menu
Function button or message: function or meaning
Stopover.
Destination.
...Estimated time of arrival at destination.
...Calculated distance to destination.
...Travelling time.
...Distance to the next stopover.
Press on the destination to display the function but-
tons.
Delete destination.
To start guidance direct to the selected
destination. Destinations that come be-
fore the selected destination are ignor-
ed.
To open the detailed view of the destina-
tion in question.
Available function buttons.
New dest.To add a new destination to the tour.
Destina-
tionsTo add a new destination from My des-
tinations
to the tour.
StoringTo store the created tour in the tour
memory.
StartTo start route guidance.
CalculateTo update calculated distance and esti-
mated arrival time. a)
StopTo stop route guidance to the active des-
tination.b)» 61
Page 66 of 104
NavigationFunction button: function
Demo mode start (only when demo mode is active)
Map display
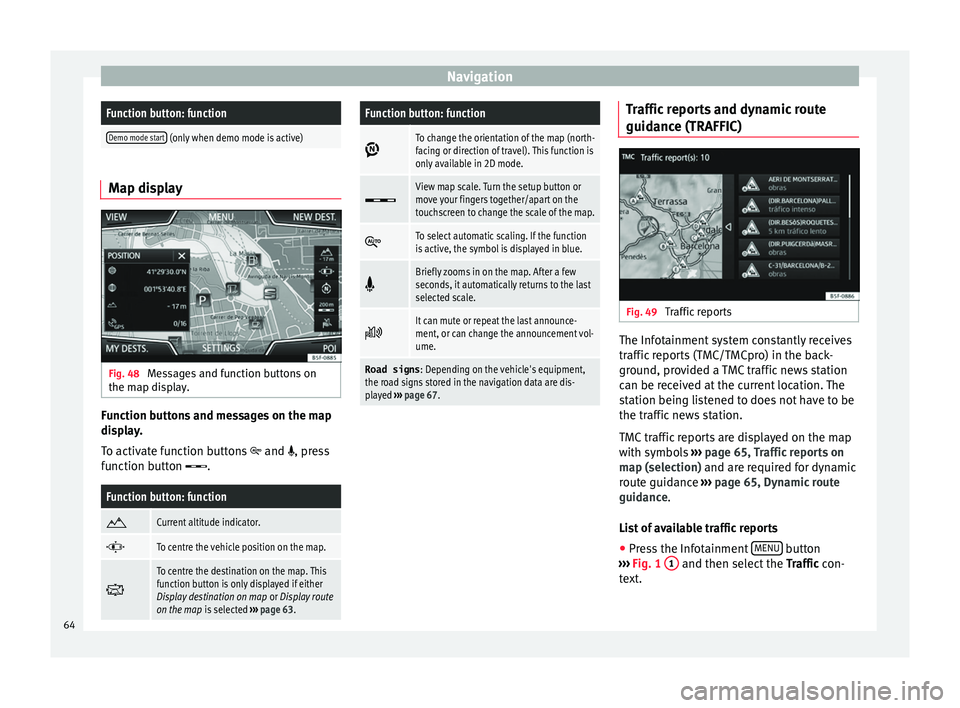
Fig. 48
Messages and function buttons on
the m ap di
s
play. Function buttons and messages on the map
di
s
p
lay.
To activate function buttons
and , press
function button .
Function button: function
Current altitude indicator.
To centre the vehicle position on the map.
To centre the destination on the map. This
function button is only displayed if either
Display destination on map
or Display route
on the map is selected ››› page 63.
Function button: function
To change the orientation of the map (north-
facing or direction of travel). This function is
only available in 2D mode.
View map scale. Turn the setup button or
move your fingers together/apart on the
touchscreen to change the scale of the map.
To select automatic scaling. If the function
is active, the symbol is displayed in blue.
Briefly zooms in on the map. After a few
seconds, it automatically returns to the last
selected scale.
It can mute or repeat the last announce-
ment, or can change the announcement vol-
ume.
Road signs
: Depending on the vehicle's equipment,
the road signs stored in the navigation data are dis-
played ››› page 67. Traffic reports and dynamic route
guid
anc
e (TRAFFIC) Fig. 49
Traffic reports The Infotainment system constantly receives
tr
affic
r
eports (TMC/TMCpro) in the back-
ground, provided a TMC traffic news station
can be received at the current location. The
station being listened to does not have to be
the traffic news station.
TMC traffic reports are displayed on the map
with symbols ››› page 65, Traffic reports on
map (selection) and are required for dynamic
route guidance ››› page 65, Dynamic route
guidance.
List of available traffic reports
● Press the Infotainment MENU button
› ›
›
Fig. 1 1 and then select the
Tr
affic con-
text.
64
Page 71 of 104
NavigationFunction button: function
Define demo mode starting point: if demo mode is acti-
vated, a fictitious starting point for virtual route
guidance can be defined when the vehicle is sta-
tionary.
Waypoint modeb) : To start Offroad navigation.
a) This function depends on the country.
b) Only available for the model: “Navi System Plus”.
Navigation in Offroad mode*
Introduction 3 Only
available for the model: Navi System Plus
O
ffroad* navigation is a function for offroad
driving that provides directions in “non-digi-
tised areas” at low speeds.
Non-digitised areas are areas about which
the system does not have information for the
streets or terrain. It does not detect streets,
buildings or natural limits such as mountains
or rivers, although they may be shown on the
map.
Offroad* navigation is not suitable for driving
on conventional roads as it does not detect
one-way streets, motorway entries or similar. Offroad Navigation Menu 3 Only available for the model: Navi System Plus
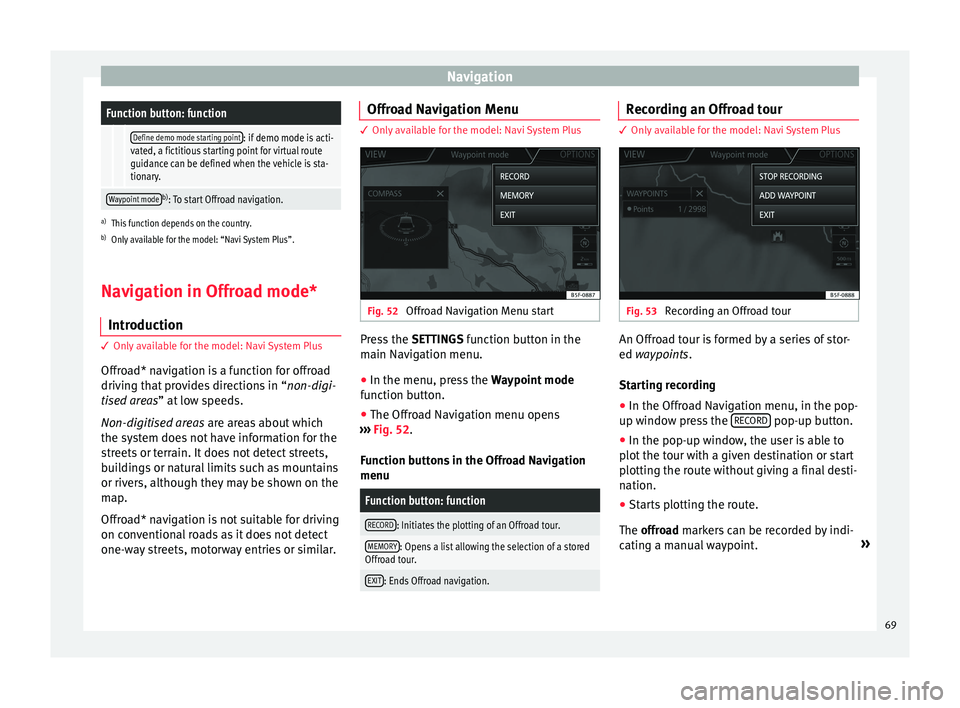
Fig. 52
Offroad Navigation Menu start Press the
SETTINGS function button in the
m ain Nav
igation menu.
● In the menu, press the Way
point mode
function button.
● The Offroad Navigation menu opens
›››
Fig. 52.
Function buttons in the Offroad Navigation
menu
Function button: function
RECORD: Initiates the plotting of an Offroad tour.
MEMORY: Opens a list allowing the selection of a stored
Offroad tour.
EXIT: Ends Offroad navigation. Recording an Offroad tour
3 Only available for the model: Navi System Plus
Fig. 53
Recording an Offroad tour An Offroad tour is formed by a series of stor-
ed wa
ypoin
t
s.
Starting recording
● In the Offroad Navigation menu, in the pop-
up window pr
ess the RECORD pop-up button.
● In the pop-up window, the user is able to
p lot
the t
our with a given destination or start
plotting the route without giving a final desti-
nation.
● Starts plotting the route.
The offroa
d markers can be recorded by indi-
cating a manual waypoint. »
69
Page 77 of 104
CAR menu
Evaluation of efficient driving style
The effic iency
of
the driving style is reflected
by different elements on the display.
Display ››› Fig. 61: Meaning
1Different symbols are shown on the left of the col-
umns that report on the current driving style ››› ta-
ble on page 75.
2
The white column is an indication of where the ef-
ficiency graph begins (from left to right).
It shows the position of the evaluation that is cur-
rently being performed.
3
Bars to represent acceleration.
The position of the car represents the acceleration.
If speed is constant, the car remains in the central
area. When accelerating or braking, the car moves
forward or backward respectively.
4
Columns to show driving style efficiency.
On the horizon, the columns represent the effi-
ciency of the driving style in a retrospective man-
ner and move from left to right every five seconds
or so. The higher the height of the columns, the
more efficient the driving style.
The colour of the sky represents the average of the
last three minutes. The colour changes from grey
(less efficient) to blue (more efficient).
Symbols ››› Fig. 62: Meaning
AForesight when driving. If sudden changes of ac-
celeration occur, driving style efficiency is re-
duced.
BGear-change indicator.
Symbols ››› Fig. 62: Meaning
CThe current vehicle speed is having a negative im-
pact on fuel consumption.
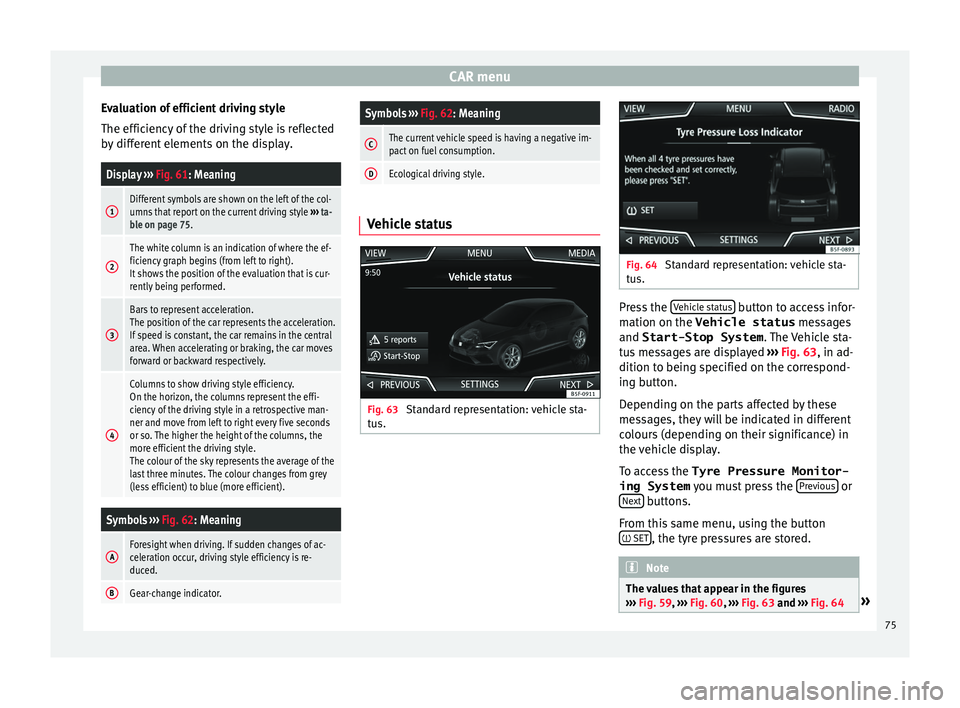
DEcological driving style. Vehicle status
Fig. 63
Standard representation: vehicle sta-
t u
s. Fig. 64
Standard representation: vehicle sta-
tu s. Press the
V
ehic
l
e status button to access infor-
m ation on the Vehicle status
me
s
sages
and Start-Stop System . The Vehicle sta-
tus messages are displayed ››› Fig. 63, in ad-
dition to being specified on the correspond-
ing button.
Depending on the parts affected by these
messages, they will be indicated in different
colours (depending on their significance) in
the vehicle display.
To access the Tyre Pressure Monitor-
ing System you must press the Previous or
Ne xt buttons.
Fr om thi
s
same menu, using the button
SET , the tyre pressures are stored.
Note
The values that appear in the figures
›› ›
Fig. 59, ››› Fig. 60, ››› Fig. 63 and ››› Fig. 64 » 75
Page 83 of 104
Telephone management system (PHONE)
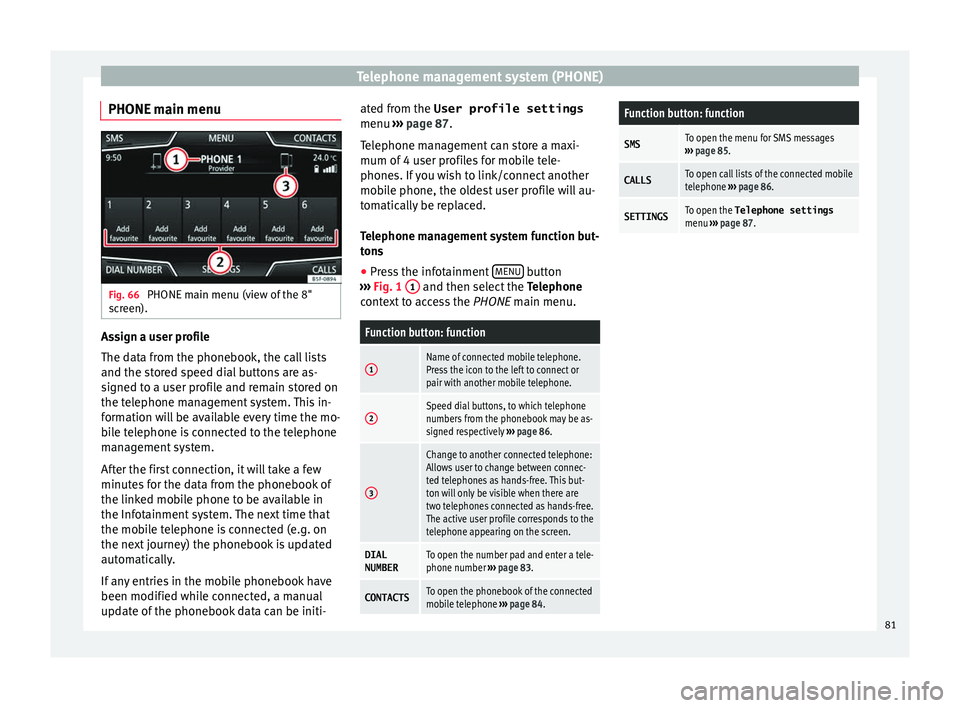
PHONE main menu Fig. 66
PHONE main menu (view of the 8"
s c
r
een). Assign a user profile
The d
at
a fr
om the phonebook, the call lists
and the stored speed dial buttons are as-
signed to a user profile and remain stored on
the telephone management system. This in-
formation will be available every time the mo-
bile telephone is connected to the telephone
management system.
After the first connection, it will take a few
minutes for the data from the phonebook of
the linked mobile phone to be available in
the Infotainment system. The next time that
the mobile telephone is connected (e.g. on
the next journey) the phonebook is updated
automatically.
If any entries in the mobile phonebook have
been modified while connected, a manual
update of the phonebook data can be initi- ated from the User profile settings
menu ›››
page 87.
Telephone management can store a maxi-
mum of 4 user profiles for mobile tele-
phones. If you wish to link/connect another
mobile phone, the oldest user profile will au-
tomatically be replaced.
Telephone management system function but-
tons
● Press the infotainment MENU button
› ›
›
Fig. 1 1 and then select the
Tel
ephone
c
ontext to access the PHONE main menu.
Function button: function
1Name of connected mobile telephone.
Press the icon to the left to connect or
pair with another mobile telephone.
2Speed dial buttons, to which telephone
numbers from the phonebook may be as-
signed respectively ››› page 86.
3
Change to another connected telephone:
Allows user to change between connec-
ted telephones as hands-free. This but-
ton will only be visible when there are
two telephones connected as hands-free.
The active user profile corresponds to the
telephone appearing on the screen.
DIAL
NUMBERTo open the number pad and enter a tele-
phone number ››› page 83.
CONTACTSTo open the phonebook of the connected
mobile telephone ››› page 84.
Function button: function
SMSTo open the menu for SMS messages
››› page 85.
CALLSTo open call lists of the connected mobile
telephone ››› page 86.
SETTINGSTo open the Telephone settings
menu ››› page 87. 81
Page 87 of 104
Telephone management system (PHONE)Possible functions
Send an SMS
to a contactPress the function button in the
detailed list.
Starting route
guidance to
the address of
a contact a)If the address details of a contact
have been stored, route guidance can
be started for the address of the con-
tact. Press the address data on the
detailed view to start route guidance.
a)
A system with a navigation function is required. Note
If you edit the number before calling, this will
only be u
sed for the call and will not be stor-
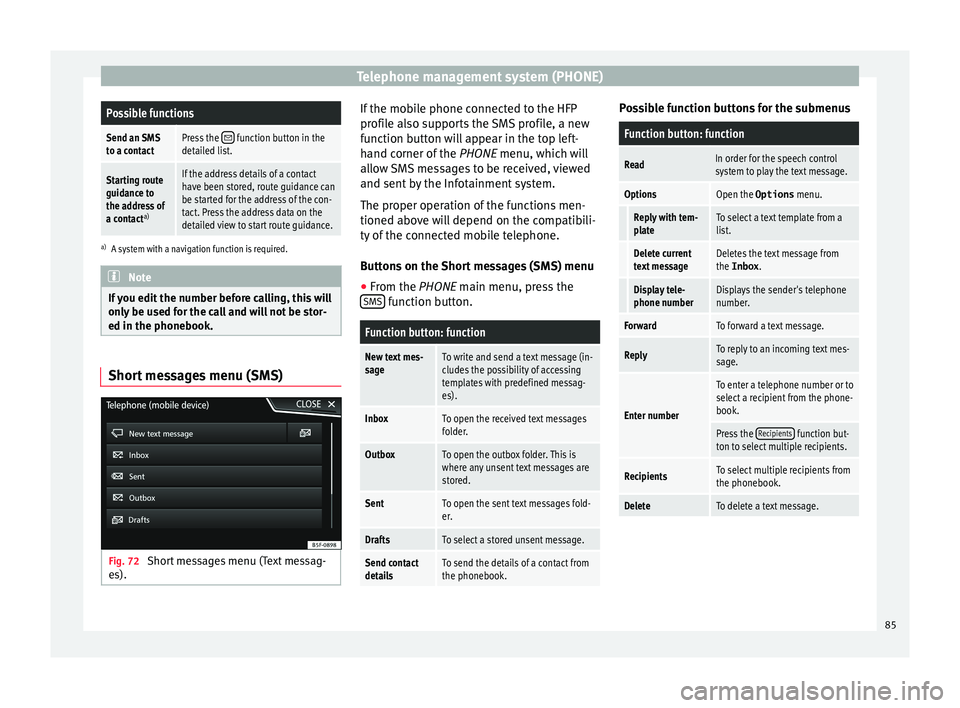
ed in the phonebook. Short messages menu (SMS)
Fig. 72
Short messages menu (Text messag-
e s). If the mobile phone connected to the HFP
pr
ofi
l
e also supports the SMS profile, a new
function button will appear in the top left-
hand corner of the PHONE menu, which will
allow SMS messages to be received, viewed
and sent by the Infotainment system.
The proper operation of the functions men-
tioned above will depend on the compatibili-
ty of the connected mobile telephone.
Buttons on the Short messages (SMS) menu
● From the PHONE main menu, pre
ss the
SMS function button.
Function button: function
New text mes-
sageTo write and send a text message (in-
cludes the possibility of accessing
templates with predefined messag-
es).
InboxTo open the received text messages
folder.
OutboxTo open the outbox folder. This is
where any unsent text messages are
stored.
SentTo open the sent text messages fold-
er.
DraftsTo select a stored unsent message.
Send contact
detailsTo send the details of a contact from
the phonebook. Possible function buttons for the submenus
Function button: function
ReadIn order for the speech control
system to play the text message.
OptionsOpen the Options
menu.
Reply with tem-
plateTo select a text template from a
list.
Delete current
text messageDeletes the text message from
the Inbox.
Display tele-
phone numberDisplays the sender's telephone
number.
ForwardTo forward a text message.
ReplyTo reply to an incoming text mes-
sage.
Enter number
To enter a telephone number or to
select a recipient from the phone-
book.
Press the Recipients function but-
ton to select multiple recipients.
RecipientsTo select multiple recipients from
the phonebook.
DeleteTo delete a text message. 85
Page 88 of 104
Telephone management system (PHONE)
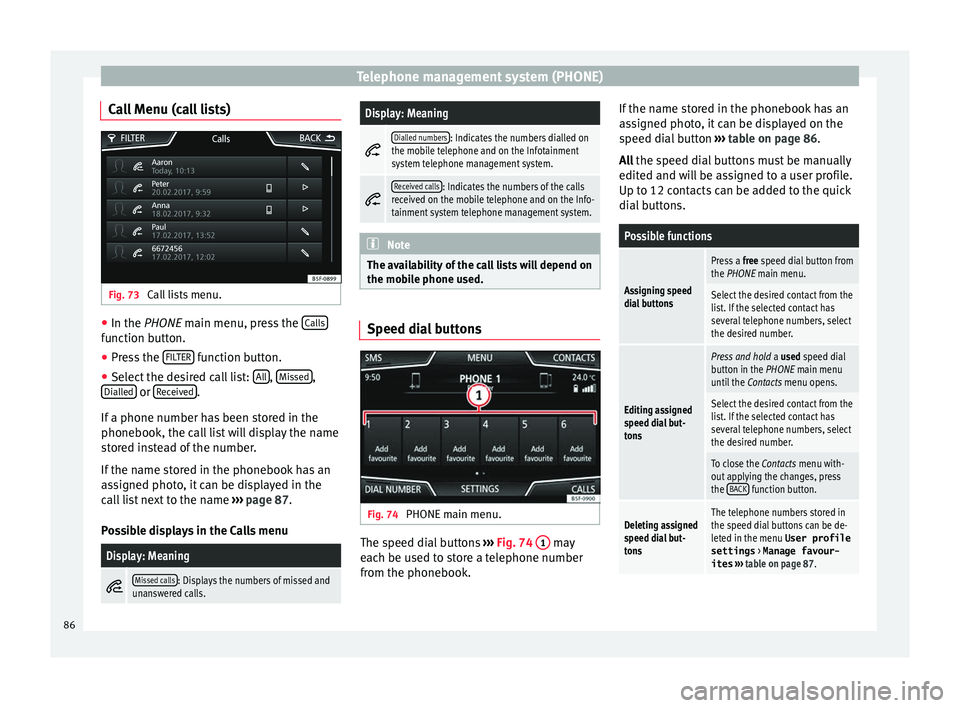
Call Menu (call lists) Fig. 73
Call lists menu. ●
In the PHONE m ain menu, pr
e ss the Calls function button.
● Press the FIL
TER function button.
● Select the desired call list: A
l
l ,
Mi
s
sed ,
Di al
l
ed or
R
ec
eiv ed .
If a phone number h
a
s been stored in the
phonebook, the call list will display the name
stored instead of the number.
If the name stored in the phonebook has an
assigned photo, it can be displayed in the
call list next to the name ››› page 87.
Possible displays in the Calls menu
Display: Meaning
Missed calls: Displays the numbers of missed and
unanswered calls.
Display: Meaning
Dialled numbers: Indicates the numbers dialled on
the mobile telephone and on the Infotainment
system telephone management system.
Received calls: Indicates the numbers of the calls
received on the mobile telephone and on the Info-
tainment system telephone management system. Note
The availability of the call lists will depend on
the mob i
le phone used. Speed dial buttons
Fig. 74
PHONE main menu. The speed dial buttons
››
›
Fig. 74 1 may
e ac
h be u
sed to store a telephone number
from the phonebook. If the name stored in the phonebook has an
ass
igned photo, it can be displayed on the
speed dial button ››› table on page 86.
All the speed dial buttons must be manually
edited and will be assigned to a user profile.
Up to 12 contacts can be added to the quick
dial buttons.
Possible functions
Assigning speed
dial buttons
Press a free speed dial button from
the PHONE main menu.
Select the desired contact from the
list. If the selected contact has
several telephone numbers, select
the desired number.
Editing assigned
speed dial but-
tons
Press and hold a used speed dial
button in the PHONE main menu
until the Contacts menu opens.
Select the desired contact from the
list. If the selected contact has
several telephone numbers, select
the desired number.
To close the Contacts menu with-
out applying the changes, press
the BACK
function button.
Deleting assigned
speed dial but-
tonsThe telephone numbers stored in
the speed dial buttons can be de-
leted in the menu User profile
settings
> Manage favour-
ites ››› table on page 87. 86