engine Seat Leon 5D 2017 User Guide
[x] Cancel search | Manufacturer: SEAT, Model Year: 2017, Model line: Leon 5D, Model: Seat Leon 5D 2017Pages: 332, PDF Size: 7.25 MB
Page 51 of 332

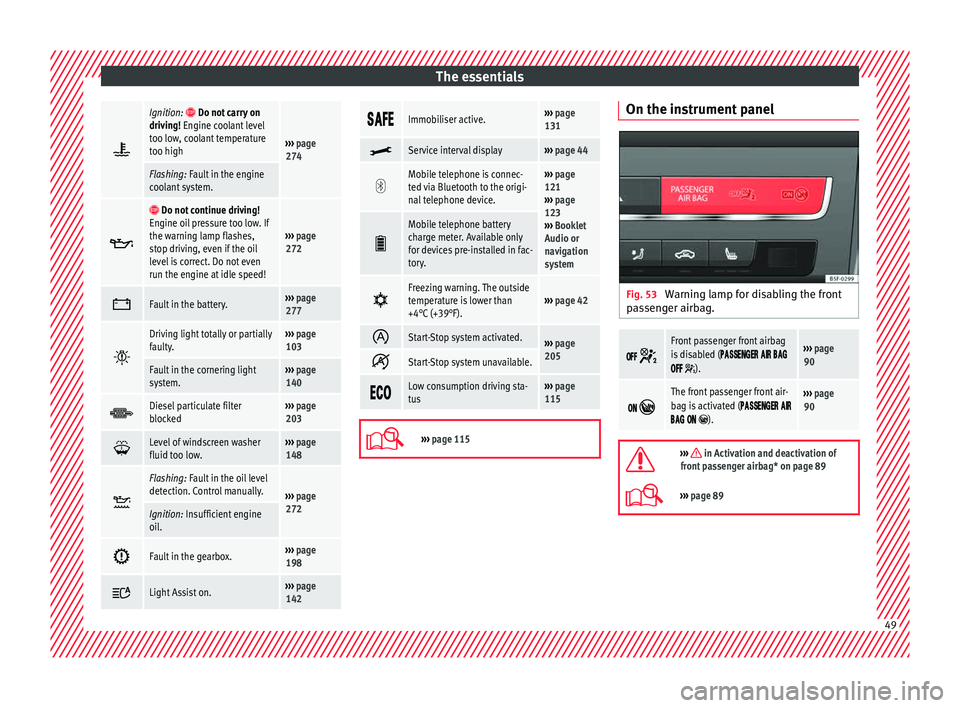
The essentials
Ignition: Do not carry on
driving! Engine coolant level
too low, coolant temperature
too high
››› page
274
Flashing: Fault in the engine
coolant system.
Do not continue driving!
Engine oil pressure too low. If
the warning lamp flashes,
stop driving, even if the oil
level is correct. Do not even
run the engine at idle speed!
››› page
272
Fault in the battery.›››
page
277
Driving light totally or partially
faulty.›››
page
103
Fault in the cornering light
system.››› page
140
Diesel particulate filter
blocked›››
page
203
Level of windscreen washer
fluid too low.›››
page
148
Flashing: Fault in the oil level
detection. Control manually.
›››
page
272
Ignition: Insufficient engine
oil.
Fault in the gearbox.›››
page
198
Light Assist on.›››
page
142
Immobiliser active.›››
page
131
Service interval display›››
page 44
Mobile telephone is connec-
ted via Bluetooth to the origi-
nal telephone device.›››
page
121
››› page
123
››› Booklet
Audio or
navigation
system
Mobile telephone battery
charge meter. Available only
for devices pre-installed in fac-
tory.
Freezing warning. The outside
temperature is lower than
+4°C (+39°F).›››
page 42
Start-Stop system activated.›››
page
205
Start-Stop system unavailable.
Low consumption driving sta-
tus›››
page
115
›››
page 115 On the instrument panel
Fig. 53
Warning lamp for disabling the front
p a
s
senger airbag.
Front passenger front airbag
is disabled (
).
››› page
90
The front passenger front air-
bag is activated (
).
››› page
90
››› in Activation and deactivation of
front passenger airbag* on page 89
››› page 89 49
Page 55 of 332

The essentials4Indications on the temperature display screen selected for the right and left sides.
Defrost functionThe air drawn in from outside the vehicle is directed at the windscreen and air recirculation is automatically switched off. To defrost the wind-
screen more quickly, the air is dehumidified at temperatures over approximately +3°C (+38°F) and the fan runs at maximum output.
Heated rear window: this only works when the engine is running and switches off automatically after a maximum of 10 minutes.
Air recirculation
Seat heating buttons
Press the button to switch on or off the cooling system.
Press the button to make maximum cooling capacity available. The recirculation of air and the cooling system turn on automatically and air distri-
bution adjusts automatically to the position .
When the warning light for button lights up, the settings on the driver side also apply to the passenger side. Press the button or the temper-
ature control on the passenger side
Automatic adjustment of temperature, fan, and air distribution. Press the button: the warning lamp on the button will light up .
Press the configuration button : the air conditioning operation menu will be displayed on the Easy Connect system screen.
Switching offTurn the blower control to the position or press the button.
››› in Introduction on page 173
›››
page 173 53
Page 57 of 332

The essentials3Air distribution
: Defrost function. The airflow is directed at the windscreen. Air recirculation is automatically switched off or is not switched on. Increase the fan power
to clear the windscreen of condensation as soon as possible. To dehumidify the air, the cooling system will automatically switch on.
: The air is directed at the chest of driver and passengers by the dash panel air vents.
: Distribution of air towards the chest and the footwell area.
: Air distribution to footwells.
: Air distribution towards the windscreen and the footwell.
Press the button to switch on or off the cooling system.
Heated rear window: this only works when the engine is running and switches off automatically after a maximum of 10 minutes.
Air recirculation
Seat heating buttons
››› in Introduction on page 173
›››
page 173 55
Page 59 of 332

The essentials
Heated rear window: this only works when the engine is running and switches off automatically after a maximum of 10 minutes
Air recirculation
››› page 176
››› in Introduction on page 173
›››
page 173 57
Page 60 of 332

The essentials
Fluid Level control Fi l
lin
g capacities
Tank level
Petrol and diesel
engines50 l, of which, approx. 7 l reserveVehicles with all-wheel-drive :
55 l, of which, approx. 8.5 l re- serve
Natural gas en-
ginea)approx. 15 kg
a)
The capacity depends on the efficacy and characteristics of
the natural gas pumps. The capacity indicated is based on a
minimum loading pressure of 200 bar.
Capacity of the windscreen washer fluid container
Versions without
headlight washer
systemapprox. 3 litres
Versions with
headlight washer
systemapprox. 5 litres Fuel
Fig. 60
Fuel tank flap with tank cap attached. The flap that covers the tank cap is unlocked
and loc
k
ed aut
omatically using the central
locking.
Opening the fuel tank cap
● Open the fuel tank flap by pressing on the
left
side.
● Unscrew the cap by turning it to the left. ●
Place it
in the space on the hinge of the
open flap ››› Fig. 60.
Closing the fuel tank cap ● Unscrew the cap by turning it to the right as
far as
it will go.
● Close the lid.
››› in Refuelling on page 265
››› page 264 58
Page 61 of 332

The essentials
Oil Fig. 61
Engine oil dipstick. Fig. 62
In the engine compartment: Engine
oil fi
ller cap. The level is measured using the dipstick loca-
t
ed in the en
gine c
ompartment
››› page 270.
The oil should leave a mark between zones A and
C . It should never exceed zone
A .
● Zone A : Do not add oil.
● Zone B : You can add oil but keep the level
in th at
zone. ●
Zone C : Add oil up to zone
B .
T op
pin
g up engine oil
● Unscrew cap from oil filler opening.
● Add oil slowly.
● At the same time, check the level to ensure
you do not a
dd too much. ●
When the oil l
evel reaches at least zone B ,
u n
s
crew the engine oil filler cap carefully.
Engine oil additives
No type of additive should be mixed with the
engine oil. The deterioration caused by these
additives is not covered by the warranty. » 59
Page 62 of 332

The essentials
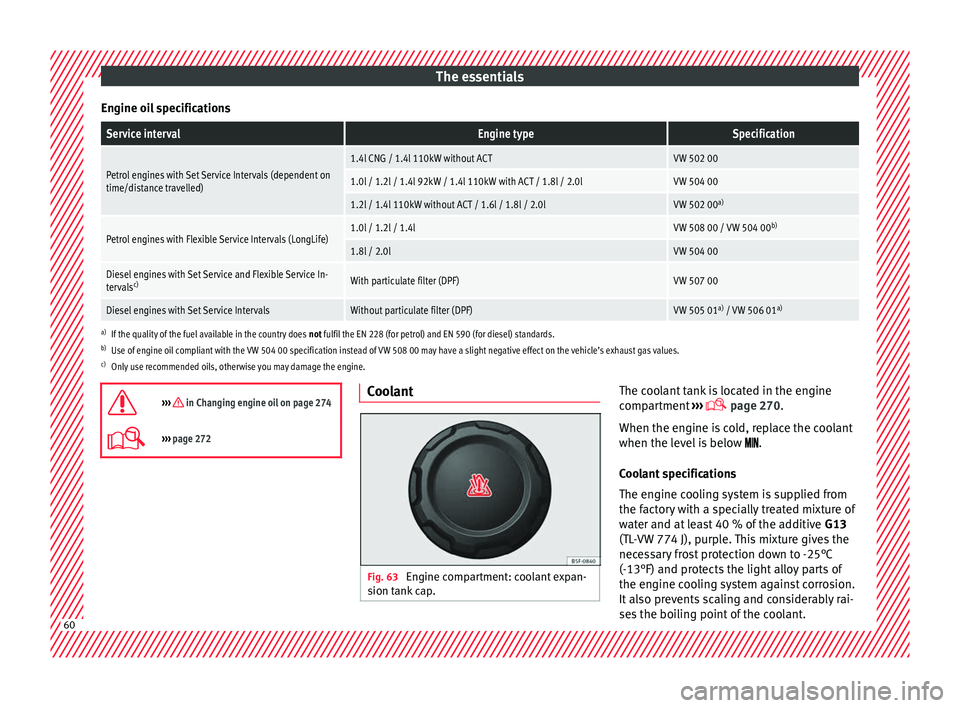
Engine oil specificationsService intervalEngine typeSpecification
Petrol engines with Set Service Intervals (dependent on
time/distance travelled)1.4l CNG / 1.4l 110kW without ACTVW 502 00
1.0l / 1.2l / 1.4l 92kW / 1.4l 110kW with ACT / 1.8l / 2.0lVW 504 00
1.2l / 1.4l 110kW without ACT / 1.6l / 1.8l / 2.0lVW 502 00 a)
Petrol engines with Flexible Service Intervals (LongLife)1.0l / 1.2l / 1.4lVW 508 00 / VW 504 00 b)
1.8l / 2.0lVW 504 00
Diesel engines with Set Service and Flexible Service In-
tervalsc)With particulate filter (DPF)VW 507 00
Diesel engines with Set Service IntervalsWithout particulate filter (DPF)VW 505 01 a)
/ VW 506 01 a)
a)
If the quality of the fuel available in the country does not fulfil the EN 228 (for petrol) and EN 590 (for diesel) standards.
b) Use of engine oil compliant with the VW 504 00 specification instead of VW 508 00 may have a slight negative effect on the vehicle’s exhaust gas values.
c) Only use recommended oils, otherwise you may damage the engine.
››› in Changing engine oil on page 274
››› page 272 Coolant
Fig. 63
Engine compartment: coolant expan-
s ion t
ank
cap. The coolant tank is located in the engine
c
omp
ar
tment ›››
page 270.
When the engine is cold, replace the coolant
when the level is below .
Coolant specifications
The engine cooling system is supplied from
the factory with a specially treated mixture of
water and at least 40 % of the additive G13
(TL-VW 774 J), purple. This mixture gives the
necessary frost protection down to -25°C
(-13°F) and protects the light alloy parts of
the engine cooling system against corrosion.
It also prevents scaling and considerably rai-
ses the boiling point of the coolant. 60
Page 63 of 332

The essentials
To protect the cooling system, the percentage
of a
d
ditive must always be at least 40 %,
even in warm climates where anti-freeze pro-
tection is not required.
If for weather reasons further protection is
necessary, the proportion of additive may be
increased, but only up to 60 %; otherwise an-
tifreeze protection will diminish and this will
worsen cooling.
When the coolant is topped up, use a mixture
of distilled water and at least 40 % of the
G13 or G12 plus-plus (TL-VW 774 G) additive
(both are purple) to obtain an optimum anti-
corrosion protection ››› in Topping up cool-
ant on p ag
e 275
. The mixture of G13 with
G12 plus (TL-VW 774 F), G12 (red) or G11
(green-blue) engine coolants will significant-
ly reduce anti-corrosion protection and
should therefore be avoided ››› in Topping
up c oo
l
ant on page 275.
››› in Topping up coolant on page 275
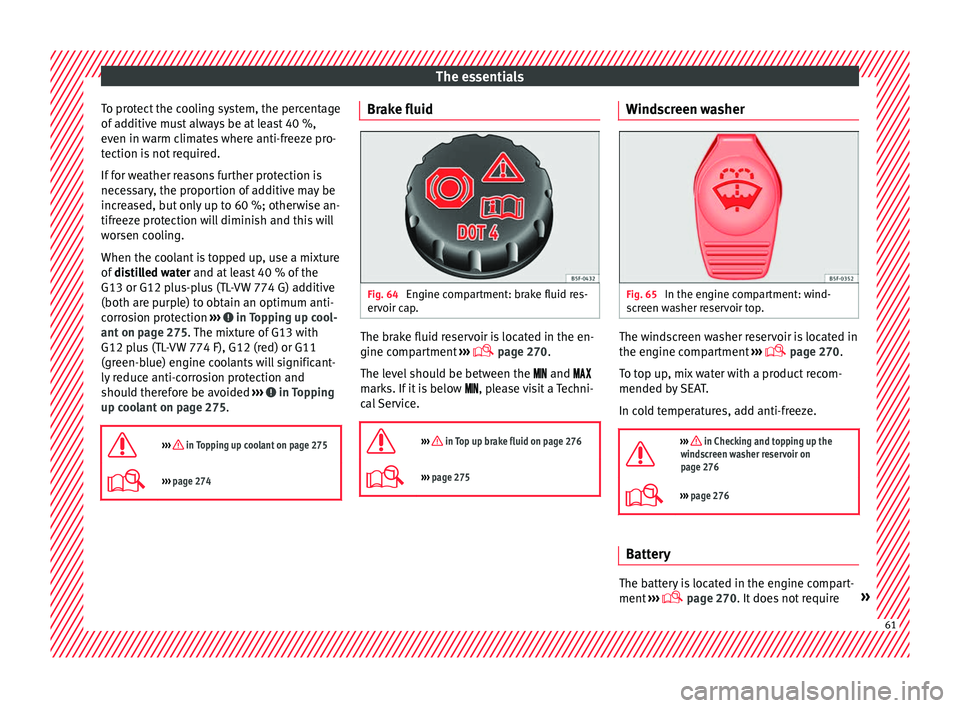
››› page 274 Brake fluid
Fig. 64
Engine compartment: brake fluid res-
er v
oir c
ap. The brake fluid reservoir is located in the en-
gine c
omp
ar
tment ›››
page 270
.
The level should be between the and
marks. If it is below , please visit a Techni-
cal Service.
››› in Top up brake fluid on page 276
››› page 275 Windscreen washer
Fig. 65
In the engine compartment: wind-
s c
r
een washer reservoir top. The windscreen washer reservoir is located in
the en
gine c
omp
artment ›››
page 270.
To top up, mix water with a product recom-
mended by SEAT.
In cold temperatures, add anti-freeze.
››› in Checking and topping up the
windscreen washer reservoir on
page 276
››› page 276 Battery
The battery is located in the engine compart-
ment
›
›
› page 270. It does not require » 61
Page 65 of 332

The essentials
Emergencies F u
se
s
Fuse location Fig. 66
On the driver-side dash panel: fuse
bo x
c
over. Fig. 67
In the engine compartment: fuse box
c o
v
er. Underneath the instrument panel
The f
use bo
x is located behind the storage
compartment ››› Fig. 66.
In the engine compartment
Press the locking tabs to release the fuse box
cover ››› Fig. 67.
Identifying fuses situated below the dash
panel by colours
ColourAmp rating
Black1
Purple3
Light brown5
Brown7.5
Red10
Blue15
Yellow20
White or transparent25
Green30
Orange40
››› in Introduction on page 101
›››
page 101 Replacing a blown fuse
Fig. 68
Image of a blown fuse. Preparation
●
Switch off the ignition, lights and all elec-
tric al
equipment
.
● Open the corresponding fuse box
›››
page 102.
Identifying a blown fuse
A fuse is blown if its metal strip is ruptured
››› Fig. 68.
● Point a lamp at the fuse to see if it has
blown.
T
o replace a fuse
● Remove the fuse.
● Replace the blown fuse by one with an
identica
l amperage rating (same colour and
markings) and identical size. » 63
Page 67 of 332

The essentials
Repairing a tyre with the anti-punc-
t ur
e k
it Fig. 69
Standard representation: contents of
the anti-p u
nct
ure kit. The anti-puncture kit is located under the
floor p
anel
in the lug
gage compartment.
Sealing the tyre
● Unscrew the tyre valve cap and insert. Use
the ›››
Fig. 69 1 tool to remove the insert.
Pl ac
e it
on a clean surface.
● Shake the tyre sealant bottle vigorously
›››
Fig. 69 10 .
● Screw the inflator tube ››
›
Fig. 69 3 into
the se al
ant
bottle. The bottle's seal will break
automatically. ●
Remov
e the lid from the filling tube
››› Fig. 69 3 and screw the open end of the
t ube int
o the ty
re valve.
● With the tyre sealant bottle upside down,
fill
the tyre with the contents of the sealant
bottle.
● Remove the bottle from the valve.
● Place the insert back into the tyre valve us-
ing the too
l ››› Fig. 69 1 .
Infl atin
g the ty
re
● Screw the compressor tyre inflator tube
›››
Fig. 69 5 into the tyre valve.
● Check that the air bleed screw is closed
› ›
›
Fig. 69 7 .
● Start the engine and leave it running.
● Insert the connector ››
›
Fig. 69 9 into the
v ehic
l
e's 12-volt socket ›››
page 159.
● Turn the air compressor on with the ON/OFF
switc
h ››› Fig. 69 8 .
● Keep the air compressor running until it
r e
ac
hes 2.0 to 2.5 bar
(29-36 psi/200-250 kPa). A maximum of 8
minutes.
● Disconnect the air compressor.
● If it does not reach the pressure indicated,
uns
crew the tyre inflator tube from the valve.
● Move the vehicle 10m so that the sealant is
dis trib
uted throughout the tyre. ●
Scr ew the c
ompressor tyre inflator into the
valve.
● Repeat the inflation process.
● If the indicated pressure still cannot be
reac
hed, the tyre is too badly damaged. Stop
and request assistance from an authorised
technician.
● Disconnect the air compressor. Unscrew
the tyre infl
ator tube from the tyre valve.
● When the tyre pressure is between 2.5 and
2.0 bars, c
ontinue driving without exceeding
80 km/h (50 mph).
● Check the pressure again after 10 minutes
›››
page 97.
››› in TMS (Tyre Mobility System)* on
page 95
››› page 95 65