ECO mode Seat Leon SC 2013 MEDIA SYSTEM 2.2
[x] Cancel search | Manufacturer: SEAT, Model Year: 2013, Model line: Leon SC, Model: Seat Leon SC 2013Pages: 112, PDF Size: 2.15 MB
Page 3 of 112
2General information
General information
This manual contains information, recommendations, advice and warnings
related to your radio and navigation system. The other publications in the
vehicle documentation contain further information of which you should be
aware for your own safety and for that of your passengers.
Ensure that the onboard documentation is kept in the vehicle at all times.
This is especially important when lending or selling the vehicle to another
person.
This manual contains a description of the equipment supplied with the ve-
hicle at the time of press. Some of the units described herein will not be
available until a later date or is only available in certain markets.
The illustrations are intended as a general guide and may vary from the
equipment fitted in your vehicle in some details.
Directions and positions of components (e.g. right, left, front, rear) are al-
ways relative to the direction of travel of the vehicle unless otherwise sta-
ted.
The equipment marked with an asterisk is only supplied as standard in
certain model versions, is optional in others or is only available in spe-
cific countries.
Registered trademarks are marked ®. The absence of this symbol does
not constitute a waiver of the rights concerning any proprietary name.
The section is continued on the following page.
Marks the end of a section .
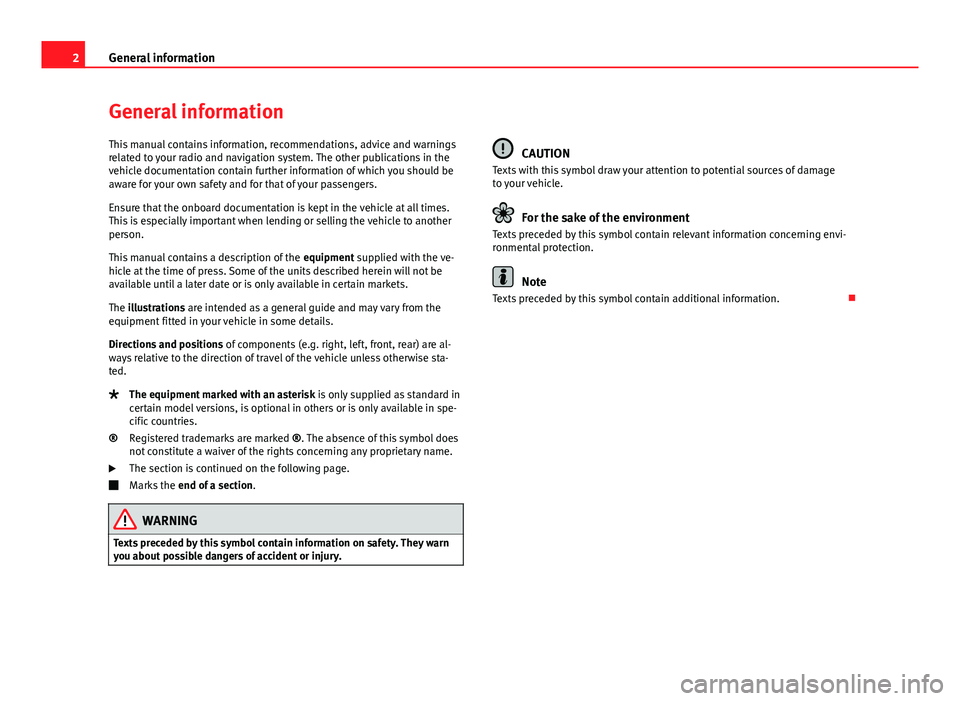
WARNING
Texts preceded by this symbol contain information on safety. They warn
you about possible dangers of accident or injury.
®
CAUTION
Texts with this symbol draw your attention to potential sources of damage
to your vehicle.
For the sake of the environment
Texts preceded by this symbol contain relevant information concerning envi-
ronmental protection.
Note
Texts preceded by this symbol contain additional information.
Page 5 of 112
4Introduction
Introduction
Before using the unit for the first time
Before using the unit for the first time, carry out the following steps. This
will enable you to use the unit safely and make full use of the functions it
provides
● Observe the basic safety notes ⇒ page 4.
● Familiarise yourself with the unit overview ⇒ page 6.
● Restore factory settings (standard settings) in the system settings menu
⇒ page 99.
● Use suitable data media for media mode ⇒ page 27.
Safety instructions
WARNING
Your attention may be distracted from the traffic if you use the radio and
navigation system while driving, resulting in accident.
● Always stay alert and drive responsibly.
● Select volume settings that allow you to easily hear signals from out-
side the vehicle at all times (e.g. emergency service sirens).
● If the volume is too high, you could damage your hearing. Even if the
volume is too loud for a short period only.
WARNING
The recommendations and traffic signs shown by the navigation system
may differ from the true traffic conditions.
● Traffic signs and traffic regulations have priority over the recommen-
dations and displays provided by the navigation system.
● Adjust your speed and driving style to visibility, road, traffic and
weather conditions.
WARNING
External devices that are placed loose in the vehicle or not properly se-
cured could be flung though the interior and cause injuries during a sud-
den driving or braking manoeuvre, or in the event of an accident.
● While the vehicle is in motion, always fasten or store external devices
securely outside the airbag deployment zones.
● Arrange the connecting leads of external devices so that they do not
obstruct the driver.
WARNING
The volume level may suddenly change when you switch audio source or
connect a new audio source.
● Reduce the base volume before switching audio sources or connect-
ing a new audio source ⇒ page 9.
Page 15 of 112
14Audio mode
Opening the FM station list
The FM station list shows all the FM stations with good reception. You can
select a specific station from the FM station list.
● Switch to the FM frequency band ⇒ page 13.
● Press the Band
function button and press the FM/List function button in
the pop-up window ⇒ Fig. 6.
● Alternatively: if the display station buttons off is ⇒ page 16, by turn-
ing the setting knob ⇒ Fig. 1 10
it is possible to change directly to the sta-
tion list.
The FM station list view closes after one minute of inactivity. The FM station
list is updated automatically.
No station list is available for the AM frequency band.
Selecting stations from the FM station list and saving them
● Open the FM station list.
● Mark a station by turning the setting knob and press the setting knob to
select the marked station ⇒ page 8.
● Alternatively: Drag the scroll marker to browse the list and select the de-
sired station by pressing it on the screen ⇒ page 8.
● After selecting a station button, press the Store
function button ⇒
Fig. 7
to store the marked station ⇒ page 16.
● To close the FM station list press the
unit button.Scan function (Scan)
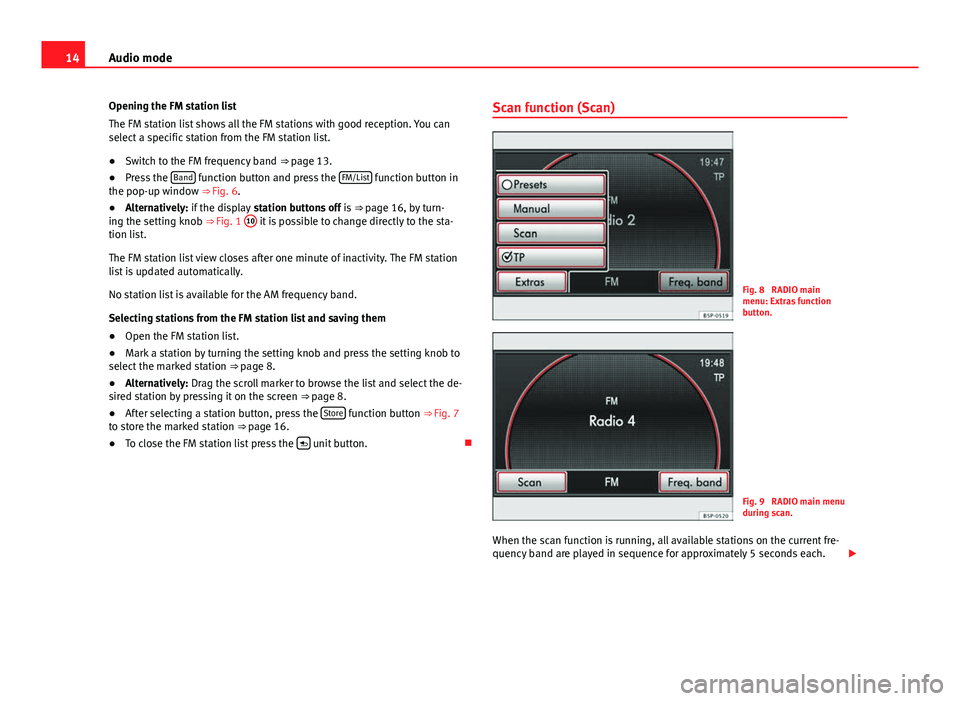
Fig. 8 RADIO main
menu: Extras function
button.
Fig. 9 RADIO main menu
during scan.
When the scan function is running, all available stations on the current fre-
quency band are played in sequence for approximately 5 seconds each.
Page 16 of 112
15
Audio mode
Starting and stopping the scan function
● Open the RADIO main menu and select the frequency band ⇒ page 13.
● Press the Extras
function button.
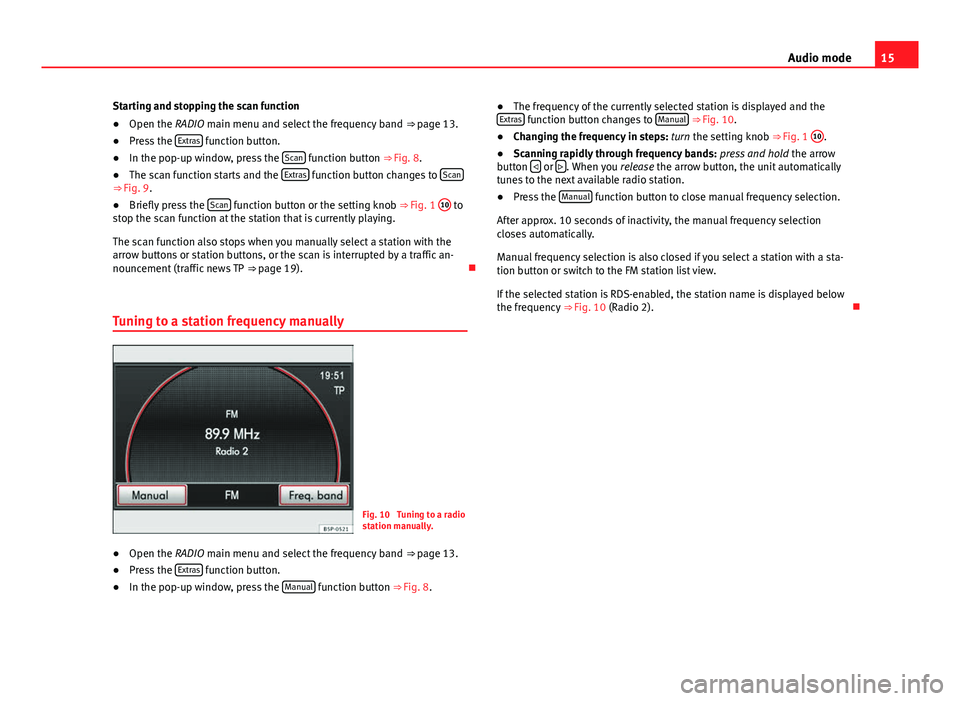
● In the pop-up window, press the Scan function button ⇒ Fig. 8.
● The scan function starts and the Extras function button changes to Scan⇒ Fig. 9.
●
Briefly press the Scan function button or the setting knob ⇒
Fig. 1 10 to
stop the scan function at the station that is currently playing.
The scan function also stops when you manually select a station with the
arrow buttons or station buttons, or the scan is interrupted by a traffic an-
nouncement (traffic news TP ⇒ page 19).
Tuning to a station frequency manually
Fig. 10 Tuning to a radio
station manually.
● Open the RADIO main menu and select the frequency band
⇒ page 13.
● Press the Extras
function button.
● In the pop-up window, press the Manual function button
⇒ Fig. 8. ●
The frequency of the currently selected station is displayed and the
Extras
function button changes to Manual ⇒ Fig. 10.
● Changing the frequency in steps: turn the setting knob ⇒ Fig. 1 10.
● Scanning rapidly through frequency bands: press and hold the arrow
button
or . When you
release the arrow button, the unit automatically
tunes to the next available radio station.
● Press the Manual
function button to close manual frequency selection.
After approx. 10 seconds of inactivity, the manual frequency selection
closes automatically.
Manual frequency selection is also closed if you select a station with a sta-
tion button or switch to the FM station list view.
If the selected station is RDS-enabled, the station name is displayed below
the frequency ⇒ Fig. 10 (Radio 2).
Page 18 of 112
17
Audio mode
You can delete the stations stored to the station buttons individually or all
together ⇒ page 17.
Note
If you do not usually use the station buttons to select stations, SEAT recom-
mends that you hide the station buttons. You can then go straight to the
station list by turning the setting knob ⇒ page 14.
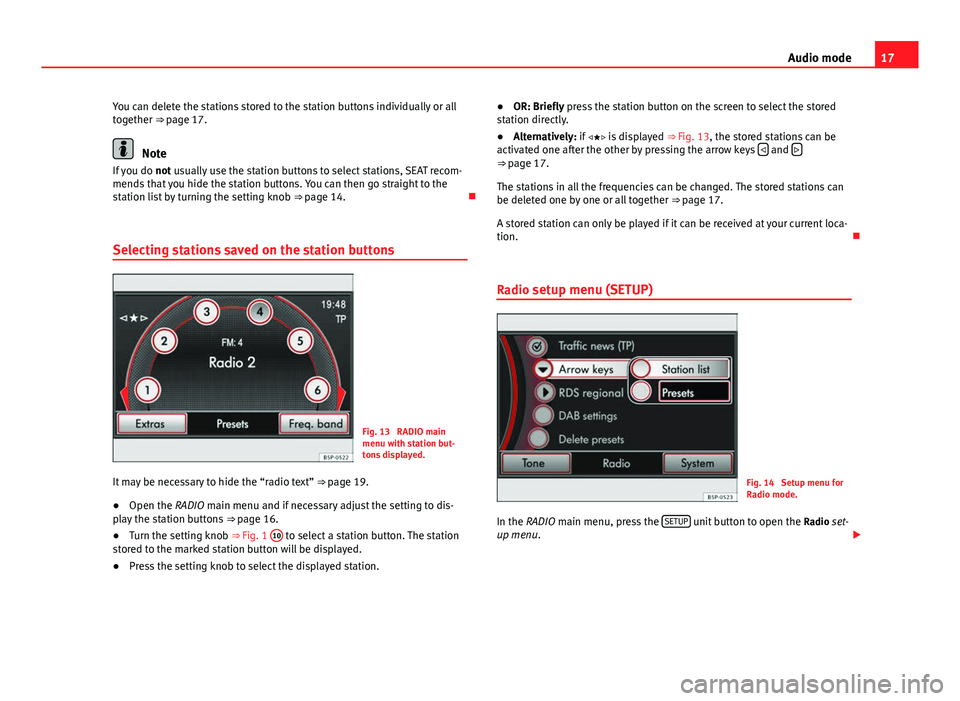
Selecting stations saved on the station buttons
Fig. 13 RADIO main
menu with station but-
tons displayed.
It may be necessary to hide the “radio text” ⇒ page 19.
● Open the RADIO main menu and if necessary adjust the setting to dis-
play the station buttons ⇒ page 16.
● Turn the setting knob ⇒ Fig. 1 10
to select a station button. The station
stored to the marked station button will be displayed.
● Press the setting knob to select the displayed station. ●
OR: Briefly press the station button on the screen to select the stored
station directly.
● Alternatively: if is displayed ⇒ Fig. 13, the stored stations can be
activated one after the other by pressing the arrow keys
and ⇒
page 17.
The stations in all the frequencies can be changed. The stored stations can
be deleted one by one or all together ⇒ page 17.
A stored station can only be played if it can be received at your current loca-
tion.
Radio setup menu (SETUP)
Fig. 14 Setup menu for
Radio mode.
In the RADIO main menu, press the SETUP
unit button to open the
Radio set-
up menu.
Page 29 of 112
28Audio mode
Variations in the quality of data media produced by different manufacturers
may lead to problems during playback.
Please observe copyright laws.
CDs recorded in UDF or Direct CD format cannot be played. Under Windows
Vista ®
ensure that the correct format is selected.
The unit may be unable to read individual tracks or the entire data medium
due to the data medium configuration or the devices and programs used for
recording. Information about the best ways to create audio files and data
media (compression rate, ID3 tag etc.) can be found on the Internet.
Due to the larger quantity of data, it takes longer to read a data medium
containing compressed audio files (MP3, WMA etc.) than a “normal” audio
CD. Complex folder structures can also slow down the reading of a data me-
dium.
Playlists only determine a certain playing order. There are no files stored in
a playlist. The unit will not play a playlist if the files are not stored on the
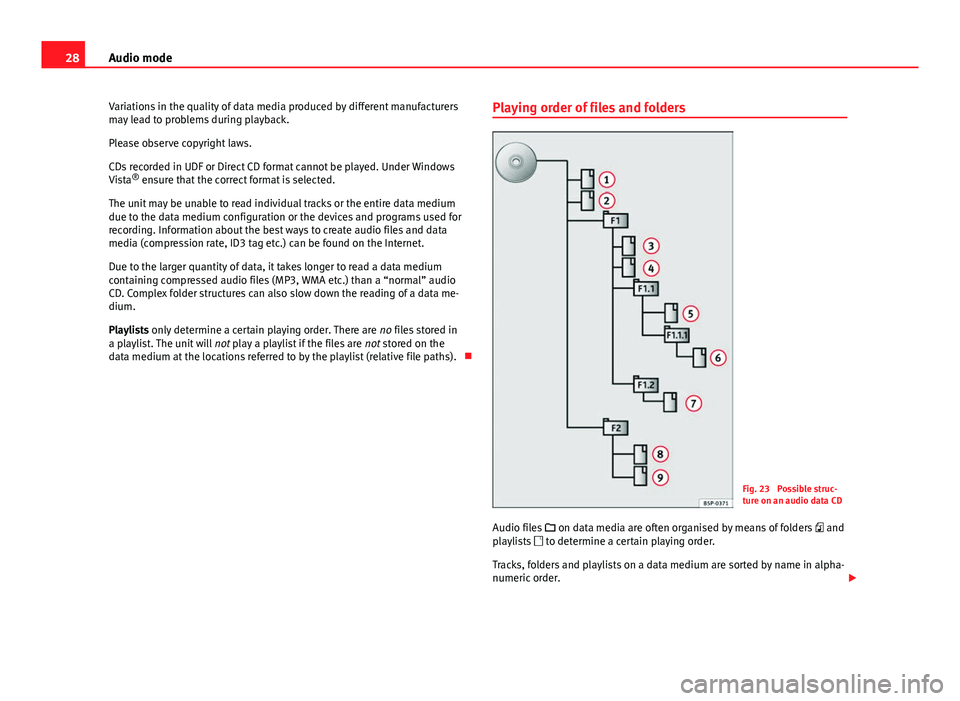
data medium at the locations referred to by the playlist (relative file paths). Playing order of files and folders
Fig. 23 Possible struc-
ture on an audio data CD
Audio files on data media are often organised by means of folders and
playlists to determine a certain playing order.
Tracks, folders and playlists on a data medium are sorted by name in alpha-
numeric order.
Page 30 of 112
29
Audio mode
The illustration ⇒ Fig. 23 shows a typical audio data CD that contains tracks
, folders and subfolders.
The tracks are played in the following order: Tracks 1
and 2 in the CD's root directory
Tracks 3 and 4 in the first folder F1 in the CD's root directory
Track 5 in the first subfolder F1.1 of the folder
F1
Track 6 in the first subfolder F1.1.1 of the subfolder
F1.1
Track 7 in the second subfolder F1.2 of the folder
F1
Tracks 8 and 9 in the second folder F2
The playlists are also treated as folders.
The playback order may differ from that described depending on the selec-
ted settings (Playback mode: Repeat, Mix,...) ⇒ page 38.
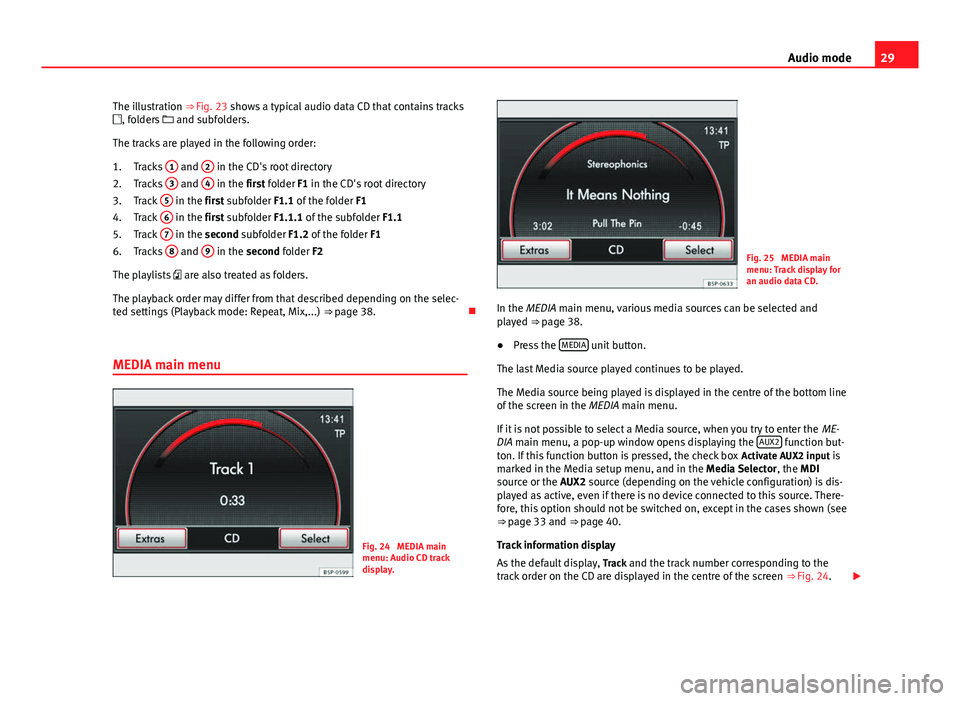
MEDIA main menu
Fig. 24 MEDIA main
menu: Audio CD track
display.
1.
2.
3.
4.
5.
6.
Fig. 25 MEDIA main
menu: Track display for
an audio data CD.
In the MEDIA main menu, various media sources can be selected and
played ⇒ page 38.
● Press the MEDIA
unit button.
The last Media source played continues to be played.
The Media source being played is displayed in the centre of the bottom line
of the screen in the MEDIA main menu.
If it is not possible to select a Media source, when you try to enter the ME-
DIA main menu, a pop-up window opens displaying the AUX2
function but-
ton. If this function button is pressed, the check box Activate AUX2 input is
marked in the Media setup menu, and in the Media Selector , the MDI
source or the AUX2 source (depending on the vehicle configuration) is dis-
played as active, even if there is no device connected to this source. There-
fore, this option should not be switched on, except in the cases shown (see
⇒ page 33 and
⇒ page 40.
Track information display
As the default display, Track and the track number corresponding to the
track order on the CD are displayed in the centre of the screen ⇒ Fig. 24.
Page 31 of 112
30Audio mode
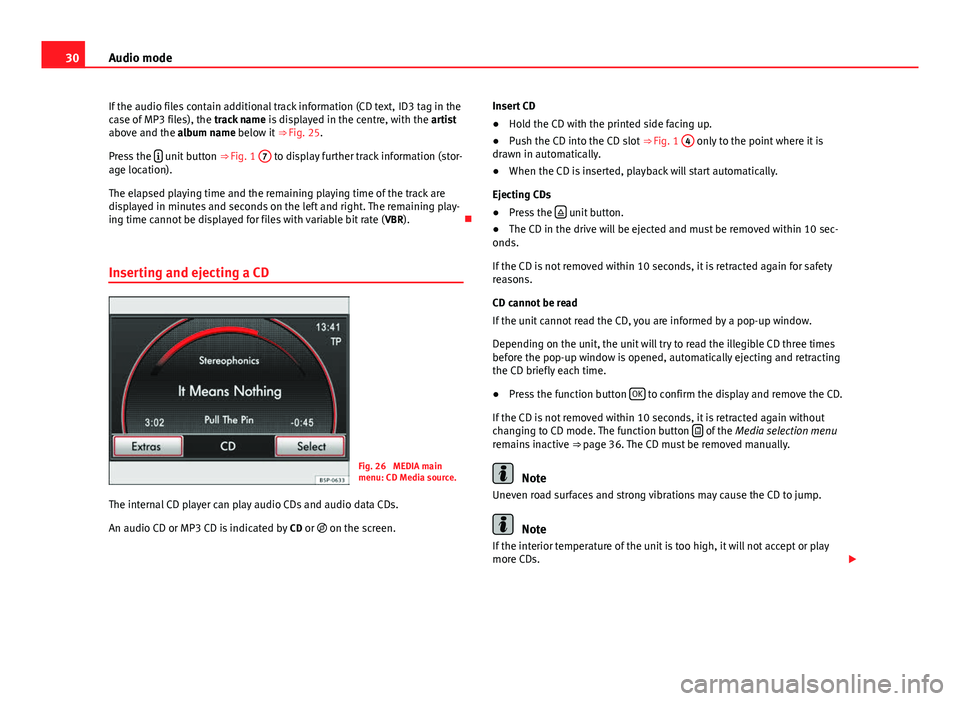
If the audio files contain additional track information (CD text, ID3 tag in the
case of MP3 files), the track name is displayed in the centre, with the artist
above and the album name below it ⇒ Fig. 25.
Press the
unit button
⇒ Fig. 1 7 to display further track information (stor-
age location).
The elapsed playing time and the remaining playing time of the track are
displayed in minutes and seconds on the left and right. The remaining play-
ing time cannot be displayed for files with variable bit rate ( VBR).
Inserting and ejecting a CD
Fig. 26 MEDIA main
menu: CD Media source.
The internal CD player can play audio CDs and audio data CDs.
An audio CD or MP3 CD is indicated by CD or on the screen. Insert CD
●
Hold the CD with the printed side facing up.
● Push the CD into the CD slot ⇒ Fig. 1 4
only to the point where it is
drawn in automatically.
● When the CD is inserted, playback will start automatically.
Ejecting CDs
● Press the
unit button.
● The CD in the drive will be ejected and must be removed within 10 sec-
onds.
If the CD is not removed within 10 seconds, it is retracted again for safety
reasons.
CD cannot be read
If the unit cannot read the CD, you are informed by a pop-up window.
Depending on the unit, the unit will try to read the illegible CD three times
before the pop-up window is opened, automatically ejecting and retracting
the CD briefly each time.
● Press the function button OK
to confirm the display and remove the CD.
If the CD is not removed within 10 seconds, it is retracted again without
changing to CD mode. The function button
of the
Media selection menu
remains inactive ⇒ page 36. The CD must be removed manually.
Note
Uneven road surfaces and strong vibrations may cause the CD to jump.
Note
If the interior temperature of the unit is too high, it will not accept or play
more CDs.
Page 35 of 112
34Audio mode
Playing audio from an RSE system using an additional external audio
source
● Lower the base volume on the radio-navigation system ⇒ page 8.
● Connect the external player to the AUX-RSE connector in the vehicle and
start playback on the external player in accordance with the instructions giv-
en in the RSE handbook.
● In Media mode, press the SETUP
unit button to open the
Media setup
menu. Tick the checkbox Activate AUX2 input so that the AUX2 source is
shown in the Media selection menu 1)
⇒ Fig. 29.
● In the MEDIA main menu, press the MEDIA
unit button to open the
Media
selection menu.
● Press the AUX2 ⇒ Fig. 30 function button to start playback of the exter-
nal audio source connected to the RSE over the vehicle speakers.
The output volume of the connected external audio source should be adjus-
ted to the volume of the other audio sources ⇒ page 39 ( AUX2 volume in
the Media settings menu ⇒ Fig. 29).
Things to note about the AUX2 additional external audio source
● If another audio source (CD, SD, etc.) is selected during playback, the
external player connected to the RSE continues playing.
● When playback on the external audio source has finished or if the exter-
nal player is disconnected from the AUX-RSE connector, the radio and navi-
gation system remains in the AUX2 menu.
● The AUX2 symbol remains visible and on (highlighted in red), and there-
fore accessible, as long as the “ Activate AUX2 input ” check box in the
(Media setup menu ) is ticked. The option should be deactivated when play-
back has finished. Recommendations for use
●
If your vehicle is not fitted with an RSE system or a MEDIA-IN or MDI mul-
timedia interface, we recommend that the Activate AUX2 input is always left
unticked. Otherwise, the AUX2 source (if your vehicle does not have MDI) or
the “MDI” source may be shown in the Media selection menu as “active”
(accessible), even if there is no audio source connected to them.
● If your vehicle is fitted with a MEDIA-IN or MDI multimedia interface, the
AUX2 additional external source is not available. Use the check box Activate
AUX2 input as described in the section MEDIA-IN or MDI multimedia inter-
face.
1)
This option can also be activated using the function button in the pop-up window which
appears when you try to go to the MEDIA main menu when there is no Media source con-
nected or activated.
Page 40 of 112
39
Audio mode
The scan function can also be started and stopped by briefly pressing the
setting knob ⇒ Fig. 1 10
.
Available playback modes
Function button: EffectScan: Each track of the current folder or current Media source will be
played for 10 seconds. The scan function starts at the next track.
Mix: The tracks of the current audio CD will be played in random order.Mix folder: The tracks of the current folder will be played in random order.Mix all: The tracks of the current data medium will be played in random or-
der.
Repeat track: Repeats the currently playing title.Repeat CD: At the end of the current audio CD, its tracks will be played
again.
Repeat folder: At the end of the current folder, its tracks will be played
again.
The random play and repeat functions remain active for the corresponding
Media source until they are closed for that source.
Media setup menu (SETUP)
In Media mode, press the SETUP unit button to open the
Media setup menu.
The selection options depend on the type of unit and equipment.
Function button: EffectTraffic programme (TP): To activate or deactivate the TP function ⇒ page 19. Scan/Mix/Repeat incl. : Subfolders are included in the selected playback
mode ⇒ page 38.
This setting must be defined before the playback mode is activated.
AUX input level: Adjust the input volume for an external audio source in the
AUX-IN multimedia socket ⇒ Fig. 1 9 to the output volume
of the other
audio sources ⇒ page 32.
Function button: EffectBluetooth settings: Press to enter the BT settings menu to view the list of de-
vices connected, search for devices, etc.
BT-Audio volume: Adjust the input volume for a Bluetooth audio source to
the playback volume of the other audio sources.
Activating the AUX2 input: Press to activate the AUX2 audio input. If your ve-
hicle does not have an RSE system, or a MEDIA-IN or MDI multimedia inter-
face, this checkbox should always be left unmarked ⇒ page 33.
MDI volume: Adjust the input volume for an iPod®
or iPhone ®
or other de-
vice connected to the MEDIA-IN multimedia interface to the playback vol-
ume of the other audio sources ⇒ page 40.
AUX2 volume: Adjust the input volume for the AUX2 ⇒ table on page 39
external audio source to the playback volume of the other audio sources
⇒ page 32.
Adjusting playback volume
If you need to increase the output volume of an external audio source, first
lower the base volume on the radio-navigation system ⇒ page 9.
If the sound from the external audio source is too quiet, increase the output
volume on the external audio source if possible. If it is too low, increase the
input volume .
If the sound from the connected external audio source is too loud or distor-
ted, lower the output volume on the external audio source if possible. If it is
still too loud, lower the input volume.
WARNING
If the volume is too high, you could damage your hearing. Even if the vol-
ume is too loud for a short period only.
CAUTION
The vehicle loudspeakers may be damaged if the volume is too high or the
sound is distorted.