CD player Seat Leon SC 2014 MEDIA SYSTEM PLUS - NAVI SYSTEM
[x] Cancel search | Manufacturer: SEAT, Model Year: 2014, Model line: Leon SC, Model: Seat Leon SC 2014Pages: 64, PDF Size: 1.71 MB
Page 5 of 64
Introduction
Introduction Before using the unit for the first timeBefore using the unit for the first time, carry out
the following steps. This will enable you to use
the unit safely and make full use of the func-
tions it provides:
Please refer to the basic safety instructions
››› page 3.
Familiarise yourself with the unit overview
››› page 5.
In System setup, restart the unit to factory settings
››› page 53.
Use suitable data media for multimedia playback
(Media mode)
››› page 18. Safety notes
WARNING
Distracting the driver in any way can lead to
an accident and cause injuries. Operating the
infotainment system while driving can dis-
tract your attention from the traffic.
● Always drive carefully and responsibly.
● Select volume settings that allow you to
easily hear signals from outside the vehicle
at all times (e.g. emergency service sirens). ●
If you set the volume excessively high you
may suffer damage to your ears. This can also
happen if you are exposed to an excessively
high volume even for a short time. WARNING
The volume level may suddenly change when
you switch audio source or connect a new au-
dio source.
● Reduce the base volume before switching
audio source or connecting a new audio
source ››› page 7
. WARNING
Connecting, inserting or removing a data me-
dium while driving can distract your attention
from the traffic and cause an accident. WARNING
Connecting leads for external devices may
obstruct the driver.
● Arrange the connecting leads so that they
do not obstruct the driver. WARNING
External devices that are placed loose in the
vehicle or not properly secured could be flung
though the interior during a sudden driving
or braking manoeuvre, or in the event of an
accident. ●
Never, for any reason, fit the external units
on the doors, on the windscreen, on or near
the area marked “AIRBAG” on the steering
wheel, on the dash panel, on the seat backr-
ests or between these areas and the passen-
gers. These units may cause serious injury in
the event of an accident, especially if the air-
bag is activated. WARNING
The centre armrest may obstruct the driver's
arm movements, which could cause an acci-
dent and severe injuries.
● Always keep the armrest closed while the
vehicle is in motion. WARNING
Opening the housing of a CD player can cause
injury due to invisible laser radiation.
● Only have CD players repaired by a special-
ised workshop. WARNING
The recommendations and traffic signs
shown by the navigation system may differ
from the true traffic conditions.
● Traffic signs and traffic regulations have
priority over the recommendations and in-
structions given by the navigation system.
● Adjust your speed and driving style to visi-
bility, road, traffic and weather conditions. » 3
Page 6 of 64
Introduction
Note
Not inserting the data medium correctly, or
inserting unsuitable data media, may damage
the unit. ● When inserting the memory card, make
sure it is in the correct position ››› page 23.
● If you push too hard, you could damage the
lock on the memory card slot.
● Only use suitable memory cards.
● The CD slot is equipped with a lock func-
tion. Do not force CDs into the slot.
● Only have the CD player repaired by a spe-
cialised workshop. ●
If you insert a CD while another is already
inside or is being ejected, this could damage
the CD player unit. Always wait until the data
medium has been fully ejected! Note
The CD drive can be damaged by foreign ob-
jects that may be attached to the data sup-
port or by irregularly shaped data supports.
● Only use standard 12 cm CDs!
● Do not stick stickers or other items to the
data media. Stickers may peel off and dam-
age the drive.
● Do not use printable data media. Covers
and stickers may peel off and damage the
drive. ●
Do not insert CD or DVD “singles” (8 cm) or
CDs that are not round (“shape-CDS”).
● Do not insert DVD-Plus discs, Dual Discs or
Flip Discs, as these are thicker than normal
CDs. Note
Playing media at a very high or distorted vol-
ume can damage the speakers of the vehicle. 4
Page 20 of 64
Audio modeFunction button: effect
Traffic programme (TP): TP function (traffic news monitor-
ing) activated ››› page 16.
If the function button is deactivated (in grey), first you
must activate the function button
radio data system (RDS)in the menu FM setup.
Delete presets: deletes the stored stations (all or sepa-
rately).
All: deletes all the stored stations (AM 1, AM 2, AM
3). To delete the stations separately, select the desired
station AM 1
, AM 2 or AM 3. Then press the stored
station button of the station to delete.
Managing logos: a station logo can be assigned to the
stations saved in the stored station buttons. DAB setup
● Select the DAB frequency band by pressing
the RADIO infotainment button.
● Press the function button Setup to open the
menu DAB setup.
Function button: effect
Sound: sound setup ››› page 54.
SCAN: scan function (SCAN). When the scan function is
running, all available stations on the current frequency
band are played in sequence for around five seconds
each ››› page 15.
Function button: effect
Search mode: determines the setup of the buttons with
arrows and . The settings will be saved for the cur-
rent frequency band.
Presets: all stored stations on the selected frequency
band can be selected with the arrow buttons.
Stations: all available stations on the selected fre-
quency band can be selected with the arrow buttons.
Traffic Program (TP): TP function (traffic news monitoring)
activated ››› page 16.
If the function button is deactivated (in grey), you must
first activate the function button
radio data system (RDS).
Delete presets: deletes the stored stations (all or sepa-
rately).
All: deletes all the stored stations (DAB 1, DAB 2,
DAB 3).
To delete stations separately, select the station de-
sired DAB 1
, DAB 2 or DAB 3. Then press the stored
station button of the station to delete.
Managing logos: logos of stations that have been saved in
the station buttons may be assigned/deleted.
Radio text: The Radio text is active.
Advanced setup: DAB services setup.
DAB traffic announcements: traffic reports broadcast
over the DAB system can be heard in any operation
mode, like TP traffic reports.
Function button: effect
Other DAB alerts: incoming DAB messages (news,
sport, weather, warnings, etc.) are played with the
DAB radio mode activated.
DAB-DAB station tracking: automatic station tracking
within the DAB frequency band has been activated.
Automatic switch DAB-FM: this allows the frequency
band to be changed to FM for automatic station track-
ing.
If the function button is deactivated (in grey), you
must first activate the
Radio data system (RDS) function
button in the FM settings menu ››› page 17.
L Band: Have this frequency band available.
Media mode
Introduction “
Media sources
”1)
ar
e audio sources contain-
ing audio files on various different data me-
dia (for example CD, memory card, external
MP3 player). These audio files can be played
by the infotainment system from its corre-
sponding drives or audio input sockets
(memory card slot, AUX-IN multi-media sock-
et etc.). 1)
Consult the compatibility list.
18
Page 21 of 64
Audio mode
The CD player and/or SD card reader, as well
as the MEDIA-IN connection, are located in-
side the glove box.
Intellectual property rights
Audio and video files saved on data media
are generally protected by intellectual proper-
ty law depending on the national and inter-
national provisions applicable. Observe legal
requirements! Note
● The audio coding technology MPEG-4 HE-
AAC and patents have a Fraunhofer IIS li-
cence.
● This product is protected by copyright and
intellectual property rights of Microsoft Cor-
poration. Using or distributing similar tech-
nology outside of this product without a li-
cence from Microsoft or any of its authorised
subsidiaries is prohibited.
● The infotainment system allows you to
view, play and manage compatible audio files
only. Other files are ignored. Data media and file requirements
Factory-fitted CD players conform to safety
class 1 according to DIN IEC 76 (CO)
6/ VDE 0837. The unit only accepts 12-cm standard CDs
and memory cards with the dimensions
32 mm x 24 mm x 2.1 mm or 1.4 mm.
The supported file formats listed are collec-
tively referred to below as “audio files”. A CD
containing audio files of these types is refer-
red to as an “audio data CD”.Media sourcesRequirements for playing
in the unit
Audio CDs (up to 80
min).– CD Digital Audio specifica-
tion .
CD-ROM, CD-R, CD-
RW with audio data up
to a max. of 700 MB
(megabyte) in the file
system ISO 9660 Level
1 and 2, Joliet or UDF
1.02, 1.5, 2.01
SD and MMC memory
cards in the file system
FAT12, FAT16, FAT32 or
VFAT up to a max. of 2
GB (gigabyte) and
SDHC memory cards to
a maximum of 32 GB
and SDXC memory
cards to a max. of 2 TB
(terabyte) in exFAT and
NTFS file systems.
– MP3 files (.mp3) with trans-
fer rates from 32 to 320
kbit/s or variable transfer
rate.
– WMA files (.wma) up to 9.2
mono/stereo with no piracy
protection.
– AAC files (.m4a,.m4b,.mp4
and.aac).
– Playlists in M3U, PLS, ASX
and WPL formats.
– Playlists should not be
above 20 kB or over 1,000
entries.
– Files and paths that do not
exceed 256 characters.
AUX-IN››› page 23
Media sourcesRequirements for playing
in the unit
MEDIA-IN or MDI-– external data media com-
patible with the MEDIA-IN
multimedia interface
››› page 24 Requirements for handling external data me-
dia through the MEDIA-IN multimedia inter-
face.
Restrictions and notes
Contamination, exposure to high tempera-
tures and mechanical damage may render a
data medium unusable. Observe the manu-
facturer's instructions.
Variations in the quality of data media pro-
duced by different manufacturers may lead to
anomalies during playback.
Observe copyright laws!
The unit may be unable to read individual
tracks or the entire data medium due to the
data medium configuration or the devices
and programs used for recording. Informa-
tion can be found on the internet regarding
the best ways to create audio files and data
media (compression rate, ID3 tag etc.).
Depending on the size, its condition due to
use (copy and delete processes), the folder
structure and file type, the read time of the
data media used can vary considerably.
»
19
Page 26 of 64
Audio mode
● Start playback of the external audio source.
● In the main MEDIA
menu, press the SOURC E›››
Fig. 21 function button and A
UX .
The output volume
of
the c
onnected external
audio source should be adjusted to the vol-
ume of the other audio sources ››› page 54.
Things to note when operating an external
audio source using the AUX-IN multimedia
ActionEffect
Selection of another audio
source on the radio-navi-
gation system.The external audio source
continues to run in the
background.
Stopping playback on the
external audio source.The infotainment system
remains in the AUX menu.
Disconnecting the plug
from the AUX-IN multime-
dia socket.The infotainment system
changes, and plays the
last media source that was
active. Note
● Please read and observe the external audio
source manufacturer operating manual.
● Interference noise may be heard if the ex-
ternal audio source is powered from the 12-
volt power socket of the vehicle. MEDIA-IN multimedia interface
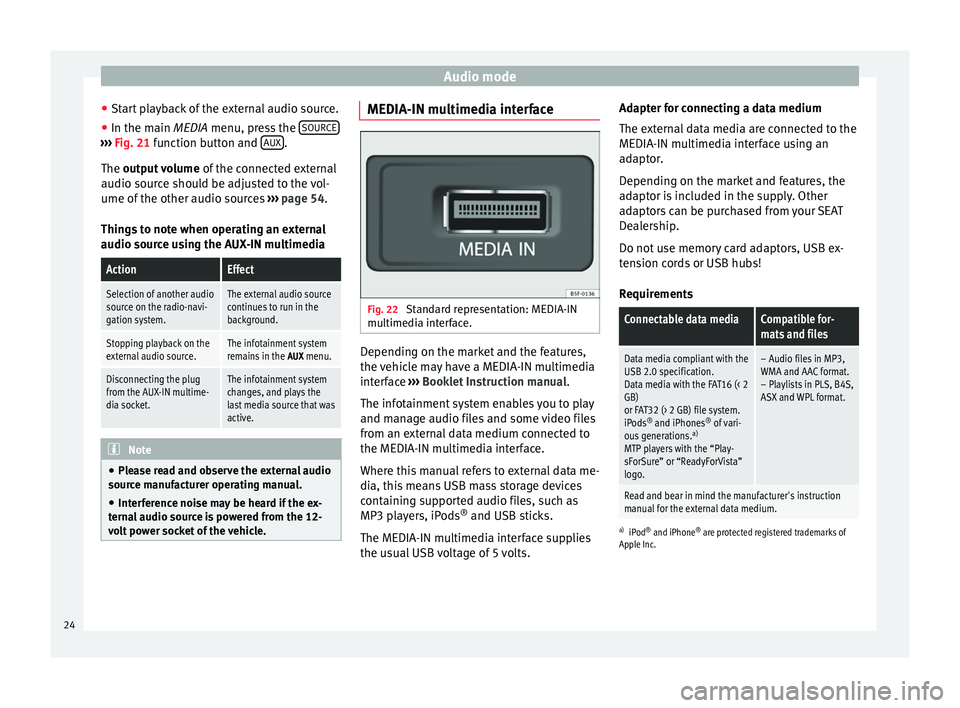
Fig. 22
Standard representation: MEDIA-IN
multimedia interface. Depending on the market and the features,
the vehicle may have a MEDIA-IN multimedia
interface
›››
Booklet Instruction manual.
The infotainment system enables you to play
and manage audio files and some video files
from an external data medium connected to
the MEDIA-IN multimedia interface.
Where this manual refers to external data me-
dia, this means USB mass storage devices
containing supported audio files, such as
MP3 players, iPods ®
and USB sticks.
The MEDIA-IN multimedia interface supplies
the usual USB voltage of 5 volts. Adapter for connecting a data medium
The external data media are connected to the
MEDIA-IN multimedia interface using an
adaptor.
Depending on the market and features, the
adaptor is included in the supply. Other
adaptors can be purchased from your SEAT
Dealership.
Do not use memory card adaptors, USB ex-
tension cords or USB hubs!
Requirements
Connectable data mediaCompatible for-
mats and files
Data media compliant with the
USB 2.0 specification.
Data media with the FAT16 (< 2
GB)
or FAT32 (> 2 GB) file system.
iPods ®
and iPhones ®
of vari-
ous generations. a)
MTP players with the “Play-
sForSure” or “ReadyForVista”
logo.– Audio files in MP3,
WMA and AAC format.
– Playlists in PLS, B4S,
ASX and WPL format.
Read and bear in mind the manufacturer's instruction
manual for the external data medium.
a) iPod ®
and iPhone ®
are protected registered trademarks of
Apple Inc.
24
Page 27 of 64
Audio mode
Notes and restrictions
The infotainment system enables you to view,
play and manage compatible audio files
through the MEDIA-IN multimedia interface.
In the case of MTP players and depending on
the battery charge and the quantity of data, it
may take a few minutes for them to be ready
for use.
External hard discs with a capacity greater
than 32 GB must, in certain circumstances,
be reformatted to the FAT32 file system. On
the Internet, for example, you will find pro-
grams and instructions for this.
If the data carrier has several partitions, only
the first partition will be recognised (except
with USB, in which the first 2 will be visible).
Take into account all other instructions and
limitations regarding requirements for media
sources.
Connecting and disconnecting an external
data medium
● Connect a suitable adaptor to the MEDIA-IN
multimedia interface.
● Connect the external data medium to the
MEDIA-IN multimedia interface via the adapt-
er.
● If necessary, switch on the external data
medium or select the appropriate data mode.
Regardless of any indications to the contrary
that there may be on the matter, the external data medium can be disconnected from the
MEDIA-IN multimedia interface at any time
without losing the data.
When disconnecting an iPod
®
or iPhone ®
from the adaptor, take care to press the two
unlocking tabs on the narrow sides of the
iPod ®
connector simultaneously.
Operating the infotainment system
An external data medium that is correctly
connected to the MEDIA-IN multimedia inter-
face can be operated using the infotainment
system.
● In the main MEDIA
menu, press the SOURC E ›››
Fig. 21 function button and select USB or
iPod ...
››› page 24 .
Other oper ation
s with the external data medi-
um (changing tracks, selecting tracks and ac-
tivating playback modes) are carried out as
described in the corresponding chapters.
iPod ®
and iPhone ®
If you connect an iPod ®
or iPhone ®
, the top
selection level will display the specific lists of
the iPod ( playlists, artist, album,
title, podcasts etc.). The appearance of
these lists is similar to that of the media cen-
tre , and they are managed as described.
Music management is blocked so it can be
managed with the iPod ®
or iPhone ®
that is
connected. The playback volume
of some iPods®
or
iPhones ®
can adapt to the volume of the oth-
er audio sources ››› page 24.
Files from iPods ®
or iPhones ®
cannot be im-
port
ed.
Possible error messages after connecting an ex-
ternal data medium
Error mes-
sageCauseProcedure
Device not
supportedThe external
data medium
cannot be
played– Consult the list of
supported devices
on the web.
– When possible,
update the software
of the external data
medium.
Unit not op-
erationalCommunication
interrupted.Check the connec-
tion and make sure
the external data
medium is working
correctly.
Due to the large number of different data media availa-
ble, it is not possible to guarantee fault-free operation of
all functions described here. Note
● The connecting adaptor used must not be
crushed or bent sharply. This could damage
the adaptor and cause operational faults.
● To play music, do not simultaneously link
the external media player to the infotainment » 25
Page 28 of 64
Audio mode
system using Bluetooth and the MEDIA-IN
multimedia interface, as this can cause play-
back limitations.
● If a connected device is not recognised, un-
plug all connected devices and reconnect the
device. External data support in MEDIA-IN*
port
Only supported audio files can be displayed
and played. Other files are ignored.
Playback starts automatically if there are
readable audio files stored on the data sup-
port.
End connection
The connected data support
must be pre-
pared for disconnection before it can be re-
moved.
● Press the infotainment button MENU ; then,
press Settings to open the menu System set-
tings ››› page 53 .
● Pr e
ss the Safely remove USB data stick function
button. After removing the data stick correct-
ly from the system, the function button be-
comes inactive (grey).
● The data media may now be disconnected. Illegible data medium
If the data on a connected support device
cannot be read, the warning
No playable files
is displayed. Note
Read and bear in mind the manufacturer's in-
struction manual for the external data medi-
um. Connecting an external media player
via Bluetooth
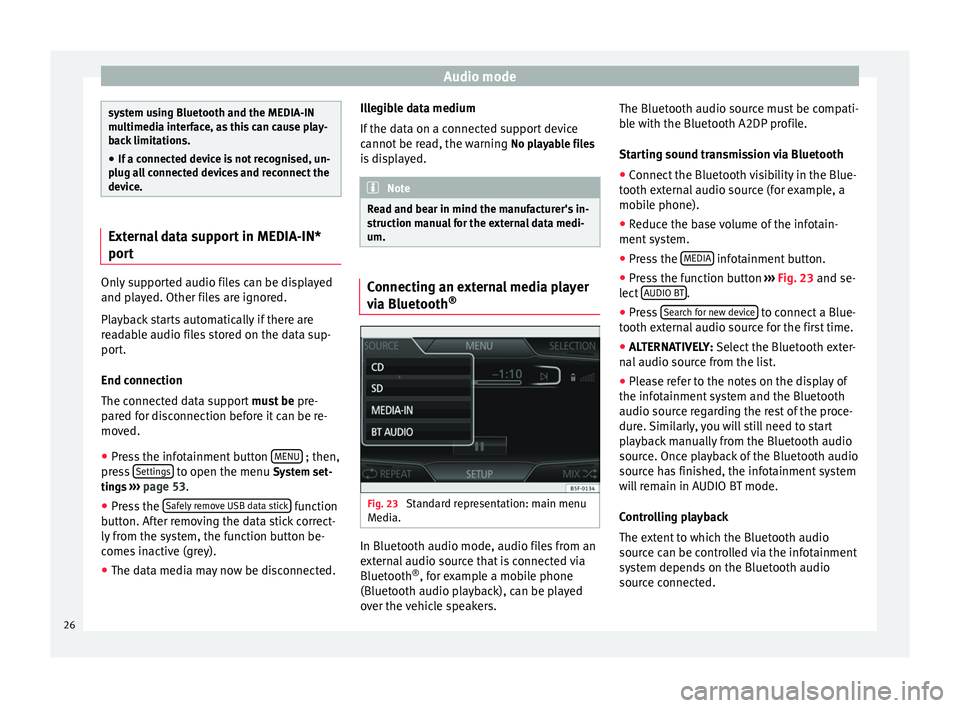
® Fig. 23
Standard representation: main menu
Media. In Bluetooth audio mode, audio files from an
external audio source that is connected via
Bluetooth
®
, for example a mobile phone
(Bluetooth audio playback), can be played
over the vehicle speakers. The Bluetooth audio source must be compati-
ble with the Bluetooth A2DP profile.
Starting sound transmission via Bluetooth
● Connect the Bluetooth visibility in the Blue-
tooth external audio source (for example, a
mobile phone).
● Reduce the base volume of the infotain-
ment system.
● Press the MEDIA infotainment button.
● Press the function button ››› Fig. 23 and se-
l ect
AUDIO BT .
● Press Search for new device to connect a Blue-
tooth external audio source for the first time.
● ALTERNATIVELY: Select the Bluetooth exter-
n al
audio source from the list.
● Please refer to the notes on the display of
the infotainment system and the Bluetooth
audio source regarding the rest of the proce-
dure. Similarly, you will still need to start
playback manually from the Bluetooth audio
source. Once playback of the Bluetooth audio
source has finished, the infotainment system
will remain in AUDIO BT mode.
Controlling playback
The extent to which the Bluetooth audio
source can be controlled via the infotainment
system depends on the Bluetooth audio
source connected.
26
Page 29 of 64
Audio mode
Media players with the AVRCP Bluetooth pro-
file, the playback of the Bluetooth audio
source can be started and stopped automati-
cally when changing to Bluetooth audio
mode, or to another audio source. In addi-
tion, it is possible to view or change the track
via the infotainment system. Note
Due to the large number of different Blue-
tooth audio sources available, it is not possi-
ble to guarantee fault-free operation of all
functions described here. Note
● Deactivate the service and warning sounds
of a connected Bluetooth audio source (for
example, the key tones of the mobile phone)
to avoid interference noise and anomalies in
the operation.
● Depending on the external player connec-
ted, the response time of the system can
vary.
● To ensure your BT player works correctly,
check the compatibility lists first. Changing tracks in the main menu
MEDIA
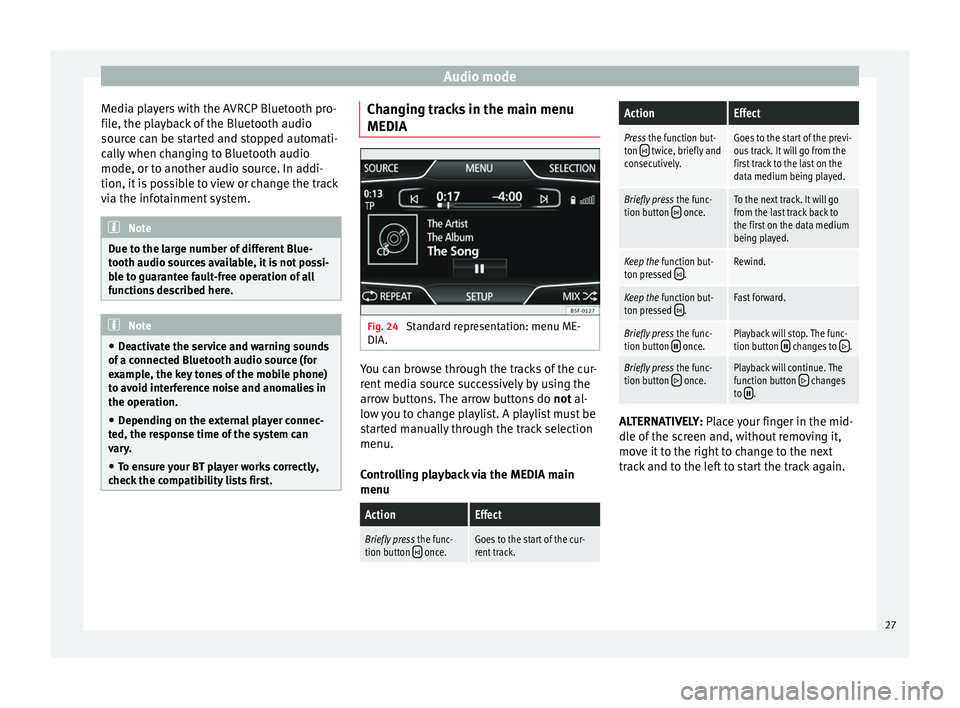
Fig. 24
Standard representation: menu ME-
DIA. You can browse through the tracks of the cur-
rent media source successively by using the
arrow buttons. The arrow buttons do
not al-
lo w
you to change playlist. A playlist must be
started manually through the track selection
menu.
Controlling playback via the MEDIA main
menu
ActionEffect
Briefly press the func-
tion button once.Goes to the start of the cur-
rent track.
ActionEffect
Press the function but-
ton twice, briefly and
consecutively.Goes to the start of the previ-
ous track. It will go from the
first track to the last on the
data medium being played.
Briefly press the func-
tion button once.To the next track. It will go
from the last track back to
the first on the data medium
being played.
Keep the function but-
ton pressed .Rewind.
Keep the function but-
ton pressed .Fast forward.
Briefly press the func-
tion button once.Playback will stop. The func-
tion button changes to .
Briefly press the func-
tion button once.Playback will continue. The
function button changes
to . ALTERNATIVELY:
Place your finger in the mid-
dl e of
the screen and, without removing it,
move it to the right to change to the next
track and to the left to start the track again.
27
Page 30 of 64
Audio mode
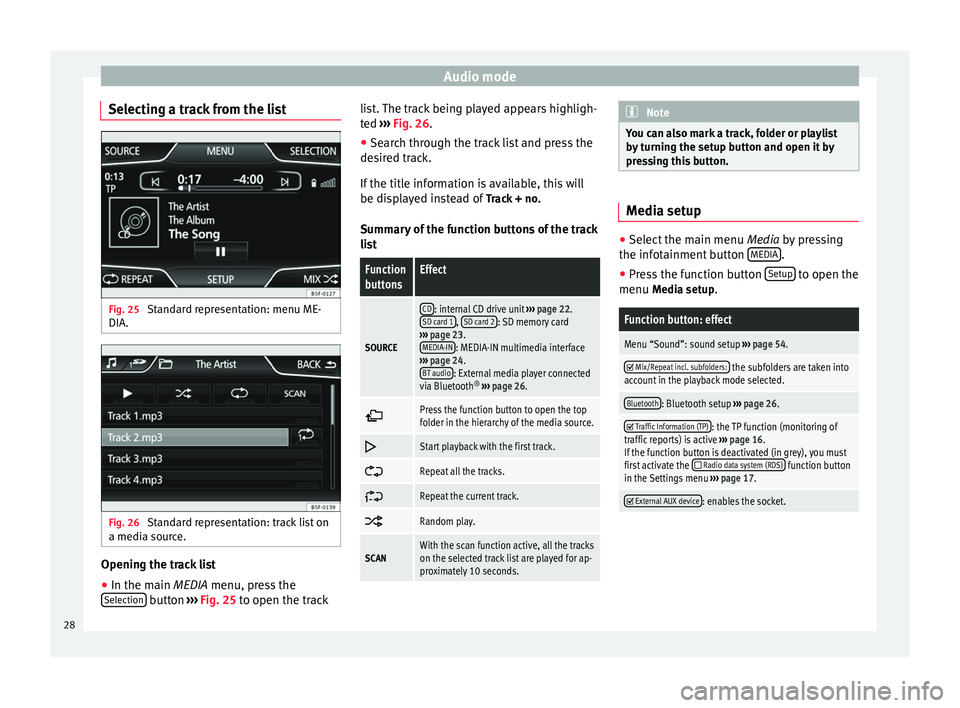
Selecting a track from the list Fig. 25
Standard representation: menu ME-
DIA. Fig. 26
Standard representation: track list on
a media source. Opening the track list
● In the main MEDIA
menu, press the
Sel
ection button
›››
Fig. 25 to open the track li
s t. The track being played appears highligh-
ted ››› Fig. 26
.
● Search through the track list and press the
desired track.
If the title information is available, this will
be displayed instead of Track + no.
Summary of the function buttons of the track
list
Function
buttonsEffect
SOURCE
CD: internal CD drive unit ››› page 22.
SD card 1, SD card 2: SD memory card
››› page 23.
MEDIA-IN
: MEDIA-IN multimedia interface
››› page 24.
BT audio
: External media player connected
via Bluetooth ®
››› page 26.
Press the function button to open the top
folder in the hierarchy of the media source.
Start playback with the first track.
Repeat all the tracks.
Repeat the current track.
Random play.
SCANWith the scan function active, all the tracks
on the selected track list are played for ap-
proximately 10 seconds. Note
You can also mark a track, folder or playlist
by turning the setup button and open it by
pressing this button. Media setup
●
Select the main menu Media by pressing
the inf ot
ainment button MEDIA .
● Press the function button Setup to open the
menu Media setup
.
Function button: effect
Menu “Sound”: sound setup ››› page 54.
Mix/Repeat incl. subfolders: the subfolders are taken into
account in the playback mode selected.
Bluetooth: Bluetooth setup ››› page 26.
Traffic Information (TP): the TP function (monitoring of
traffic reports) is active ››› page 16.
If the function button is deactivated (in grey), you must
first activate the
Radio data system (RDS) function button
in the Settings menu ››› page 17.
External AUX device: enables the socket.
28
Page 41 of 64
CAR menu
CAR menu Introduction to managing the
CAR menu Car menu By pressing the “CAR” infotainment button
you will access the main menu with the fol-
lowing options:
● VIEW
● MINIPLAYER (Radio and Media function)
● PREVIOUS-NEXT (to change screen)
● SETUP ›››
Booklet Instruction Manual,
chapter System setup (CAR)
With the function button View you can access
the following information:
● DRIVING DATA
● ECO
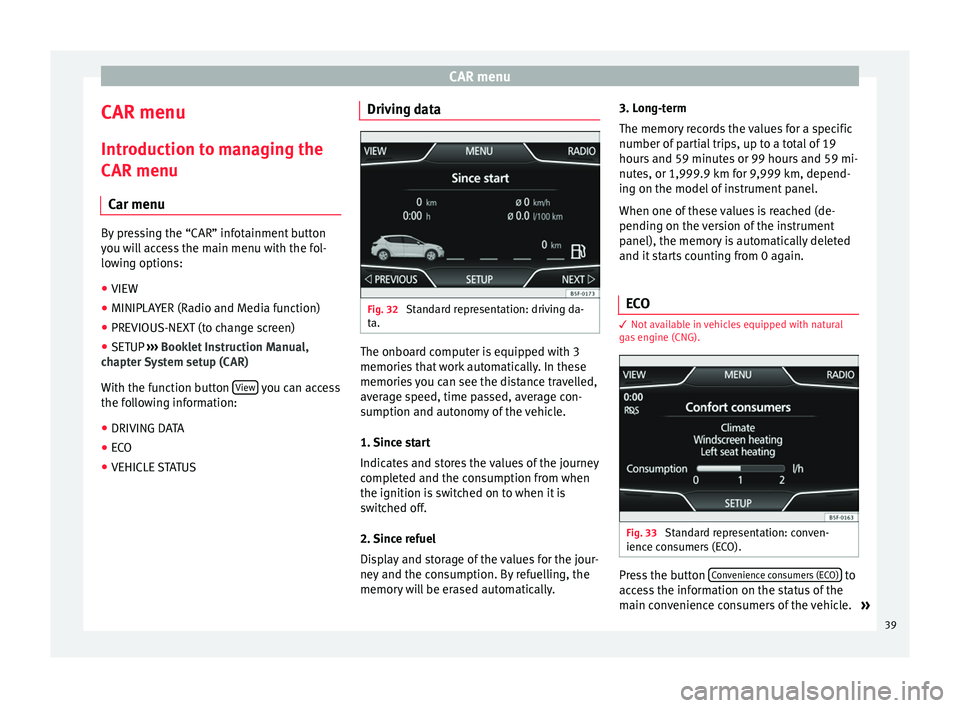
● VEHICLE STATUS Driving data
Fig. 32
Standard representation: driving da-
ta. The onboard computer is equipped with 3
memories that work automatically. In these
memories you can see the distance travelled,
average speed, time passed, average con-
sumption and autonomy of the vehicle.
1. Since start
Indicates and stores the values of the journey
completed and the consumption from when
the ignition is switched on to when it is
switched off.
2. Since refuel
Display and storage of the values for the jour-
ney and the consumption. By refuelling, the
memory will be erased automatically.3. Long-term
The memory records the values for a specific
number of partial trips, up to a total of 19
hours and 59 minutes or 99 hours and 59 mi-
nutes, or 1,999.9 km for 9,999 km, depend-
ing on the model of instrument panel.
When one of these values is reached (de-
pending on the version of the instrument
panel), the memory is automatically deleted
and it starts counting from 0 again.
ECO 3
Not available in vehicles equipped with natural
gas engine (CNG). Fig. 33
Standard representation: conven-
ience consumers (ECO). Press the button
Convenience consumers (ECO) to
access the information on the status of the
main convenience consumers of the vehicle. »
39