start stop button Seat Leon SC 2014 MEDIA SYSTEM PLUS - NAVI SYSTEM
[x] Cancel search | Manufacturer: SEAT, Model Year: 2014, Model line: Leon SC, Model: Seat Leon SC 2014Pages: 64, PDF Size: 1.71 MB
Page 8 of 64
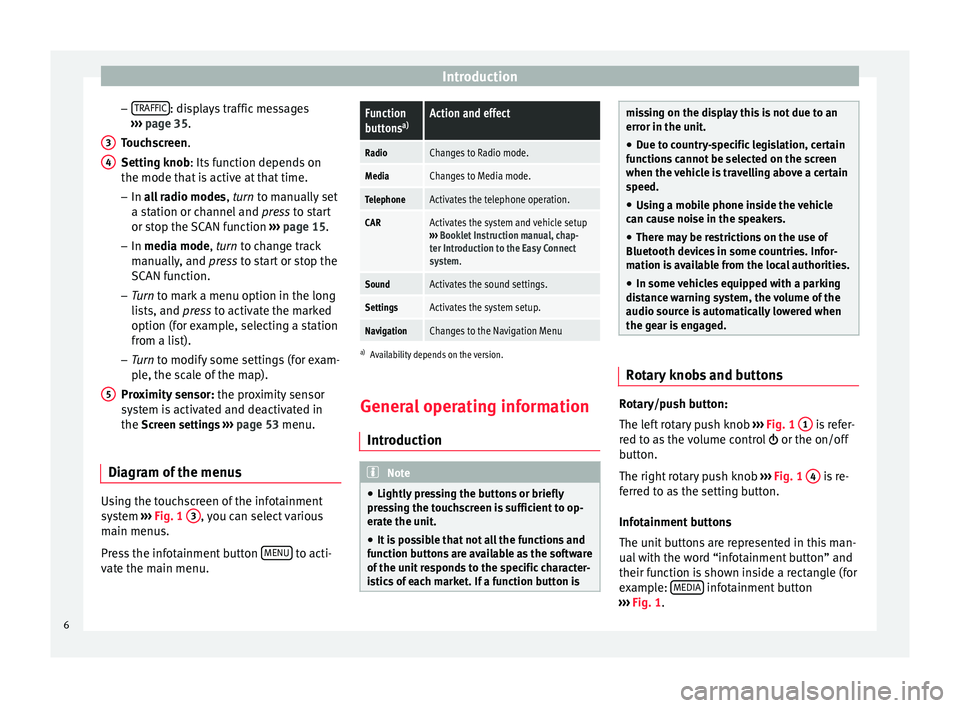
Introduction
– TRAFFIC : displays traffic messages
››› page 35 .
T ouc
hscreen
.
Setting knob
: Its function depends on
the mode that is active at that time.
– In all radio modes , turn
to manually set
a station or channel and press to start
or stop the SCAN function ››› page 15.
– In media mode,
turn to change track
manually, and press to start or stop the
SCAN function.
– Turn to mark a menu option in the long
lis
ts, and press to activate the marked
option (for example, selecting a station
from a list).
– Turn to modify some settings (for exam-
pl
e, the scale of the map).
Proximity sensor: the proximity sensor
system is activated and deactivated in
the Screen settings ››› page 53 menu.
Diagram of the menus Using the touchscreen of the infotainment
system
›››
Fig. 1 3 , you can select various
main menus.
Press the infotainment button MENU to acti-
vate the main menu. 3 4
5
Function
buttons
a)Action and effect
RadioChanges to Radio mode.
MediaChanges to Media mode.
TelephoneActivates the telephone operation.
CARActivates the system and vehicle setup
››› Booklet Instruction manual, chap-
ter Introduction to the Easy Connect
system.
SoundActivates the sound settings.
SettingsActivates the system setup.
NavigationChanges to the Navigation Menu
a) Availability depends on the version.
General operating information
Introduction Note
● Lightly pressing the buttons or briefly
pressing the touchscreen is sufficient to op-
erate the unit.
● It is possible that not all the functions and
function buttons are available as the software
of the unit responds to the specific character-
istics of each market. If a function button is missing on the display this is not due to an
error in the unit.
● Due to country-specific legislation, certain
functions cannot be selected on the screen
when the vehicle is travelling above a certain
speed.
● Using a mobile phone inside the vehicle
can cause noise in the speakers.
● There may be restrictions on the use of
Bluetooth devices in some countries. Infor-
mation is available from the local authorities.
● In some vehicles equipped with a parking
distance warning system, the volume of the
audio source is automatically lowered when
the gear is engaged. Rotary knobs and buttons
Rotary/push button:
The left rotary push knob
››› Fig. 1 1 is refer-
red to as the volume control or the on/off
button.
The right rotary push knob ››› Fig. 1 4 is re-
ferred to as the setting button.
Infotainment buttons
The unit buttons are represented in this man-
ual with the word “infotainment button” and
their function is shown inside a rectangle (for
example: MEDIA infotainment button
››› Fig. 1 .
6
Page 17 of 64
Audio modeHiding the
frequency
bandBriefly press
the function button Manual.
If you select a station with a stored sta-
tion button, the manual selection of the
frequency is also finalised. If you do not
do anything else, after a certain time the
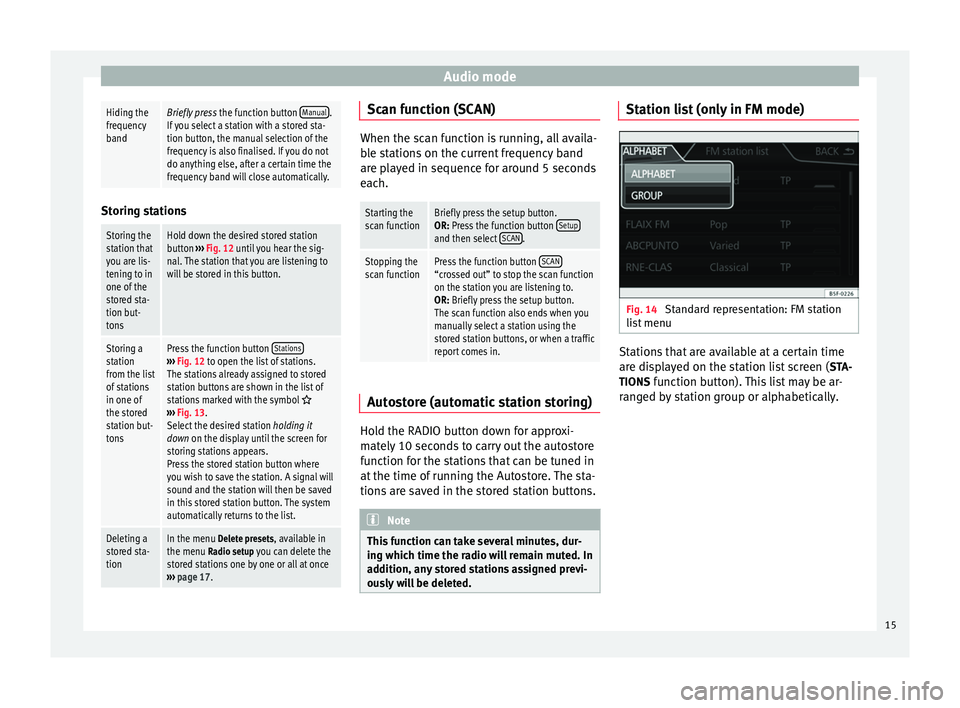
frequency band will close automatically. Storing stations
Storing the
station that
you are lis-
tening to in
one of the
stored sta-
tion but-
tonsHold down the desired stored station
button
››› Fig. 12 until you hear the sig-
nal. The station that you are listening to
will be stored in this button.
Storing a
station
from the list
of stations
in one of
the stored
station but-
tonsPress the function button Stations›››
Fig. 12 to open the list of stations.
The stations already assigned to stored
station buttons are shown in the list of
stations marked with the symbol
››› Fig. 13.
Select the desired station holding it
down on the display until the screen for
storing stations appears.
Press the stored station button where
you wish to save the station. A signal will
sound and the station will then be saved
in this stored station button. The system
automatically returns to the list.
Deleting a
stored sta-
tionIn the menu Delete presets, available in the menu Radio setup you can delete the
stored stations one by one or all at once
››› page 17. Scan function (SCAN)
When the scan function is running, all availa-
ble stations on the current frequency band
are played in sequence for around 5 seconds
each.
Starting the
scan functionBriefly press the setup button.
OR: Press the function button
Setup
and then select SCAN.
Stopping the
scan functionPress the function button SCAN“crossed out” to stop the scan function
on the station you are listening to.
OR: Briefly press the setup button.
The scan function also ends when you
manually select a station using the
stored station buttons, or when a traffic
report comes in. Autostore (automatic station storing)
Hold the RADIO button down for approxi-
mately 10 seconds to carry out the autostore
function for the stations that can be tuned in
at the time of running the Autostore. The sta-
tions are saved in the stored station buttons.
Note
This function can take several minutes, dur-
ing which time the radio will remain muted. In
addition, any stored stations assigned previ-
ously will be deleted. Station list (only in FM mode)
Fig. 14
Standard representation: FM station
list menu Stations that are available at a certain time
are displayed on the station list screen (
STA-
TIONS function button). This list may be ar-
ranged by station group or alphabetically.
15
Page 23 of 64
Audio mode
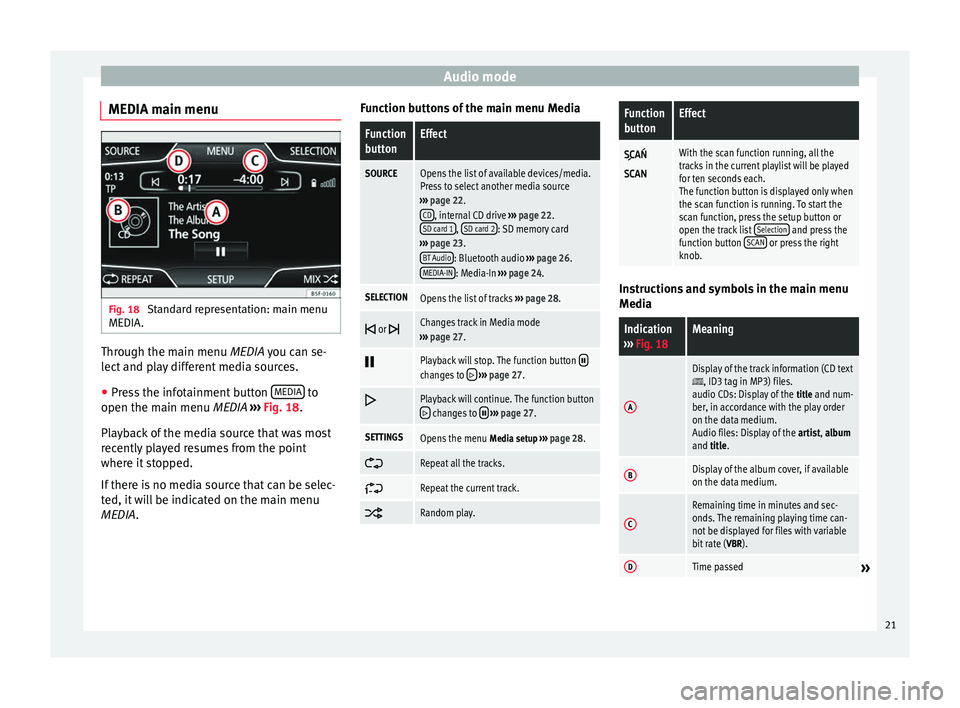
MEDIA main menu Fig. 18
Standard representation: main menu
MEDIA. Through the main menu
MEDIA
you can se-
l
ect and play different media sources.
● Press the infotainment button MEDIA to
open the main menu MEDIA ›››
Fig. 18 .
Pl a
yback of the media source that was most
recently played resumes from the point
where it stopped.
If there is no media source that can be selec-
ted, it will be indicated on the main menu
MEDIA
. Function buttons of the main menu Media
Function
buttonEffect
SOURCEOpens the list of available devices/media.
Press to select another media source
››› page 22.
CD
, internal CD drive ››› page 22.
SD card 1, SD card 2: SD memory card
››› page 23.
BT Audio
: Bluetooth audio ››› page 26.
MEDIA-IN: Media-In ››› page 24.
SELECTIONOpens the list of tracks ››› page 28.
or Changes track in Media mode
››› page 27.
Playback will stop. The function button changes to
››› page 27.
Playback will continue. The function button changes to
››› page 27.
SETTINGSOpens the menu Media setup ››› page 28.
Repeat all the tracks.
Repeat the current track.
Random play.
Function
buttonEffect
With the scan function running, all the
tracks in the current playlist will be played
for ten seconds each.
The function button is displayed only when
the scan function is running. To start the
scan function, press the setup button or
open the track list
Selection
and press the
function button SCAN or press the right
knob. Instructions and symbols in the main menu
Media
Indication
››› Fig. 18Meaning
A
Display of the track information (CD text, ID3 tag in MP3) files.
audio CDs: Display of the title and num-
ber, in accordance with the play order
on the data medium.
Audio files: Display of the artist, album
and title.
BDisplay of the album cover, if available
on the data medium.
C
Remaining time in minutes and sec-
onds. The remaining playing time can-
not be displayed for files with variable
bit rate ( VBR).
DTime passed» 21
Page 24 of 64
Audio modeIndication
››› Fig. 18Meaning
RDS radio data service deactivated. The
RDS can be activated in the menu Setup
(FM, AM) ››› page 17.
TPThe TP is active and receiving
››› page 16.
No traffic news station can be received.
No DAB reception possible.
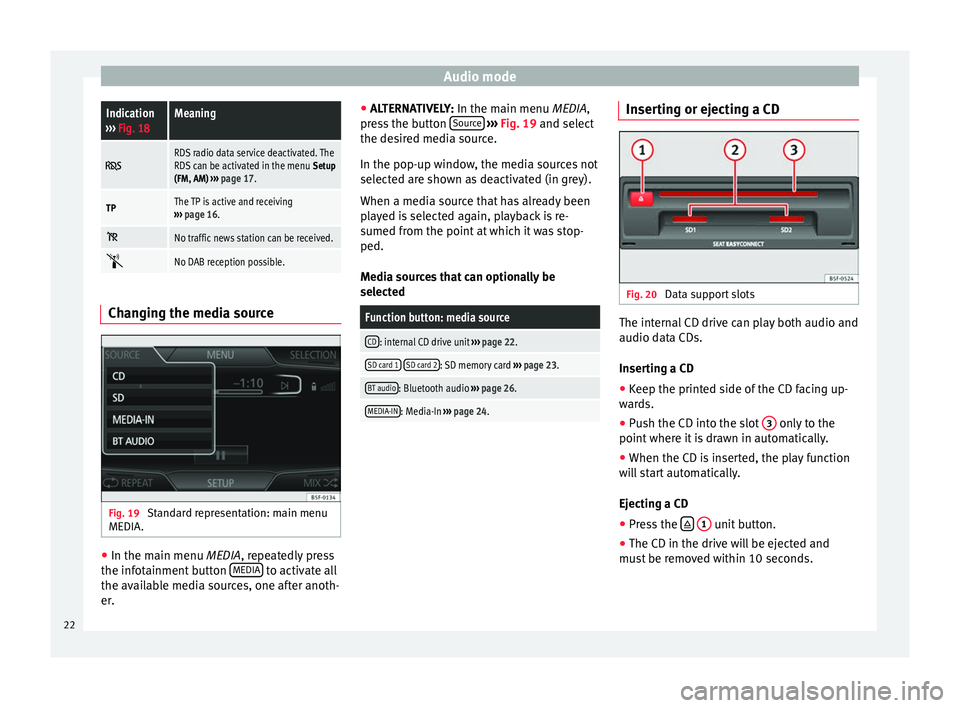
Changing the media source
Fig. 19
Standard representation: main menu
MEDIA. ●
In the main menu MEDIA, repeatedly press
the inf
otainment button MEDIA to activate all
the available media sources, one after anoth-
er. ●
ALTERNATIVELY: In the main menu MEDIA
,
press the button Source
››› Fig. 19 and select
the de s
ired media source.
In the pop-up window, the media sources not
selected are shown as deactivated (in grey).
When a media source that has already been
played is selected again, playback is re-
sumed from the point at which it was stop-
ped.
Media sources that can optionally be
selected
Function button: media source
CD: internal CD drive unit ››› page 22.
SD card 1 SD card 2: SD memory card
››› page 23.
BT audio: Bluetooth audio ››› page 26.
MEDIA-IN: Media-In ››› page 24. Inserting or ejecting a CD
Fig. 20
Data support slots The internal CD drive can play both audio and
audio data CDs.
Inserting a CD
● Keep the printed side of the CD facing up-
wards.
● Push the CD into the slot 3 only to the
point where it is drawn in automatically.
● When the CD is inserted, the play function
will start automatically.
Ejecting a CD
● Press the
1 unit button.
● The CD in the drive will be ejected and
must be removed within 10 seconds.
22
Page 25 of 64
Audio mode
If you do not remove the CD in the following
10 seconds, it will be drawn back in for safety
reasons, without changing to CD mode.
Unreadable or defective CD
If the data on the inserted CD cannot be read
or the CD is damaged, the corresponding in-
dication will be shown on the screen.
Depending on the unit, when a CD cannot be
read it will retry three times, ejecting and re-
inserting the CD, before showing the indica-
tion. Note
● Uneven road surfaces and strong vibrations
may cause the CD to jump.
● If the interior temperature of the unit is too
high, it will not accept or play any more CDs.
● If, after having inserted several CDs, the in-
dication CD drive error still appears, contact a
s pec
ialist workshop. Inserting and removing memory cards
Inserting a memory card
If a memory card cannot be inserted, make
sure it is positioned correctly and is compati-
ble with the unit.
Playback starts automatically if supported
audio files are stored on the memory card. Insert a compatible memory card by pushing
it into the memory card slot with the cut-off
corner first facing
upwards until it locks in
› ›
› Fig. 20.
Remo
ving a memory card
The memory card inserted must be prepared
before it is ejected.
● Press the infotainment button MENU ; then,
press Setup to open the menu
System set-
tin g
s.
● Press the function button
Remove SD card 1 safely or
Remove SD card 2 safely .
After ejecting the memory card, the function
button will be shown in grey.
● Press the memory card inserted. The mem-
ory card “jumps” to the eject position.
● Remove the memory card.
Unreadable memory card
If you insert a memory card containing data
that cannot be read, the unit will not change
to memory card mode after loading.
It will show the indication: There are no playa-
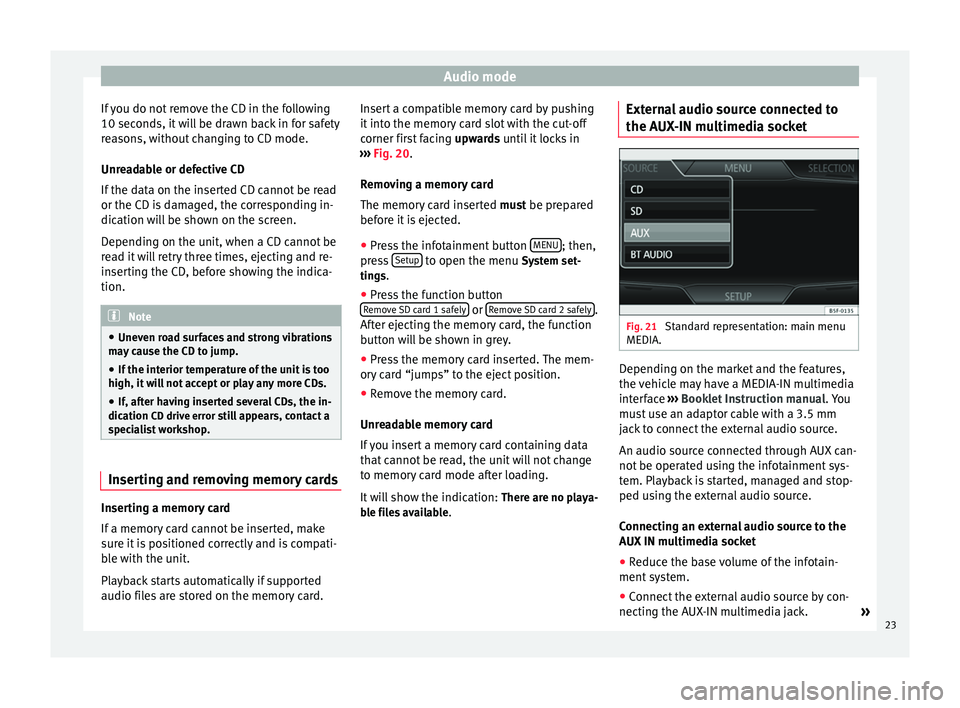
ble files available . External audio source connected to
the AUX-IN multimedia socket
Fig. 21
Standard representation: main menu
MEDIA. Depending on the market and the features,
the vehicle may have a MEDIA-IN multimedia
interface
›››
Booklet Instruction manual. You
must use an adaptor cable with a 3.5 mm
jack to connect the external audio source.
An audio source connected through AUX can-
not be operated using the infotainment sys-
tem. Playback is started, managed and stop-
ped using the external audio source.
Connecting an external audio source to the
AUX IN multimedia socket
● Reduce the base volume of the infotain-
ment system.
● Connect the external audio source by con-
necting the AUX-IN multimedia jack. »
23
Page 26 of 64
Audio mode
● Start playback of the external audio source.
● In the main MEDIA
menu, press the SOURC E›››
Fig. 21 function button and A
UX .
The output volume
of
the c
onnected external
audio source should be adjusted to the vol-
ume of the other audio sources ››› page 54.
Things to note when operating an external
audio source using the AUX-IN multimedia
ActionEffect
Selection of another audio
source on the radio-navi-
gation system.The external audio source
continues to run in the
background.
Stopping playback on the
external audio source.The infotainment system
remains in the AUX menu.
Disconnecting the plug
from the AUX-IN multime-
dia socket.The infotainment system
changes, and plays the
last media source that was
active. Note
● Please read and observe the external audio
source manufacturer operating manual.
● Interference noise may be heard if the ex-
ternal audio source is powered from the 12-
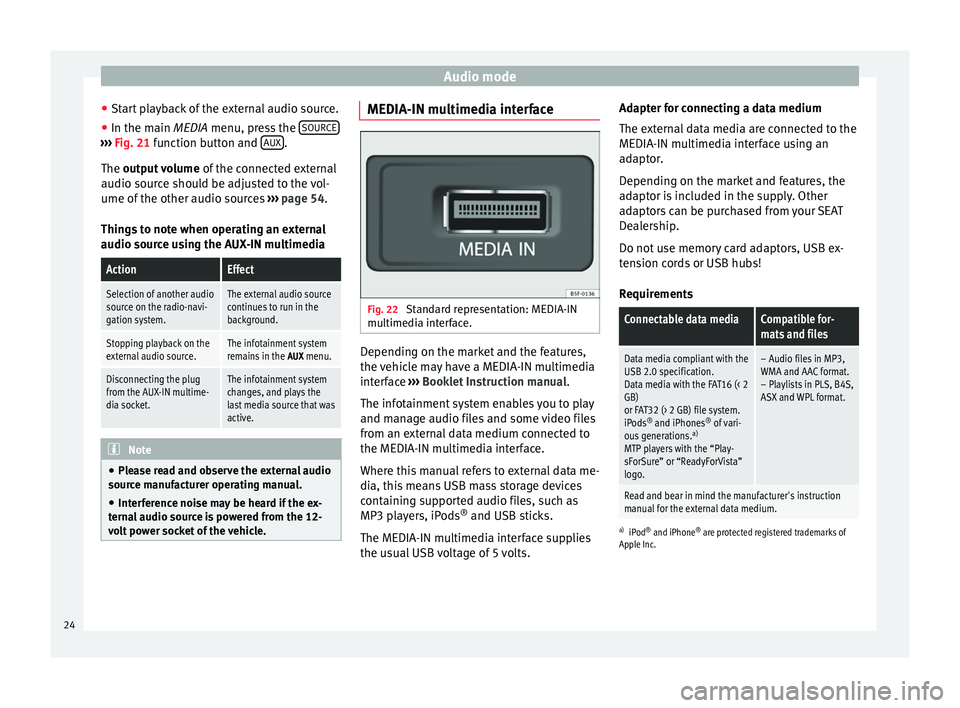
volt power socket of the vehicle. MEDIA-IN multimedia interface
Fig. 22
Standard representation: MEDIA-IN
multimedia interface. Depending on the market and the features,
the vehicle may have a MEDIA-IN multimedia
interface
›››
Booklet Instruction manual.
The infotainment system enables you to play
and manage audio files and some video files
from an external data medium connected to
the MEDIA-IN multimedia interface.
Where this manual refers to external data me-
dia, this means USB mass storage devices
containing supported audio files, such as
MP3 players, iPods ®
and USB sticks.
The MEDIA-IN multimedia interface supplies
the usual USB voltage of 5 volts. Adapter for connecting a data medium
The external data media are connected to the
MEDIA-IN multimedia interface using an
adaptor.
Depending on the market and features, the
adaptor is included in the supply. Other
adaptors can be purchased from your SEAT
Dealership.
Do not use memory card adaptors, USB ex-
tension cords or USB hubs!
Requirements
Connectable data mediaCompatible for-
mats and files
Data media compliant with the
USB 2.0 specification.
Data media with the FAT16 (< 2
GB)
or FAT32 (> 2 GB) file system.
iPods ®
and iPhones ®
of vari-
ous generations. a)
MTP players with the “Play-
sForSure” or “ReadyForVista”
logo.– Audio files in MP3,
WMA and AAC format.
– Playlists in PLS, B4S,
ASX and WPL format.
Read and bear in mind the manufacturer's instruction
manual for the external data medium.
a) iPod ®
and iPhone ®
are protected registered trademarks of
Apple Inc.
24
Page 29 of 64
Audio mode
Media players with the AVRCP Bluetooth pro-
file, the playback of the Bluetooth audio
source can be started and stopped automati-
cally when changing to Bluetooth audio
mode, or to another audio source. In addi-
tion, it is possible to view or change the track
via the infotainment system. Note
Due to the large number of different Blue-
tooth audio sources available, it is not possi-
ble to guarantee fault-free operation of all
functions described here. Note
● Deactivate the service and warning sounds
of a connected Bluetooth audio source (for
example, the key tones of the mobile phone)
to avoid interference noise and anomalies in
the operation.
● Depending on the external player connec-
ted, the response time of the system can
vary.
● To ensure your BT player works correctly,
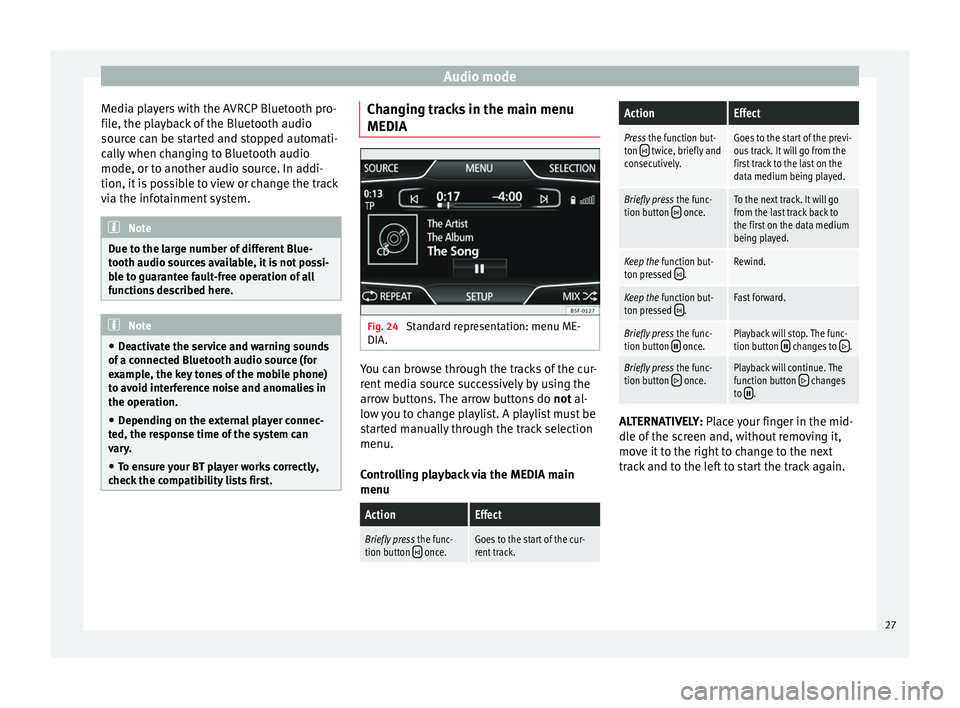
check the compatibility lists first. Changing tracks in the main menu
MEDIA
Fig. 24
Standard representation: menu ME-
DIA. You can browse through the tracks of the cur-
rent media source successively by using the
arrow buttons. The arrow buttons do
not al-
lo w
you to change playlist. A playlist must be
started manually through the track selection
menu.
Controlling playback via the MEDIA main
menu
ActionEffect
Briefly press the func-
tion button once.Goes to the start of the cur-
rent track.
ActionEffect
Press the function but-
ton twice, briefly and
consecutively.Goes to the start of the previ-
ous track. It will go from the
first track to the last on the
data medium being played.
Briefly press the func-
tion button once.To the next track. It will go
from the last track back to
the first on the data medium
being played.
Keep the function but-
ton pressed .Rewind.
Keep the function but-
ton pressed .Fast forward.
Briefly press the func-
tion button once.Playback will stop. The func-
tion button changes to .
Briefly press the func-
tion button once.Playback will continue. The
function button changes
to . ALTERNATIVELY:
Place your finger in the mid-
dl e of
the screen and, without removing it,
move it to the right to change to the next
track and to the left to start the track again.
27
Page 34 of 64
Navigation
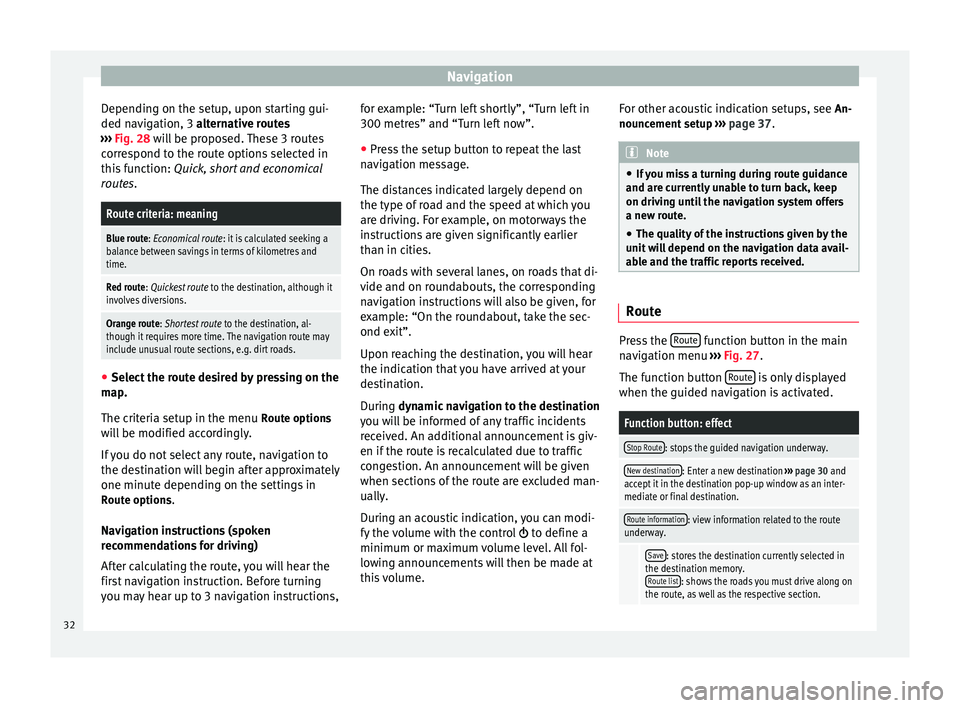
Depending on the setup, upon starting gui-
ded navigation, 3 alternative routes
› ›
› Fig. 28 will be proposed. These 3 routes
correspond to the route options selected in
this function: Quick, short and economical
routes.
Route criteria: meaning
Blue route: Economical route: it is calculated seeking a
balance between savings in terms of kilometres and
time.
Red route: Quickest route to the destination, although it
involves diversions.
Orange route: Shortest route to the destination, al-
though it requires more time. The navigation route may
include unusual route sections, e.g. dirt roads. ●
Select the route desired by pressing on the
map.
The criteria setup in the menu Route options
will be modified accordingly.
If you do not select any route, navigation to
the destination will begin after approximately
one minute depending on the settings in Route options .
Navigation instructions (spoken
recommendations for driving)
After calculating the route, you will hear the
first navigation instruction. Before turning
you may hear up to 3 navigation instructions, for example: “Turn left shortly”, “Turn left in
300 metres” and “Turn left now”.
●
Press the setup button to repeat the last
navigation message.
The distances indicated largely depend on
the type of road and the speed at which you
are driving. For example, on motorways the
instructions are given significantly earlier
than in cities.
On roads with several lanes, on roads that di-
vide and on roundabouts, the corresponding
navigation instructions will also be given, for
example: “On the roundabout, take the sec-
ond exit”.
Upon reaching the destination, you will hear
the indication that you have arrived at your
destination.
During dynamic navigation to the destination
y ou w
ill be informed of any traffic incidents
received. An additional announcement is giv-
en if the route is recalculated due to traffic
congestion. An announcement will be given
when sections of the route are excluded man-
ually.
During an acoustic indication, you can modi-
fy the volume with the control to define a
minimum or maximum volume level. All fol-
lowing announcements will then be made at
this volume. For other acoustic indication setups, see
An-
nouncement setup ››› page 37. Note
● If you miss a turning during route guidance
and are currently unable to turn back, keep
on driving until the navigation system offers
a new route.
● The quality of the instructions given by the
unit will depend on the navigation data avail-
able and the traffic reports received. Route
Press the
Route function button in the main
navigation menu ›››
Fig. 27 .
The f u
nction button Route is only displayed
when the guided navigation is activated.
Function button: effect
Stop Route: stops the guided navigation underway.
New destination: Enter a new destination ››› page 30 and
accept it in the destination pop-up window as an inter-
mediate or final destination.
Route information: view information related to the route
underway.
Save: stores the destination currently selected in
the destination memory. Route list
: shows the roads you must drive along on
the route, as well as the respective section. 32
Page 40 of 64
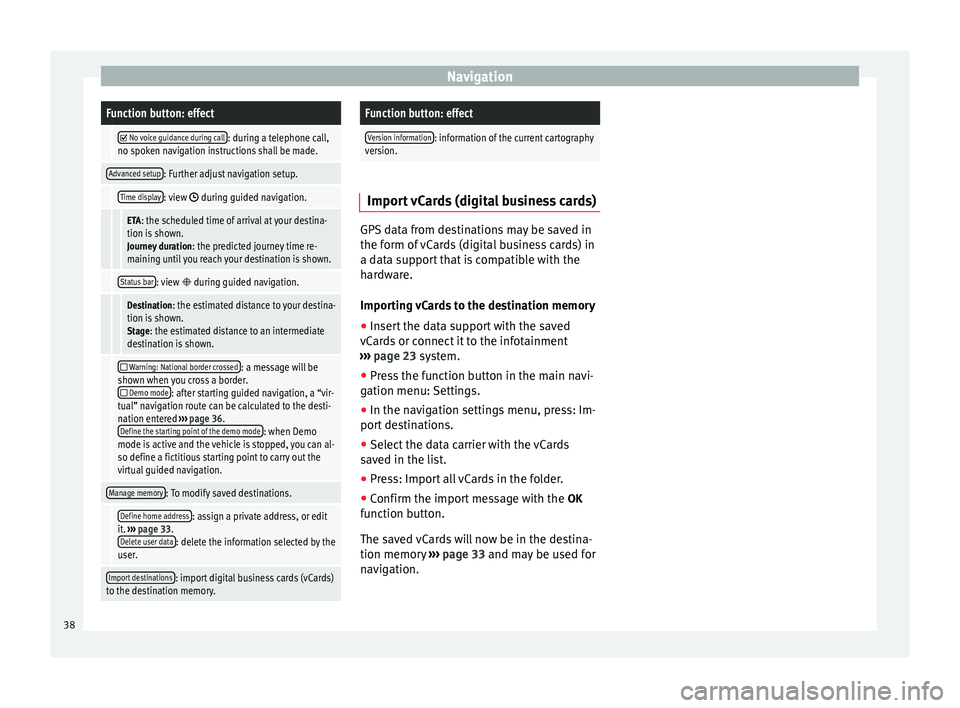
NavigationFunction button: effect
No voice guidance during call: during a telephone call,
no spoken navigation instructions shall be made.
Advanced setup: Further adjust navigation setup.
Time display: view during guided navigation.
ETA: the scheduled time of arrival at your destina-
tion is shown. Journey duration : the predicted journey time re-
maining until you reach your destination is shown.
Status bar: view during guided navigation.
Destination: the estimated distance to your destina-
tion is shown. Stage: the estimated distance to an intermediate
destination is shown.
Warning: National border crossed: a message will be
shown when you cross a border.
Demo mode: after starting guided navigation, a “vir-
tual” navigation route can be calculated to the desti-
nation entered ››› page 36.
Define the starting point of the demo mode
: when Demo
mode is active and the vehicle is stopped, you can al-
so define a fictitious starting point to carry out the
virtual guided navigation.
Manage memory: To modify saved destinations.
Define home address: assign a private address, or edit
it. ››› page 33.
Delete user data
: delete the information selected by the
user.
Import destinations: import digital business cards (vCards)
to the destination memory.
Function button: effect
Version information: information of the current cartography
version. Import vCards (digital business cards)
GPS data from destinations may be saved in
the form of vCards (digital business cards) in
a data support that is compatible with the
hardware.
Importing vCards to the destination memory
●
Insert the data support with the saved
vCards or connect it to the infotainment
››› page 23 system.
● Pr e
ss the function button in the main navi-
gation menu: Settings.
● In the navigation settings menu, press: Im-
port destinations.
● Select the data carrier with the vCards
saved in the list.
● Press: Import all vCards in the folder.
● Confirm the import message with the OK
function button.
The saved vCards will now be in the destina-
tion memory ›››
page 33 and may be used for
nav
igation. 38
Page 44 of 64
Telephone management (PHONE)
Note
In areas with special requirements and where
the use of mobile phones is prohibited, you
must keep the mobile phone and its prein-
stallation switched off at all times. The radia-
tion emitted by mobile phones when switch-
ed on can cause interference in sensitive
technical and medical equipment, which
could damage this equipment or cause it to
stop working properly. Linking and connecting your mobile
phone to the infotainment system
To operate a mobile phone through the info-
tainment system, you need to link both devi-
ces
one time only .
F or
your safety, we recommend you make the
link when the vehicle is stationary. In some
countries you cannot
make the link with the
vehicle running.
You must guarantee the following setup in
the mobile phone and the infotainment sys-
tem:
● The
Bluetooth ®
function must be active
and visible on the mobile phone and info-
tainment system, respectively.
● The keypad lock of the mobile phone must
be disconnected.
● The
notification and key tones of your mo-
bile phone must be disconnected. In some countries, after switching the igni-
tion on, the
Bluetooth
®
function of the info-
tainment system should be activated or re-
main visible for around 3 minutes.
During the linking process you must enter da-
ta using your mobile phone's keypad. To do
so, you must have your mobile phone to
hand.
Once the link has been made, the schedule
and call lists stored in your mobile phone will
be loaded. The duration of the loading proc-
ess depends on the amount of data stored on
your mobile phone. When the loading proc-
ess is complete, the data will be available to
the infotainment system.
Starting the link from the system
● Make sure the mobile device is active and
visible.
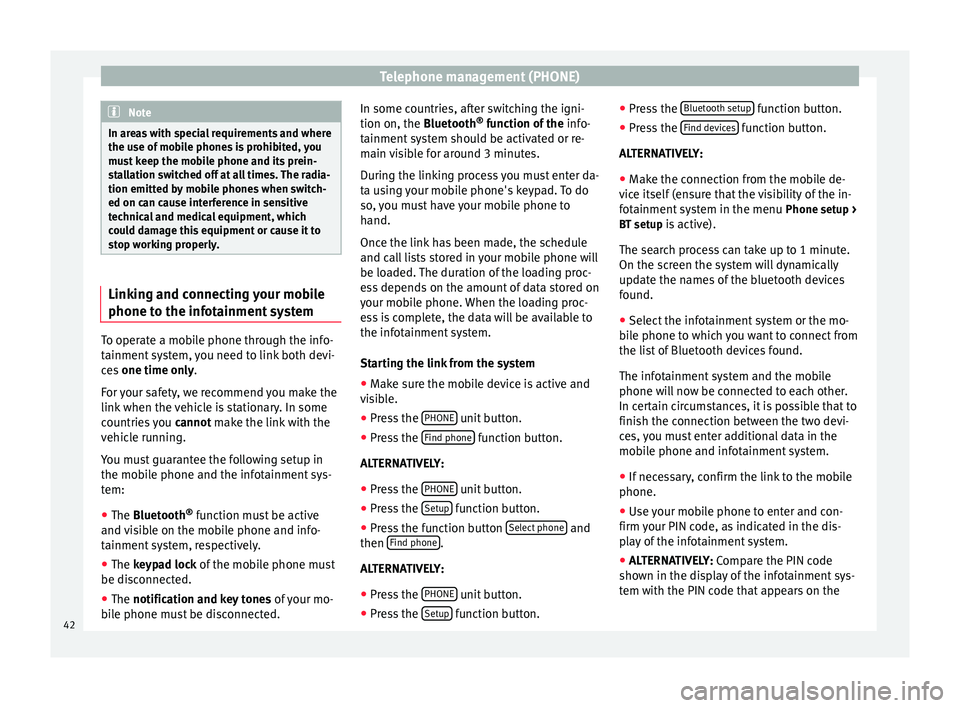
● Press the PHONE unit button.
● Press the Find phone function button.
ALTERNATIVELY:
● Press the PHONE unit button.
● Press the Setup function button.
● Press the function button Select phone and
then Find phone .
ALTERNATIVELY:
● Press the PHONE unit button.
● Press the Setup function button.●
Press the Bluetooth setup function button.
● Press the Find devices function button.
ALTERNATIVELY:
● Make the connection from the mobile de-
vice itself (ensure that the visibility of the in-
fotainment system in the menu Phone setup >
BT setup is active).
The search process can take up to 1 minute.
On the screen the system will dynamically
update the names of the bluetooth devices
found.
● Select the infotainment system or the mo-
bile phone to which you want to connect from
the list of Bluetooth devices found.
The infotainment system and the mobile
phone will now be connected to each other.
In certain circumstances, it is possible that to
finish the connection between the two devi-
ces, you must enter additional data in the
mobile phone and infotainment system.
● If necessary, confirm the link to the mobile
phone.
● Use your mobile phone to enter and con-
firm your PIN code, as indicated in the dis-
play of the infotainment system.
● ALTERNATIVELY: Compare the PIN code
sho wn in the di
splay of the infotainment sys-
tem with the PIN code that appears on the
42