start stop button Seat Leon SC 2014 MEDIA SYSTEM TOUCH - COLOUR
[x] Cancel search | Manufacturer: SEAT, Model Year: 2014, Model line: Leon SC, Model: Seat Leon SC 2014Pages: 44, PDF Size: 1.45 MB
Page 9 of 44
Introduction
The volume modification is shown on the
screen with a bar. During this time the unit
cannot be operated.
It is possible to preset certain volume set-
tings and adjustments ››› page 37.
Silence the unit
● Turn the volume control anticlockwise
u nti
l you see .
● ALTERNATIVELY:
Press the MUTE infotain-
ment button or the SILENCE function button
››› Fig. 3 1)
.
While the unit is in silence, the active media
source is stopped. is displayed on the
screen. Note
If the basic playback volume of an audio
source has been increased substantially, low-
er the volume before changing to another au-
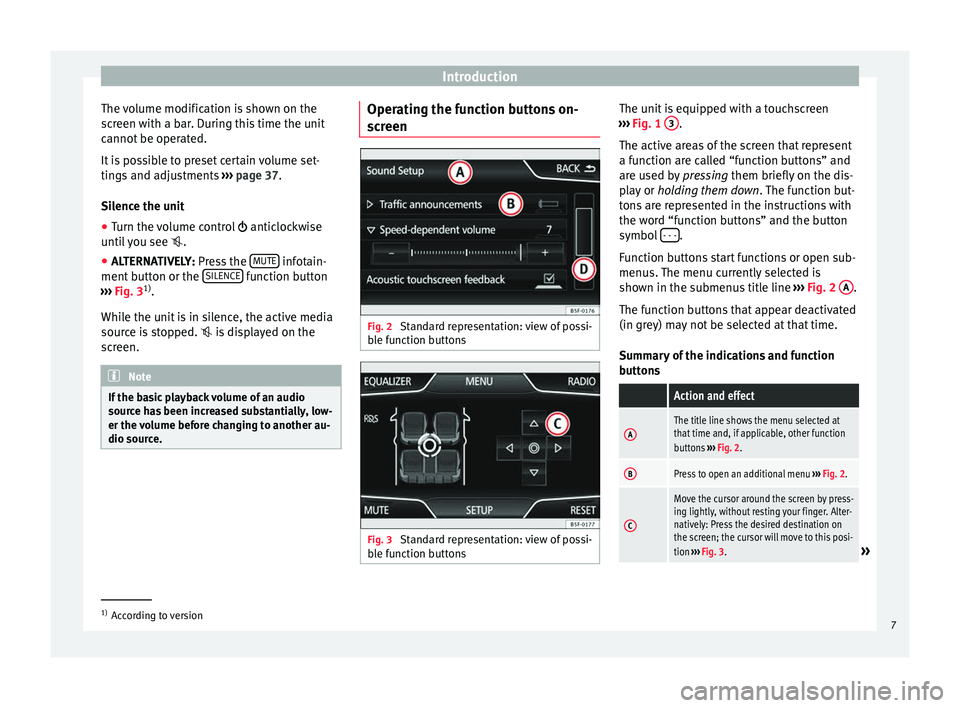
dio source. Operating the function buttons on-
screen
Fig. 2
Standard representation: view of possi-
ble function buttons Fig. 3
Standard representation: view of possi-
ble function buttons The unit is equipped with a touchscreen
››› Fig. 1 3 .
The active areas of the screen that represent
a function are called “function buttons” and
are used by pressing them briefly on the dis-
p l
ay or holding them down . The function but-
tons are represented in the instructions with
the word “function buttons” and the button
symbol - - - .
Function buttons start functions or open sub-
menus. The menu currently selected is
shown in the submenus title line ››› Fig. 2 A .
The function buttons that appear deactivated
(in grey) may not be selected at that time.
Summary of the indications and function
buttons
Action and effect
AThe title line shows the menu selected at
that time and, if applicable, other function
buttons ››› Fig. 2.
BPress to open an additional menu ››› Fig. 2.
C
Move the cursor around the screen by press-
ing lightly, without resting your finger. Alter-
natively: Press the desired destination on
the screen; the cursor will move to this posi-
tion ››› Fig. 3.
» 1)
According to version
7
Page 13 of 44
Audio modeStoring stations
Storing the
station that
you are lis-
tening to in
one of the
stored sta-
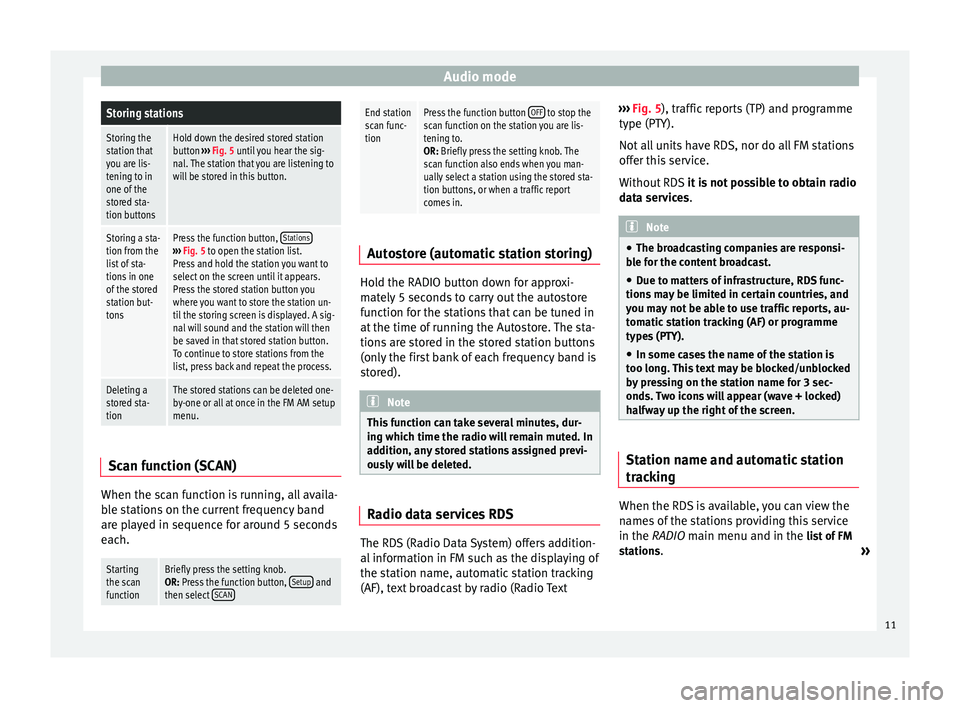
tion buttonsHold down the desired stored station
button
››› Fig. 5 until you hear the sig-
nal. The station that you are listening to
will be stored in this button.
Storing a sta-
tion from the
list of sta-
tions in one
of the stored
station but-
tonsPress the function button, Stations›››
Fig. 5 to open the station list.
Press and hold the station you want to
select on the screen until it appears.
Press the stored station button you
where you want to store the station un-
til the storing screen is displayed. A sig-
nal will sound and the station will then
be saved in that stored station button.
To continue to store stations from the
list, press back and repeat the process.
Deleting a
stored sta-
tionThe stored stations can be deleted one-
by-one or all at once in the FM AM setup
menu. Scan function (SCAN)
When the scan function is running, all availa-
ble stations on the current frequency band
are played in sequence for around 5 seconds
each.
Starting
the scan
functionBriefly press the setting knob.
OR: Press the function button,
Setup and
then select SCAN
End station
scan func-
tionPress the function button OFF to stop the
scan function on the station you are lis-
tening to.
OR: Briefly press the setting knob. The
scan function also ends when you man-
ually select a station using the stored sta-
tion buttons, or when a traffic report
comes in. Autostore (automatic station storing)
Hold the RADIO button down for approxi-
mately 5 seconds to carry out the autostore
function for the stations that can be tuned in
at the time of running the Autostore. The sta-
tions are stored in the stored station buttons
(only the first bank of each frequency band is
stored).
Note
This function can take several minutes, dur-
ing which time the radio will remain muted. In
addition, any stored stations assigned previ-
ously will be deleted. Radio data services RDS
The RDS (Radio Data System) offers addition-
al information in FM such as the displaying of
the station name, automatic station tracking
(AF), text broadcast by radio (Radio Text›››
Fig. 5 ), traffic reports (TP) and programme
type (P T
Y).
Not all units have RDS, nor do all FM stations
offer this service.
Without RDS it is not possible to obtain radio
data services. Note
● The broadcasting companies are responsi-
ble for the content broadcast.
● Due to matters of infrastructure, RDS func-
tions may be limited in certain countries, and
you may not be able to use traffic reports, au-
tomatic station tracking (AF) or programme
types (PTY).
● In some cases the name of the station is
too long. This text may be blocked/unblocked
by pressing on the station name for 3 sec-
onds. Two icons will appear (wave + locked)
halfway up the right of the screen. Station name and automatic station
tracking
When the RDS is available, you can view the
names of the stations providing this service
in the
RADIO
main menu and in the li
st of FM
stations .
»
11
Page 19 of 44
Audio mode
Function buttons of the main menu MediaFunction
buttonEffect
MEDIA
Press to select another media source
››› page 17.
CD
: internal CD drive unit ››› page 17.
SD card: SD memory card ››› page 18.
Bluetooth audio: Bluetooth audio
››› page 19.
USB
: USB data medium ››› page 22.
AUX: external audio source ››› page 22.
SELECTIONOpens the list of tracks ››› page 20.
or Changes track in Media mode
››› page 19.
Playback will stop. The function button changes to
››› page 19.
Playback will continue. The function button changes to
››› page 19.
SETTINGSOpens the menu Media setup ››› page 21.
Repeat all the tracks.
Repeat the current track.
Random play.
Function
buttonEffect
SCAN
With the scan function running, all the
tracks in the current playlist will be played
for ten seconds each.
The function button is displayed only when
the scan function is running. To start the
scan function, press the setting knob or
open the track list
Selection
and press the
function button SCAN or press the right
knob.
or
Change folder in media mode
Information and possible icons
DisplayMeaning
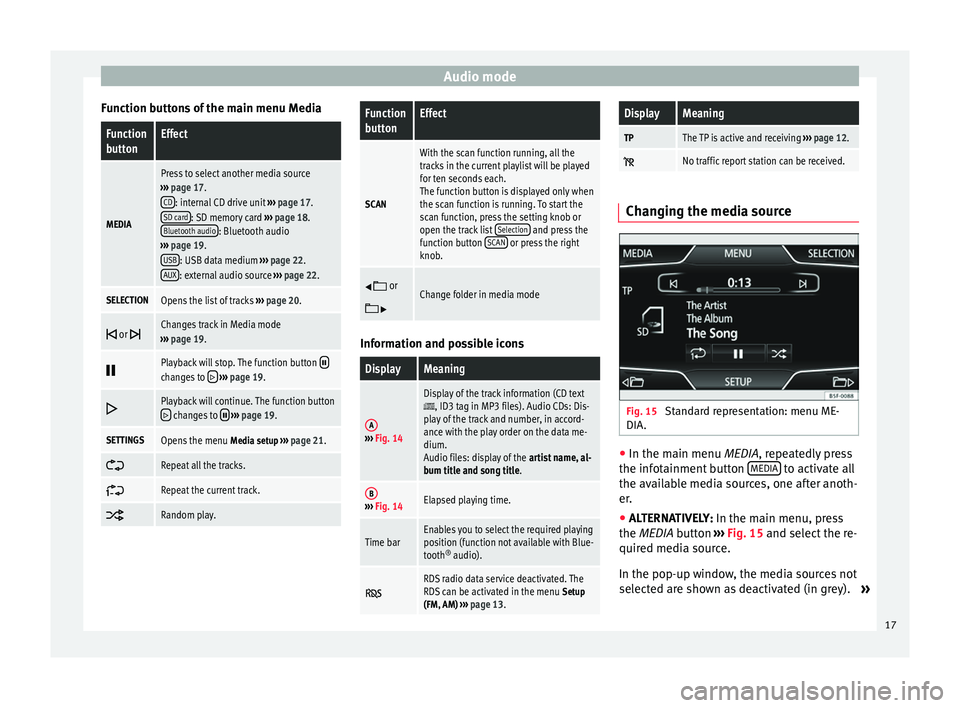
A›››
Fig. 14
Display of the track information (CD text, ID3 tag in MP3 files). Audio CDs: Dis-
play of the track and number, in accord-
ance with the play order on the data me-
dium.
Audio files: display of the artist name, al-
bum title and song title.
B››› Fig. 14Elapsed playing time.
Time barEnables you to select the required playing
position (function not available with Blue-
tooth ®
audio).
RDS radio data service deactivated. The
RDS can be activated in the menu Setup
(FM, AM) ››› page 13.
DisplayMeaning
TPThe TP is active and receiving ››› page 12.
No traffic report station can be received. Changing the media source
Fig. 15
Standard representation: menu ME-
DIA. ●
In the main menu MEDIA
, repeatedly press
the inf
otainment button MEDIA to activate all
the available media sources, one after anoth-
er.
● ALTERNATIVELY: In the main menu, press
the MEDIA
button ››› Fig. 15 and select the re-
quired media source.
In the pop-up window, the media sources not
selected are shown as deactivated (in grey). »
17
Page 20 of 44
Audio mode
When a media source that has already been
played is selected again, playback is re-
sumed from the point at which it was stop-
ped.
Media sources that can optionally be
selectedFunction button: media source
CD*: Audio CD or audio data CD inserted in the internal
CD player ››› page 18.
SD card: SD memory card ››› page 18.
AUX: external audio source connected to the AUX-IN
multimedia port ››› page 21.
USB: USB data medium ››› page 22.
Bluetooth audio: playing audio files via Bluetooth ®
››› page 19. Inserting and ejecting a CD
The internal CD player can play audio CDs
and audio data CDs.
Inserting a CD
● Keep the printed side of the CD facing up-
wards.
● Push the CD into the CD slot only to the
point where it is drawn in automatically.
● When the CD is inserted, the play function
will start automatically. Ejecting CDs
●
Press the unit button.
● The CD in the drive will be ejected and
must be removed within 10 seconds.
If you do not remove the CD in the following
10 seconds, it will be drawn back in for safety
reasons, without changing to CD mode.
Unreadable or defective CD
If the data on the inserted CD cannot be read
or the CD is damaged, the corresponding in-
dication will be shown on the screen.
Depending on the unit, when a CD cannot be
read it will retry three times, ejecting and re-
inserting the CD, before showing the indica-
tion. Note
● Uneven road surfaces and strong vibrations
may cause the CD to jump.
● If the interior temperature of the unit is too
high, it will not accept or play the CD.
● If you insert a number of different CDs and
receive the message CD drive error every time,
c ont
act a specialised workshop. Inserting and removing memory cards
Inserting a memory card
If a memory card cannot be inserted, make
sure it is positioned correctly and is compati-
ble with the unit.
Playback starts automatically if supported
audio files are stored on the memory card.
›››
Fig. 1 6
Insert a compatible memory card into memory card slot
with the cut-off corner first and facing the right until it
clicks into place. Removing a memory card
The memory card inserted must be prepared
before it is ejected.
● Press the function button Setup to open the
menu Media setup
.
● Press the function button,
Eject SD card safely . After the system closes the
memory card, a message will appear on the
screen indicating that the card can be re-
moved.
● Press the memory card inserted. The mem-
ory card “jumps” to the eject position.
● Remove the memory card.
Unreadable memory card
If you insert a memory card containing data
that cannot be read, the unit will not change
18
Page 21 of 44
Audio mode
to memory card mode after loading. It will
show the corresponding indication.
External media player connected via
Bluetooth ®In Bluetooth audio mode, audio files from an
external audio source that is connected via
Bluetooth
®
, for example a mobile phone
(Bluetooth audio playback), can be played
over the vehicle speakers.
The Bluetooth audio source must be compati-
ble with the Bluetooth A2DP profile.
Starting sound transmission via Bluetooth
● Reduce the base volume of the infotain-
ment system.
● Pair or connect the Bluetooth audio source
with the Bluetooth interface from the mobile
preinstallation, according to the operating in-
structions.
Playing through the vehicle speakers
In Media Setup
, the default setup
Bluetooth audio autoplay is deactivated. After
making the connection with the Bluetooth
audio source, Bluetooth audio mode must be
selected manually.
● If you require the system to change to Blue-
tooth audio automatically each time the con-
nection is established with the connected Bluetooth audio source, you can activate the
setup
Bluetooth audio autoplay in
Media Setup
.
● In the MEDIA main menu, press the func-
tion b
utton, MEDIA ››› Fig. 15 and select
Bluetooth audio .
Once playback of the Bluetooth audio source
has finished, the infotainment system will re-
main in Bluetooth audio mode.
Controlling playback
The extent to which the Bluetooth audio
source can be controlled via the infotainment
system depends on the Bluetooth audio
source connected.
Media players with the AVRCP Bluetooth pro-
file, the playback of the Bluetooth audio
source can be started and stopped automati-
cally when changing to Bluetooth audio
mode, or to another audio source. In addi-
tion, it is possible to view or change the track
via the infotainment system.
It is possible to connect a device as a player
and another as hands-free at the same time. Note
● Due to the large number of different Blue-
tooth audio sources available, it is not possi-
ble to guarantee fault-free operation of all
functions described here.
● Deactivate the service and warning sounds
of a connected Bluetooth audio source (for example, the key tones of the mobile phone)
to avoid interference noise and anomalies in
the operation.
● To play music, do not link the external me-
dia player simultaneously to Bluetooth and
the USB interface of the infotainment system,
as this can cause limitations during playback.
● Depending on the external player connec-
ted, the response time of the system can
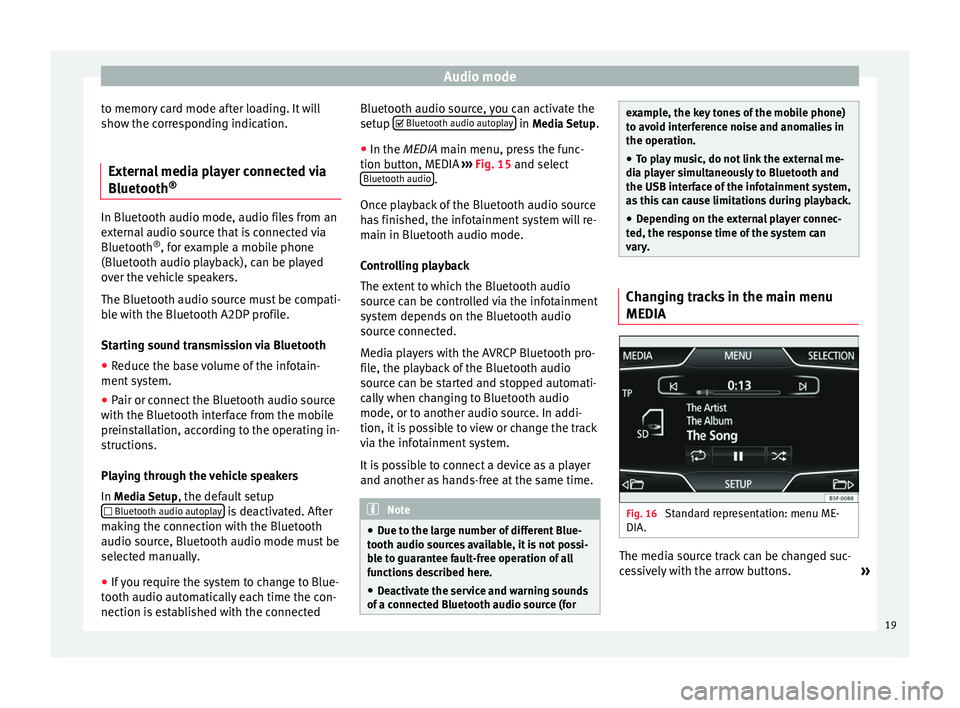
vary. Changing tracks in the main menu
MEDIA
Fig. 16
Standard representation: menu ME-
DIA. The media source track can be changed suc-
cessively with the arrow buttons.
»
19
Page 22 of 44
Audio mode
The arrow buttons do not allow you to change
p l
aylist. A playlist must be started manually
through the track selection menu.
Controlling playback via the MEDIA main
menu
ActionEffect
Briefly pressing the
function button, once.
Goes to the start of the cur-
rent track.
Briefly pressing the
function button, two
consecutive times.Goes to the start of the previ-
ous track. It will go from the
first track to the last on the
data medium being played.
Briefly pressing the
function button, once.
Goes to the next track. It will
go from the first track to the
last on the data medium be-
ing played.
Keeping the function
button pressed.Rewind.
Keeping the function
button pressed.Fast forward.
Briefly pressing the
function button, once.
Playback will stop. The func-
tion button changes to .
Briefly pressing the
function button, once.
Playback will continue. The
function button changes
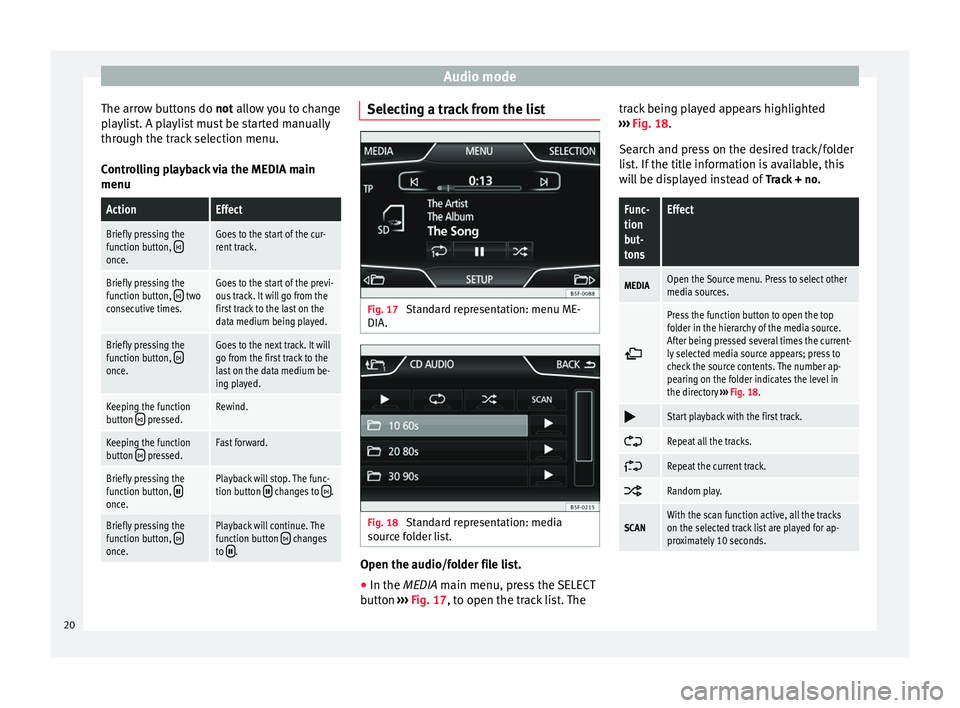
to . Selecting a track from the list
Fig. 17
Standard representation: menu ME-
DIA. Fig. 18
Standard representation: media
source folder list. Open the audio/folder file list.
● In the MEDIA
main menu, press the SELECT
b
utton ›››
Fig. 17, to open the track list. The track being played appears highlighted
››› Fig. 18
.
Search and press on the desired track/folder
list. If the title information is available, this
will be displayed instead of Track + no.
Func-
tion
but-
tonsEffect
MEDIAOpen the Source menu. Press to select other
media sources.
Press the function button to open the top
folder in the hierarchy of the media source.
After being pressed several times the current-
ly selected media source appears; press to
check the source contents. The number ap-
pearing on the folder indicates the level in
the directory
››› Fig. 18.
Start playback with the first track.
Repeat all the tracks.
Repeat the current track.
Random play.
SCANWith the scan function active, all the tracks
on the selected track list are played for ap-
proximately 10 seconds.
20
Page 24 of 44
Audio mode
● In the MEDIA
main menu press the function
b
utton MEDIA and select AUX
››› Fig. 19 .
The output volume of
the connected external
audio source should be adjusted to the vol-
ume of the other audio sources ››› page 37.
Things to note when operating an external
audio source using the AUX-IN multimedia
ActionEffect
Selection of another audio
source on the radio-navi-
gation system.The external audio source
continues to run in the
background.
Stopping playback on the
external audio source.The infotainment system
remains in the AUX menu.
Disconnecting the plug
from the AUX-IN multime-
dia socket.The infotainment system
changes, and plays the
last media source that was
active. Note
● Please read and observe the external audio
source manufacturer operating manual.
● Interference noise may be heard if the ex-
ternal audio source is powered from the 12-
volt power socket of the vehicle.
● If the sound from the external audio source
is too low, if possible, increase the output
volume on the external audio source. If this is
not sufficient, increase the input volume.
● If the sound from the connected external
audio source is too loud or distorted, if possi- ble, lower the output volume on the external
audio source. If this is not sufficient, reduce
the input volume.
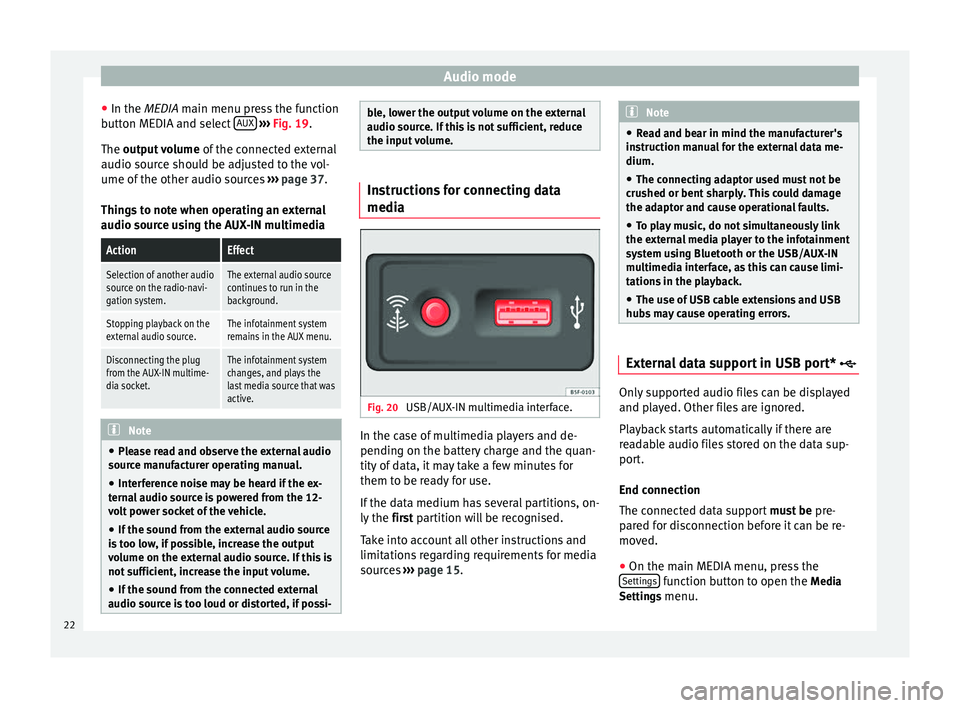
Instructions for connecting data
media
Fig. 20
USB/AUX-IN multimedia interface. In the case of multimedia players and de-
pending on the battery charge and the quan-
tity of data, it may take a few minutes for
them to be ready for use.
If the data medium has several partitions, on-
ly the
first partition will be recognised.
T ak
e into account all other instructions and
limitations regarding requirements for media
sources ››› page 15. Note
● Read and bear in mind the manufacturer's
instruction manual for the external data me-
dium.
● The connecting adaptor used must not be
crushed or bent sharply. This could damage
the adaptor and cause operational faults.
● To play music, do not simultaneously link
the external media player to the infotainment
system using Bluetooth or the USB/AUX-IN
multimedia interface, as this can cause limi-
tations in the playback.
● The use of USB cable extensions and USB
hubs may cause operating errors. External data support in USB port*
Only supported audio files can be displayed
and played. Other files are ignored.
Playback starts automatically if there are
readable audio files stored on the data sup-
port.
End connection
The connected data support
must be pre-
pared for disconnection before it can be re-
moved.
● On the main MEDIA menu, press the
Settings function button to open the
Media
Settings menu.
22
Page 27 of 44
PHONE mode*
Places with special regulations Switch off the mobile phone and the prein-
stallation for mobile telephones in places
with risk of explosion. These areas are com-
mon but are not always clearly marked
››› in Introduction to telephone management on
page 24. They include, for example:
●
Ar e
as with piping and reservoirs containing
chemical products.
● Below deck, on boats and ferries.
● Near vehicles that run on liquefied gas
(such as propane or butane).
● In places where there are chemical sub-
stances or particles such as flour, dust or
metal chips in the air.
● In any other place where you must turn off
the engine of your vehicle. WARNING
Switch off your mobile phone in places with
risk of explosion! Your mobile phone will au-
tomatically connect to the mobile phone net-
work as soon as the Bluetooth connection is
cut from the mobile preinstallation. Note
In areas with special requirements and where
the use of mobile phones is prohibited, you
must keep the mobile phone and its prein-
stallation switched off at all times. The radia- tion emitted by mobile phones when switch-
ed on can cause interference in sensitive
technical and medical equipment, which
could damage this equipment or cause it to
stop working properly.
Linking and connecting your mobile
phone to the infotainment system
To operate a mobile phone through the info-
tainment system, you need to link both devi-
ces
one time only .
F or
your safety, we recommend you carry out
this connection when the vehicle is station-
ary. In some countries you cannot perform
the pairing with the vehicle running.
You must guarantee the following setup in
the mobile phone and the infotainment sys-
tem:
● The
Bluetooth ®
function must be active
and visible on the mobile phone and info-
tainment system, respectively.
● The
keypad lock of the mobile phone must
be disconnected.
● The
notification and key tones of your mo-
bile phone must be disconnected.
In some countries, after switching the igni-
tion on, the
Bluetooth ®
function of the info-
tainment system should be activated or re-
main visible for around 3 minutes. During the linking process you must enter da-
ta using your mobile phone's keypad. To do
so, you must have your mobile phone at
hand.
Once the link has been made, the schedule
and call lists stored in your mobile phone will
be loaded. The duration of the loading proc-
ess depends on the amount of data stored on
your mobile phone. When the loading proc-
ess is complete, the data will be available to
the infotainment system.
Starting the link from the system
Make sure the mobile device is active and
visible.
● Press the PHONE unit button.
● Press the function button Find .
ALTERNATIVELY: ● Press the PHONE unit button.
● Press the Setup function button.
● Press the function button Select phone and
then Find .
The search process can take up to 1 minute.
On the screen the system will dynamically
update the names of the Bluetooth devices
found. ● Select the mobile phone to which you want
to pair from the list of Bluetooth devices
found. »
25
Page 36 of 44
CAR menu
Press the button, Status, to access the infor-
mation on the vehicle status messages and
Start-Stop System. Note
The values that appear in the figures are indi-
cative and may vary depending on the fea-
tures. Tyres
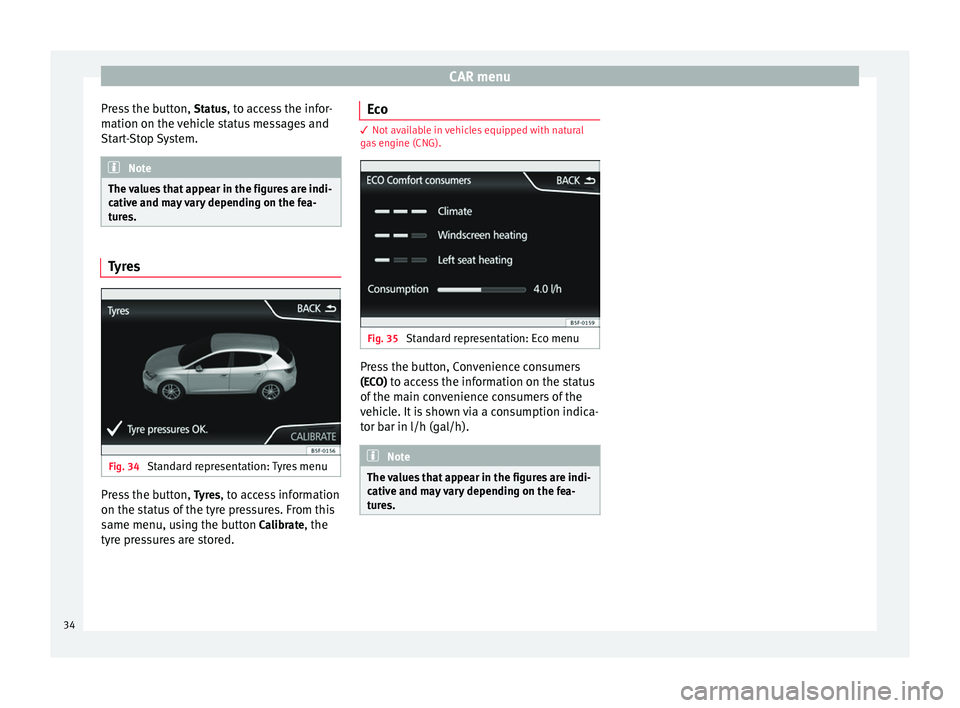
Fig. 34
Standard representation: Tyres menu Press the button,
Tyres
, to access information
on the status of the tyre pressures. From this
same menu, using the button Calibrate
, the
tyre pressures are stored. Eco 3
Not available in vehicles equipped with natural
gas engine (CNG). Fig. 35
Standard representation: Eco menu Press the button, Convenience consumers
(ECO) to access the information on the status
of the main convenience consumers of the
vehicle. It is shown via a consumption indica-
tor bar in l/h (gal/h). Note
The values that appear in the figures are indi-
cative and may vary depending on the fea-
tures. 34