buttons Seat Leon SC 2014 User Guide
[x] Cancel search | Manufacturer: SEAT, Model Year: 2014, Model line: Leon SC, Model: Seat Leon SC 2014Pages: 284, PDF Size: 5.85 MB
Page 86 of 284
Operation
The vehicle keys or new spare keys can be
obtained from a SEAT Official Service, a spe-
cialised workshop or an approved key service
qualified to create this kind of key.
New keys or spare keys must be synchron-
ised before use ››› page 87. CAUTION
All of the vehicle keys contain electronic com-
ponents. Protect them from damage, impacts
and humidity. Note
● Only use the key button when you require
the corresponding function. Pushing the but-
ton unnecessarily could accidentally unlock
the vehicle or trigger the alarm. It is also pos-
sible even when you are outside the radius of
action.
● Key operation can be greatly influenced by
overlapping radio signals close to the vehicle
working in the same range of frequencies, for
example, radio transmitters or mobile tele-
phones.
● Obstacles between the remote control and
the vehicle, bad weather conditions and dis-
charged batteries can considerably reduce
the range of the remote control.
● If the buttons of the vehicle key are press-
ed ››› Fig. 91 or ››› Fig. 92 or one of the central
locking buttons ››› page 85 is pressed re-
peat
edly in short succession, the central
locking briefly disconnects as protection against overloading. The vehicle is then un-
locked. Lock it if necessary.
Remote unlock/lock
Read the additional information carefully
››› page 9
The vehicle will be locked again automatical-
ly if you do not open one of the doors or the
rear lid within 30 seconds after unlocking the
car. This function prevents the vehicle from
remaining unlocked if the unlocking button is
pressed by mistake. This does not apply if
you press the button for at least one sec-
ond.
In vehicles with a security central locking
feature (selective unlocking of side doors)
› ›
› page 84, when the button is pressed
once, only the driver door and the fuel tank
flap are unlocked. When the button is press-
ed a second time, all the vehicle doors are
unlocked. WARNING
Observe the safety warnings ››› in Descrip-
tion on page 82. Note
● Do not use the remote control key until the
vehicle is visible. ●
Other functions of the remote control key
››› page 91, Convenience opening/closing. Selective unlocking system
The selective unlocking system allows you to
only unlock the driver door and the fuel tank
flap. All other doors and the rear lid remain
locked.
Unlocking the driver door and tank flap
– Press button on the remote control key
once , or turn the key
onc
e
to open.
Unlocking all the doors, the rear lid and the
tank flap simultaneously.
– Within 5 seconds, press button on the
remote control key twice, or turn the key to
open twice
within 5 seconds.
The anti-theft security system* and the anti-
theft alarm* are immediately disabled if you
unlock only the driver door, without unlock-
ing the other doors.
In vehicles with Easy Connect*, you can pro-
gramme the security central locking system
directly ››› page 85.
84
Page 93 of 284
Opening and closing
Safety switch * (only in 5-door vehicles)
Saf ety
switch 5 on the driver door can be
used to disable the electric window buttons
in the rear doors.
Safety switch not pressed: buttons on rear
doors are activated.
Safety switch pressed: buttons on rear doors
are deactivated.
The safety control symbol lights up in yel-
lo w if
the buttons on the rear door are switch-
ed off. WARNING
Observe the safety warnings ››› in Intro-
duction on page 227.
● Inc orr
ect use of the electric windows can
result in injury.
● Never close the rear lid without observing
and ensuring it is clear, to do otherwise could
cause serious injury to you and third parties.
Make sure that no one is in the path of a win-
dow.
● The engine may accidentally be started and
be out of control.
● If the ignition is switched on, the electric
equipment could be activated with risk of in-
jury, for example, in the electric windows.
● The doors can be locked using the remote
control key. This could become an obstacle
for assistance in an emergency situation. ●
Always take the key with you when you
leave the vehicle.
● The electric windows will work until the ig-
nition has been switched off and one of the
front doors has been opened.
● If necessary, use the safety switch to disa-
ble the rear electric windows. Make sure that
they have been disabled. Note
If the window is not able to close because it
is stiff or because of an obstruction, the win-
dow will automatically open again
››› page 91
. If this happens, check why the
w indo
w could not be closed before attempt-
ing to close it again. Roll-back function
The roll-back function reduces the risk of in-
jury when the electric windows close.
● If a window is obstructed when closing au-
tomatically, the window stops at this point
and lowers immediately ››› .
● Next, check why the window does not close
before attempting it again.
● If you try within the following 10 seconds
and the window closes again with difficulty
or there is an obstruction, the automatic clos-
ing will stop working for 10 seconds. ●
If the window is still obstructed, the win-
dow will stop at this point.
● If there is no obvious reason why the win-
dow cannot be closed, try to close it again by
pulling the tab within ten seconds. The win-
dow closes with maximum force. The roll-
back function is now deactivated.
● If more than 10 seconds pass, the window
will open fully when you operate one of the
buttons. One-touch closing is reactivated. WARNING
Observe the safety warnings ››› in Opening
and closing of the electric windows* on
page 91.
● The r o
ll-back function does not prevent fin-
gers or other parts of the body getting
pinched against the window frame. Risk of
accident. Convenience opening/closing
Use the convenience opening/closing func-
tion to easily open/close all the windows and
the sliding/tilting sunroof* from the outside.
Convenience open function
– Press and hold button on the remote
control key until all the windows and the
sliding/tilting sunroof* have reached the
desired position, or »
91
Technical specifications
Advice
Operation
Safety
The essentials
Page 94 of 284
Operation
– First unlock the vehicle using button on
the remote control key and then keep the
key in the driver door lock until all the win-
dows and the sliding/tilting sunroof* have
reached the required position.
Convenience close function
– Press and hold button on the remote
control key until all the windows and the
sliding/tilting sunroof* are closed ››› , or
– Keep the key in the driver door in the "lock"
position until all the windows and the slid-
ing/tilting sunroof* are closed.
Programming convenience opening in the
Easy Connect*
– Select: function button CAR > control but-
ton Vehicle systems* > Car settings > Central
locking > Open the window by holding button
down or else > Front window on/off or else
Roof on/off *. WARNING
● Take care when closing the sliding/tilting
sunroof* and windows. There is a risk of suf-
fering injury.
● For safety reasons, you should only use the
remote control open and close functions with-
in about 2 metres of the vehicle. To avoid in-
juries, always keep an eye on the windows
and the sliding/tilting sunroof* when press-
ing the button to close them. The windows stop moving as soon as the button is re-
leased.
One-touch opening and closing*
One-touch opening and closing means you
do not have to hold down the button.
Buttons
››› Fig. 97 1 ,
2 ,
3 and
4 have
two positions for opening windows and two
for closing them. This makes it easier to open
and close windows to the desired position.
One-touch closing
– Pull up the window button briefly up to the
second position. The window closes fully.
One-touch opening
– Push down the window button briefly up to
the second position. The window opens
fully.
Restoring one-touch opening and closing
The automatic open and close function will
not work if the battery has been temporarily
disconnected. The function can be restored
as follows:
– Close the window as far as it will go by lift-
ing and holding the electric window switch. –
Release the switch and then lift it again for
1 second. This will re-enable the automatic
function.
If you push (or pull) a button to the first
stage, the window will open (or close) until
you release the button. If you push or lift the
button briefly to the second stage, the win-
dow will open (one-touch opening) or close
(one-touch closing) automatically. If you op-
erate the button while the window is opening
or closing, it stops at this position.
Panoramic sliding sunroof*
Opening or closing the panoramic
sliding sunroof Read the additional information carefully
››› page 11
The panoramic sliding sunroof will only work
with the ignition on. It can be opened or
closed for a few minutes after the ignition
has been switched off, provided the driver
door and the front passenger door are not
opened. WARNING
Careless or uncontrolled use of the panoram-
ic sliding sunroof can cause serious injuries. 92
Page 119 of 284
Transport and practical equipment
Removing the net partition
● Fold the rear seat backrests forward.
● Press the left or right release catch
››› Fig. 125 in the direction of the arrow 1 .
● Remove the casing from the support in the
direction of the arrow ››› Fig. 125 2 .
Fitting the net partition
● Fold the rear seat backrests forward.
● Fit the casing in the right and left supports.
● Press the casing into the left and right sup-
ports in the opposite direction to the arrow
››› Fig. 125 2 until it engages.
The red markings on the release buttons
should no longer be visible. WARNING
● Always secure objects, even when the net
partition is properly assembled.
● There should be nobody behind the assem-
bled partition when the vehicle is moving. CAUTION
Incorrect handling of the net partition could
cause damage. ● Do not “release” the net partition when
lowering it, as the net and other vehicle parts
could be damaged. Roll down the net parti-
tion by hand. Use of the net partition with the rear
seat backrests lowered
3 Applies to the model: LEON ST
Fig. 126
Assembling the net partition in the
rear seat backrests. Fig. 127
In the luggage compartment: net
partition hooked into the rear seat backrests. Fitting the net partition
● Fold the rear seat backrests forward. ●
Remove the net partition from the side sup-
ports.
● Place the net casing in the rail slots in the
direction of the arrows ››› Fig. 126 1 .
● Push the casing towards the left side of the
vehicle in the direction of arrow ››› Fig. 126
2 and as far as it will go.
● Check that the net is secure.
Pulling out and securing the net partition
● Pull up handle ››› Fig. 127 2 to remove the
net from the casing ››› Fig. 127 4 .
● Hook in the net partition on the right side
››› Fig. 127 3 (magnified image).
● Hook in the net partition in the left side
housing ››› Fig. 127 1 pulling the rod.
The net partition is properly assembled when
the T-shaped ends are firmly secured in the
corresponding housings ››› Fig. 127 3 and
1 .
Retracting the net partition
● Remove the rod from the housings in the
trims of the roof side members.
● Roll up the net into the casing ››› Fig. 127
4 lowering it with your hand.
»
117Technical specifications
Advice
Operation
Safety
The essentials
Page 148 of 284
Operation
Stability programme (ESC), including the ASR
function.
● The ASR and ESC function are reconnected
by pressing the button
›
›› Fig. 146.
● OR
: activate or deactivate the ASR or ESC
function in the Easy Connect system by
means of the button and the function
buttons Setup and
ESC System .
WARNING
You should switch on the ESC Sport mode on-
ly if the traffic conditions and your driving
ability allow you to do so safely: risk of skid-
ding!
● With ESC in Sport mode, the stabilising
function will be limited to allow for a sportier
drive. The driving wheels could spin and the
vehicle could skid.
● If the ESC/ASR is deactivated, the vehicle
stabilisation function is not available. Note
If the ASR is disconnected or the ESC’s Sport
mode is selected, cruise control* will be
switched off. Brakes
New brake pads
For the first 400 km (250 miles), new brake
pads have not yet reached their maximum braking capacity, and need to be “run in”
first. However, you can compensate for the
slightly reduced braking effect by applying
more pressure on the brake pedal. Avoid
overloading the brakes while running them
in.
Wear
The rate of wear on the
brake pads depends
a great deal on how you drive and the condi-
tions in which the vehicle is operated. This is
a particular problem in urban traffic and
short stretches, or with very sporty driving.
Depending on the speed, the braking force,
and the environmental conditions (for exam-
ple, the temperature, air humidity, etc.)
noises may be produced on braking.
Wet roads or road salt
In certain situations (for example, on driving
through flooded areas, in severe downpours
or after washing the vehicle) the braking ac-
tion could be delayed if the discs and pads
are damp, or frozen in winter. In this case the
brakes should be “dried” by pressing the
brake pedal several times.
At high speed and with the windscreen wip-
ers activated, the brake pads will briefly
touch the brake discs. This takes place, al-
though unnoticeable to the driver, at regular
intervals to improve the response time of the
brakes when they are wet. The effectiveness of the brakes can also be
temporarily reduced if the vehicle is driven
for some distance without using the brakes
when there is a lot of salt on the road in win-
ter. The layer of salt that accumulates on the
discs and pads can be removed by gently ap-
plying the brakes a few times.
Corrosion
There may be a tendency for corrosion to
form on the discs and dirt to build up on the
brake pads if the vehicle is used infrequently
or the brakes are not used very often.
If the brakes are not used frequently, or if
rust has formed on the disks, it is advisable
to clean off the pads and disks by braking
firmly a few times at a moderately high speed
››› .
Fault in the brake system
If the brake pedal travel should ever increase
suddenly , this may mean that one of the two
br ak
e circuits has failed. Drive immediately
to the nearest specialised workshop and
have the fault repaired. Drive there slowly
and remember that you will have to apply
more pressure on the brake pedal and allow
for longer stopping distances.
146
Page 157 of 284
Driver assistance systems
speed must be different from the speed at
which the vehicle travels if the distance is be-
ing adjusted at the time.
What functions can be operated?
If you activate the ACC the current speed can
be programmed as the “control speed”.
During driving, control can be operated at
any time and the speed also modified.
The following settings can also be adjusted:
● Distance.
● Driving Programme.
● Driving style.
Activating/Deactivating
Any speed 1)
between 30 and 160 km/h (19
and 100 mph) can be adjusted.
Activating the ACC
● Pull the lever to position 1
››› Fig. 152 .
A C
C standby will be shown on the instrument
panel display.
Programme speed and activate control
● Press the SET
››› Fig. 153 button to pro-
gramme current speed. ●
Automatic gearbox: apply the brake pedal
to activate control with the vehicle stationary.
Deactivating the ACC
● Move the lever to position 0 until it en-
gages. The text ACC: off appears.
A lt
ering speed
● To increase or reduce speed step by step,
press the lever up/down briefly ››› Fig. 153.
Any
modification to the programmed speed
is shown on the bottom left part of the instru-
ment panel display.
Adjusting distance level
The distance according to speed with regard
to the vehicle in front can be controlled on
the Easy Connect system on 5 levels
››› page 17.
In wet
road conditions, you should always set
a larger distance with regard to the vehicle in
front than when driving in dry conditions.
The following distances can be preselected:
● Very short
● Short
● Media ●
Long
● Very long
You can use the Easy Connect system to ad-
just the level of distance that should be ad-
justed when the ACC is switched on with the
button and the function buttons
and
Driver assistance
›››
page 17.
Adjusting the driving programme
In vehicles with driving profile selection
(SEAT Drive Profile), the profile selected can
influence acceleration behaviour
››› page 169 .
The f o
llowing driving programmes items can
be selected:
● Normal
● Sport
● Eco
In vehicles without driving profile selection,
acceleration behaviour can be influenced by
selecting a driving programme on the Easy
Connect system by means of the button and the function buttons
and
Driver assistance
›››
page 17.
»1)
Different speed limits apply in each country and
depend on the unit indicated on the speedometer. 155
Technical specifications
Advice
Operation
Safety
The essentials
Page 166 of 284
Operation
Switching the Front Assist monitoring
system on and off
With the ignition switched on, the Front As-
sist can be switched on and off as follows:
● Select the corresponding menu option us-
ing the button for the driver assist systems
››› page 73 .
● OR: switch the system on or off in the Easy
C onnect
system with the button and the
function buttons and
Driver Assist ›››
page 17
.
When the Fr ont
Assist monitoring system is
switched off, the instrument panel will inform
that it has been switched off with the follow-
ing indicator ››› Fig. 160
.
Switching the pre-warning function on or off
The pre-warning function can be switched on
or off in the Easy Connect system with the
button and the function buttons
and
Driver Assist
›››
page 17.
The system will store the setting for the next
time the ignition is switched on.
SEAT recommends keeping the pre-warning
function switched on at all times.
Switching distance warning on and off
If the safe distance with regard to the vehicle
in front is exceeded, the relevant warning will
appear on the instrument panel display . In this case, increase the safe dis-
tance.
The distance warning function can be activa-
ted or deactivated in the Easy Connect sys-
tem with the button
and the function but-
tons and
Driver Assist
›››
page 17.
The system will store the setting for the next
time the ignition is switched on.
SEAT recommends keeping the distance
warning switched on at all times.
Switching the Front Assist Monitoring
System off in the following situations In the following situations the Front Assist
Monitoring System should be deactivated
due to the system's limitations
››› :
● When the vehicle is to be towed.
● If the vehicle is on a test bed.
● When the radar sensor is damaged.
● If the radar sensor takes a heavy knock, for
example in a rear collision.
● If it intervenes several times unnecessarily.
● If the radar sensor is covered temporarily
with some kind of accessory, such as an ad-
ditional headlight or the like.
● When the vehicle is to be loaded on a lorry,
ferry or train. WARNING
If the Front Assist is not switched off in the
situations described, serious accidents and
injuries may occur.
● Switch off the Front Assist in critical situa-
tions. System limitations
The Front Assist Monitoring System has cer-
tain physical limitations inherent in the sys-
tem. Thus, in certain circumstances some of
the system's reactions may be inopportune
or be delayed from the driver's standpoint.
So pay attention in order to intervene if nec-
essary.
The following conditions may cause the Front
Assist Monitoring System not to react or do
so too late:
● On taking tight bends.
● Pressing the accelerator all the way down.
● If the Front Assist is switched off or dam-
aged.
● If the ASR has been manually disconnec-
ted.
● If the ESC is controlling.
● If several brake lights of the vehicle or elec-
trically connected trailer are damaged.
● If the radar sensor is dirty or covered.
164
Page 167 of 284
Driver assistance systems
● If there are metal objects, e.g. rails on the
road or sheets used in road works.
● If the vehicle is reversing.
● If the vehicle over-accelerates.
● In case of snow or heavy rain.
● In case of narrow vehicles, such as motor-
bikes.
● Misaligned vehicles.
● Vehicles crossing the other's path.
● Vehicles approaching in the opposite direc-
tion.
● Special loads and accessories of other ve-
hicles that jut out over the sides, backwards
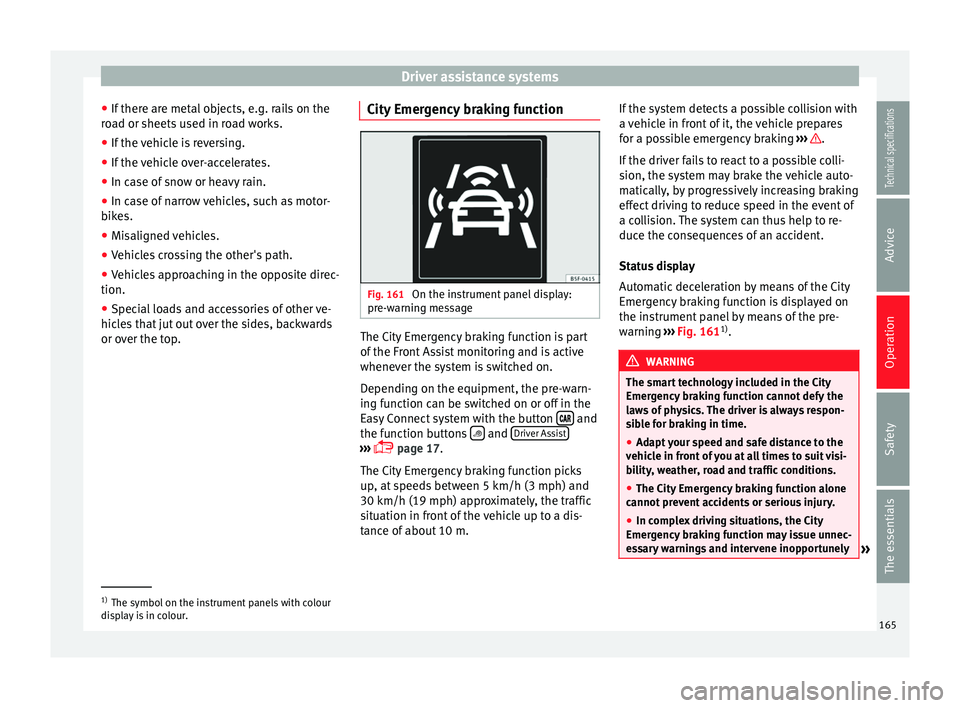
or over the top. City Emergency braking function Fig. 161
On the instrument panel display:
pre-warning message The City Emergency braking function is part
of the Front Assist monitoring and is active
whenever the system is switched on.
Depending on the equipment, the pre-warn-
ing function can be switched on or off in the
Easy Connect system with the button
and
the function buttons and
Driver Assist ›››
page 17
.
The C ity
Emergency braking function picks
up, at speeds between 5 km/h (3 mph) and
30 km/h (19 mph) approximately, the traffic
situation in front of the vehicle up to a dis-
tance of about 10 m. If the system detects a possible collision with
a vehicle in front of it, the vehicle prepares
for a possible emergency braking
››› .
If the driver fails to react to a possible colli-
sion, the system may brake the vehicle auto-
matically, by progressively increasing braking
effect driving to reduce speed in the event of
a collision. The system can thus help to re-
duce the consequences of an accident.
Status display
Automatic deceleration by means of the City
Emergency braking function is displayed on
the instrument panel by means of the pre-
warning ››› Fig. 161 1)
. WARNING
The smart technology included in the City
Emergency braking function cannot defy the
laws of physics. The driver is always respon-
sible for braking in time.
● Adapt your speed and safe distance to the
vehicle in front of you at all times to suit visi-
bility, weather, road and traffic conditions.
● The City Emergency braking function alone
cannot prevent accidents or serious injury.
● In complex driving situations, the City
Emergency braking function may issue unnec-
essary warnings and intervene inopportunely »1)
The symbol on the instrument panels with colour
display is in colour. 165
Technical specifications
Advice
Operation
Safety
The essentials