radio Seat Leon SC 2014 SOUND SYSTEM 2.0
[x] Cancel search | Manufacturer: SEAT, Model Year: 2014, Model line: Leon SC, Model: Seat Leon SC 2014Pages: 62, PDF Size: 1.14 MB
Page 32 of 62
31
Audio mode
● When playing large capacity hard discs with several files and a complex
data structure (several folders and subfolders, non-playable files, etc.) it
may take some time to read the audio files. The reaction time may also be
influenced by the connected device.
● WMA (Windows Media Audio) audio files can only be played if they are
not protected by authors' rights with the DRM (Digital Rights Management)
system.
● Generally, files with anti-copy protection cannot be played (e.g. M4P).
● It is not possible to play files in 3GP format or “WMA lossless” files.
Check there are no MP3 files stored in the playlist. A playlist only defines a
certain order of play. If a playlist cannot be played, check that the “relative
paths” are correct, i.e. that the MP3 files on the data medium are actually
stored at the locations referenced by the playlist.
If an external data medium is divided into several partitions, only the first
partition with compatible audio files will be played.
Please refer to further limitations and notes on the requirements placed on
media sources ⇒ page 21.
WARNING
● The connected audio devices must be protected from possible me-
chanical damage and other kind of wear.
● We do not hold responsible for any possible damage on the connec-
ted devices.
● The connection of USB devices is sensitive to interference from mo-
bile telephones. Mobile telephones should not be left next to the USB
when this is connected, to prevent distortion.
● The connected audio devices must be protected from possible me-
chanical damage and other kind of wear.
● Objects which are not secured in the vehicle compartment may inter-
fere with driving and could result in serious injury.
WARNING (Continued)
● The external data device should never be left on the dash panel. A
sharp manoeuvre can throw the device towards the compartment and in-
jure the vehicle passengers.
● The external data device should never be mounted in the vicinity of
the airbag. If an airbag is activated it can project the device towards the
compartment and injure the vehicle passengers.
● The external data device must not be held in hand or on the legs
while driving. A sharp manoeuvre can throw the device towards the com-
partment and injure the vehicle passengers.
● Place the external data device cables so that they are not in the way
while driving.
CAUTION
Make sure that the adapter lead is not pinched or severely bent. This can
damage the adapter lead and cause functional faults.
Note
● Some vehicles with the MEDIA-IN multimedia interface mounted on the
centre armrest are also equipped with an additional compartment. The rub-
ber insert of this compartment can be removed in order to extract small ob-
jects which may have fallen inside.
● Do not connect an external media player to the radio-navigation system
via Bluetooth and via the MEDIA-IN multimedia interface at the same time,
as this could lead to limitations in playback.
● The use of memory card adapters or USB hubs can cause problems in
reading files.
Page 33 of 62
32Audio mode
Connection and use
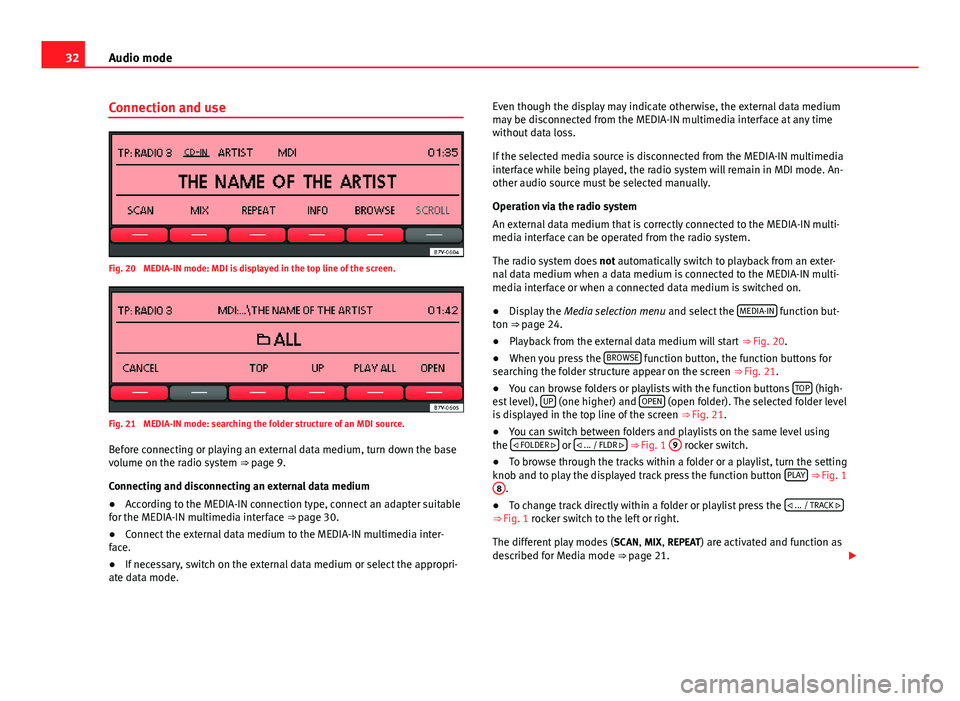
Fig. 20 MEDIA-IN mode: MDI is displayed in the top line of the screen.
Fig. 21 MEDIA-IN mode: searching the folder structure of an MDI source.
Before connecting or playing an external data medium, turn down the base
volume on the radio system ⇒ page 9.
Connecting and disconnecting an external data medium
● According to the MEDIA-IN connection type, connect an adapter suitable
for the MEDIA-IN multimedia interface ⇒ page 30.
● Connect the external data medium to the MEDIA-IN multimedia inter-
face.
● If necessary, switch on the external data medium or select the appropri-
ate data mode. Even though the display may indicate otherwise, the external data medium
may be disconnected from the MEDIA-IN multimedia interface at any time
without data loss.
If the selected media source is disconnected from the MEDIA-IN multimedia
interface while being played, the radio system will remain in MDI mode. An-
other audio source must be selected manually.
Operation via the radio system
An external data medium that is correctly connected to the MEDIA-IN multi-
media interface can be operated from the radio system.
The radio system does not automatically switch to playback from an exter-
nal data medium when a data medium is connected to the MEDIA-IN multi-
media interface or when a connected data medium is switched on.
● Display the Media selection menu and select the MEDIA-IN
function but-
ton ⇒ page 24.
● Playback from the external data medium will start ⇒ Fig. 20.
● When you press the BROWSE
function button, the function buttons for
searching the folder structure appear on the screen ⇒ Fig. 21.
● You can browse folders or playlists with the function buttons TOP
(high-
est level), UP (one higher) and OPEN (open folder). The selected folder level
is displayed in the top line of the screen ⇒ Fig. 21.
● You can switch between folders and playlists on the same level using
the
FOLDER
or
... / FLDR ⇒ Fig. 1 9 rocker switch.
● To browse through the tracks within a folder or a playlist, turn the setting
knob and to play the displayed track press the function button PLAY
⇒ Fig. 1
8.
● To change track directly within a folder or playlist press the
... / TRACK
⇒ Fig. 1 rocker switch to the left or right.
The different play modes ( SCAN, MIX, REPEAT) are activated and function as
described for Media mode ⇒ page 21.
Page 35 of 62
34Audio mode
External CD changer*
Introduction
Depending on the vehicle model, the external CD changer will be in the pas-
senger side glove compartment or in the front centre armrest.
The CD changer can hold six 12 cm standard audio CDs. You do not have to
load all the slots in the CD changer.
The CD inserted can be selected and played through the radio system.
Additional information and warnings:
● Safety notes ⇒ page 4
● Unit overview ⇒ page 6
● Media mode ⇒ page 21
Note
● Audio data CDs and audio DVDs cannot be played in the external CD
changer.
● You might not be able to play CDs with copy protection or CD-Rs and CD-
RWs, or playback might be restricted.
● CD text cannot be displayed for CDs played from an external CD changer. Overview
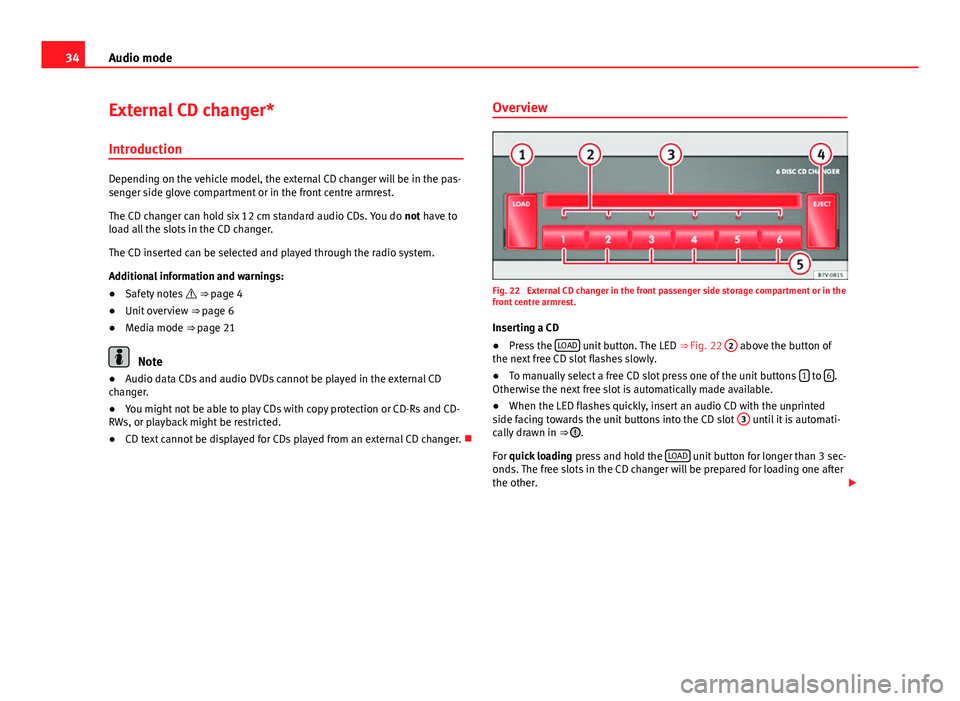
Fig. 22 External CD changer in the front passenger side storage compartment or in the
front centre armrest.
Inserting a CD
● Press the LOAD
unit button. The LED
⇒ Fig. 22 2 above the button of
the next free CD slot flashes slowly.
● To manually select a free CD slot press one of the unit buttons 1
to 6.
Otherwise the next free slot is automatically made available.
● When the LED flashes quickly, insert an audio CD with the unprinted
side facing towards the unit buttons into the CD slot 3
until it is automati-
cally drawn in ⇒ .
For quick loading press and hold the LOAD
unit button for longer than 3 sec-
onds. The free slots in the CD changer will be prepared for loading one after
the other.
Page 36 of 62
35
Audio mode
Ejecting CDs
● When a CD is being played from the CD changer, pressing the EJECT
unit
button ejects that CD.
● When no CD in the CD changer is being played, press the EJECT
unit but-
ton followed by one of the unit buttons 1 to 6 to select the CD slot.
● A CD will be drawn back in if it is not removed from the eject position
within 15 seconds ⇒
.
To eject all CDs, press and hold the EJECT
unit button for longer than 3 sec-
onds. The CDs will be ejected one after the other.
Status display by the LEDs 2
StatusdisplayCD slot emptyLED is off.CD slot loadedLED is lit up.CD slot availableLED flashes slowly.CD slot readyThe LED blinks quickly.
You can insert a CD.
CAUTION
Before closing the storage compartment on the front passenger side or the
front centre armrest, check that the CD has been properly inserted or re-
moved. The CD changer or the CD might otherwise be damaged. Operation via the radio system
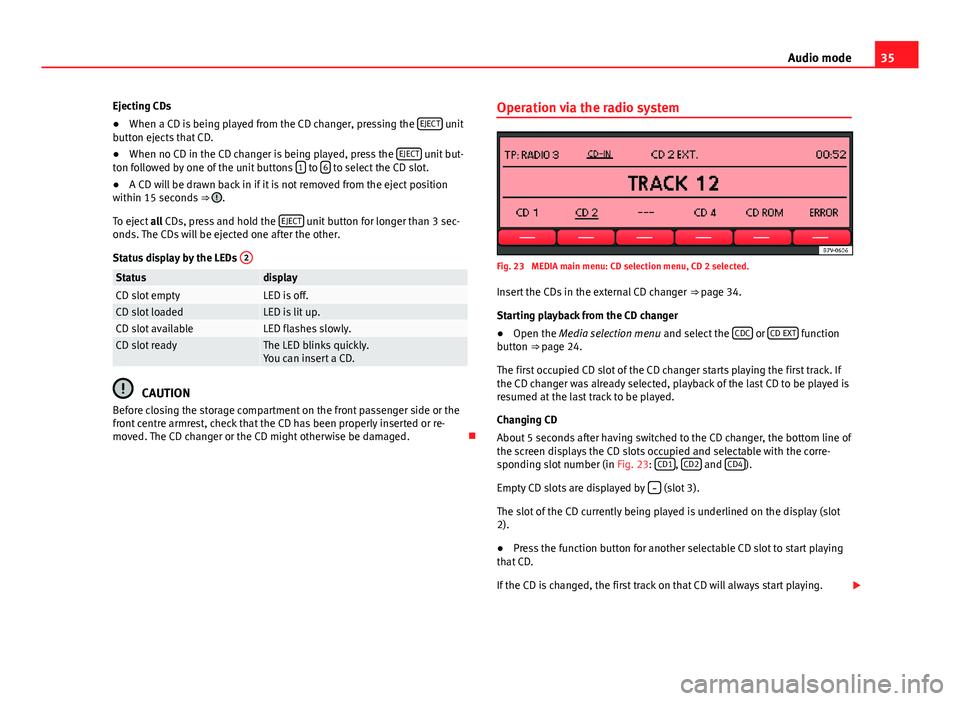
Fig. 23 MEDIA main menu: CD selection menu, CD 2 selected.
Insert the CDs in the external CD changer ⇒ page 34.
Starting playback from the CD changer
● Open the Media selection menu and select the CDC
or CD EXT function
button ⇒ page 24.
The first occupied CD slot of the CD changer starts playing the first track. If
the CD changer was already selected, playback of the last CD to be played is
resumed at the last track to be played.
Changing CD
About 5 seconds after having switched to the CD changer, the bottom line of
the screen displays the CD slots occupied and selectable with the corre-
sponding slot number (in Fig. 23: CD1
, CD2 and CD4).
Empty CD slots are displayed by
(slot 3).
The slot of the CD currently being played is underlined on the display (slot
2).
● Press the function button for another selectable CD slot to start playing
that CD.
If the CD is changed, the first track on that CD will always start playing.
Page 39 of 62
38Phone mode
WARNING
● Please concentrate on driving. As the driver, you are also responsible
for road safety. For this reason, you should only use the functions when
the traffic situation allows so and in a manner that allows you to main-
tain control of the vehicle. Otherwise, you run the risk of causing an acci-
dent.
● The speech system must not be used in cases of emergency, since the
voice changes in stressful situations. This could result in a failed or de-
layed telephone connection. Always dial emergency numbers manually!
● Always observe applicable legislation.
● Adjust the volume so that external warning sounds (e.g. emergency
vehicles, etc.) are always audible.
Note
● The voice control system is only available in the following languages:
Spanish, Mexican Spanish, German, English, French, Canadian French, Ital-
ian, Portuguese, Czech, Russian and Dutch. For other languages, the prede-
fined language for the voice instructions is English. Please take the vehicle
to a Technical Service if you wish to change the language.
● There may be restrictions on the use of Bluetooth devices in some coun-
tries. Information is available from the local authorities.
● If you connect the mobile phone Bluetooth system to a Bluetooth de-
vice, consult the safety warnings in its instruction manual. Use compatible
Bluetooth products only.
● If a call is received or made using the Bluetooth system when the radio
is switched off, this will always automatically turn on providing that the igni-
tion is switched on.
● If a call is received or made, the sound of the audio source that is cur-
rently being listened to will be muted in order for the telephone conversa-
tion to be carried out without unpleasant background noise.
● Adjust the volume of the conversation on the mobile phone to “maxi-
mum” and modify the volume on the radio volume control. Compatibility with mobile phones
New models of mobile phones are being released constantly by the differ-
ent brands, with different operating systems and different ways of operat-
ing. For this reason there are some mobile phones that do not perform
some of the functions correctly or are even totally incompatible. To help you
when choosing a mobile phone, SEAT offers the results of the compatibility
tests on different mobile phones. Visit the SEAT website or ask at your deal-
er.
Depending on your mobile phone model, certain functions may not be avail-
able or it may be necessary to change the configuration. Familiarise yourself
with your phone and read the instruction manual to learn the possibilities it
offers.
Even when the mobile phone appears as compatible in our list, we have no-
ticed that occasionally it is possible that the phone presents an abnormal
behaviour with the system due to software errors. In this case, we recom-
mend you update the telephone software. Mobile phone manufacturers
usually make updates available on Internet for their customers in order to
improve the working of the phone.
In the event that you have various applications to make calls, such as inter-
net calling, the mobile will ask you from which application you wish to make
the call. Until confirmation is given you will not be able to make the call.
If you try to make a call and it is not processed, check your mobile phone as
it is possible that your a pop-up window on your telephone is requesting
you to select the program with which to make the call.
Page 40 of 62
39
Phone mode
Bluetooth system components
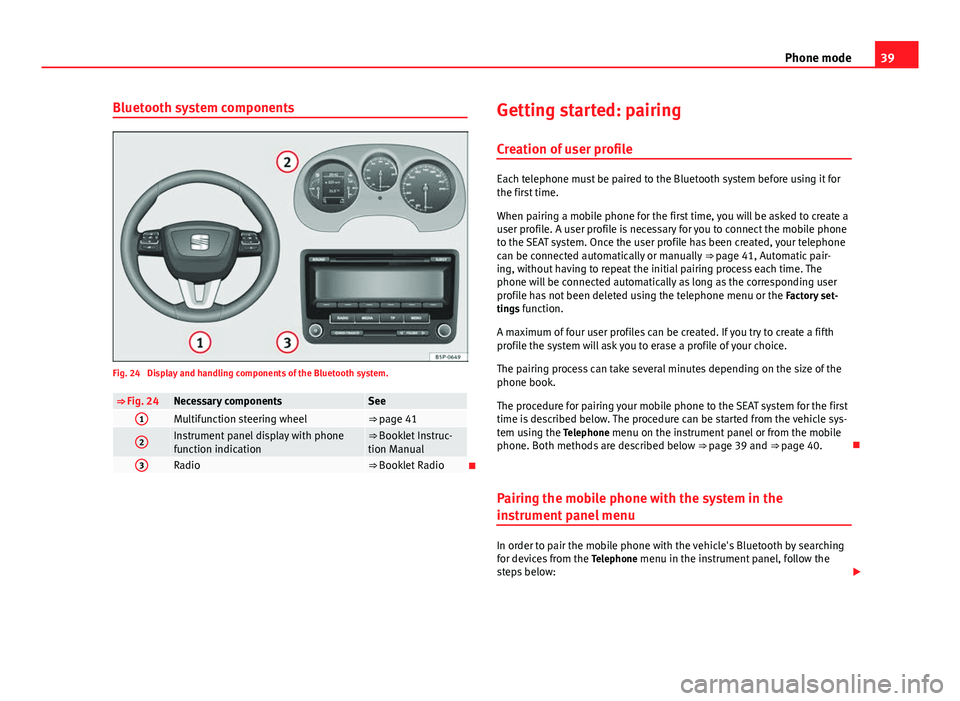
Fig. 24 Display and handling components of the Bluetooth system.
⇒ Fig. 24Necessary componentsSee1Multifunction steering wheel⇒ page 41
2Instrument panel display with phone
function indication⇒ Booklet Instruc-
tion Manual
3Radio⇒ Booklet Radio Getting started: pairing
Creation of user profile
Each telephone must be paired to the Bluetooth system before using it for
the first time.
When pairing a mobile phone for the first time, you will be asked to create a
user profile. A user profile is necessary for you to connect the mobile phone
to the SEAT system. Once the user profile has been created, your telephone
can be connected automatically or manually ⇒ page 41, Automatic pair-
ing, without having to repeat the initial pairing process each time. The
phone will be connected automatically as long as the corresponding user
profile has not been deleted using the telephone menu or the Factory set-
tings function.
A maximum of four user profiles can be created. If you try to create a fifth
profile the system will ask you to erase a profile of your choice.
The pairing process can take several minutes depending on the size of the
phone book.
The procedure for pairing your mobile phone to the SEAT system for the first
time is described below. The procedure can be started from the vehicle sys-
tem using the Telephone menu on the instrument panel or from the mobile
phone. Both methods are described below ⇒ page 39 and ⇒ page 40.
Pairing the mobile phone with the system in the
instrument panel menu
In order to pair the mobile phone with the vehicle's Bluetooth by searching
for devices from the Telephone menu in the instrument panel, follow the
steps below:
Page 44 of 62
43
Phone mode
Functions during a call
When you are making a call, the following actions are possible:
effectDescriptionEnd callEnd a telephone call.HoldPlace the active call on hold in order to make a
second call.
Conference callingLaunch a conference call between the active call
and the “on hold” call.
Private callSwitch the active call to the mobile phone so that
passengers cannot hear the conversation. The call
can be switched back to normal mode by using the
hands-free option displayed on the menu. It is al-
so possible to switch from one mode to the other
by pressing .
Microphone OffSwitch off the vehicle microphone. It can be reacti-
vated with the menu option “Connect micro-
phone”.
DTMFThe DTMF function (Dual Tone Multiple Frequency)
allows entering numbers from the multifunction
steering wheel during a call. This saves you the
trouble of picking up the mobile phone and enter-
ing numbers when you call automatic services.
Operation via voice control
Introduction
The voice control system is activated by the “Push to talk (PTT) button”
⇒ Fig. 25 or ⇒ Fig. 26 . Thanks to the voice control you can use many telephone functions without
having to take your eyes off the road or your hands off the steering wheel.
Dialogue is the time during which the voice control system transmits mes-
sages and can receive spoken orders (commands).
If a call is received, then the dialogue is immediately interrupted.
You can use the HELP in any part of the menu. If you have any doubts or
cannot decide the Command to use, the system will provide you with the
available options.
You can CANCEL in any part of the menu.
Basic functions when using voice control
Adjusting the volume
You can change the sound volume at any time with the radio button or with
the buttons on the multifunction control.
The volume transmitted by the speaker depends, among other aspects, on
the volume transmitted by the mobile. If the volume of the mobile is low, or
on silent, it is possible that no sound will be heard through the car speaker.
Adjust the volume of your Bluetooth device to the maximum.
Do not leave headphones connected to the Bluetooth device when you wish
to use the hands free system.
Complying with these requirements, if the speaker volume is very high, ad-
just it using the controls on the steering wheel or the volume control on the
radio.
Connecting voice control (Dialogue)
Briefly press the “PTT” button ⇒ Fig. 25 or ⇒ Fig. 26 on the steering
wheel multifunction control to start the dialogue at any moment.
Page 50 of 62
49
Phone mode
Audiostreaming (Wireless communication
Interface)
Radio
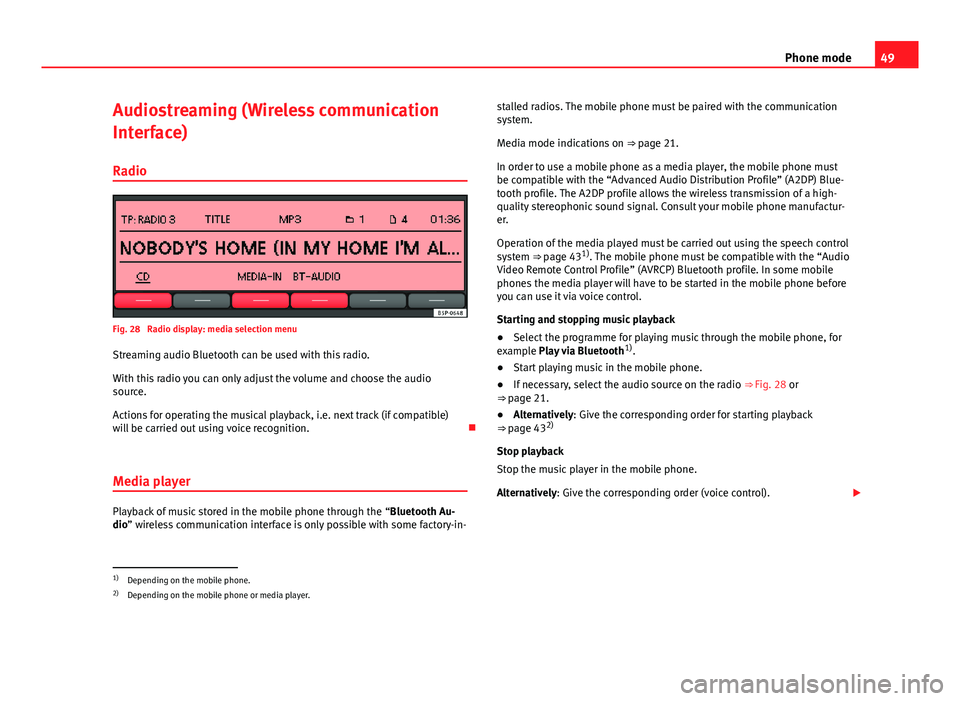
Fig. 28 Radio display: media selection menu
Streaming audio Bluetooth can be used with this radio.
With this radio you can only adjust the volume and choose the audio
source.
Actions for operating the musical playback, i.e. next track (if compatible)
will be carried out using voice recognition.
Media player
Playback of music stored in the mobile phone through the “Bluetooth Au-
dio” wireless communication interface is only possible with some factory-in- stalled radios. The mobile phone must be paired with the communication
system.
Media mode indications on ⇒ page 21.
In order to use a mobile phone as a media player, the mobile phone must
be compatible with the “Advanced Audio Distribution Profile” (A2DP) Blue-
tooth profile. The A2DP profile allows the wireless transmission of a high-
quality stereophonic sound signal. Consult your mobile phone manufactur-
er.
Operation of the media played must be carried out using the speech control
system ⇒ page 43 1)
. The mobile phone must be compatible with the “Audio
Video Remote Control Profile” (AVRCP) Bluetooth profile. In some mobile
phones the media player will have to be started in the mobile phone before
you can use it via voice control.
Starting and stopping music playback
● Select the programme for playing music through the mobile phone, for
example Play via Bluetooth 1)
.
● Start playing music in the mobile phone.
● If necessary, select the audio source on the radio ⇒ Fig. 28 or
⇒ page 21.
● Alternatively: Give the corresponding order for starting playback
⇒ page 43 2)
Stop playback
Stop the music player in the mobile phone.
Alternatively: Give the corresponding order (voice control).
1)
Depending on the mobile phone.
2) Depending on the mobile phone or media player.
Page 51 of 62
50Phone mode
Operation during music playback via the “Bluetooth Audio” function
The sound settings and selection of other audio sources are done through
the radio.
Choosing tracks, search forward and rewind are carried out with the mobile
telephone buttons or by the voice control system 1)
.
Holding telephone conversations during music playback via the “Bluetooth
Audio” function
While playing music with the “Bluetooth Audio” function, the telephone
functions are still available. Music is paused during telephone conversa-
tions.
Note
● If the mobile phone and the communication system are connected via
Bluetooth, when another user is connected, they will be disconnected and
the music currently playing on the mobile phone will stop. There can only be
one device connected to the communication system at a time.
● With some mobile phones the volume can be adjusted directly on the
phone. SEAT recommends setting the maximum volume on the mobile
phone and making necessary adjustments on the radio during playback.
● Always switch off the warning and service tones on a connected Blue-
tooth audio source, e.g. key tones on a mobile telephone, to prevent inter-
ference noise and malfunctions.
1)
Depending on the mobile phone or media player.
Page 53 of 62
52Settings menus
System and function settings (SETUP)
Introduction
Additional information and warnings:
● Safety notes ⇒ page 4
● Unit overview ⇒ page 6
● Basic information on use ⇒ page 8
Modifying the settings
● Press the MENU
⇒ Fig. 1 2 unit button in Radio or Media mode.
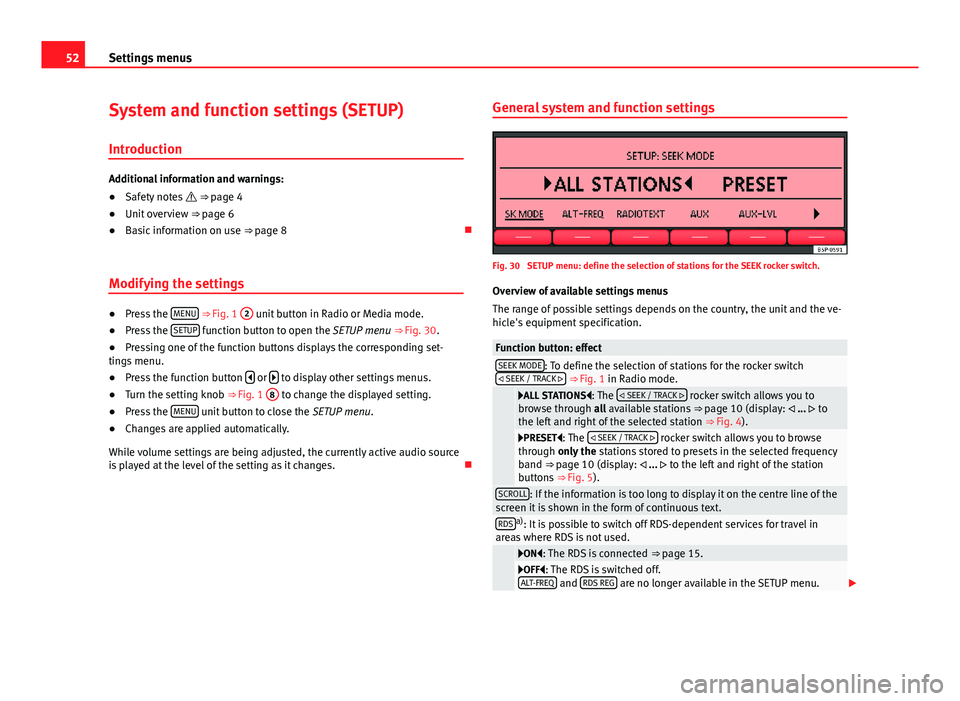
● Press the SETUP function button to open the SETUP menu
⇒ Fig. 30.
● Pressing one of the function buttons displays the corresponding set-
tings menu.
● Press the function button
or to display other settings menus.
● Turn the setting knob ⇒ Fig. 1 8 to change the displayed setting.
● Press the MENU unit button to close the
SETUP menu.
● Changes are applied automatically.
While volume settings are being adjusted, the currently active audio source
is played at the level of the setting as it changes. General system and function settings
Fig. 30 SETUP menu: define the selection of stations for the SEEK rocker switch.
Overview of available settings menus
The range of possible settings depends on the country, the unit and the ve-
hicle's equipment specification.
Function button: effectSEEK MODE: To define the selection of stations for the rocker switch
SEEK / TRACK ⇒ Fig. 1 in Radio mode.
ALL STATIONS: The SEEK / TRACK rocker switch allows you to
browse through all available stations ⇒ page 10 (display: ... to
the left and right of the selected station ⇒ Fig. 4).
PRESET: The SEEK / TRACK rocker switch allows you to browse
through only the stations stored to presets in the selected frequency
band ⇒ page 10 (display: ... to the left and right of the station
buttons ⇒ Fig. 5).
SCROLL: If the information is too long to display it on the centre line of the
screen it is shown in the form of continuous text.
RDSa) : It is possible to switch off RDS-dependent services for travel in
areas where RDS is not used.
ON: The RDS is connected ⇒ page 15.OFF: The RDS is switched off.
ALT-FREQ and RDS REG are no longer available in the SETUP menu.