audio Seat Leon SC 2014 SOUND SYSTEM 2.0
[x] Cancel search | Manufacturer: SEAT, Model Year: 2014, Model line: Leon SC, Model: Seat Leon SC 2014Pages: 62, PDF Size: 1.14 MB
Page 36 of 62
35
Audio mode
Ejecting CDs
● When a CD is being played from the CD changer, pressing the EJECT
unit
button ejects that CD.
● When no CD in the CD changer is being played, press the EJECT
unit but-
ton followed by one of the unit buttons 1 to 6 to select the CD slot.
● A CD will be drawn back in if it is not removed from the eject position
within 15 seconds ⇒
.
To eject all CDs, press and hold the EJECT
unit button for longer than 3 sec-
onds. The CDs will be ejected one after the other.
Status display by the LEDs 2
StatusdisplayCD slot emptyLED is off.CD slot loadedLED is lit up.CD slot availableLED flashes slowly.CD slot readyThe LED blinks quickly.
You can insert a CD.
CAUTION
Before closing the storage compartment on the front passenger side or the
front centre armrest, check that the CD has been properly inserted or re-
moved. The CD changer or the CD might otherwise be damaged. Operation via the radio system
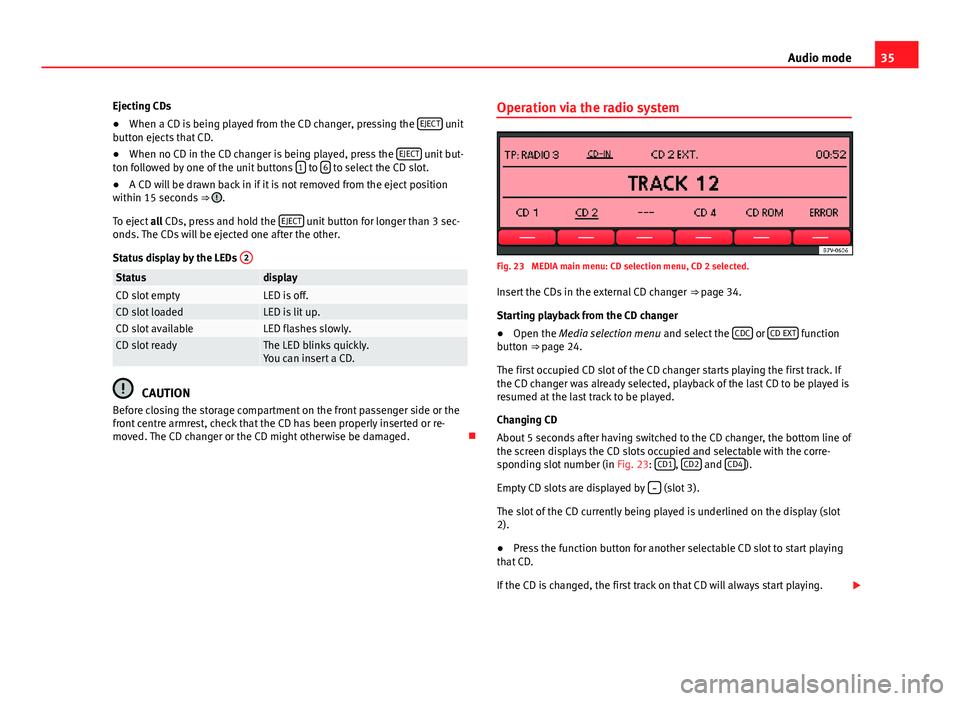
Fig. 23 MEDIA main menu: CD selection menu, CD 2 selected.
Insert the CDs in the external CD changer ⇒ page 34.
Starting playback from the CD changer
● Open the Media selection menu and select the CDC
or CD EXT function
button ⇒ page 24.
The first occupied CD slot of the CD changer starts playing the first track. If
the CD changer was already selected, playback of the last CD to be played is
resumed at the last track to be played.
Changing CD
About 5 seconds after having switched to the CD changer, the bottom line of
the screen displays the CD slots occupied and selectable with the corre-
sponding slot number (in Fig. 23: CD1
, CD2 and CD4).
Empty CD slots are displayed by
(slot 3).
The slot of the CD currently being played is underlined on the display (slot
2).
● Press the function button for another selectable CD slot to start playing
that CD.
If the CD is changed, the first track on that CD will always start playing.
Page 37 of 62
36Audio mode
An inserted CD that cannot be read is displayed as CD ERROR or ERROR on
the corresponding function button ⇒ Fig. 23.
Activating the playback modes for the external CD changer mode
● Press the MENU
⇒ Fig. 1
2 unit button to show the playback modes
available for the CD changer mode ( SCAN and MIX).
● Press a function button to start the corresponding playback mode. The
function button is underlined.
● Press the function button again to use the selected play mode with all
the CDs in the CD changer (Display: ... MAG
).
The rest of the operations correspond with the description for Media mode
⇒ page 21.
● Press the function button again to finalise the play mode.
Page 38 of 62
37
Phone mode
Phone mode Bluetooth System
General information
This system allows you to connect your mobile phone via Bluetooth connec-
tion and to use the hands-free mode, as well as connecting a multimedia
player.
The hands-free device means that the telephone can be used inside the ve-
hicle; the driver will not have to remove their hands from the steering wheel
nor will be distracted from traffic.
Available functions include making calls in hands-free mode, access to the
phone book, access to the call list, music playback via streaming audio and
control of the voice recognition system.
Before using the Bluetooth system, the mobile phone should be connected
to the vehicle installation via Bluetooth ⇒ page 39.
Switching on/off
The Bluetooth system is activated when the ignition is turned on and it is
deactivated when the key is removed from the ignition.
With the system activated, if the “PTT” is pressed the voice control activates
and if there is no telephone connected, Bluetooth visible is turned on and a
search for a telephone is begun.
If there is a call in process when the system is deactivated, the active call is
not cancelled, but transferred to the mobile phone.
Bluetooth
Use compatible Bluetooth devices only. For more information about compat-
ible Bluetooth products, consult your dealership or the SEAT website. Some Bluetooth mobile phones are detected and connected automatically
when the ignition is switched on. For this to take place the telephone must
be switched on and its Bluetooth function activated, and there must be no
active Bluetooth connection from other devices.
Bluetooth connections are free.
Bluetooth ®
is a registered trademark of Bluetooth ®
SIG, Inc.
Declaration of conformity
S1nn GmbH & Co. KG certifies that the UHV High unit complies with the ba-
sic requirements and the rest of the relevant provisions of the Directive
1999/5/CE. A copy of the declaration of conformity can be found at http://
www.s1nn.de/certifications/uhv-high-manual .
Exchange of information between the mobile phone and the Bluetooth
system
The mobile phone system sends the data and the requests via Bluetooth to
the mobile phone that is connected. If the connected mobile phone is tem-
porarily “overloaded”, it may not respond to the requests from the Blue-
tooth system. The following message is shown in the instrument panel dis-
play: “Mobile phone does not respond ”.
In this case, wait for the mobile phone to react or make a new call.
Page 39 of 62
38Phone mode
WARNING
● Please concentrate on driving. As the driver, you are also responsible
for road safety. For this reason, you should only use the functions when
the traffic situation allows so and in a manner that allows you to main-
tain control of the vehicle. Otherwise, you run the risk of causing an acci-
dent.
● The speech system must not be used in cases of emergency, since the
voice changes in stressful situations. This could result in a failed or de-
layed telephone connection. Always dial emergency numbers manually!
● Always observe applicable legislation.
● Adjust the volume so that external warning sounds (e.g. emergency
vehicles, etc.) are always audible.
Note
● The voice control system is only available in the following languages:
Spanish, Mexican Spanish, German, English, French, Canadian French, Ital-
ian, Portuguese, Czech, Russian and Dutch. For other languages, the prede-
fined language for the voice instructions is English. Please take the vehicle
to a Technical Service if you wish to change the language.
● There may be restrictions on the use of Bluetooth devices in some coun-
tries. Information is available from the local authorities.
● If you connect the mobile phone Bluetooth system to a Bluetooth de-
vice, consult the safety warnings in its instruction manual. Use compatible
Bluetooth products only.
● If a call is received or made using the Bluetooth system when the radio
is switched off, this will always automatically turn on providing that the igni-
tion is switched on.
● If a call is received or made, the sound of the audio source that is cur-
rently being listened to will be muted in order for the telephone conversa-
tion to be carried out without unpleasant background noise.
● Adjust the volume of the conversation on the mobile phone to “maxi-
mum” and modify the volume on the radio volume control. Compatibility with mobile phones
New models of mobile phones are being released constantly by the differ-
ent brands, with different operating systems and different ways of operat-
ing. For this reason there are some mobile phones that do not perform
some of the functions correctly or are even totally incompatible. To help you
when choosing a mobile phone, SEAT offers the results of the compatibility
tests on different mobile phones. Visit the SEAT website or ask at your deal-
er.
Depending on your mobile phone model, certain functions may not be avail-
able or it may be necessary to change the configuration. Familiarise yourself
with your phone and read the instruction manual to learn the possibilities it
offers.
Even when the mobile phone appears as compatible in our list, we have no-
ticed that occasionally it is possible that the phone presents an abnormal
behaviour with the system due to software errors. In this case, we recom-
mend you update the telephone software. Mobile phone manufacturers
usually make updates available on Internet for their customers in order to
improve the working of the phone.
In the event that you have various applications to make calls, such as inter-
net calling, the mobile will ask you from which application you wish to make
the call. Until confirmation is given you will not be able to make the call.
If you try to make a call and it is not processed, check your mobile phone as
it is possible that your a pop-up window on your telephone is requesting
you to select the program with which to make the call.
Page 50 of 62
49
Phone mode
Audiostreaming (Wireless communication
Interface)
Radio
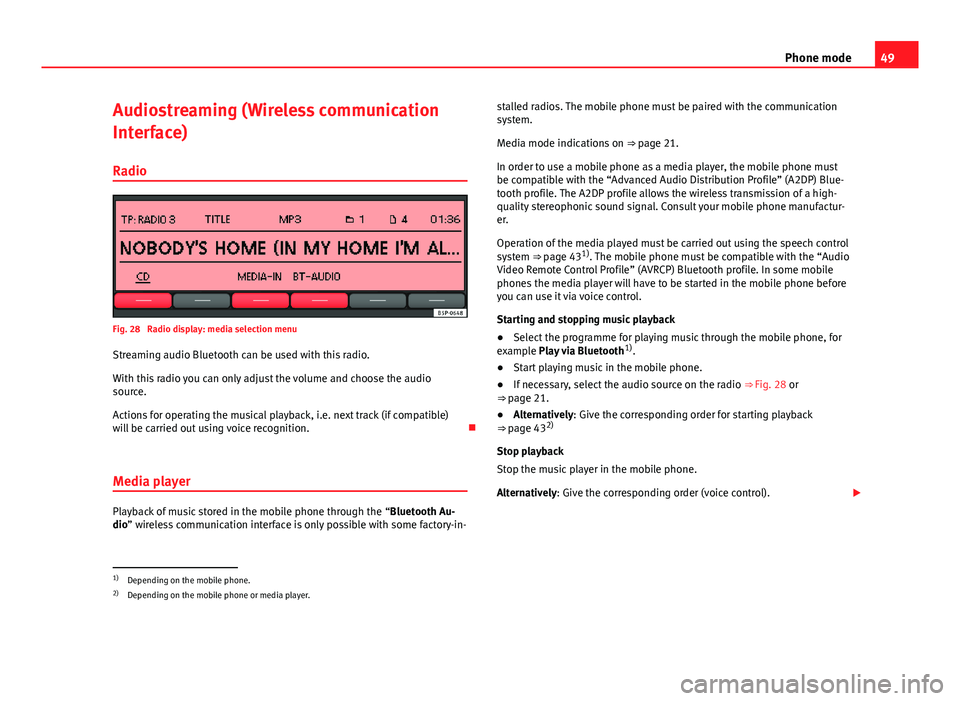
Fig. 28 Radio display: media selection menu
Streaming audio Bluetooth can be used with this radio.
With this radio you can only adjust the volume and choose the audio
source.
Actions for operating the musical playback, i.e. next track (if compatible)
will be carried out using voice recognition.
Media player
Playback of music stored in the mobile phone through the “Bluetooth Au-
dio” wireless communication interface is only possible with some factory-in- stalled radios. The mobile phone must be paired with the communication
system.
Media mode indications on ⇒ page 21.
In order to use a mobile phone as a media player, the mobile phone must
be compatible with the “Advanced Audio Distribution Profile” (A2DP) Blue-
tooth profile. The A2DP profile allows the wireless transmission of a high-
quality stereophonic sound signal. Consult your mobile phone manufactur-
er.
Operation of the media played must be carried out using the speech control
system ⇒ page 43 1)
. The mobile phone must be compatible with the “Audio
Video Remote Control Profile” (AVRCP) Bluetooth profile. In some mobile
phones the media player will have to be started in the mobile phone before
you can use it via voice control.
Starting and stopping music playback
● Select the programme for playing music through the mobile phone, for
example Play via Bluetooth 1)
.
● Start playing music in the mobile phone.
● If necessary, select the audio source on the radio ⇒ Fig. 28 or
⇒ page 21.
● Alternatively: Give the corresponding order for starting playback
⇒ page 43 2)
Stop playback
Stop the music player in the mobile phone.
Alternatively: Give the corresponding order (voice control).
1)
Depending on the mobile phone.
2) Depending on the mobile phone or media player.
Page 51 of 62
50Phone mode
Operation during music playback via the “Bluetooth Audio” function
The sound settings and selection of other audio sources are done through
the radio.
Choosing tracks, search forward and rewind are carried out with the mobile
telephone buttons or by the voice control system 1)
.
Holding telephone conversations during music playback via the “Bluetooth
Audio” function
While playing music with the “Bluetooth Audio” function, the telephone
functions are still available. Music is paused during telephone conversa-
tions.
Note
● If the mobile phone and the communication system are connected via
Bluetooth, when another user is connected, they will be disconnected and
the music currently playing on the mobile phone will stop. There can only be
one device connected to the communication system at a time.
● With some mobile phones the volume can be adjusted directly on the
phone. SEAT recommends setting the maximum volume on the mobile
phone and making necessary adjustments on the radio during playback.
● Always switch off the warning and service tones on a connected Blue-
tooth audio source, e.g. key tones on a mobile telephone, to prevent inter-
ference noise and malfunctions.
1)
Depending on the mobile phone or media player.
Page 53 of 62
52Settings menus
System and function settings (SETUP)
Introduction
Additional information and warnings:
● Safety notes ⇒ page 4
● Unit overview ⇒ page 6
● Basic information on use ⇒ page 8
Modifying the settings
● Press the MENU
⇒ Fig. 1 2 unit button in Radio or Media mode.
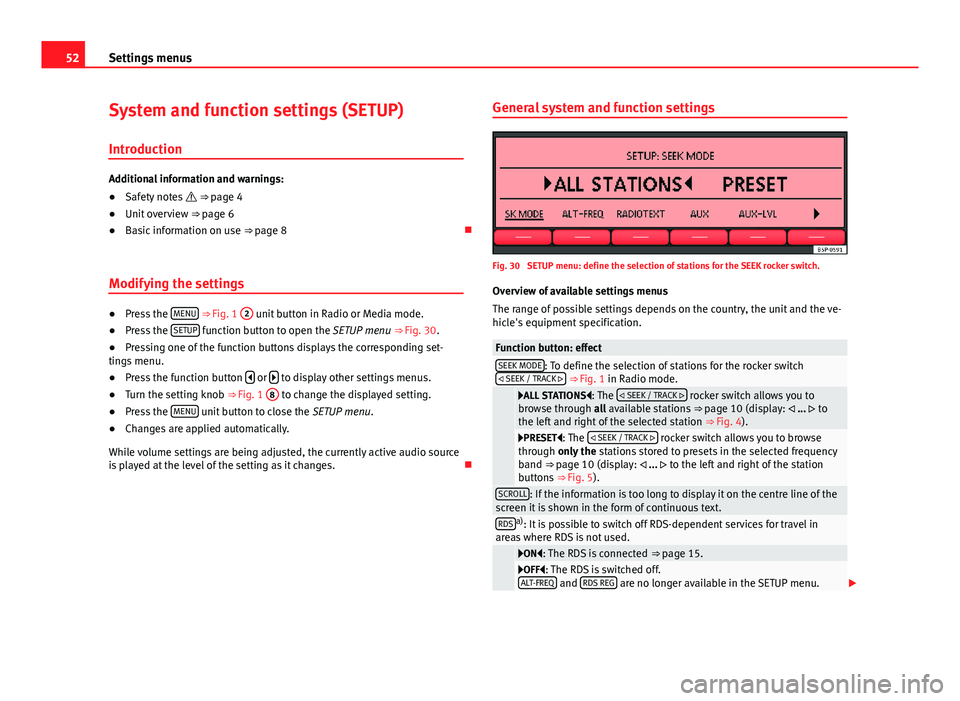
● Press the SETUP function button to open the SETUP menu
⇒ Fig. 30.
● Pressing one of the function buttons displays the corresponding set-
tings menu.
● Press the function button
or to display other settings menus.
● Turn the setting knob ⇒ Fig. 1 8 to change the displayed setting.
● Press the MENU unit button to close the
SETUP menu.
● Changes are applied automatically.
While volume settings are being adjusted, the currently active audio source
is played at the level of the setting as it changes. General system and function settings
Fig. 30 SETUP menu: define the selection of stations for the SEEK rocker switch.
Overview of available settings menus
The range of possible settings depends on the country, the unit and the ve-
hicle's equipment specification.
Function button: effectSEEK MODE: To define the selection of stations for the rocker switch
SEEK / TRACK ⇒ Fig. 1 in Radio mode.
ALL STATIONS: The SEEK / TRACK rocker switch allows you to
browse through all available stations ⇒ page 10 (display: ... to
the left and right of the selected station ⇒ Fig. 4).
PRESET: The SEEK / TRACK rocker switch allows you to browse
through only the stations stored to presets in the selected frequency
band ⇒ page 10 (display: ... to the left and right of the station
buttons ⇒ Fig. 5).
SCROLL: If the information is too long to display it on the centre line of the
screen it is shown in the form of continuous text.
RDSa) : It is possible to switch off RDS-dependent services for travel in
areas where RDS is not used.
ON: The RDS is connected ⇒ page 15.OFF: The RDS is switched off.
ALT-FREQ and RDS REG are no longer available in the SETUP menu.
Page 54 of 62
53
Settings menus
Function button: effectALT-FREQb)
ALTERNATIVE FREQUENCY : Define the setting for automatic sta-
tion tracking.
ON: The unit always switches to the radio station's frequency that
offers the best reception as the vehicle travels from one area to the
next. As a result, regional programmes may be interrupted.
OFF: No frequency change takes place. The unit remains tuned to
the selected frequency until reception is lost. RDS REG
is no longer available in the SETUP menu.RDS REGb)c) RDS REGIONAL : Define the setting for automatic station track-
ing.
AUTO: The unit always switches to the radio station's frequency that
offers the best reception as the vehicle travels from one area to the
next. As a result, regional programmes may be interrupted.
FIX: The unit only changes to regional alternative frequencies for
the current station broadcasting the same regional service. The radio
will accept the frequencies of other stations, only when the reception
quality is very poor.
RADIOTEXT: Some RDS-compatible and DAB stations broadcast additional
text information. The individual radio station is responsible for the texts
displayed.
ON: If the currently selected radio station supports radio text and
the reception is strong enough, radio text is displayed in the centre
line of the screen (if necessary as scrolling text) instead of the station
name.
OFF: No radio text is displayed (factory setting).DAB... settings d)
⇒ page 54.AUX: AUX-IN multimedia socket enabled ON or disabled OFF
⇒ page 28.
AUX LVL: The input volume for some external audio sources (AUX, iPod
or iPhone) can be adjusted to the output volume of the other audio sour-
ces ⇒ page 53.
BT AUDIO: Bluetooth audio mode active ON or deactivated OFF
⇒ page 28.
Function button: effectON-VOL ALTERNATIVELY START-VOL: To regulate the maximum switch on vol-
ume.
GALA OR SCV: To set the speed-dependent volume adjustment
⇒ page 53.
DISPLAY: To set the brightness of the display when the dipped beam head-
lights are switched on.
PDC: PDC VOL ATTENU. : To reduce the volume of the current audio source
to a preset level when the parking distance warning system is active.
a) RDS is not available in all locations ⇒ page 15.
b) Not displayed if RDS OFF is selected.
c) Not displayed if ALT-FREQ OFF is selected.
d) DAB radio mode is only available depending on the unit and currently only in part of Eu-
rope ⇒ page 18.
Adjusting the output volume ( AUX/MDI VOLUME LEVEL)
If you need to increase the output volume for the external audio source, first
lower the base volume on the radio system ⇒ page 9.
If the sound from the external audio source is too quiet, increase the output
volume on the external audio source if possible. If this is not sufficient, set
the input volume (AUX VOL LEVEL) in the system settings to level 2 or level 3.
If the sound from the connected external audio source is too loud or distor-
ted, lower the output volume on the external audio source if possible. If this
is not sufficient, set AUX VOL LEVEL to level 2 or level 1.
Speed-dependent volume adjustment
The GALA function automatically adjusts the volume in line with the speed
of the vehicle.
You can set the degree to which the volume increases with speed on a scale
between 1 and 7.
Page 57 of 62
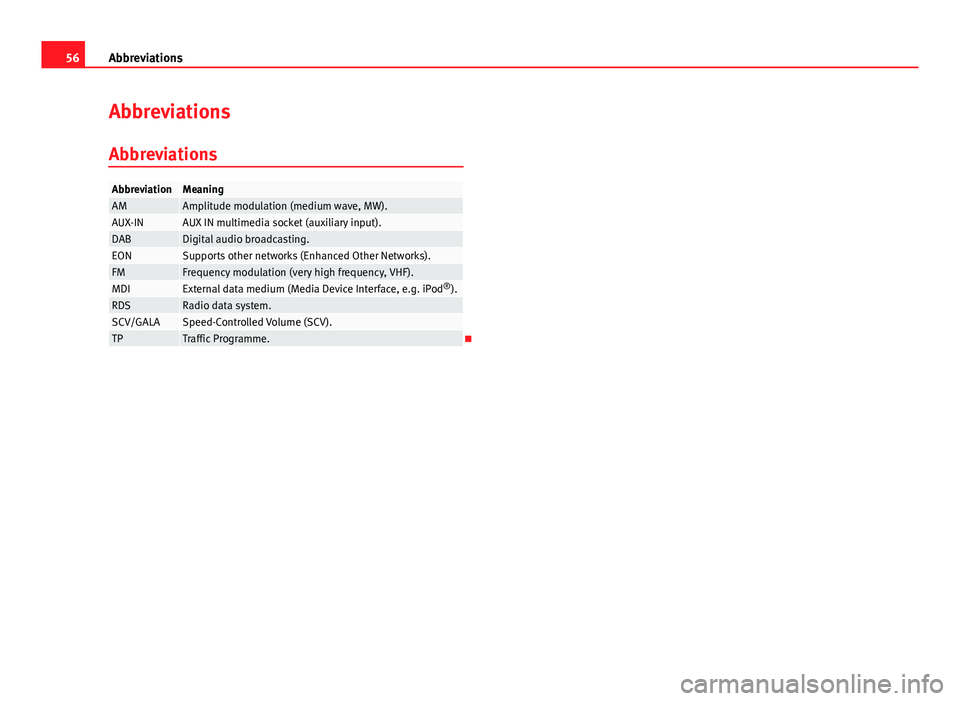
56Abbreviations
Abbreviations
Abbreviations
AbbreviationMeaningAMAmplitude modulation (medium wave, MW).AUX-INAUX IN multimedia socket (auxiliary input).DABDigital audio broadcasting.EONSupports other networks (Enhanced Other Networks).FMFrequency modulation (very high frequency, VHF).MDIExternal data medium (Media Device Interface, e.g. iPod ®
).RDSRadio data system.SCV/GALASpeed-Controlled Volume (SCV).TPTraffic Programme.
Page 58 of 62
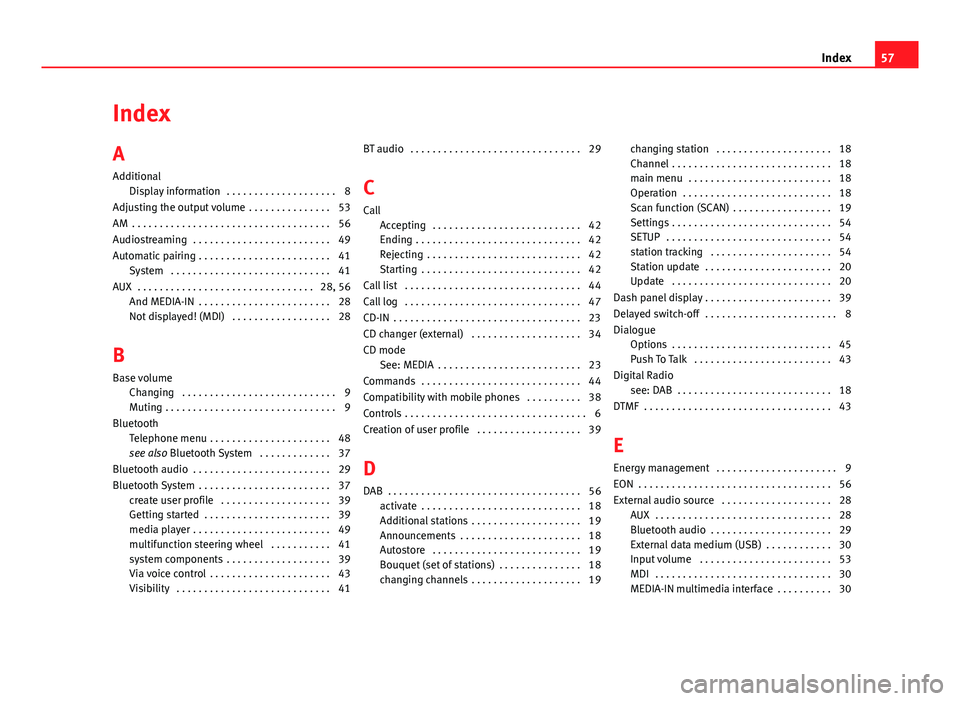
Index
A
AdditionalDisplay information . . . . . . . . . . . . . . . . . . . . 8
Adjusting the output volume . . . . . . . . . . . . . . . 53
AM . . . . . . . . . . . . . . . . . . . . . . . . . . . . . . . . . . . . 56
Audiostreaming . . . . . . . . . . . . . . . . . . . . . . . . . 49
Automatic pairing . . . . . . . . . . . . . . . . . . . . . . . . 41 System . . . . . . . . . . . . . . . . . . . . . . . . . . . . . 41
AUX . . . . . . . . . . . . . . . . . . . . . . . . . . . . . . . . 28, 56 And MEDIA-IN . . . . . . . . . . . . . . . . . . . . . . . . 28
Not displayed! (MDI) . . . . . . . . . . . . . . . . . . 28
B
Base volume Changing . . . . . . . . . . . . . . . . . . . . . . . . . . . . 9
Muting . . . . . . . . . . . . . . . . . . . . . . . . . . . . . . . 9
Bluetooth Telephone menu . . . . . . . . . . . . . . . . . . . . . . 48
see also Bluetooth System . . . . . . . . . . . . . 37
Bluetooth audio . . . . . . . . . . . . . . . . . . . . . . . . . 29
Bluetooth System . . . . . . . . . . . . . . . . . . . . . . . . 37 create user profile . . . . . . . . . . . . . . . . . . . . 39
Getting started . . . . . . . . . . . . . . . . . . . . . . . 39
media player . . . . . . . . . . . . . . . . . . . . . . . . . 49
multifunction steering wheel . . . . . . . . . . . 41
system components . . . . . . . . . . . . . . . . . . . 39
Via voice control . . . . . . . . . . . . . . . . . . . . . . 43
Visibility . . . . . . . . . . . . . . . . . . . . . . . . . . . . 41 BT audio . . . . . . . . . . . . . . . . . . . . . . . . . . . . . . . 29
C
Call Accepting . . . . . . . . . . . . . . . . . . . . . . . . . . . 42
Ending . . . . . . . . . . . . . . . . . . . . . . . . . . . . . . 42
Rejecting . . . . . . . . . . . . . . . . . . . . . . . . . . . . 42
Starting . . . . . . . . . . . . . . . . . . . . . . . . . . . . . 42
Call list . . . . . . . . . . . . . . . . . . . . . . . . . . . . . . . . 44
Call log . . . . . . . . . . . . . . . . . . . . . . . . . . . . . . . . 47
CD-IN . . . . . . . . . . . . . . . . . . . . . . . . . . . . . . . . . . 23
CD changer (external) . . . . . . . . . . . . . . . . . . . . 34
CD mode See: MEDIA . . . . . . . . . . . . . . . . . . . . . . . . . . 23
Commands . . . . . . . . . . . . . . . . . . . . . . . . . . . . . 44
Compatibility with mobile phones . . . . . . . . . . 38
Controls . . . . . . . . . . . . . . . . . . . . . . . . . . . . . . . . . 6
Creation of user profile . . . . . . . . . . . . . . . . . . . 39
D
DAB . . . . . . . . . . . . . . . . . . . . . . . . . . . . . . . . . . . 56 activate . . . . . . . . . . . . . . . . . . . . . . . . . . . . . 18
Additional stations . . . . . . . . . . . . . . . . . . . . 19
Announcements . . . . . . . . . . . . . . . . . . . . . . 18
Autostore . . . . . . . . . . . . . . . . . . . . . . . . . . . 19
Bouquet (set of stations) . . . . . . . . . . . . . . . 18
changing channels . . . . . . . . . . . . . . . . . . . . 19 changing station . . . . . . . . . . . . . . . . . . . . . 18
Channel . . . . . . . . . . . . . . . . . . . . . . . . . . . . . 18
main menu . . . . . . . . . . . . . . . . . . . . . . . . . . 18
Operation . . . . . . . . . . . . . . . . . . . . . . . . . . . 18
Scan function (SCAN) . . . . . . . . . . . . . . . . . . 19
Settings . . . . . . . . . . . . . . . . . . . . . . . . . . . . . 54
SETUP . . . . . . . . . . . . . . . . . . . . . . . . . . . . . . 54
station tracking . . . . . . . . . . . . . . . . . . . . . . 54
Station update . . . . . . . . . . . . . . . . . . . . . . . 20
Update . . . . . . . . . . . . . . . . . . . . . . . . . . . . . 20
Dash panel display . . . . . . . . . . . . . . . . . . . . . . . 39
Delayed switch-off . . . . . . . . . . . . . . . . . . . . . . . . 8
Dialogue Options . . . . . . . . . . . . . . . . . . . . . . . . . . . . . 45
Push To Talk . . . . . . . . . . . . . . . . . . . . . . . . . 43
Digital Radio see: DAB . . . . . . . . . . . . . . . . . . . . . . . . . . . . 18
DTMF . . . . . . . . . . . . . . . . . . . . . . . . . . . . . . . . . . 43
E
Energy management . . . . . . . . . . . . . . . . . . . . . . 9
EON . . . . . . . . . . . . . . . . . . . . . . . . . . . . . . . . . . . 56
External audio source . . . . . . . . . . . . . . . . . . . . 28 AUX . . . . . . . . . . . . . . . . . . . . . . . . . . . . . . . . 28
Bluetooth audio . . . . . . . . . . . . . . . . . . . . . . 29
External data medium (USB) . . . . . . . . . . . . 30
Input volume . . . . . . . . . . . . . . . . . . . . . . . . 53
MDI . . . . . . . . . . . . . . . . . . . . . . . . . . . . . . . . 30
MEDIA-IN multimedia interface . . . . . . . . . . 30
57
Index