change time Seat Leon SC 2015 MEDIA SYSTEM PLUS - NAVI SYSTEM
[x] Cancel search | Manufacturer: SEAT, Model Year: 2015, Model line: Leon SC, Model: Seat Leon SC 2015Pages: 88, PDF Size: 2.23 MB
Page 41 of 88
Navigation*Route criteria: Meaning
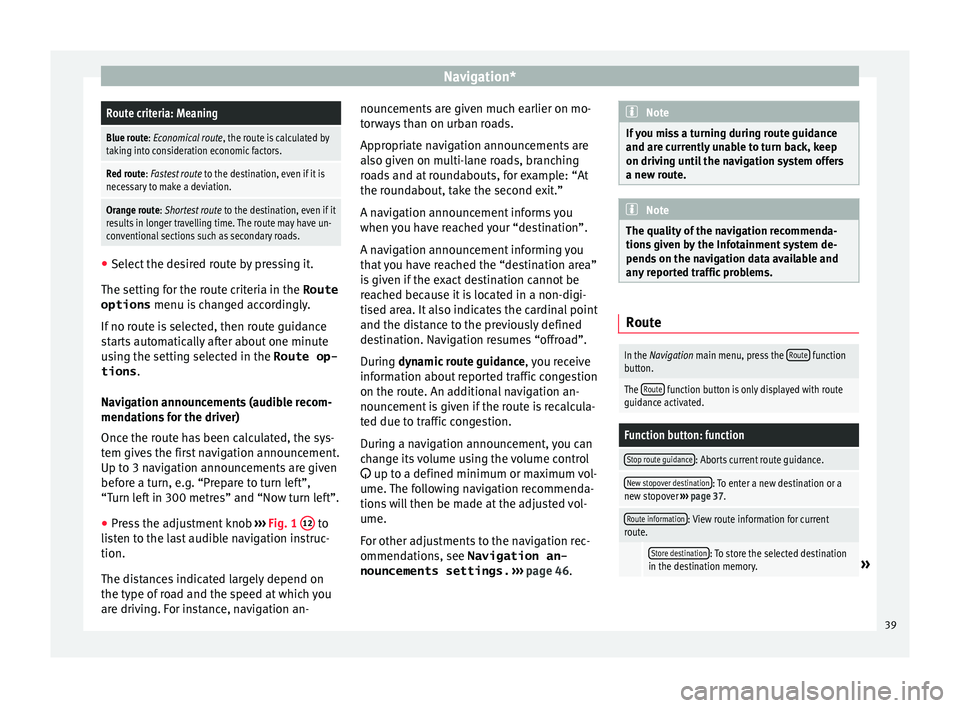
Blue route: Economical route, the route is calculated by
taking into consideration economic factors.
Red route: Fastest route to the destination, even if it is
necessary to make a deviation.
Orange route: Shortest route to the destination, even if it
results in longer travelling time. The route may have un-
conventional sections such as secondary roads. ●
Select the desired route by pressing it.
The setting f or the r
oute criteria in the Route
options menu is changed accordingly.
If no route is selected, then route guidance
starts automatically after about one minute
using the setting selected in the Route op- tions .
Navigation announcements (audible recom-
mendations for the driver)
Once the route has been calculated, the sys-
tem gives the first navigation announcement.
Up to 3 navigation announcements are given
before a turn, e.g. “Prepare to turn left”,
“Turn left in 300 metres” and “Now turn left”.
● Press the adjustment knob ››
›
Fig. 1 12 to
li s
t
en to the last audible navigation instruc-
tion.
The distances indicated largely depend on
the type of road and the speed at which you
are driving. For instance, navigation an- nouncements are given much earlier on mo-
torw
ays than on urban roads.
Appropriate navigation announcements are
also given on multi-lane roads, branching
roads and at roundabouts, for example: “At
the roundabout, take the second exit.”
A navigation announcement informs you
when you have reached your “destination”.
A navigation announcement informing you
that you have reached the “destination area”
is given if the exact destination cannot be
reached because it is located in a non-digi-
tised area. It also indicates the cardinal point
and the distance to the previously defined
destination. Navigation resumes “offroad”.
During dynamic route guidance , you receive
information about reported traffic congestion
on the route. An additional navigation an-
nouncement is given if the route is recalcula-
ted due to traffic congestion.
During a navigation announcement, you can
change its volume using the volume control
up to a defined minimum or maximum vol-
ume. The following navigation recommenda-
tions will then be made at the adjusted vol-
ume.
For other adjustments to the navigation rec-
ommendations, see Navigation an-
nouncements settings. ››› page 46. Note
If you miss a turning during route guidance
and are c urr
ently unable to turn back, keep
on driving until the navigation system offers
a new route. Note
The quality of the navigation recommenda-
tions giv
en by the Infotainment system de-
pends on the navigation data available and
any reported traffic problems. Route
In the Navigation main menu, press the
Route function
button.
The Route function button is only displayed with route
guidance activated.
Function button: function
Stop route guidance: Aborts current route guidance.
New stopover destination: To enter a new destination or a
new stopover ››› page 37.
Route information: View route information for current
route.
Store destination: To store the selected destination
in the destination memory.» 39
Page 42 of 88
Navigation*Function button: function
Congestion ahead: To exclude a section (of 0.2 to 10 km in
length) from the current route, e.g. to avoid congestion.
To cancel the exclusion, press the Route
function button
and then Cancel congestion. My destinations (destination memory)
The stored destinations can be selected from
the My destinations
menu.
● Press the M
y de
stinations function button in
the m ain
Na
vigation menu.
● Select the desired function button.
Store po
sition ,
D
e
s tinations or
Home a
d
dr ess .
St or
e po
sition
● By pressing the Store po
sition function but-
t on, the indic
at
ed position is stored as
Flagged destination in the Destina-
tion memory .
To permanently retain the position stored as
a Flagged destination , it must be re-
named in the Destination memory . Oth-
erwise the stored position will be overwritten
the next time a flagged destination is stored.
● Mark the Flagged destination in the
Destination memory .
● Press the Store function button. The name can be changed in the following in-
p
ut
w
indow. Press the function button to
s t
or
e the destination.
Destinations
● Select the desired function button.
Function button: function
Last destinations: View of destinations for which a route
has already been started.
Destination memory: View of destinations stored manually
and from imported vCards ››› page 44, Importing
vCards (electronic business cards) .
Favourites: View of destinations stored as favourites.
Contacts: View of entries in the phonebook that have a
stored address (postal address). Home address
On
ly
one a
ddress or position can be stored
as the home address at any one time. The
stored home address can be edited or over-
written.
If a home address has already been stored,
route guidance will be started to the stored
home address.
If a home address has not yet been stored,
an address can be assigned as the home ad-
dress.
Assigning the home address for the first time:
Position: Press to store the vehicle's current position as
the home address.
Address: Press to enter the home address manually.
Editing the home address:
The home address can be edited in the Navigation
settings menu ››› page 46.
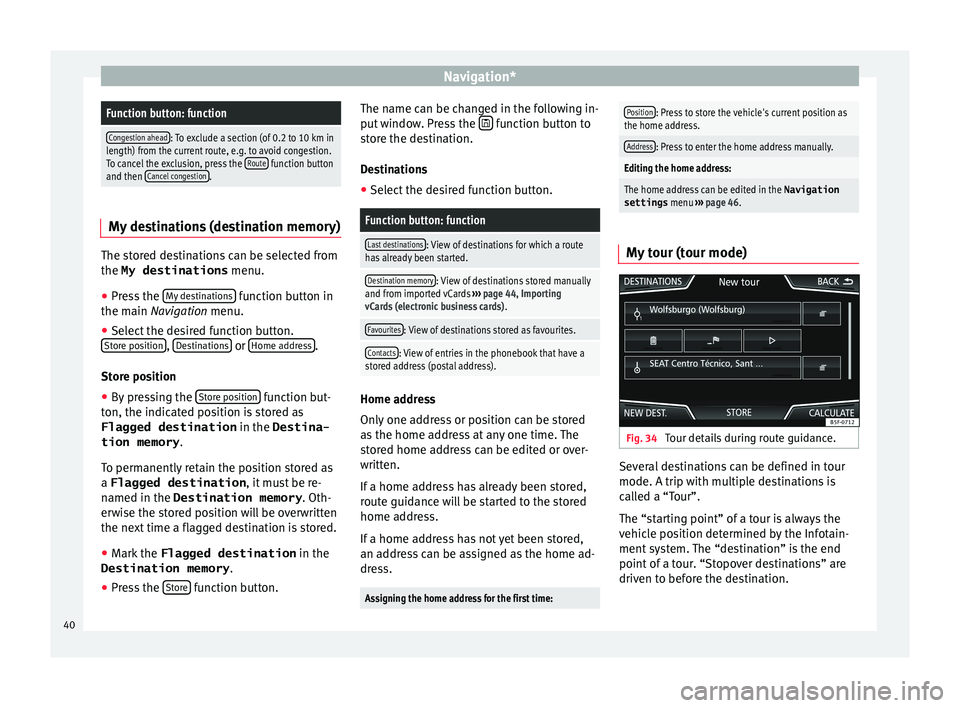
My tour (tour mode) Fig. 34
Tour details during route guidance. Several destinations can be defined in tour
mode. A trip w
ith mu
ltip
le destinations is
called a “Tour”.
The “starting point” of a tour is always the
vehicle position determined by the Infotain-
ment system. The “destination” is the end
point of a tour. “Stopover destinations” are
driven to before the destination.
40
Page 45 of 88
Navigation*
Function buttons and messages on the map
di s
p
lay.
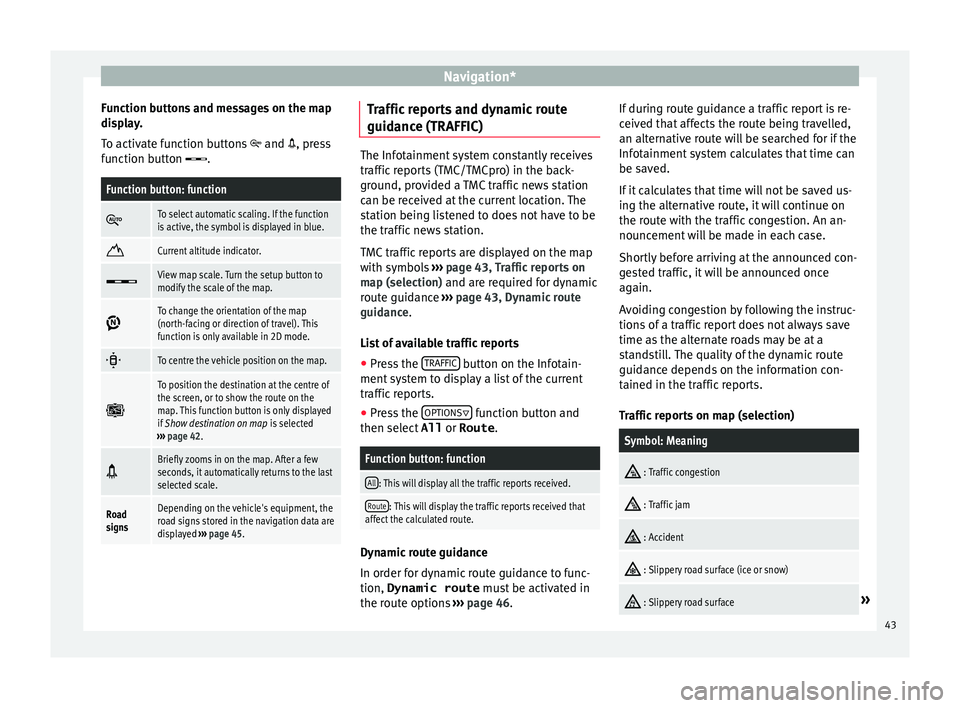
To activate function buttons and , press
function button .
Function button: function
To select automatic scaling. If the function
is active, the symbol is displayed in blue.
Current altitude indicator.
View map scale. Turn the setup button to
modify the scale of the map.
To change the orientation of the map
(north-facing or direction of travel). This
function is only available in 2D mode.
To centre the vehicle position on the map.
To position the destination at the centre of
the screen, or to show the route on the
map. This function button is only displayed
if
Show destination on map is selected
››› page 42.
Briefly zooms in on the map. After a few
seconds, it automatically returns to the last
selected scale.
Road
signsDepending on the vehicle's equipment, the
road signs stored in the navigation data are
displayed
››› page 45. Traffic reports and dynamic route
guid
anc
e (TRAFFIC) The Infotainment system constantly receives
traffic
r
eports (TMC/TMCpro) in the back-
ground, provided a TMC traffic news station
can be received at the current location. The
station being listened to does not have to be
the traffic news station.
TMC traffic reports are displayed on the map
with symbols ››› page 43, Traffic reports on
map (selection) and are required for dynamic
route guidance ››› page 43, Dynamic route
guidance.
List of available traffic reports
● Press the TRAFFIC button on the Infotain-
ment sy
s
tem to display a list of the current
traffic reports.
● Press the OPTIONS function button and
then sel ect
All or
Route .
Function button: function
All: This will display all the traffic reports received.
Route: This will display the traffic reports received that
affect the calculated route. Dynamic route guidance
In or
der f
or dy
namic route guidance to func-
tion, Dynamic route must be activated in
the route options ›››
page 46. If during route guidance a traffic report is re-
ceived th
at affects the route being travelled,
an alternative route will be searched for if the
Infotainment system calculates that time can
be saved.
If it calculates that time will not be saved us-
ing the alternative route, it will continue on
the route with the traffic congestion. An an-
nouncement will be made in each case.
Shortly before arriving at the announced con-
gested traffic, it will be announced once
again.
Avoiding congestion by following the instruc-
tions of a traffic report does not always save
time as the alternate roads may be at a
standstill. The quality of the dynamic route
guidance depends on the information con-
tained in the traffic reports.
Traffic reports on map (selection)
Symbol: Meaning
: Traffic congestion
: Traffic jam
: Accident
: Slippery road surface (ice or snow)
: Slippery road surface»
43
Page 50 of 88
CAR menu
CAR menu Intr oduction t
o m
anaging the
CAR menu
Car menu By pressing the “CAR” infotainment button
you w
i
ll access its main menu with the follow-
ing options:
● VIEW
● In the top right corner: MINIPLAYER (Radio
or Medi a) or HDC
(Descent control)*.
● PREVIOUS-NEXT (to change screen).
● SETUP ›››
Booklet Instruction Manual,
chapter System settings (CAR) .
With the function button View you can access
the f o
l
lowing information:
● SPORT*
● OFFROAD*
● CONSUMERS
● DRIVING DATA
● ECOTRAINER*
● VEHICLE STATUS Sport*
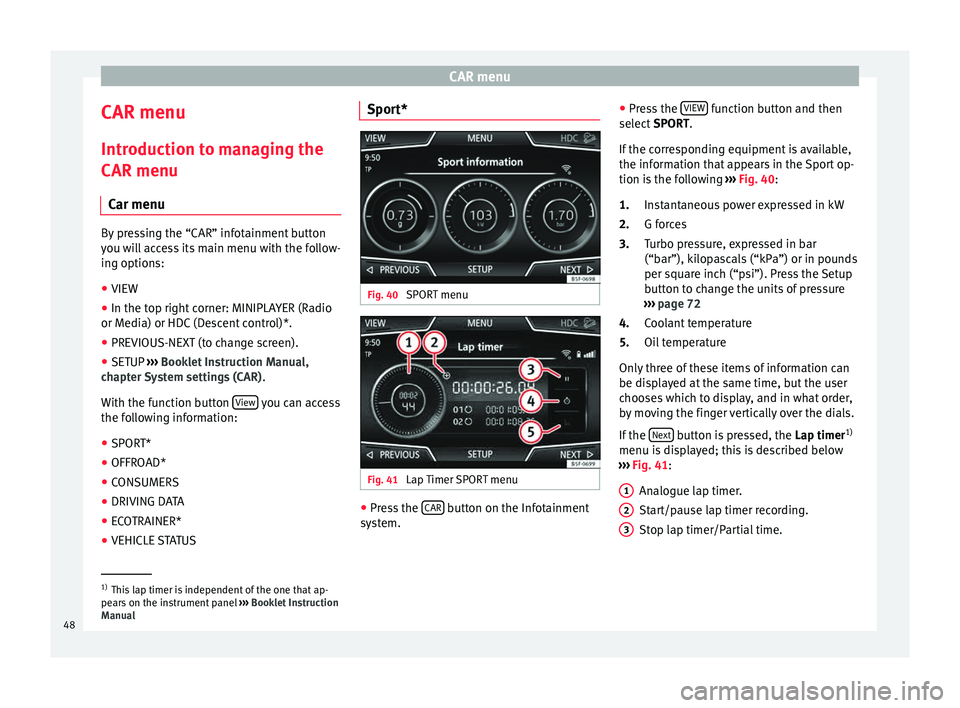
Fig. 40
SPORT menu Fig. 41
Lap Timer SPORT menu ●
Press the CAR button on the Infotainment
sy s
t
em. ●
Pres
s the VIEW function button and then
sel ect
S
PORT.
If the corresponding equipment is available,
the information that appears in the Sport op-
tion is the following ››› Fig. 40:
Instantaneous power expressed in kW
G forces
Turbo pressure, expressed in bar
(“bar”), kilopascals (“kPa”) or in pounds
per square inch (“psi”). Press the Setup
button to change the units of pressure
››› page 72
Coolant temperature
Oil temperature
Only three of these items of information can
be displayed at the same time, but the user
chooses which to display, and in what order,
by moving the finger vertically over the dials.
If the Next button is pressed, the
Lap timer1)
menu i s
di
splayed; this is described below
››› Fig. 41:
Analogue lap timer.
Start/pause lap timer recording.
Stop lap timer/Partial time.
1.
2.
3.
4.
5.
1 2
3
1)
This lap timer is independent of the one that ap-
pear s
on the instrument panel ››› Booklet Instruction
Manual
48
Page 58 of 88
Telephone management system (PHONE)
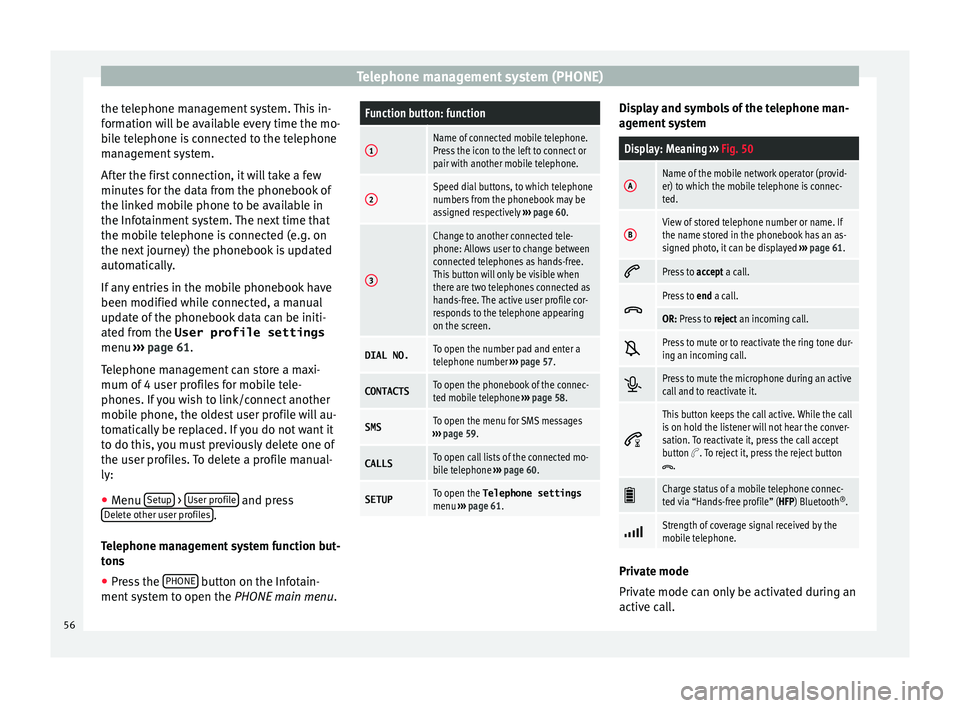
the telephone management system. This in-
f orm
ation w
ill be available every time the mo-
bile telephone is connected to the telephone
management system.
After the first connection, it will take a few
minutes for the data from the phonebook of
the linked mobile phone to be available in
the Infotainment system. The next time that
the mobile telephone is connected (e.g. on
the next journey) the phonebook is updated
automatically.
If any entries in the mobile phonebook have
been modified while connected, a manual
update of the phonebook data can be initi-
ated from the User profile settings
menu ››› page 61.
Telephone management can store a maxi-
mum of 4 user profiles for mobile tele-
phones. If you wish to link/connect another
mobile phone, the oldest user profile will au-
tomatically be replaced. If you do not want it
to do this, you must previously delete one of
the user profiles. To delete a profile manual-
ly:
● Menu Setup >
U
ser pr
ofi
le and press
D el
et
e other user profiles .
T el
ephone m
anagement system function but-
tons
● Press the PHONE button on the Infotain-
ment sy
s
tem to open the PHONE main menu.
Function button: function
1Name of connected mobile telephone.
Press the icon to the left to connect or
pair with another mobile telephone.
2Speed dial buttons, to which telephone
numbers from the phonebook may be
assigned respectively ››› page 60.
3
Change to another connected tele-
phone: Allows user to change between
connected telephones as hands-free.
This button will only be visible when
there are two telephones connected as
hands-free. The active user profile cor-
responds to the telephone appearing
on the screen.
DIAL NO.To open the number pad and enter a
telephone number ››› page 57.
CONTACTSTo open the phonebook of the connec-
ted mobile telephone ››› page 58.
SMSTo open the menu for SMS messages
››› page 59.
CALLSTo open call lists of the connected mo-
bile telephone ››› page 60.
SETUPTo open the Telephone settings
menu ››› page 61. Display and symbols of the telephone man-
ag
ement sy
stem
Display: Meaning ››› Fig. 50
AName of the mobile network operator (provid-
er) to which the mobile telephone is connec-
ted.
BView of stored telephone number or name. If
the name stored in the phonebook has an as-
signed photo, it can be displayed ››› page 61.
Press to
accept a call.
Press to
end a call.
OR: Press to reject an incoming call.
Press to mute or to reactivate the ring tone dur-
ing an incoming call.
Press to mute the microphone during an active
call and to reactivate it.
This button keeps the call active. While the call
is on hold the listener will not hear the conver-
sation. To reactivate it, press the call accept
button
. To reject it, press the reject button.
Charge status of a mobile telephone connec-
ted via “Hands-free profile” (HFP) Bluetooth
®
.
Strength of coverage signal received by the
mobile telephone.
Private mode
Priv
at
e mode c
an only be activated during an
active call.
56
Page 60 of 88
Telephone management system (PHONE)
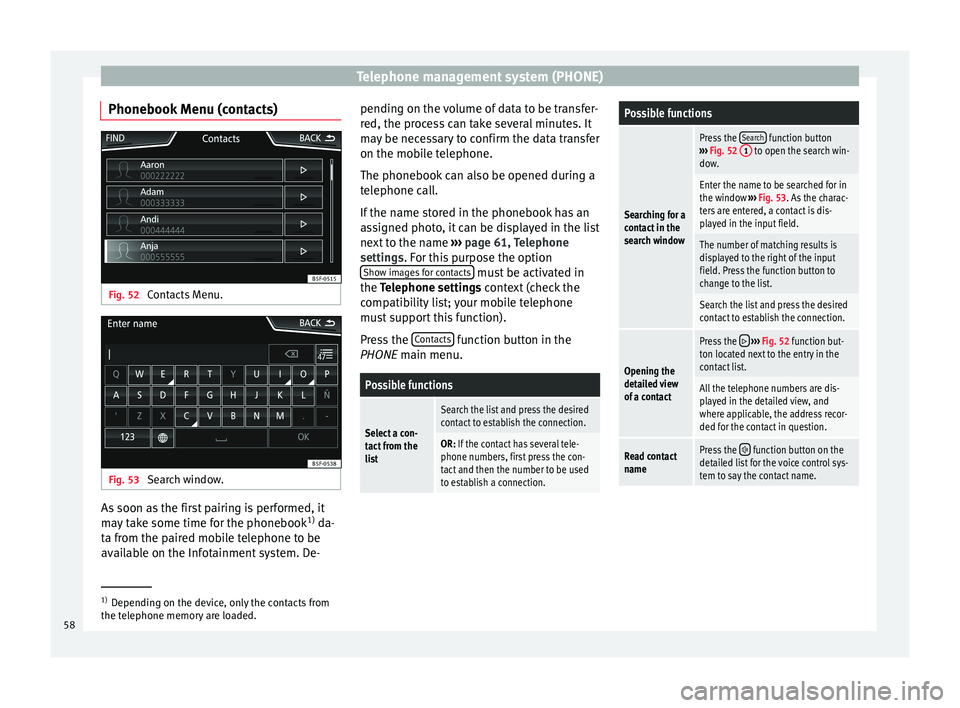
Phonebook Menu (contacts) Fig. 52
Contacts Menu. Fig. 53
Search window. As soon as the first pairing is performed, it
m
a
y
take some time for the phonebook 1)
da-
ta from the paired mobile telephone to be
available on the Infotainment system. De- pending on the volume of data to be transfer-
red, the proc
ess can take several minutes. It
may be necessary to confirm the data transfer
on the mobile telephone.
The phonebook can also be opened during a
telephone call.
If the name stored in the phonebook has an
assigned photo, it can be displayed in the list
next to the name ››› page 61, Telephone
settings. For this purpose the option Show images for contacts must be activated in
the T el
ephone settin
gs context (check the
compatibility list; your mobile telephone
must support this function).
Press the Contacts function button in the
PHONE m ain menu.
Possible functions
Select a con-
tact from the
list
Search the list and press the desired
contact to establish the connection.
OR: If the contact has several tele-
phone numbers, first press the con-
tact and then the number to be used
to establish a connection.
Possible functions
Searching for a
contact in the
search window
Press the Search function button
››› Fig. 52 1 to open the search win-
dow.
Enter the name to be searched for in
the window ››› Fig. 53. As the charac-
ters are entered, a contact is dis-
played in the input field.
The number of matching results is
displayed to the right of the input
field. Press the function button to
change to the list.
Search the list and press the desired
contact to establish the connection.
Opening the
detailed view
of a contact
Press the ››› Fig. 52 function but-
ton located next to the entry in the
contact list.
All the telephone numbers are dis-
played in the detailed view, and
where applicable, the address recor-
ded for the contact in question.
Read contact
namePress the function button on the
detailed list for the voice control sys-
tem to say the contact name. 1)
Depending on the device, only the contacts from
the tel ephone memor
y are loaded.
58
Page 69 of 88
Full Link™*
Pairing of portable devices supporting
the Mirr orLink™, Andr
oid Aut
o™
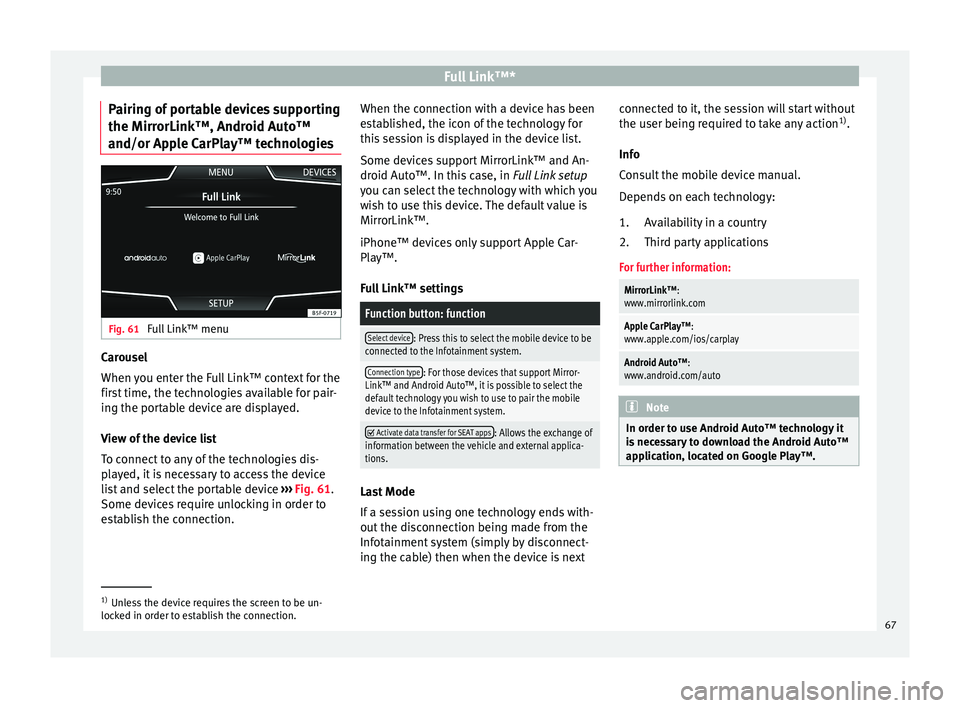
and/or Apple CarPlay™ technologies Fig. 61
Full Link™ menu Carousel
When
y
ou ent
er the Full Link™ context for the
first time, the technologies available for pair-
ing the portable device are displayed.
View of the device list
To connect to any of the technologies dis-
played, it is necessary to access the device
list and select the portable device ››› Fig. 61.
Some devices require unlocking in order to
establish the connection. When the connection with a device has been
est
ablished, the icon of the technology for
this session is displayed in the device list.
Some devices support MirrorLink™ and An-
droid Auto™. In this case, in Full Link setup
you can select the technology with which you
wish to use this device. The default value is
MirrorLink™.
iPhone™ devices only support Apple Car-
Play™.
Full Link™ settings
Function button: function
Select device: Press this to select the mobile device to be
connected to the Infotainment system.
Connection type: For those devices that support Mirror-
Link™ and Android Auto™, it is possible to select the
default technology you wish to use to pair the mobile
device to the Infotainment system.
Activate data transfer for SEAT apps: Allows the exchange of
information between the vehicle and external applica-
tions. Last Mode
If
a se
s
sion using one technology ends with-
out the disconnection being made from the
Infotainment system (simply by disconnect-
ing the cable) then when the device is next connected to it, the session will start without
the user being r
equired to take any action 1)
.
Info
Consult the mobile device manual.
Depends on each technology: Availability in a country
Third party applications
For further information:
MirrorLink™:
www.mirrorlink.com
Apple CarPlay™:
www.apple.com/ios/carplay
Android Auto™:
www.android.com/auto Note
In order to use Android Auto™ technology it
is nec
essary to download the Android Auto™
application, located on Google Play™. 1.
2.
1)
Unless the device requires the screen to be un-
lock ed in or
der to establish the connection. 67
Page 74 of 88
Settings
Settings
M enu and sy
s
tem settings
Main menu System settings
›› ›
table on page 2
The selection of possible settings will de-
pend on the country, the unit in question and
the vehicle equipment.
● Press the Infotainment system MENU but-
t on and then pr
e
ss the SETUP function but-
t on.
● To a
djust the settings for a certain function,
pres
s the appropriate function button.
Changes are automatically stored when a
menu is closed.
Function button: function
Screen: To perform screen setup.
Switch off screen (in 10 seconds): If this function is ac-
tive and the Infotainment system is not in use, the
screen will switch off after approximately 10 sec-
onds. Pressing the screen or pressing one of the Info-
tainment system buttons will switch the screen back
on.
Brightness: To select the brightness level of the
screen.
Day/Night: To select the display type ( Day, Night or
Automatic ).
Function button: function
Touchscreen tone: Confirmation tone for pressing a
function button is activated.
Proximity sensors: The proximity sensors are activa-
ted. Also see ››› page 11, Proximity sensors .
Show clock in standby mode: In standby mode, the cur-
rent time is shown on the Infotainment system dis-
play.
Date and time: To alter the time and date.
Clock time source: To select the time source (GPS or
manual).
GPS: The date and time can be selected using the
Time zone function button. In this case, the Dateand Time function buttons for manually entering
the data will not be active.
Manually: The date and time can be manually ad-
justed using the Date and Time function buttons.
In this case, the Time zone function button will not
be active.
Time: To manually alter the time.
Automatic summer timea)
: The time is set automatical-
ly.
Time zone: To change to the desired time zone.
Time format: To select the time display format (12- or
24-hour clock).
Date: To adjust the current time.
Date format: To select the display format for the date
(DD.MM.YYYY , YY-MM-DD or MM-DD-YY ).
Function button: function
Idioma/Language: To select the desired language for the
texts and announcements in the voice control system.
Keyboard: To select the keypad (ABC or QWERTY).
Additional keypad languages: To select the additional key-
pad languages.
Units: To set the measurement units for the vehicle dis-
plays.
Distance , vehicle speed , temperature, volume,
consumption and pressure .
Mobile device data transfer
Activate data transfer for SEAT apps : To allow the mobile
telephone paired via USB to transfer applications to
the system.
Use apps to operate: Allows the execution of all the
available functions from the App.
Deactivate: Limits specific functions that require a
higher level of security. Confirm
: Allows 100% functionality of the App but
with certain actions relating to the Infotainment
system requiring confirmation. Allow
: Allows the execution of all the available
functions from the App.
Voice control: To perform the voice control setup
››› page 12.
Remove safely: To eject the data storage device (SD card
1/SD card 2/USB) from the system. After correctly eject-
ing the data storage device from the system, the func-
tion button becomes inactive (grey colour). 72
Page 75 of 88
SettingsFunction button: function
Factory settings: When restoring factory settings, all
en-
tries and changes made are deleted, depending on the
selected setup.
Bluetooth: To perform Bluetooth ®
settings ››› page 61.
System information: Viewing system information (device
number, hardware and software versions).
Copyright: Copyright information.
a) Option available depending on the equipment. Note
For the proper functioning of the Infotain-
ment sy s
tem it is important that the date and
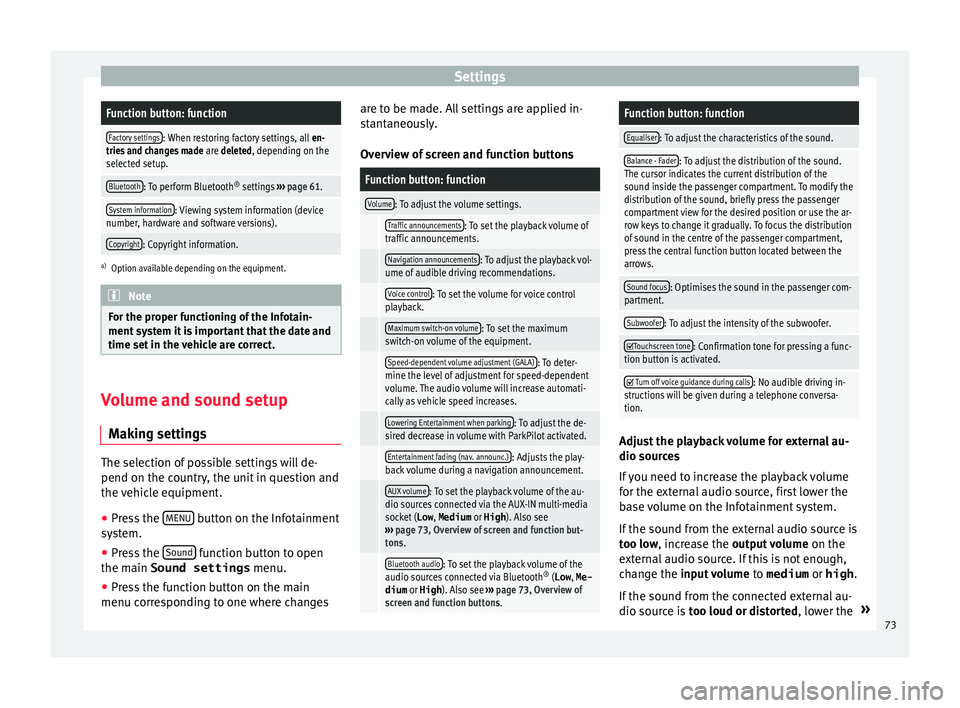
time set in the vehicle are correct. Volume and sound setup
M ak
in
g settings The selection of possible settings will de-
pend on the c
ou
ntr
y, the unit in question and
the vehicle equipment.
● Press the MENU button on the Infotainment
sy s
t
em.
● Press the Sound function button to open
the m ain Sound settings
menu.
● Pr e
ss the function button on the main
menu corre
sponding to one where changes are to be made. All settings are applied in-
stant
aneously.
Overview of screen and function buttons
Function button: function
Volume: To adjust the volume settings.
Traffic announcements: To set the playback volume of
traffic announcements.
Navigation announcements: To adjust the playback vol-
ume of audible driving recommendations.
Voice control: To set the volume for voice control
playback.
Maximum switch-on volume: To set the maximum
switch-on volume of the equipment.
Speed-dependent volume adjustment (GALA): To deter-
mine the level of adjustment for speed-dependent
volume. The audio volume will increase automati-
cally as vehicle speed increases.
Lowering Entertainment when parking: To adjust the de-
sired decrease in volume with ParkPilot activated.
Entertainment fading (nav. announc.): Adjusts the play-
back volume during a navigation announcement.
AUX volume: To set the playback volume of the au-
dio sources connected via the AUX-IN multi-media
socket ( Low, Medium or High). Also see
››› page 73, Overview of screen and function but-
tons.
Bluetooth audio: To set the playback volume of the
audio sources connected via Bluetooth ®
(Low , Me-
dium or High ). Also see ››› page 73, Overview of
screen and function buttons.
Function button: function
Equaliser: To adjust the characteristics of the sound.
Balance - Fader: To adjust the distribution of the sound.
The cursor indicates the current distribution of the
sound inside the passenger compartment. To modify the
distribution of the sound, briefly press the passenger
compartment view for the desired position or use the ar-
row keys to change it gradually. To focus the distribution
of sound in the centre of the passenger compartment,
press the central function button located between the
arrows.
Sound focus: Optimises the sound in the passenger com-
partment.
Subwoofer: To adjust the intensity of the subwoofer.
Touchscreen tone: Confirmation tone for pressing a func-
tion button is activated.
Turn off voice guidance during calls: No audible driving in-
structions will be given during a telephone conversa-
tion. Adjust the playback volume for external au-
dio sour
c
e
s
If you need to increase the playback volume
for the external audio source, first lower the
base volume on the Infotainment system.
If the sound from the external audio source is
too low, increase the output volume on the
external audio source. If this is not enough,
change the input volume to medium or high.
If the sound from the connected external au-
dio source is too loud or distorted, lower the »
73
Page 79 of 88
Index
Index
A
Af t
er s
tarting route guidance . . . . . . . . . . . . . . . . 38
AM . . . . . . . . . . . . . . . . . . . . . . . . . . . . . . . . . . . 15, 75
Android Auto™ . . . . . . . . . . . . . . . . . . . . . . . . . . . . 67
Apple CarPlay™ . . . . . . . . . . . . . . . . . . . . . . . . . . . 67
Areas where special regulations apply . . . . . . . . . 53
AUX . . . . . . . . . . . . . . . . . . . . . . . . . . . . . . . . . . . . . 75
AUX-IN . . . . . . . . . . . . . . . . . . . . . . . . . . . . . . . . . . . 33 AUX-IN multimedia socket . . . . . . . . . . . . . . . . . 33
external audio source . . . . . . . . . . . . . . . . . . . . . 33
AUX-IN multimedia socket . . . . . . . . . . . . . . . . . . . 33
Avoid congestion . . . . . . . . . . . . . . . . . . . . . . . . . . 43
B Base volume . . . . . . . . . . . . . . . . . . . . . . . . . . . . . . . 8 change . . . . . . . . . . . . . . . . . . . . . . . . . . . . . . . . . 8
sound suppression (mute) . . . . . . . . . . . . . . . . . . 8
Bluetooth connect audio source . . . . . . . . . . . . . . . . . . . . . 33
profiles . . . . . . . . . . . . . . . . . . . . . . . . . . . . . . . . 53
select Bluetooth audio . . . . . . . . . . . . . . . . . . . . 28
settings . . . . . . . . . . . . . . . . . . . . . . . . . . . . . . . . 61
Buttons . . . . . . . . . . . . . . . . . . . . . . . . . . . . . . . . . 3, 9
C
Call lists . . . . . . . . . . . . . . . . . . . . . . . . . . . . . . . . . 60
Call mailbox . . . . . . . . . . . . . . . . . . . . . . . . . . . . . . 57
CAR . . . . . . . . . . . . . . . . . . . . . . . . . . . . . . . . . . . . . 48
CAR menu management . . . . . . . . . . . . . . . . . . . . . . . . . . . . 48
CD inserting and ejecting . . . . . . . . . . . . . . . . . . . . 30
mode . . . . . . . . . . . . . . . . . . . . . . . . . . . . . . . . . . 30
select . . . . . . . . . . . . . . . . . . . . . . . . . . . . . . . . . . 28 Check boxes . . . . . . . . . . . . . . . . . . . . . . . . . . . . . . . 9
Communic
ation between the Infotainment sys-
tem and mobile devices . . . . . . . . . . . . . . . . . . . 63
Controls . . . . . . . . . . . . . . . . . . . . . . . . . . . . . . . . . . . 3
Copyright . . . . . . . . . . . . . . . . . . . . . . . . . . . . . . . . 24 information . . . . . . . . . . . . . . . . . . . . . . . . . . . . . 73
Cursor . . . . . . . . . . . . . . . . . . . . . . . . . . . . . . . . . . . 10
D
DAB . . . . . . . . . . . . . . . . . . . . . . . . . . . . . . . . . . . . . 15 see: RADIO . . . . . . . . . . . . . . . . . . . . . . . . . . . . . 17
Delayed switch off (waiting time) . . . . . . . . . . . . . . 8
Delete all entries . . . . . . . . . . . . . . . . . . . . . . . . . . . . . . 72
user entries . . . . . . . . . . . . . . . . . . . . . . . . . . . . . 72
Delete data . . . . . . . . . . . . . . . . . . . . . . . . . . . . . . . 72
Delete entries . . . . . . . . . . . . . . . . . . . . . . . . . . . . . 72
Demo mode Navigation . . . . . . . . . . . . . . . . . . . . . . . . . . . . . . 46
Destination memory . . . . . . . . . . . . . . . . . . . . . . . . 40
Dial number . . . . . . . . . . . . . . . . . . . . . . . . . . . . . . 57
Dial (telephone number) . . . . . . . . . . . . . . . . . . . . 57
Display . . . . . . . . . . . . . . . . . . . . . . . . . . . . . . . . . . . 3 use . . . . . . . . . . . . . . . . . . . . . . . . . . . . . . . . . . . . . 9
Dynamic route guidance . . . . . . . . . . . . . . . . . . . . 43
E
Ejecting see: CD . . . . . . . . . . . . . . . . . . . . . . . . . . . . . . . . 30
EON . . . . . . . . . . . . . . . . . . . . . . . . . . . . . . . . . . . . . 21
Explosion risk areas Telephone . . . . . . . . . . . . . . . . . . . . . . . . . . . . . . 53
External audio source . . . . . . . . . . . . . . . . . . . . . . 33 adjust the playback volume . . . . . . . . . . . . . . . . 73
Bluetooth audio . . . . . . . . . . . . . . . . . . . . . . . . . 33
MEDIA-IN . . . . . . . . . . . . . . . . . . . . . . . . . . . . . . . 31 External data storage device
MEDIA-IN . . . . . . . . . . . . . . . . . . . . . . . . . . . . . . . 31
USB
. . . . . . . . . . . . . . . . . . . . . . . . . . . . . . . . . . . 31
F
Factory settings . . . . . . . . . . . . . . . . . . . . . . . . . . . 72
Favourites (speed dial buttons) see PHONE . . . . . . . . . . . . . . . . . . . . . . . . . . . . . 60
FM . . . . . . . . . . . . . . . . . . . . . . . . . . . . . . . . . . . 15, 75
Frequency wavelength AM . . . . . . . . . . . . . . . . . . . . . . . . . . . . . . . . . . . . 15
change . . . . . . . . . . . . . . . . . . . . . . . . . . . . . . . . 15
DAB . . . . . . . . . . . . . . . . . . . . . . . . . . . . . . . . . . . 15
FM . . . . . . . . . . . . . . . . . . . . . . . . . . . . . . . . . . . . 15
Full Link pairing . . . . . . . . . . . . . . . . . . . . . . . . . . . . . . . . . 67
Full Link™ . . . . . . . . . . . . . . . . . . . . . . . . . . . . . . . . 63 settings . . . . . . . . . . . . . . . . . . . . . . . . . . . . . . . . 67
Function buttons . . . . . . . . . . . . . . . . . . . . . . . . . 3, 9 Images main menu . . . . . . . . . . . . . . . . . . . . . . . 35
MEDIA main menu . . . . . . . . . . . . . . . . . . . . . . . 26
RADIO main menu . . . . . . . . . . . . . . . . . . . . . . . 15
G GALA . . . . . . . . . . . . . . . . . . . . . . . . . . . . . . . . . . . . 73
I Ignition switched off delayed switch off (waiting time) . . . . . . . . . . . . 8
Images display . . . . . . . . . . . . . . . . . . . . . . . . . . . . . . . . . 35
main menu . . . . . . . . . . . . . . . . . . . . . . . . . . . . . 35
settings . . . . . . . . . . . . . . . . . . . . . . . . . . . . . . . . 35
Infotainment buttons . . . . . . . . . . . . . . . . . . . . . . . . 3
Infotainment system buttons . . . . . . . . . . . . . . . . . 7
Input mask . . . . . . . . . . . . . . . . . . . . . . . . . . . . . . . 10
Interference from a mobile telephone . . . . . . . . . . 7
77