display Seat Leon SC 2015 MEDIA SYSTEM PLUS - NAVI SYSTEM
[x] Cancel search | Manufacturer: SEAT, Model Year: 2015, Model line: Leon SC, Model: Seat Leon SC 2015Pages: 88, PDF Size: 2.23 MB
Page 46 of 88
Navigation*Symbol: Meaning
: Danger
: Road works
: Strong wind
: Road closed to traffic
During route guidance, traffic congestion that
does
not
affect the route calculated is dis-
played in grey.
The extent of the traffic congestion along the
route calculated is shown by a red line.
Any incidents that affect the route calculated
and have caused the route to be recalculated
are displayed in orange.
The position of a symbol indicates the start
of the traffic congestion if it is clearly defined
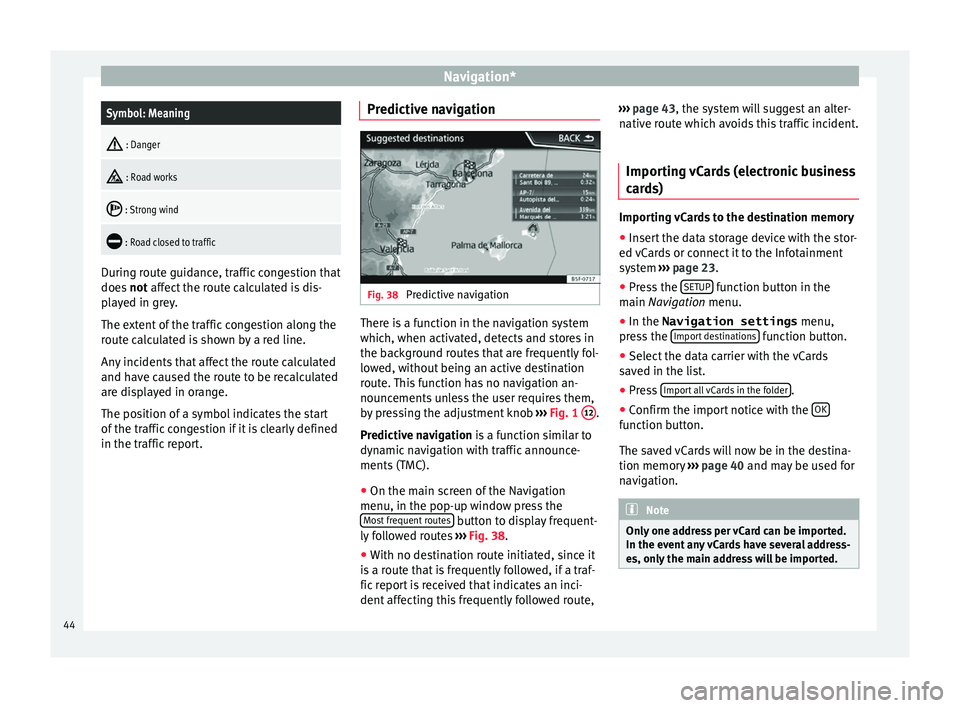
in the traffic report. Predictive navigation Fig. 38
Predictive navigation There is a function in the navigation system
whic
h, when activ
at
ed, detects and stores in
the background routes that are frequently fol-
lowed, without being an active destination
route. This function has no navigation an-
nouncements unless the user requires them,
by pressing the adjustment knob ››› Fig. 1 12 .
Pr edictiv
e n
avigation is a function similar to
dynamic navigation with traffic announce-
ments (TMC).
● On the main screen of the Navigation
menu, in the pop-up window pr
ess the
Most frequent routes button to display frequent-
ly f
o
llowed routes ›››
Fig. 38.
● With no destination route initiated, since it
is a r
oute that is frequently followed, if a traf-
fic report is received that indicates an inci-
dent affecting this frequently followed route, ›››
page 43, the system will suggest an alter-
nativ
e route which avoids this traffic incident.
Importing vCards (electronic business
card
s) Importing vCards to the destination memory
● Insert the data storage device with the stor-
ed vC ar
ds or connect it to the Infotainment
system ››› page 23.
● Press the SETUP function button in the
m ain
Na
vigation menu.
● In the Navigation settings menu,
pres
s the Import destinations function button.
● Select the data carrier with the vCards
s av
ed in the li
st.
● Press Import al
l vCards in the folder .
● Confirm the import notice with the OK function button.
The s
av
ed
vCards will now be in the destina-
tion memory ›››
page 40 and may be used for
navigation. Note
Only one address per vCard can be imported.
In the event an
y vCards have several address-
es, only the main address will be imported. 44
Page 47 of 88
Navigation*
Importing Personal POI Importing the Personal POI to a points of in-
ter
e
st destination memory
● Insert the data storage device with the stor-
ed Person
al POI or connect it to the Infotain-
ment system ››› page 23.
● Press the Infotainment MENU button and
then select Set
up .
● In the System settings menu, pres
s the
System information function button.
● Press U
pd at
e software to import the Personal
POI.
● Confirm the import notice with the OKfunction button.
The s
t
or
ed Personal POI are now in the points
of interest destination memory ›››
page 41
and can be used for navigation purposes.
The stored Personal POI can be deleted in the
Navigation Settings menu
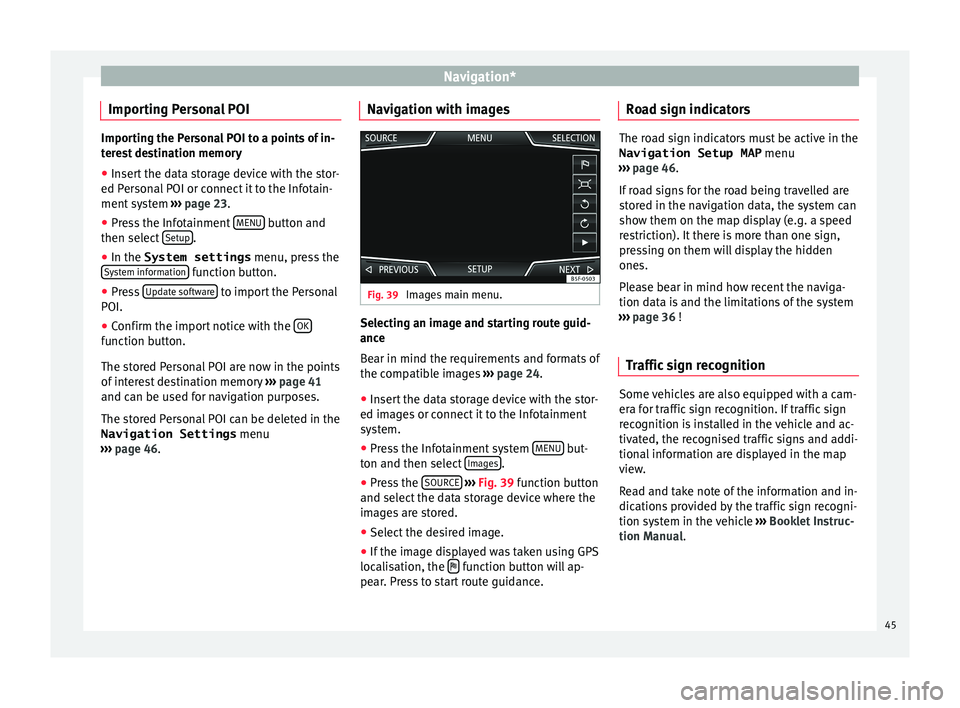
››› page 46. Navigation with images Fig. 39
Images main menu. Selecting an image and starting route guid-
anc
e
B e
ar in mind the requirements and formats of
the compatible images ››› page 24.
● Insert the data storage device with the stor-
ed image
s or connect it to the Infotainment
system.
● Press the Infotainment system MENU but-
t on and then sel
ect
Images .
● Press the SOURC
E
› ›
› Fig. 39
function button
and select the data storage device where the
images are stored.
● Select the desired image.
● If the image displayed was taken using GPS
localis
ation, the function button will ap-
pe ar
. Pr
ess to start route guidance. Road sign indicators The road sign indicators must be active in the
Navigation Setup MAP menu
›› ›
page 46.
If road signs for the road being travelled are
stored in the navigation data, the system can
show them on the map display (e.g. a speed
restriction). It there is more than one sign,
pressing on them will display the hidden
ones.
Please bear in mind how recent the naviga-
tion data is and the limitations of the system
››› page 36 !
Traffic sign recognition Some vehicles are also equipped with a cam-
er
a f
or tr
affic sign recognition. If traffic sign
recognition is installed in the vehicle and ac-
tivated, the recognised traffic signs and addi-
tional information are displayed in the map
view.
Read and take note of the information and in-
dications provided by the traffic sign recogni-
tion system in the vehicle ›››
Booklet Instruc-
tion Manual.
45
Page 48 of 88
Navigation*
Route guidance in demo mode If demo mode is activated in the
Naviga-
tion Settings menu ›››
page 46, an ad-
ditional pop-up window opens when you
start route guidance.
● Pressing the Demo mode function button
st ar
ts a “virtual route guidance” to the desti-
nation you have entered.
● If you press the Normal function button, a
“re al
route guidance” starts.
The sequence of events and the operations in
virtual route guidance are similar to those in
real route guidance.
Virtual route guidance is repeated when you
reach the fictitious destination and always
starts again from the starting point if not
aborted beforehand.
If the starting point for demo mode has been
defined manually in the Navigation Set-
tings menu, virtual route guidance will start
from the position set.
A manually entered starting point is overwrit-
ten with the current vehicle location if the ve-
hicle moves off. Note
Disable demo mode after use, otherwise you
wi l
l be prompted to choose between virtual
and normal route guidance each time you
start route guidance. Navigation settings
●
Press the SETUP function button in the
main Na
vigation menu.
Function button: function
Route options: To make adjustments to route calculation.
Suggest 3 alternative routes: After starting route guid-
ance, 3 alternative routes are suggested ››› page 38.
Route: Select the route type.
Economical: The route is calculated by taking into
consideration economic factors.
Fast: The fastest route to the destination.
Short: shortest route to the destination, even if it
results in a longer travelling time.
Dynamic route: Route guidance with TMC is active
››› page 43.
Most frequent routes: Information on the user's most
frequent routes.
Avoid motorways and highways: Motorways will be ex-
cluded from the calculation whenever possible.
Avoid ferries and motorail trains: Ferries and motorail
trains will not be considered in the calculation of the
route whenever possible.
Avoid toll roads: Toll roads will be excluded from the
calculation whenever possible.
Avoid tunnels: Tunnels will be excluded from the cal-
culation whenever possible.
Function button: function
Avoid routes requiring toll stickers (vignette): Routes re-
quiring toll stickers will be excluded from the calcula-
tion whenever possible.
Show available toll stickers: To mark the available toll
stickers on the list ( Avoid routes requiring toll stickersmust be active).
Roads requiring toll stickers that have been marked
as having said toll sticker will be taken into account
in the calculation of the route.
Map: To make adjustments to the visual display of the
map.
Show road signs: The road signs stored in the naviga-
tion data for the road being travelled will be dis-
played during route guidance ››› page 45.
Lane guidance: During route guidance, when driving
and turning on multi-lane roads, an additional dis-
play is shown with lane guidance. This will only ap-
pear if there is information in the database for the
area being driven in.
Show favourites: The stored destinations are shown
on the map as favourites (orange symbol)
Show POI
Select categories for POI: To select which point of in-
terest categories are displayed on the map
››› page 41.
Show POI flags.: View of category logos of the se-
lected points of interest (e.g. view of petrol station
logos).
Fuel options: To make adjustments relating to fuel. 46
Page 49 of 88
Navigation*Function button: function
Select preferred petrol station: The selected petrol station
mark will be shown before other points of interest in
the search.
Fuel warning: The warning to refuel is active.
If the fuel level reaches the reserve level, the corre-
sponding warning is generated which permits the
search for petrol stations.
Navigation announcements: To make adjustments to naviga-
tion announcements.
Volume: To adjust the volume for driving recommen-
dations.
Lowering navigation announcements: Adjusting the volume
of the active audio source during navigation instruc-
tions.
Turn off voice guidance during calls: No audible driving
instructions will be given during a telephone conver-
sation.
Warning: My points of interest: Audible announcement
when nearing a point of interest.
Advanced settings: To make advanced adjustments to the
navigation.
Time display: displayed during route guidance.
Time of arrival: The estimated time of arrival at the
final destination is displayed.
Travelling time: The estimated travelling time to the
final destination is displayed.
Status line: displayed during route guidance.
Function button: function
Destination: The distance calculated to final desti-
nation is displayed.
Next stopover: The calculated distance until next
stopover is displayed.
Note: National border crossed: Displays the speed lim-
its of the country in question when crossing the bor-
der.
Demo mode: When Demo mode is activated and
route guidance is started, virtual guidance to the en-
tered destination can be initiated ››› page 46.
Define demo mode starting point: if demo mode is activa-
ted, a fictitious starting point for virtual route guid-
ance can be defined when the vehicle is stationary.
Manage memory: To modify saved destinations.
Sort contacts: To select the sequential order of the en-
tries in the phonebook that have (postal) addresses,
see also ››› page 40.
Define home address: To assign or edit a home address,
see also ››› page 40.
Delete my points of interest: To delete the points of inter-
est stored in the points of interest memory
››› page 45.
Update my points of interest: To update the stored points
of interest ››› page 45.
Delete user data: To delete the stored destinations
(e.g., the Recent destinations or the Destina-
tion memory ).
Import destinations: To import electronic business cards
(vCards) into the destination memory ››› page 44.
Function button: function
Version information: Information on the stored navigation
data.
Maximum speeds: Shows the speed limits, depending on
the road, for the current country. 47
Page 50 of 88
CAR menu
CAR menu Intr oduction t
o m
anaging the
CAR menu
Car menu By pressing the “CAR” infotainment button
you w
i
ll access its main menu with the follow-
ing options:
● VIEW
● In the top right corner: MINIPLAYER (Radio
or Medi a) or HDC
(Descent control)*.
● PREVIOUS-NEXT (to change screen).
● SETUP ›››
Booklet Instruction Manual,
chapter System settings (CAR) .
With the function button View you can access
the f o
l
lowing information:
● SPORT*
● OFFROAD*
● CONSUMERS
● DRIVING DATA
● ECOTRAINER*
● VEHICLE STATUS Sport*
Fig. 40
SPORT menu Fig. 41
Lap Timer SPORT menu ●
Press the CAR button on the Infotainment
sy s
t
em. ●
Pres
s the VIEW function button and then
sel ect
S
PORT.
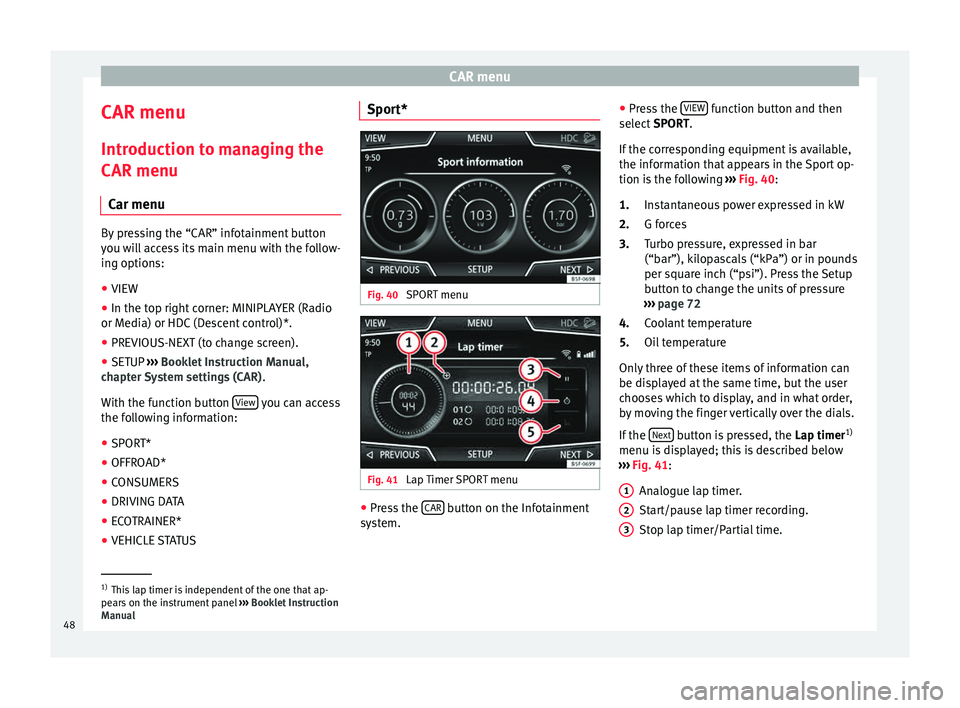
If the corresponding equipment is available,
the information that appears in the Sport op-
tion is the following ››› Fig. 40:
Instantaneous power expressed in kW
G forces
Turbo pressure, expressed in bar
(“bar”), kilopascals (“kPa”) or in pounds
per square inch (“psi”). Press the Setup
button to change the units of pressure
››› page 72
Coolant temperature
Oil temperature
Only three of these items of information can
be displayed at the same time, but the user
chooses which to display, and in what order,
by moving the finger vertically over the dials.
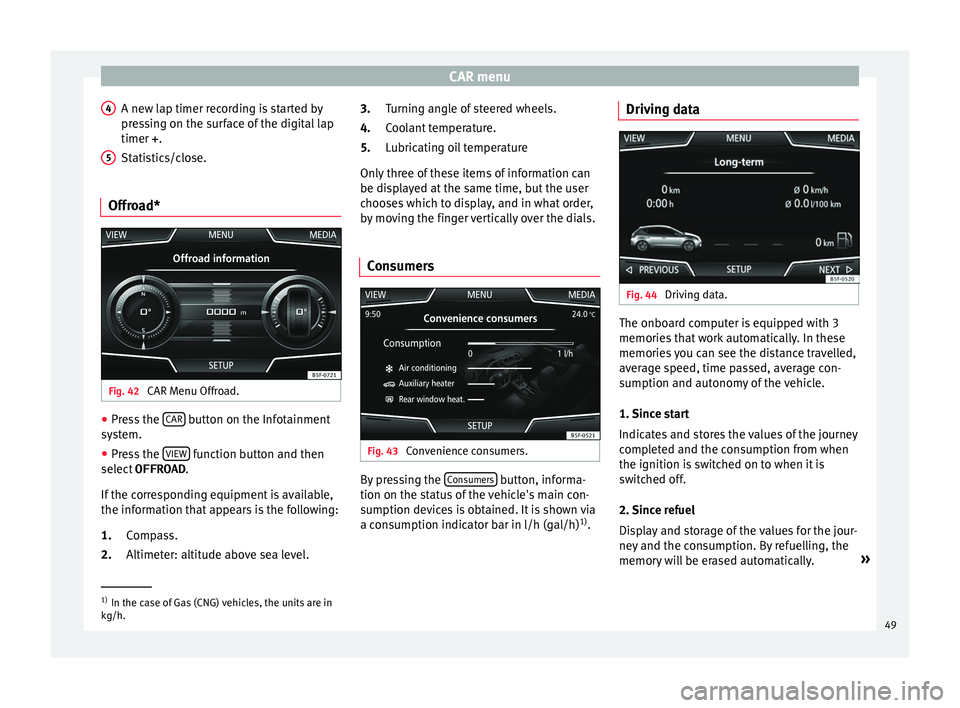
If the Next button is pressed, the
Lap timer1)
menu i s
di
splayed; this is described below
››› Fig. 41:
Analogue lap timer.
Start/pause lap timer recording.
Stop lap timer/Partial time.
1.
2.
3.
4.
5.
1 2
3
1)
This lap timer is independent of the one that ap-
pear s
on the instrument panel ››› Booklet Instruction
Manual
48
Page 51 of 88
CAR menu
A new lap timer recording is started by
pr e
s
sing on the surface of the digital lap
timer + .
Statistics/close.
Offroad* Fig. 42
CAR Menu Offroad. ●
Press the CAR button on the Infotainment
sy s
t
em.
● Press the VIEW function button and then
sel ect
OFFROAD .
If
the corresponding equipment is available,
the information that appears is the following:
Compass.
Altimeter: altitude above sea level.
4 5
1.
2. Turning angle of steered wheels.
C
oo
l
ant temperature.
Lubricating oil temperature
Only three of these items of information can
be displayed at the same time, but the user
chooses which to display, and in what order,
by moving the finger vertically over the dials.
Consumers Fig. 43
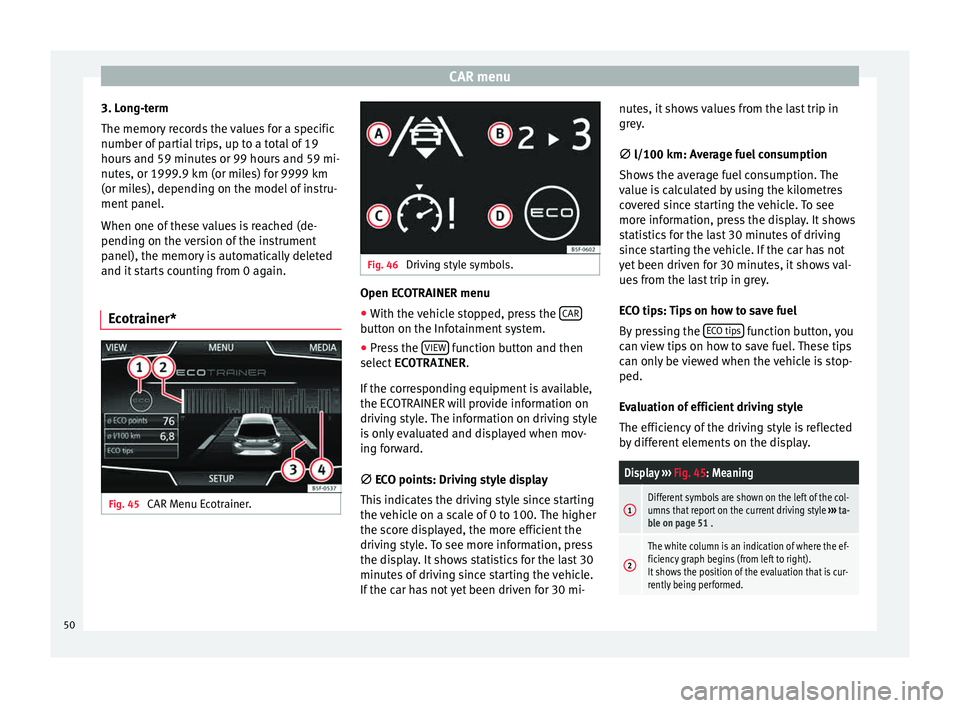
Convenience consumers. By pressing the
C
on
s
umers button, informa-
tion on the s t
at
us of the vehicle's main con-
sumption devices is obtained. It is shown via
a consumption indicator bar in l/h (gal/h) 1)
.
3.
4.
5.
Driving data Fig. 44
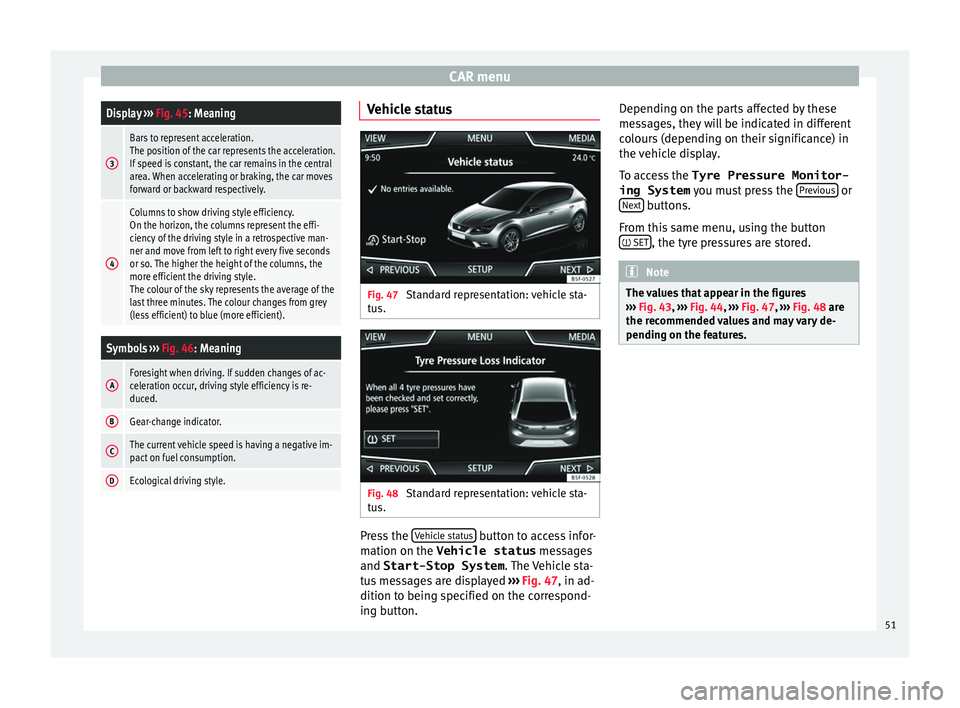
Driving data. The onboard computer is equipped with 3
memorie
s
th
at work automatically. In these
memories you can see the distance travelled,
average speed, time passed, average con-
sumption and autonomy of the vehicle.
1. Since start
Indicates and stores the values of the journey
completed and the consumption from when
the ignition is switched on to when it is
switched off.
2. Since refuel
Display and storage of the values for the jour-
ney and the consumption. By refuelling, the
memory will be erased automatically. »1)
In the case of Gas (CNG) vehicles, the units are in
kg/h. 49
Page 52 of 88
CAR menu
3. Long-term
The memor y
r
ecords the values for a specific
number of partial trips, up to a total of 19
hours and 59 minutes or 99 hours and 59 mi-
nutes, or 1999.9 km (or miles) for 9999 km
(or miles), depending on the model of instru-
ment panel.
When one of these values is reached (de-
pending on the version of the instrument
panel), the memory is automatically deleted
and it starts counting from 0 again.
Ecotrainer* Fig. 45
CAR Menu Ecotrainer. Fig. 46
Driving style symbols. Open ECOTRAINER menu
● With the vehicle stopped, press the CAR button on the Infotainment system.
● Press the VIEW function button and then
sel ect
ECOTRAINER .
If
the corresponding equipment is available,
the ECOTRAINER will provide information on
driving style. The information on driving style
is only evaluated and displayed when mov-
ing forward.
∅ ECO points: Driving style display
This indicates the driving style since starting
the vehicle on a scale of 0 to 100. The higher
the score displayed, the more efficient the
driving style. To see more information, press
the display. It shows statistics for the last 30
minutes of driving since starting the vehicle.
If the car has not yet been driven for 30 mi- nutes, it shows values from the last trip in
grey.
∅
l/100 km: Average fuel consumption
Shows the average fuel consumption. The
value is calculated by using the kilometres
covered since starting the vehicle. To see
more information, press the display. It shows
statistics for the last 30 minutes of driving
since starting the vehicle. If the car has not
yet been driven for 30 minutes, it shows val-
ues from the last trip in grey.
ECO tips: Tips on how to save fuel
By pressing the ECO tips function button, you
c an
v
iew tips on how to save fuel. These tips
can only be viewed when the vehicle is stop-
ped.
Evaluation of efficient driving style
The efficiency of the driving style is reflected
by different elements on the display.
Display ››› Fig. 45: Meaning
1Different symbols are shown on the left of the col-
umns that report on the current driving style ››› ta-
ble on page 51 .
2
The white column is an indication of where the ef-
ficiency graph begins (from left to right).
It shows the position of the evaluation that is cur-
rently being performed. 50
Page 53 of 88
CAR menuDisplay
››› Fig. 45: Meaning
3
Bars to represent acceleration.
The position of the car represents the acceleration.
If speed is constant, the car remains in the central
area. When accelerating or braking, the car moves
forward or backward respectively.
4
Columns to show driving style efficiency.
On the horizon, the columns represent the effi-
ciency of the driving style in a retrospective man-
ner and move from left to right every five seconds
or so. The higher the height of the columns, the
more efficient the driving style.
The colour of the sky represents the average of the
last three minutes. The colour changes from grey
(less efficient) to blue (more efficient).
Symbols ››› Fig. 46: Meaning
AForesight when driving. If sudden changes of ac-
celeration occur, driving style efficiency is re-
duced.
BGear-change indicator.
CThe current vehicle speed is having a negative im-
pact on fuel consumption.
DEcological driving style. Vehicle status
Fig. 47
Standard representation: vehicle sta-
t u
s. Fig. 48
Standard representation: vehicle sta-
t u s. Press the
V
ehic
l
e status button to access infor-
m ation on the Vehicle status
me
s
sages
and Start-Stop System . The Vehicle sta-
tus messages are displayed ››› Fig. 47, in ad-
dition to being specified on the correspond-
ing button. Depending on the parts affected by these
mess
ages, they will be indicated in different
colours (depending on their significance) in
the vehicle display.
To access the Tyre Pressure Monitor-
ing System you must press the Previous or
Ne xt buttons.
Fr om thi
s
same menu, using the button
SET , the tyre pressures are stored.
Note
The values that appear in the figures
›› ›
Fig. 43, ››› Fig. 44, ››› Fig. 47, ››› Fig. 48 are
the recommended values and may vary de-
pending on the features. 51
Page 56 of 88
Telephone management system (PHONE)
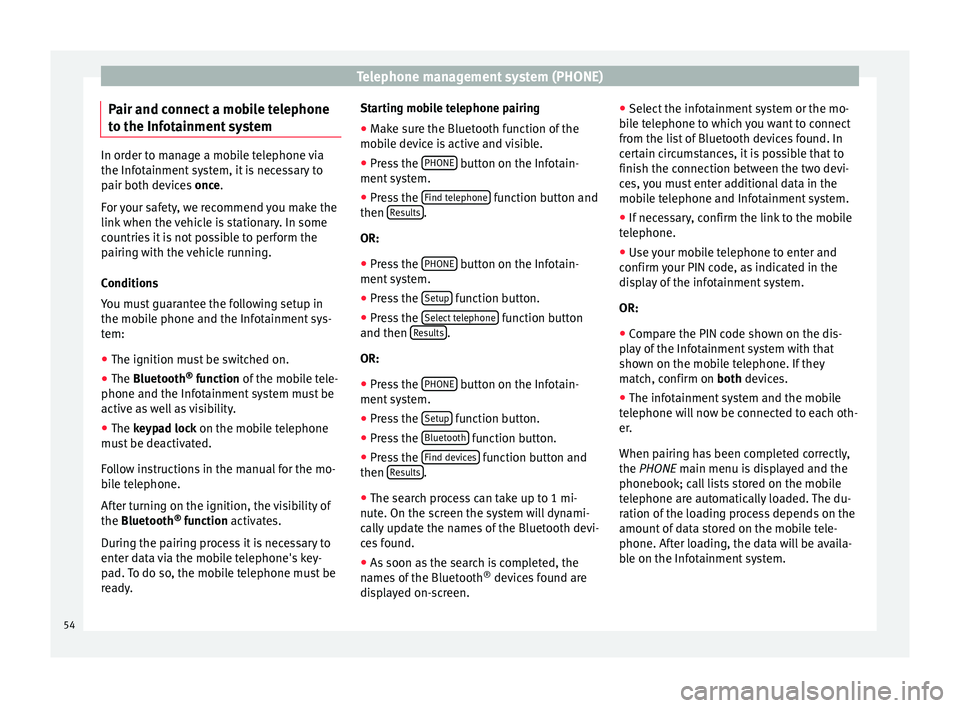
Pair and connect a mobile telephone
t o the Inf
ot
ainment systemIn order to manage a mobile telephone via
the Infot
ainment
system, it is necessary to
pair both devices once.
For your safety, we recommend you make the
link when the vehicle is stationary. In some
countries it is not possible to perform the
pairing with the vehicle running.
Conditions
You must guarantee the following setup in
the mobile phone and the Infotainment sys-
tem:
● The ignition must be switched on.
● The Bluetooth ®
fu
nction of the mobile tele-
phone and the Infotainment system must be
active as well as visibility.
● The keypad lock on the mobile telephone
mus
t be deactivated.
Follow instructions in the manual for the mo-
bile telephone.
After turning on the ignition, the visibility of
the Bluetooth ®
function activates.
During the pairing process it is necessary to
enter data via the mobile telephone's key-
pad. To do so, the mobile telephone must be
ready. Starting mobile telephone pairing
● Make sure the Bluetooth function of the
mobi
le device is active and visible.
● Press the PHONE button on the Infotain-
ment sy
s
tem.
● Press the Find telephone function button and
then R
e
s
ults .
OR:
● Press the PHONE button on the Infotain-
ment sy
s
tem.
● Press the Setup function button.
● Press the Sel
ect
t
elephone function button
and then R
e
s
ults .
OR:
● Press the PHONE button on the Infotain-
ment sy
s
tem.
● Press the Setup function button.
● Press the Bluet
ooth function button.
● Press the Find dev
ic
e
s function button and
then R
e
s
ults .
● The search process can take up to 1 mi-
nut e. On the s
c
reen the system will dynami-
cally update the names of the Bluetooth devi-
ces found.
● As soon as the search is completed, the
names
of the Bluetooth ®
devices found are
displayed on-screen. ●
Select the inf
otainment system or the mo-
bile telephone to which you want to connect
from the list of Bluetooth devices found. In
certain circumstances, it is possible that to
finish the connection between the two devi-
ces, you must enter additional data in the
mobile telephone and Infotainment system.
● If necessary, confirm the link to the mobile
telephone.
● U
se your mobile telephone to enter and
confirm y
our PIN code, as indicated in the
display of the infotainment system.
OR:
● Compare the PIN code shown on the dis-
pla
y of the Infotainment system with that
shown on the mobile telephone. If they
match, confirm on both devices.
● The infotainment system and the mobile
telephone w
ill now be connected to each oth-
er.
When pairing has been completed correctly,
the PHONE main menu is displayed and the
phonebook; call lists stored on the mobile
telephone are automatically loaded. The du-
ration of the loading process depends on the
amount of data stored on the mobile tele-
phone. After loading, the data will be availa-
ble on the Infotainment system.
54
Page 58 of 88
Telephone management system (PHONE)
the telephone management system. This in-
f orm
ation w
ill be available every time the mo-
bile telephone is connected to the telephone
management system.
After the first connection, it will take a few
minutes for the data from the phonebook of
the linked mobile phone to be available in
the Infotainment system. The next time that
the mobile telephone is connected (e.g. on
the next journey) the phonebook is updated
automatically.
If any entries in the mobile phonebook have
been modified while connected, a manual
update of the phonebook data can be initi-
ated from the User profile settings
menu ››› page 61.
Telephone management can store a maxi-
mum of 4 user profiles for mobile tele-
phones. If you wish to link/connect another
mobile phone, the oldest user profile will au-
tomatically be replaced. If you do not want it
to do this, you must previously delete one of
the user profiles. To delete a profile manual-
ly:
● Menu Setup >
U
ser pr
ofi
le and press
D el
et
e other user profiles .
T el
ephone m
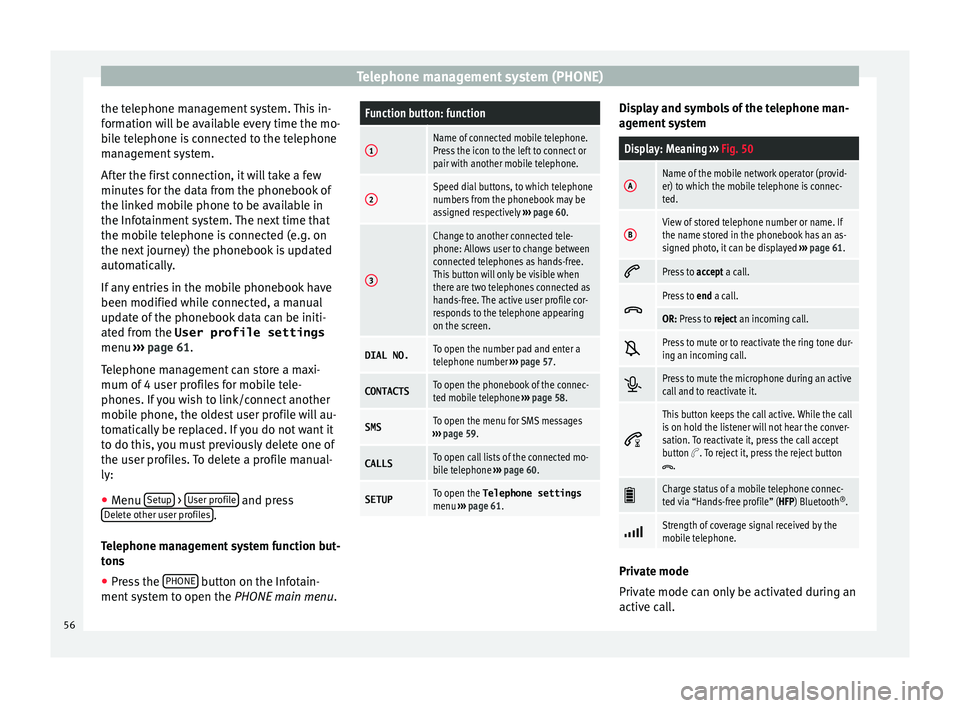
anagement system function but-
tons
● Press the PHONE button on the Infotain-
ment sy
s
tem to open the PHONE main menu.
Function button: function
1Name of connected mobile telephone.
Press the icon to the left to connect or
pair with another mobile telephone.
2Speed dial buttons, to which telephone
numbers from the phonebook may be
assigned respectively ››› page 60.
3
Change to another connected tele-
phone: Allows user to change between
connected telephones as hands-free.
This button will only be visible when
there are two telephones connected as
hands-free. The active user profile cor-
responds to the telephone appearing
on the screen.
DIAL NO.To open the number pad and enter a
telephone number ››› page 57.
CONTACTSTo open the phonebook of the connec-
ted mobile telephone ››› page 58.
SMSTo open the menu for SMS messages
››› page 59.
CALLSTo open call lists of the connected mo-
bile telephone ››› page 60.
SETUPTo open the Telephone settings
menu ››› page 61. Display and symbols of the telephone man-
ag
ement sy
stem
Display: Meaning ››› Fig. 50
AName of the mobile network operator (provid-
er) to which the mobile telephone is connec-
ted.
BView of stored telephone number or name. If
the name stored in the phonebook has an as-
signed photo, it can be displayed ››› page 61.
Press to
accept a call.
Press to
end a call.
OR: Press to reject an incoming call.
Press to mute or to reactivate the ring tone dur-
ing an incoming call.
Press to mute the microphone during an active
call and to reactivate it.
This button keeps the call active. While the call
is on hold the listener will not hear the conver-
sation. To reactivate it, press the call accept
button
. To reject it, press the reject button.
Charge status of a mobile telephone connec-
ted via “Hands-free profile” (HFP) Bluetooth
®
.
Strength of coverage signal received by the
mobile telephone.
Private mode
Priv
at
e mode c
an only be activated during an
active call.
56