ECO mode Seat Leon SC 2015 NAVI SYSTEM PLUS
[x] Cancel search | Manufacturer: SEAT, Model Year: 2015, Model line: Leon SC, Model: Seat Leon SC 2015Pages: 96, PDF Size: 2.48 MB
Page 30 of 96
Audio and Media Mode
Messages and symbols on the MEDIA main
menuDisplay: Meaning
A
Displays information about the artist name,
album name and song title (CD text , ID3
tag on compressed audio files).
Audio CD: displays track information if availa-
ble via Gracenote ®a)
. If no data is available, it
only displays Track and the number corre-
sponding to the position it occupies on the
data storage device.
B
Viewing the album cover: If there are various
covers within the same folder/album, the sys-
tem only displays one of them.
It prioritizes displaying the covers in the fol-
lowing manner:
1. Cover embedded in the file(s).
2. Image in file folder.
3. Image provided by the Gracenote ®a)
data-
base.
4. Default icon for the connected device.
If playing a video file, by pressing the icon
(cover) it can be played on full screen.
C
The playing time so far and time remaining in
minutes and seconds. In the case of audio
files with variable bit rates (VBR) the remain-
ing time may vary.
RDS
Off b)The RDS radio data service is deactivated. The
RDS can be activated in the
FM setup menu
››› page 22.
TP b)The TP function is active and can be tuned in
››› page 21.
Display: Meaning
b)There is no traffic news station available
››› page 21.
b)DAB not available
››› page 17.
a)
Gracenote ®
is a database available on the Infotainment sys-
tem hard drive that contains information on the tracks about dif-
ferent artists and albums. In order for the user to benefit from
the functions offered by Gracenote ®
, it is necessary for the
tracks to contain the artist and/or album data.
b) Depends on the market and unit in question. Note
● When the media sour c
e is inserted, playing
will not start automatically; it is necessary for
the user to select the source. Nor will the me-
dia source change when it is ejected.
● In order to see the different covers inside of
the same al
bum/folder, make sure that the
tracks contain different information about the
Artist or Album in its metadata. If not, you
will see the same cover for all of tracks con-
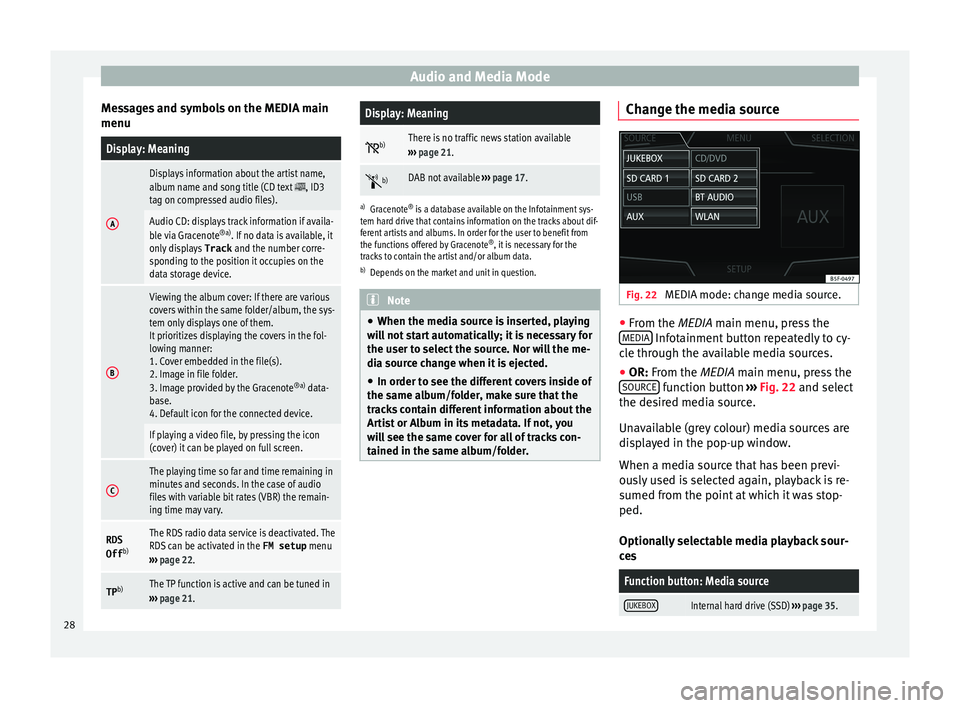
tained in the same album/folder. Change the media source
Fig. 22
MEDIA mode: change media source. ●
From the MEDIA m ain menu, pr
e
ss the
MEDIA Infotainment button repeatedly to cy-
c l
e thr
ough the available media sources.
● OR: From the MEDIA main menu, press the
SOURCE function button
››
›
Fig. 22 and select
the desired media source.
Unavailable (grey colour) media sources are
displayed in the pop-up window.
When a media source that has been previ-
ously used is selected again, playback is re-
sumed from the point at which it was stop-
ped.
Optionally selectable media playback sour-
ces
Function button: Media source
JUKEBOXInternal hard drive (SSD) ››› page 35. 28
Page 31 of 96
Audio and Media ModeFunction button: Media source
CD/DVDInternal CD/DVD drive
››› page 31.
SD CARD 1SD memory card ››› page 32.SD CARD 2
USBExternal data storage device connected
to the USB port ››› page 32.
AUXExternal audio source connected to AUX
IN ››› page 34 multimedia socket.
BT AUDIOBluetooth ®
audio ››› page 34.
WLANExternal audio source connected by
WLAN ››› page 37 Note
The Media source can be changed in the Tr ac
k
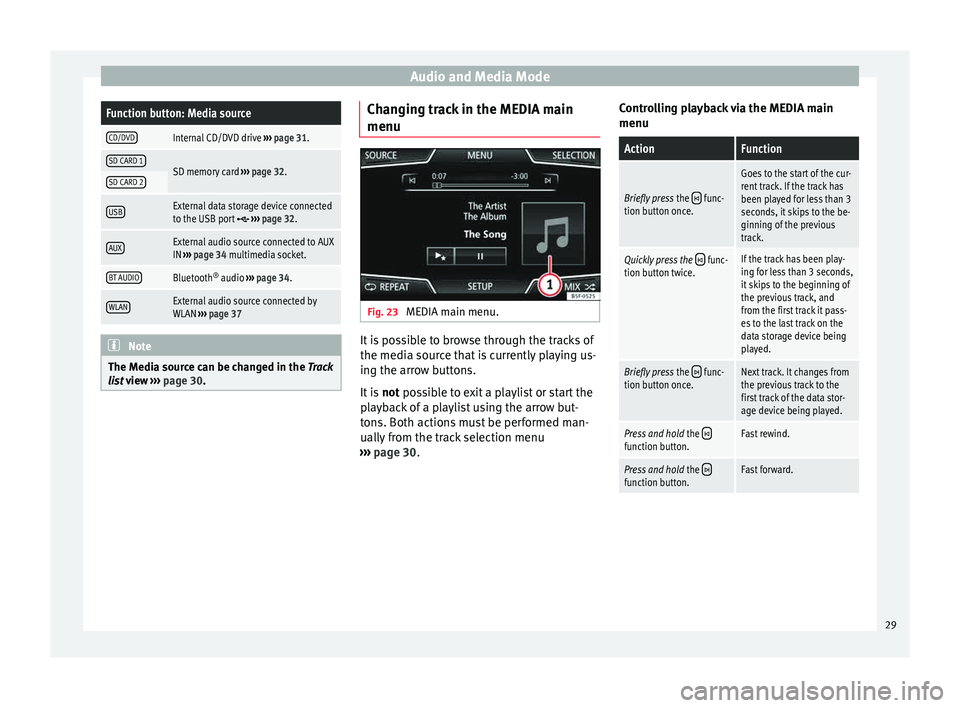
list view ››› page 30. Changing track in the MEDIA main
menu
Fig. 23
MEDIA main menu. It is possible to browse through the tracks of
the medi
a sour
c
e that is currently playing us-
ing the arrow buttons.
It is not possible to exit a playlist or start the
playback of a playlist using the arrow but-
tons. Both actions must be performed man-
ually from the track selection menu
››› page 30. Controlling playback via the MEDIA main
menu
ActionFunction
Briefly press
the func-
tion button once.
Goes to the start of the cur-
rent track. If the track has
been played for less than 3
seconds, it skips to the be-
ginning of the previous
track.
Quickly press the func-
tion button twice.If the track has been play-
ing for less than 3 seconds,
it skips to the beginning of
the previous track, and
from the first track it pass-
es to the last track on the
data storage device being
played.
Briefly press the func-
tion button once.Next track. It changes from
the previous track to the
first track of the data stor-
age device being played.
Press and hold the function button.Fast rewind.
Press and hold the function button.Fast forward. 29
Page 32 of 96
Audio and Media Mode
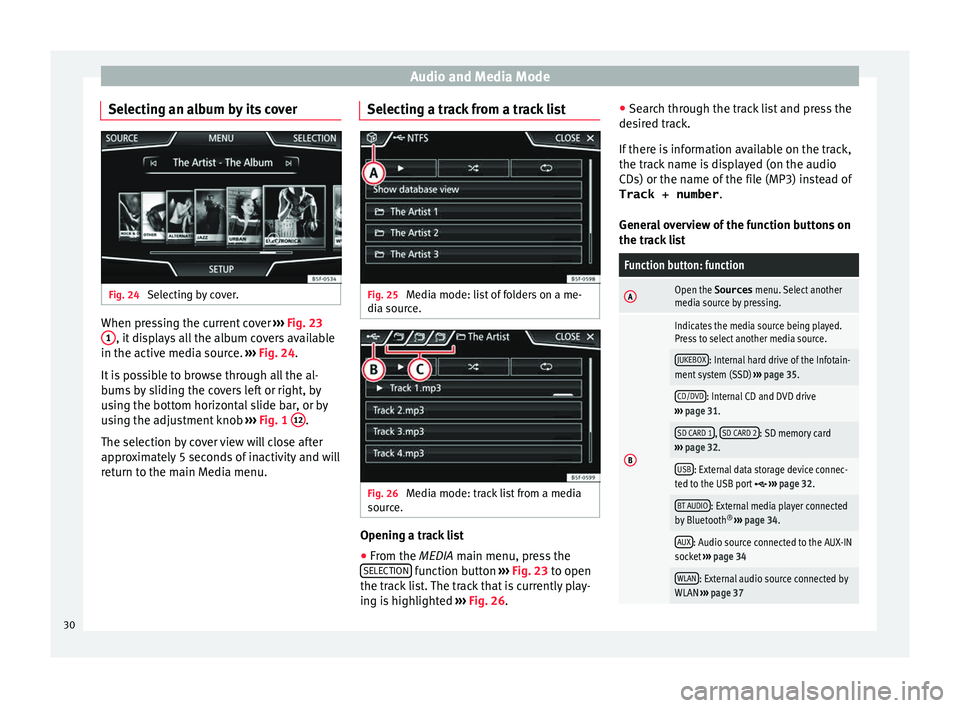
Selecting an album by its cover Fig. 24
Selecting by cover. When pressing the current cover
››
› Fig. 23
1 , it displays all the album covers available
in the activ e medi
a sour
ce. ››› Fig. 24.
It is possible to browse through all the al-
bums by sliding the covers left or right, by
using the bottom horizontal slide bar, or by
using the adjustment knob ››› Fig. 1 12 .
The sel ection b
y
cover view will close after
approximately 5 seconds of inactivity and will
return to the main Media menu. Selecting a track from a track list
Fig. 25
Media mode: list of folders on a me-
di a sour
c
e. Fig. 26
Media mode: track list from a media
sour ce. Opening a track list
● From the MEDIA m ain menu, pr
e
ss the
SELECTION function button
›
››
Fig. 23 to open
the track list. The track that is currently play-
ing is highlighted ››› Fig. 26. ●
Searc
h through the track list and press the
desired track.
If there is information available on the track,
the track name is displayed (on the audio
CDs) or the name of the file (MP3) instead of Track + number .
General overview of the function buttons on
the track list
Function button: function
AOpen the Sources menu. Select another
media source by pressing.
B
Indicates the media source being played.
Press to select another media source.
JUKEBOX: Internal hard drive of the Infotain-
ment system (SSD) ››› page 35.
CD/DVD: Internal CD and DVD drive
››› page 31.
SD CARD 1, SD CARD 2: SD memory card
››› page 32.
USB: External data storage device connec-
ted to the USB port ››› page 32.
BT AUDIO: External media player connected
by Bluetooth ®
››› page 34.
AUX: Audio source connected to the AUX-IN
socket ››› page 34
WLAN: External audio source connected by
WLAN ››› page 37 30
Page 34 of 96
Audio and Media Mode
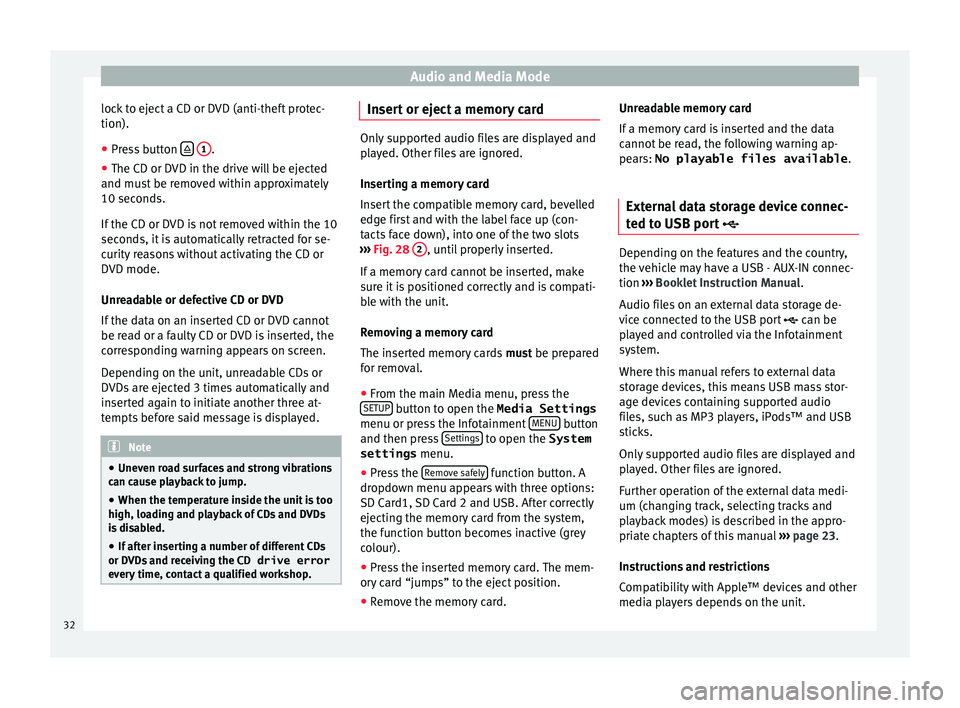
lock to eject a CD or DVD (anti-theft protec-
tion).
● Press button
1 .
● The CD or DVD in the drive will be ejected
and mu s
t
be removed within approximately
10 seconds.
If the CD or DVD is not removed within the 10
seconds, it is automatically retracted for se-
curity reasons without activating the CD or
DVD mode.
Unreadable or defective CD or DVD
If the data on an inserted CD or DVD cannot
be read or a faulty CD or DVD is inserted, the
corresponding warning appears on screen.
Depending on the unit, unreadable CDs or
DVDs are ejected 3 times automatically and
inserted again to initiate another three at-
tempts before said message is displayed. Note
● Uneven r o
ad surfaces and strong vibrations
can cause playback to jump.
● When the temperature inside the unit is too
high, loadin
g and playback of CDs and DVDs
is disabled.
● If after inserting a number of different CDs
or DVDs
and receiving the CD drive error
every time, contact a qualified workshop. Insert or eject a memory card
Only supported audio files are displayed and
pl
a
yed. Other files are ignored.
Inserting a memory card
Insert the compatible memory card, bevelled
edge first and with the label face up (con-
tacts face down), into one of the two slots
››› Fig. 28 2 , until properly inserted.
If a memor y
card cannot be inserted, make
sure it is positioned correctly and is compati-
ble with the unit.
Removing a memory card
The inserted memory cards must be prepared
for removal.
● From the main Media menu, press the
SETUP button to open the Media Settings
menu or pr e
s
s the Infotainment MENU button
and then pr e
s
s Settings to open the System
settings menu.
● Press the R
emo
v
e safely function button. A
dr opdo
wn menu ap
pears with three options:
SD Card1, SD Card 2 and USB. After correctly
ejecting the memory card from the system,
the function button becomes inactive (grey
colour).
● Press the inserted memory card. The mem-
ory c
ard “jumps” to the eject position.
● Remove the memory card. Unreadable memory card
If a memor
y
card is inserted and the data
cannot be read, the following warning ap-
pears: No playable files available .
External data storage device connec-
ted to USB por
t Depending on the features and the country,
the v
ehic
le may have a USB - AUX-IN connec-
tion ››› Booklet Instruction Manual.
Audio files on an external data storage de-
vice connected to the USB port can be
played and controlled via the Infotainment
system.
Where this manual refers to external data
storage devices, this means USB mass stor-
age devices containing supported audio
files, such as MP3 players, iPods™ and USB
sticks.
Only supported audio files are displayed and
played. Other files are ignored.
Further operation of the external data medi-
um (changing track, selecting tracks and
playback modes) is described in the appro-
priate chapters of this manual ›››
page 23.
Instructions and restrictions
Compatibility with Apple™ devices and other
media players depends on the unit.
32
Page 35 of 96
Audio and Media Mode
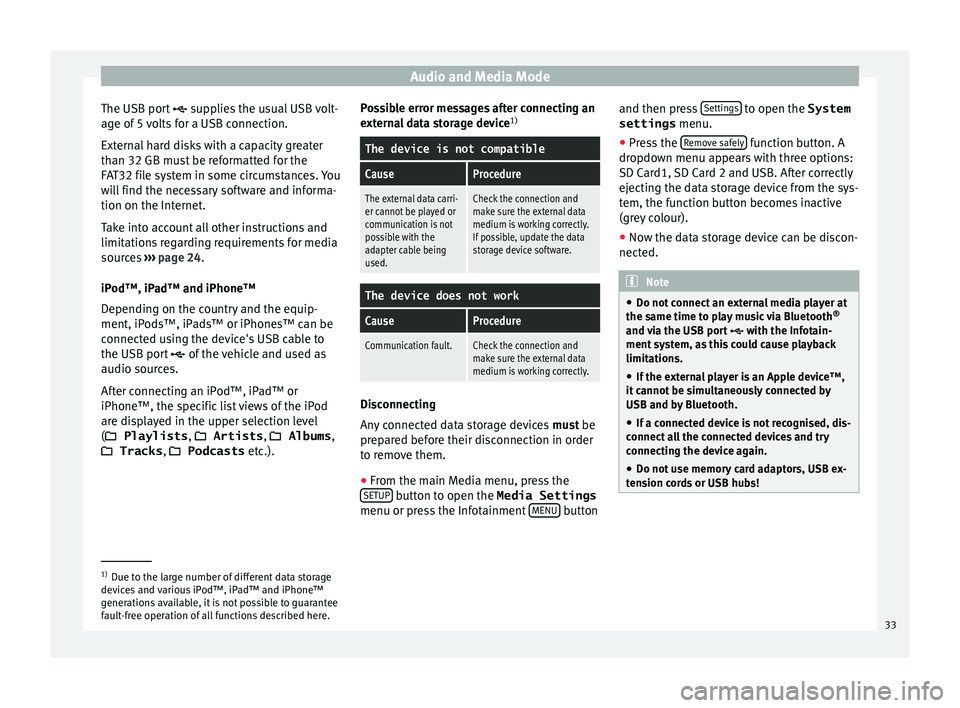
The USB port sup
p lies the usual USB volt-
age of 5 volts for a USB connection.
External hard disks with a capacity greater
than 32 GB must be reformatted for the
FAT32 file system in some circumstances. You
will find the necessary software and informa-
tion on the Internet.
Take into account all other instructions and
limitations regarding requirements for media
sources ››› page 24.
iPod™, iPad™ and iPhone™
Depending on the country and the equip-
ment, iPods™, iPads™ or iPhones™ can be
connected using the device's USB cable to
the USB port of the vehicle and used as
audio sources.
After connecting an iPod™, iPad™ or
iPhone™, the specific list views of the iPod
are displayed in the upper selection level
( Playlists , Artists, Albums,
Tracks , Podcasts etc.). Possible error messages after connecting an
extern
al data storage device 1)
The device is not compatible
CauseProcedure
The external data carri-
er cannot be played or
communication is not
possible with the
adapter cable being
used.Check the connection and
make sure the external data
medium is working correctly.
If possible, update the data
storage device software.
The device does not work
CauseProcedure
Communication fault.Check the connection and
make sure the external data
medium is working correctly. Disconnecting
An
y
c
onnected data storage devices must be
prepared before their disconnection in order
to remove them.
● From the main Media menu, press the
SETUP button to open the Media Settings
menu or pr e
s
s the Infotainment MENU buttonand then press
Settin
g
s to open the System
settings menu.
● Press the R
emo
v
e safely function button. A
dr opdo
wn menu ap
pears with three options:
SD Card1, SD Card 2 and USB. After correctly
ejecting the data storage device from the sys-
tem, the function button becomes inactive
(grey colour).
● Now the data storage device can be discon-
nected. Note
● Do not c onnect
an external media player at
the same time to play music via Bluetooth ®
and via the USB port with the Infotain-
ment system, as this could cause playback
limitations.
● If the external player is an Apple device™,
it cannot
be simultaneously connected by
USB and by Bluetooth.
● If a connected device is not recognised, dis-
connect a
ll the connected devices and try
connecting the device again.
● Do not use memory card adaptors, USB ex-
tens
ion cords or USB hubs! 1)
Due to the large number of different data storage
devic e
s and various iPod™, iPad™ and iPhone™
generations available, it is not possible to guarantee
fault-free operation of all functions described here. 33
Page 38 of 96
Audio and Media Mode
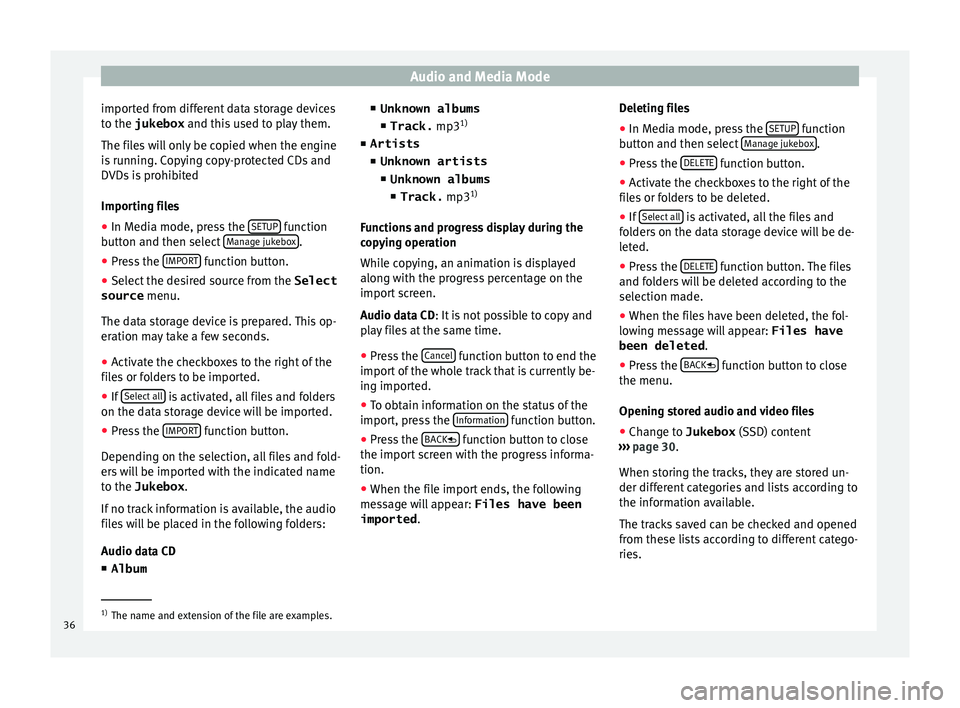
imported from different data storage devices
t o the
jukebox and thi
s used to play them.
The files will only be copied when the engine
is running. Copying copy-protected CDs and
DVDs is prohibited
Importing files
● In Media mode, press the SETUP function
b utt
on and then sel
ect Manage jukebox .
● Press the IMPOR
T function button.
● Select the desired source from the Select
source menu.
The d at
a s
torage device is prepared. This op-
eration may take a few seconds.
● Activate the checkboxes to the right of the
file
s or folders to be imported.
● If Select al
l is activated, all files and folders
on the d at
a s
torage device will be imported.
● Press the IMPORT function button.
D ependin
g on the sel
ection, all files and fold-
ers will be imported with the indicated name
to the Jukebox .
If no track information is available, the audio
files will be placed in the following folders:
Audio data CD ■ Album ■
Unknown albums
■ Track. mp31)
■ Artists
■ Unknown artists
■Unknown albums
■ Track. mp31)
Function
s and progress display during the
copying operation
While copying, an animation is displayed
along with the progress percentage on the
import screen.
Audio data CD: It is not possible to copy and
play files at the same time.
● Press the Cancel function button to end the
impor t
of
the whole track that is currently be-
ing imported.
● To obtain information on the status of the
import, pre
ss the Information function button.
● Press the B
A
CK
function button to close
the impor t
s
creen with the progress informa-
tion.
● When the file import ends, the following
mess
age will appear: Files have been
imported . Deleting files
● In Media mode, press the SETUP function
b utt
on and then sel
ect Manage jukebox .
● Press the DELETE function button.
● Activate the checkboxes to the right of the
fi l
e
s or folders to be deleted.
● If Select al
l is activated, all the files and
f o
l
ders on the data storage device will be de-
leted.
● Press the DELETE function button. The files
and f o
l
ders will be deleted according to the
selection made.
● When the files have been deleted, the fol-
lowin
g message will appear: Files have
been deleted .
● Press the BACK
function button to close
the menu.
Openin g s
t
ored audio and video files
● Change to Jukebox (SSD) cont
ent
››› page 30.
When storing the tracks, they are stored un-
der different categories and lists according to
the information available.
The tracks saved can be checked and opened
from these lists according to different catego-
ries. 1)
The name and extension of the file are examples.
36
Page 51 of 96
NavigationFunction button: function
Position: current vehicle position in coordinates and GPS
status (satellite reception).
a) This function button is only displayed with route guidance ac-
tivated.
Press the function button to deactivate the
sp lit
screen.
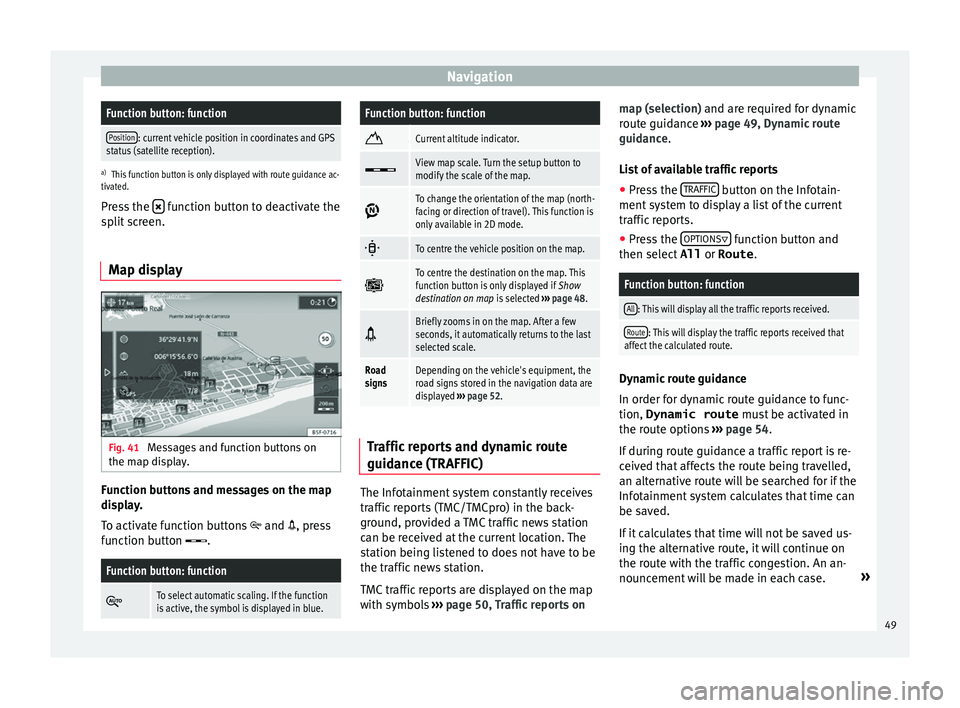
Map display Fig. 41
Messages and function buttons on
the m ap di
s
play. Function buttons and messages on the map
di
s
p
lay.
To activate function buttons and , press
function button .
Function button: function
To select automatic scaling. If the function
is active, the symbol is displayed in blue.
Function button: function
Current altitude indicator.
View map scale. Turn the setup button to
modify the scale of the map.
To change the orientation of the map (north-
facing or direction of travel). This function is
only available in 2D mode.
To centre the vehicle position on the map.
To centre the destination on the map. This
function button is only displayed if
Show
destination on map is selected ››› page 48.
Briefly zooms in on the map. After a few
seconds, it automatically returns to the last
selected scale.
Road
signsDepending on the vehicle's equipment, the
road signs stored in the navigation data are
displayed
››› page 52. Traffic reports and dynamic route
guid
anc
e (TRAFFIC) The Infotainment system constantly receives
tr
affic
r
eports (TMC/TMCpro) in the back-
ground, provided a TMC traffic news station
can be received at the current location. The
station being listened to does not have to be
the traffic news station.
TMC traffic reports are displayed on the map
with symbols ››› page 50, Traffic reports on map (selection) and are requir
ed for dynamic
route guidance ››› page 49, Dynamic route
guidance.
List of available traffic reports
● Press the TRAFFIC button on the Infotain-
ment sy
s
tem to display a list of the current
traffic reports.
● Press the OPTIONS function button and
then sel ect
All or
Route .
Function button: function
All: This will display all the traffic reports received.
Route: This will display the traffic reports received that
affect the calculated route. Dynamic route guidance
In or
der f
or dy
namic route guidance to func-
tion, Dynamic route must be activated in
the route options ›››
page 54.
If during route guidance a traffic report is re-
ceived that affects the route being travelled,
an alternative route will be searched for if the
Infotainment system calculates that time can
be saved.
If it calculates that time will not be saved us-
ing the alternative route, it will continue on
the route with the traffic congestion. An an-
nouncement will be made in each case. »
49
Page 54 of 96
Navigation
Road sign indicators The road sign indicators must be active in the
Navigation Setup menu ›››
page 54.
If road signs for the road being travelled are
stored in the navigation data, the system can
show them on the map display (e.g. a speed
restriction).
Please bear in mind how recent the naviga-
tion data is and the limitations of the system
››› page 42 !
Traffic sign recognition Some vehicles are also equipped with a cam-
er
a f
or tr
affic sign recognition. If traffic sign
recognition is installed in the vehicle and ac-
tivated, the recognised traffic signs and addi-
tional information are displayed in the map
view.
Read and take note of the information and in-
dications provided by the traffic sign recogni-
tion system in the vehicle ›››
Booklet Instruc-
tion Manual.
Route guidance in demo mode If demo mode is activated in the
Naviga-
tion Settings menu ››
›
page 54, an ad-
ditional pop-up window opens when you
start route guidance. ●
Pres
sing the Demo mode function button
s t
ar
ts a “virtual route guidance” to the desti-
nation you have entered.
● If you press the Normal function button, a
“r e
al
route guidance” starts.
The sequence of events and the operations in
virtual route guidance are similar to those in
real route guidance.
Virtual route guidance is repeated when you
reach the fictitious destination and always
starts again from the starting point if not
aborted beforehand.
If the starting point for demo mode has been
defined manually in the Navigation Set-
tings menu, virtual route guidance will start
from the position set.
A manually entered starting point is overwrit-
ten with the current vehicle location if the ve-
hicle moves off. Note
Disable demo mode after use, otherwise you
wi l
l be prompted to choose between virtual
and normal route guidance each time you
start route guidance. Navigation in Offroad mode*
Intr oduction Offroad* navigation is a function for offroad
drivin
g th
at provides directions in “non-digi-
tised areas” at low speeds.
Non-digitised areas are areas about which
the system does not have information for the
streets or terrain. It does not detect streets,
buildings or natural limits such as mountains
or rivers, although they may be shown on the
map.
Offroad* navigation is not suitable for driving
on conventional roads as it does not detect
one-way streets, motorway entries or similar.
52
Page 57 of 96
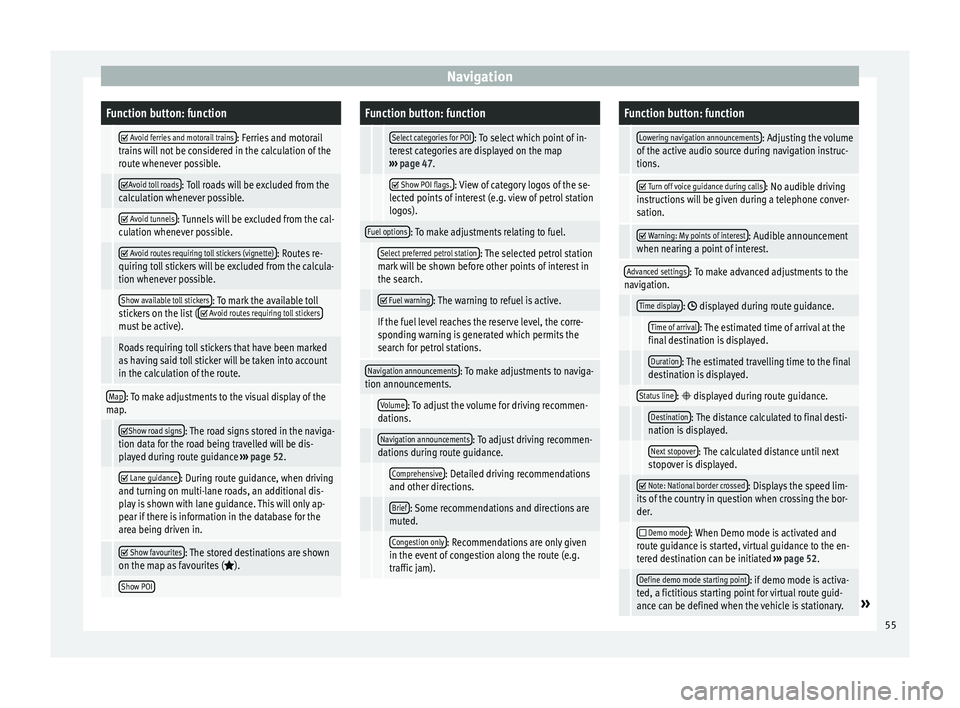
NavigationFunction button: function
Avoid ferries and motorail trains: Ferries and motorail
trains will not be considered in the calculation of the
route whenever possible.
Avoid toll roads: Toll roads will be excluded from the
calculation whenever possible.
Avoid tunnels: Tunnels will be excluded from the cal-
culation whenever possible.
Avoid routes requiring toll stickers (vignette): Routes re-
quiring toll stickers will be excluded from the calcula-
tion whenever possible.
Show available toll stickers: To mark the available toll
stickers on the list ( Avoid routes requiring toll stickersmust be active).
Roads requiring toll stickers that have been marked
as having said toll sticker will be taken into account
in the calculation of the route.
Map: To make adjustments to the visual display of the
map.
Show road signs: The road signs stored in the naviga-
tion data for the road being travelled will be dis-
played during route guidance ››› page 52.
Lane guidance: During route guidance, when driving
and turning on multi-lane roads, an additional dis-
play is shown with lane guidance. This will only ap-
pear if there is information in the database for the
area being driven in.
Show favourites: The stored destinations are shown
on the map as favourites ().
Show POI
Function button: function
Select categories for POI: To select which point of in-
terest categories are displayed on the map
››› page 47.
Show POI flags.: View of category logos of the se-
lected points of interest (e.g. view of petrol station
logos).
Fuel options: To make adjustments relating to fuel.
Select preferred petrol station: The selected petrol station
mark will be shown before other points of interest in
the search.
Fuel warning: The warning to refuel is active.
If the fuel level reaches the reserve level, the corre-
sponding warning is generated which permits the
search for petrol stations.
Navigation announcements: To make adjustments to naviga-
tion announcements.
Volume: To adjust the volume for driving recommen-
dations.
Navigation announcements: To adjust driving recommen-
dations during route guidance.
Comprehensive: Detailed driving recommendations
and other directions.
Brief: Some recommendations and directions are
muted.
Congestion only: Recommendations are only given
in the event of congestion along the route (e.g.
traffic jam).
Function button: function
Lowering navigation announcements: Adjusting the volume
of the active audio source during navigation instruc-
tions.
Turn off voice guidance during calls: No audible driving
instructions will be given during a telephone conver-
sation.
Warning: My points of interest: Audible announcement
when nearing a point of interest.
Advanced settings: To make advanced adjustments to the
navigation.
Time display: displayed during route guidance.
Time of arrival: The estimated time of arrival at the
final destination is displayed.
Duration: The estimated travelling time to the final
destination is displayed.
Status line: displayed during route guidance.
Destination: The distance calculated to final desti-
nation is displayed.
Next stopover: The calculated distance until next
stopover is displayed.
Note: National border crossed: Displays the speed lim-
its of the country in question when crossing the bor-
der.
Demo mode: When Demo mode is activated and
route guidance is started, virtual guidance to the en-
tered destination can be initiated ››› page 52.
Define demo mode starting point: if demo mode is activa-
ted, a fictitious starting point for virtual route guid-
ance can be defined when the vehicle is stationary.
» 55
Page 61 of 96
CAR menu
3. Long-term
The memor y
r
ecords the values for a specific
number of partial trips, up to a total of 19
hours and 59 minutes or 99 hours and 59 mi-
nutes, or 1999.9 km (or miles) for 9999 km
(or miles), depending on the model of instru-
ment panel.
When one of these values is reached (de-
pending on the version of the instrument
panel), the memory is automatically deleted
and it starts counting from 0 again.
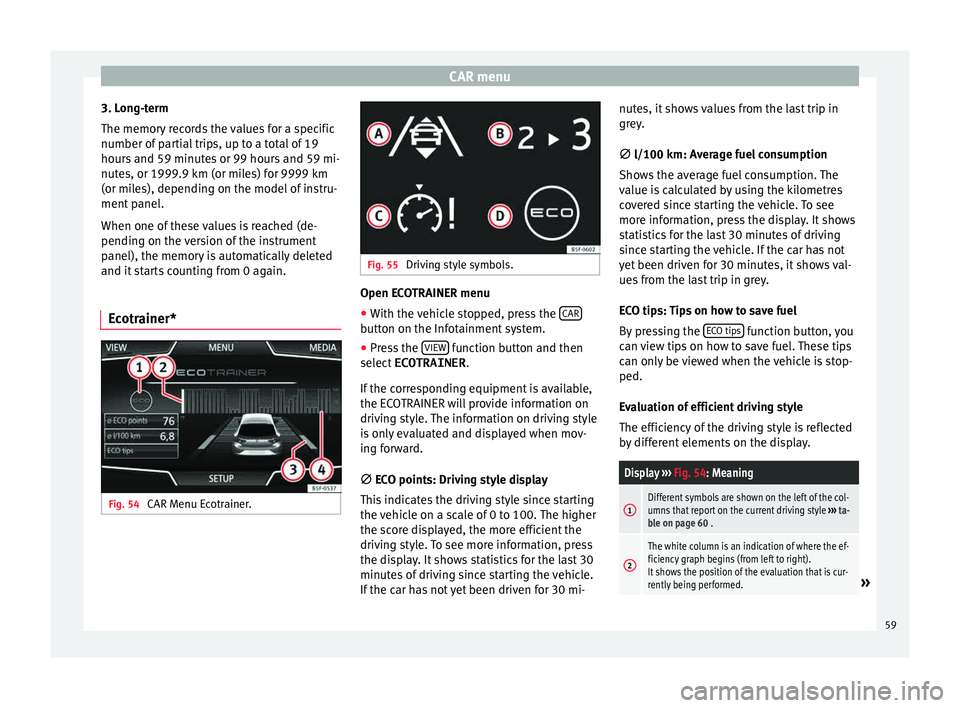
Ecotrainer* Fig. 54
CAR Menu Ecotrainer. Fig. 55
Driving style symbols. Open ECOTRAINER menu
● With the vehicle stopped, press the CAR button on the Infotainment system.
● Press the VIEW function button and then
sel ect
ECOTRAINER .
If
the corresponding equipment is available,
the ECOTRAINER will provide information on
driving style. The information on driving style
is only evaluated and displayed when mov-
ing forward.
∅ ECO points: Driving style display
This indicates the driving style since starting
the vehicle on a scale of 0 to 100. The higher
the score displayed, the more efficient the
driving style. To see more information, press
the display. It shows statistics for the last 30
minutes of driving since starting the vehicle.
If the car has not yet been driven for 30 mi- nutes, it shows values from the last trip in
grey.
∅
l/100 km: Average fuel consumption
Shows the average fuel consumption. The
value is calculated by using the kilometres
covered since starting the vehicle. To see
more information, press the display. It shows
statistics for the last 30 minutes of driving
since starting the vehicle. If the car has not
yet been driven for 30 minutes, it shows val-
ues from the last trip in grey.
ECO tips: Tips on how to save fuel
By pressing the ECO tips function button, you
c an
v
iew tips on how to save fuel. These tips
can only be viewed when the vehicle is stop-
ped.
Evaluation of efficient driving style
The efficiency of the driving style is reflected
by different elements on the display.
Display ››› Fig. 54: Meaning
1Different symbols are shown on the left of the col-
umns that report on the current driving style ››› ta-
ble on page 60 .
2
The white column is an indication of where the ef-
ficiency graph begins (from left to right).
It shows the position of the evaluation that is cur-
rently being performed.
» 59