buttons Seat Leon SC 2015 NAVI SYSTEM PLUS
[x] Cancel search | Manufacturer: SEAT, Model Year: 2015, Model line: Leon SC, Model: Seat Leon SC 2015Pages: 96, PDF Size: 2.48 MB
Page 20 of 96
Audio and Media Mode
Once the corresponding FM station has been
f ou
nd,
(FM) is displayed after the station
name. When reception for the corresponding
DAB station returns, the unit will switch back
to DAB mode after a short time. The (FM)
display is hidden.
If the reception of the selected DAB station is
too weak and the station can no longer be
found on the FM frequency band, the radio
will be muted.
Screen view menu
The function buttons refer to the menu that
appears when the View button is pressed
› ›
›
Fig. 12.
Function button: function
Preset list: Memory buttons display ››› Fig. 12.
Station information: Simultaneous displaying of radio text
››› Fig. 13 A and slideshow B instead of the memory
buttons.
Radio text: Radio text is displayed instead of memory
buttons.
Presentation: The slideshows are displayed in full screen. Note
● Not a l
l DAB stations support Radio Text and
slideshows.
● Radio stations are responsible for the con-
tent of
the information they transmit. Memory buttons
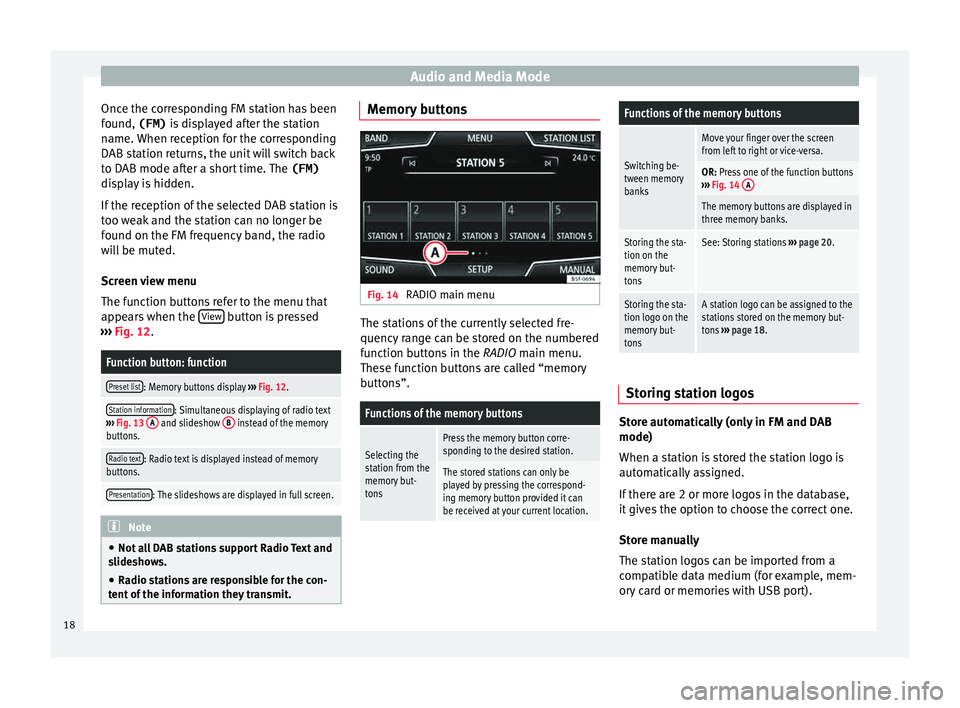
Fig. 14
RADIO main menu The stations of the currently selected fre-
quency r
an
ge can be stored on the numbered
function buttons in the RADIO main menu.
These function buttons are called “memory
buttons”.
Functions of the memory buttons
Selecting the
station from the
memory but-
tonsPress the memory button corre-
sponding to the desired station.
The stored stations can only be
played by pressing the correspond-
ing memory button provided it can
be received at your current location.
Functions of the memory buttons
Switching be-
tween memory
banks
Move your finger over the screen
from left to right or vice-versa.
OR: Press one of the function buttons
››› Fig. 14 A
The memory buttons are displayed in
three memory banks.
Storing the sta-
tion on the
memory but-
tonsSee: Storing stations
››› page 20.
Storing the sta-
tion logo on the
memory but-
tonsA station logo can be assigned to the
stations stored on the memory but-
tons ››› page 18. Storing station logos
Store automatically (only in FM and DAB
mode)
When a s
t
ation i
s stored the station logo is
automatically assigned.
If there are 2 or more logos in the database,
it gives the option to choose the correct one.
Store manually
The station logos can be imported from a
compatible data medium (for example, mem-
ory card or memories with USB port).
18
Page 21 of 96
Audio and Media Mode
● Pr e
s
s the function button Setup and then
St ation log
o
s .
● Press the station button where you wish to
s t
or
e the logo of a station.
● Select the source where the logo is stored
(for ex
ample, SD card 1 ). We recommend sav-
in g log
o
s in the memory unit’s root directory.
● Select the station logo.
● Repeat the process to assign other logos;
pres
s the infotainment button RADIO to re-
t urn t
o the RADIO m
ain menu.
● If you wish to change the logo of a memory
button th
at already has one assigned to it, it
must first be deleted from the button in ques-
tion. Note
Not all stations are stored in the database
and theref or
e it is not always possible to as-
sign logos automatically. Select, tune and store a station
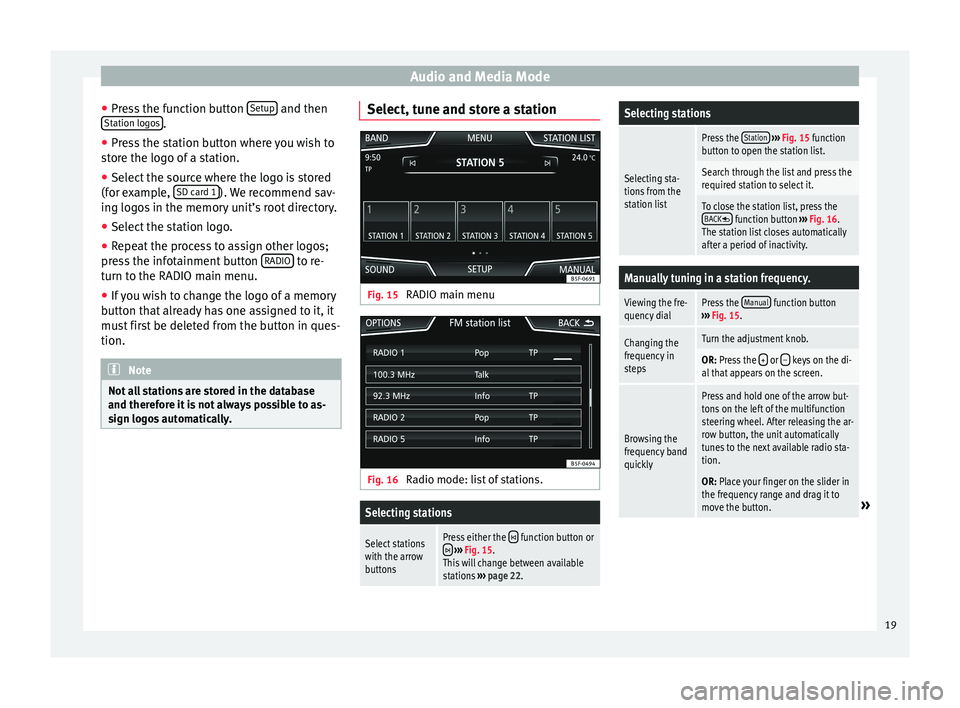
Fig. 15
RADIO main menu Fig. 16
Radio mode: list of stations.
Selecting stations
Select stations
with the arrow
buttonsPress either the function button or ››› Fig. 15.
This will change between available
stations ››› page 22.
Selecting stations
Selecting sta-
tions from the
station list
Press the Station
››› Fig. 15 function
button to open the station list.
Search through the list and press the
required station to select it.
To close the station list, press the BACK function button ››› Fig. 16.
The station list closes automatically
after a period of inactivity.
Manually tuning in a station frequency.
Viewing the fre-
quency dialPress the Manual function button
››› Fig. 15.
Changing the
frequency in
stepsTurn the adjustment knob.
OR: Press the + or – keys on the di-
al that appears on the screen.
Browsing the
frequency band
quickly
Press and hold one of the arrow but-
tons on the left of the multifunction
steering wheel. After releasing the ar-
row button, the unit automatically
tunes to the next available radio sta-
tion.
OR: Place your finger on the slider in
the frequency range and drag it to
move the button.
» 19
Page 22 of 96
Audio and Media ModeManually tuning in a station frequency.
Hiding the fre-
quency band
Briefly press the adjustment knob
››› Fig. 1 12
Manual frequency selection is also
closed if you select a station with a
memory button. If no operation is
performed, the frequency range will
disappear after a period of inactivity.
Storing stations
Storing the sta-
tion that is cur-
rently being lis-
tened to.Press and hold
the desired memory
button ››› Fig. 15 until an audible sig-
nal is heard.
The station tuned in will be stored on
this memory button.
Storing stations
Storing a sta-
tion on the list
of stations
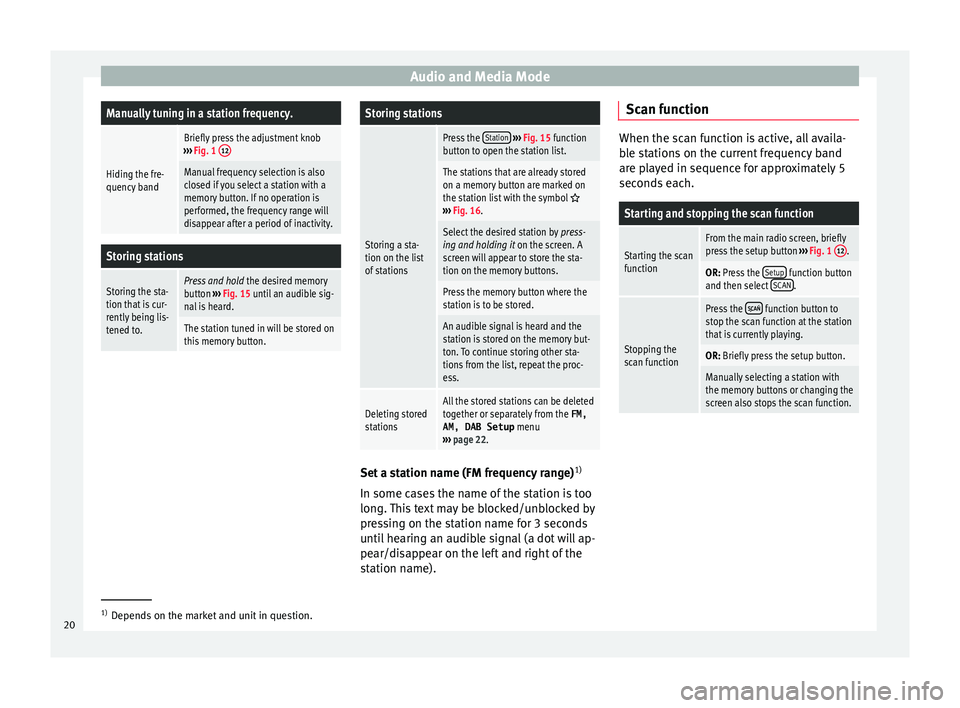
Press the Station
››› Fig. 15 function
button to open the station list.
The stations that are already stored
on a memory button are marked on
the station list with the symbol
››› Fig. 16.
Select the desired station by press-
ing and holding it on the screen. A
screen will appear to store the sta-
tion on the memory buttons.
Press the memory button where the
station is to be stored.
An audible signal is heard and the
station is stored on the memory but-
ton. To continue storing other sta-
tions from the list, repeat the proc-
ess.
Deleting stored
stationsAll the stored stations can be deleted
together or separately from the FM,
AM, DAB Setup menu
››› page 22. Set a station name (FM frequency range)
1)
In some c a
se
s the name of the station is too
long. This text may be blocked/unblocked by
pressing on the station name for 3 seconds
until hearing an audible signal (a dot will ap-
pear/disappear on the left and right of the
station name). Scan function When the scan function is active, all availa-
bl
e s
tations on the current frequency band
are played in sequence for approximately 5
seconds each.
Starting and stopping the scan function
Starting the scan
functionFrom the main radio screen, briefly
press the setup button ››› Fig. 1 12.
OR: Press the
Setup function button
and then select SCAN.
Stopping the
scan function
Press the function button to
stop the scan function at the station
that is currently playing.
OR: Briefly press the setup button.
Manually selecting a station with
the memory buttons or changing the
screen also stops the scan function. 1)
Depends on the market and unit in question.
20
Page 24 of 96
Audio and Media Mode
Incoming traffic announcement In active Audio mode, an incoming traffic an-
nounc
ement
will play automatically.
During the traffic announcement, a pop-up
window is displayed and the radio changes,
depending on the case, to the traffic news
station (EON).
The media mode is paused and the volume is
adjusted to the preset level ››› page 82.
The volume of the traffic announcement can
be modified with the volume control . The
adjusted volume setting will be applied to
subsequent announcements.
● Press the Canc
el function button to end the
c urr
ent
traffic announcement. The TP function
remains switched on.
● OR: Press the De
activate function button to
end the tr affic
annou
ncement and disconnect
the TP function permanently.
Setup (FM, AM, DAB) FM setup
Sel
ect
the FM
frequency band by pressing
the RADIO Infotainment button.
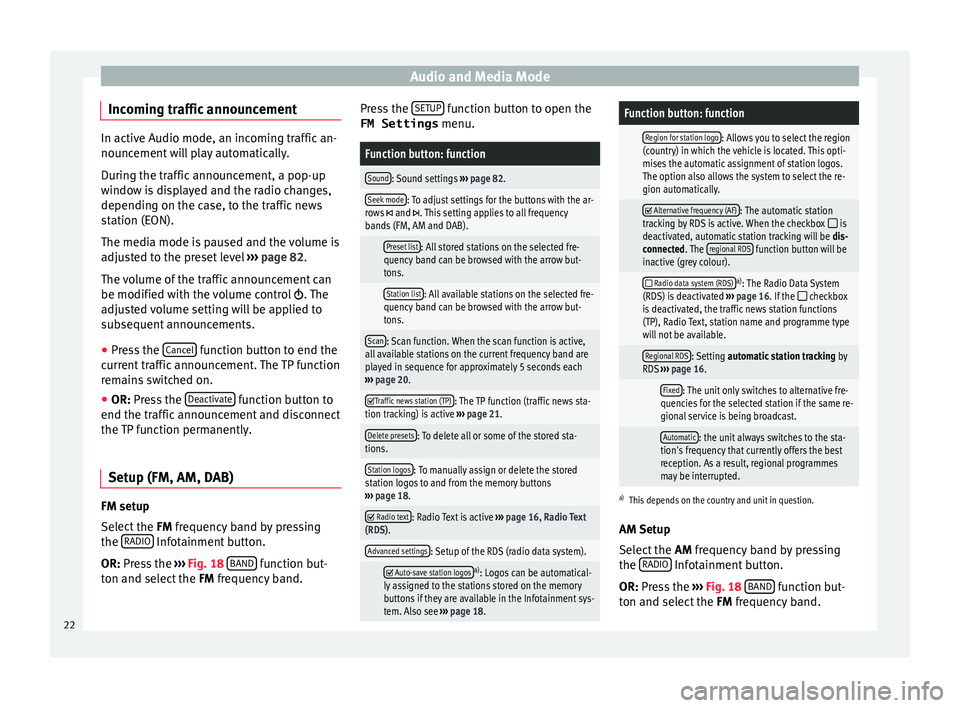
OR: Pr e
s
s the ›››
Fig. 18 BAND function but-
t on and sel
ect
the FM frequency band. Press the
SETUP function button to open the
FM Settings menu.
Function button: function
Sound: Sound settings ››› page 82.
Seek mode: To adjust settings for the buttons with the ar-
rows and . This setting applies to all frequency
bands (FM, AM and DAB).
Preset list: All stored stations on the selected fre-
quency band can be browsed with the arrow but-
tons.
Station list: All available stations on the selected fre-
quency band can be browsed with the arrow but-
tons.
Scan: Scan function. When the scan function is active,
all available stations on the current frequency band are
played in sequence for approximately 5 seconds each
››› page 20.
Traffic news station (TP): The TP function (traffic news sta-
tion tracking) is active ››› page 21.
Delete presets: To delete all or some of the stored sta-
tions.
Station logos: To manually assign or delete the stored
station logos to and from the memory buttons
››› page 18.
Radio text: Radio Text is active
››› page 16, Radio Text
(RDS).
Advanced settings: Setup of the RDS (radio data system).
Auto-save station logosa)
: Logos can be automatical-
ly assigned to the stations stored on the memory
buttons if they are available in the Infotainment sys-
tem. Also see ››› page 18.
Function button: function
Region for station logo: Allows you to select the region
(country) in which the vehicle is located. This opti-
mises the automatic assignment of station logos.
The option also allows the system to select the re-
gion automatically.
Alternative frequency (AF): The automatic station
tracking by RDS is active. When the checkbox is
deactivated, automatic station tracking will be dis-
connected. The regional RDS
function button will be
inactive (grey colour).
Radio data system (RDS)a)
: The Radio Data System
(RDS) is deactivated ››› page 16. If the checkbox
is deactivated, the traffic news station functions
(TP), Radio Text, station name and programme type
will not be available.
Regional RDS: Setting automatic station tracking by
RDS ››› page 16.
Fixed: The unit only switches to alternative fre-
quencies for the selected station if the same re-
gional service is being broadcast.
Automatic: the unit always switches to the sta-
tion's frequency that currently offers the best
reception. As a result, regional programmes
may be interrupted.
a) This depends on the country and unit in question.
AM Setup
Select the AM frequency band by pressing
the RADIO Infotainment button.
OR: Pr e
s
s the ››› Fig. 18 BAND function but-
t on and sel
ect
the FM frequency band.
22
Page 25 of 96
Audio and Media Mode
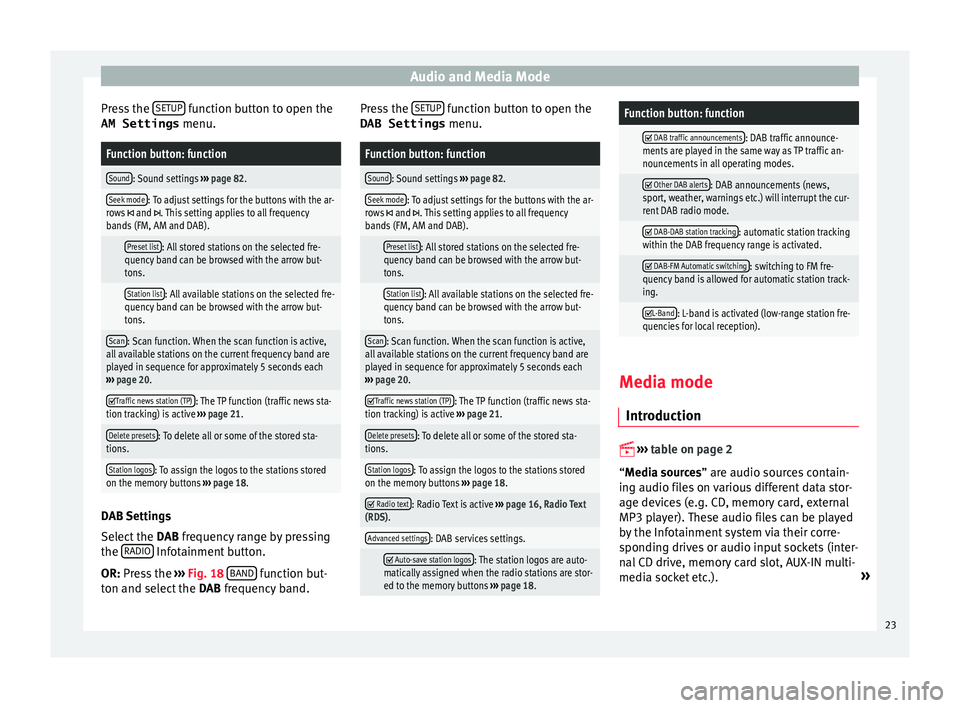
Press the S
ETUP function button to open the
AM Settings menu.Function button: function
Sound: Sound settings ››› page 82.
Seek mode: To adjust settings for the buttons with the ar-
rows and . This setting applies to all frequency
bands (FM, AM and DAB).
Preset list: All stored stations on the selected fre-
quency band can be browsed with the arrow but-
tons.
Station list: All available stations on the selected fre-
quency band can be browsed with the arrow but-
tons.
Scan: Scan function. When the scan function is active,
all available stations on the current frequency band are
played in sequence for approximately 5 seconds each
››› page 20.
Traffic news station (TP): The TP function (traffic news sta-
tion tracking) is active ››› page 21.
Delete presets: To delete all or some of the stored sta-
tions.
Station logos: To assign the logos to the stations stored
on the memory buttons ››› page 18. DAB Settings
Sel
ect
the D
AB frequency range by pressing
the RADIO Infotainment button.
OR: Pr e
s
s the ››› Fig. 18 BAND function but-
t on and sel
ect
the DAB frequency band. Press the
SETUP function button to open the
DAB Settings menu.
Function button: function
Sound: Sound settings ››› page 82.
Seek mode: To adjust settings for the buttons with the ar-
rows and . This setting applies to all frequency
bands (FM, AM and DAB).
Preset list: All stored stations on the selected fre-
quency band can be browsed with the arrow but-
tons.
Station list: All available stations on the selected fre-
quency band can be browsed with the arrow but-
tons.
Scan: Scan function. When the scan function is active,
all available stations on the current frequency band are
played in sequence for approximately 5 seconds each
››› page 20.
Traffic news station (TP): The TP function (traffic news sta-
tion tracking) is active ››› page 21.
Delete presets: To delete all or some of the stored sta-
tions.
Station logos: To assign the logos to the stations stored
on the memory buttons ››› page 18.
Radio text: Radio Text is active
››› page 16, Radio Text
(RDS).
Advanced settings: DAB services settings.
Auto-save station logos: The station logos are auto-
matically assigned when the radio stations are stor-
ed to the memory buttons ››› page 18.
Function button: function
DAB traffic announcements: DAB traffic announce-
ments are played in the same way as TP traffic an-
nouncements in all operating modes.
Other DAB alerts: DAB announcements (news,
sport, weather, warnings etc.) will interrupt the cur-
rent DAB radio mode.
DAB-DAB station tracking: automatic station tracking
within the DAB frequency range is activated.
DAB-FM Automatic switching: switching to FM fre-
quency band is allowed for automatic station track-
ing.
L-Band: L-band is activated (low-range station fre-
quencies for local reception). Media mode
Intr oduction
››
›
table on page 2
“Media sources” are audio sources contain-
ing audio files on various different data stor-
age devices (e.g. CD, memory card, external
MP3 player). These audio files can be played
by the Infotainment system via their corre-
sponding drives or audio input sockets (inter-
nal CD drive, memory card slot, AUX-IN multi-
media socket etc.). »
23
Page 29 of 96
Audio and Media Mode
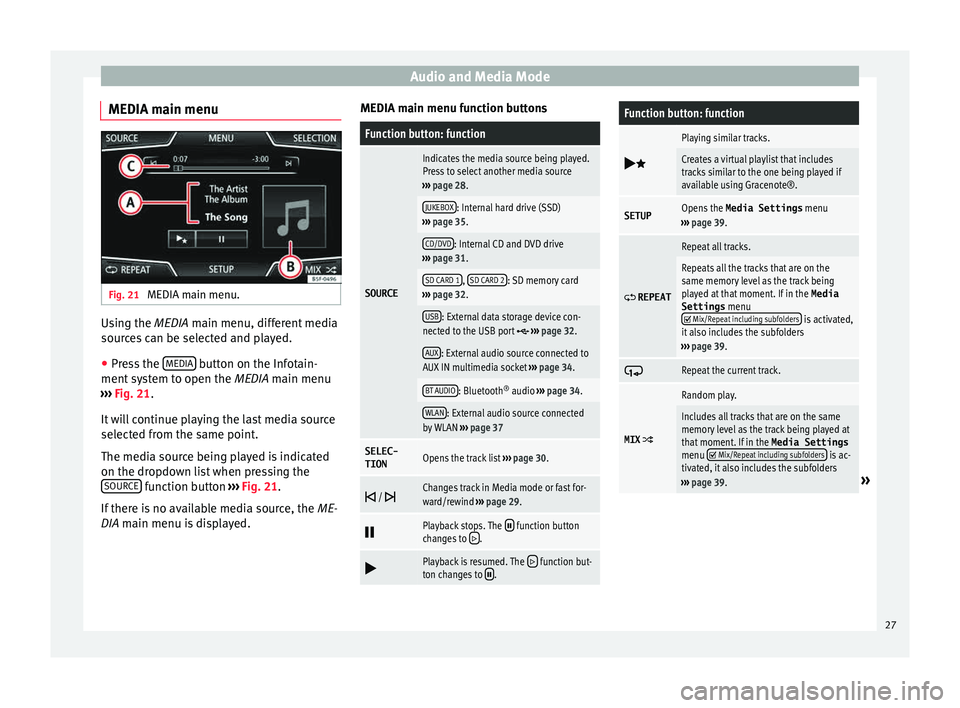
MEDIA main menu Fig. 21
MEDIA main menu. Using the MEDIA m
ain menu, diff
er ent media
sources can be selected and played.
● Press the MEDIA button on the Infotain-
ment sy
s
tem to open the MEDIA main menu
››› Fig. 21.
It will continue playing the last media source
selected from the same point.
The media source being played is indicated
on the dropdown list when pressing the SOURCE function button
››
›
Fig. 21.
If there is no available media source, the ME-
DIA main menu is displayed. MEDIA main menu function buttons
Function button: function
SOURCE
Indicates the media source being played.
Press to select another media source
››› page 28.
JUKEBOX: Internal hard drive (SSD)
››› page 35.
CD/DVD: Internal CD and DVD drive
››› page 31.
SD CARD 1, SD CARD 2: SD memory card
››› page 32.
USB: External data storage device con-
nected to the USB port ››› page 32.
AUX: External audio source connected to
AUX IN multimedia socket ››› page 34.
BT AUDIO: Bluetooth ®
audio ››› page 34.
WLAN: External audio source connected
by WLAN ››› page 37
SELEC-
TIONOpens the track list ››› page 30.
/ Changes track in Media mode or fast for-
ward/rewind
››› page 29.
Playback stops. The function button
changes to .
Playback is resumed. The function but-
ton changes to .
Function button: function
Playing similar tracks.
Creates a virtual playlist that includes
tracks similar to the one being played if
available using Gracenote®.
SETUPOpens the
Media Settings menu
››› page 39.
REPEAT
Repeat all tracks.
Repeats all the tracks that are on the
same memory level as the track being
played at that moment. If in the
Media
Settings menu
Mix/Repeat including subfolders is activated,
it also includes the subfolders
››› page 39.
Repeat the current track.
MIX
Random play.
Includes all tracks that are on the same
memory level as the track being played at
that moment. If in the Media Settings
menu
Mix/Repeat including subfolders is ac-
tivated, it also includes the subfolders
››› page 39.
» 27
Page 31 of 96
Audio and Media ModeFunction button: Media source
CD/DVDInternal CD/DVD drive
››› page 31.
SD CARD 1SD memory card ››› page 32.SD CARD 2
USBExternal data storage device connected
to the USB port ››› page 32.
AUXExternal audio source connected to AUX
IN ››› page 34 multimedia socket.
BT AUDIOBluetooth ®
audio ››› page 34.
WLANExternal audio source connected by
WLAN ››› page 37 Note
The Media source can be changed in the Tr ac
k
list view ››› page 30. Changing track in the MEDIA main
menu
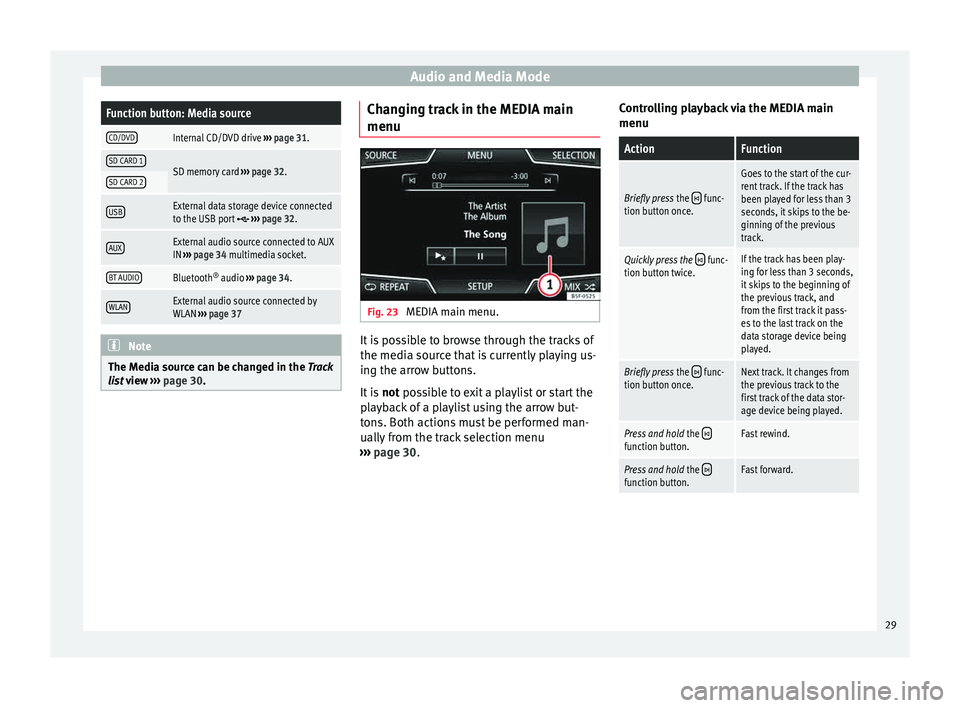
Fig. 23
MEDIA main menu. It is possible to browse through the tracks of
the medi
a sour
c
e that is currently playing us-
ing the arrow buttons.
It is not possible to exit a playlist or start the
playback of a playlist using the arrow but-
tons. Both actions must be performed man-
ually from the track selection menu
››› page 30. Controlling playback via the MEDIA main
menu
ActionFunction
Briefly press
the func-
tion button once.
Goes to the start of the cur-
rent track. If the track has
been played for less than 3
seconds, it skips to the be-
ginning of the previous
track.
Quickly press the func-
tion button twice.If the track has been play-
ing for less than 3 seconds,
it skips to the beginning of
the previous track, and
from the first track it pass-
es to the last track on the
data storage device being
played.
Briefly press the func-
tion button once.Next track. It changes from
the previous track to the
first track of the data stor-
age device being played.
Press and hold the function button.Fast rewind.
Press and hold the function button.Fast forward. 29
Page 32 of 96
Audio and Media Mode
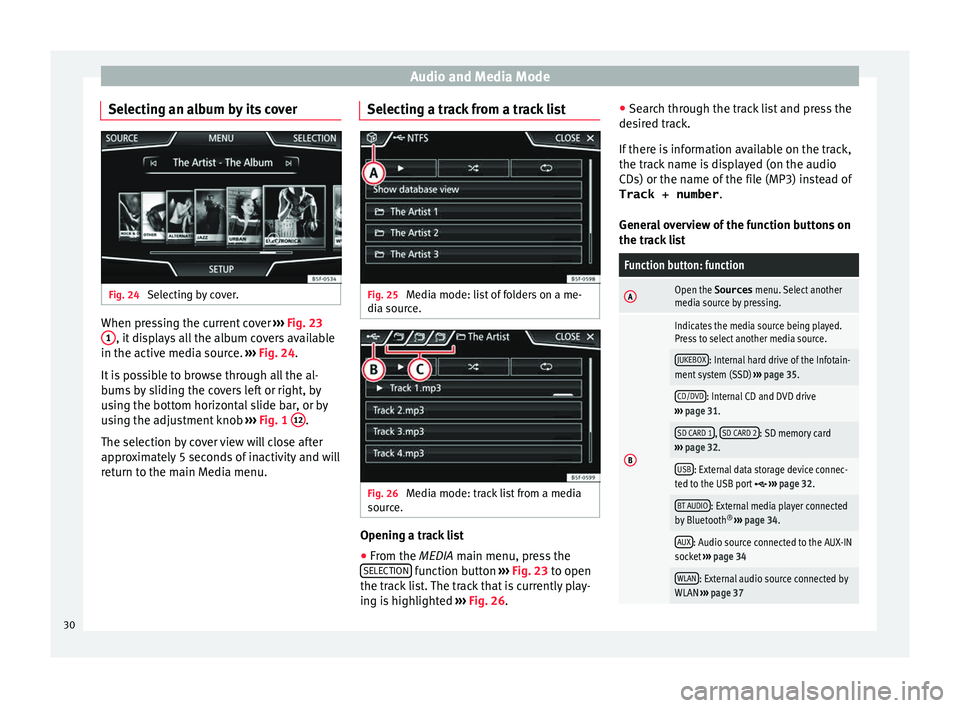
Selecting an album by its cover Fig. 24
Selecting by cover. When pressing the current cover
››
› Fig. 23
1 , it displays all the album covers available
in the activ e medi
a sour
ce. ››› Fig. 24.
It is possible to browse through all the al-
bums by sliding the covers left or right, by
using the bottom horizontal slide bar, or by
using the adjustment knob ››› Fig. 1 12 .
The sel ection b
y
cover view will close after
approximately 5 seconds of inactivity and will
return to the main Media menu. Selecting a track from a track list
Fig. 25
Media mode: list of folders on a me-
di a sour
c
e. Fig. 26
Media mode: track list from a media
sour ce. Opening a track list
● From the MEDIA m ain menu, pr
e
ss the
SELECTION function button
›
››
Fig. 23 to open
the track list. The track that is currently play-
ing is highlighted ››› Fig. 26. ●
Searc
h through the track list and press the
desired track.
If there is information available on the track,
the track name is displayed (on the audio
CDs) or the name of the file (MP3) instead of Track + number .
General overview of the function buttons on
the track list
Function button: function
AOpen the Sources menu. Select another
media source by pressing.
B
Indicates the media source being played.
Press to select another media source.
JUKEBOX: Internal hard drive of the Infotain-
ment system (SSD) ››› page 35.
CD/DVD: Internal CD and DVD drive
››› page 31.
SD CARD 1, SD CARD 2: SD memory card
››› page 32.
USB: External data storage device connec-
ted to the USB port ››› page 32.
BT AUDIO: External media player connected
by Bluetooth ®
››› page 34.
AUX: Audio source connected to the AUX-IN
socket ››› page 34
WLAN: External audio source connected by
WLAN ››› page 37 30
Page 41 of 96
Audio and Media Mode
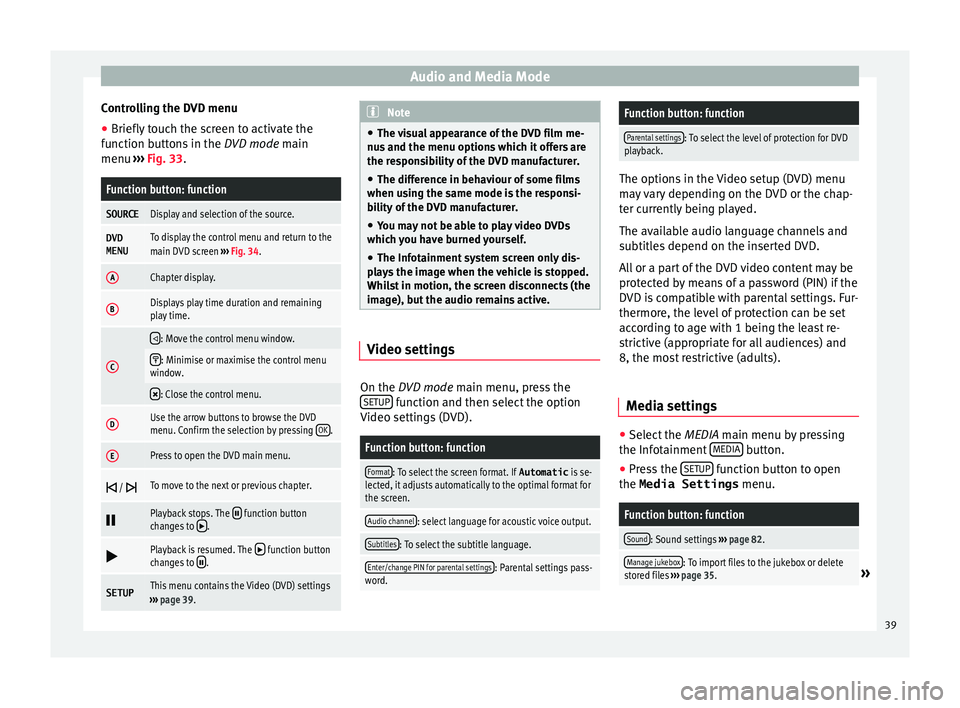
Controlling the DVD menu
● Briefly touch the screen to activate the
f u
nction b
uttons in the DVD mode main
menu ››› Fig. 33.
Function button: function
SOURCEDisplay and selection of the source.
DVD
MENUTo display the control menu and return to the
main DVD screen ››› Fig. 34.
AChapter display.
BDisplays play time duration and remaining
play time.
C
: Move the control menu window.
: Minimise or maximise the control menu
window.
: Close the control menu.
DUse the arrow buttons to browse the DVD
menu. Confirm the selection by pressing
OK.
EPress to open the DVD main menu.
/ To move to the next or previous chapter.
Playback stops. The function button
changes to .
Playback is resumed. The function button
changes to .
SETUPThis menu contains the Video (DVD) settings
››› page 39. Note
● The v i
sual appearance of the DVD film me-
nus and the menu options which it offers are
the responsibility of the DVD manufacturer.
● The difference in behaviour of some films
when usin
g the same mode is the responsi-
bility of the DVD manufacturer.
● You may not be able to play video DVDs
which y
ou have burned yourself.
● The Infotainment system screen only dis-
pla
ys the image when the vehicle is stopped.
Whilst in motion, the screen disconnects (the
image), but the audio remains active. Video settings
On the D
VD mode main menu, press the
S ETUP function and then select the option
V ideo settin
g
s (DVD).
Function button: function
Format: To select the screen format. If Automatic is se-
lected, it adjusts automatically to the optimal format for
the screen.
Audio channel: select language for acoustic voice output.
Subtitles: To select the subtitle language.
Enter/change PIN for parental settings: Parental settings pass-
word.
Function button: function
Parental settings: To select the level of protection for DVD
playback. The options in the Video setup (DVD) menu
ma
y
vary depending on the DVD or the chap-
ter currently being played.
The available audio language channels and
subtitles depend on the inserted DVD.
All or a part of the DVD video content may be
protected by means of a password (PIN) if the
DVD is compatible with parental settings. Fur-
thermore, the level of protection can be set
according to age with 1 being the least re-
strictive (appropriate for all audiences) and
8, the most restrictive (adults).
Media settings ●
Select the MEDIA main menu b
y
pressing
the Infotainment MEDIA button.
● Press the S
ETUP function button to open
the Media Settings menu.
Function button: function
Sound: Sound settings ››› page 82.
Manage jukebox: To import files to the jukebox or delete
stored files ››› page 35.» 39
Page 45 of 96
Navigation
● Inser
t
the memory card containing the navi-
gation data ››› page 23.
● Press the Infotainment MENU button and
then sel ect
Set
up .
● In the System settings menu, pre
s
s the
System information function button.
● Press U
pd
at
e software to import the stored
n av
ig
ation data.
● Follow the instructions displayed on the
scr
een.
Once installed, the memory card can be re-
moved. The memory card must be prepared
for removal ››› page 23. CAUTION
Do not remove the memory card while the
nav ig
ation data is being installed. The memo-
ry card may be irreparably damaged! Note
● The nav ig
ation memory card may not be
used as memory storage for other files. The
Infotainment system will not recognise the
files saved on it.
● SEAT recommends a CLASS 10 1)
memory
car
d for the use of navigation data. The use of
other memory cards could limit its operation. Navigation main menu
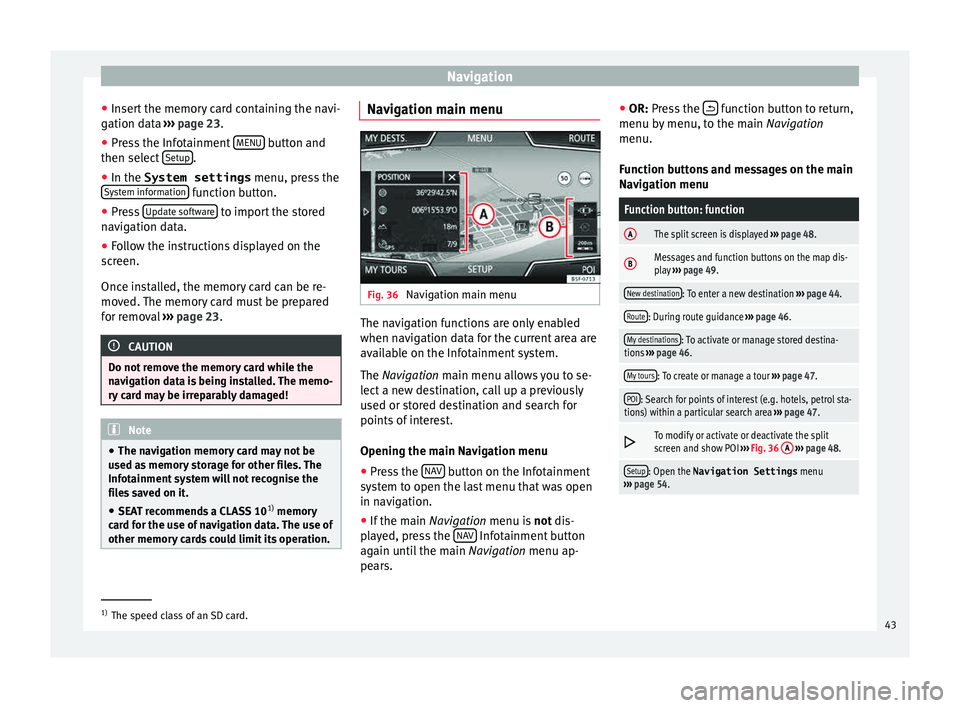
Fig. 36
Navigation main menu The navigation functions are only enabled
when n
av
ig
ation data for the current area are
available on the Infotainment system.
The Navigation main menu allows you to se-
lect a new destination, call up a previously
used or stored destination and search for
points of interest.
Opening the main Navigation menu
● Press the NAV button on the Infotainment
sy s
t
em to open the last menu that was open
in navigation.
● If the main Navigation menu i
s not dis-
played, press the NAV Infotainment button
ag ain u
nti
l the main Navigation menu ap-
pears. ●
OR: Pres
s the function button to return,
menu b y
menu, t
o the main Navigation
menu.
Function buttons and messages on the main
Navigation menu
Function button: function
AThe split screen is displayed ››› page 48.
BMessages and function buttons on the map dis-
play ››› page 49.
New destination: To enter a new destination ››› page 44.
Route: During route guidance ››› page 46.
My destinations: To activate or manage stored destina-
tions ››› page 46.
My tours: To create or manage a tour ››› page 47.
POI: Search for points of interest (e.g. hotels, petrol sta-
tions) within a particular search area ››› page 47.
To modify or activate or deactivate the split
screen and show POI
››› Fig. 36 A
››› page 48.
Setup: Open the Navigation Settings menu
››› page 54. 1)
The speed class of an SD card.
43