Seat Leon Sportstourer 2013 Owner's manual
Manufacturer: SEAT, Model Year: 2013, Model line: Leon Sportstourer, Model: Seat Leon Sportstourer 2013Pages: 339, PDF Size: 4.8 MB
Page 131 of 339
129
Seats and storage
Front seats
Manual seat adjustment
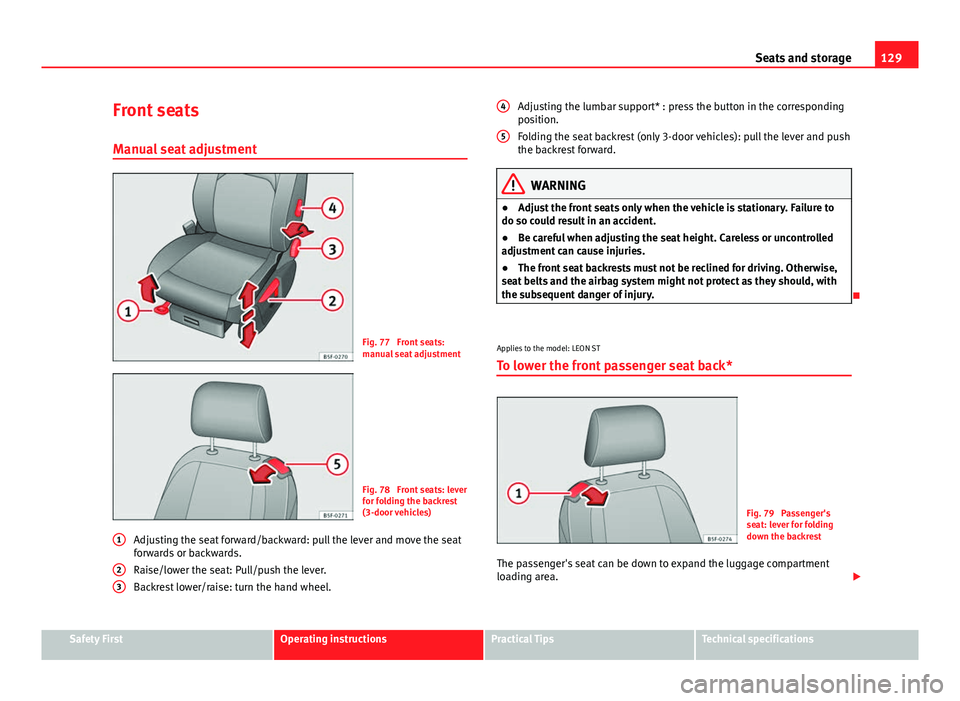
Fig. 77 Front seats:
manual seat adjustment
Fig. 78 Front seats: lever
for folding the backrest
(3-door vehicles)
Adjusting the seat forward/backward: pull the lever and move the seat
forwards or backwards.
Raise/lower the seat: Pull/push the lever.
Backrest lower/raise: turn the hand wheel.
1
23
Adjusting the lumbar support* : press the button in the corresponding
position.
Folding the seat backrest (only 3-door vehicles): pull the lever and push
the backrest forward.
WARNING
● Adjust the front seats only when the vehicle is stationary. Failure to
do so could result in an accident.
● Be careful when adjusting the seat height. Careless or uncontrolled
adjustment can cause injuries.
● The front seat backrests must not be reclined for driving. Otherwise,
seat belts and the airbag system might not protect as they should, with
the subsequent danger of injury.
Applies to the model: LEON ST
To lower the front passenger seat back*
Fig. 79 Passenger's
seat: lever for folding
down the backrest
The passenger's seat can be down to expand the luggage compartment
loading area.
4
5
Safety FirstOperating instructionsPractical TipsTechnical specifications
Page 132 of 339
130Seats and storage
● Pull on lever 1
⇒ Fig. 79 and push the backrest forwards so that the
backrest is horizontal.
WARNING
When the passenger's backrest is folded down this place cannot be occu-
pied by a passenger.
Front centre armrest
The centre armrest can be adjusted to various levels. Adjusting the centre armrest
– To adjust the tilt, lift the armrest from the starting position so
that it is engaged.
– To return the armrest to the starting position, remove the arm-
rest from the upper fixed position and lower it.
The armrest can be moved backwards and forwards.
Seat functions Introduction
Additional information and warnings
● Adjusting the position of the seats ⇒ page 10
● Seat belts ⇒ page 20 ●
Airbag system ⇒ page 31
● Child seats (accessories) ⇒ page 48
WARNING
Inappropriate use of the seat functions can cause severe injuries.
● Assume the proper sitting position before your trip and remain in it
throughout. This also applies to the other occupants.
● Always keep hands, fingers, feet and other parts of the body away
from the operating radius and the adjustment of seats.
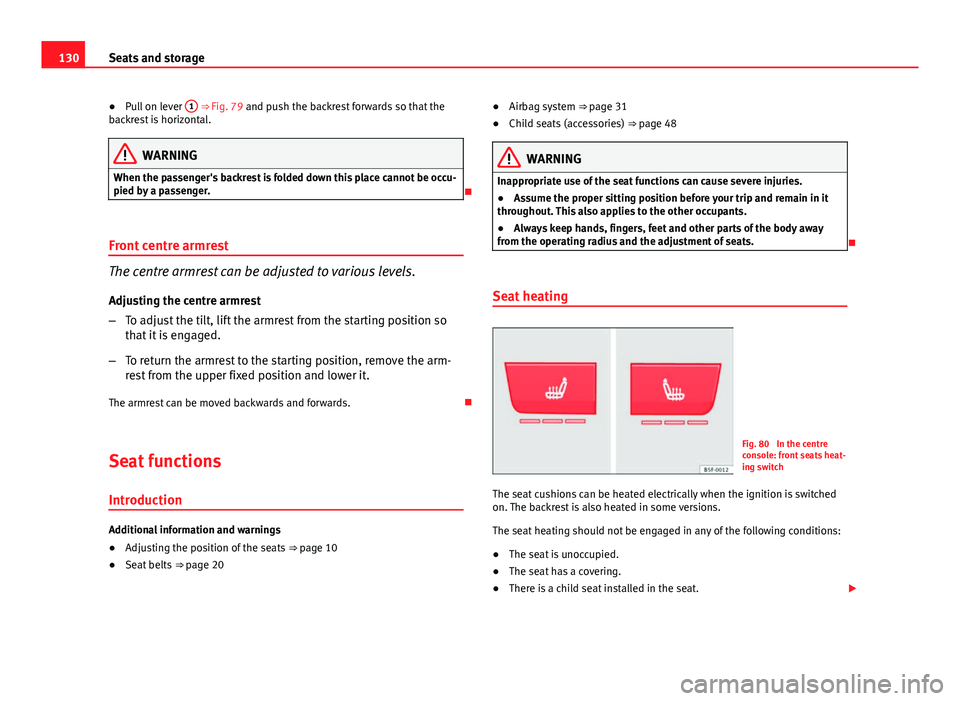
Seat heating
Fig. 80 In the centre
console: front seats heat-
ing switch
The seat cushions can be heated electrically when the ignition is switched
on. The backrest is also heated in some versions.
The seat heating should not be engaged in any of the following conditions:
● The seat is unoccupied.
● The seat has a covering.
● There is a child seat installed in the seat.
Page 133 of 339
131
Seats and storage
● The seat cushion is wet or damp.
● The indoor or outdoor temperature is greater than 25 °C (77 °F).
effectUsing seat heatingTo switch sys-
tem on:Press the button or . Seat heating is switched on fully.
Adjusting the
heating out-
put:Press the button or repeatedly until the desired inten-
sity level is reached.
To switch sys-
tem off:Press the button or until all warning lamps switch off.
WARNING
People who, because of medications, paralysis or chronic diseases (e.g.
diabetes) cannot perceive pain or temperature, or have a limited percep-
tion thereof, may suffer burns to the back, buttocks or legs when using
seat heating, an occurrence that may entail a very lengthy recovery peri-
od or from which it may not be possible to recover fully. Seek medical ad-
vice if you have doubts regarding your health.
● People with a limit pain and temperature threshold must never use
seat heating.
WARNING
If the fabric of the cushion is wet, this can adversely affect the operation
of the seat heating, increasing the risk of burns.
● Make sure the seat cushion is dry prior to using the seat heater.
● Do not sit on the seat with clothing that is wet or damp.
● Do not leave clothing that is wet or damp on the seat.
● Do not spill liquid on the seat.
CAUTION
● To avoid damaging the heating elements of the seat heating, please do
not kneel on the seat or apply sharp pressure at a single point to the seat
cushion and backrest.
● Liquids, sharps objects and insulating materials (e.g., covers or child
seats) can damage the seat heating.
● In the event of odours, switch off the seat heating immediately and have
the unit inspected by a specialised workshop.
For the sake of the environment
The seat heating should remain on only when needed. Otherwise, it is an
unnecessary fuel waste.
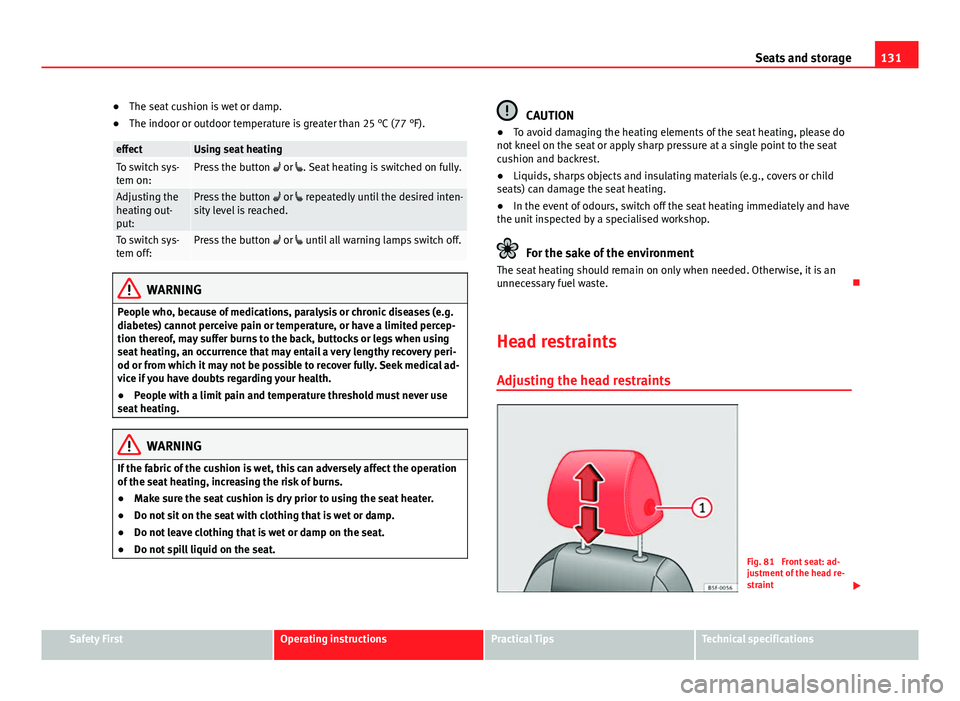
Head restraints Adjusting the head restraints
Fig. 81 Front seat: ad-
justment of the head re-
straint
Safety FirstOperating instructionsPractical TipsTechnical specifications
Page 134 of 339
132Seats and storage
Adjust the head restraint so that the top of the head restraint is lev-
el with the top of your head. When this is not possible, try to get as
close as possible to this position.
–Grasp the sides of the head restraint with both hands and move
it up/down (to lower you must press button 1
) until you see it
engage.
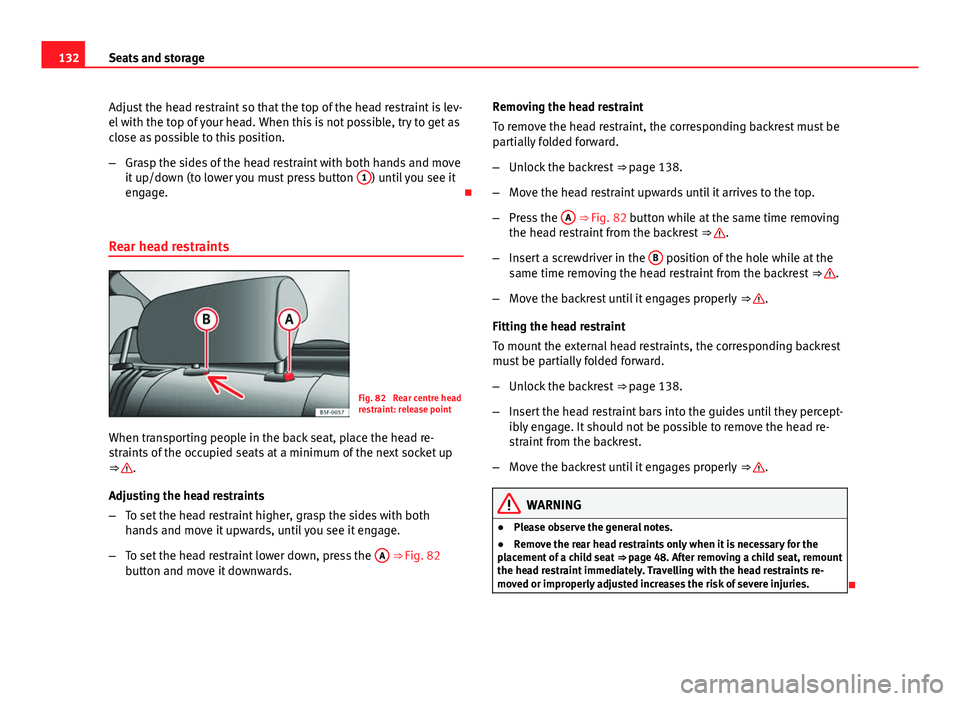
Rear head restraints
Fig. 82 Rear centre head
restraint: release point
When transporting people in the back seat, place the head re-
straints of the occupied seats at a minimum of the next socket up
⇒
.
Adjusting the head restraints
– To set the head restraint higher, grasp the sides with both
hands and move it upwards, until you see it engage.
– To set the head restraint lower down, press the A
⇒ Fig. 82
button and move it downwards. Removing the head restraint
To remove the head restraint, the corresponding backrest must be
partially folded forward.
–
Unlock the backrest ⇒ page 138.
– Move the head restraint upwards until it arrives to the top.
– Press the A
⇒ Fig. 82 button while at the same time removing
the head restraint from the backrest ⇒ .
– Insert a screwdriver in the B
position of the hole while at the
same time removing the head restraint from the backrest ⇒ .
– Move the backrest until it engages properly ⇒
.
Fitting the head restraint
To mount the external head restraints, the corresponding backrest
must be partially folded forward.
– Unlock the backrest ⇒ page 138.
– Insert the head restraint bars into the guides until they percept-
ibly engage. It should not be possible to remove the head re-
straint from the backrest.
– Move the backrest until it engages properly ⇒
.
WARNING
● Please observe the general notes.
● Remove the rear head restraints only when it is necessary for the
placement of a child seat ⇒ page 48. After removing a child seat, remount
the head restraint immediately. Travelling with the head restraints re-
moved or improperly adjusted increases the risk of severe injuries.
Page 135 of 339
133
Seats and storage
Storage compartments
Storage areas under the front seats*
There is a storage compartment with a cover under each
front seat.
Fig. 83 Storage com-
partment under the front
seats
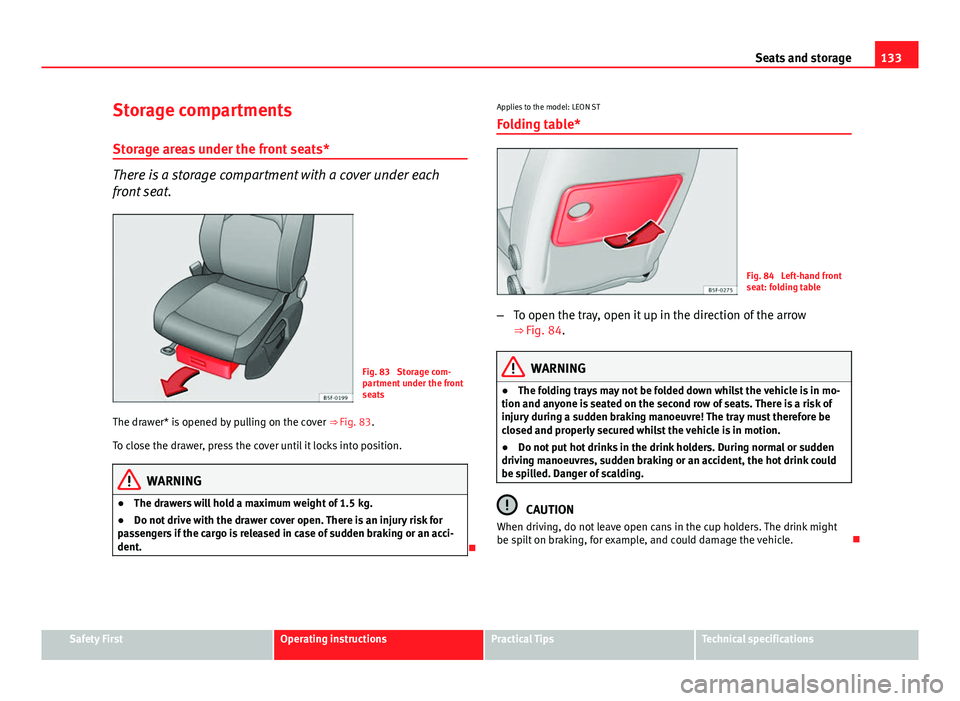
The drawer* is opened by pulling on the cover ⇒ Fig. 83.
To close the drawer, press the cover until it locks into position.
WARNING
● The drawers will hold a maximum weight of 1.5 kg.
● Do not drive with the drawer cover open. There is an injury risk for
passengers if the cargo is released in case of sudden braking or an acci-
dent.
Applies to the model: LEON ST
Folding table*
Fig. 84 Left-hand front
seat: folding table
– To open the tray, open it up in the direction of the arrow
⇒ Fig. 84.
WARNING
● The folding trays may not be folded down whilst the vehicle is in mo-
tion and anyone is seated on the second row of seats. There is a risk of
injury during a sudden braking manoeuvre! The tray must therefore be
closed and properly secured whilst the vehicle is in motion.
● Do not put hot drinks in the drink holders. During normal or sudden
driving manoeuvres, sudden braking or an accident, the hot drink could
be spilled. Danger of scalding.
CAUTION
When driving, do not leave open cans in the cup holders. The drink might
be spilt on braking, for example, and could damage the vehicle.
Safety FirstOperating instructionsPractical TipsTechnical specifications
Page 136 of 339
134Seats and storage
Drink holders
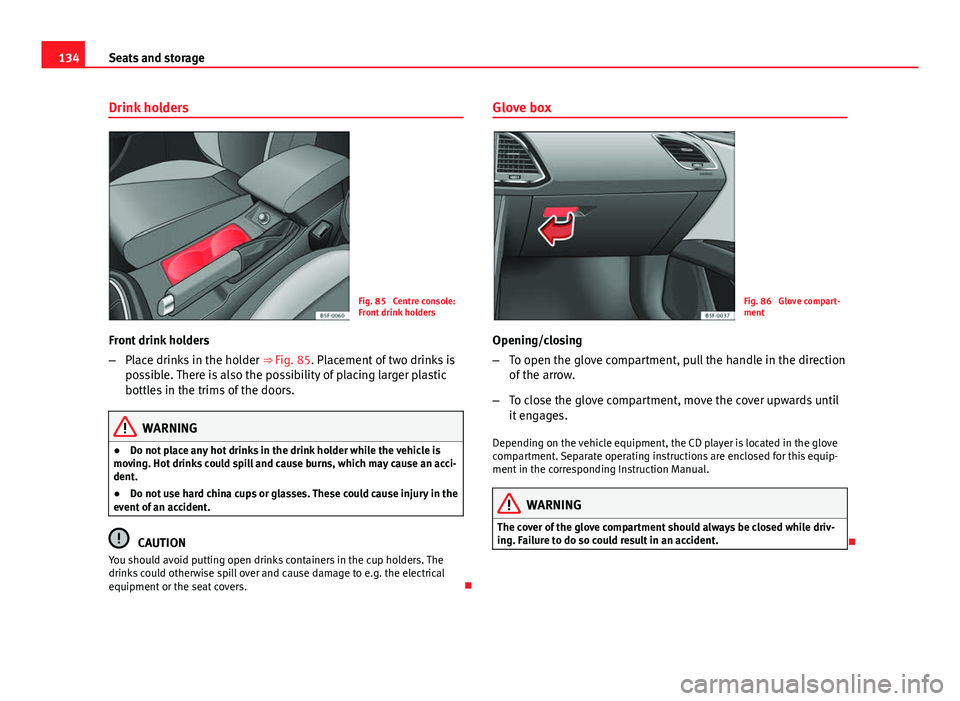
Fig. 85 Centre console:
Front drink holders
Front drink holders
– Place drinks in the holder ⇒ Fig. 85. Placement of two drinks is
possible. There is also the possibility of placing larger plastic
bottles in the trims of the doors.
WARNING
● Do not place any hot drinks in the drink holder while the vehicle is
moving. Hot drinks could spill and cause burns, which may cause an acci-
dent.
● Do not use hard china cups or glasses. These could cause injury in the
event of an accident.
CAUTION
You should avoid putting open drinks containers in the cup holders. The
drinks could otherwise spill over and cause damage to e.g. the electrical
equipment or the seat covers. Glove box
Fig. 86 Glove compart-
ment
Opening/closing
– To open the glove compartment, pull the handle in the direction
of the arrow.
– To close the glove compartment, move the cover upwards until
it engages.
Depending on the vehicle equipment, the CD player is located in the glove
compartment. Separate operating instructions are enclosed for this equip-
ment in the corresponding Instruction Manual.
WARNING
The cover of the glove compartment should always be closed while driv-
ing. Failure to do so could result in an accident.
Page 137 of 339
135
Seats and storage
Other storage compartments
You will find more object holders, compartments and supports in other
parts of the vehicle:
● In the top of the glove compartment in vehicles that do not have a CD
reader. The load must not exceed 1.2 kg.
● In the centre console under the centre armrest*.
● In the driver side panel there is a removable box for access to fuses and
relays. The load of the compartment should not exceed 0.2 kg.
● Coat hooks in the pillar B ⇒
.
● Other storage compartments are found in the rear seat, to the left and
the right of the seats.
WARNING
● Please make sure that any items of clothing hanging from the coat
hooks do not obstruct your view to the rear.
● The coat hooks should only be used for lightweight clothing. Do not
leave any heavy or sharp objects in the pockets.
● Do not use clothes hangers to hang up the clothing, as this could in-
terfere with the function of the head-protection airbags.
Power sockets
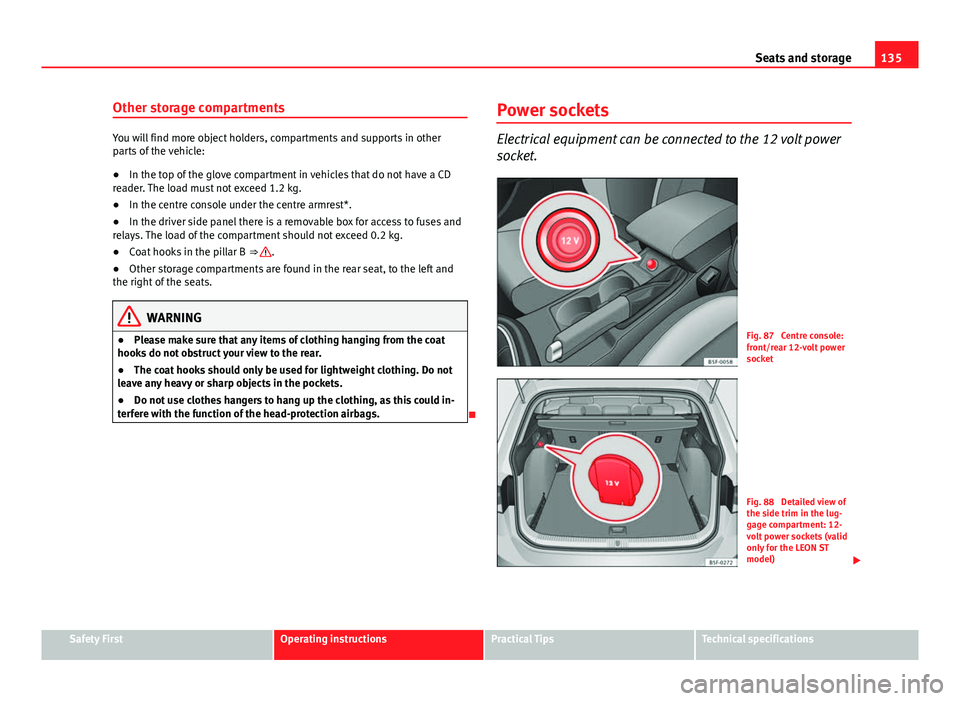
Electrical equipment can be connected to the 12 volt power
socket.
Fig. 87 Centre console:
front/rear 12-volt power
socket
Fig. 88 Detailed view of
the side trim in the lug-
gage compartment: 12-
volt power sockets (valid
only for the LEON ST
model)
Safety FirstOperating instructionsPractical TipsTechnical specifications
Page 138 of 339
136Seats and storage
In the centre console
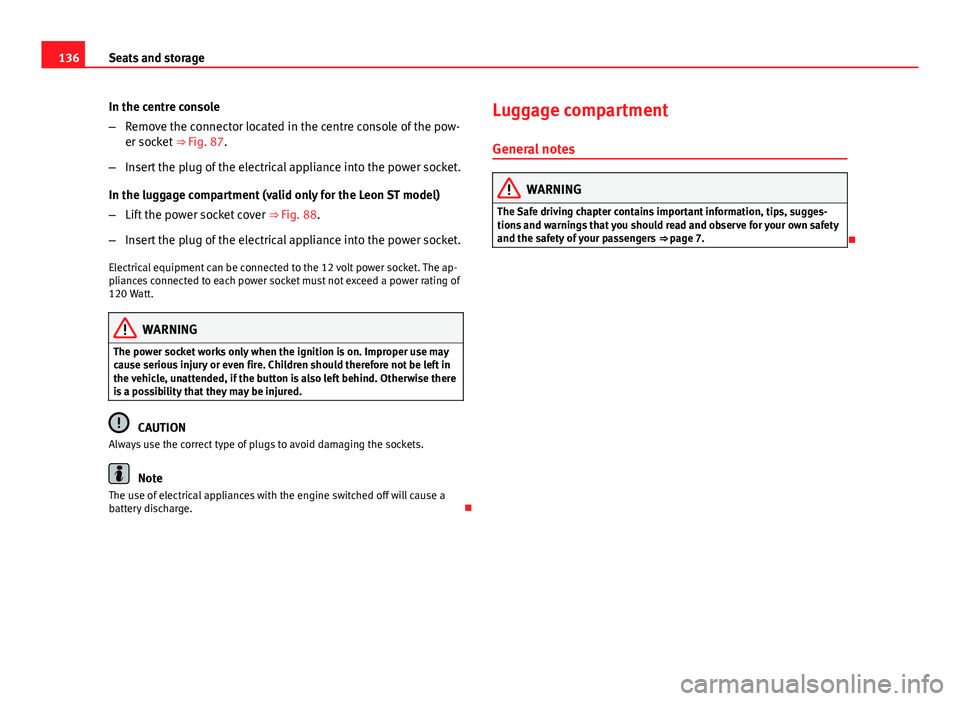
–Remove the connector located in the centre console of the pow-
er socket ⇒ Fig. 87.
– Insert the plug of the electrical appliance into the power socket.
In the luggage compartment (valid only for the Leon ST model)
– Lift the power socket cover ⇒ Fig. 88.
– Insert the plug of the electrical appliance into the power socket.
Electrical equipment can be connected to the 12 volt power socket. The ap-
pliances connected to each power socket must not exceed a power rating of
120 Watt.
WARNING
The power socket works only when the ignition is on. Improper use may
cause serious injury or even fire. Children should therefore not be left in
the vehicle, unattended, if the button is also left behind. Otherwise there
is a possibility that they may be injured.
CAUTION
Always use the correct type of plugs to avoid damaging the sockets.
Note
The use of electrical appliances with the engine switched off will cause a
battery discharge. Luggage compartment
General notes
WARNING
The Safe driving chapter contains important information, tips, sugges-
tions and warnings that you should read and observe for your own safety
and the safety of your passengers ⇒ page 7.
Page 139 of 339
137
Seats and storage
Applies to the model: LEON / LEON SC
Increase capacity of luggage compartment
The backrests can be folded forward individually or togeth-
er.
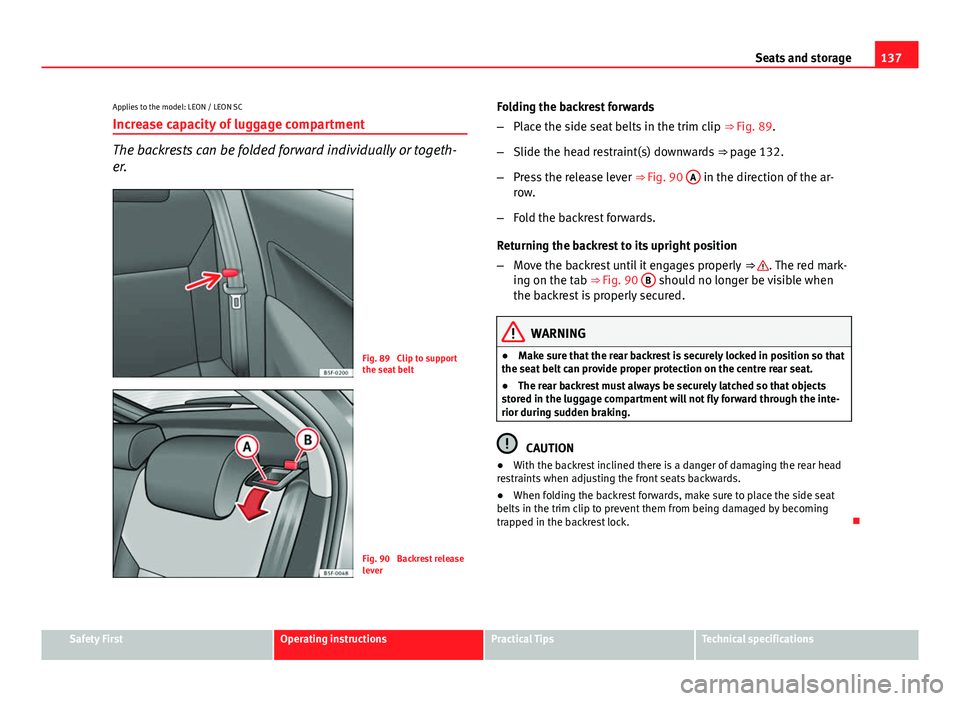
Fig. 89 Clip to support
the seat belt
Fig. 90 Backrest release
lever Folding the backrest forwards
–
Place the side seat belts in the trim clip ⇒ Fig. 89.
– Slide the head restraint(s) downwards ⇒ page 132.
– Press the release lever ⇒ Fig. 90 A
in the direction of the ar-
row.
– Fold the backrest forwards.
Returning the backrest to its upright position
– Move the backrest until it engages properly ⇒
. The red mark-
ing on the tab ⇒ Fig. 90 B should no longer be visible when
the backrest is properly secured.
WARNING
● Make sure that the rear backrest is securely locked in position so that
the seat belt can provide proper protection on the centre rear seat.
● The rear backrest must always be securely latched so that objects
stored in the luggage compartment will not fly forward through the inte-
rior during sudden braking.
CAUTION
● With the backrest inclined there is a danger of damaging the rear head
restraints when adjusting the front seats backwards.
● When folding the backrest forwards, make sure to place the side seat
belts in the trim clip to prevent them from being damaged by becoming
trapped in the backrest lock.
Safety FirstOperating instructionsPractical TipsTechnical specifications
Page 140 of 339
138Seats and storage
Applies to the model: LEON ST
Folding down and lifting the rear seat backrest
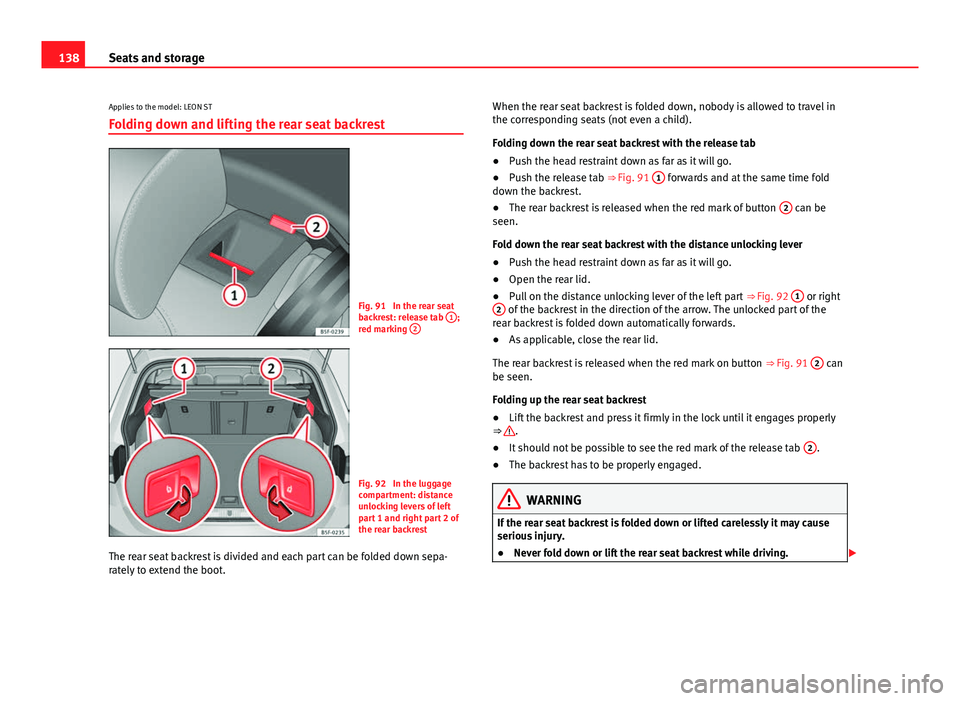
Fig. 91 In the rear seat
backrest: release tab 1;
red marking 2
Fig. 92 In the luggage
compartment: distance
unlocking levers of left
part 1 and right part 2 of
the rear backrest
The rear seat backrest is divided and each part can be folded down sepa-
rately to extend the boot. When the rear seat backrest is folded down, nobody is allowed to travel in
the corresponding seats (not even a child).
Folding down the rear seat backrest with the release tab
●
Push the head restraint down as far as it will go.
● Push the release tab ⇒ Fig. 91 1
forwards and at the same time fold
down the backrest.
● The rear backrest is released when the red mark of button 2
can be
seen.
Fold down the rear seat backrest with the distance unlocking lever
● Push the head restraint down as far as it will go.
● Open the rear lid.
● Pull on the distance unlocking lever of the left part ⇒ Fig. 92 1
or right
2 of the backrest in the direction of the arrow. The unlocked part of the
rear backrest is folded down automatically forwards.
● As applicable, close the rear lid.
The rear backrest is released when the red mark on button ⇒ Fig. 91 2
can
be seen.
Folding up the rear seat backrest
● Lift the backrest and press it firmly in the lock until it engages properly
⇒
.
● It should not be possible to see the red mark of the release tab 2.
● The backrest has to be properly engaged.
WARNING
If the rear seat backrest is folded down or lifted carelessly it may cause
serious injury.
● Never fold down or lift the rear seat backrest while driving.