158 Seat Mii 2013 Owner's manual
[x] Cancel search | Manufacturer: SEAT, Model Year: 2013, Model line: Mii, Model: Seat Mii 2013Pages: 306, PDF Size: 4.3 MB
Page 160 of 306
158Driver assistance systems
Function
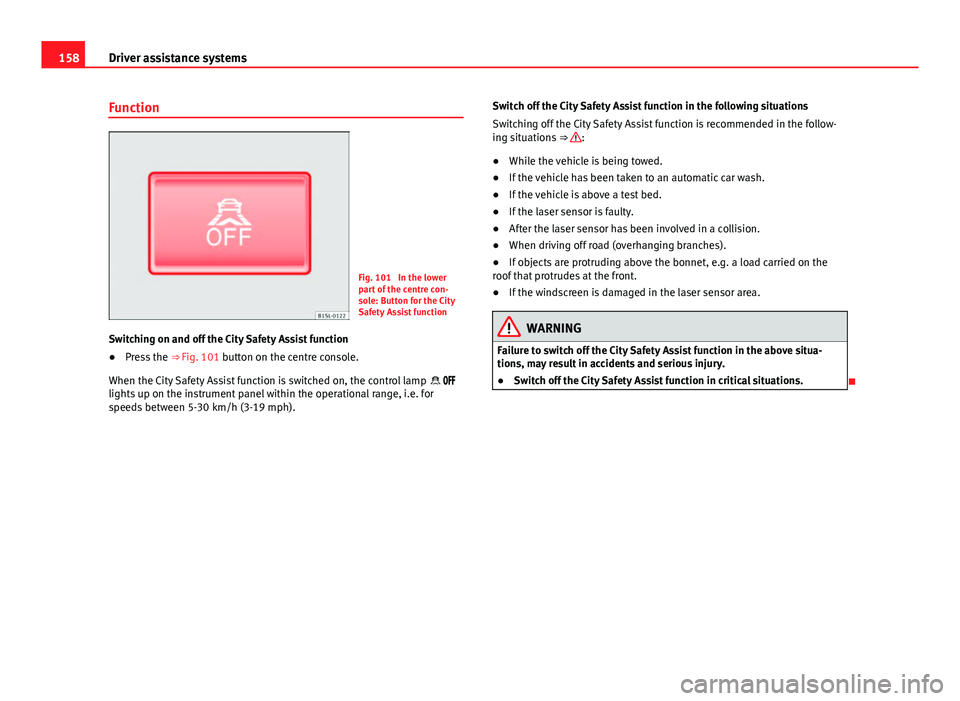
Fig. 101 In the lower
part of the centre con-
sole: Button for the City
Safety Assist function
Switching on and off the City Safety Assist function
● Press the ⇒ Fig. 101 button on the centre console.
When the City Safety Assist function is switched on, the control lamp
lights up on the instrument panel within the operational range, i.e. for
speeds between 5-30 km/h (3-19 mph). Switch off the City Safety Assist function in the following situations
Switching off the City Safety Assist function is recommended in the follow-
ing situations
⇒
:
● While the vehicle is being towed.
● If the vehicle has been taken to an automatic car wash.
● If the vehicle is above a test bed.
● If the laser sensor is faulty.
● After the laser sensor has been involved in a collision.
● When driving off road (overhanging branches).
● If objects are protruding above the bonnet, e.g. a load carried on the
roof that protrudes at the front.
● If the windscreen is damaged in the laser sensor area.
WARNING
Failure to switch off the City Safety Assist function in the above situa-
tions, may result in accidents and serious injury.
● Switch off the City Safety Assist function in critical situations.
Page 274 of 306
272Practical information
3.Carefully remove the cover 1 towards the lever
⇒ Fig. 156 A.
4.Pull the release 3 in the connector 2 in the direction of the arrow
⇒ Fig. 156 B. Use the screwdriver in the vehicle tool kit.
5.Press position 4 and remove the connector 2 ⇒ Fig. 156 B.6.Unscrew the wing nut 5 ⇒ Fig. 156 B.
7.Remove the tail light from the bodywork by carefully pulling back-
wards.
8.Disassemble the tail light unit and place it on a flat, clean surface.
To change the bulb
9.Unlock the bulb holder locking tab (arrow)
⇒ Fig. 157 C and remove
the bulb holder from the tail light.
10.Replace the faulty bulb by a new identical bulb ⇒ Fig. 157 D.
11.Place the lamp holder in the tail light unit. The attachment tabs (ar-
row) should audibly click into place ⇒ Fig. 157 C.
Assembling the tail light units
12.Carefully insert the tail light unit into the opening in the bodywork.
13.Support the tail light with one hand in the assembly position and
securely screw the wing nut with the other 5 ⇒ Fig. 156 B.
14.Ensure that the tail light unit has been correctly fitted and is firmly
secured.
15.Insert the connector 2 into the bulb holder and press the lock 3on the connector in the opposite direction to the arrow ⇒ Fig. 156
B.
16.Insert the cover. The cover should lock into place.17.Close the rear lid ⇒ page 39.Changing the number plate light
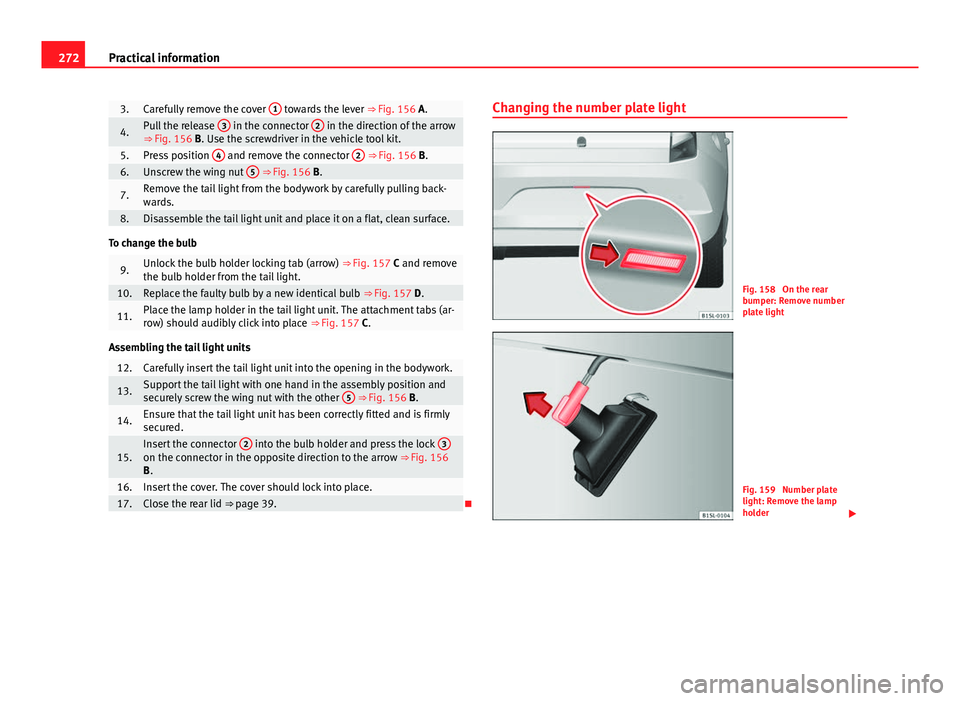
Fig. 158 On the rear
bumper: Remove number
plate light
Fig. 159 Number plate
light: Remove the lamp
holder
Page 275 of 306
273
Practical information
Complete operations only in the sequence given:
1.Always take the checklist into account and take the necessary ac-
tions ⇒ page 267.
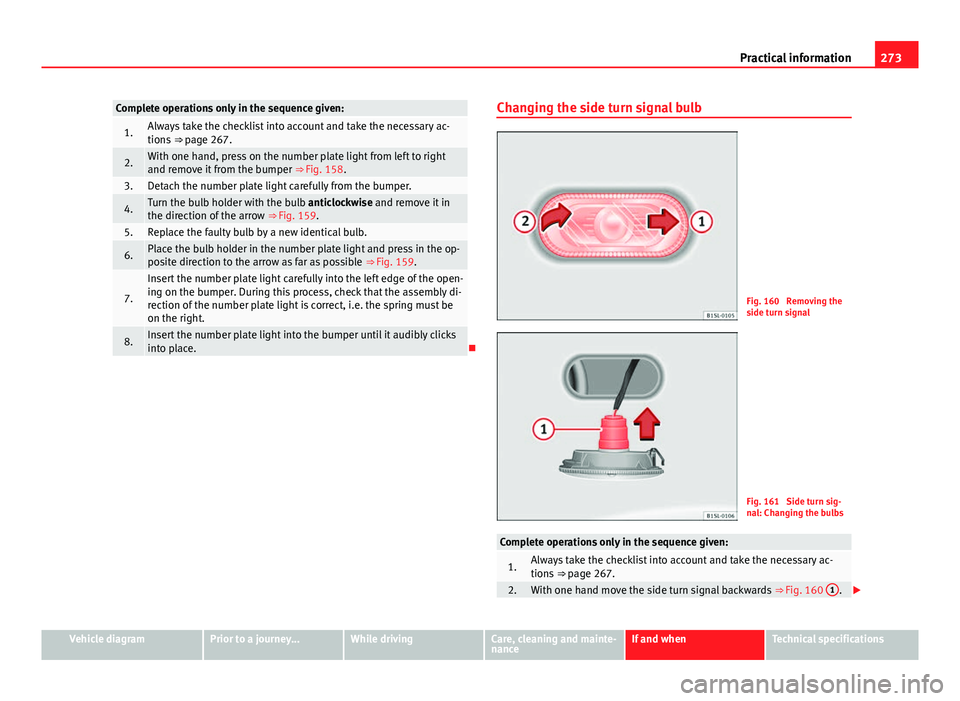
2.With one hand, press on the number plate light from left to right
and remove it from the bumper ⇒ Fig. 158.
3.Detach the number plate light carefully from the bumper.
4.Turn the bulb holder with the bulb anticlockwise and remove it in
the direction of the arrow ⇒ Fig. 159.
5.Replace the faulty bulb by a new identical bulb.
6.Place the bulb holder in the number plate light and press in the op-
posite direction to the arrow as far as possible ⇒ Fig. 159.
7.
Insert the number plate light carefully into the left edge of the open-
ing on the bumper. During this process, check that the assembly di-
rection of the number plate light is correct, i.e. the spring must be
on the right.
8.Insert the number plate light into the bumper until it audibly clicks
into place.Changing the side turn signal bulb
Fig. 160 Removing the
side turn signal
Fig. 161 Side turn sig-
nal: Changing the bulbs
Complete operations only in the sequence given:
1.Always take the checklist into account and take the necessary ac-
tions
⇒ page 267.
2.With one hand move the side turn signal backwards ⇒ Fig. 160 1.
Vehicle diagramPrior to a journey...While drivingCare, cleaning and mainte-
nanceIf and whenTechnical specifications
Page 293 of 306
Changing gear . . . . . . . . . . . . . . . . . . . . . . . . . 124Automatic gearbox . . . . . . . . . . . . . . . . . . . 129
Engaging gears (automatic gearbox) . . . . 129
Engaging gears (manual gearbox) . . . . . . 128
Manual gearbox . . . . . . . . . . . . . . . . . . . . . 128
Warning and control lamps . . . . . . . . . . . . 125
with Tiptronic . . . . . . . . . . . . . . . . . . . . . . . 130
Changing gears Gear recommendation . . . . . . . . . . . . . . . . 132
Changing the bulbs Side turn signal . . . . . . . . . . . . . . . . . . . . . 273
Changing the wheel After changing the wheel . . . . . . . . . . . . . . 257
Chassis number . . . . . . . . . . . . . . . . . . . . . . . . 283
Checking Tyre pressures . . . . . . . . . . . . . . . . . . . . . . . 215
Checking the oil level . . . . . . . . . . . . . . . . . . . . 186
Checklist Before working in the engine compart-ment . . . . . . . . . . . . . . . . . . . . . . . . . . . . . 182
Changing bulbs . . . . . . . . . . . . . . . . . . . . . 267
In case of an emergency . . . . . . . . . . . . . . 241
Check list Journey preparations . . . . . . . . . . . . . . . . . . 25
Preparations for changing a wheel . . . . . . 253
Raising the vehicle with the jack . . . . . . . . 256
Checklist Refilling precautions . . . . . . . . . . . . . . . . . 176
Check list Safe driving . . . . . . . . . . . . . . . . . . . . . . . . . 25 Checklist
Seat belts . . . . . . . . . . . . . . . . . . . . . . . . . . . 60
Tire Mobility Set . . . . . . . . . . . . . . . . . . . . . 260
Transporting children in the vehicle . . . . . . 75
Check list Upholstery . . . . . . . . . . . . . . . . . . . . . . . . . 206
Child safety seat Securing with seat belt . . . . . . . . . . . . . . . . 78
Child seat ISOFIX child seat on rear seats . . . . . . . . . . 78
Mounting child seats . . . . . . . . . . . . . . . . . . 76
Mounting systems . . . . . . . . . . . . . . . . . . . . 77
On rear seats . . . . . . . . . . . . . . . . . . . . . . . . 78
On the front passenger seat . . . . . . . . . . . . 77
Regulations . . . . . . . . . . . . . . . . . . . . . . . . . . 75
Securing using a Top Tether retaining strap 81
Securing using ISOFIX . . . . . . . . . . . . . . . . . 79
Securing using LATCH . . . . . . . . . . . . . . . . . 79
Transporting children in the vehicle . . . . . . 75
Weight categories . . . . . . . . . . . . . . . . . . . . 75
Child seats . . . . . . . . . . . . . . . . . . . . . . . . . . . . . 74 Disabling the front passenger front airbag 71
Chromework care . . . . . . . . . . . . . . . . . . . . . . . 202
Cigarette lighter . . . . . . . . . . . . . . . . . . . . . . . . 115
City Safety Assist function . . . . . . . . . . . . . . . . 155 Control lamp . . . . . . . . . . . . . . . . . . . . . . . . 156
Function . . . . . . . . . . . . . . . . . . . . . . . . . . . 158
Sensor . . . . . . . . . . . . . . . . . . . . . . . . . . . . . 157
Special driving situations . . . . . . . . . . . . . 159
Warning lamp . . . . . . . . . . . . . . . . . . . . . . . 156
Cleaning dash panel . . . . . . . . . . . . . . . . . . . . . . . . . 208
Engine compartment . . . . . . . . . . . . . . . . . 204 Seat belts . . . . . . . . . . . . . . . . . . . . . . . . . . 208
See "Care of your vehicle" . . . . . . . . . . . . . 197
wheels . . . . . . . . . . . . . . . . . . . . . . . . . . . . . 203
Windscreen wiper blades . . . . . . . . . . . . . 201
Clock . . . . . . . . . . . . . . . . . . . . . . . . . . . . . . . . . . 18
Close Sliding/tilting electric panoramic sunroof . 43
Closing Doors . . . . . . . . . . . . . . . . . . . . . . . . . . . . . . . 37
from the exterior . . . . . . . . . . . . . . . . . . . . . . 33
from the inside . . . . . . . . . . . . . . . . . . . . . . . 34
Rear Lid . . . . . . . . . . . . . . . . . . . . . . . . . . . . . 40
Windows . . . . . . . . . . . . . . . . . . . . . . . . . . . . 42
Coat hooks . . . . . . . . . . . . . . . . . . . . . . . . . . . . 112
Code number . . . . . . . . . . . . . . . . . . . . . . . . . . 248
Collection of end-of-life vehicles . . . . . . . . . . . 235
Compartments Centre console . . . . . . . . . . . . . . . . . . . . . . 109
Glove compartment . . . . . . . . . . . . . . 110, 111
luggage compartment variable floor . . . . 101
Other storage compartments . . . . . . . . . . 112
Passenger side . . . . . . . . . . . . . . . . . . 110, 111
Sunglasses storage compartment . . . . . . 110
Components . . . . . . . . . . . . . . . . . . . . . . . . . . . 224
Conformity certification . . . . . . . . . . . . . . . . . . 235
Consumer disconnection . . . . . . . . . . . . . . . . . 196
Consumption How it is determined . . . . . . . . . . . . . . . . . 284
Information . . . . . . . . . . . . . . . . . . . . . . . . . 284
control lamp on the driver door . . . . . . . . . . . . . . . . . . . . . 36
Vehicle key . . . . . . . . . . . . . . . . . . . . . . . . . . 30
291
Index