stop start Seat Mii 2017 Owner's Guide
[x] Cancel search | Manufacturer: SEAT, Model Year: 2017, Model line: Mii, Model: Seat Mii 2017Pages: 232, PDF Size: 4.91 MB
Page 146 of 232

Operation
Automatic gear change Fig. 148
Automatic gearbox diagram of gears Read the additional information carefully
› ›
›
page 27
Move the selector lever to the N position to:
● Starting up the engine
● Remove the key from the ignition switch
● Engage the steering wheel lock
Move the sel
ector lever to the D or R position
to:
● Park the vehicle
● Repair a puncture
● Changing a wheel
To mov
e the gear selector lever from the posi-
tion N to D or to R, first press and hold the
brake pedal. In the instrument panel display, with the igni-
tion switc
hed on, the selected gear range or
the gear engaged in the gearbox is shown.
- Reverse gear
Reverse gear is selected. Engage only when
the vehicle is stopped.
- Neutral
The gearbox is in neutral. No movement is
transmitted to the wheels and the engine
does not act as a brake.
- Standard driving position
The gears are changed (up and down) auto-
matically. The gear shifts are determined by
the engine load, your individual driving style
and the speed of the vehicle.
- Tiptronic driving position (manual shift
programme)
All gears can be changed (up and down)
manually ››› page 145. This is possible as
long as the system is not changing gear auto-
matically due to a traffic situation. WARNING
Placing the selector lever in an incorrect posi-
tion ma y
cause loss of control of the vehicle
and a serious accident.
● Do not press the accelerator when engag-
ing a ran
ge of gears. ●
With the en gine ru
nning and a gear range
selected, the vehicle will move when the ac-
celerator is pressed.
● Never engage reverse gear while driving.
● Unintentional movements of the vehicle
coul
d cause serious injury.
● As a driver, you should never leave your ve-
hicle if
the engine is running and a gear range
is engaged. If you have to leave your vehicle
while the engine is running, you must always
apply the handbrake and put the selector lev-
er in position N.
● Never engage the R gear range when the
vehicl
e is moving.
● Never leave the vehicle without applying
the handbrak
e. With the engine running the
vehicle moves downhill regardless of the gear
range selected. Note
If, while driving, the selector lever is acciden-
ta l
ly placed in position N, lift your foot off the
accelerator. Wait until the engine is running
at idle speed before selecting a new gear
range. 144
Page 147 of 232
Driving
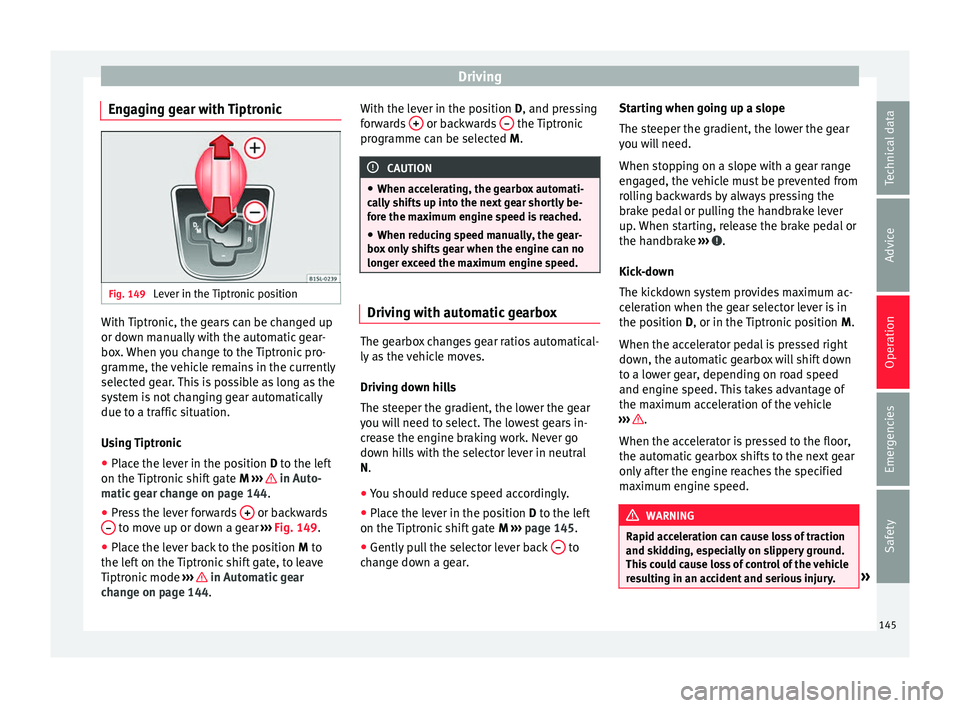
Engaging gear with Tiptronic Fig. 149
Lever in the Tiptronic position With Tiptronic, the gears can be changed up
or do
wn m
anual
ly with the automatic gear-
box. When you change to the Tiptronic pro-
gramme, the vehicle remains in the currently
selected gear. This is possible as long as the
system is not changing gear automatically
due to a traffic situation.
Using Tiptronic
● Place the lever in the position D to the lef
t
on the Tiptronic shift gate M ››› in Auto-
m atic
g
ear change on page 144.
● Press the lever forwards + or backwards
– to move up or down a gear
››
›
Fig. 149.
● Place the lever back to the position M to
the lef
t on the Tiptronic shift gate, to leave
Tiptronic mode ››› in Automatic gear
c h
an
ge on page 144. With the lever in the position D, and pres
sing
forwards + or backwards
– the Tiptronic
pr ogr
amme c
an be selected M. CAUTION
● When acc el
erating, the gearbox automati-
cally shifts up into the next gear shortly be-
fore the maximum engine speed is reached.
● When reducing speed manually, the gear-
box on
ly shifts gear when the engine can no
longer exceed the maximum engine speed. Driving with automatic gearbox
The gearbox changes gear ratios automatical-
ly
a
s
the vehicle moves.
Driving down hills
The steeper the gradient, the lower the gear
you will need to select. The lowest gears in-
crease the engine braking work. Never go
down hills with the selector lever in neutral
N.
● You should reduce speed accordingly.
● Place the lever in the position D to the lef
t
on the Tiptronic shift gate M ›››
page 145.
● Gently pull the selector lever back – to
c h
an
ge down a gear. Starting when going up a slope
The steeper the gr
adient, the lower the gear
you will need.
When stopping on a slope with a gear range
engaged, the vehicle must be prevented from
rolling backwards by always pressing the
brake pedal or pulling the handbrake lever
up. When starting, release the brake pedal or
the handbrake ››› .
Kic k
-do
wn
The kickdown system provides maximum ac-
celeration when the gear selector lever is in
the position D, or in the Tiptronic position M.
When the accelerator pedal is pressed right
down, the automatic gearbox will shift down
to a lower gear, depending on road speed
and engine speed. This takes advantage of
the maximum acceleration of the vehicle
››› .
When the ac c
el
erator is pressed to the floor,
the automatic gearbox shifts to the next gear
only after the engine reaches the specified
maximum engine speed. WARNING
Rapid acceleration can cause loss of traction
and skid din
g, especially on slippery ground.
This could cause loss of control of the vehicle
resulting in an accident and serious injury. » 145
Technical data
Advice
Operation
Emergencies
Safety
Page 148 of 232

Operation
●
Alw a
ys adapt your driving style to suit the
flow of traffic.
● Only use the kick-down function or rapid
accel
eration if visibility, weather, road and
traffic conditions so permit.
● Never put other road users in danger by ac-
celer
ating or with your driving style. CAUTION
If you stop on a hill with a gear range engag-
ed, do not try
to prevent the vehicle from roll-
ing back by pressing on the accelerator. Oth-
erwise, the automatic gearbox may overheat
causing damage. Automatic gearbox malfunction
Back-up programme
When aut
om
atic
gearbox warning and indica-
tion lamps light up on the instrument panel,
there may be a system malfunction
››› page 142. In the event of some faults the
automatic gearbox functions using a backup
programme. When the programme is activa-
ted, it is possible to drive the vehicle, howev-
er, at low speeds and within a selected range
of gears.
With the manual gearbox, in some cases it is
not possible to drive with all the gears .
In all cases the automatic gearbox must be
checked at a specialised workshop. Automatic gearbox overheating
The automatic
gearbox can overheat with a
prolonged start up, or when stopping and
starting continuously. This overheating is dis-
played with a warning lamp in the instru-
ment panel. Additionally, an audible warning
can be heard. Stop and let the gearbox cool
››› .
The v
ehic
le moves forward or back despite
having selected a gear range
When the vehicle does not move in the re-
quired direction, the system may not have
the gear range correctly engaged. Press the
brake pedal and engage the gear range
again. If the vehicle still does not move in the
required direction, there is a system malfunc-
tion. Seek specialist assistance and have the
system checked. CAUTION
● When the ge arbo
x is displayed as overheat-
ing for the first time, the vehicle must be
parked safely or must be driven at a speed of
more than 20 km/h (12 mph).
● When the warning lamp lights up and the
audible w
arning is heard, the vehicle must be
parked safely and the engine switched off.
Let the gearbox cool down.
● To prevent damage to the gearbox, driving
must
only be continued when the warning
lamps are no longer lit up. While the gearbox is overheated, starting up and driving, even
at a s
lo
w speed should be avoided. Recommended gear display
In some vehicles, the recommended gear for
reduc
in
g fuel consumption is displayed on
the instrument panel:
DisplayMeaning
Optimum gear.
Recommendation to change up a gear.
Recommendation to change down a
gear.
WARNING
The recommended gear display is intended as
a guideline only; it shou
ld never replace the
driver's attention to driving carefully.
● Responsibility for selecting the correct gear
for eac
h situation continues to lie with the
driver, for example when overtaking or climb-
ing a hill. For the sake of the environment
Selecting the most appropriate gear for the
sit uation w
ill help you to save fuel.146
Page 149 of 232
Driving
Note
The recommended gear display is switched
off when the c lut
ch pedal is pressed.Steering
Introduction The power steering* is not hydraulic but elec-
tromec
h
anical. The advantage of this steer-
ing system is that it disposes of hydraulic
tubes, hydraulic oil, the pump, filter and oth-
er components. The electromechanical sys-
tem saves fuel. While a hydraulic system re-
quires oil pressure to be maintained, electro-
mechanical steering only requires energy
when the steering wheel is turned.
With the power steering system, the assisted
steering function automatically adjusts ac-
cording to the vehicle speed, the steering tor-
que and the wheel turning angle. The power
steering only works when the engine is run-
ning. WARNING
If the power steering is not working then the
st eerin
g wheel is much more difficult to turn
and the vehicle more difficult to control.
● The power steering only works when the
engine is
running. ●
Never a l
low the vehicle to move when the
engine is switched off.
● Never remove the key from the ignition if
the vehic
le is in motion. The steering may
lock and it will not be possible to turn the
steering wheel. Control and warning lamps
It lights up red
Power steer-
ing faulty.The steering system should be checked
by a specialised workshop as soon as
possible.
It lights up yellow
Power steer-
ing opera-
tion re-
duced.
The steering system should be checked
by a specialised workshop as soon as
possible.
If, after restarting the engine and driv-
ing for a short distance, the yellow
warning lamp no longer comes on, it will
not be necessary to take the vehicle to a
specialised workshop.
Flashes red
Fault in the
steering col-
umn elec-
tronic lock.
Do not drive on!
Seek professional advice.
It flashes yellow
Steering col-
umn devia-
tion.Gently turn the steering wheel to and
fro.
Steering
wheel not
unlocked or
locked.
Remove the key from the ignition and
then switch the ignition back on. If nec-
essary, check the messages displayed
on the instrument panel display.
Do not drive on, if
the steering column
remains locked after the ignition has
been switched on. Seek specialist assis-
tance. Several warning and control lamps light up
f
or a f
ew sec
onds when the ignition is switch-
ed on, signalling that the function is being
verified. They will switch off after a few sec-
onds. WARNING
If the warning lamps are ignored, the vehicle
ma y
stall in traffic, or may cause accidents
and severe injuries.
● Never ignore the warning lamps.
● Stop the vehicle safely as soon as possible. CAUTION
Failure to heed the warning lamps when they
appe ar m
ay result in faults in the vehicle. 147
Technical data
Advice
Operation
Emergencies
Safety
Page 154 of 232
Operation
Catalytic converter The catalytic converter permits the subse-
quent tr
e
atment of the exhaust gases thus
reducing contaminating gas emissions. To
ensure a longer working life for the exhaust
system and catalytic converter in a petrol en-
gine:
● Always use unleaded petrol.
● Never run the fuel tank completely dry.
● Do not top up with too much engine oil
›››
page 189.
● Do not tow-start the vehicle; use the starter
cab l
es ›››
page 43.
If you should notice misfiring, uneven run-
ning or loss of power when the car is moving,
reduce speed immediately. Have the car in-
spected by a specialised workshop. If this
happens, unburnt fuel can enter the exhaust
system and escape into the atmosphere. The
catalytic converter can also be damaged by
overheating. For the sake of the environment
Even when the emission control system is
work in
g perfectly, there may be a smell of
sulphur under certain conditions. This de-
pends on the sulphur content of the fuel
used. Driving tips
Driv in
g abr
oad In some countries, certain safety regulations
and requir
ements
are in force relating to ex-
haust gas emissions, which differ from the
technical characteristics of the vehicle. Be-
fore travelling abroad, SEAT recommends you
consult a technical service about the legal re-
quirements and the following points:
● Does the vehicle need technical modifica-
tions f
or driving abroad, for example, adjust-
ment of the headlamps?
● Does the vehicle have all the tools, diag-
nostic
s equipment and spare parts required
for inspections and repairs?
● Are there any SEAT dealers in the destina-
tion countr
y?
● For petrol vehicles: Is unleaded petrol avail-
able at
the right octane rating?
● For diesel engines: is diesel fuel available
with a low s
ulphur content?
● Are a suitable engine oil ( ›››
page 189) and
other engine fluids complying with SEAT
specifications available in the destination
country?
● Are special tyres required in the destination
countr
y? CAUTION
SEAT does not accept liability for any damage
to the v
ehicle due to the use of a lower quali-
ty fuel, an inadequate service or the non-
availability of genuine spare parts. Driving through flooded roadways
To prevent damage to the vehicle when driv-
ing thr
ough w
ater, for example, along a floo-
ded road, please observe the following:
● Check the depth of the water before enter-
ing the flooded z
one. The water should never
come above the lower edge of the bodywork
››› .
● Do not drive faster than a pedestrian.
● Do not stop in the water, use reverse gear
or sw it
c
h off the engine.
● Oncoming traffic will cause waves which
raise the l
evel of the water, making it difficult
to cross the water.
● Disconnect the Start-Stop system whenever
cro
ssing water. WARNING
When driving through water, mud, melted
sno w
, etc., please remember that due to
damp or frozen brake discs and shoes in win-
ter, the braking effect may be delayed, there-
fore the required braking distance is greater. 152
Page 162 of 232

Operation
Possible malfunction in the laser sensor
If l
a
ser sensor operation is impaired, for ex-
ample due to heavy rain, mist, snow or dirt,
the City Safety Assist system function is tem-
porarily switched off. On the instrument pan-
el display the control lamp flashes.
When the fault in the laser sensor has been
rectified, the City Safety Assist system func-
tion automatically becomes available again.
The control lamp switches off.
The following conditions could prevent the
City Safety Assist system from functioning:
● Tight bends.
● Accelerator pressed all the way down to the
floor.
● If the C
ity Safety Assist system is switched
off or there i
s a fault ››› page 157.
● If the laser sensor is dirty, covered or over-
heated ›
›› page 158.
● In the event of snow, heavy rain or dense
fog.
● If ther
e are vehicles in front.
● Vehicles changing lanes.
● Vehicles moving in the opposite direction
in the same lane.
● V
ery dirty vehicles with a low degree of re-
flection.
● Pre
sence of thick dust. Hill driving assistant*
Operation This function is only included in vehicles with
ESC.
The hi
l
l driving assistant helps the driver to
move off and upward on a hill when the vehi-
cle is stationary.
The system maintains brake pressure for ap-
proximately two seconds after the driver
takes his foot off the brake pedal to prevent
the vehicle from lurching backward when it is
started. During these 2 seconds, the driver
has enough time to release the clutch pedal
and accelerate without the vehicle moving
and without having to use the handbrake,
making start-up easier, more comfortable
and safer.
These are the basic operation conditions:
● being on a ramp or hill/slope,
● doors closed,
● vehicle completely stationary,
● engine running and foot on the brake,
● besides having a gear engaged or being in
neutral f
or manual gear change and with the
selector lever at positions S, D or R in vehi-
cles with an automatic gearbox.
This system is also active when reversing up-
hill. WARNING
● If y
ou do not start the vehicle immediately
after taking your foot off the brake pedal, the
vehicle may start to roll back under certain
conditions. Depress the brake pedal or use
the hand brake immediately.
● If the engine stalls, depress the brake ped-
al or u
se the hand brake immediately.
● When following a line of traffic uphill, if you
want t
o prevent the vehicle from rolling back
accidentally when starting off, hold the brake
pedal down for a few seconds before starting
off. Note
The Official Service or a specialist workshop
can t el
l you if your vehicle is equipped with
this system. Start-Stop System
C ontr
o
l lamps
It lights up
The Start-Stop system is enabled.
160
Page 163 of 232
Driver assistance systems
It lights up
The Start-Stop sys-
tem is enabled but
the engine cannot
be automatically
stopped.
Contact a specialised workshop.
It lights up
The Start-Stop sys-
tem cannot start the
engine.Start the engine by hand using
the vehicle's key
››› page 133.
There is a fault in the
alternator.››› page 196
Flashes
The Start-Stop sys-
tem is not available.Contact a specialised workshop.
Some warning and control lamps will light up
briefly
when the ignition i
s
switched on to
check certain functions. They will switch off
after a few seconds. WARNING
Observe the safety warnings ›››
in On the
ins trument
panel on page 26. Start-Stop system
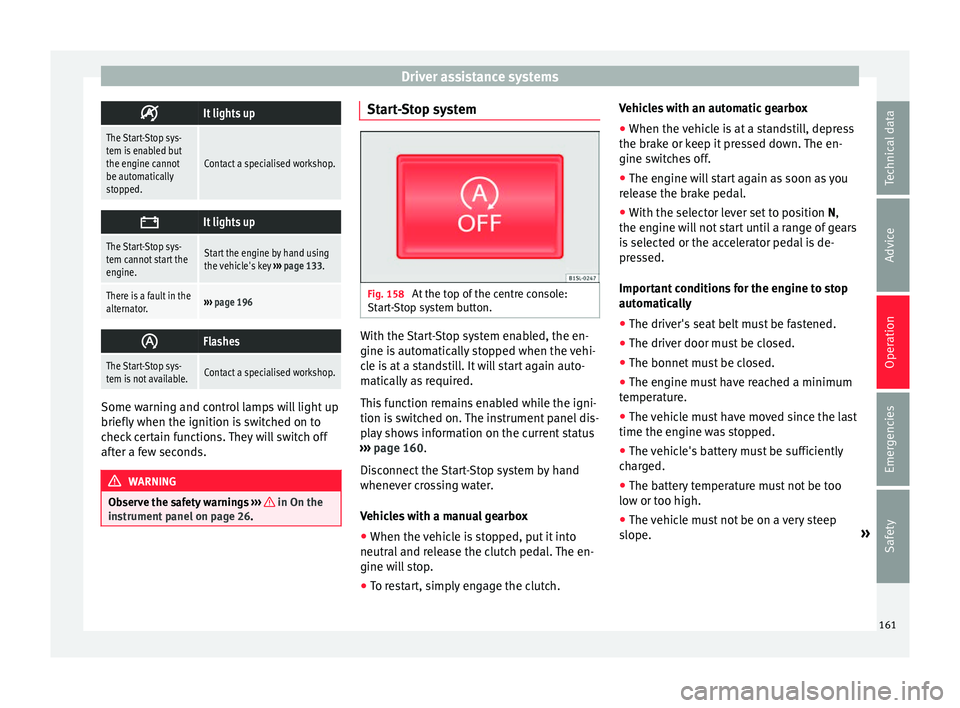
Fig. 158
At the top of the centre console:
St ar
t
-Stop system button. With the Start-Stop system enabled, the en-
gine i
s
aut
omatically stopped when the vehi-
cle is at a standstill. It will start again auto-
matically as required.
This function remains enabled while the igni-
tion is switched on. The instrument panel dis-
play shows information on the current status
››› page 160.
Disconnect the Start-Stop system by hand
whenever crossing water.
Vehicles with a manual gearbox
● When the vehicle is stopped, put it into
neutral and r
elease the clutch pedal. The en-
gine will stop.
● To restart, simply engage the clutch. Vehicles with an automatic gearbox
●
When the vehicle is at a standstill, depress
the brake or k
eep it pressed down. The en-
gine switches off.
● The engine will start again as soon as you
rele
ase the brake pedal.
● With the selector lever set to position N,
the engine wi
ll not start until a range of gears
is selected or the accelerator pedal is de-
pressed.
Important conditions for the engine to stop
automatically
● The driver's seat belt must be fastened.
● The driver door must be closed.
● The bonnet must be closed.
● The engine must have reached a minimum
temperat
ure.
● The vehicle must have moved since the last
time the engine wa
s stopped.
● The vehicle's battery must be sufficiently
char
ged.
● The battery temperature must not be too
low or too high.
● The
vehicle must not be on a very steep
slope. »
161
Technical data
Advice
Operation
Emergencies
Safety
Page 164 of 232
Operation
Conditions for the engine to restart automat-
ic a
l
ly
The engine can be automatically restarted in
the following cases:
● If the vehicle starts to moves.
● If the battery voltage drops.
Conditions
requiring engine start-up using
the key
The engine has to be manually started in the
following cases:
● If the driver unbuckles his/her seat belt.
● If the driver door is opened.
● If the bonnet is opened.
Switc
hing the Start-Stop system on and off
● Press the button situat
ed in the centre
console ››› Fig. 158.
● The button will light up when the Start-Stop
syst
em is switched off.
The engine will start immediately if the vehi-
cle is in Stop mode when the system is
switched off by hand. WARNING
The smart technology included in the hill
hol d c
annot change the laws of physics. Do
not let the extra convenience afforded by the hill hold tempt you into taking any risks
when drivin
g.
● An
y accidental movement of the vehicle
coul
d result in serious injury.
● The hill hold is not a replacement for driver
awar
eness.
● Adjust your speed and driving style to visi-
bility
, weather, road and traffic conditions.
● The hill hold cannot always keep the vehi-
cle at
a standstill on a slope or brake suffi-
ciently when travelling downhill (e.g. on slip-
pery or frozen surfaces). WARNING
The brake servo and the electromechanical
st eerin
g do not work when the engine is
switched off.
● The vehicle must never be allowed to move
with the engine sw
itched off.
● Disconnect the Start-Stop system before
workin
g in the engine compartment. CAUTION
The vehicle's battery could be damaged if the
vehic l
e is used for long periods at very high
outside temperatures. Note
In some cases, it may be necessary to start
the engine b y
hand using the key. Refer to the corresponding control lamp on the instru-
ment p
anel
.162
Page 187 of 232
Checking and refilling levels
driving. Whenever the ignition is switched
on, the needl e c
h
anges first for a few sec-
onds to the petrol area in order to display the
current level of fuel. The needle then moves
to the natural gas area. After the engine is
started, the needle changes to the area corre-
sponding to the current operating mode.
Problem: if the vehicle is left parked for a
long time just after refuelling, the gas level
indicator does not accurately indicate the
same level shown after refuelling when the
vehicle is started up again. This is not due to
a leak in the system, but to a drop in pres-
sure in the gas tank for technical reasons af-
ter a cooling phase immediately after refuel-
ling. WARNING
Driving with insufficient fuel reserve could re-
su lt
in the vehicle breaking down in traffic
and a serious accident.
● If the fuel level is too low then the fuel sup-
ply t
o the engine can become irregular espe-
cially on slopes.
● If the engine “is choked” or stalls due to
lack
of or irregularity of the fuel supply, the
power steering as well as all of the driver as-
sistance systems including braking assis-
tance will stop working.
● Always refuel when there is only one quar-
ter of the f
uel tank left to avoid running out of
fuel. CAUTION
● Alw a
ys pay attention to any lit control
lamps and to the corresponding descriptions
and instructions to avoid damage to the vehi-
cle.
● Never run the fuel tank completely dry. An
irregu
lar fuel supply may lead to ignition
faults and unburnt fuel could enter the ex-
haust system. This could damage the catalyt-
ic converter. Note
The arrow next to the fuel pump symbol on
the ins trument
panel ››› Fig. 164 indicates the
side of the vehicle on which the fuel tank flap
is located. Refuelling with petrol
Fig. 166
Open fuel tank flap with tank cap in
the ho l
der Read the additional information carefully
› ›
›
page 31
Before refuelling, always turn off the engine,
the ignition, mobile telephones, auxiliary
heating and keep them off during refuelling.
Refuelling
The correct petrol type for the vehicle is loca-
ted on a sticker inside the fuel tank flap
››› page 181.
● If the automatic filler nozzle is operated
correctly
, it will switch itself off as soon as
the fuel tank is full ››› .
● Do not continue to refuel if it is turned off!
Other w
i
se, this will fill the expansion cham-
ber and fuel may leak out if the ambient con-
ditions are warm.
Vehicles with a natural gas engine
Every 6 months it is necessary to run on pet-
rol until the control lamp switches off and
then the tank must be refilled. This is neces-
sary to ensure the efficient operation of the
system and the fuel quality required for run-
ning on gas. WARNING
Do not continue refilling once the fuel nozzle
ha s
switched itself off. The fuel tank may be
filled too much. As a result, fuel may spurt
out and spill. This could lead to a fire, explo-
sion and severe injuries. » 185
Technical data
Advice
Operation
Emergencies
Safety
Page 189 of 232
Checking and refilling levels
●
Noise s
heard when refuelling are normal
and do not indicate the presence of a fault in
the system.
● The vehicle natural gas system is prepared
both for ref
uelling with a small compressor
(slow refuel) and a large compressor (fast re-
fuel) in natural gas service stations. Bonnet
Work in
g in the engine compartment Read the additional information carefully
› ›
›
page 10
Before working in the engine compartment,
make sure that the vehicle is parked on hori-
zontal and firm ground.
The engine compartment of the vehicle is a
hazardous area. Never work on the engine or
in the engine compartment if you are not fa-
miliar with the operations to be carried out,
the applicable safety standards and especial-
ly if you do not have the necessary instru-
ments, liquids and tools ››› ! If required,
h av
e an
y work carried out by a specialised
workshop. Negligent work can cause serious
injury. WARNING
If the vehicle moves unexpectedly, this could
cau se seriou
s injury. ●
Never w ork
under the vehicle if it has not
been immobilized. If you must work under-
neath the vehicle with the wheels in contact
with the ground then it should be parked on
flat ground, the wheels should be prevented
from moving and the key should be removed
from the ignition.
● If you have to work underneath the vehicle,
you mus
t use suitable stands additionally to
support the vehicle, there is a risk of acci-
dent!. The jack is not intended for this kind of
work and its failure could lead to severe inju-
ries.
● Disconnect the Start-Stop system. WARNING
The engine compartment is a dangerous area
cap ab
le of causing serious injury.
● For all type of work, always take the utmost
precaution
s, work carefully and note the gen-
eral safety standards in force. Never take per-
sonal risks.
● Never work on the engine or in the engine
compar
tment if you are not familiar with the
necessary operations. If you are not sure
about procedures then visit a specialised
workshop to carry out the necessary work.
Working incorrectly can cause serious inju-
ries.
● Never open the bonnet if you see steam or
cool
ant escaping from the engine compart-
ment. This may cause serious burns. Always
wait until you cannot see or hear the sound of steam or coolant coming from the engine
comp
ar
tment.
● Always allow the engine to cool down be-
fore openin
g the bonnet.
● Contact with hot elements of the engine
and the exhau
st system can cause burns.
● Once the engine has cooled, follow the in-
structions
below before opening the bonnet:
– Engage the handbrake and place the gear
selector lever in N or the gear stick in
neutral.
– Remove the key from the ignition.
– Keep children away from the engine com-
partment and never leave them unsuper-
vised.
● When the engine is warm or hot, the cool-
ing sys
tem is pressurised. Do not unscrew
the cap on the expansion tank when the en-
gine is hot. Otherwise, coolant may spray out
under pressure causing burns and serious in-
jury.
– After cooling, carefully and slowly un-
screw the cap anticlockwise, gently
pressing down on it.
– Always protect your face, hands and arms
from hot coolant and steam using a large,
thick cloth.
● When refilling liquids, avoid spilling them
on part
s of the engine and the exhaust sys-
tem. Spilled liquids could cause a fire. » 187
Technical data
Advice
Operation
Emergencies
Safety