engine oil Seat Mii 2017 Owner's manual
[x] Cancel search | Manufacturer: SEAT, Model Year: 2017, Model line: Mii, Model: Seat Mii 2017Pages: 232, PDF Size: 4.91 MB
Page 4 of 232
Frequently Asked Ques-
tion
sBefore driving
How do you adjust the seat?
››› page 12
How do you adjust the steering wheel? ››› page 14
How do you adjust the exterior mirrors? ››› page 13
How do you turn on the exterior lights? ››› page 21
How does the automatic gearbox selector lever work?
››› page 27
How do you refuel? ››› page 31
How do you activate the windscreen wipers and wind-
screen washer system? ››› page 22
Emergency situations
A warning lamp lights up or flashes. What does this
mean? ››› page 25
Where are the first-aid kit and the warning triangle in
the vehicle? ››› page 70
How do you open the bonnet? ››› page 10
How do you perform a jump start? ››› page 43
Where is the vehicle tool kit located? ››› page 70
How do you repair a tyre with the anti-puncture kit?
››› page 35
How do you change a wheel? ››› page 36
How do you change a fuse? ››› page 34
How do you change a light? ››› page 79
How do you tow a vehicle? ››› page 42
Useful tips
How do you set the time? ››› page 89
When should the vehicle inspection should be per-
formed? ››› page 90
How do you remove the luggage compartment cover?
››› page 125
How do you drive in an economical and environmental-
ly-friendly way? ››› page 149
How do you check and top up the engine oil?
››› page 31
How do you check and top up the engine coolant?
››› page 32
How do you top up the windscreen washer fluid?
››› page 33
How do you check and top up the brake fluid?
››› page 33
How do you check and adjust tyre pressure values?
››› page 203
Vehicle washing tips ››› page 171
Functions of interest
How does the START-STOP system work? ››› page 160
What parking assistants are available? ››› page 153
How does tyre pressure monitoring work? ››› page 206
Interior lighting ››› page 22
Page 6 of 232
Table of Contents
Advice . . . . . . . . . . . . . . . . . . . . . . . . . . . . . . . . 164
Care and maintenance . . . . . . . . . . . . . . . . . . . . 164
Accessories, replacement of parts and modifi-
c ation
s
. . . . . . . . . . . . . . . . . . . . . . . . . . . . . . . . 164
Caring for and cleaning the vehicle exterior . . . 170
Caring for and cleaning the vehicle interior . . . 176
Notes for the user . . . . . . . . . . . . . . . . . . . . . . . . 179
Checking and refilling levels . . . . . . . . . . . . . . . 181
Fuel . . . . . . . . . . . . . . . . . . . . . . . . . . . . . . . . . . . 181
Filling the tank . . . . . . . . . . . . . . . . . . . . . . . . . . 183
Bonnet . . . . . . . . . . . . . . . . . . . . . . . . . . . . . . . . 187
Engine oil . . . . . . . . . . . . . . . . . . . . . . . . . . . . . . 189
Engine coolant . . . . . . . . . . . . . . . . . . . . . . . . . . 192
Brake fluid . . . . . . . . . . . . . . . . . . . . . . . . . . . . . 194
Windscreen washer reservoir . . . . . . . . . . . . . . 195
Vehicle battery . . . . . . . . . . . . . . . . . . . . . . . . . . 196
Wheels and tyres . . . . . . . . . . . . . . . . . . . . . . . . 200
Tyres . . . . . . . . . . . . . . . . . . . . . . . . . . . . . . . . . . 200
Technical data . . . . . . . . . . . . . . . . . . . . . . . . 211
Technical features . . . . . . . . . . . . . . . . . . . . . . . 211
Important information . . . . . . . . . . . . . . . . . . . . 211
Wheels . . . . . . . . . . . . . . . . . . . . . . . . . . . . . . . . 212
Engine data . . . . . . . . . . . . . . . . . . . . . . . . . . . . . 214
Dimensions . . . . . . . . . . . . . . . . . . . . . . . . . . . . . 217
Index . . . . . . . . . . . . . . . . . . . . . . . . . . . . . . . . . 219
4
Page 27 of 232
The essentials
● Re
activ
ating the CCS: Press button
››› Fig. 34 2 in
. The memorised speed
i s
saved and controlled again.
● Increasing stored speed during CCS regula-
tion: pres
s button 2 in
. The vehicle ac-
c el
erates until the new stored speed.
● Reducing stored speed during CCS regula-
tion: pres
s button 2 in t
o lower the
s peed b
y 1 km/h (1 mph). Speed is reduced
until reaching the new stored speed.
● Switching off the CCS: Move switch
›››
Fig. 34 1 to .
The system is disconnec-
t ed and the memori
sed speed is deleted.
››› in Cruise control operation on
page 156
››› page 155 Warning lamps
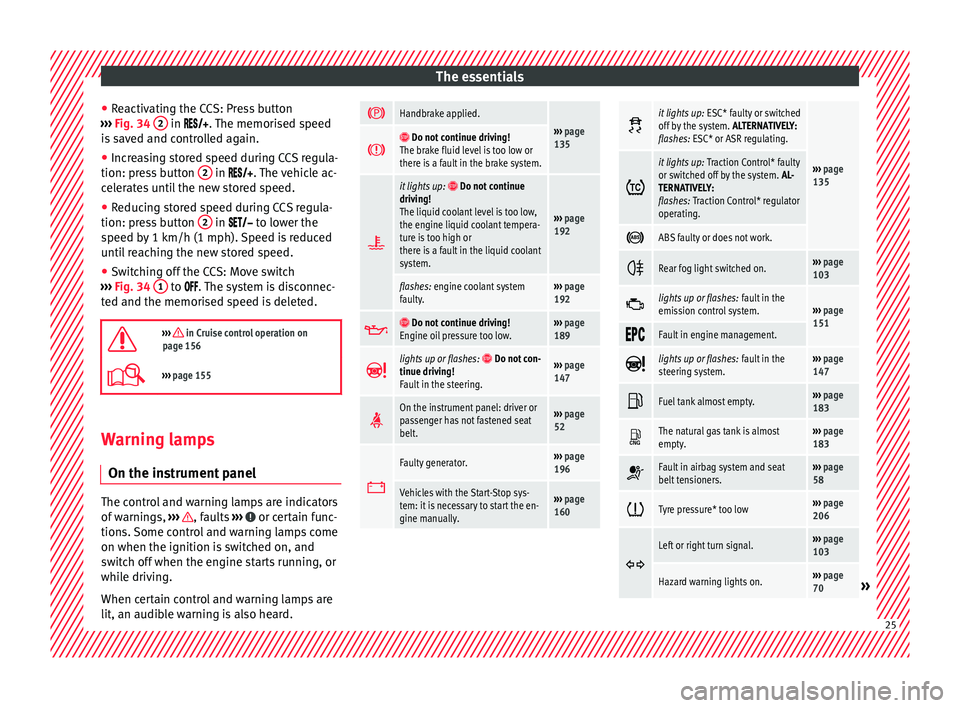
On the in s
trument
panelThe control and warning lamps are indicators
of
w
arnin
gs, ››› , faults
››
› or certain func-
tion s.
Some c
ontrol and warning lamps come
on when the ignition is switched on, and
switch off when the engine starts running, or
while driving.
When certain control and warning lamps are
lit, an audible warning is also heard.
Handbrake applied.
›››
page
135 Do not continue driving!
The brake fluid level is too low or
there is a fault in the brake system.
it lights up:
Do not continue
driving!
The liquid coolant level is too low,
the engine liquid coolant tempera-
ture is too high or
there is a fault in the liquid coolant
system.
››› page
192
flashes: engine coolant system
faulty.››› page
192
Do not continue driving!
Engine oil pressure too low.››› page
189
lights up or flashes: Do not con-
tinue driving!
Fault in the steering.››› page
147
On the instrument panel: driver or
passenger has not fastened seat
belt.›››
page
52
Faulty generator.›››
page
196
Vehicles with the Start-Stop sys-
tem: it is necessary to start the en-
gine manually.››› page
160
it lights up:
ESC* faulty or switched
off by the system. ALTERNATIVELY:
flashes: ESC* or ASR regulating.
››› page
135 it lights up:
Traction Control* faulty
or switched off by the system. AL-
TERNATIVELY:
flashes: Traction Control* regulator
operating.
ABS faulty or does not work.
Rear fog light switched on.›››
page
103
lights up or flashes:
fault in the
emission control system.››› page
151
Fault in engine management.
lights up or flashes: fault in the
steering system.››› page
147
Fuel tank almost empty.›››
page
183
The natural gas tank is almost
empty.›››
page
183
Fault in airbag system and seat
belt tensioners.›››
page
58
Tyre pressure* too low›››
page
206
Left or right turn signal.›››
page
103
Hazard warning lights on.››› page
70» 25
Page 33 of 232
The essentials
Fluid Level control Fi l
lin
g the fuel tank
Fuel tank capacity
Petrol enginesAround 35.0 l,
of which approximately 4.0 are the reserve.
Natural gas en-
gineNatural gas: approx. 11 kg; of whichmax. 1.5 kg reserve
Petrol: approx. 10 l; of which approx. 5 l reserve
Windscreen washer tank capacity
The washer bottle capacity is approximately 3 litres.Fuel
Fig. 39
Open fuel tank flap with tank cap in
the ho l
der Opening the fuel tank cap
The t
ank fl
ap is at the rear of the vehicle on
the right.
● Pull the rear zone of the fuel tank flap to
open.
● Unfold the key shaft if necessary
›››
page 92.
● Insert the vehicle key into the lock cylinder
of the fuel
tank plug and turn the key in an
anticlockwise direction.
● Take out the fuel tank plug by turning it in
an anticlock
wise direction and rest it on the
upper part of the fuel tank flap ››› Fig. 39.
Closing the fuel tank cap
● Screw on the fuel tank filler plug in a clock-
wise dir
ection until it is fully inserted with a
click.
● Insert the vehicle key into the lock cylinder
of the fuel
tank plug, turn the key in a clock-
wise direction and remove the key.
● Press the tank flap until you hear it click in-
to pl
ace. The tank flap must be flush with the
body contour.
››› in Introduction on page 183
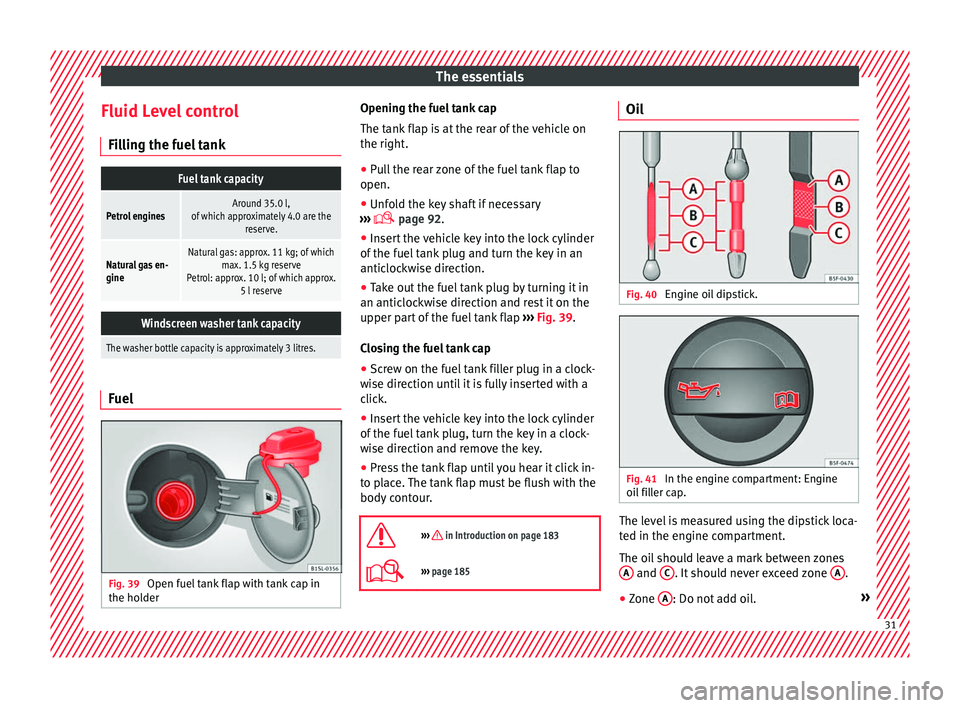
››› page 185 Oil
Fig. 40
Engine oil dipstick. Fig. 41
In the engine compartment: Engine
oi l
fi
ller cap. The level is measured using the dipstick loca-
t
ed in the en
gine c
ompartment.
The oil should leave a mark between zones A and
C . It should never exceed zone
A .
● Zone A : Do not add oil.
» 31
Page 34 of 232
The essentials
● Zone B : You can add oil but keep the level
in th at
zone.
● Zone C : Add oil up to zone
B .
T op
pin
g up engine oil
● Unscrew cap from oil filler opening.
● Add oil slowly.
● At the same time, check the level to ensure
you do not a
dd too much.
● When the oil level reaches at least zone B ,
u n
s
crew the engine oil filler cap carefully.
Engine oil specifications
Service intervalEngine typeSpecifica- tion
Petrol engines with Set
Service Intervals (de-
pendent on time/dis-
tance travelled)1.0lVW 504 00
1.0l GNCVW 502 00
››› in Topping up engine oil on
page 191
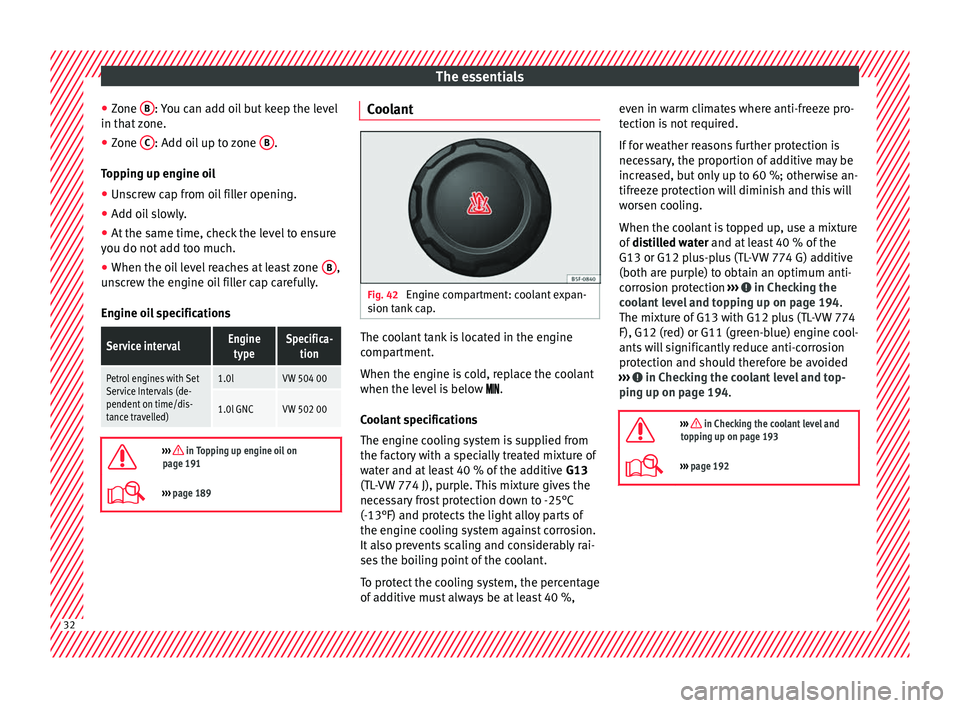
››› page 189 Coolant
Fig. 42
Engine compartment: coolant expan-
s ion t
ank
cap. The coolant tank is located in the engine
c
omp
ar
tment.
When the engine is cold, replace the coolant
when the level is below .
Coolant specifications
The engine cooling system is supplied from
the factory with a specially treated mixture of
water and at least 40 % of the additive G13
(TL-VW 774 J), purple. This mixture gives the
necessary frost protection down to -25°C
(-13°F) and protects the light alloy parts of
the engine cooling system against corrosion.
It also prevents scaling and considerably rai-
ses the boiling point of the coolant.
To protect the cooling system, the percentage
of additive must always be at least 40 %, even in warm climates where anti-freeze pro-
tection is
not required.
If for weather reasons further protection is
necessary, the proportion of additive may be
increased, but only up to 60 %; otherwise an-
tifreeze protection will diminish and this will
worsen cooling.
When the coolant is topped up, use a mixture
of distilled water and at least 40 % of the
G13 or G12 plus-plus (TL-VW 774 G) additive
(both are purple) to obtain an optimum anti-
corrosion protection ››› in Checking the
c oo
l
ant level and topping up on page 194.
The mixture of G13 with G12 plus (TL-VW 774
F), G12 (red) or G11 (green-blue) engine cool-
ants will significantly reduce anti-corrosion
protection and should therefore be avoided
››› in Checking the coolant level and top-
pin g up on p
ag
e 194.
››› in Checking the coolant level and
topping up on page 193
››› page 192 32
Page 42 of 232
The essentials
WARNING
If the vehicle is not correctly raised, it could
fa l
l off the jack causing serious injury. Please
observe the following rules to minimise the
risk of injury:
● You should only use a jack approved by
SEAT f
or your vehicle. Other jacks, even those
approved for other SEAT models, might slip
out of place.
● The ground should be firm and flat. If the
ground i
s sloped or soft then the vehicle
could slip and fall off the jack. If necessary,
support the jack on a wide solid base.
● If the ground is slippery, such as tiles,
plac
e a non-slip surface (a floor mat, for in-
stance) beneath the jack to avoid slipping.
● Only fit the jack at the prescribed jacking
points. The c
law of the jack should grip the
reinforcement nerve on the underbody
››› Fig. 56.
● You should never place a body limb such as
an arm or leg u
nder a raised vehicle that is
solely supported by the jack.
● If you have to work underneath the vehicle,
you mus
t use suitable stands additionally to
support the vehicle, there is a risk of acci-
dent!.
● Never raise the vehicle if it is tilting to one
side or the engine i
s running.
● Never start the engine when the vehicle is
raised.
The vehicle may come loose from the
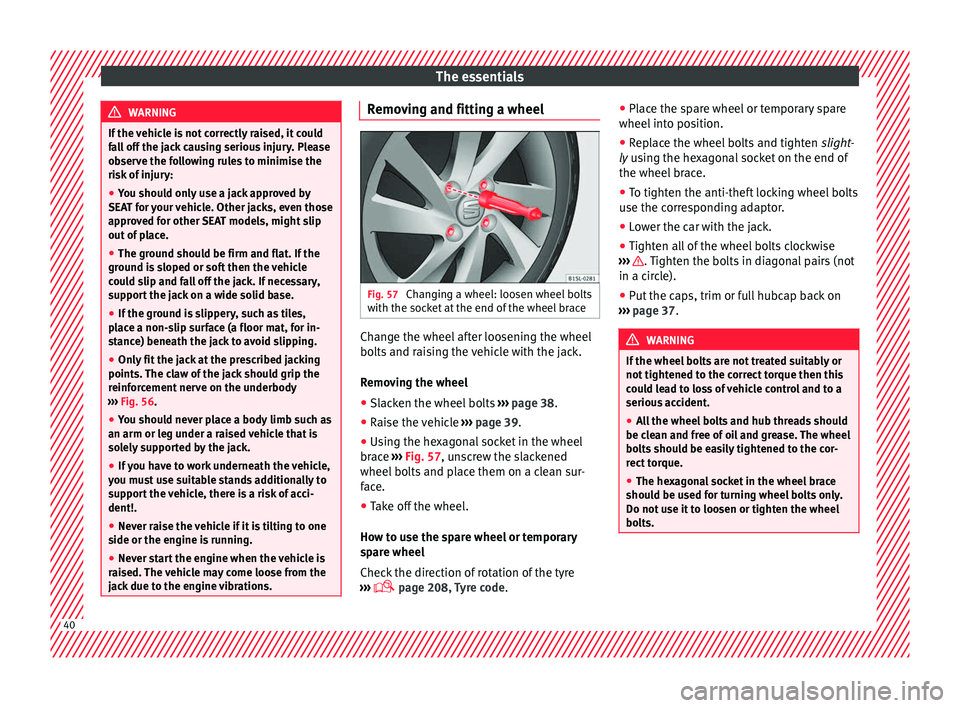
jack due to the engine vibrations. Removing and fitting a wheel
Fig. 57
Changing a wheel: loosen wheel bolts
w ith the soc
k
et at the end of the wheel brace Change the wheel after loosening the wheel
bo
lts
and r
aising the vehicle with the jack.
Removing the wheel
● Slacken the wheel bolts ›››
page 38.
● Raise the vehicle ›››
page 39.
● Using the hexagonal socket in the wheel
brace ›
›› Fig. 57, unscrew the slackened
wheel bolts and place them on a clean sur-
face.
● Take off the wheel.
How to u
se the spare wheel or temporary
spare wheel
Check the direction of rotation of the tyre
››› page 208, Tyre code. ●
Place the s
pare wheel or temporary spare
wheel into position.
● Replace the wheel bolts and tighten slight
-
ly using the hexagonal socket on the end of
the wheel brace.
● To tighten the anti-theft locking wheel bolts
use the corr
esponding adaptor.
● Lower the car with the jack.
● Tighten all of the wheel bolts clockwise
›››
. Tighten the bolts in diagonal pairs (not
in a c ir
c
le).
● Put the caps, trim or full hubcap back on
›››
page 37. WARNING
If the wheel bolts are not treated suitably or
not tight ened t
o the correct torque then this
could lead to loss of vehicle control and to a
serious accident.
● All the wheel bolts and hub threads should
be cle
an and free of oil and grease. The wheel
bolts should be easily tightened to the cor-
rect torque.
● The hexagonal socket in the wheel brace
should be u
sed for turning wheel bolts only.
Do not use it to loosen or tighten the wheel
bolts. 40
Page 92 of 232

Operation
outside temperature as a result of heat com-
in g fr
om the en
gine.
The temperatures measured range from
-40°C to +50°C (-40°F to +122°F).
Selector lever position
The range of engaged gears of the selector
lever is shown on the side of the lever, and
on the instrument panel display. In positions
D and M, and with the Tiptronic, the corre-
sponding gear is also indicated on the dis-
play.
Recommended gear* (manual gearbox)
The recommended gear to save fuel can be
displayed on the instrument panel display
while you are driving ››› page 142.
Seat belt status display for the rear seats*
The seat belt status display on the instru-
ment panel display informs the driver, when
the ignition is switched on, whether any pas-
sengers in the rear seats have fastened their
seat belts ››› page 52.
Start-Stop system status display
The instrument panel display shows informa-
tion on the current status ››› page 160. WARNING
If the warning lamps are ignored, the vehicle
ma y
stall in traffic, or may cause accidents
and severe injuries.
● Never ignore the warning lamps.
● Stop the vehicle safely as soon as possible.
● A faulty vehicle represents a risk of acci-
dent for the driv
er and for other road users. If
necessary, switch on the hazard warning
lamps and put out the warning triangle to ad-
vise other drivers.
● Park the vehicle away from traffic and en-
sure th
at no highly flammable materials are
under the vehicle that could come into con-
tact with the exhaust system (e.g. dry grass,
fuel). WARNING
Even though outside temperatures are above
freez in
g, some roads and bridges may be icy.
● At outside temperatures above +4°C
(+39°F), even when the “ice c
rystal” symbol
is not visible, there may still be patches of ice
on the road.
● Do not rely on the outside temperature in-
dicator! CAUTION
Failure to heed the warning lamps when they
appe ar m
ay result in faults in the vehicle. Note
● Differ ent
versions of the instrument panel
are available and therefore the versions and
instructions on the display may vary.
● When several warnings are active at the
same time, the symbol
s are shown succes-
sively for a few seconds and will stay on until
the fault is rectified. Service interval display
The inspection message appears on the in-
s
trument
p
anel display ›››
Fig. 95 2 .
S EA
T di
stinguishes between services with en-
gine oil change (Oil Change Service) and
services without engine oil change (Inspec-
tion Service). The service interval display only
gives information for service dates which in-
volve an engine oil change. The dates of the
remaining services (e.g. the next Inspection
Service or change of brake fluid) are listed on
the label attached to the door strut, or in the
Maintenance Programme.
The set service intervals have been specified
with the service dependent on time/distance
travelled.
Inspection reminder
If the inspection period is due to expire
shortly, Inspection reminder appears when
starting the ignition abbreviated to
and a
90
Page 143 of 232
Driving
and increase braking distance. If you drive for
a pr o
lon
ged period on salted roads without
braking then brake carefully several times to
eliminate the layer of salt on the brakes ››› .
If the
v
ehicle remains parked for considera-
ble lengths of time, is used little, or if the
brakes are not used, there may be corrosion
on the brake discs and a build up of dirt on
the brake pads. If the brakes are not used fre-
quently, or if rust has formed on the discs,
SEAT recommends cleaning the pads and
discs by braking firmly a few times at a mod-
erately high speed. Only do this without en-
dangering vehicles behind you or any other
road users ››› .
F au
lt
s in the brake system
During braking, if you notice that the vehicle
does not react as usual (that the braking dis-
tance has increased suddenly) it may be pos-
sible that there is a fault in the braking sys-
tem. This is indicated by the warning lamp
. Take the vehicle to a specialised work-
shop immediately and have the fault re-
paired. Drive at a moderate speed and be
prepared to use more pressure on the brake
pedal, and allow for longer stopping distan-
ces.
Brake servo
The brake servo only operates when the en-
gine is running and the pressure applied by
the driver on the brake pedal increases. If the brake servo does not operate or the ve-
hicle mu
st be towed, then the brake pedal
will have to be pressed with more force given
that the braking distance will be increased
when the brake servo does not operate ››› .
WARNING
New brake pads do not brake to full efficien-
cy.
● For the fir
st 320 km, new brake pads have
not y
et reached their maximum braking ca-
pacity, and need to be “run in” first. For this,
to compensate for reduced braking efficiency
the brake pedal will have to be pressed with
more force.
● To avoid losing control of the vehicle and
caus
ing serious accidents, always take great
care when driving with new brake pads.
● When running in new brake pads, always
res
pect the safety distances between you and
other vehicles and do not cause situations re-
quiring extreme braking performance. WARNING
When brakes overheat, braking is less effi-
cient and br
aking distances increase.
● When driving on slopes, brakes can be
overlo
aded and overheat quickly.
● Reduce speed or change down a gear when
faced w
ith steep and long slopes. This allows
you to use the engine braking effect and to
reduce the strain on the brake system. ●
Non-s t
andard or damaged front spoilers
could restrict the airflow to the brakes and
cause them to overheat. WARNING
Wet, frozen or salt-covered brakes take lon-
g er t o en
gage and this increases braking dis-
tances.
● Test the brakes carefully.
● Dry the brakes, free them of ice and salt by
brakin
g gently several times, when visibility,
weather, and road and traffic conditions per-
mit. WARNING
Driving without the brake servo may signifi-
cantly inc
rease the braking distance and re-
sult in a severe accident.
● Never allow the vehicle to move forwards
when the engine is
switched off.
● If the brake servo does not operate or the
vehicl
e must be towed, then the brake pedal
will have to be pressed with more force given
that the braking distance will be increased
when the brake servo does not operate. CAUTION
● Never m ak
e the brakes “slip” by pressing
the pedal gently, if it is not really necessary
to brake. Continuously pressing on the brake
pedal will heat the brakes. This could signifi-
cantly reduce braking power, increase » 141
Technical data
Advice
Operation
Emergencies
Safety
Page 149 of 232
Driving
Note
The recommended gear display is switched
off when the c lut
ch pedal is pressed.Steering
Introduction The power steering* is not hydraulic but elec-
tromec
h
anical. The advantage of this steer-
ing system is that it disposes of hydraulic
tubes, hydraulic oil, the pump, filter and oth-
er components. The electromechanical sys-
tem saves fuel. While a hydraulic system re-
quires oil pressure to be maintained, electro-
mechanical steering only requires energy
when the steering wheel is turned.
With the power steering system, the assisted
steering function automatically adjusts ac-
cording to the vehicle speed, the steering tor-
que and the wheel turning angle. The power
steering only works when the engine is run-
ning. WARNING
If the power steering is not working then the
st eerin
g wheel is much more difficult to turn
and the vehicle more difficult to control.
● The power steering only works when the
engine is
running. ●
Never a l
low the vehicle to move when the
engine is switched off.
● Never remove the key from the ignition if
the vehic
le is in motion. The steering may
lock and it will not be possible to turn the
steering wheel. Control and warning lamps
It lights up red
Power steer-
ing faulty.The steering system should be checked
by a specialised workshop as soon as
possible.
It lights up yellow
Power steer-
ing opera-
tion re-
duced.
The steering system should be checked
by a specialised workshop as soon as
possible.
If, after restarting the engine and driv-
ing for a short distance, the yellow
warning lamp no longer comes on, it will
not be necessary to take the vehicle to a
specialised workshop.
Flashes red
Fault in the
steering col-
umn elec-
tronic lock.
Do not drive on!
Seek professional advice.
It flashes yellow
Steering col-
umn devia-
tion.Gently turn the steering wheel to and
fro.
Steering
wheel not
unlocked or
locked.
Remove the key from the ignition and
then switch the ignition back on. If nec-
essary, check the messages displayed
on the instrument panel display.
Do not drive on, if
the steering column
remains locked after the ignition has
been switched on. Seek specialist assis-
tance. Several warning and control lamps light up
f
or a f
ew sec
onds when the ignition is switch-
ed on, signalling that the function is being
verified. They will switch off after a few sec-
onds. WARNING
If the warning lamps are ignored, the vehicle
ma y
stall in traffic, or may cause accidents
and severe injuries.
● Never ignore the warning lamps.
● Stop the vehicle safely as soon as possible. CAUTION
Failure to heed the warning lamps when they
appe ar m
ay result in faults in the vehicle. 147
Technical data
Advice
Operation
Emergencies
Safety
Page 150 of 232
Operation
Information on the steering To prevent theft, we recommend you lock the
st
eerin
g before leaving the vehicle.
Steering column mechanical lock
Lock the steering column by removing the
key from the ignition when the vehicle is
stopped.
Please engage steer-
ing lockUnlocking the steering
Parking the vehicle
››› page 135.Insert the key in the igni-
tion lock.
Remove the key from the
ignition.Turn the steering wheel
slightly to release the
steering lock.
Turn the steering wheel
slightly until you hear the
steering lock.Hold the steering wheel in
this position and switch
on the ignition. Electromechanical power steering
W
ith the po
w
er steering system, the assisted
steering function automatically adjusts ac-
cording to the vehicle speed, the steering tor-
que and the wheel turning angle. The power
steering only works when the engine is run-
ning.
You should remember that you will need con-
siderably more power than normal to steer
the vehicle if the power steering is not work-
ing correctly or not at all. Run-in and economical driving
Runnin
g in Please observe the instructions for running-in
new components.
R u
nning-in the engine
The engine needs to be run in over the first
1,500 km. During its first few hours of run-
ning, the internal friction in the engine is
greater than later on when all the moving
parts have bedded down.
How the vehicle is driven for the first 1,500
km influences the future engine perform-
ance. Throughout the life of the vehicle, it
should be driven at a moderate speed, espe-
cially when the engine is cold, as this will re-
duce engine wear and increase its useful life.
Never drive at extremely low engine speeds.
Change down to a lower gear when the en-
gine no longer runs “smoothly”. Up to 1,000
kilometres the following instructions apply:
● Do not use full throttle.
● Do not force the engine above two thirds of
its m ax
imum speed.
Between 1,000 and 1,500 kilometres, gradu-
ally increase power until reaching the maxi-
mum speed and high engine speeds. Running in new tyres and brake pads
●
Replacement of wheel rims and new tyres
›››
page 200
● Notes on the brakes ›››
page 135 For the sake of the environment
If the engine is run in gently, the life of the
engine w i
ll be increased and the engine oil
consumption reduced. Environmental compatibility
Environmental protection is a top priority in
the de
s
ign, c
hoice of materials and manufac-
ture of your new SEAT.
Constructive measures to encourage recy-
cling
● Joints and connections designed for easy
dismantlin
g.
● Modular construction to facilitate disman-
tling.
● Incr
eased use of single-grade materials.
● Plastic parts and elastomers are marked in
accor
dance with ISO 1043, ISO 11469 and
ISO 1629.
Choice of materials
● Use of recycled materials.
148