check engine light Seat Toledo 2013 User Guide
[x] Cancel search | Manufacturer: SEAT, Model Year: 2013, Model line: Toledo, Model: Seat Toledo 2013Pages: 258, PDF Size: 3.94 MB
Page 178 of 258
176Care of the vehicle and cleaning
Note
● Make sure, when washing the vehicle, that the least amount of water
possible enters the lock cylinders.
● We recommend the use of products from the selection of SEAT Original
Accessories to care for the door lock cylinder.
Wheels
Wheel trims
If you wash the vehicle regularly, you must also thoroughly wash the wheel
trims. Regularly remove any brake abrasion residue and road salt from the
wheels, otherwise the wheel material could be damaged. Repair any dam-
age to the wheel paintwork immediately.
Alloy wheels
After thorough washing, treat the wheels with a protective product for alloy
wheels. Do not use abrasive products to care for the wheels.
WARNING
Moisture, ice and road salt may affect braking efficiency. Risk of acci-
dent!
CAUTION
Heavy dirt on the wheels could lead to their misalignment. This could result
in vibrations being transmitted to the steering wheel that under certain con-
ditions may cause premature steering wear. This dirt must be removed.
Note
We recommend you leave paint damage repairs to a SEAT Authorised Serv-
ice. Underbody sealant
The underside of the vehicle is coated to permanently protect it from chemi-
cal and mechanical agents.
Given that damage to the
protective coating during driving cannot be com-
pletely ruled out, we recommend you check the condition of the protective
coating on the underbody and suspension at regular intervals, preferably
before the start and end of the coldest season of the year.
Authorised SEAT dealers have suitable special products and the necessary
facilities and are aware of the techniques required for their application. We
therefore recommend all touch-up work or additional anti-corrosion meas-
ures be performed by an authorised SEAT dealer.
WARNING
Do not apply underseal or anti-corrosion coatings to the exhaust pipes,
catalytic converter, particulate filter or heat shields on the exhaust sys-
tem. Once the engine has reached operating temperature, these substan-
ces could catch fire. Risk of fire!
Cavity waxing
All cavities on the vehicle exposed to corrosion are permanently factory-pro-
tected by a wax solution .
This wax solution does not need to be checked or touched up. Should wax
run out of the cavities at high ambient temperatures, remove it using a plas-
tic scraper and clean away any stains using lighter fluid.
Page 182 of 258
180Checking and refilling levels
–Press the tank flap with your hand to close it.
– Check that the fuel flap is correctly closed.
CAUTION
● Switch off the auxiliary heater (heater and independent heater) before
filling the tank.
● The fuel tank is full as soon as the automatic filler nozzle cuts out. Do
not continue filling, as this will fill the expansion chamber.
Note
The fuel tank capacity is around 55 litres, of which 7 litres are the reserve.
Unleaded petrol
Your vehicle must only be run on unleaded petrol that complies with the
Standard EN 228 (in Germany, also DIN 51626 – 1, or E10 for unleaded pet-
rol with 95 and 91 octane rating (RON) or DIN 51626 – 2, or E5 for unleaded
petrol with 95 and 98 RON).
Prescribed fuel – unleaded petrol (95/91 RON)
Use unleaded petrol with 95 RON. Unleaded petrol with 91 RON can also be
used, although this will result in a slight loss of power.
If, as an emergency measure, you have to fill the tank with petrol with a low-
er RON to that prescribed, use only moderate engine speeds and light throt-
tle. High engine speed and full throttle can seriously damage the engine!
Fill up with petrol with the correct RON as soon as possible.
Prescribed fuel – unleaded petrol (min. 95 RON)
Use unleaded petrol with 95 RON. If unleaded petrol with
95 RON is not available, you can fill up with petrol
with 91 RON as an emergency measure. In this case, use only moderate en-
gine speeds and a light throttle. High engine speed and full throttle can se-
riously damage the engine! Fill up with petrol with the correct RON as soon
as possible.
Petrol with a RON below 91 cannot be used, even as an emergency meas-
ure. Risk of seriously damaging the engine!
Unleaded petrol with higher RON
Unleaded petrol with a higher RON to that prescribed can be used without
limits.
In vehicles running on prescribed unleaded petrol with 95/91 RON, there is
no notable increase in power or lower fuel consumption when petrol with a
RON higher than 95 is used.
In vehicles running on prescribed unleaded petrol with min. 95 RON, there
is an increase in power and a lower fuel consumption when petrol with a
RON higher than 95 is used.
Prescribed fuel – unleaded petrol (98/(95) RON)
Use unleaded petrol with 98 RON. Unleaded petrol with 95 RON can also be
used, although this will result in a slight loss of power.
If unleaded petrol with 98 or 95 RON is not available, you can fill up with
petrol with 91 RON as an emergency measure. In this case, use only moder-
ate engine speeds and a light throttle. High engine speed and full throttle
can seriously damage the engine! Fill up with petrol with the correct RON as
soon as possible.
Petrol with a RON below 91 cannot be used, even as an emergency meas-
ure. Risk of seriously damaging the engine!
Petrol additives
The quality of the fuel influences the behaviour, performance and service
life of the engine. This is why the petrol you use should carry suitable addi-
tives already included by the petrol industry, free of metals. These additives
Page 186 of 258
184Checking and refilling levels
Before opening the bonnet, make sure that the windscreen wiper
arms are not lifted away from the glass. Otherwise the paintwork
may be damaged.
–Pull the release catch in the direction of the arrow 2
⇒ Fig. 123
and the bonnet will be released.
– Hold and lift the bonnet.
– Remove the support strut 3
⇒ Fig. 124 from its fastening in the
direction of the arrow and secure the raised bonnet so that the
end of the strut hooks onto the opening in the bonnet 4
.
Closing the bonnet
– Lift the bonnet slightly and unhook the support strut keeping
the bonnet open and insert it into its fastening 3
.
– Let the bonnet drop from a height of around 20 cm into the
catch Do not press down afterwards!
– Check that the bonnet is correctly closed.
Engine oil General notes
The engine comes with a special, multi-grade oil that can be used all year
round.
Because the use of high-quality oil is essential for the correct operation of
the engine and its long useful life, when topping up or changing oil, use on-
ly those oils that comply with VW standards. The specifications (VW standards) set out in the following page should ap-
pear on the container of the service oil; when the container displays the
specific standards for petrol and diesel engines together, it means that the
oil can be used for both types of engines.
We recommend that the oil change, indicated in the Maintenance Pro-
gramme, be performed by a Technical Service or a specialised workshop.
The correct oil specifications for your engine are listed in the
⇒ page 185,
Oil properties.
Service intervals
Service intervals can be flexible (LongLife service) or fixed (dependent on
time/distance travelled).
If the PR code that appears on the back of the “Maintenance Programme”
booklet is QG1, this means that your vehicle has the LongLife service pro-
grammed. If it has the codes QG0 or QG2 the interval service is dependent
on time/distance travelled.
Flexible service intervals (LongLife service intervals*)
Special oils and processes have been developed which, depending on the
characteristics and individual driving profiles, enable the extension of the
oil change service (LongLife service intervals).
Because this oil is essential for extending the service intervals, it must only
be used observing the following indications:
● Avoid mixing it with oil for fixed service intervals.
● Only in exceptional circumstances, if the engine oil level is too low
⇒ page 186 and LongLife oil is not available, it is permitted to top up
(once) with oil for fixed service intervals ⇒ page 185 (up to a maximum of
0.5 litres).
Fixed service intervals*
If your vehicle does not have the “LongLife service interval” or it has been
disabled (by request), you may use oils for fixed service intervals, which al-
so appear in ⇒ page 185, Oil properties. In this case, your vehicle must be
Page 190 of 258
188Checking and refilling levels
Diesel enginesTop-up quantity (in litres)1.6 l/77 kW TDI CR6.5
CAUTION
● Anti-freeze that does not correspond to the correct specification may
particularly affect corrosion protection considerably.
● Faults caused by corrosion may lead to coolant leaks. Risk of serious en-
gine faults!
Checking coolant level
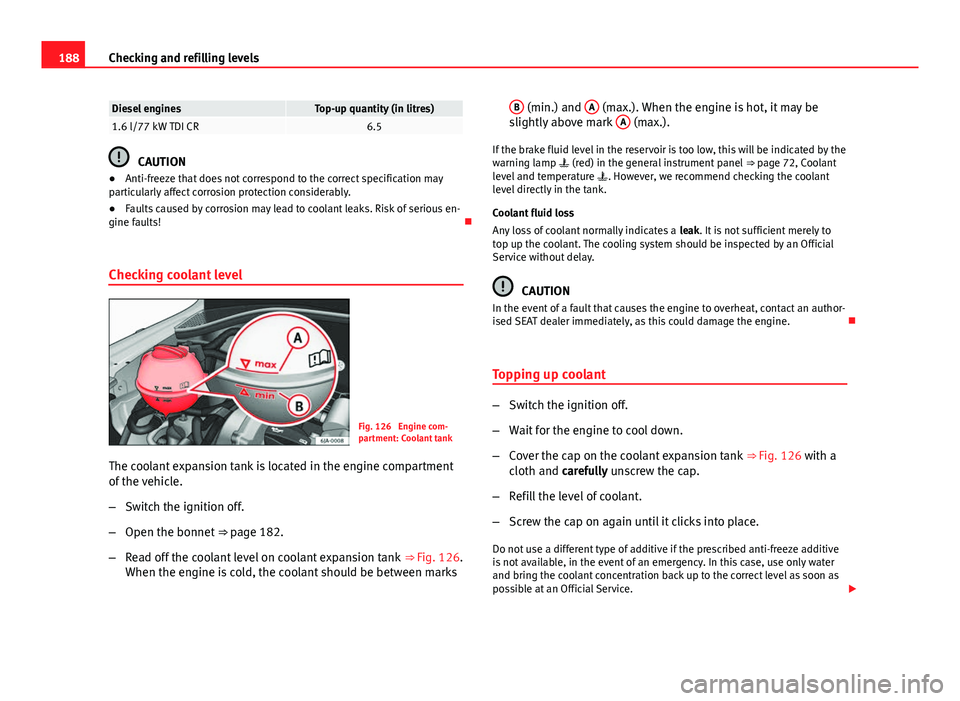
Fig. 126 Engine com-
partment: Coolant tank
The coolant expansion tank is located in the engine compartment
of the vehicle.
– Switch the ignition off.
– Open the bonnet ⇒ page 182.
– Read off the coolant level on coolant expansion tank ⇒
Fig. 126.
When the engine is cold, the coolant should be between marks B
(min.) and
A (max.). When the engine is hot, it may be
slightly above mark A (max.).
If the brake fluid level in the reservoir is too low, this will be indicated by the
warning lamp (red) in the general instrument panel ⇒ page 72, Coolant
level and temperature . However, we recommend checking the coolant
level directly in the tank.
Coolant fluid loss
Any loss of coolant normally indicates a leak. It is not sufficient merely to
top up the coolant. The cooling system should be inspected by an Official
Service without delay.
CAUTION
In the event of a fault that causes the engine to overheat, contact an author-
ised SEAT dealer immediately, as this could damage the engine.
Topping up coolant
– Switch the ignition off.
– Wait for the engine to cool down.
– Cover the cap on the coolant expansion tank ⇒ Fig. 126 with a
cloth and carefully unscrew the cap.
– Refill the level of coolant.
– Screw the cap on again until it clicks into place.
Do not use a different type of additive if the prescribed anti-freeze additive
is not available, in the event of an emergency. In this case, use only water
and bring the coolant concentration back up to the correct level as soon as
possible at an Official Service.
Page 191 of 258
189
Checking and refilling levels
Always top up with unused coolant.
Never fill the coolant tank above mark A
(max.) ⇒ Fig. 126 Excess coolant
is forced out of the cooling system through the overpressure valve in the fill-
er cap of the expansion tank when the engine heats up.
WARNING
● The anti-freeze additive and, therefore, the entire coolant, are a
health hazard. Avoid touching the coolant. Coolant fumes are also a
health hazard. Store the coolant additive in a safe place out of the reach
of children. Risk of poisoning!
● If splashed into eyes, rinse immediately with clean water and seek
immediate medical advice.
● Seek immediate medical advice if the coolant is accidentally inges-
ted.
CAUTION
If the engine oil cannot be topped up under the given conditions, do not
drive on. We recommend contacting an authorised SEAT dealer, as this can
damage the engine.
Radiator fan
The radiator is driven by an electric motor and controlled according to the
temperature of the coolant.
After the engine has been stopped and the ignition switched off, the radia-
tor fan may continue running for around 10 minutes. Brake fluid
Checking brake fluid level
Fig. 127 Engine com-
partment: Brake fluid res-
ervoir
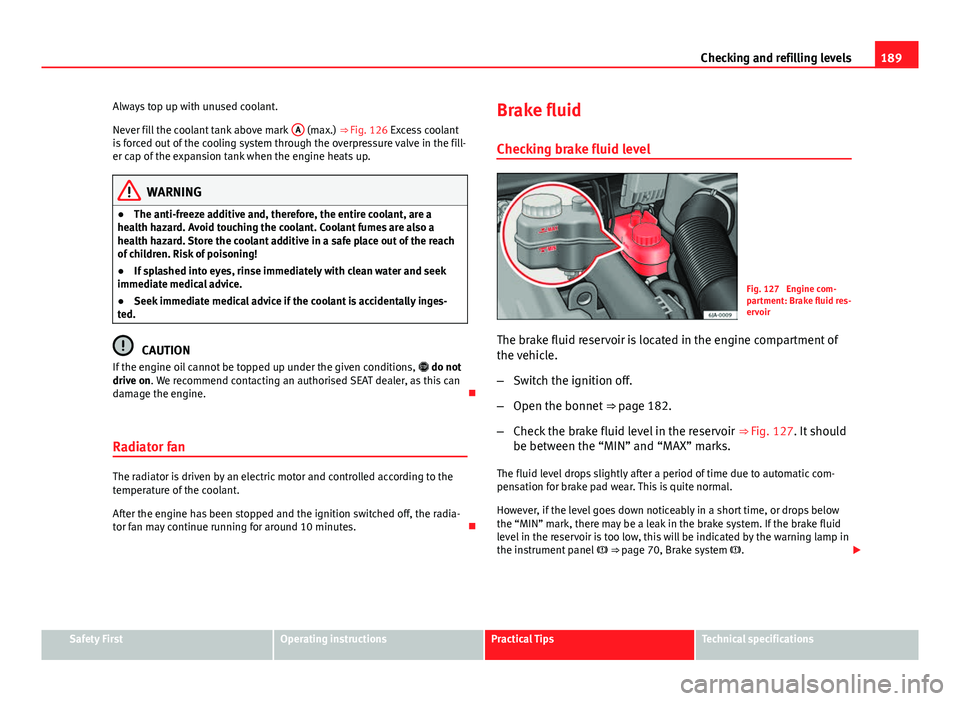
The brake fluid reservoir is located in the engine compartment of
the vehicle.
– Switch the ignition off.
– Open the bonnet ⇒ page 182.
– Check the brake fluid level in the reservoir ⇒ Fig. 127. It should
be between the “MIN” and “MAX” marks.
The fluid level drops slightly after a period of time due to automatic com-
pensation for brake pad wear. This is quite normal.
However, if the level goes down noticeably in a short time, or drops below
the “MIN” mark, there may be a leak in the brake system. If the brake fluid
level in the reservoir is too low, this will be indicated by the warning lamp in
the instrument panel
⇒ page 70, Brake system .
Safety FirstOperating instructionsPractical TipsTechnical specifications
Page 192 of 258
190Checking and refilling levels
WARNING
If the fluid level has dropped below the MIN mark, do not drive on.
Risk of accident! Seek professional help.
Changing the brake fluid
Brake fluid absorbs moisture. Therefore, it gradually absorbs moisture from
the atmosphere. If the water content in the brake fluid is too high, the brake
system could corrode. The water content also reduces the boiling point of
the brake fluid.
The brake fluid must comply with one of the following standards or specifi-
cations:
● VW 50114
● FMVSS 116 DOT4
WARNING
Heavy use of the brakes may cause a vapour lock if the brake fluid is left
in the brake system for too long. This would seriously affect the efficien-
cy of the brakes and the safety of the vehicle.
CAUTION
Brake fluid damages the vehicle paintwork. Windscreen washer
Fig. 128 Engine com-
partment: Windscreen
washer container
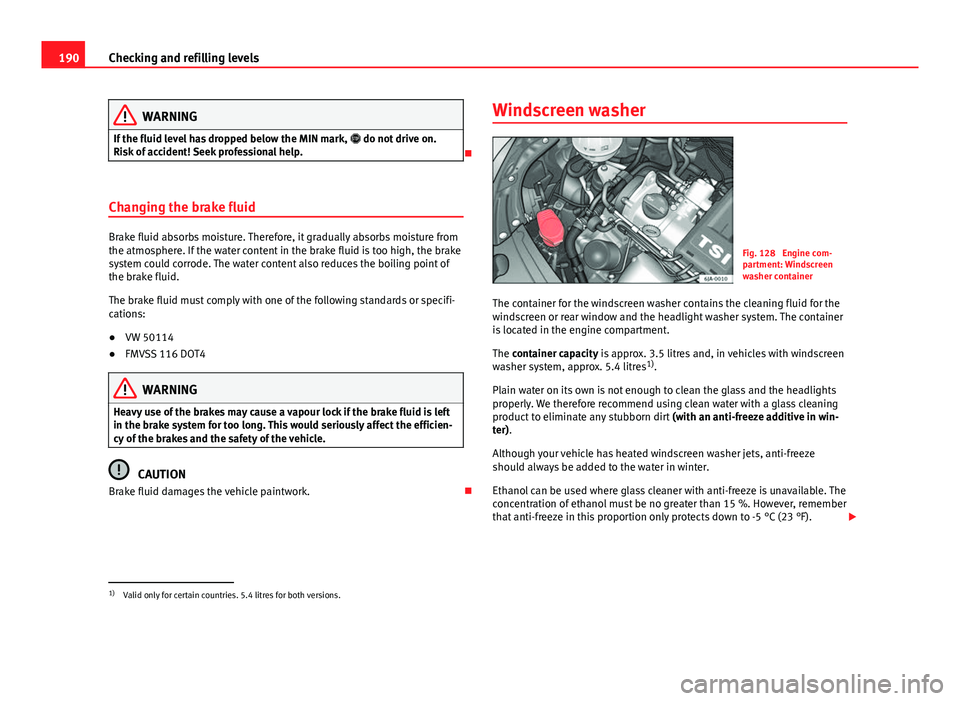
The container for the windscreen washer contains the cleaning fluid for the
windscreen or rear window and the headlight washer system. The container
is located in the engine compartment.
The container capacity is approx. 3.5 litres and, in vehicles with windscreen
washer system, approx. 5.4 litres 1)
.
Plain water on its own is not enough to clean the glass and the headlights
properly. We therefore recommend using clean water with a glass cleaning
product to eliminate any stubborn dirt (with an anti-freeze additive in win-
ter).
Although your vehicle has heated windscreen washer jets, anti-freeze
should always be added to the water in winter.
Ethanol can be used where glass cleaner with anti-freeze is unavailable. The
concentration of ethanol must be no greater than 15 %. However, remember
that anti-freeze in this proportion only protects down to -5 °C (23 °F).
1)
Valid only for certain countries. 5.4 litres for both versions.
Page 194 of 258
192Checking and refilling levels
WARNING (Continued)
● The following is forbidden while working on the battery: fire and open
flames, smoking and activities that could produce sparks. Avoid causing
sparks when handling cables or electrical apparatus. Risk of injury in the
event of large sparks.
● Before working on the electrical system, you must switch off the en-
gine, the ignition and all electrical components and disconnect the cable
from the negative terminal (-) of the battery. To change a bulb, simply
switch off the corresponding light.
● Never charge a frozen or thawed out battery. Risk of explosion and
acid burns! Replace a frozen battery.
● Never use the jump leads on batteries in which the electrolyte level is
too low. Risk of explosion and acid burns.
● Never use a damaged battery. Risk of explosion! Replace a damaged
battery immediately.
CAUTION
● Never disconnect the battery when the ignition is switched on, as the
electrical system (electronic components) of the vehicle could be damaged.
When disconnecting the battery from the vehicle electrical system, discon-
nect its negative terminal (-) first. Only then may the positive terminal (+) be
disconnected.
● When connecting the battery, connect the positive terminal (+) first. On-
ly then may the negative terminal (-) be connected. The battery cables must
never be connected to the wrong battery terminals. Risk of burning the elec-
trical installation.
● Make sure the battery acid does not come into contact with the body-
work. Risk of paintwork damage.
● Do not expose the battery to direct sunlight to protect it from ultraviolet
radiation. ●
If the vehicle is not used for 3 or 4 weeks, the battery could run flat. This
is because some components use electricity even in standby mode (e.g.
control units). Prevent the battery from running flat by disconnecting its
negative terminal or leave it charging at a low current.
● If you frequently use the vehicle for short trips, the battery may not fully
charge and could run flat.
For the sake of the environment
A flat battery is particularly harmful waste for the environment. It must
therefore be disposed of according to current local law.
Note
Replace a battery once it is older than 5 years.
Battery cover
Fig. 129 Battery: Open-
ing the cover
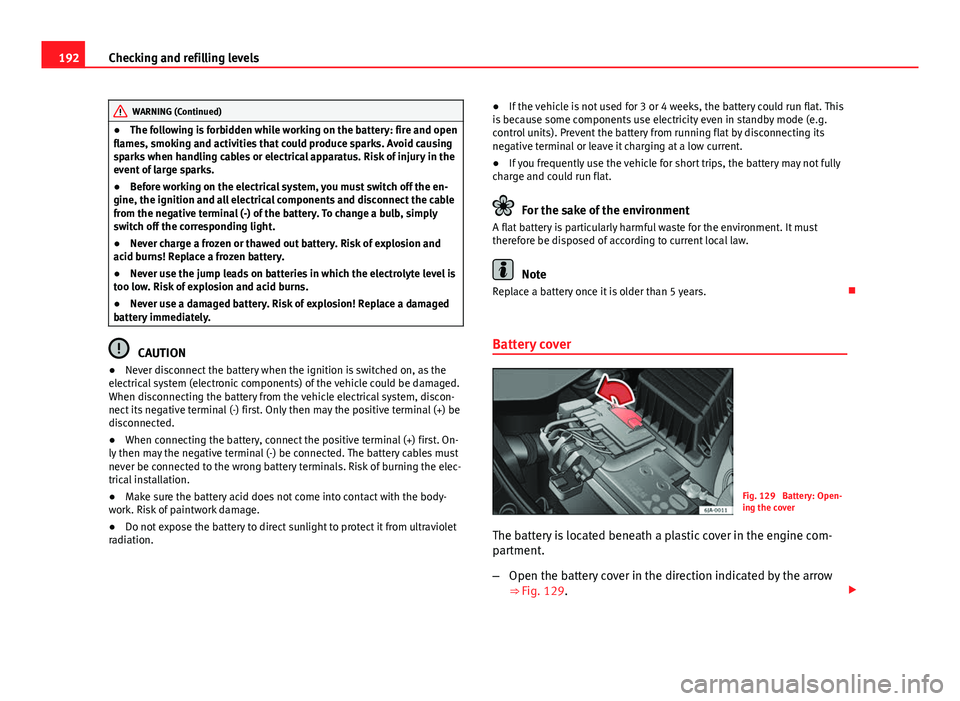
The battery is located beneath a plastic cover in the engine com-
partment.
– Open the battery cover in the direction indicated by the arrow
⇒ Fig. 129.
Page 195 of 258

193
Checking and refilling levels
– The positive terminal (+) of the battery is connected in reverse
order.
Checking battery acid level
Fig. 130 Battery: Acid
level indicator
We recommend you have the acid level regularly checked at an official tech-
nical service, particularly in the following cases.
● At high outside temperatures.
● On long daily trips.
● Whenever the vehicle is loaded ⇒ page 193, Charging the battery.
In vehicles equipped with a battery with colour indicator, the so-called mag-
ic eye ⇒ Fig. 130 changes colour to indicate the acid level.
Air bubbles can influence the colour of the indicator. Therefore, carefully
knock the indicator before checking the acid level.
● Black – the acid level is correct.
● Colourless or light yellow – acid level too low, battery must be changed.
Note
● The battery acid level is also regularly checked during servicing at au-
thorised SEAT dealers.
● The acid level on “AGM” vehicle batteries cannot be checked for techni-
cal reasons.
● Vehicles equipped with the “START-STOP” system include a battery con-
trol unit to control the battery level for repeat engine starting.
Winter service
At low temperatures the battery provides only a fraction of the starting pow-
er it has at normal temperatures.
A flat battery can also freeze at temperatures slightly below 0 °C (32 °F).
We therefore recommend you have the battery checked and, if necessary,
charged at an official SEAT technical service before the start of winter.
Charging the battery
A fully-charged battery is essential for reliable starting.
– Switch off the ignition and all electrical equipment.
– For “fast-charging” only: disconnect both battery connection ca-
bles (first the “negative” terminal and then the “positive”).
– Connect the charger cables to the battery terminals (red = “pos-
itive”, black = “negative”).
– Plug in the battery charger and switch on.
Safety FirstOperating instructionsPractical TipsTechnical specifications
Page 197 of 258
195
Checking and refilling levels
Note
Despite any measures taken by the control unit, the battery could drain. e.g.
with the engine is switched off, the key is turned in the ignition for a long
period or the side lights or parking lights are switched on. The switching off
of certain electrical components does not impair driving comfort and the
driver will often not even realise.
Safety FirstOperating instructionsPractical TipsTechnical specifications
Page 217 of 258
215
Self-help
Both batteries must be rated at 12 Volts. The capacity (Ah) of the booster
battery should not be significantly lower than that of the discharged battery.
Jump leads
The jump leads must be heavy enough to carry the starter current and must
be fitted with insulated battery clamps. Refer to the instructions given by
the manufacturer.
Positive cable – usually red
Negative cable – usually black
WARNING
● A flat battery can also freeze at temperatures slightly below 0 °C
(32 °F). Do not attempt a jump start with a frozen battery – Explosion
hazard!
● Please note the safety warnings referring to working in the engine
compartment ⇒ page 182.
● The non-insulated parts of the battery clamps must not be allowed to
touch. Additionally, the jump lead attached to the positive battery termi-
nal must not touch metal parts of the vehicle. Risk of short circuit!
● Do not connect the negative lead to the negative terminal of the dis-
charged battery. In the event of sparks when starting the engine, the ex-
plosive gas given off by the battery could catch fire.
● Position the jump leads in such a way that they cannot come into con-
tact with any moving parts in the engine compartment.
● Do not bend over the battery. Risk of acid burns!
● The screw plugs on the battery cells must be screwed in firmly.
● Keep sources of fire (flames, lit cigarettes, etc.) away from the bat-
tery. Risk of explosion!
● Never use the jump leads on batteries in which the electrolyte level is
too low. Risk of explosion and acid burns.
Note
● The vehicles must not touch each other, as electricity could flow as soon
as the positive terminals are connected.
● The discharged battery must be properly connected to the vehicle elec-
trical system.
● The jump leads should be checked in a specialist vehicle battery shop.
Starting the engine
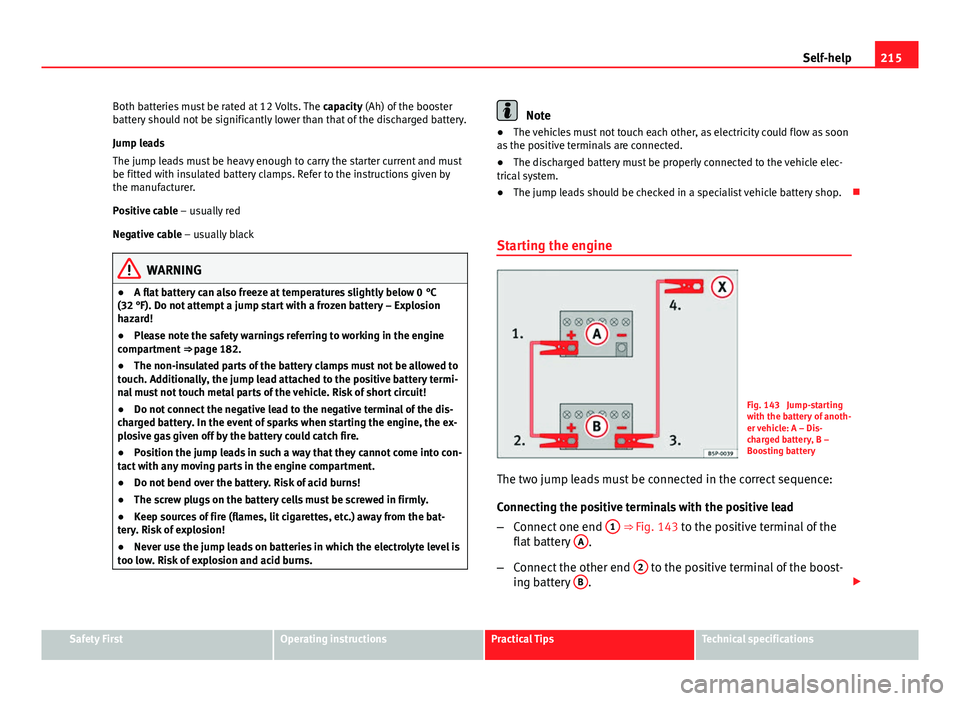
Fig. 143 Jump-starting
with the battery of anoth-
er vehicle: A – Dis-
charged battery, B –
Boosting battery
The two jump leads must be connected in the correct sequence:
Connecting the positive terminals with the positive lead
– Connect one end 1
⇒ Fig. 143 to the positive terminal of the
flat battery A.
– Connect the other end 2
to the positive terminal of the boost-
ing battery B.
Safety FirstOperating instructionsPractical TipsTechnical specifications