ESP Seat Toledo 2013 SOUND SYSTEM 2.0
[x] Cancel search | Manufacturer: SEAT, Model Year: 2013, Model line: Toledo, Model: Seat Toledo 2013Pages: 48, PDF Size: 1.85 MB
Page 22 of 48
21Audio modeMedia mode
Introduction
Media sources are audio sources containing audio files on various differentdata media (e.g. CD, external MP3 player). These audio files can be playedby the radio system from its corresponding players or audio input sockets(internal CD player , external CD changer, AUX-IN multimedia socket).
Additional information and warnings:
●
Safety notes ⇒ page 4
●
Unit overview ⇒ page 6
●
External audio sources (AUX, MDI) ⇒ page 28
●
MEDIA-IN multimedia interface ⇒ page 30
●
External CD changer ⇒ page 34
●
System and function settings (SETUP) ⇒ page 38
Note
MPEG-4 HE-AAC audio coding technology and patents are licensed fromFraunhofer IIS.
Note
This product is subject to certain intellectual property rights and copyrightsowned by the Microsoft Corporation. The use or distribution of this type oftechnology outside this product requires a licence from Microsoft or an au-thorised Microsoft company.
Requirements for media sources and audio files
Factory-fitted CD players conform to safety class 1 according toDIN IEC 76 (CO) 6/ VDE 0837.
The unit only accepts 12-cm standard CDs.
The supported file formats listed are collectively referred to below as “audiofiles”. A CD containing audio files of these types is referred to as an “audiodata CD”.
Media sourceRequirements for playing in the unit Audio CDs (up to 80 mi-nutes).– CD Digital Audio specification . CD, CD-ROM, CD-R, CD-RWwith audio data of up to 700MB (megabytes) in accord-ance with ISO 9660 or Jolietfile system.
– MP3 files (.mp3) with bitrates of between48 and 320 kbit/s or with variable bitrate.– WMA files (.wma) up to 9.0 without copyprotection.– Playlists in the formats PLS and M3U.– Playlists no larger than 20 kB and contain-ing no more than 250 links.– Max. 32 playlists on a data medium.– File names not longer than 64 characters.– Folder structures with a maximum of tenlevels.– Max. 120 folders and max. 500 files on adata medium.
Audio file playback viaBluetooth®a).– The external audio source must be com-patible with Bluetooth® A2DP or AVRCP pro-files and must be paired with a factory-fittedmobile phone preparation with this function⇒ page 28.
Page 24 of 48
23Audio modeTracks 1 and 2 in the root directory of the CD (display: ROOT).
Tracks
3
and
4
in the first folder F1 in the root directory of the CD(display: 01).
Track
5
in the first subfolder F1.1 of the folder F1 (display: 02).
Track
6
in the first subfolder F1.1.1 of the subfolder F1.1 (display: 03).
Track
7
in the second subfolder F1.2 of the folder F1 (display: 04).
Tracks
8
and
9
in the second folder F2 (display: 05).
MEDIA main menu
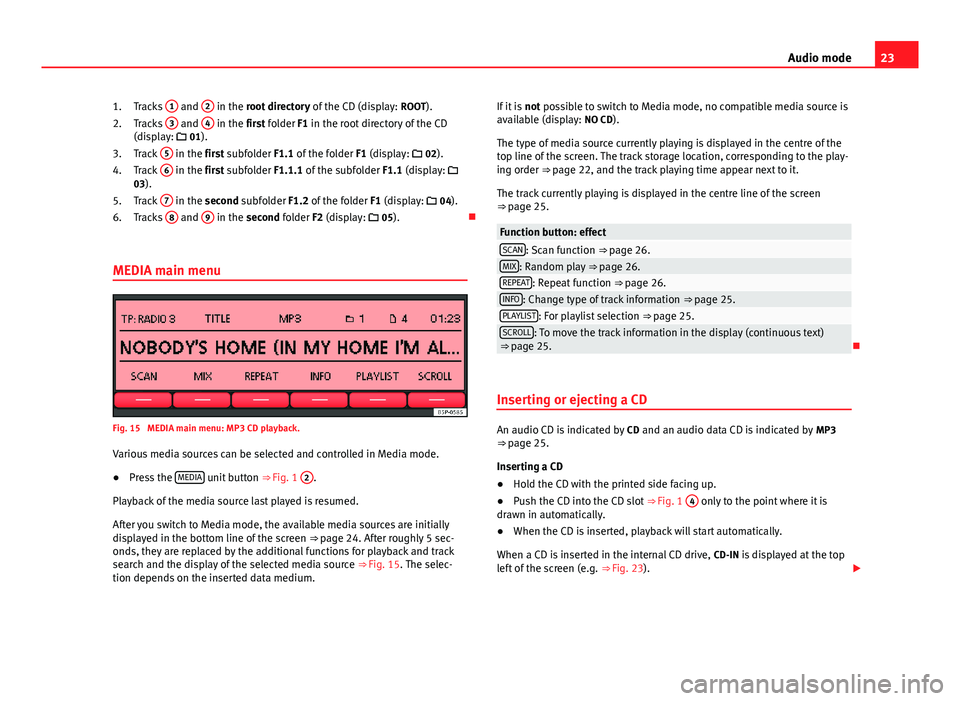
Fig. 15
MEDIA main menu: MP3 CD playback.
Various media sources can be selected and controlled in Media mode.
●
Press the MEDIA unit button ⇒ Fig. 1
2
.
Playback of the media source last played is resumed.
After you switch to Media mode, the available media sources are initiallydisplayed in the bottom line of the screen ⇒ page 24. After roughly 5 sec-onds, they are replaced by the additional functions for playback and tracksearch and the display of the selected media source ⇒ Fig. 15. The selec-tion depends on the inserted data medium.
1.2.3.4.5.6.If it is not possible to switch to Media mode, no compatible media source isavailable (display: NO CD).
The type of media source currently playing is displayed in the centre of thetop line of the screen. The track storage location, corresponding to the play-ing order ⇒ page 22, and the track playing time appear next to it.
The track currently playing is displayed in the centre line of the screen⇒ page 25.
Function button: effectSCAN: Scan function ⇒ page 26.MIX: Random play ⇒ page 26.REPEAT: Repeat function ⇒ page 26.INFO: Change type of track information ⇒ page 25.PLAYLIST: For playlist selection ⇒ page 25.SCROLL: To move the track information in the display (continuous text)⇒ page 25.
Inserting or ejecting a CD
An audio CD is indicated by CD and an audio data CD is indicated by MP3⇒ page 25.
Inserting a CD
●
Hold the CD with the printed side facing up.
●
Push the CD into the CD slot ⇒ Fig. 1
4
only to the point where it isdrawn in automatically.
●
When the CD is inserted, playback will start automatically.
When a CD is inserted in the internal CD drive, CD-IN is displayed at the topleft of the screen (e.g. ⇒ Fig. 23).
Page 26 of 48
25Audio modeFunction button: media sourceBT-AUDIO: Bluetooth® audio source connected ⇒ page 28.When a media source that has already been played is selected again, play-back is resumed from the point that was last played (except: external audiosources ⇒ page 28).
Track information display
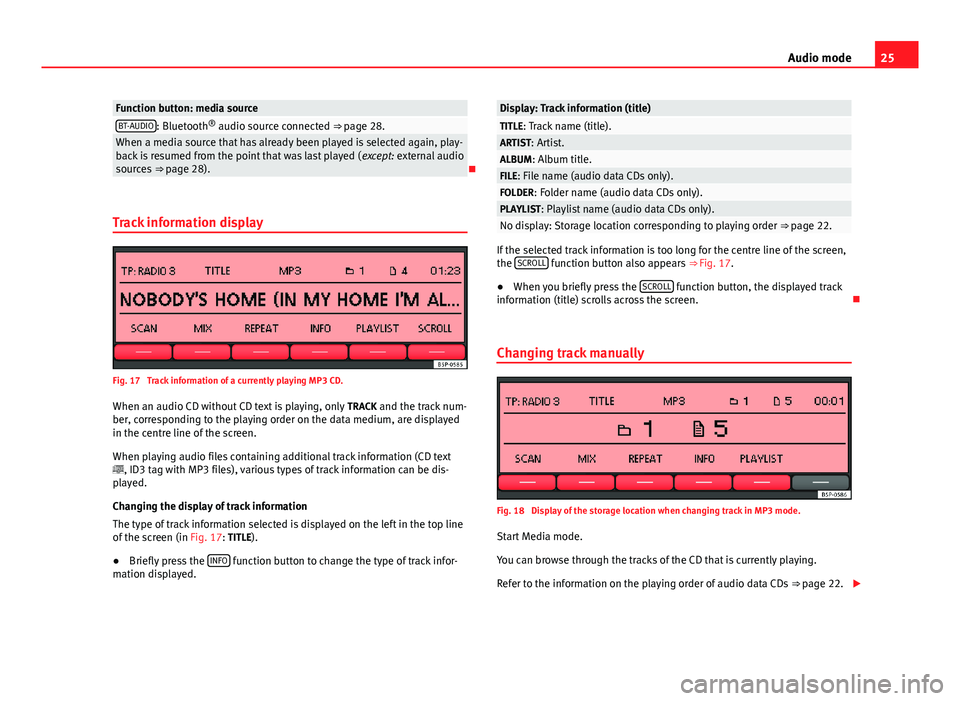
Fig. 17
Track information of a currently playing MP3 CD.
When an audio CD without CD text is playing, only TRACK and the track num-ber, corresponding to the playing order on the data medium, are displayedin the centre line of the screen.
When playing audio files containing additional track information (CD text, ID3 tag with MP3 files), various types of track information can be dis-played.
Changing the display of track information
The type of track information selected is displayed on the left in the top lineof the screen (in Fig. 17: TITLE).
●
Briefly press the INFO function button to change the type of track infor-mation displayed.
Display: Track information (title)TITLE: Track name (title).ARTIST: Artist.ALBUM: Album title.FILE: File name (audio data CDs only).FOLDER: Folder name (audio data CDs only).PLAYLIST: Playlist name (audio data CDs only).No display: Storage location corresponding to playing order ⇒ page 22.
If the selected track information is too long for the centre line of the screen,the SCROLL function button also appears ⇒ Fig. 17.
●
When you briefly press the SCROLL function button, the displayed trackinformation (title) scrolls across the screen.
Changing track manually
Fig. 18
Display of the storage location when changing track in MP3 mode.
Start Media mode.
You can browse through the tracks of the CD that is currently playing.
Refer to the information on the playing order of audio data CDs ⇒ page 22.
Page 27 of 48
26Audio modeBrowsing tracks
Press the ... / TRACK ⇒ Fig. 1 rocker switch to the left or right.
ActioneffectBriefly pressing to the left.Goes to the start of the current track.Briefly pressing to the right.Next track.Briefly pressing twice in quick suc-cession to the left.Goes to the start of the previous track.Pressing and holding to the left.Fast reverse.Pressing and holding to the right.Fast forward.
You can also change track by turning the setting knob ⇒ Fig. 1
8
.
Changing folder in audio data CD mode
●
Press the FOLDER or ... / FLDR ⇒ Fig. 1
9
rocker switch to the rightor left to switch to the first track of the next or previous folder respectively.
After changing folder or track, the storage location corresponding to theplaying order of the audio data CD is briefly displayed (in Fig. 18: folder 1and track number 5). After roughly 5 seconds, the selected track informa-tion is displayed again.
Playing playlists
Playlists on data media do not play automatically.
●
Press the PLAYLIST function button to start playing the playlists on datamedia.
●
Press the FOLDER or ... / FLDR rocker switch to the right or left toswitch to the first track of the next or previous playlist respectively.
The scan function (SCAN) and random playback (MIX) are only available forthe playlist you are listening to ⇒ page 26.
●
Press the PLAYLIST function button again to stop playing the playlists.
Note●Selecting tracks and CDs from an external CD changer ⇒ page 34.●
Selecting tracks and CDs via MEDIA-IN multimedia interface⇒ page 30.
Changing playback mode (SCAN, MIX, REPEAT)
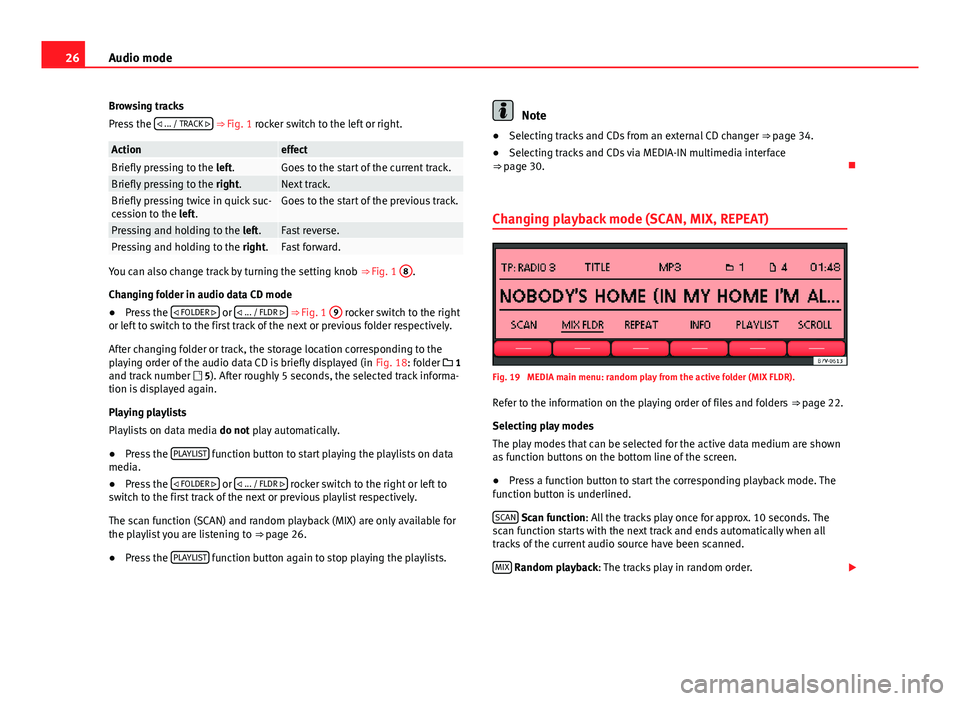
Fig. 19
MEDIA main menu: random play from the active folder (MIX FLDR).
Refer to the information on the playing order of files and folders ⇒ page 22.
Selecting play modes
The play modes that can be selected for the active data medium are shownas function buttons on the bottom line of the screen.
●
Press a function button to start the corresponding playback mode. Thefunction button is underlined.
SCAN Scan function: All the tracks play once for approx. 10 seconds. Thescan function starts with the next track and ends automatically when alltracks of the current audio source have been scanned.
MIX Random playback: The tracks play in random order.
Page 28 of 48
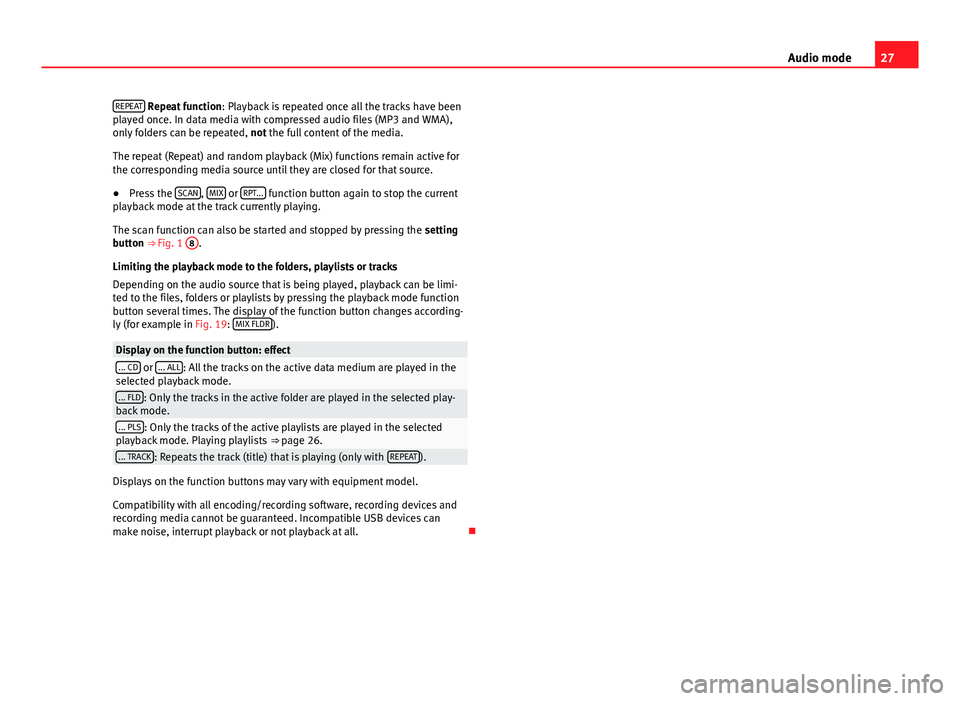
27Audio modeREPEAT Repeat function: Playback is repeated once all the tracks have beenplayed once. In data media with compressed audio files (MP3 and WMA),only folders can be repeated, not the full content of the media.
The repeat (Repeat) and random playback (Mix) functions remain active forthe corresponding media source until they are closed for that source.
●
Press the SCAN, MIX or RPT... function button again to stop the currentplayback mode at the track currently playing.
The scan function can also be started and stopped by pressing the settingbutton ⇒ Fig. 1
8
.
Limiting the playback mode to the folders, playlists or tracks
Depending on the audio source that is being played, playback can be limi-ted to the files, folders or playlists by pressing the playback mode functionbutton several times. The display of the function button changes according-ly (for example in Fig. 19: MIX FLDR).
Display on the function button: effect... CD or ... ALL: All the tracks on the active data medium are played in theselected playback mode.... FLD: Only the tracks in the active folder are played in the selected play-back mode.... PLS: Only the tracks of the active playlists are played in the selectedplayback mode. Playing playlists ⇒ page 26.... TRACK: Repeats the track (title) that is playing (only with REPEAT).
Displays on the function buttons may vary with equipment model.
Compatibility with all encoding/recording software, recording devices andrecording media cannot be guaranteed. Incompatible USB devices canmake noise, interrupt playback or not playback at all.
Page 32 of 48
31Audio mode●When playing large capacity hard discs with several files and a complexdata structure (several folders and subfolders, non-playable files, etc.) itmay take some time to read the audio files. The reaction time may also beinfluenced by the connected device.
●
WMA (Windows Media Audio) audio files can only be played if they arenot protected by authors' rights with the DRM (Digital Rights Management)system.
●
Generally, files with anti-copy protection cannot be played (e.g. M4P).
●
It is not possible to play files in 3GP format or “WMA lossless” files.Check there are no MP3 files stored in the playlist. A playlist only defines acertain order of play. If a playlist cannot be played, check that the “relativepaths” are correct, i.e. that the MP3 files on the data medium are actuallystored at the locations referenced by the playlist.
If an external data medium is divided into several partitions, only the firstpartition with compatible audio files will be played.
Please refer to further limitations and notes on the requirements placed onmedia sources ⇒ page 21.
WARNING●The connected audio devices must be protected from possible me-chanical damage and other kind of wear.●
We do not hold responsible for any possible damage on the connec-ted devices.
●
The connection of USB devices is sensitive to interference from mo-bile telephones. Mobile telephones should not be left next to the USBwhen this is connected, to prevent distortion.
●
The connected audio devices must be protected from possible me-chanical damage and other kind of wear.
●
Objects which are not secured in the vehicle compartment may inter-fere with driving and could result in serious injury.
WARNING (Continued)●The external data device should never be left on the dash panel. Asharp manoeuvre can throw the device towards the compartment and in-jure the vehicle passengers.
●
The external data device should never be mounted in the vicinity ofthe airbag. If an airbag is activated it can project the device towards thecompartment and injure the vehicle passengers.
●
The external data device must not be held in hand or on the legswhile driving. A sharp manoeuvre can throw the device towards the com-partment and injure the vehicle passengers.
●
Place the external data device cables so that they are not in the waywhile driving.
CAUTION
Make sure that the adapter lead is not pinched or severely bent. This candamage the adapter lead and cause functional faults.
Note
Some vehicles with the MEDIA-IN multimedia interface mounted on the cen-tre armrest are also equipped with an additional compartment. The rubberinsert of this compartment can be removed in order to extract small objectswhich may have fallen inside.
Note
●Do not connect an external media player to the radio-navigation systemvia Bluetooth and via the MEDIA-IN multimedia interface at the same time,as this could lead to limitations in playback.
●
The use of memory card adapters or USB hubs can cause problems inreading files.
Page 37 of 48
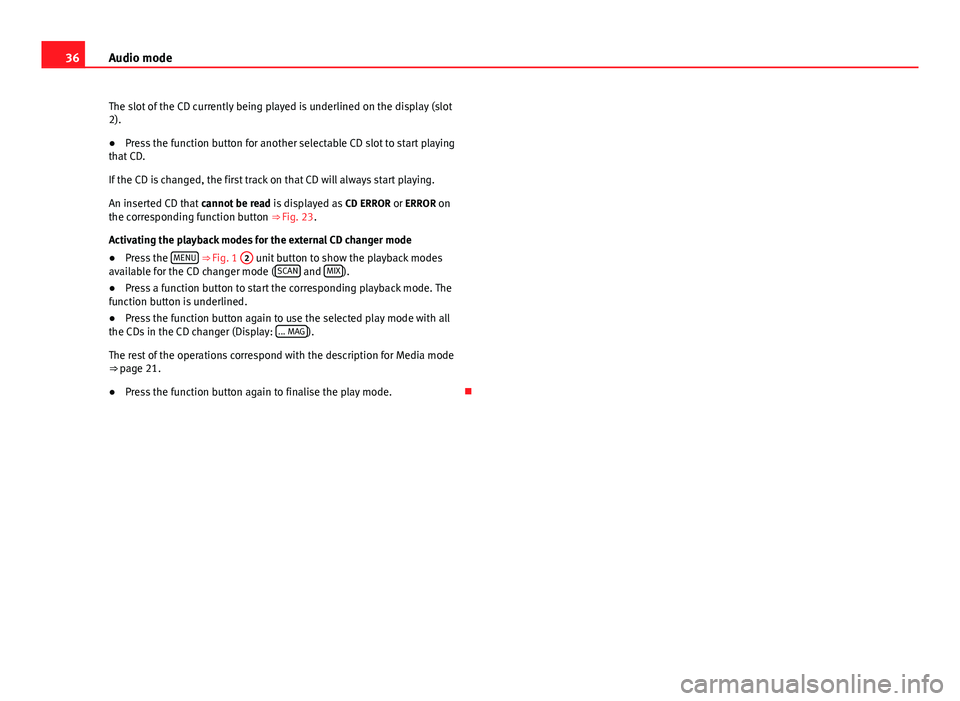
36Audio modeThe slot of the CD currently being played is underlined on the display (slot2).●
Press the function button for another selectable CD slot to start playingthat CD.
If the CD is changed, the first track on that CD will always start playing.
An inserted CD that cannot be read is displayed as CD ERROR or ERROR onthe corresponding function button ⇒ Fig. 23.
Activating the playback modes for the external CD changer mode
●
Press the MENU ⇒ Fig. 1
2
unit button to show the playback modesavailable for the CD changer mode (SCAN and MIX).
●
Press a function button to start the corresponding playback mode. Thefunction button is underlined.
●
Press the function button again to use the selected play mode with allthe CDs in the CD changer (Display: ... MAG).
The rest of the operations correspond with the description for Media mode⇒ page 21.
●
Press the function button again to finalise the play mode.
Page 38 of 48
37Settings menusSettings menusSound settings (SOUND)
Introduction
Additional information and warnings:
●
Safety notes ⇒ page 4
●
Unit overview ⇒ page 6
Configuring the sound and volume settings
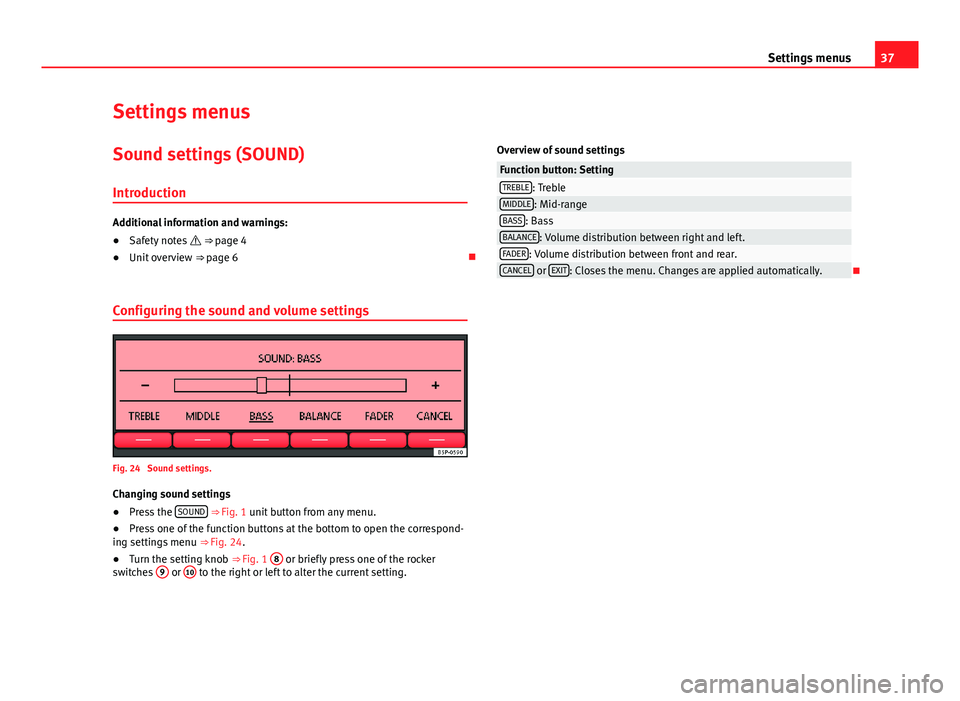
Fig. 24
Sound settings.
Changing sound settings
●
Press the SOUND ⇒ Fig. 1 unit button from any menu.
●
Press one of the function buttons at the bottom to open the correspond-ing settings menu ⇒ Fig. 24.
●
Turn the setting knob ⇒ Fig. 1
8
or briefly press one of the rockerswitches
9
or
10
to the right or left to alter the current setting.
Overview of sound settingsFunction button: SettingTREBLE: TrebleMIDDLE: Mid-rangeBASS: BassBALANCE: Volume distribution between right and left.FADER: Volume distribution between front and rear.CANCEL or EXIT: Closes the menu. Changes are applied automatically.
Page 39 of 48
38Settings menusSystem and function settings (SETUP)
Introduction
Additional information and warnings:
●
Safety notes ⇒ page 4
●
Unit overview ⇒ page 6
●
Basic information on use ⇒ page 8
Modifying the settings
●
Press the MENU ⇒ Fig. 1
2
unit button in Radio or Media mode.
●
Press the SETUP function button to open the SETUP menu ⇒ Fig. 25.
●
Pressing one of the function buttons displays the corresponding set-tings menu.
●
Press the function button or to display other settings menus.
●
Turn the setting knob ⇒ Fig. 1
8
to change the displayed setting.
●
Press the MENU unit button to close the SETUP menu.
●
Changes are applied automatically.
While volume settings are being adjusted, the currently active audio sourceis played at the level of the setting as it changes.
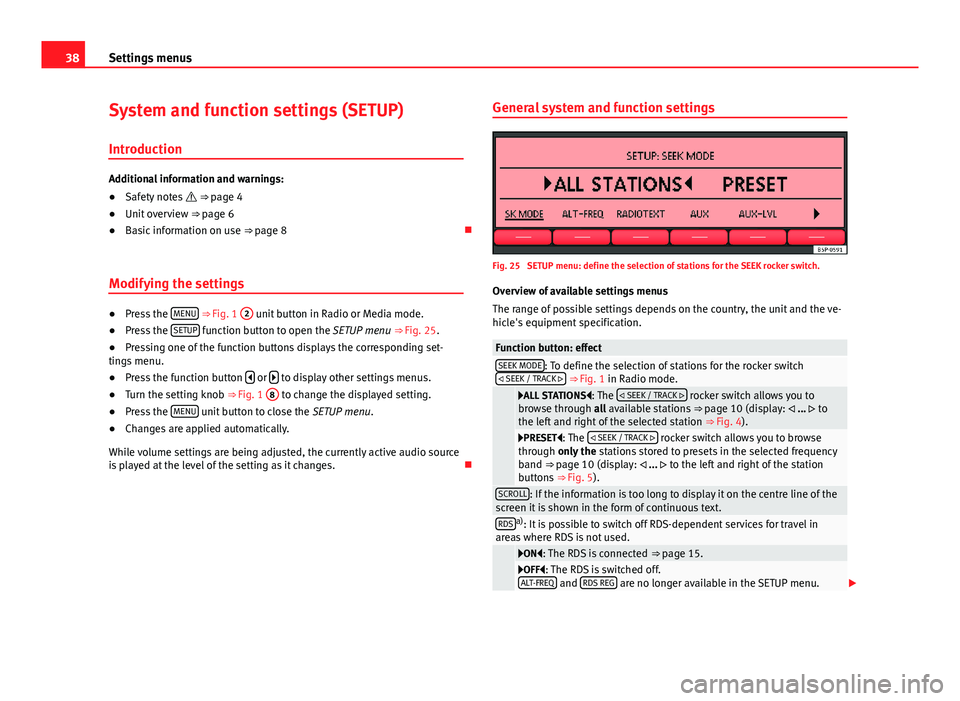
General system and function settingsFig. 25
SETUP menu: define the selection of stations for the SEEK rocker switch.
Overview of available settings menus
The range of possible settings depends on the country, the unit and the ve-hicle's equipment specification.
Function button: effectSEEK MODE: To define the selection of stations for the rocker switch SEEK / TRACK ⇒ Fig. 1 in Radio mode.
ALL STATIONS: The SEEK / TRACK rocker switch allows you tobrowse through all available stations ⇒ page 10 (display: ... tothe left and right of the selected station ⇒ Fig. 4).
PRESET: The SEEK / TRACK rocker switch allows you to browsethrough only the stations stored to presets in the selected frequencyband ⇒ page 10 (display: ... to the left and right of the stationbuttons ⇒ Fig. 5).
SCROLL: If the information is too long to display it on the centre line of thescreen it is shown in the form of continuous text.RDSa): It is possible to switch off RDS-dependent services for travel inareas where RDS is not used.
ON: The RDS is connected ⇒ page 15.OFF: The RDS is switched off.ALT-FREQ and RDS REG are no longer available in the SETUP menu.
Page 40 of 48
39Settings menusFunction button: effectALT-FREQb) ALTERNATIVE FREQUENCY: Define the setting for automatic sta-tion tracking.
ON: The unit always switches to the radio station's frequency thatoffers the best reception as the vehicle travels from one area to thenext. As a result, regional programmes may be interrupted.
OFF: No frequency change takes place. The unit remains tuned tothe selected frequency until reception is lost.RDS REG is no longer available in the SETUP menu.
RDS REGb)c) RDS REGIONAL: Define the setting for automatic station track-ing.
AUTO: The unit always switches to the radio station's frequency thatoffers the best reception as the vehicle travels from one area to thenext. As a result, regional programmes may be interrupted.
FIX: The unit only changes to regional alternative frequencies forthe current station broadcasting the same regional service. The radiowill accept the frequencies of other stations, only when the receptionquality is very poor.
RADIOTEXT: Some RDS-compatible and DAB stations broadcast additionaltext information. The individual radio station is responsible for the textsdisplayed.
ON: If the currently selected radio station supports radio text andthe reception is strong enough, radio text is displayed in the centreline of the screen (if necessary as scrolling text) instead of the stationname.
OFF: No radio text is displayed (factory setting).DAB... settings d) ⇒ page 40.AUX: AUX-IN multimedia socket enabled ON or disabled OFF⇒ page 28.AUX LVL: The input volume for some external audio sources (AUX, iPodor iPhone) can be adjusted to the output volume of the other audio sour-ces ⇒ page 39.
BT AUDIO: Bluetooth audio mode active ON or deactivated OFF⇒ page 28.Function button: effectON-VOL ALTERNATIVELY START-VOL: To regulate the maximum switch on vol-ume.GALA OR SCV: To set the speed-dependent volume adjustment⇒ page 39.DISPLAY: To set the brightness of the display when the dipped beam head-lights are switched on.PDC: PDC VOL ATTENU.: To reduce the volume of the current audio sourceto a preset level when the parking distance warning system is active.
a)
RDS is not available in all locations ⇒ page 15.
b)
Not displayed if RDS OFF is selected.
c)
Not displayed if ALT-FREQ OFF is selected.
d)
DAB radio mode is only available depending on the unit and currently only in part of Eu-rope ⇒ page 18.
Adjusting the output volume (AUX/MDI VOLUME LEVEL)
If you need to increase the output volume for the external audio source, firstlower the base volume on the radio system ⇒ page 9.
If the sound from the external audio source is too quiet, increase the outputvolume on the external audio source if possible. If this is not sufficient, setthe input volume (AUX VOL LEVEL) in the system settings to level 2 or level 3.
If the sound from the connected external audio source is too loud or distor-ted, lower the output volume on the external audio source if possible. If thisis not sufficient, set AUX VOL LEVEL to level 2 or level 1.
Speed-dependent volume adjustment
The GALA function automatically adjusts the volume in line with the speedof the vehicle.
You can set the degree to which the volume increases with speed on a scalebetween 1 and 7.