radio Seat Toledo 2013 SOUND SYSTEM 2.0
[x] Cancel search | Manufacturer: SEAT, Model Year: 2013, Model line: Toledo, Model: Seat Toledo 2013Pages: 48, PDF Size: 1.85 MB
Page 32 of 48
31Audio mode●When playing large capacity hard discs with several files and a complexdata structure (several folders and subfolders, non-playable files, etc.) itmay take some time to read the audio files. The reaction time may also beinfluenced by the connected device.
●
WMA (Windows Media Audio) audio files can only be played if they arenot protected by authors' rights with the DRM (Digital Rights Management)system.
●
Generally, files with anti-copy protection cannot be played (e.g. M4P).
●
It is not possible to play files in 3GP format or “WMA lossless” files.Check there are no MP3 files stored in the playlist. A playlist only defines acertain order of play. If a playlist cannot be played, check that the “relativepaths” are correct, i.e. that the MP3 files on the data medium are actuallystored at the locations referenced by the playlist.
If an external data medium is divided into several partitions, only the firstpartition with compatible audio files will be played.
Please refer to further limitations and notes on the requirements placed onmedia sources ⇒ page 21.
WARNING●The connected audio devices must be protected from possible me-chanical damage and other kind of wear.●
We do not hold responsible for any possible damage on the connec-ted devices.
●
The connection of USB devices is sensitive to interference from mo-bile telephones. Mobile telephones should not be left next to the USBwhen this is connected, to prevent distortion.
●
The connected audio devices must be protected from possible me-chanical damage and other kind of wear.
●
Objects which are not secured in the vehicle compartment may inter-fere with driving and could result in serious injury.
WARNING (Continued)●The external data device should never be left on the dash panel. Asharp manoeuvre can throw the device towards the compartment and in-jure the vehicle passengers.
●
The external data device should never be mounted in the vicinity ofthe airbag. If an airbag is activated it can project the device towards thecompartment and injure the vehicle passengers.
●
The external data device must not be held in hand or on the legswhile driving. A sharp manoeuvre can throw the device towards the com-partment and injure the vehicle passengers.
●
Place the external data device cables so that they are not in the waywhile driving.
CAUTION
Make sure that the adapter lead is not pinched or severely bent. This candamage the adapter lead and cause functional faults.
Note
Some vehicles with the MEDIA-IN multimedia interface mounted on the cen-tre armrest are also equipped with an additional compartment. The rubberinsert of this compartment can be removed in order to extract small objectswhich may have fallen inside.
Note
●Do not connect an external media player to the radio-navigation systemvia Bluetooth and via the MEDIA-IN multimedia interface at the same time,as this could lead to limitations in playback.
●
The use of memory card adapters or USB hubs can cause problems inreading files.
Page 33 of 48
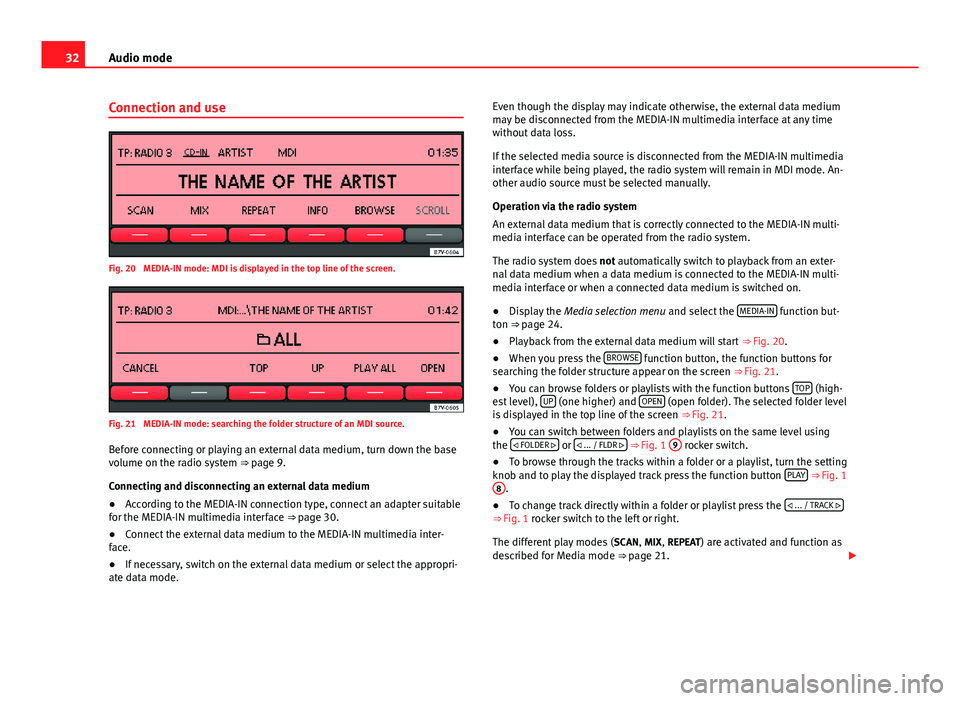
32Audio modeConnection and useFig. 20
MEDIA-IN mode: MDI is displayed in the top line of the screen.
Fig. 21
MEDIA-IN mode: searching the folder structure of an MDI source.
Before connecting or playing an external data medium, turn down the basevolume on the radio system ⇒ page 9.
Connecting and disconnecting an external data medium
●
According to the MEDIA-IN connection type, connect an adapter suitablefor the MEDIA-IN multimedia interface ⇒ page 30.
●
Connect the external data medium to the MEDIA-IN multimedia inter-face.
●
If necessary, switch on the external data medium or select the appropri-ate data mode.
Even though the display may indicate otherwise, the external data mediummay be disconnected from the MEDIA-IN multimedia interface at any timewithout data loss.
If the selected media source is disconnected from the MEDIA-IN multimediainterface while being played, the radio system will remain in MDI mode. An-other audio source must be selected manually.
Operation via the radio system
An external data medium that is correctly connected to the MEDIA-IN multi-media interface can be operated from the radio system.
The radio system does not automatically switch to playback from an exter-nal data medium when a data medium is connected to the MEDIA-IN multi-media interface or when a connected data medium is switched on.
●
Display the Media selection menu and select the MEDIA-IN function but-ton ⇒ page 24.
●
Playback from the external data medium will start ⇒ Fig. 20.
●
When you press the BROWSE function button, the function buttons forsearching the folder structure appear on the screen ⇒ Fig. 21.
●
You can browse folders or playlists with the function buttons TOP (high-est level), UP (one higher) and OPEN (open folder). The selected folder levelis displayed in the top line of the screen ⇒ Fig. 21.
●
You can switch between folders and playlists on the same level usingthe FOLDER or ... / FLDR ⇒ Fig. 1
9
rocker switch.
●
To browse through the tracks within a folder or a playlist, turn the settingknob and to play the displayed track press the function button PLAY ⇒ Fig. 1
8
.
●
To change track directly within a folder or playlist press the ... / TRACK ⇒ Fig. 1 rocker switch to the left or right.
The different play modes (SCAN, MIX, REPEAT) are activated and function asdescribed for Media mode ⇒ page 21.
Page 35 of 48
34Audio modeExternal CD changer*
Introduction
Depending on the vehicle model, the external CD changer will be in the pas-senger side glove compartment or in the front centre armrest.
The CD changer can hold six 12 cm standard audio CDs. You do not have toload all the slots in the CD changer.
The CD inserted can be selected and played through the radio system.
Additional information and warnings:
●
Safety notes ⇒ page 4
●
Unit overview ⇒ page 6
●
Media mode ⇒ page 21
Note●Audio data CDs and audio DVDs cannot be played in the external CDchanger.●
You might not be able to play CDs with copy protection or CD-Rs and CD-RWs, or playback might be restricted.
●
CD text cannot be displayed for CDs played from an external CD changer.
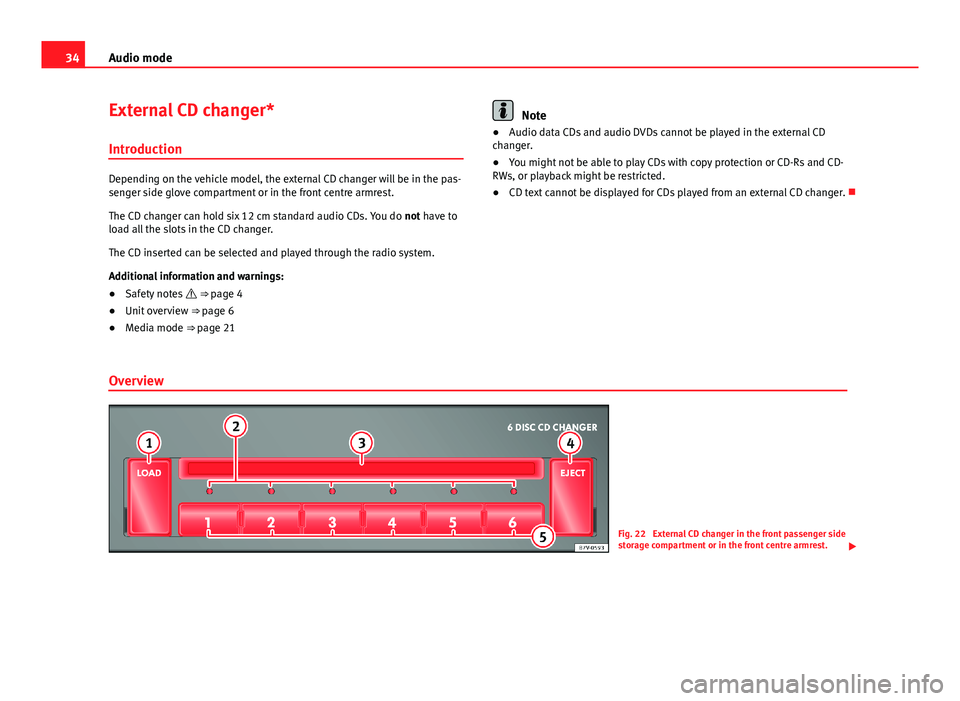
Overview
Fig. 22
External CD changer in the front passenger sidestorage compartment or in the front centre armrest.
Page 36 of 48
35Audio modeInserting a CD●
Press the LOAD unit button. The LED ⇒ Fig. 22
2
above the button ofthe next free CD slot flashes slowly.
●
To manually select a free CD slot press one of the unit buttons 1 to 6.Otherwise the next free slot is automatically made available.
●
When the LED flashes quickly, insert an audio CD with the unprintedside facing towards the unit buttons into the CD slot
3
until it is automati-cally drawn in ⇒ .
For quick loading press and hold the LOAD unit button for longer than 3 sec-onds. The free slots in the CD changer will be prepared for loading one afterthe other.
Ejecting CDs
●
When a CD is being played from the CD changer, pressing the EJECT unitbutton ejects that CD.
●
When no CD in the CD changer is being played, press the EJECT unit but-ton followed by one of the unit buttons 1 to 6 to select the CD slot.
●
A CD will be drawn back in if it is not removed from the eject positionwithin 15 seconds ⇒ .
To eject all CDs, press and hold the EJECT unit button for longer than 3 sec-onds. The CDs will be ejected one after the other.
Status display by the LEDs
2StatusdisplayCD slot emptyLED is off.CD slot loadedLED is lit up.CD slot availableLED flashes slowly.CD slot readyThe LED blinks quickly.You can insert a CD.CAUTIONBefore closing the storage compartment on the front passenger side or thefront centre armrest, check that the CD has been properly inserted or re-moved. The CD changer or the CD might otherwise be damaged.
Operation via the radio system
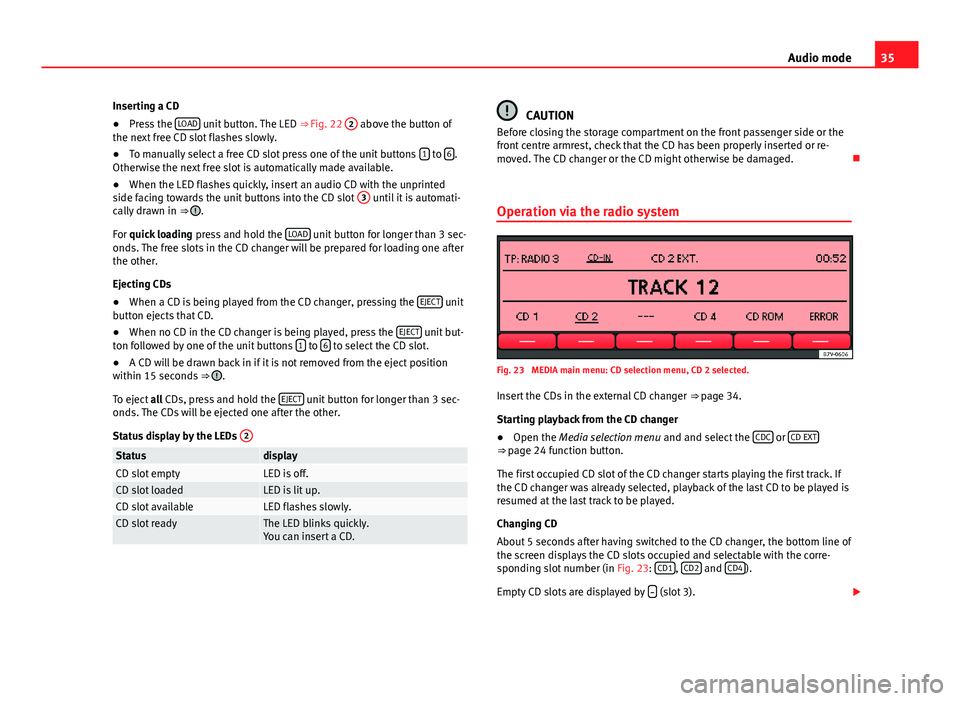
Fig. 23
MEDIA main menu: CD selection menu, CD 2 selected.
Insert the CDs in the external CD changer ⇒ page 34.
Starting playback from the CD changer
●
Open the Media selection menu and and select the CDC or CD EXT⇒ page 24 function button.
The first occupied CD slot of the CD changer starts playing the first track. Ifthe CD changer was already selected, playback of the last CD to be played isresumed at the last track to be played.
Changing CD
About 5 seconds after having switched to the CD changer, the bottom line ofthe screen displays the CD slots occupied and selectable with the corre-sponding slot number (in Fig. 23: CD1, CD2 and CD4).
Empty CD slots are displayed by (slot 3).
Page 39 of 48
38Settings menusSystem and function settings (SETUP)
Introduction
Additional information and warnings:
●
Safety notes ⇒ page 4
●
Unit overview ⇒ page 6
●
Basic information on use ⇒ page 8
Modifying the settings
●
Press the MENU ⇒ Fig. 1
2
unit button in Radio or Media mode.
●
Press the SETUP function button to open the SETUP menu ⇒ Fig. 25.
●
Pressing one of the function buttons displays the corresponding set-tings menu.
●
Press the function button or to display other settings menus.
●
Turn the setting knob ⇒ Fig. 1
8
to change the displayed setting.
●
Press the MENU unit button to close the SETUP menu.
●
Changes are applied automatically.
While volume settings are being adjusted, the currently active audio sourceis played at the level of the setting as it changes.
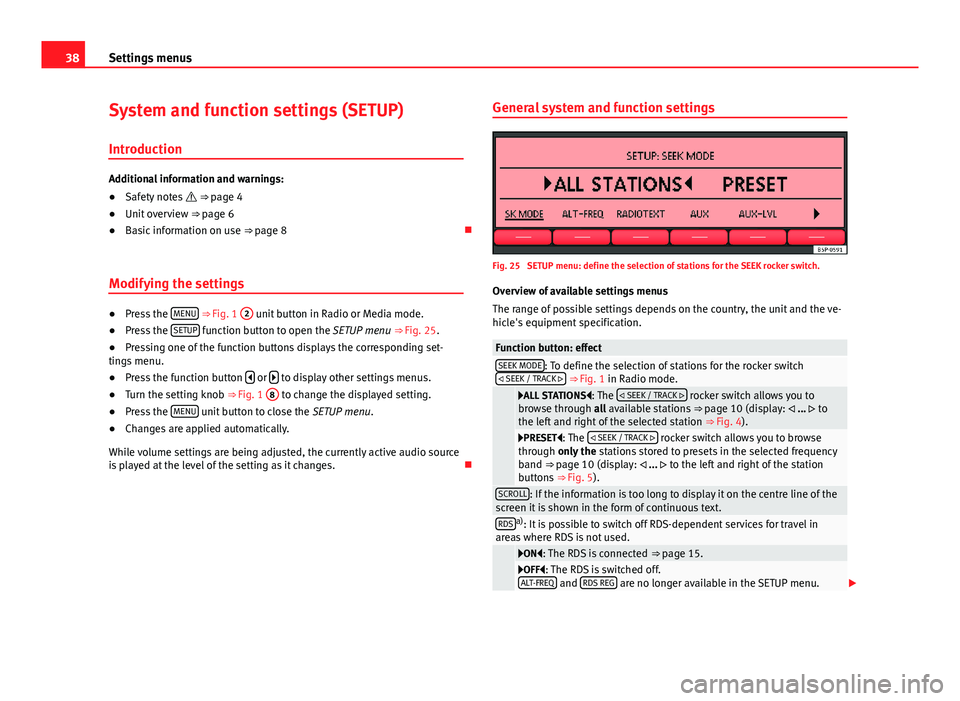
General system and function settingsFig. 25
SETUP menu: define the selection of stations for the SEEK rocker switch.
Overview of available settings menus
The range of possible settings depends on the country, the unit and the ve-hicle's equipment specification.
Function button: effectSEEK MODE: To define the selection of stations for the rocker switch SEEK / TRACK ⇒ Fig. 1 in Radio mode.
ALL STATIONS: The SEEK / TRACK rocker switch allows you tobrowse through all available stations ⇒ page 10 (display: ... tothe left and right of the selected station ⇒ Fig. 4).
PRESET: The SEEK / TRACK rocker switch allows you to browsethrough only the stations stored to presets in the selected frequencyband ⇒ page 10 (display: ... to the left and right of the stationbuttons ⇒ Fig. 5).
SCROLL: If the information is too long to display it on the centre line of thescreen it is shown in the form of continuous text.RDSa): It is possible to switch off RDS-dependent services for travel inareas where RDS is not used.
ON: The RDS is connected ⇒ page 15.OFF: The RDS is switched off.ALT-FREQ and RDS REG are no longer available in the SETUP menu.
Page 40 of 48
39Settings menusFunction button: effectALT-FREQb) ALTERNATIVE FREQUENCY: Define the setting for automatic sta-tion tracking.
ON: The unit always switches to the radio station's frequency thatoffers the best reception as the vehicle travels from one area to thenext. As a result, regional programmes may be interrupted.
OFF: No frequency change takes place. The unit remains tuned tothe selected frequency until reception is lost.RDS REG is no longer available in the SETUP menu.
RDS REGb)c) RDS REGIONAL: Define the setting for automatic station track-ing.
AUTO: The unit always switches to the radio station's frequency thatoffers the best reception as the vehicle travels from one area to thenext. As a result, regional programmes may be interrupted.
FIX: The unit only changes to regional alternative frequencies forthe current station broadcasting the same regional service. The radiowill accept the frequencies of other stations, only when the receptionquality is very poor.
RADIOTEXT: Some RDS-compatible and DAB stations broadcast additionaltext information. The individual radio station is responsible for the textsdisplayed.
ON: If the currently selected radio station supports radio text andthe reception is strong enough, radio text is displayed in the centreline of the screen (if necessary as scrolling text) instead of the stationname.
OFF: No radio text is displayed (factory setting).DAB... settings d) ⇒ page 40.AUX: AUX-IN multimedia socket enabled ON or disabled OFF⇒ page 28.AUX LVL: The input volume for some external audio sources (AUX, iPodor iPhone) can be adjusted to the output volume of the other audio sour-ces ⇒ page 39.
BT AUDIO: Bluetooth audio mode active ON or deactivated OFF⇒ page 28.Function button: effectON-VOL ALTERNATIVELY START-VOL: To regulate the maximum switch on vol-ume.GALA OR SCV: To set the speed-dependent volume adjustment⇒ page 39.DISPLAY: To set the brightness of the display when the dipped beam head-lights are switched on.PDC: PDC VOL ATTENU.: To reduce the volume of the current audio sourceto a preset level when the parking distance warning system is active.
a)
RDS is not available in all locations ⇒ page 15.
b)
Not displayed if RDS OFF is selected.
c)
Not displayed if ALT-FREQ OFF is selected.
d)
DAB radio mode is only available depending on the unit and currently only in part of Eu-rope ⇒ page 18.
Adjusting the output volume (AUX/MDI VOLUME LEVEL)
If you need to increase the output volume for the external audio source, firstlower the base volume on the radio system ⇒ page 9.
If the sound from the external audio source is too quiet, increase the outputvolume on the external audio source if possible. If this is not sufficient, setthe input volume (AUX VOL LEVEL) in the system settings to level 2 or level 3.
If the sound from the connected external audio source is too loud or distor-ted, lower the output volume on the external audio source if possible. If thisis not sufficient, set AUX VOL LEVEL to level 2 or level 1.
Speed-dependent volume adjustment
The GALA function automatically adjusts the volume in line with the speedof the vehicle.
You can set the degree to which the volume increases with speed on a scalebetween 1 and 7.
Page 41 of 48
40Settings menusIf a low value is set, the volume increases only slightly as the speed of thevehicle increases. At a high setting the volume increases further. At 0speed-dependent volume adjustment is switched off.
Note
Due to country-specific legislation, certain functions cannot be selectedwhen the vehicle is travelling above a certain speed.
Function only available in Europe
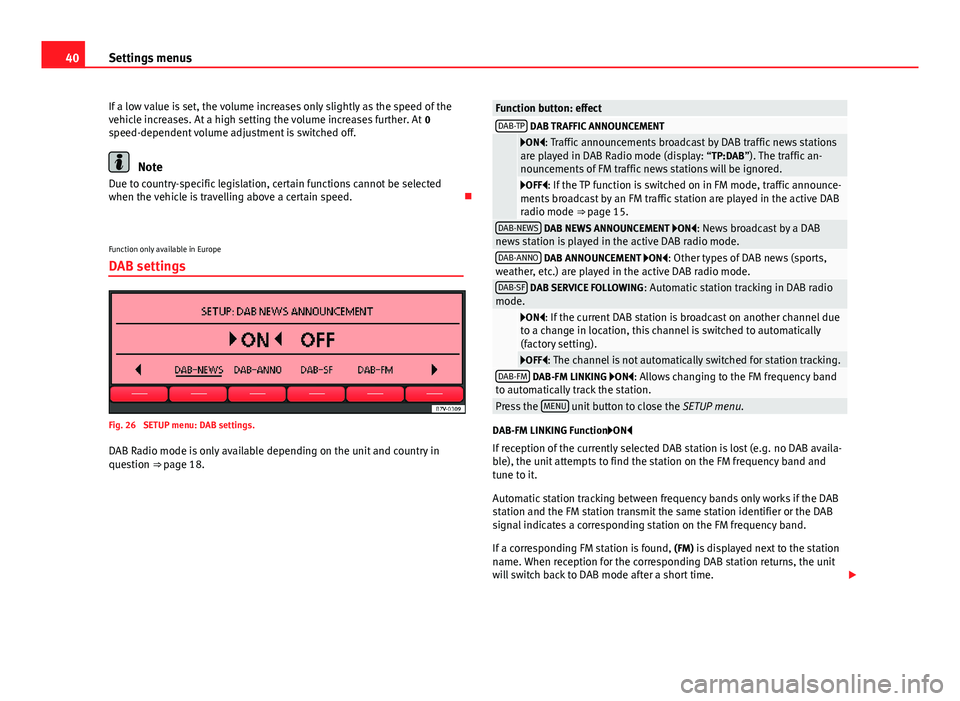
DAB settings
Fig. 26
SETUP menu: DAB settings.
DAB Radio mode is only available depending on the unit and country inquestion ⇒ page 18.
Function button: effectDAB-TP DAB TRAFFIC ANNOUNCEMENT
ON: Traffic announcements broadcast by DAB traffic news stationsare played in DAB Radio mode (display: “TP:DAB”). The traffic an-nouncements of FM traffic news stations will be ignored.
OFF: If the TP function is switched on in FM mode, traffic announce-ments broadcast by an FM traffic station are played in the active DABradio mode ⇒ page 15.
DAB-NEWS DAB NEWS ANNOUNCEMENT ON: News broadcast by a DABnews station is played in the active DAB radio mode.DAB-ANNO DAB ANNOUNCEMENT ON: Other types of DAB news (sports,weather, etc.) are played in the active DAB radio mode.DAB-SF DAB SERVICE FOLLOWING: Automatic station tracking in DAB radiomode.
ON: If the current DAB station is broadcast on another channel dueto a change in location, this channel is switched to automatically(factory setting).
OFF: The channel is not automatically switched for station tracking.DAB-FM DAB-FM LINKING ON: Allows changing to the FM frequency bandto automatically track the station.Press the MENU unit button to close the SETUP menu.
DAB-FM LINKING FunctionON
If reception of the currently selected DAB station is lost (e.g. no DAB availa-ble), the unit attempts to find the station on the FM frequency band andtune to it.
Automatic station tracking between frequency bands only works if the DABstation and the FM station transmit the same station identifier or the DABsignal indicates a corresponding station on the FM frequency band.
If a corresponding FM station is found, (FM) is displayed next to the stationname. When reception for the corresponding DAB station returns, the unitwill switch back to DAB mode after a short time.
Page 42 of 48
41Settings menusIf the reception of the selected DAB station is lost and the station cannot befound on the FM frequency band, the radio will be muted.
Page 43 of 48
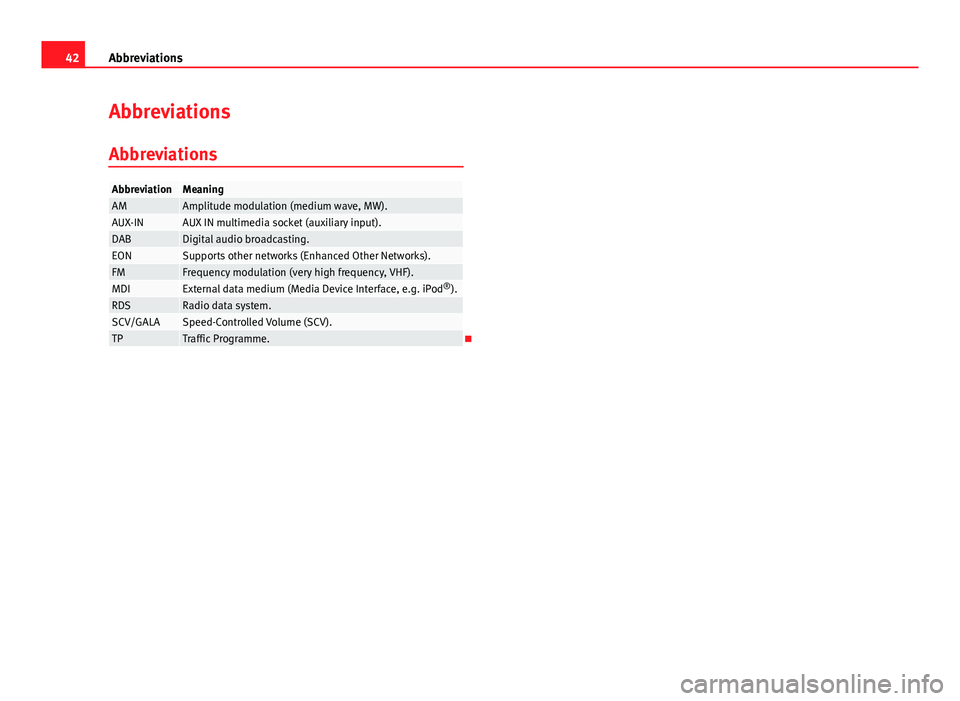
42AbbreviationsAbbreviationsAbbreviationsAbbreviationMeaningAMAmplitude modulation (medium wave, MW).AUX-INAUX IN multimedia socket (auxiliary input).DABDigital audio broadcasting.EONSupports other networks (Enhanced Other Networks).FMFrequency modulation (very high frequency, VHF).MDIExternal data medium (Media Device Interface, e.g. iPod®).RDSRadio data system.SCV/GALASpeed-Controlled Volume (SCV).TPTraffic Programme.
Page 44 of 48
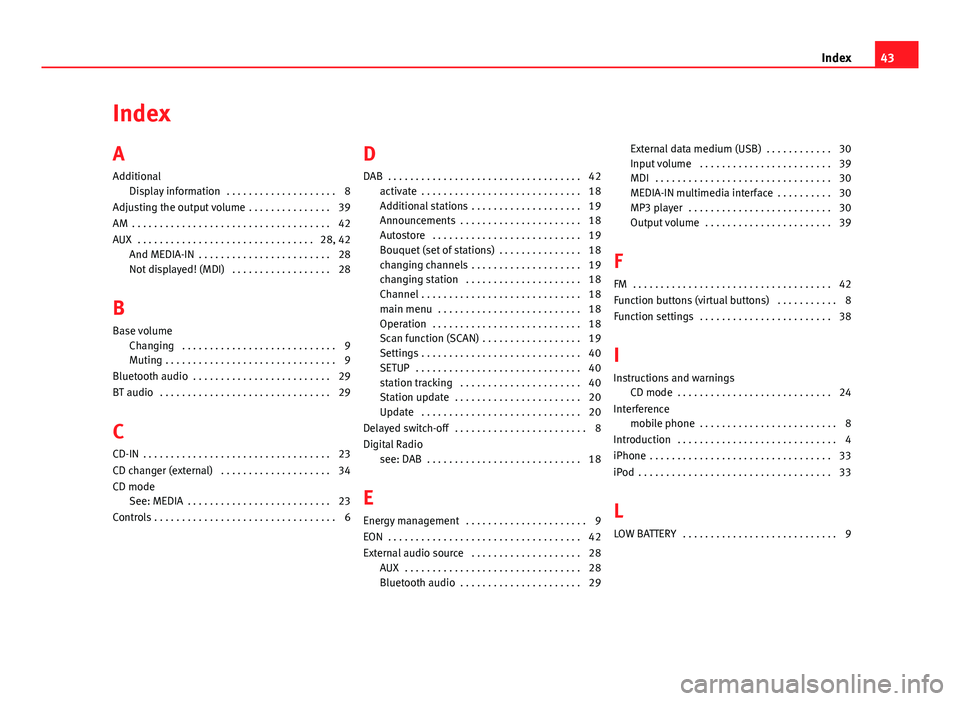
IndexA
Additional
Display information . . . . . . . . . . . . . . . . . . . . 8
Adjusting the output volume . . . . . . . . . . . . . . . 39
AM . . . . . . . . . . . . . . . . . . . . . . . . . . . . . . . . . . . . 42
AUX . . . . . . . . . . . . . . . . . . . . . . . . . . . . . . . . 28, 42
And MEDIA-IN . . . . . . . . . . . . . . . . . . . . . . . . 28Not displayed! (MDI) . . . . . . . . . . . . . . . . . . 28
B
Base volume
Changing . . . . . . . . . . . . . . . . . . . . . . . . . . . . 9Muting . . . . . . . . . . . . . . . . . . . . . . . . . . . . . . . 9
Bluetooth audio . . . . . . . . . . . . . . . . . . . . . . . . . 29
BT audio . . . . . . . . . . . . . . . . . . . . . . . . . . . . . . . 29
C
CD-IN . . . . . . . . . . . . . . . . . . . . . . . . . . . . . . . . . . 23
CD changer (external) . . . . . . . . . . . . . . . . . . . . 34
CD modeSee: MEDIA . . . . . . . . . . . . . . . . . . . . . . . . . . 23
Controls . . . . . . . . . . . . . . . . . . . . . . . . . . . . . . . . . 6
D
DAB . . . . . . . . . . . . . . . . . . . . . . . . . . . . . . . . . . . 42
activate . . . . . . . . . . . . . . . . . . . . . . . . . . . . . 18Additional stations . . . . . . . . . . . . . . . . . . . . 19Announcements . . . . . . . . . . . . . . . . . . . . . . 18Autostore . . . . . . . . . . . . . . . . . . . . . . . . . . . 19
Bouquet (set of stations) . . . . . . . . . . . . . . . 18changing channels . . . . . . . . . . . . . . . . . . . . 19changing station . . . . . . . . . . . . . . . . . . . . . 18Channel . . . . . . . . . . . . . . . . . . . . . . . . . . . . . 18main menu . . . . . . . . . . . . . . . . . . . . . . . . . . 18Operation . . . . . . . . . . . . . . . . . . . . . . . . . . . 18
Scan function (SCAN) . . . . . . . . . . . . . . . . . . 19Settings . . . . . . . . . . . . . . . . . . . . . . . . . . . . . 40SETUP . . . . . . . . . . . . . . . . . . . . . . . . . . . . . . 40station tracking . . . . . . . . . . . . . . . . . . . . . . 40Station update . . . . . . . . . . . . . . . . . . . . . . . 20Update . . . . . . . . . . . . . . . . . . . . . . . . . . . . . 20
Delayed switch-off . . . . . . . . . . . . . . . . . . . . . . . . 8
Digital Radiosee: DAB . . . . . . . . . . . . . . . . . . . . . . . . . . . . 18
E
Energy management . . . . . . . . . . . . . . . . . . . . . . 9
EON . . . . . . . . . . . . . . . . . . . . . . . . . . . . . . . . . . . 42
External audio source . . . . . . . . . . . . . . . . . . . . 28AUX . . . . . . . . . . . . . . . . . . . . . . . . . . . . . . . . 28Bluetooth audio . . . . . . . . . . . . . . . . . . . . . . 29
External data medium (USB) . . . . . . . . . . . . 30Input volume . . . . . . . . . . . . . . . . . . . . . . . . 39MDI . . . . . . . . . . . . . . . . . . . . . . . . . . . . . . . . 30MEDIA-IN multimedia interface . . . . . . . . . . 30MP3 player . . . . . . . . . . . . . . . . . . . . . . . . . . 30Output volume . . . . . . . . . . . . . . . . . . . . . . . 39
F
FM . . . . . . . . . . . . . . . . . . . . . . . . . . . . . . . . . . . . 42
Function buttons (virtual buttons) . . . . . . . . . . . 8
Function settings . . . . . . . . . . . . . . . . . . . . . . . . 38
I
Instructions and warningsCD mode . . . . . . . . . . . . . . . . . . . . . . . . . . . . 24
Interferencemobile phone . . . . . . . . . . . . . . . . . . . . . . . . . 8
Introduction . . . . . . . . . . . . . . . . . . . . . . . . . . . . . 4
iPhone . . . . . . . . . . . . . . . . . . . . . . . . . . . . . . . . . 33
iPod . . . . . . . . . . . . . . . . . . . . . . . . . . . . . . . . . . . 33
L
LOW BATTERY . . . . . . . . . . . . . . . . . . . . . . . . . . . . 9
43Index