ESP Seat Toledo 2015 MEDIA SYSTEM PLUS - NAVI SYSTEM
[x] Cancel search | Manufacturer: SEAT, Model Year: 2015, Model line: Toledo, Model: Seat Toledo 2015Pages: 88, PDF Size: 2.23 MB
Page 2 of 88
SEAT S.A. is permanently concerned about continuous development of its t\
ypes and models. For this reason we ask you to under-
stand, that at any given time, changes regarding shape, equipment and te\
chnique may take place on the car delivered. For this reason
no right at all may derive based on the data, drawings and descriptions \
in this current handbook.
All texts, illustrations and standards in this handbook are based on the\
status of information at the time of printing. Except for error
or omission, the information included in the current handbook is valid a\
s of the date of closing print.
Re-printing, copying or translating, whether total or partial is not all\
owed unless SEAT allows it in written form.
SEAT reserves all rights in accordance with the “Copyright” Act.
All rights on changes are reserved.
❀This paper has been manufactured using bleached non-chlorine cellulose.
© SEAT S.A. - Reprint: 15.11.15
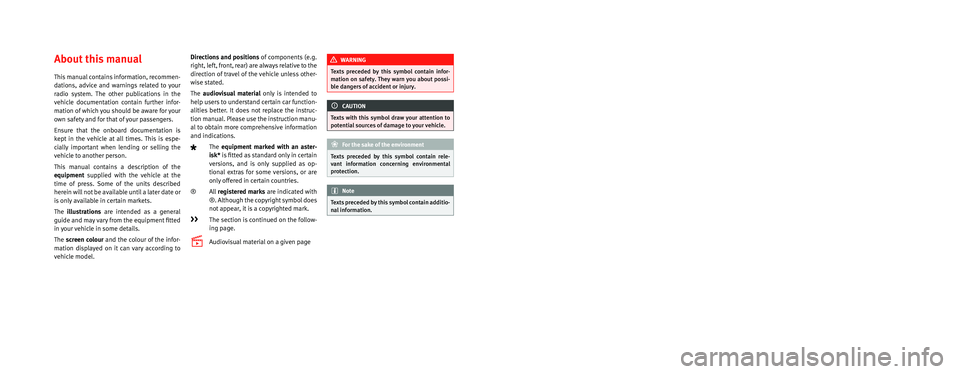
About this manual
This manual contains information, recommen-
dations, advice and warnings related to your
radio system. The other publications in the
vehicle documentation contain further infor -
mation of which you should be aware for your
own safety and for that of your passengers.
Ensure that the onboard documentation is
kept in the vehicle at all times. This is espe -
cially important when lending or selling the
vehicle to another person.
This manual contains a description of the
equipment supplied with the vehicle at the
time of press. Some of the units described
herein will not be available until a later date or
is only available in certain markets.
The illustrations are intended as a general
guide and may vary from the equipment �tted
in your vehicle in some details.
The screen colour and the colour of the infor -
mation displayed on it can vary according to
vehicle model. Directions and positions
of components (e.g.
right, left, front, rear) are always relative to the
direction of travel of the vehicle unless other -
wise stated.
The audiovisual material only is intended to
help users to understand certain car function -
alities better. It does not replace the instruc -
tion manual. Please use the instruction manu-
al to obtain more comprehensive information
and indications.
The equipment marked with an aster -
isk* is �tted as standard only in certain
versions, and is only supplied as op -
tional extras for some versions, or are
only offered in certain countries.
® All registered marks are indicated with
®. Although the copyright symbol does
not appear, it is a copyrighted mark.
>> The section is continued on the follow -
ing page.
Audiovisual material on a given page
WARNING
Texts preceded by this symbol contain infor -
mation on safety. They warn you about possi -
ble dangers of accident or injury.
CAUTION
Texts with this symbol draw your attention to
potential sources of damage to your vehicle.
For the sake of the environment
Texts preceded by this symbol contain rele-
vant information concerning environmental
protection.
Note
Texts preceded by this symbol contain additio -
nal information.
Page 8 of 88
Introduction
Introduction Saf ety
in
structions relating to the In-
fotainment system Travelling on today's roads requires the driv-
er's f
u
ll attention at all times.
Only operate the radio and its various func-
tions when the traffic situation really permits
this. WARNING
● Bef or
e starting the trip, you should famili-
arise yourself with the different radio func-
tions.
● High audio volume may represent a danger
to y
ou and to others.
● Adjust the volume in a way that you can
distin
guish surrounding noise, for example,
horns and sirens, etc.
● Radio settings should be made when the
car is
stopped or by a passenger. WARNING
Distracting the driver in any way can lead to
an acc ident
and cause injuries. Operating the
Infotainment system can distract your atten-
tion from the traffic.
● Always drive carefully and responsibly.
● Select volume settings that allow you to
eas
ily hear signals from outside the vehicle at all times (e.g. emergency services sirens
and horns).
● He arin
g may be impaired if using too high a
volume settin
g, even if only for short periods
of time. WARNING
The volume level may suddenly change when
y ou sw it
ch audio source or connect a new au-
dio source.
● Lower the base volume before connecting
or switc
hing audio sources. WARNING
The driving recommendations and traffic indi-
cation s
shown on the navigation system may
differ from the current traffic situation.
● Traffic signs and traffic regulations have
priority ov
er the recommendations and dis-
plays provided by the navigation system.
● Adjust your vehicle speed and driving style
to suit
visibility, weather, road and traffic
conditions. WARNING
Connecting, inserting or removing a data me-
dium whil e driv
ing can distract your attention
from the traffic and cause an accident. WARNING
Connecting leads for external devices may
ob s
truct the driver.
● Arrange the connecting leads so that they
do not ob
struct the driver. WARNING
External devices that are loose or not proper-
ly sec ur
ed could move around the passenger
compartment during a sudden driving or
braking manoeuvre or an accident and cause
damage or injury.
● Never place or fit external devices to the
doors, wind
screen, steering wheel, dash pan-
el, the backs of the seats, on top of or near
the area marked “AIRBAG” or between these
areas and the occupants. External devices
can cause serious injury in an accident, espe-
cially when the airbags inflate. WARNING
The armrest may obstruct the driver's arm
mov ement
s, which could cause an accident
and severe injuries.
● Always keep the armrest closed while the
vehicl
e is in motion. WARNING
Opening a CD player's housing may lead to
injuries fr
om invisible laser radiation.
● Have CD players repaired only by a quali-
fied workshop
.6
Page 14 of 88
Introduction
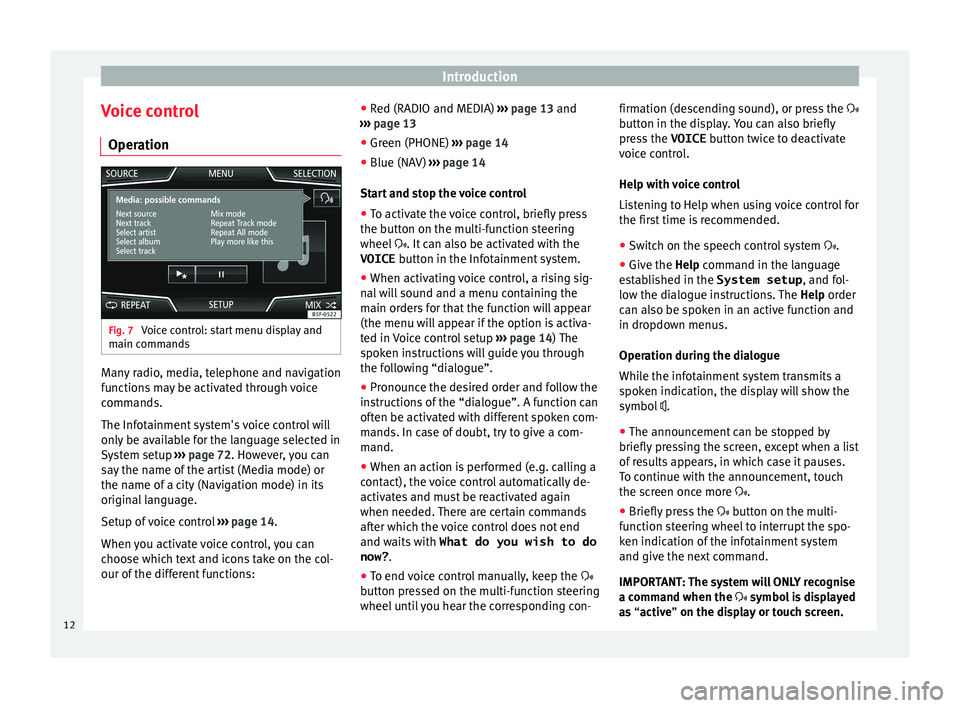
Voice control Oper ation Fig. 7
Voice control: start menu display and
m ain c
omm
ands Many radio, media, telephone and navigation
f
u
nction
s may be activated through voice
commands.
The Infotainment system's voice control will
only be available for the language selected in
System setup ››› page 72. However, you can
say the name of the artist (Media mode) or
the name of a city (Navigation mode) in its
original language.
Setup of voice control ››› page 14.
When you activate voice control, you can
choose which text and icons take on the col-
our of the different functions: ●
Red (RADIO and MEDIA) ››
› page 13 and
››› page 13
● Green (PHONE) ›››
page 14
● Blue (NAV) ››› pag
e 14
Start and stop the voice control
● To activate the voice control, briefly press
the button on the mu
lti-function steering
wheel . It can also be activated with the
VOICE button in the Infotainment system.
● When activating voice control, a rising sig-
nal w
ill sound and a menu containing the
main orders for that the function will appear
(the menu will appear if the option is activa-
ted in Voice control setup ››› page 14) The
spoken instructions will guide you through
the following “dialogue”.
● Pronounce the desired order and follow the
instruction
s of the “dialogue”. A function can
often be activated with different spoken com-
mands. In case of doubt, try to give a com-
mand.
● When an action is performed (e.g. calling a
contact), the
voice control automatically de-
activates and must be reactivated again
when needed. There are certain commands
after which the voice control does not end
and waits with What do you wish to do
now? .
● To end voice control manually, keep the
button pr
essed on the multi-function steering
wheel until you hear the corresponding con- firmation (descending sound), or press the
button in the di
splay. You can also briefly
press the VOICE button twice to deactivate
voice control.
Help with voice control
Listening to Help when using voice control for
the first time is recommended.
● Switch on the speech control system .
● Give the Help command in the l
anguage
established in the System setup , and fol-
low the dialogue instructions. The Help order
can also be spoken in an active function and
in dropdown menus.
Operation during the dialogue
While the infotainment system transmits a
spoken indication, the display will show the
symbol .
● The announcement can be stopped by
briefly pre
ssing the screen, except when a list
of results appears, in which case it pauses.
To continue with the announcement, touch
the screen once more .
● Briefly press the button on the mu
lti-
function steering wheel to interrupt the spo-
ken indication of the infotainment system
and give the next command.
IMPORTANT: The system will ONLY recognise
a command when the symbol is displayed
as “active” on the display or touch screen.
12
Page 18 of 88
Audio and Media Mode
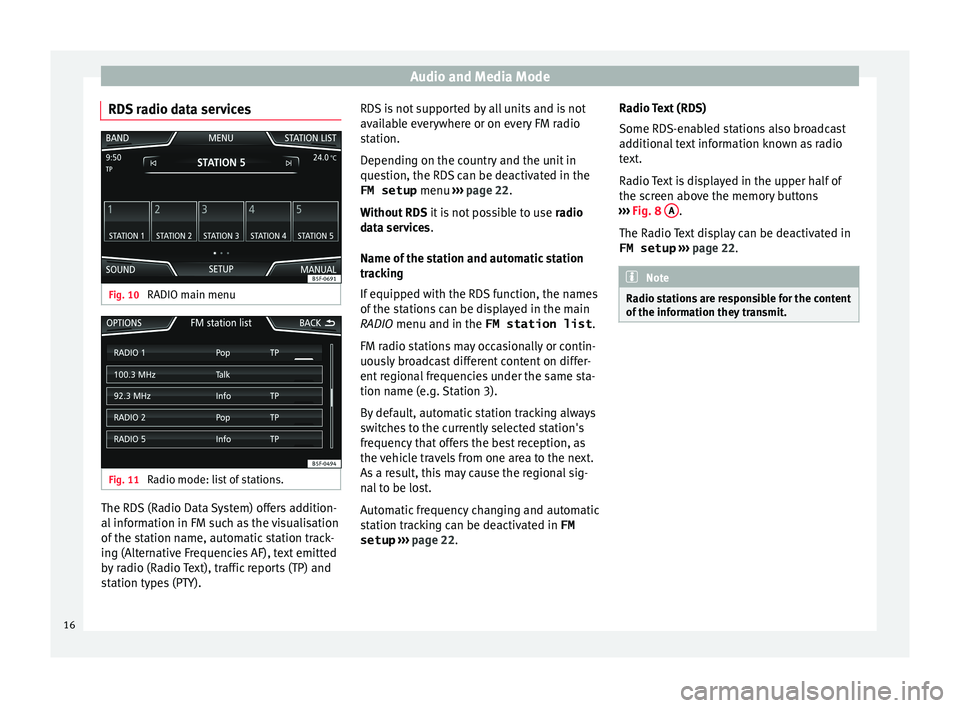
RDS radio data services Fig. 10
RADIO main menu Fig. 11
Radio mode: list of stations. The RDS (Radio Data System) offers addition-
al
inf
orm
ation in FM such as the visualisation
of the station name, automatic station track-
ing (Alternative Frequencies AF), text emitted
by radio (Radio Text), traffic reports (TP) and
station types (PTY). RDS is not supported by all units and is not
avail
able everywhere or on every FM radio
station.
Depending on the country and the unit in
question, the RDS can be deactivated in the
FM setup menu ››› page 22.
Without RDS it is not possible to use radio
data services.
Name of the station and automatic station
tracking
If equipped with the RDS function, the names
of the stations can be displayed in the main
RADIO menu and in the FM station list .
FM radio stations may occasionally or contin-
uously broadcast different content on differ-
ent regional frequencies under the same sta-
tion name (e.g. Station 3).
By default, automatic station tracking always
switches to the currently selected station's
frequency that offers the best reception, as
the vehicle travels from one area to the next.
As a result, this may cause the regional sig-
nal to be lost.
Automatic frequency changing and automatic
station tracking can be deactivated in FM setup ››› page 22. Radio Text (RDS)
Some RDS-enab
led stations also broadcast
additional text information known as radio
text.
Radio Text is displayed in the upper half of
the screen above the memory buttons
››› Fig. 8 A .
The R a
dio
Text display can be deactivated in
FM setup ››› page 22. Note
Radio stations are responsible for the content
of the inf orm
ation they transmit.16
Page 20 of 88
Audio and Media Mode
Once the corresponding FM station has been
f ou
nd,
(FM) is displayed after the station
name. When reception for the corresponding
DAB station returns, the unit will switch back
to DAB mode after a short time. The (FM)
display is hidden.
If the reception of the selected DAB station is
too weak and the station can no longer be
found on the FM frequency band, the radio
will be muted.
Screen view menu
The function buttons refer to the menu that
appears when the View button is pressed
› ›
›
Fig. 12.
Function button: function
Preset list: Memory buttons display ››› Fig. 12.
Station information: Simultaneous displaying of radio text
››› Fig. 13 A and slideshow B instead of the memory
buttons.
Radio text: Radio text is displayed instead of memory
buttons.
Presentation: The slideshows are displayed in full screen. Note
● Not a l
l DAB stations support Radio Text and
slideshows.
● Radio stations are responsible for the con-
tent of
the information they transmit. Memory buttons
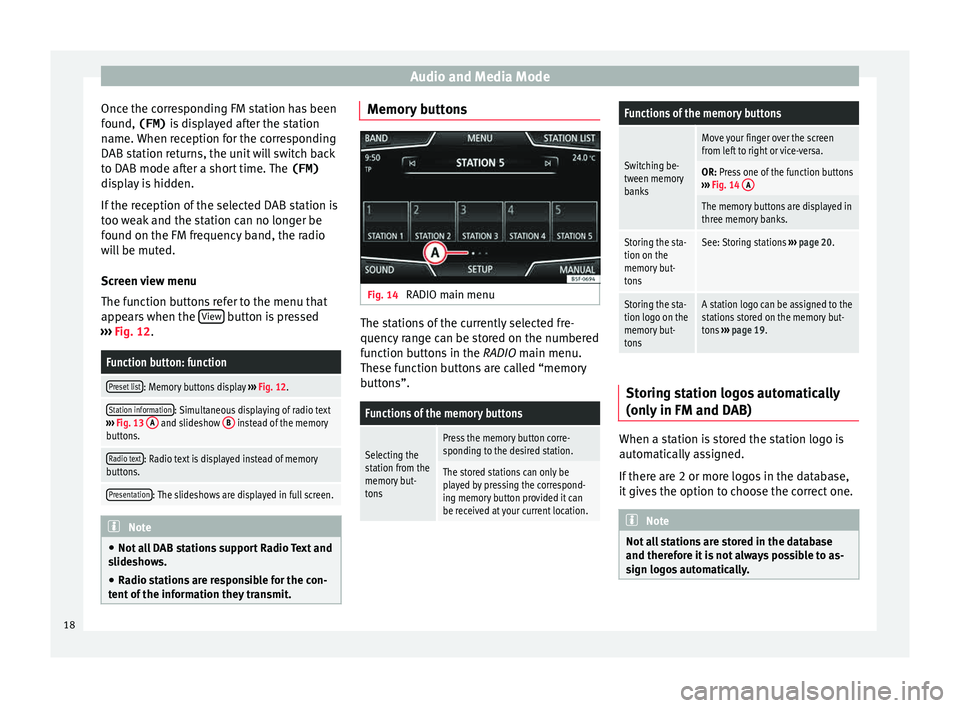
Fig. 14
RADIO main menu The stations of the currently selected fre-
quency r
an
ge can be stored on the numbered
function buttons in the RADIO main menu.
These function buttons are called “memory
buttons”.
Functions of the memory buttons
Selecting the
station from the
memory but-
tonsPress the memory button corre-
sponding to the desired station.
The stored stations can only be
played by pressing the correspond-
ing memory button provided it can
be received at your current location.
Functions of the memory buttons
Switching be-
tween memory
banks
Move your finger over the screen
from left to right or vice-versa.
OR: Press one of the function buttons
››› Fig. 14 A
The memory buttons are displayed in
three memory banks.
Storing the sta-
tion on the
memory but-
tonsSee: Storing stations
››› page 20.
Storing the sta-
tion logo on the
memory but-
tonsA station logo can be assigned to the
stations stored on the memory but-
tons ››› page 19. Storing station logos automatically
(on
ly
in FM and D
AB) When a station is stored the station logo is
aut
om
atic
ally assigned.
If there are 2 or more logos in the database,
it gives the option to choose the correct one. Note
Not all stations are stored in the database
and theref or
e it is not always possible to as-
sign logos automatically. 18
Page 26 of 88
Audio and Media Mode
Copyright
Audio and v
ideo fi
les on data storage devices
are usually protected by intellectual property
rights, as per the corresponding national and
international laws. Be aware of the current le-
gal provisions! Note
● MPEG-4 HE -AA
C audio coding technology
and patents are licensed from Fraunhofer IIS.
● This product is subject to certain intellectu-
al pr
operty rights and copyrights owned by the Microsoft Corporation. The use or distri-
bution of
thi
s type of technology outside this
product requires a licence from Microsoft or
an authorised Microsoft company. Requirements for data storage devices and files
Factory-fitted CD drives conform to safety
cl
a
ss 1 according to DIN IEC 76 (CO)
6/ VDE 0837.
The Infotainment system only accepts stand-
ard 12 cm CDs and memory cards with these dimensions: 32 mm x 24 mm x 2.1 mm or
1.4 mm.
The suppor
ted file formats listed are collec-
tively referred to below as “audio files”. A CD containing audio files of these types is refer-
red to a
s an “audio data CD”.
24
Page 29 of 88
Audio and Media Mode
MEDIA main menu function buttonsFunction button: function
SOURCE
Indicates the media source being played.
Press to select another media source
››› page 28.
CD: Internal CD player ››› page 30.
SD CARD 1, SD CARD 2: SD memory card
››› page 31.
USB: External data storage device con-
nected to the USB port ››› page 31.
AUX: External audio source connected to
AUX IN multimedia socket ››› page 33.
BT AUDIO: Bluetooth ®
audio ››› page 33.
SELEC-
TIONOpens the track list ››› page 29.
/ Changes track in Media mode or fast for-
ward/rewind
››› page 28.
Playback stops. The function button
changes to .
Playback is resumed. The function but-
ton changes to .
SETUPOpens the Media Settings menu
››› page 34.
Function button: function
REPEAT
Repeat all tracks.
Repeats all the tracks that are on the
same memory level as the track being
played at that moment. If in the
Media
Settings menu
Mix/Repeat including subfolders is activated,
it also includes the subfolders
››› page 34.
Repeat the current track.
MIX
Random play.
Includes all tracks that are on the same
memory level as the track being played at
that moment. If in the Media Settings
menu
Mix/Repeat including subfolders is ac-
tivated, it also includes the subfolders
››› page 34. Messages and symbols on the MEDIA main
menu
Display: Meaning
A
Displays information about the artist name,
album name and song title (CD text , ID3
tag on compressed audio files).
Audio CD: displays track information. If no
data is available, it only displays Track
and the number corresponding to the posi-
tion it occupies on the data storage device.
Display: Meaning
B
Viewing the album cover: If there are vari-
ous covers within the same folder/album,
the system only displays one of them.
It prioritizes displaying the covers in the fol-
lowing manner:
1º Cover embedded in the file(s).
2º Image in the file folder.
3º Default icon for the connected device.
C
The playing time so far and time remaining
in minutes and seconds. In the case of au-
dio files with variable bit rates (VBR) the re-
maining time may vary.
RDS
Off a)The RDS radio data service is deactivated.
The RDS can be activated in the
FM setup
menu ››› page 22.
TP a)The TP function is active and can be tuned
in
››› page 21.
a)There is no traffic news station available
››› page 21.
a)DAB not available
››› page 17.
a)
Depends on the market and unit in question. Note
When the media source is inserted, playing
wi l
l not start automatically; it is necessary for
the user to select the source. Nor will the me-
dia source change when it is ejected. 27
Page 33 of 88
Audio and Media Mode
● The CD in the driv e w
i
ll be ejected and
must be removed within approximately
10 seconds.
If the CD is not removed within the 10 sec-
onds, it is automatically retracted for security
reasons without activating the CD mode.
CD cannot be read or is faulty
If the data on an inserted CD cannot be read
or a faulty CD is inserted, the corresponding
warning appears on screen.
Depending on the unit, unreadable CDs are
ejected 3 times automatically and inserted
again to initiate another three attempts be-
fore said message is displayed. Note
● Uneven r o
ad surfaces and strong vibrations
can cause playback to jump.
● You will be unable to insert or play a CD if
the temperat
ure inside the unit is too high.
● If you insert a number of different CDs and
receiv
e the message CD drive error every
time, contact a qualified workshop. Insert or eject a memory card
Only supported audio files are displayed and
p
l
a
yed. Other files are ignored. Inserting a memory card
Insert
the compatible memory card, bevelled
edge first and with the label face up (con-
tacts face down), into one of the two slots
››› Fig. 28 2 , until properly inserted.
If a memor
y
card cannot be inserted, make
sure it is positioned correctly and is compati-
ble with the unit.
Removing a memory card
The inserted memory cards must be prepared
for removal.
● From the main Media menu, press the
SETUP button to open the Media Settings
menu or pr e
s
s the Infotainment MENU button
and then pr e
s
s Settings to open the System
settings menu.
● Press the R
emo
v
e safely function button. A
dr opdo
wn menu ap
pears with three options:
SD Card1, SD Card 2 and USB. After correctly
ejecting the memory card from the system,
the function button becomes inactive (grey
colour).
● Press the inserted memory card. The mem-
ory c
ard “jumps” to the eject position.
● Remove the memory card.
Unrea
dable memory card
If a memory card is inserted and the data
cannot be read, the following warning ap-
pears: No playable files available .External data storage device connec-
ted to USB por
t Depending on the equipment and the coun-
try
, the
vehicle may have a USB/AUX-IN con-
nection.(vehicle instruction manual).
Audio files on an external data storage de-
vice connected to the USB port can be
played and controlled via the Infotainment
system.
Where this manual refers to external data
storage devices, this means USB mass stor-
age devices containing supported audio
files, such as MP3 players, iPods™ and USB
sticks.
Only supported audio files are displayed and
played. Other files are ignored.
Further operation of the external data medi-
um (changing track, selecting tracks and
playback modes) is described in the appro-
priate chapters of this manual ›››
page 23.
Instructions and restrictions
Compatibility with Apple™ devices and other
media players depends on the unit.
The USB port supplies the usual USB volt-
age of 5 volts for a USB connection.
External hard disks with a capacity greater
than 32 GB must be reformatted for the
FAT32 file system in some circumstances. You »
31
Page 40 of 88
Navigation*Function button: function
Country: To select the desired country.
City: To enter the desired city or postcode.
Street: To enter the desired street name.
House number: To enter the desired house number.
Junction: To select the desired intersection.
Last destinations: Open My destinations
menu
››› page 40.
Start: Start route guidance to the selected address. Points of Interest (POI)
Start route guidance to a point of interest.
Function button: function
Search area: To select the search area for the points of in-
terest.
Near current location: The points of interest are
searched for near the current location.
Near destinationa) : The points of interest are
searched for near the destination.
Along the routea) : The points of interest are searched
for along the route.
Near address: The points of interest are searched for
near the address.
Function button: function
Select on map: The points of interest are searched
for near the destination selected on the map. To se-
lect a destination on the map, press the Edit
func-
tion button.
Categories: Select the main category (e.g. Vehicle and
travel ), the category (e.g. Airports) and then the
desired entry from the list.
Save: To save the selected point of interest in the
destination memory ››› page 40.
Dial number: Establishes a telephone connection to
the number registered under the point of interest.
Start: Starts guided navigation to the selected
point of interest.
Find: To search for a point of interest by entering the
name or by means of synonyms of categories (e.g.
“Sleep” for hotels and hostels).
a) This function button is only displayed with route guidance ac-
tivated.
Using the
● Select the destination on the map or enter
the GPS c
oordinates and confirm with OK .
Function button: function
Save: To save the selected point of interest in the desti-
nation memory ››› page 40.
Edit: To edit a destination or to enter another destina-
tion.
Function button: function
Route options: To adjust route options, see Navigation
Setup ››› page 46.
Start: Starts guided navigation to the selected point of
interest. After starting route guidance
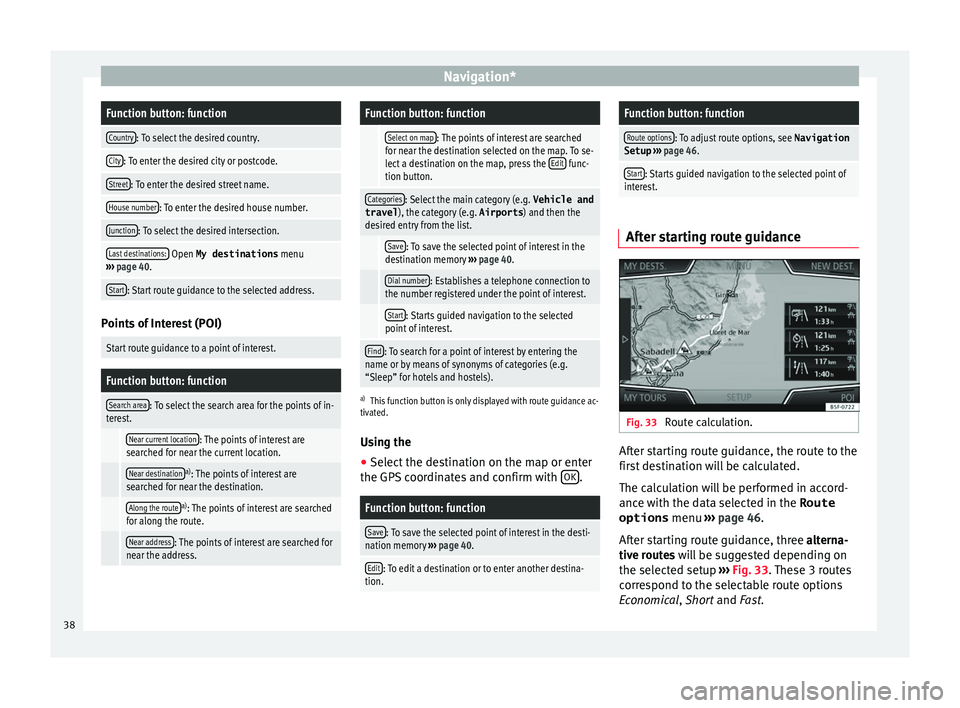
Fig. 33
Route calculation. After starting route guidance, the route to the
fir
s
t
destination will be calculated.
The calculation will be performed in accord-
ance with the data selected in the Route options menu ›››
page 46.
After starting route guidance, three alterna-
tive routes will be suggested depending on
the selected setup ›››
Fig. 33. These 3 routes
correspond to the selectable route options
Economical, Short and Fast.
38
Page 50 of 88
CAR menu
CAR menu Intr oduction t
o m
anaging the
CAR menu
Car menu By pressing the “CAR” infotainment button
you w
i
ll access its main menu with the follow-
ing options:
● VIEW
● In the top right corner: MINIPLAYER (Radio
or Medi a) or HDC
(Descent control)*.
● PREVIOUS-NEXT (to change screen).
● SETUP ›››
Booklet Instruction Manual,
chapter System settings (CAR) .
With the function button View you can access
the f o
l
lowing information:
● SPORT*
● OFFROAD*
● CONSUMERS
● DRIVING DATA
● ECOTRAINER*
● VEHICLE STATUS Sport*
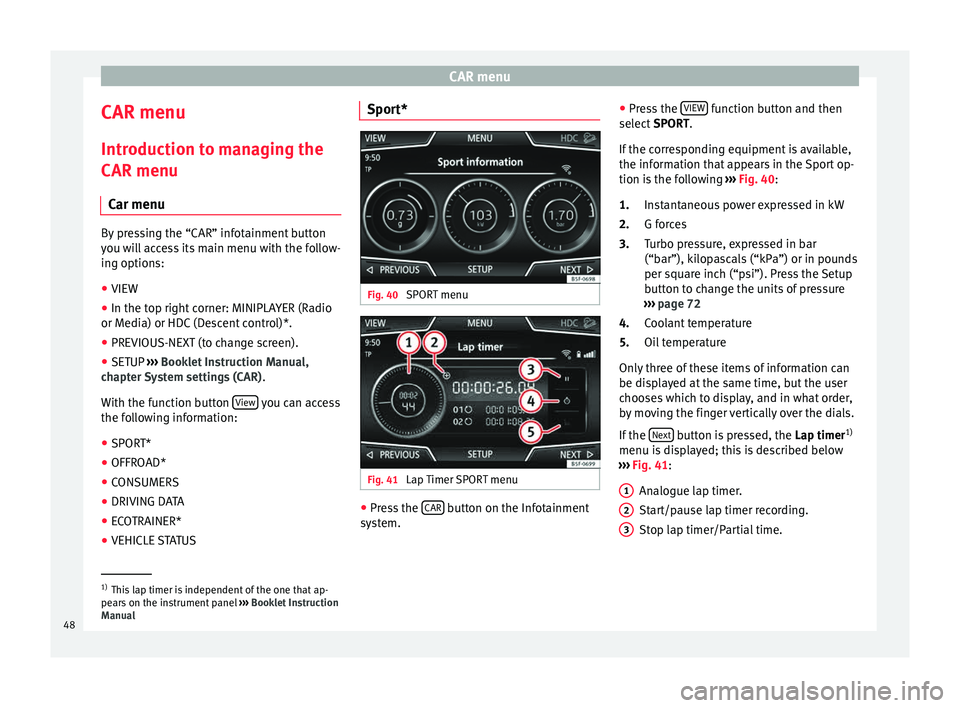
Fig. 40
SPORT menu Fig. 41
Lap Timer SPORT menu ●
Press the CAR button on the Infotainment
sy s
t
em. ●
Pres
s the VIEW function button and then
sel ect
S
PORT.
If the corresponding equipment is available,
the information that appears in the Sport op-
tion is the following ››› Fig. 40:
Instantaneous power expressed in kW
G forces
Turbo pressure, expressed in bar
(“bar”), kilopascals (“kPa”) or in pounds
per square inch (“psi”). Press the Setup
button to change the units of pressure
››› page 72
Coolant temperature
Oil temperature
Only three of these items of information can
be displayed at the same time, but the user
chooses which to display, and in what order,
by moving the finger vertically over the dials.
If the Next button is pressed, the
Lap timer1)
menu i s
di
splayed; this is described below
››› Fig. 41:
Analogue lap timer.
Start/pause lap timer recording.
Stop lap timer/Partial time.
1.
2.
3.
4.
5.
1 2
3
1)
This lap timer is independent of the one that ap-
pear s
on the instrument panel ››› Booklet Instruction
Manual
48