airbag Seat Toledo 2015 Owner's Guide
[x] Cancel search | Manufacturer: SEAT, Model Year: 2015, Model line: Toledo, Model: Seat Toledo 2015Pages: 248, PDF Size: 5.06 MB
Page 74 of 248
Safety
– Open the p a
s
senger side storage compart-
ment.
– Insert the key into the slot of the switch for
deactivatin
g the front passenger airbag
››› Fig. 81. About 3/4 of the key should en-
ter, as far as it will go.
– Then turn the key gently to the position.
Do not
force it if you feel resistance, and
make sure you have inserted the key fully.
– Close the passenger side storage compart-
ment.
– Check, w
ith the ignition switched on, that
the contro
l lamp does not illuminate,
with the words in the
centre of the dash panel.
Control lamp with the word
(front passenger airbag disabled)
If the front passenger front airbag is disa-
bled, after switching on the ignition, the con-
trol lamp will illuminate for several seconds,
then it will switch off for about 1 s and then
switch on again.
If the control lamp is flashing, there is a fault
in the disabling of the airbag system ››› .
Pl e
a
se go immediately to an Official Service. WARNING
● The driver of the
vehicle is responsible for
disabling or switching on the airbag. ●
Alw a
ys switch off the ignition before disa-
bling the front passenger airbag! Failure to do
so could result in a fault in the airbag disa-
bling system.
● Never leave the key in the airbag disabling
switc
h as it could get damaged or enable or
disable the airbag during driving.
● If the (airbag dis
abled) control lamp
flashes, the front passenger front airbag will
not trigger in the event of an accident! Have
the system immediately checked by an Offi-
cial Service. Transporting children safely
Saf ety
f
or children
Introduction For safety reasons, as we have learned from
acc
ident
statistics, we recommend that chil-
dren under 12 years of age travel in the rear
seats. Depending on their age, height and
weight, children travelling in rear seats must
use a child seat or a seat belt. For safety rea-
sons, the child seat should be installed in the
rear seat, behind the front passenger seat or
in the centre back seat.
The physical laws involved and the forces
acting in a collision apply also to children
››› page 63. But unlike adults, children do not
have fully developed muscle and bone struc-
tures. This means that children are subject to
a greater risk of injury.
To reduce the risk of injuries, children must
always use special child restraint systems
when travelling in the vehicle.
We recommend the use of child safety prod-
ucts from the SEAT Original Accessories Pro-
gramme, which includes systems for all ages
made by “Peke” (not for all countries).
These systems have been especially de-
signed and approved, complying with the
ECE-R44. regulation.
72
Page 75 of 248
Transporting children safely
Follow the manufacturer's instructions and
o b
ser
ve any statutory requirements when in-
stalling and using child seats. Always read
and note ››› page 73.
We recommend you always carry the manu-
facturer's Child Seat Instruction Manual to-
gether with the on-board documentation.
Important information regarding the
front p
assenger's airbag Read the additional information carefully
› ›
›
page 16.
Read and always observe the safety informa-
tion included in the following chapters:
● Safety distance with respect to the passen-
ger airbag ›
›› page 66, Why is it so important
to wear a seat belt and to sit correctly? .
● Objects between the passenger and the
pas
senger side airbag ››› in Front airbags
on p ag
e 69
.
The passenger side front airbag, when ena-
bled, is a serious risk for a child that is facing
backward since the airbag can strike the seat
with such force that it can cause serious or
fatal injuries. Children up to 12 years old
should always travel on the rear seat.
Therefore we strongly recommend you to
transport children on the rear seats. This is
the safest location in the vehicle. Alternative- ly, the front passenger airbag can be disa-
bled w
ith a key-operated switch ››› page 71.
When transporting children, use a child seat
suitable for the age and size of each child
››› page 72. WARNING
● If a c hi
ld seat is secured to the front pas-
senger seat, the risk to the child of sustain-
ing critical or fatal injuries in the event of an
accident increases.
● An inflating front passenger airbag can
strike the r
ear-facing child seat and project it
with great force against the door, the roof or
the backrest.
● Never install a child seat facing backwards
on the front p
assenger seat unless the front
passenger front airbag has been disabled.
Risk of potentially fatal injuries to the child!
However, if it is necessary, in exceptional ca-
ses, to transport a child in the front passen-
ger seat, the front passenger front airbag
must always be disabled ››› page 71. If the
front passenger seat has a height adjustment
option, move it to the highest position.
● For those vehicles that do not include a key
lock sw
itch to deactivate the airbag, the vehi-
cle must be taken to a technical service.
● All vehicle occupants, especially children,
must
assume the proper sitting position and
be properly belted in while travelling.
● Never hold children or babies on your lap,
this c
an result in potentially fatal injuries to
the child! ●
Never a l
low a child to be transported in a
vehicle without being properly secured, or to
stand up or kneel on a seat while travelling.
In an accident, the child could be flung
through the vehicle, causing possibly fatal in-
juries to themselves and to the other vehicle
occupants.
● If children assume an improper sitting posi-
tion when the vehic
le is moving, they expose
themselves to greater risk of injury in the
event of a sudden braking manoeuvre or in an
accident. This is particularly important if the
child is travelling on the front passenger seat
and the airbag system is triggered in an acci-
dent; as this could cause serious injury or
even death.
● A suitable child seat can protect your child!
● Never leave a child alone in the child seat
or inside the
vehicle because depending on
the season, very high temperatures may be
reached inside a parked vehicle, which could
be fatal.
● Children who are less than 1.5 metres tall
must
not wear a normal seat belt without a
child seat, as this could cause injuries to the
abdominal and neck areas during a sudden
braking manoeuvre or in an accident.
● Only one child may occupy a child seat
›››
page 74, Child seats. 73
Technical data
Advice
Operation
Emergencies
Safety
Page 83 of 248
Fuses and bulbs
●
Prot ect
the fuse boxes when open to pre-
vent the entry of dust or humidity as they can
damage the electrical system.
● Always carefully remove the fuse box cov-
ers and r
efit them correctly to avoid problems
with your vehicle. Note
● One c omponent m
ay have more than one
fuse.
● Several components may run on a single
fuse.
● In the
vehicle, there are more fuses than
those indicat
ed in this chapter. These should
only be changed by a specialised workshop.
● Positions not containing a fuse do not ap-
pear in the fo
llowing tables.
● Some of the equipment listed in the tables
below pert
ain only to certain versions of the
model or are optional extras.
● Please note that the above lists, while cor-
rect at
the time of printing, are subject to
change. Fuses in the dash panel
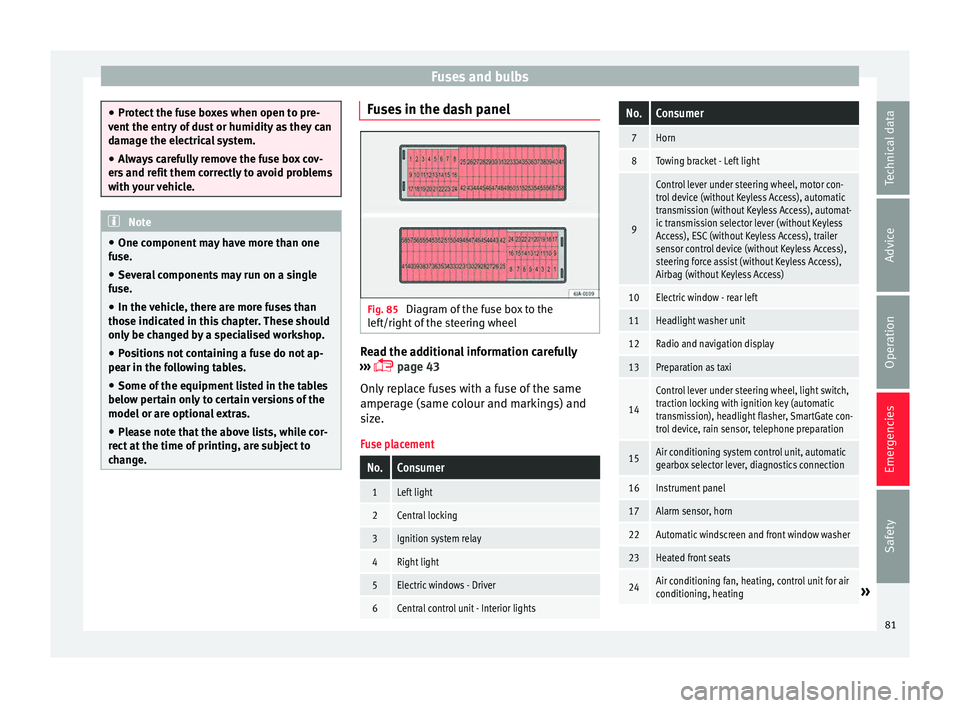
Fig. 85
Diagram of the fuse box to the
l ef
t/right
of the steering wheel Read the additional information carefully
› ›
›
page 43
Only replace fuses with a fuse of the same
amperage (same colour and markings) and
size.
Fuse placement
No.Consumer
1Left light
2Central locking
3Ignition system relay
4Right light
5Electric windows - Driver
6Central control unit - Interior lights
No.Consumer
7Horn
8Towing bracket - Left light
9
Control lever under steering wheel, motor con-
trol device (without Keyless Access), automatic
transmission (without Keyless Access), automat-
ic transmission selector lever (without Keyless
Access), ESC (without Keyless Access), trailer
sensor control device (without Keyless Access),
steering force assist (without Keyless Access),
Airbag (without Keyless Access)
10Electric window - rear left
11Headlight washer unit
12Radio and navigation display
13Preparation as taxi
14
Control lever under steering wheel, light switch,
traction locking with ignition key (automatic
transmission), headlight flasher, SmartGate con-
trol device, rain sensor, telephone preparation
15Air conditioning system control unit, automatic
gearbox selector lever, diagnostics connection
16Instrument panel
17Alarm sensor, horn
22Automatic windscreen and front window washer
23Heated front seats
24Air conditioning fan, heating, control unit for air
conditioning, heating» 81
Technical data
Advice
Operation
Emergencies
Safety
Page 84 of 248
EmergenciesNo.Consumer
26Front seat heating switch.
27Rear window wiper
29Airbag (Keyless Access)
30
Electric windows, headlight switch, reversing
light switch, air conditioning control unit, park-
ing aid control unit, exterior mirror, feed for mid-
dle button bar, feed for the side button bar, inte-
rior mirror, telephone preparation
31Fuel pump, radiator fan control unit, cruise con-
trol, relay coil for the windscreen and rear win-
dow washer system
32Diagnostics socket, headlight range regulator,
control lever under the steering wheel
33Ignition relay coil, clutch pedal switch
34Heated windscreen washer jets
37Radar
39Additional electric heating
41Rear window heater
42Electric windows - passenger
43Towing bracket - Connector contact
44Lighter, 12 volt socket
45Electric window - rear right
46Windshield and front window washing system,
control lever under the steering wheel
No.Consumer
47Towing bracket - Connector contact
48Towing bracket - Right hand light
49Fuel pump control unit
50Radio
51Heat for exterior mirrors
52Keyless Access
53Steering block seized (Keyless Access)
54ABS/ESC control unit
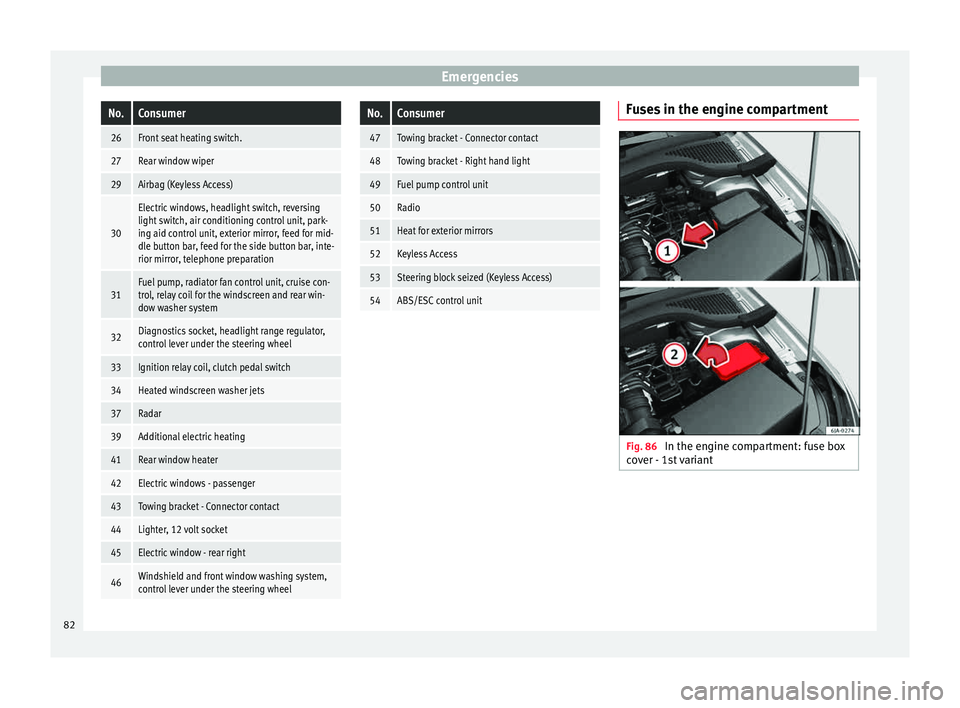
Fuses in the engine compartment
Fig. 86
In the engine compartment: fuse box
c o
v
er - 1st variant 82
Page 95 of 248
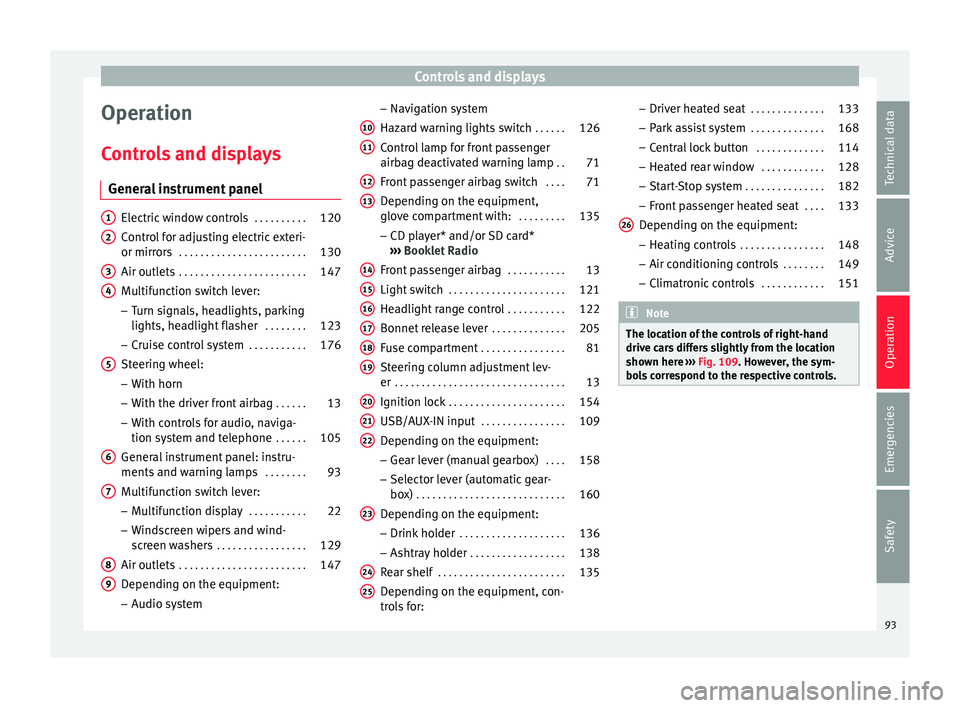
Controls and displays
Operation
C ontr
o
ls and displays
General instrument panel Electric window controls
. . . . . . . . . .120
Control for adjusting electric exteri-
or mirror s . . . . . . . . . . . . . . . . . . . . . . . . 130
Air outl
ets . . . . . . . . . . . . . . . . . . . . . . . . 147
Multifunction switch lever:
– Turn s ign
als, headlights, parking
lights, headlight flasher . . . . . . . .123
– Crui se c
ontrol system . . . . . . . . . . .176
Steering wheel:
– With horn
– With the driv
er front airbag . . . . . .13
– With c ontr
ols for audio, naviga-
tion system and telephone . . . . . .105
General instrument panel: instru-
ments and w arnin
g lamps . . . . . . . . 93
Multifunction switch lever:
– Multif
unction display . . . . . . . . . . .22
– Wind s
creen wipers and wind-
screen washers . . . . . . . . . . . . . . . . . 129
Air outlets . . . . . . . . . . . . . . . . . . . . . . . . 147
Depending on the equipment:
– Audio sy st
em
1 2
3
4
5
6
7
8
9 –
Nav ig
ation sy
stem
Hazard warning lights switch . . . . . .126
Control lamp for front passenger
airbag deactiv
ated warning lamp . .71
Front passenger airbag switch . . . .71
Depending on the equipment,
glove c
ompartment with: . . . . . . . . .135
– CD pla
yer* and/or SD card*
››› Booklet Radio
Front passenger airbag . . . . . . . . . . .13
Light switch . . . . . . . . . . . . . . . . . . . . . . 121
Headlight range control . . . . . . . . . . .122
Bonnet release lever . . . . . . . . . . . . . .205
Fuse compartment . . . . . . . . . . . . . . . . 81
Steering column adjustment lev-
er . . . . . . . . . . . . . . . . . . . . . . . . . . . . . . . . 13
Ignition lock . . . . . . . . . . . . . . . . . . . . . . 154
USB/AUX-IN input . . . . . . . . . . . . . . . . 109
Depending on the equipment: – Gear lev
er (manual gearbox) . . . .158
– Select or l
ever (automatic gear-
box) . . . . . . . . . . . . . . . . . . . . . . . . . . . . 160
Depending on the equipment:
– Drink ho l
der . . . . . . . . . . . . . . . . . . . . 136
– Ashtra y
holder . . . . . . . . . . . . . . . . . . 138
Rear shelf . . . . . . . . . . . . . . . . . . . . . . . . 135
Depending on the equipment, con-
tro l
s for:
10 11
12
13
14
15
16
17
18
19
20
21
22
23
24
25 –
Driv er he
at
ed seat . . . . . . . . . . . . . . 133
– Park a
ssist system . . . . . . . . . . . . . . 168
– Central
lock button . . . . . . . . . . . . . 114
– Heated r
ear window . . . . . . . . . . . . 128
– Start
-Stop system . . . . . . . . . . . . . . . 182
– Front p
assenger heated seat . . . .133
Depending on the equipment: – Heating c
ontrols . . . . . . . . . . . . . . . . 148
– Air conditioning c
ontrols . . . . . . . . 149
– Climatr
onic controls . . . . . . . . . . . . 151 Note
The location of the controls of right-hand
drive c ar
s differs slightly from the location
shown here ››› Fig. 109. However, the sym-
bols correspond to the respective controls. 26
93
Technical data
Advice
Operation
Emergencies
Safety
Page 105 of 248
Instruments and warning lamps
Airbag system If the warning lamp
is lit up, there is a
fault in the airbag system.
The informative display indicates:
Airbag fault!
The airbag system availability is controlled
electronically, regardless of whether an air-
bag is disabled.
If the front airbag, side airbag, head protec-
tion airbag or the belt tensioner are disabled
using the diagnostics system: ● After switching on the ignition, the warn-
in g l
amp illuminates for about 4 seconds and
flashes for another 12 seconds.
The informative display indicates:
Airbag/belt tensioner disabled!
If the front passenger airbag has been disa-
bled with the airbag switch located in the
storage compartment side: ● When the ignition is turned on, the
warning l
amp illuminates for about 4 sec-
onds.
● The airbag is disabled, signalled with the
warning l
amp which lights up with the
word placed in the cen-
tre part of the dash panel ›››
Fig. 81
››› page 71. WARNING
When there is a fault in the airbag system,
hav e an in
spection carried out by an Author-
ised Service. Otherwise the airbags may fail
to trigger in an accident. Tyre pressure control*
If the
warning lamp illuminates, the pres-
s ur
e in one of the tyres has decreased signifi-
cantly. Check and adjust the pressure of all
the tyres ›››
page 215.
If the warning lamp flashes, there is a fault
in the system.
Go to a technical service.
Further information ›››
page 219, Tyre pres-
sure*. Note
If the battery is disconnected the warning
lamp
lights up when the ignition is switch-
ed on. This warning lamp must switch off af-
ter covering a short distance. Level of windscreen washer fluid
If the
warning lamp illuminates, the level
of w
indscreen washer fluid in the tank is very
low. Fill the windscreen washer fluid ›››
page 210, topping up windscreen washer
fluid.
The inf
ormative display indicates:
Refill windscreen washer fluid!
Turn signals Depending on the position of the turn signal
lev
er the l
eft warning lamp on the left or
right flashes.
If there is a turn signal fault, the warning
lamp flashes at approximately double the
normal speed.
All the turn signals flash in addition to both
warning lamps when the hazard warning
lights are switched on.
Further information ›››
page 123, Turn signal
and main beam lever.
Fog lights The control lamp
lights up when the f
og
lights
are switched on ›››
page 124.
103
Technical data
Advice
Operation
Emergencies
Safety
Page 128 of 248
Operation
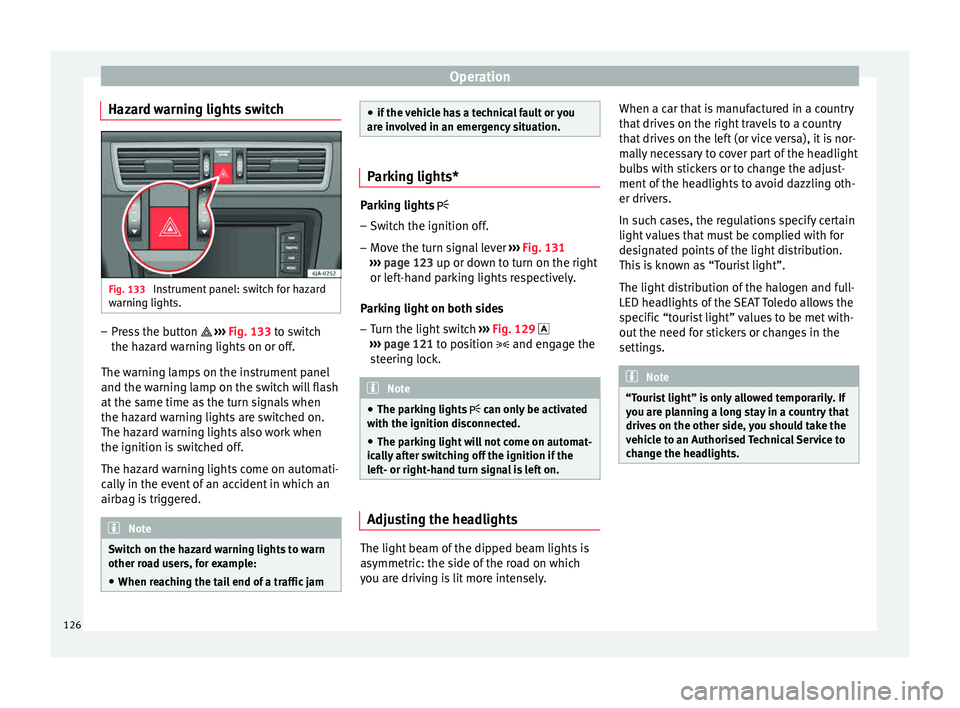
Hazard warning lights switch Fig. 133
Instrument panel: switch for hazard
w arnin
g lights. –
Press the button ››
›
Fig. 133 to switch
the hazard warning lights on or off.
The warning lamps on the instrument panel
and the warning lamp on the switch will flash
at the same time as the turn signals when
the hazard warning lights are switched on.
The hazard warning lights also work when
the ignition is switched off.
The hazard warning lights come on automati-
cally in the event of an accident in which an
airbag is triggered. Note
Switch on the hazard warning lights to warn
other ro a
d users, for example:
● When reaching the tail end of a traffic jam ●
if the v
ehicle has a technical fault or you
are involved in an emergency situation. Parking lights*
Parking lights
– Switch the ignition off.
– Move the turn signal lever ›››
Fig. 131
››› page 123 up or down to turn on the right
or left-hand parking lights respectively.
Parking light on both sides
– Turn the light switch ›››
Fig. 129
››› page 121 to position and engage the
steering lock. Note
● The park in
g lights can only be activated
with the ignition disconnected.
● The parking light will not come on automat-
ical
ly after switching off the ignition if the
left- or right-hand turn signal is left on. Adjusting the headlights
The light beam of the dipped beam lights is
a
symmetric: the s
ide of
the road on which
you are driving is lit more intensely. When a car that is manufactured in a country
that driv
es on the right travels to a country
that drives on the left (or vice versa), it is nor-
mally necessary to cover part of the headlight
bulbs with stickers or to change the adjust-
ment of the headlights to avoid dazzling oth-
er drivers.
In such cases, the regulations specify certain
light values that must be complied with for
designated points of the light distribution.
This is known as “Tourist light”.
The light distribution of the halogen and full-
LED headlights of the SEAT Toledo allows the
specific “tourist light” values to be met with-
out the need for stickers or changes in the
settings. Note
“Tourist light” is only allowed temporarily. If
you ar e p
lanning a long stay in a country that
drives on the other side, you should take the
vehicle to an Authorised Technical Service to
change the headlights. 126
Page 130 of 248
Operation
10 minutes after the boot lid has been
opened.
Visibility
He at
ed r
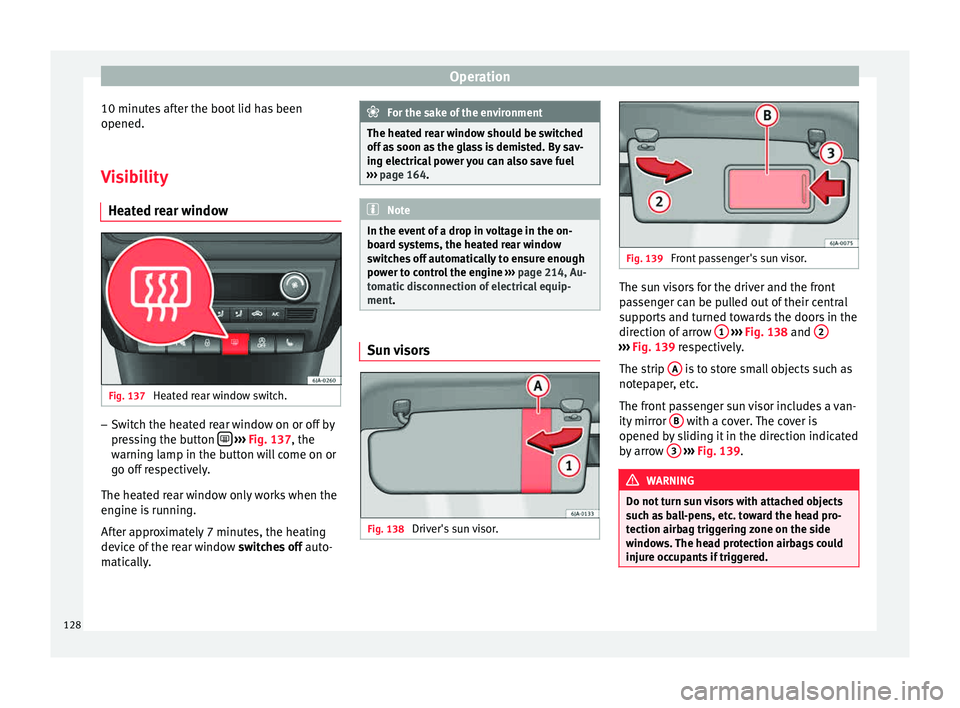
ear window Fig. 137
Heated rear window switch. –
Switch the heated rear window on or off by
pr e
s
sing the button
› ›
› Fig. 137 , the
warning lamp in the button will come on or
go off respectively.
The heated rear window only works when the
engine is running.
After approximately 7 minutes, the heating
device of the rear window switches off auto-
matically. For the sake of the environment
The heated rear window should be switched
off a s
soon as the glass is demisted. By sav-
ing electrical power you can also save fuel
››› page 164. Note
In the event of a drop in voltage in the on-
boar d sy
stems, the heated rear window
switches off automatically to ensure enough
power to control the engine ››› page 214, Au-
tomatic disconnection of electrical equip-
ment. Sun visors
Fig. 138
Driver's sun visor. Fig. 139
Front passenger's sun visor. The sun visors for the driver and the front
p
a
s
senger can be pulled out of their central
supports and turned towards the doors in the
direction of arrow 1
› ›
› Fig. 138
and 2 ›››
Fig. 139 re s pectively.
The strip A is to store small objects such as
not ep
aper
, etc.
The front passenger sun visor includes a van-
ity mirror B with a cover. The cover is
opened b y
s
liding it in the direction indicated
by arrow 3
› ›
› Fig. 139
. WARNING
Do not turn sun visors with attached objects
suc h a
s ball-pens, etc. toward the head pro-
tection airbag triggering zone on the side
windows. The head protection airbags could
injure occupants if triggered. 128
Page 133 of 248
Seats and head restraints
not rely on these rear vision mirrors for judg-
ing the di
s
tance of vehicle behind.
● If possible, use the interior rear vision mir-
ror to e
stimate distances to vehicles behind
you. Note
● Ext erior mirr or
s are only heated when the
engine is running.
● Do not touch the exterior mirrors when the
heating sy
stem is running.
● If the electrical adjustment should ever fail
to operat
e, the rear vision mirrors can be ad-
justed by hand by pressing the edge of the
mirror glass.
● Visit the technical service in the event of a
fault
in the electrical rear vision mirror ad-
justment system. Seats and head restraints
Adju
s
tin
g seats and head re-
straints
Introduction Read the additional information carefully
›› ›
page 11
Set the driver seat in such a way that the
pedals can be fully depressed with your legs
slightly bent.
Set the driver seat backrest so that you can
reach the upper point of the steering wheel
with your arms slightly bent.
The correct seat position is very important
for:
● reaching all of the controls safely and
quick ly
,
● a relaxed posture that will not produce fati-
gue,
● maximum protection from the seat belts
and airbag sys
tem WARNING
● Adjus t
the driver seat only when the vehi-
cle is stationary. Risk of accident!
● Be careful when adjusting the front seats!
Carel
ess and uncontrolled adjustment can
cause injuries. ●
The bac k
rests must not be reclined too far
back while driving. This could limit the effect
of the seat belts and the airbag system. Risk
of injury!
● Never transport more than the permitted
amount of
people in your vehicle.
● Every occupant in the vehicle must properly
fas
ten and wear the seat belt belonging to
his or her seat. Children must be protected
with an appropriate child restraint system
››› page 72, Transporting children safely.
● The front seats, head restraints and seat
belts mu
st always be adjusted to the size of
the vehicle occupant to provide you and your
passengers with the greatest possible protec-
tion.
● Your feet should remain in the footwell
while the
vehicle is moving; never rest them
on the dash panel, on the window or on the
seat! This also applies to passengers. An in-
correct sitting position exposes you to an in-
creased risk of injury in case of a sudden
braking or an accident. If the airbag is trig-
gered, you could sustain severe injuries due
to an incorrect sitting position!
● It is important for the driver and front pas-
senger t
o keep a distance of at least 25 cm
from the steering wheel and dash panel. Fail-
ure to respect the minimum distance means
that the airbag will not protect you. Risk of
fatal injury if triggered!
● Objects must not be placed in the footwell,
as they
could move to the area of the pedals
in the event of a braking manoeuvre or
change of direction. This would prevent the » 131
Technical data
Advice
Operation
Emergencies
Safety
Page 141 of 248

Transport and practical equipment
protect them from any damage caused by
fluctuation
s
in voltage.
● Follow the instructions for use of connected
appli
ances! Multimedia compartment
Fig. 155
Front centre console: multimedia
c omp
ar
tment. The multimedia compartment is in the stor-
ag
e c
omp
artment of the front centre console
››› Fig. 155.
The compartment can be used to hold mobile
phones, mp3 players or similar devices. WARNING
Never use the multimedia compartment as an
ashtr a
y or to store flammable materials. Risk
of fire! Storage compartment for eyeglasses*
Fig. 156
Close-up of roof panel: storage com-
p ar
tment
for eyeglasses. –
Press the compartment lid and it will drop
do wn
›
›
› Fig. 156. WARNING
This compartment must only remain open
when remo v
ing or replacing glasses. CAUTION
● Do not p l
ace heat-sensitive objects in the
compartment as they could be damaged.
● The side compartment supports a maxi-
mum load of
0.25 kg. Coat hooks*
The coat hooks are located on the B-pillars
and on the handl
e
s on the interior lining
above each rear door. WARNING
● Mak e s
ure that any items of clothing hang-
ing from the coat hooks do not obstruct your
view to the rear.
● Only use the coat hooks for light items of
clothing and m
ake sure that there are no
heavy or sharp objects in the pockets.
● Do not use clothes hangers to hang up the
clothing, a
s this could interfere with the func-
tion of the head-protection airbags. CAUTION
The side hooks support a maximum load of 2
kg. 139
Technical data
Advice
Operation
Emergencies
Safety