key Seat Toledo 2016 MEDIA SYSTEM PLUS - NAVI SYSTEM - NAVI SYSTEM PLUS
[x] Cancel search | Manufacturer: SEAT, Model Year: 2016, Model line: Toledo, Model: Seat Toledo 2016Pages: 100, PDF Size: 2.72 MB
Page 12 of 100
Introduction
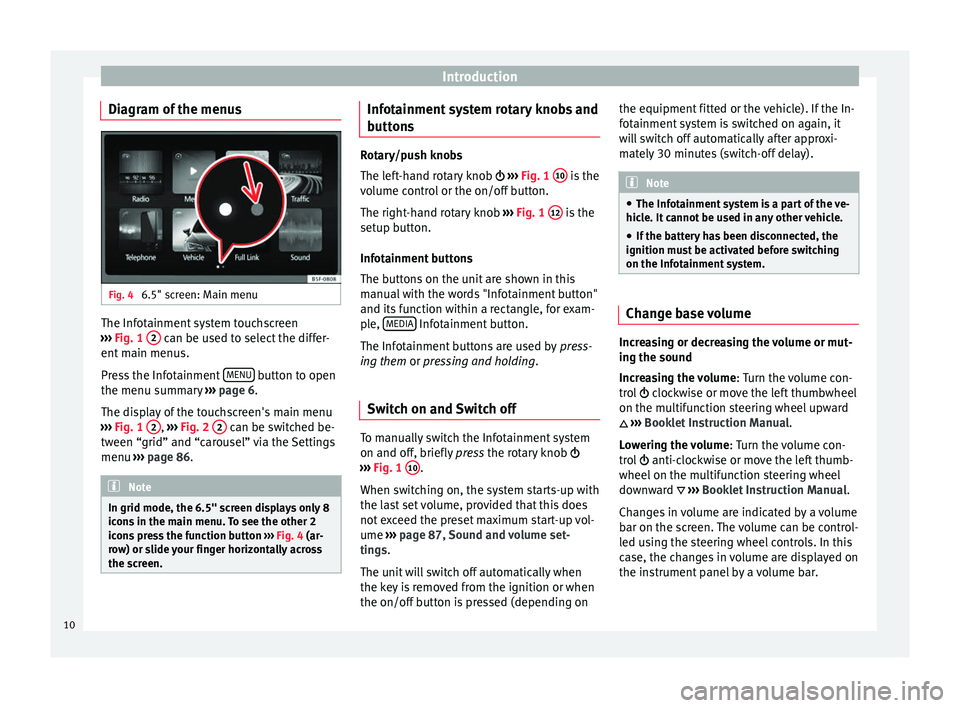
Diagram of the menus Fig. 4
6.5" screen: Main menu The Infotainment system touchscreen
› ›
›
Fig. 1 2 can be used to select the differ-
ent m
ain menu
s.
Press the Infotainment MENU button to open
the menu s umm
ar
y ››› page 6.
The display of the touchscreen's main menu
››› Fig. 1 2 ,
››
› Fig. 2 2 can be switched be-
tw een “grid” and “c
ar
ousel” via the Settings
menu ››› page 86. Note
In grid mode, the 6.5" screen displays only 8
icon s
in the main menu. To see the other 2
icons press the function button ››› Fig. 4 (ar-
row) or slide your finger horizontally across
the screen. Infotainment system rotary knobs and
b
utt
on
s Rotary/push knobs
The lef
t
-hand rotary knob ››› Fig. 1 10 is the
vo lume c
ontrol or the on/off button.
The right-hand rotary knob ››› Fig. 1 12 is the
setup b utt
on.
Infotainment buttons
The buttons on the unit are shown in this
manual with the words "Infotainment button"
and its function within a rectangle, for exam-
ple, MEDIA Infotainment button.
The Inf ot
ainment
buttons are used by press-
ing them or pressing and holding.
Switch on and Switch off To manually switch the Infotainment system
on and off
, briefly
pr
ess the rotary knob
››› Fig. 1 10 .
When sw it
c
hing on, the system starts-up with
the last set volume, provided that this does
not exceed the preset maximum start-up vol-
ume ›››
page 87, Sound and volume set-
tings.
The unit will switch off automatically when
the key is removed from the ignition or when
the on/off button is pressed (depending on the equipment fitted or the vehicle). If the In-
fotainment
system is switched on again, it
will switch off automatically after approxi-
mately 30 minutes (switch-off delay). Note
● The Infot ainment
system is a part of the ve-
hicle. It cannot be used in any other vehicle.
● If the battery has been disconnected, the
ignition must
be activated before switching
on the Infotainment system. Change base volume
Increasing or decreasing the volume or mut-
in
g the sou
nd
Inc
reasing the volume : Turn the volume con-
trol clockwise or move the left thumbwheel
on the multifunction steering wheel upward
›››
Booklet Instruction Manual.
Lowering the volume : Turn the volume con-
trol anti-clockwise or move the left thumb-
wheel on the multifunction steering wheel
downward ›››
Booklet Instruction Manual.
Changes in volume are indicated by a volume
bar on the screen. The volume can be control-
led using the steering wheel controls. In this
case, the changes in volume are displayed on
the instrument panel by a volume bar.
10
Page 15 of 100
Introduction
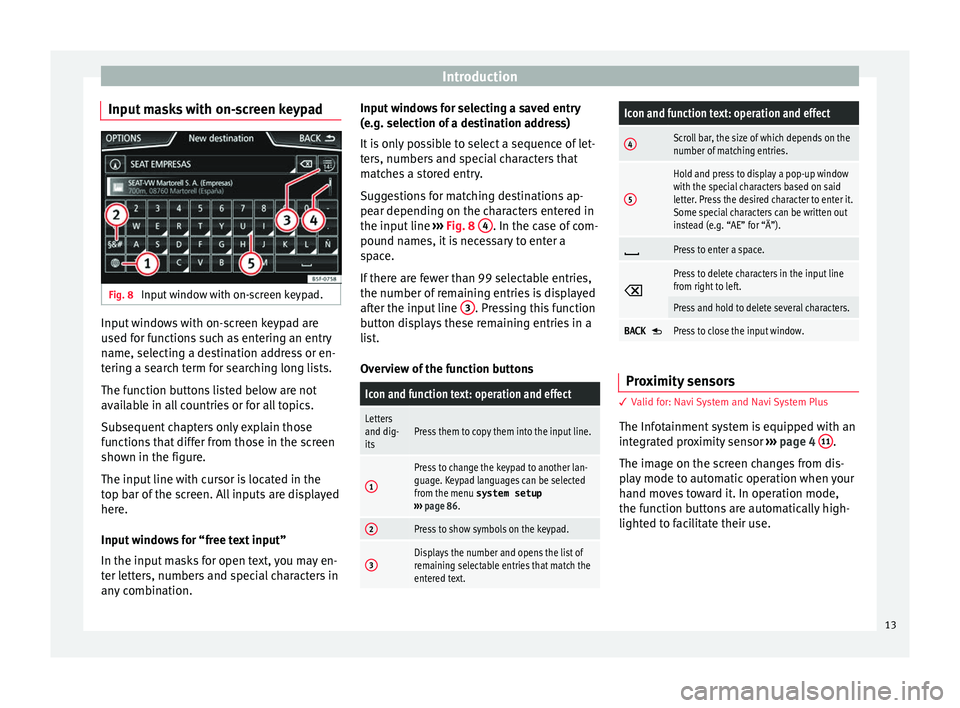
Input masks with on-screen keypad Fig. 8
Input window with on-screen keypad. Input windows with on-screen keypad are
u
sed f
or f
unctions such as entering an entry
name, selecting a destination address or en-
tering a search term for searching long lists.
The function buttons listed below are not
available in all countries or for all topics.
Subsequent chapters only explain those
functions that differ from those in the screen
shown in the figure.
The input line with cursor is located in the
top bar of the screen. All inputs are displayed
here.
Input windows for “free text input”
In the input masks for open text, you may en-
ter letters, numbers and special characters in
any combination. Input windows for selecting a saved entry
(e.g. selection of
a destination address)
It is only possible to select a sequence of let-
ters, numbers and special characters that
matches a stored entry.
Suggestions for matching destinations ap-
pear depending on the characters entered in
the input line ››› Fig. 8 4 . In the case of com-
pou nd n
ame
s, it is necessary to enter a
space.
If there are fewer than 99 selectable entries,
the number of remaining entries is displayed
after the input line 3 . Pressing this function
b utt
on di
splays these remaining entries in a
list.
Overview of the function buttons
Icon and function text: operation and effect
Letters
and dig-
itsPress them to copy them into the input line.
1
Press to change the keypad to another lan-
guage. Keypad languages can be selected
from the menu system setup
››› page 86.
2Press to show symbols on the keypad.
3Displays the number and opens the list of
remaining selectable entries that match the
entered text.
Icon and function text: operation and effect
4Scroll bar, the size of which depends on the
number of matching entries.
5
Hold and press to display a pop-up window
with the special characters based on said
letter. Press the desired character to enter it.
Some special characters can be written out
instead (e.g. “AE” for “Ä”).
Press to enter a space.
Press to delete characters in the input line
from right to left.
Press and hold to delete several characters.
BACK Press to close the input window.
Proximity sensors
3 V
alid for: Navi System and Navi System Plus
The Inf
otainment system is equipped with an
integrated proximity sensor ›››
page 4 11 .
The im ag
e on the s
creen changes from dis-
play mode to automatic operation when your
hand moves toward it. In operation mode,
the function buttons are automatically high-
lighted to facilitate their use.
13
Page 24 of 100
Audio and Media ModeFunctions of the memory buttons
Switching be-
tween memory
banks
Move your finger over the screen
from left to right or vice-versa.
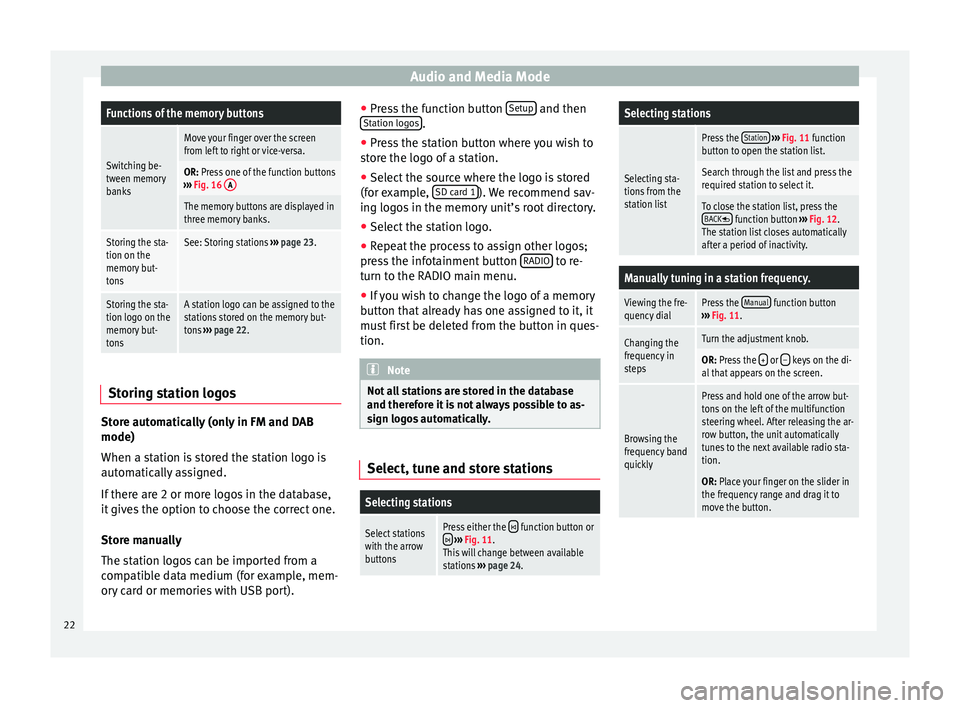
OR: Press one of the function buttons
››› Fig. 16 A
The memory buttons are displayed in
three memory banks.
Storing the sta-
tion on the
memory but-
tonsSee: Storing stations
››› page 23.
Storing the sta-
tion logo on the
memory but-
tonsA station logo can be assigned to the
stations stored on the memory but-
tons ››› page 22. Storing station logos
Store automatically (only in FM and DAB
mode)
When a s
t
ation i
s stored the station logo is
automatically assigned.
If there are 2 or more logos in the database,
it gives the option to choose the correct one.
Store manually
The station logos can be imported from a
compatible data medium (for example, mem-
ory card or memories with USB port). ●
Pres
s the function button Setup and then
St ation log
o
s .
● Press the station button where you wish to
s t
or
e the logo of a station.
● Select the source where the logo is stored
(for ex
ample, SD card 1 ). We recommend sav-
in g log
o
s in the memory unit’s root directory.
● Select the station logo.
● Repeat the process to assign other logos;
pres
s the infotainment button RADIO to re-
t urn t
o the RADIO m
ain menu.
● If you wish to change the logo of a memory
button th
at already has one assigned to it, it
must first be deleted from the button in ques-
tion. Note
Not all stations are stored in the database
and theref or
e it is not always possible to as-
sign logos automatically. Select, tune and store stations
Selecting stations
Select stations
with the arrow
buttonsPress either the function button or
››› Fig. 11.
This will change between available
stations ››› page 24.
Selecting stations
Selecting sta-
tions from the
station list
Press the Station
››› Fig. 11 function
button to open the station list.
Search through the list and press the
required station to select it.
To close the station list, press the BACK function button ››› Fig. 12.
The station list closes automatically
after a period of inactivity.
Manually tuning in a station frequency.
Viewing the fre-
quency dialPress the Manual function button
››› Fig. 11.
Changing the
frequency in
stepsTurn the adjustment knob.
OR: Press the + or – keys on the di-
al that appears on the screen.
Browsing the
frequency band
quickly
Press and hold one of the arrow but-
tons on the left of the multifunction
steering wheel. After releasing the ar-
row button, the unit automatically
tunes to the next available radio sta-
tion.
OR: Place your finger on the slider in
the frequency range and drag it to
move the button. 22
Page 36 of 100
Audio and Media ModeFunction button: function
B
Indicates the media source being explored.
If pressed it goes to the root folder of the
device indicated on the icon.
JUKEBOXa)
: Internal hard drive of the Info-
tainment system (SSD) ››› page 38.
CD/DVDb)
: Internal CD and DVD drive
››› page 35.
SD CARD 1, SD CARD 2*: SD memory card
››› page 35.
USB 1, USB 2*: External data storage device
connected to the USB port ››› page 36.
BT AUDIO: External media player connected
by Bluetooth ®
››› page 37.
AUX: Audio source connected to the AUX-IN
socket ››› page 37
WLANa)
: External audio source connected
by WLAN ››› page 40
CPress the function button to open the top
folder of the media source.
Starts playback of the first track.
Function button: function
Repeat all tracks.
Repeats all the tracks that are on the same
memory level as the track being played at
that moment. If in the
Media Settings
menu
Mix/Repeat including subfolders is acti-
vated, it also includes the subfolders
››› page 42.
Random play.
Includes all the tracks that are on the same
memory level as the track being played at
that moment. If in the
Media Settings
menu
Mix/Repeat including subfolders is acti-
vated, it also includes the subfolders
››› page 42.
CLOSE ×To close the track list.
a)
Only available for the model: “Navi System Plus”.
b) The DVD drive is only available for the model: “Navi System
Plus”. Note
The tracks, folders and playlists can also be
select ed b
y turning the setup button, and can
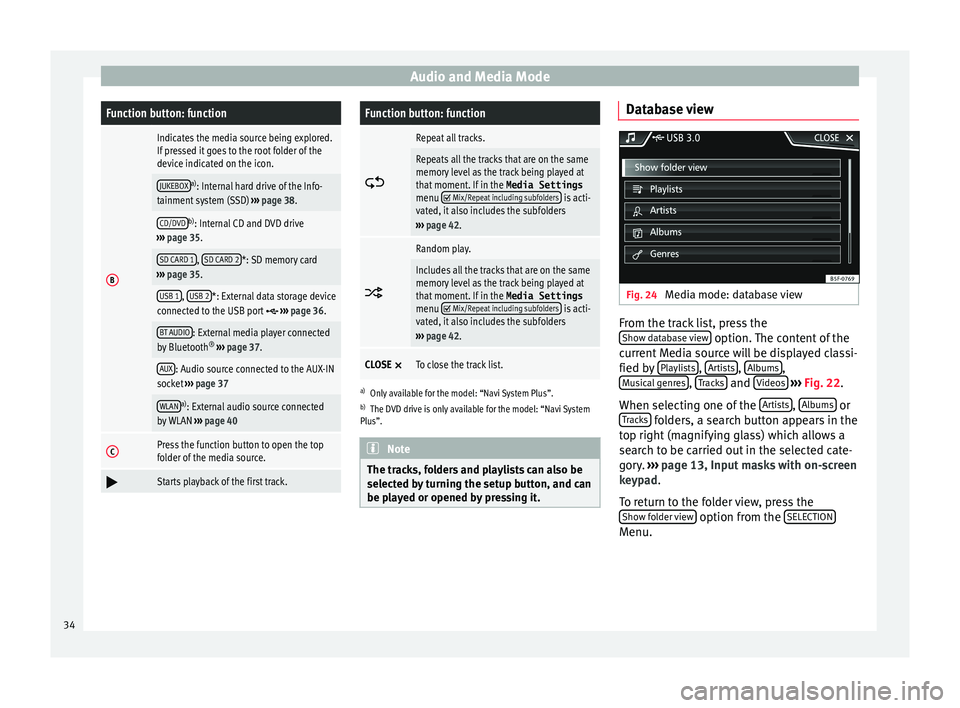
be played or opened by pressing it. Database view
Fig. 24
Media mode: database view From the track list, press the
Sho w d
at
abase view option. The content of the
c urr
ent
Media source will be displayed classi-
fied by Playlists ,
Ar
ti
s
ts ,
A
l
b ums ,
M u
s
ical genres ,
T
r
ac ks and
V
ideo
s
› ›
› Fig. 22 .
When selecting one of the Artists ,
A
l
b
ums or
T r
ac
ks folders, a search button appears in the
t op right
(m
agnifying glass) which allows a
search to be carried out in the selected cate-
gory. ››› page 13, Input masks with on-screen
keypad.
To return to the folder view, press the Show folder view option from the
S
ELE
CTION Menu.
34
Page 40 of 100
Audio and Media Mode
Starting Bluetooth ®
audio tr an
sf er
● Activate Bluetooth ®
vis
ibility on the exter-
nal Bluetooth ®
audio source (e.g., mobile tel-
ephone).
● Lower the base volume on the Infotainment
syst
em.
● In the MEDIA main screen, press the
SOURCE function button and select
B
T audio .
● Press Find new dev
ic
e in order to connect an
e xt
ern
al Bluetooth ®
audio source for the first
time ››› page 66.
● OR: Select a Bluetooth ®
ext
ernal audio
source from the list.
● Please refer to the instructions on the
scr
een of the Infotainment system and on the
Bluetooth ®
audio source regarding the rest
of the procedure.
You may still need to manually start playback
on the Bluetooth ®
source.
When playback on the Bluetooth ®
audio
source is stopped, the Infotainment system
remains in Bluetooth ®
Audio mode.
Controlling playback
The extent to which the Bluetooth ®
audio
source can be controlled via the Infotainment
system depends on the connected Blue-
tooth ®
audio source. The available functions will depend on the
Bluetooth
®
Audio profi
le that the connected
external player supports.
With media players that support the AVRCP
Bluetooth ®
profile, playback on the Blue-
tooth ®
audio source can be automatically
started or stopped when the unit is switched
to Bluetooth ®
Audio mode or to a different
audio source. In addition, it is possible to
view or change the track via the Infotainment
system. Note
● Due t o the l
arge number of possible Blue-
tooth ®
audio sources, it is not possible to
guarantee fault-free operation of all descri-
bed functions.
● Always switch off the warning and service
tones
on a connected Bluetooth ®
audio
source, e.g. key tones on a mobile telephone,
to prevent possible interference noise and
malfunctions.
● To play music, do not link the external me-
dia pl
ayer simultaneously to Bluetooth and
the USB interface of the infotainment system,
as this can cause limitations during playback.
● Depending on the external player connec-
ted, the re
sponse time of the system can
vary. ●
Do not c onnect
an external media player to
play music via Bluetooth ®
and via the USB
port ››› page 36 at the same time with the
Infotainment system, as this could cause
playback limitations.
● If the external player is an Apple device™,
it c
annot be simultaneously connected by
USB and by Bluetooth. Jukebox (SSD)
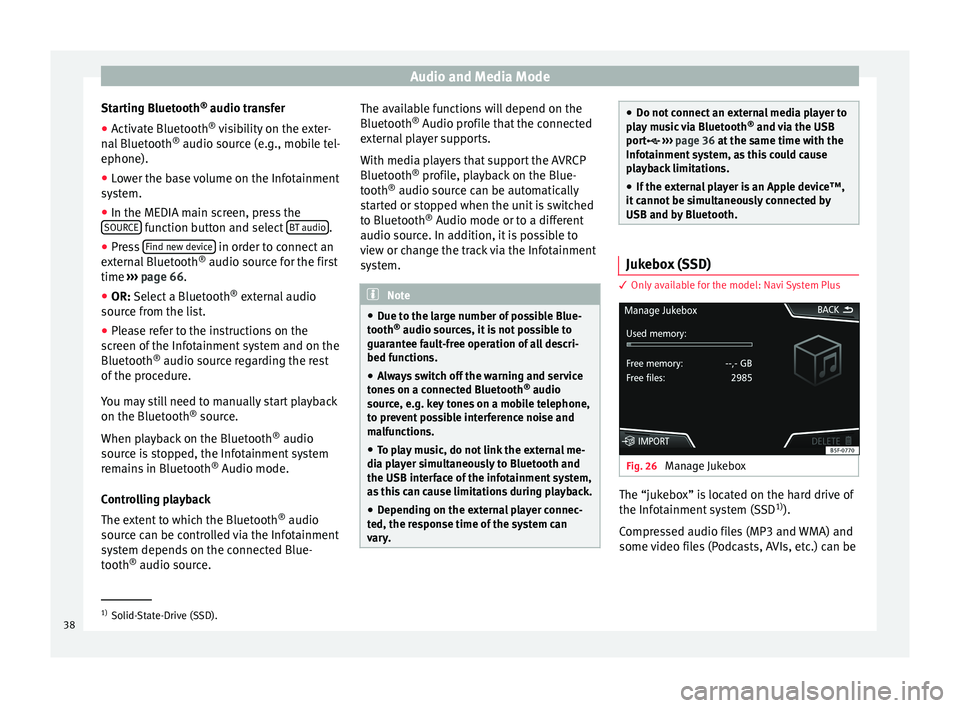
3 Only
available for the model: Navi System Plus Fig. 26
Manage Jukebox The “jukebox” is located on the hard drive of
the Inf
ot
ainment
system (SSD1)
).
Compressed audio files (MP3 and WMA) and
some video files (Podcasts, AVIs, etc.) can be 1)
Solid-State-Drive (SSD).
38
Page 43 of 100
Audio and Media Mode
● Pr e
s
s the Configuration function button
to configure the WLAN network.
Function button: function
Mobile hotspot: To switch the WLAN network on/off.
Security level: To select the code type (encryption),
choose WAP2 or No security level . An 8-charac-
ter network key is automatically generated.
Network key: Network key automatically generated.
Press the function button to manually change the
network key. The network key must have a minimum
of 8 characters and a maximum of 63.
SSID: Name of the Infotainment system WLAN net-
work.
Do not send network name (SSID): Activate the check-
box to deactivate the visibility of the WLAN network. To save the changes made to the mobile hot-
s
pot
c
onfiguration, press the STORE button.DVD video mode 3 Only available for the model: Navi System Plus
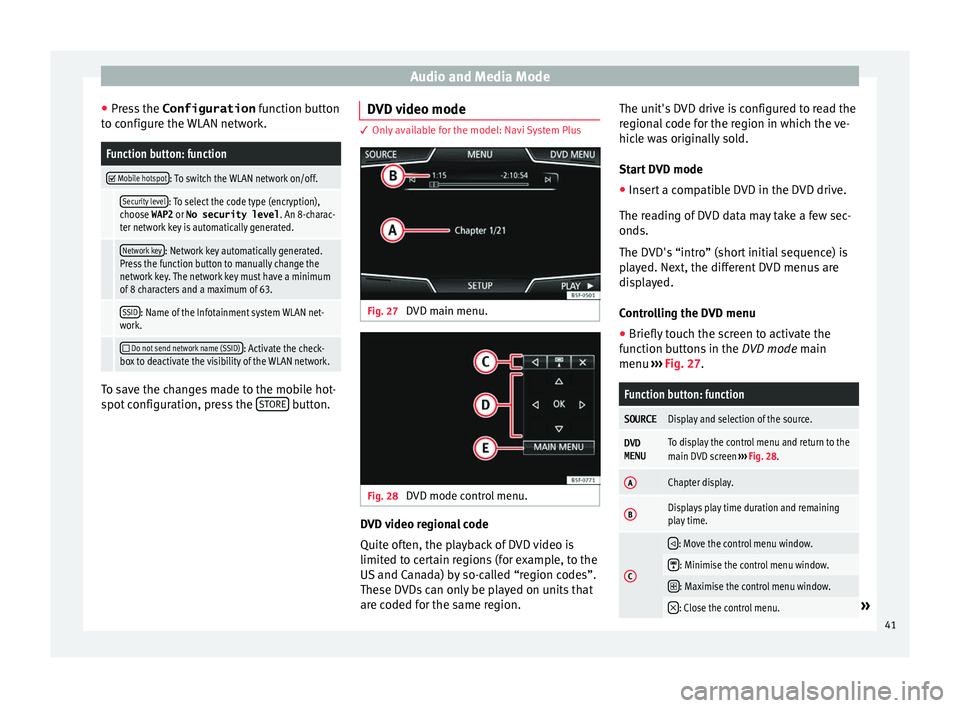
Fig. 27
DVD main menu. Fig. 28
DVD mode control menu. DVD video regional code
Quit
e of
t
en, the playback of DVD video is
limited to certain regions (for example, to the
US and Canada) by so-called “region codes”.
These DVDs can only be played on units that
are coded for the same region. The unit's DVD drive is configured to read the
region
al code for the region in which the ve-
hicle was originally sold.
Start DVD mode
● Insert a compatible DVD in the DVD drive.
The rea
ding of DVD data may take a few sec-
onds.
The DVD's “intro” (short initial sequence) is
played. Next, the different DVD menus are
displayed.
Controlling the DVD menu
● Briefly touch the screen to activate the
function b
uttons in the DVD mode main
menu ››› Fig. 27.
Function button: function
SOURCEDisplay and selection of the source.
DVD
MENUTo display the control menu and return to the
main DVD screen ››› Fig. 28.
AChapter display.
BDisplays play time duration and remaining
play time.
C
: Move the control menu window.
: Minimise the control menu window.
: Maximise the control menu window.
: Close the control menu.»
41
Page 49 of 100
Navigation
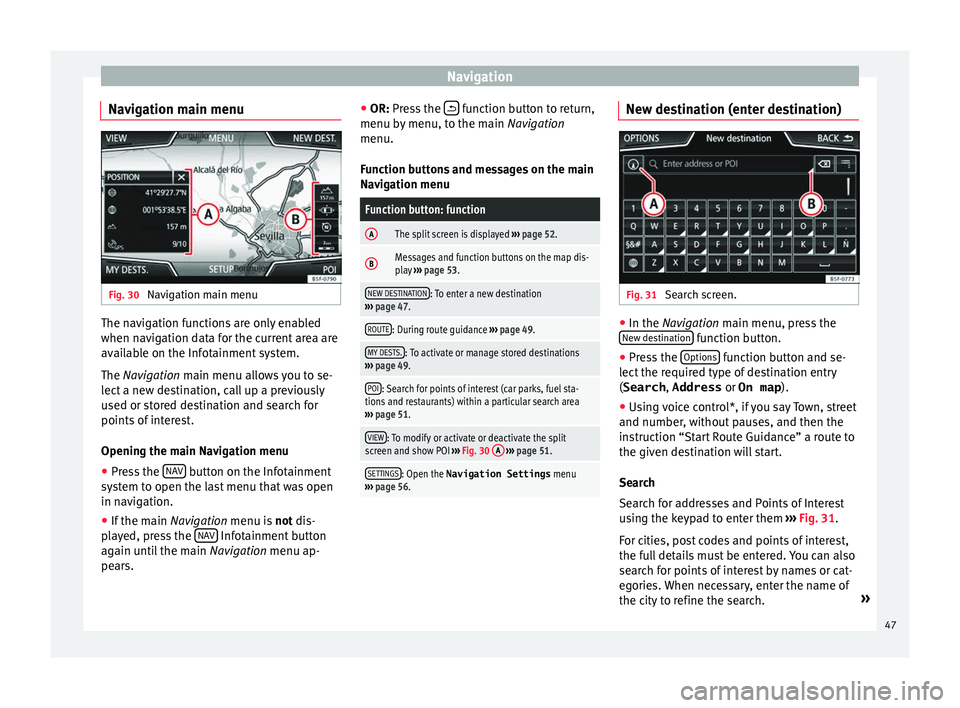
Navigation main menu Fig. 30
Navigation main menu The navigation functions are only enabled
when n
av
ig
ation data for the current area are
available on the Infotainment system.
The Navigation main menu allows you to se-
lect a new destination, call up a previously
used or stored destination and search for
points of interest.
Opening the main Navigation menu
● Press the NAV button on the Infotainment
sy s
t
em to open the last menu that was open
in navigation.
● If the main Navigation menu i
s not dis-
played, press the NAV Infotainment button
ag ain u
nti
l the main Navigation menu ap-
pears. ●
OR: Pres
s the function button to return,
menu b y
menu, t
o the main Navigation
menu.
Function buttons and messages on the main
Navigation menu
Function button: function
AThe split screen is displayed ››› page 52.
BMessages and function buttons on the map dis-
play ››› page 53.
NEW DESTINATION: To enter a new destination
››› page 47.
ROUTE: During route guidance ››› page 49.
MY DESTS.: To activate or manage stored destinations
››› page 49.
POI: Search for points of interest (car parks, fuel sta-
tions and restaurants) within a particular search area
››› page 51.
VIEW: To modify or activate or deactivate the split
screen and show POI ››› Fig. 30 A
››› page 51.
SETTINGS: Open the Navigation Settings menu
››› page 56. New destination (enter destination)
Fig. 31
Search screen. ●
In the Na vigation main menu, press the
New de s
tination function button.
● Press the Option
s function button and se-
l ect
the r
equired type of destination entry
(Search , Address or On map ).
● Using voice control*, if you say Town, street
and number, without
pauses, and then the
instruction “Start Route Guidance” a route to
the given destination will start.
Search
Search for addresses and Points of Interest
using the keypad to enter them ››› Fig. 31.
For cities, post codes and points of interest,
the full details must be entered. You can also
search for points of interest by names or cat-
egories. When necessary, enter the name of
the city to refine the search. »
47
Page 53 of 100
Navigation
Last destinations
V iew of
de
stinations for which a route has al-
ready been started.
Destinations
● Select the desired function button.
Function button: function
Destination memory: View of destinations stored manually
and from imported vCards ››› page 54, Importing
vCards (electronic business cards) .
Favourites: View of destinations stored as favourites.
Contacts: View of entries in the phonebook that have a
stored address (postal address). Home address
On
ly
one a
ddress or position can be stored
as the home address at any one time. The
stored home address can be edited or over-
written.
If a home address has already been stored,
route guidance will be started to the stored
home address.
If a home address has not yet been stored,
an address can be assigned as the home ad-
dress.
Assigning the home address for the first time:
Position: Press to store the vehicle's current position as
the home address.
Address: Press to enter the home address manually.
Editing the home address:
The home address can be edited in the Navigation
settings menu ››› page 56.
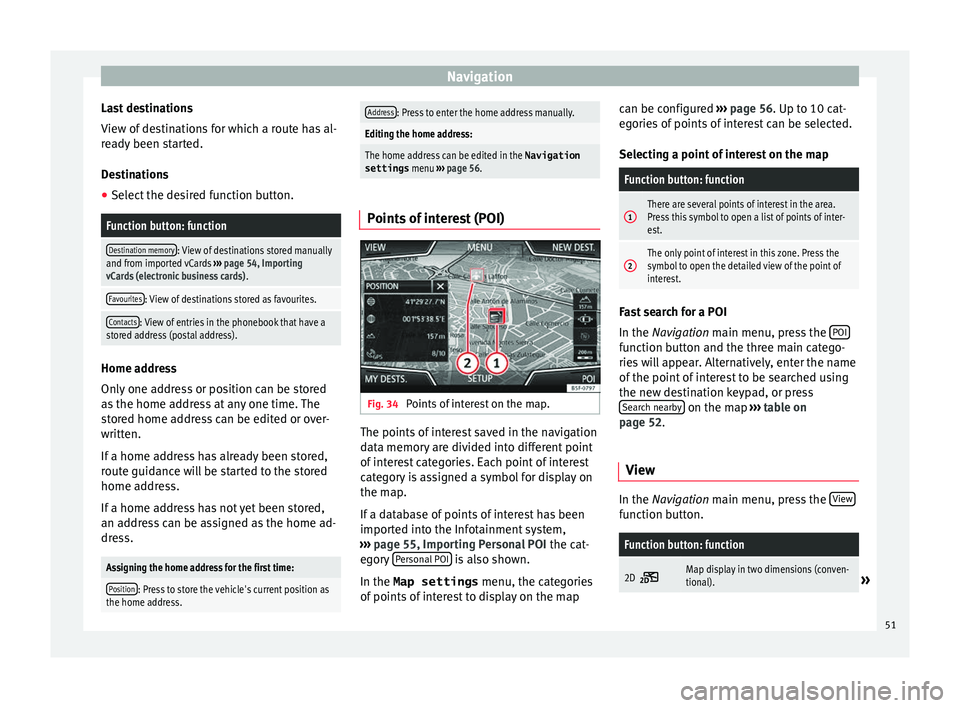
Points of interest (POI) Fig. 34
Points of interest on the map. The points of interest saved in the navigation
d
at
a memor
y are divided into different point
of interest categories. Each point of interest
category is assigned a symbol for display on
the map.
If a database of points of interest has been
imported into the Infotainment system,
››› page 55, Importing Personal POI the cat-
egory Personal POI is also shown.
In the Map settings menu, the cat
e
gories
of points of interest to display on the map can be configured
›››
page 56. Up to 10 cat-
egories of points of interest can be selected.
Selecting a point of interest on the map
Function button: function
1There are several points of interest in the area.
Press this symbol to open a list of points of inter-
est.
2The only point of interest in this zone. Press the
symbol to open the detailed view of the point of
interest. Fast search for a POI
In the Na
vigation
m
ain menu, press the POI function button and the three main catego-
rie
s
w
ill appear. Alternatively, enter the name
of the point of interest to be searched using
the new destination keypad, or press Search nearby on the map
››
›
table on
page 52.
View In the Na
vigation main menu, press the V
iew function button.
Function button: function
2D Map display in two dimensions (conven-
tional).»
51
Page 69 of 100
Telephone management system (PHONE)
Pair and connect a mobile telephone
t o the Inf
ot
ainment systemIn order to manage a mobile telephone via
the Infot
ainment
system, it is necessary to
pair both devices once.
For your safety, we recommend you make the
link when the vehicle is stationary. In some
countries it is not possible to perform the
pairing with the vehicle running.
Conditions
You must guarantee the following setup in
the mobile phone and the Infotainment sys-
tem:
● The ignition must be switched on.
● The Bluetooth ®
fu
nction of the mobile tele-
phone and the Infotainment system must be
active as well as visibility.
● The keypad lock on the mobile telephone
mus
t be deactivated.
Follow instructions in the manual for the mo-
bile telephone.
After turning on the ignition, the visibility of
the Bluetooth ®
function activates.
During the pairing process it is necessary to
enter data via the mobile telephone's key-
pad. To do so, the mobile telephone must be
ready. Starting mobile telephone pairing
● Make sure the Bluetooth function of the
mobi
le device is active and visible.
● Press the PHONE button on the Infotain-
ment sy
s
tem.
● Press the Find telephone function button and
then R
e
s
ults .
OR:
● Press the PHONE button on the Infotain-
ment sy
s
tem.
● Press the Setup function button.
● Press the Sel
ect
t
elephone function button
and then R
e
s
ults .
OR:
● Press the PHONE button on the Infotain-
ment sy
s
tem.
● Press the Setup function button.
● Press the Bluet
ooth function button.
● Press the Find dev
ic
e
s function button and
then R
e
s
ults .
OR:
● Connect from the mobile device itself.
The n ame of
the Bluet
ooth function of your
Infotainment system will be displayed in the
main PHONE screen and you can edit this via
the Bluetooth Setup menu
››
› p
age 75 The search process can take up to 1 minute.
On the scr
een the system will dynamically
update the names of the Bluetooth devices
found.
As soon as the search is completed, the
names of the Bluetooth ®
devices found are
displayed on-screen.
● In the Infotainment system select the mo-
bil
e telephone to which you want to connect
from the list of Bluetooth devices found. In
certain circumstances, it is possible that to
finish the connection between the two devi-
ces, you must enter additional data in the
mobile telephone and Infotainment system.
● If necessary, confirm the link to the mobile
telephone.
● U
se your mobile telephone to enter and
confirm y
our PIN code, as indicated in the
display of the infotainment system.
OR:
● Compare the PIN code shown on the dis-
pla
y of the Infotainment system with that
shown on the mobile telephone. If they
match, confirm on both devices.
The infotainment system and the mobile tele-
phone will now be connected to each other.
When the pairing has been finalized correct-
ly, the PHONE main menu will appear. The
phonebook and call lists stored in the mobile
phone will be loaded once the requests have »
67
Page 73 of 100
Telephone management system (PHONE)Possible functions
Enter telephone
numberEntering a phone number with the
keypad.
Press the function button to
make a call.
Select a contact
from the list
Enter the first letters of the contact
to find using the keypad. The avail-
able entries appear in the phone-
book.
Select the desired contact from the
phonebook to make the call.
Redial
Press button 1
››› Fig. 55 and the
last number dialled will be shown
on the display. To make a call,
press the 1
button again.
Enter the country
code
To enter a country code, instead of
the first two digits (international
access code e.g. “00
”) you can en-
ter the character “+”.
Press the 0 button for approx. 2
seconds to add the +.
Assistance callPress the function button to obtain
help in the event of breakdown.
For this the network of SEAT deal-
erships is available to you with
their Mobile Service.
Possible functions
Information call Press the function button to obtain
information on the SEAT brand and
the additional services contracted
related to traffic and travel.
Call mailbox
Press the Voicemail function but-
ton to make the call.
OR: Press the function button
for approx. 2 seconds to make the
call.
If the number for the mailbox has
not yet been stored, enter it and
confirm with OK
. Note
Breakdown service and information calls can
incur an a d
ditional cost on your telephone
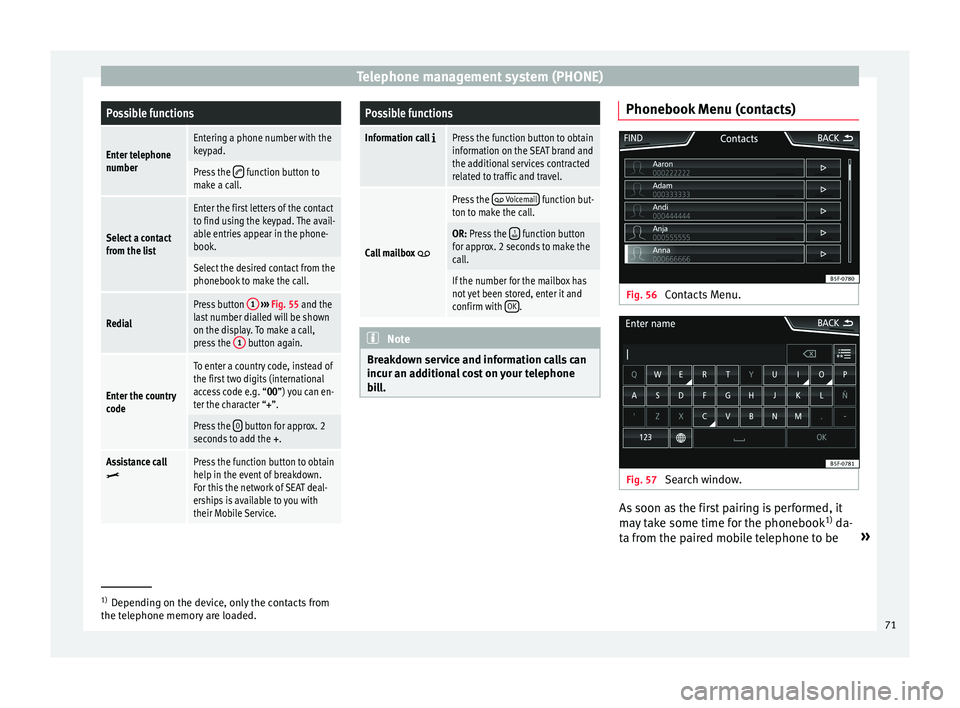
bill. Phonebook Menu (contacts)
Fig. 56
Contacts Menu. Fig. 57
Search window. As soon as the first pairing is performed, it
m
a
y
take some time for the phonebook 1)
da-
ta from the paired mobile telephone to be »1)
Depending on the device, only the contacts from
the tel ephone memor
y are loaded. 71