pairing phone Seat Toledo 2016 MEDIA SYSTEM TOUCH - COLOUR
[x] Cancel search | Manufacturer: SEAT, Model Year: 2016, Model line: Toledo, Model: Seat Toledo 2016Pages: 52, PDF Size: 1.5 MB
Page 7 of 52
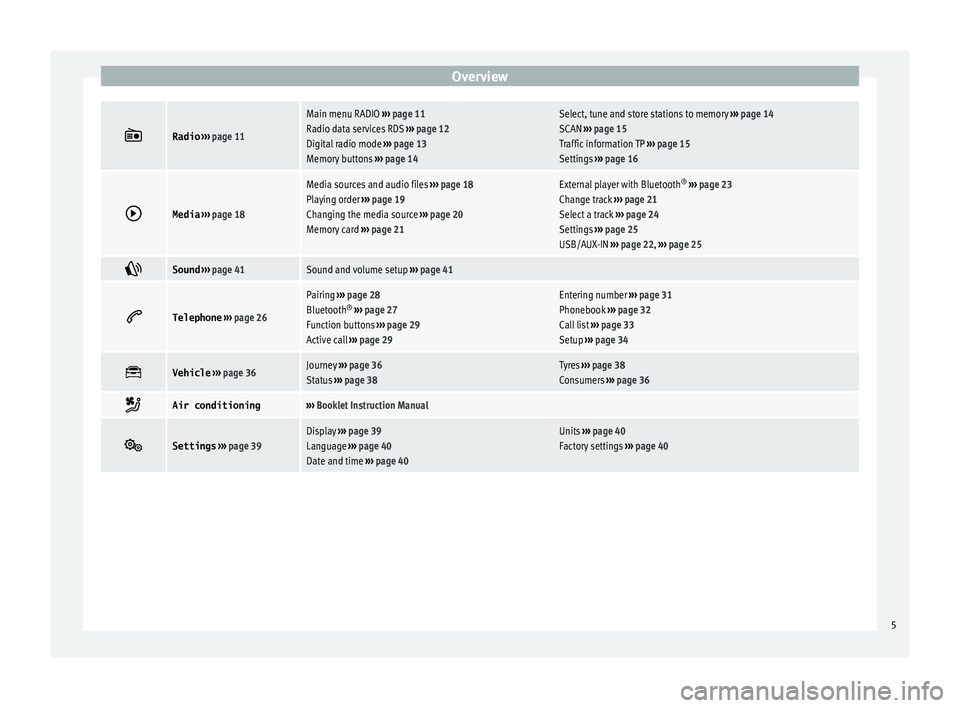
Overview
Radio
››› page 11
Main menu RADIO ››› page 11
Radio data services RDS ››› page 12
Digital radio mode ››› page 13
Memory buttons ››› page 14Select, tune and store stations to memory ››› page 14
SCAN ››› page 15
Traffic information TP ››› page 15
Settings ››› page 16
Media
››› page 18
Media sources and audio files ››› page 18
Playing order ››› page 19
Changing the media source ››› page 20
Memory card ››› page 21External player with Bluetooth ®
››› page 23
Change track ››› page 21
Select a track ››› page 24
Settings ››› page 25
USB/AUX-IN ››› page 22, ››› page 25
Sound
››› page 41Sound and volume setup ››› page 41
Telephone
››› page 26
Pairing ››› page 28
Bluetooth ®
››› page 27
Function buttons ››› page 29
Active call ››› page 29Entering number ››› page 31
Phonebook ››› page 32
Call list ››› page 33
Setup ››› page 34
Vehicle
››› page 36Journey ››› page 36
Status ››› page 38Tyres ››› page 38
Consumers ››› page 36
Air conditioning›››
Booklet Instruction Manual
Settings
››› page 39Display ››› page 39
Language ››› page 40
Date and time ››› page 40Units ››› page 40
Factory settings ››› page 40 5
Page 30 of 52
Telephone management system (PHONE)*
Pair and connect a mobile telephone
t o the Inf
otainment systemIn order to manage a mobile telephone via
the Inf
ot
ainment system, it is necessary to
pair both devices once.
For your safety, we recommend you make the
link when the vehicle is stationary. In some
countries it is not possible to perform the
pairing with the vehicle running.
Conditions
You must guarantee the following setup in
the mobile phone and the Infotainment sys-
tem:
● The ignition must be switched on.
● The Bluet ooth®
f
unction of the mobile tele-
phone and the Infotainment system must be
active as well as visibility.
● The keypad lock on the mobile telephone
mu
st be deactivated.
Follow instructions in the manual for the mo-
bile telephone.
After turning on the ignition, the visibility of
the Bluetooth ®
function activates.
During the pairing process it is necessary to
enter data via the mobile telephone's key-
pad. To do so, the mobile telephone must be
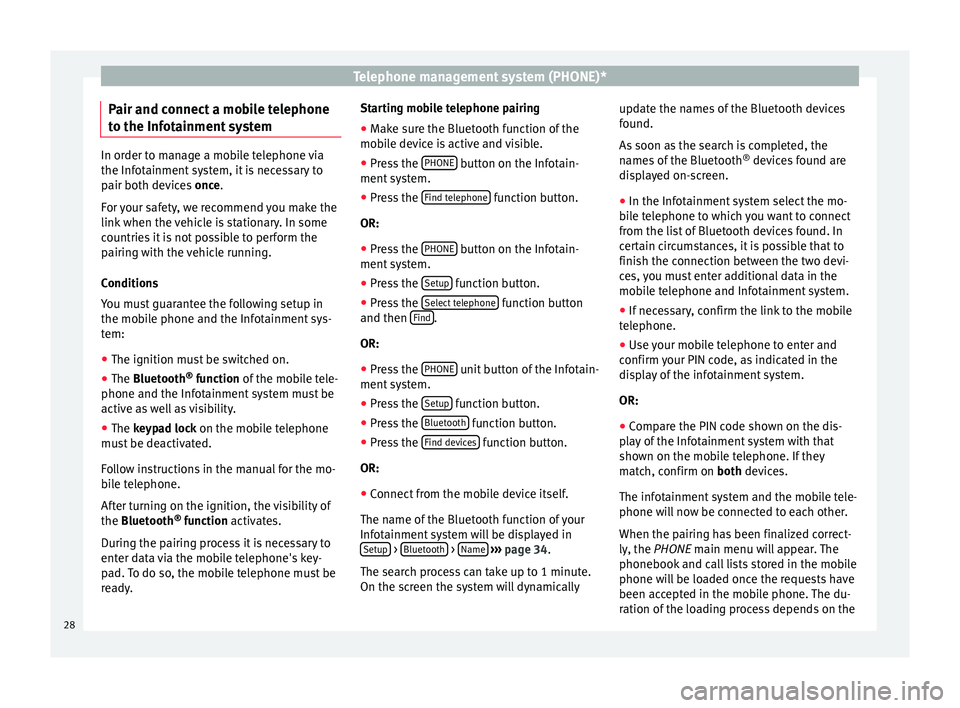
ready. Starting mobile telephone pairing
● Make sure the Bluetooth function of the
mob
ile device is active and visible.
● Press the PHONE button on the Infotain-
ment sy
stem.
● Press the Find tel
ephone function button.
OR:
● Press the PHONE button on the Infotain-
ment sy
stem.
● Press the Setup function button.
● Press the Sel
ect
telephone function button
and then Find .
OR:
● Press the PHONE unit button of the Infotain-
ment sy
stem.
● Press the Setup function button.
● Press the Bluet
ooth function button.
● Press the Find dev
ic
es function button.
OR:
● Connect from the mobile device itself.
The n ame of
the Bluetooth function of your
Infotainment system will be displayed in Setup >
Bluet
ooth >
Name
› ›
›
page 34.
The search process can take up to 1 minute.
On the screen the system will dynamically update the names of the Bluetooth devices
fou
nd.
As soon as the search is completed, the
names of the Bluetooth ®
devices found are
displayed on-screen.
● In the Infotainment system select the mo-
bi
le telephone to which you want to connect
from the list of Bluetooth devices found. In
certain circumstances, it is possible that to
finish the connection between the two devi-
ces, you must enter additional data in the
mobile telephone and Infotainment system.
● If necessary, confirm the link to the mobile
tel
ephone.
● Use your mobile telephone to enter and
confirm
your PIN code, as indicated in the
display of the infotainment system.
OR:
● Compare the PIN code shown on the dis-
pl
ay of the Infotainment system with that
shown on the mobile telephone. If they
match, confirm on both devices.
The infotainment system and the mobile tele-
phone will now be connected to each other.
When the pairing has been finalized correct-
ly, the PHONE main menu will appear. The
phonebook and call lists stored in the mobile
phone will be loaded once the requests have
been accepted in the mobile phone. The du-
ration of the loading process depends on the
28
Page 31 of 52
Telephone management system (PHONE)*
amount of data stored on the mobile tele-
phone. Af t
er loading, the data will be availa-
ble on the Infotainment system.
Pairing and connection of mobile telephones
You can pair up to 20 mobile telephones to
the Infotainment system, but only one mobile
telephone can be connected as hands-free,
and this or another device as a Bluetooth au-
dio profile.
When the Infotainment system is switched
on, it automatically connects to the last con-
nected mobile telephone. If it is not possible
to connect to this mobile telephone, the tele-
phone management system will try to auto-
matically connect to the next mobile tele-
phone on the list of paired devices.
The maximum range of the Bluetooth ®
con-
nection is approx. 10 metres. The active
Bluetooth ®
connection disconnects if this
distance is exceeded. The connection is auto-
matically re-established as soon as the de-
vice is once again within Bluetooth ®
range.
If the maximum number of paired devices is
reached and you wish to pair another one to
the system, it will automatically replace the
one least used recently. If you wish to replace
it with another one, the user must erase it be-
forehand. To do so:
● Press the Setup button on the device while
in tel
ephone mode. ●
Pre
ss the Bluetooth function button.
● Activate the P
air
ed devices function button.
● In the list of paired devices, press the function button next to the mobile telephone
t
o be del
eted and then press Delete to con-
firm the process. Note
● It m
ay be necessary to confirm the phone-
book data transfer request on the mobile tel-
ephone.
● Check that there are no requests pending
acc
eptance in your mobile phone. If there are,
this could block some of the functions in the
PHONE menu. Description of the telephone
m
an
agement system
Introduction Some functions and setup can only be per-
f
ormed when the
vehicle is stopped and are
not available on all mobile telephones.
With the help of the telephone manager, up
to 2 mobile telephones can be connected to
the Infotainment system via the Bluetooth
profiles (for example, one used as a Blue-
tooth-audio player and/or another as a
hands-free telephone). Note
● Us
ing a mobile telephone inside the vehicle
may provoke noise in the speakers.
● Some networks may not recognise all lan-
guage c
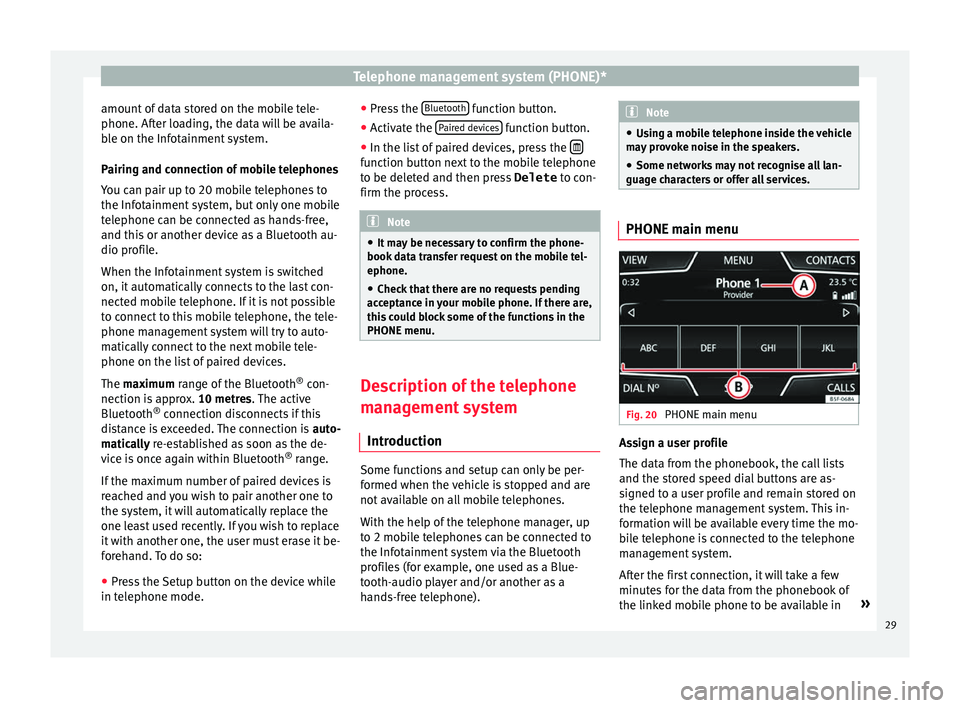
haracters or offer all services. PHONE main menu
Fig. 20
PHONE main menu Assign a user profile
The d
at
a from the phonebook, the call lists
and the stored speed dial buttons are as-
signed to a user profile and remain stored on
the telephone management system. This in-
formation will be available every time the mo-
bile telephone is connected to the telephone
management system.
After the first connection, it will take a few
minutes for the data from the phonebook of
the linked mobile phone to be available in »
29
Page 34 of 52
Telephone management system (PHONE)*
Note
Breakdown service and information calls can
inc ur an a
dditional cost on your telephone
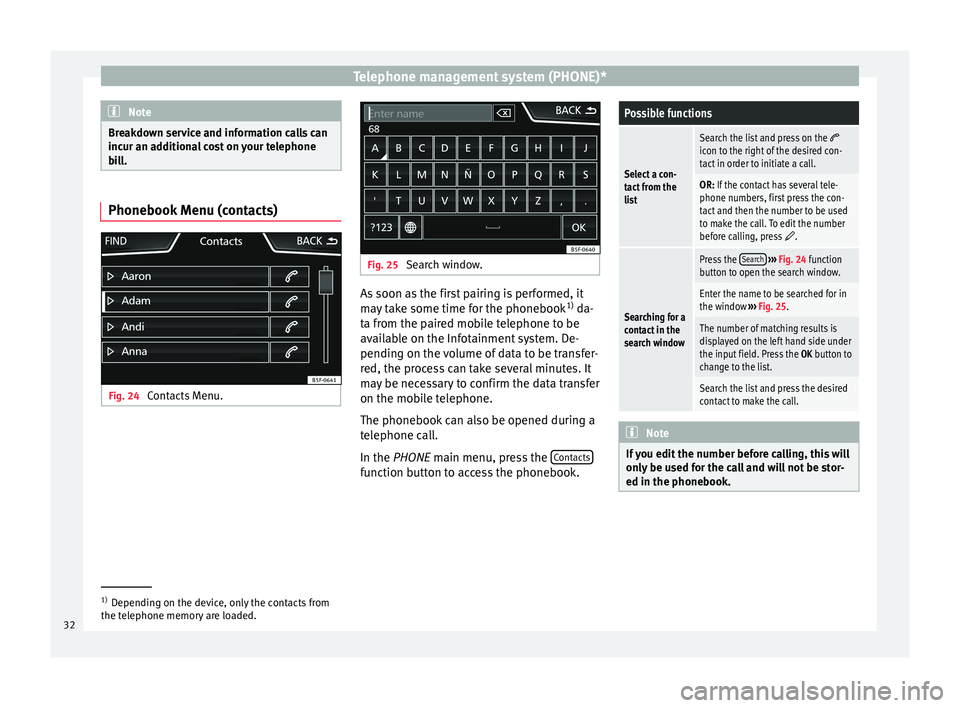
bill. Phonebook Menu (contacts)
Fig. 24
Contacts Menu. Fig. 25
Search window. As soon as the first pairing is performed, it
m
a
y take some time for the phonebook 1)
da-
ta from the paired mobile telephone to be
available on the Infotainment system. De-
pending on the volume of data to be transfer-
red, the process can take several minutes. It
may be necessary to confirm the data transfer
on the mobile telephone.
The phonebook can also be opened during a
telephone call.
In the PHONE main menu, press the Contacts function button to access the phonebook.
Possible functions
Select a con-
tact from the
list
Search the list and press on the icon to the right of the desired con-
tact in order to initiate a call.
OR: If the contact has several tele-
phone numbers, first press the con-
tact and then the number to be used
to make the call. To edit the number
before calling, press
.
Searching for a
contact in the
search window
Press the
Search
››› Fig. 24 function
button to open the search window.
Enter the name to be searched for in
the window ››› Fig. 25.
The number of matching results is
displayed on the left hand side under
the input field. Press the OK button to
change to the list.
Search the list and press the desired
contact to make the call. Note
If you edit the number before calling, this will
on ly
be used for the call and will not be stor-
ed in the phonebook. 1)
Depending on the device, only the contacts from
the t el
ephone memory are loaded.
32
Page 36 of 52
Telephone management system (PHONE)*
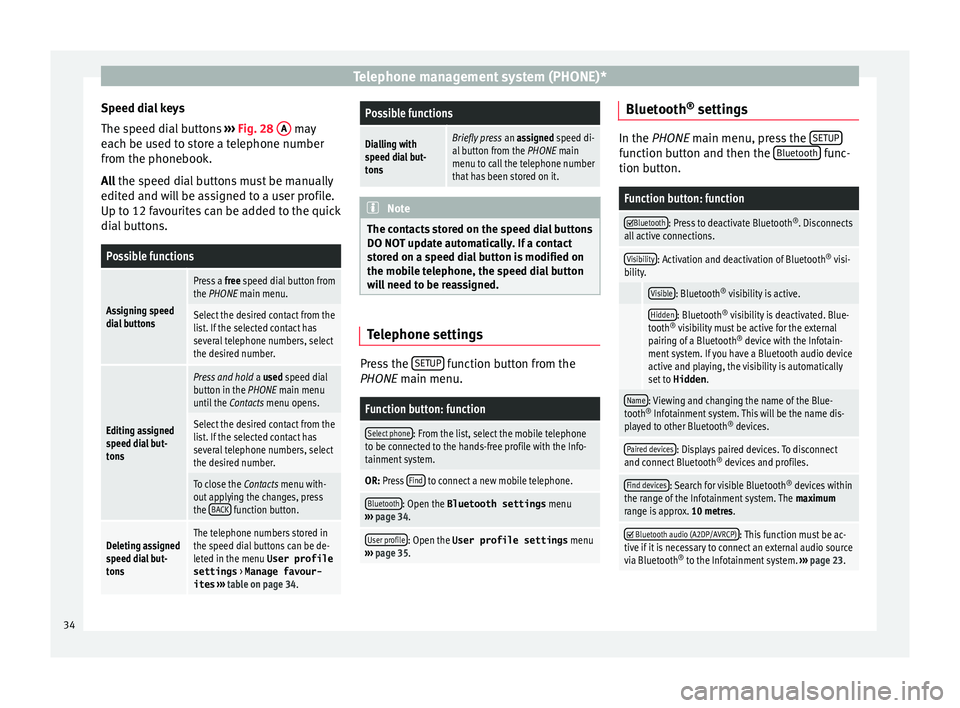
Speed dial keys
The s peed di
al buttons ››› Fig. 28 A may
e ac
h be used to store a telephone number
from the phonebook.
All the speed dial buttons must be manually
edited and will be assigned to a user profile.
Up to 12 favourites can be added to the quick
dial buttons.
Possible functions
Assigning speed
dial buttons
Press a free speed dial button from
the PHONE main menu.
Select the desired contact from the
list. If the selected contact has
several telephone numbers, select
the desired number.
Editing assigned
speed dial but-
tons
Press and hold a used speed dial
button in the PHONE main menu
until the Contacts menu opens.
Select the desired contact from the
list. If the selected contact has
several telephone numbers, select
the desired number.
To close the Contacts menu with-
out applying the changes, press
the BACK
function button.
Deleting assigned
speed dial but-
tonsThe telephone numbers stored in
the speed dial buttons can be de-
leted in the menu User profile
settings
> Manage favour-
ites ››› table on page 34.
Possible functions
Dialling with
speed dial but-
tonsBriefly press an assigned speed di-
al button from the PHONE main
menu to call the telephone number
that has been stored on it. Note
The contacts stored on the speed dial buttons
DO NO T upd
ate automatically. If a contact
stored on a speed dial button is modified on
the mobile telephone, the speed dial button
will need to be reassigned. Telephone settings
Press the
S
ETUP function button from the
PHONE m ain menu.
Function button: function
Select phone: From the list, select the mobile telephone
to be connected to the hands-free profile with the Info-
tainment system.
OR: Press Find to connect a new mobile telephone.
Bluetooth: Open the Bluetooth settings
menu
››› page 34.
User profile: Open the User profile settings menu
››› page 35. Bluetooth
®
settin g
s In the PHONE m
ain menu, pr
ess the SETUP function button and then the
Bluet
ooth func-
tion b utt
on.
Function button: function
Bluetooth: Press to deactivate Bluetooth
®
. Disconnects
all active connections.
Visibility: Activation and deactivation of Bluetooth ®
visi-
bility.
Visible: Bluetooth ®
visibility is active.
Hidden: Bluetooth ®
visibility is deactivated. Blue-
tooth ®
visibility must be active for the external
pairing of a Bluetooth ®
device with the Infotain-
ment system. If you have a Bluetooth audio device
active and playing, the visibility is automatically
set to Hidden .
Name: Viewing and changing the name of the Blue-
tooth ®
Infotainment system. This will be the name dis-
played to other Bluetooth ®
devices.
Paired devices: Displays paired devices. To disconnect
and connect Bluetooth ®
devices and profiles.
Find devices: Search for visible Bluetooth ®
devices within
the range of the Infotainment system. The maximum
range is approx. 10 metres.
Bluetooth audio (A2DP/AVRCP): This function must be ac-
tive if it is necessary to connect an external audio source
via Bluetooth ®
to the Infotainment system. ››› page 23. 34
Page 46 of 52
Index
O Oper atin
g instructions
checkboxes . . . . . . . . . . . . . . . . . . . . . . . . . . . . . . 8
function buttons . . . . . . . . . . . . . . . . . . . . . . . . . . 8
Unit buttons . . . . . . . . . . . . . . . . . . . . . . . . . . . . . 8
Operation PHONE . . . . . . . . . . . . . . . . . . . . . . . . . . . . . . 26, 29
Overview of the unit . . . . . . . . . . . . . . . . . . . . . . . 2, 3
P PHONE A2DP . . . . . . . . . . . . . . . . . . . . . . . . . . . . . . . . . . 27
Areas where special regulations apply . . . . . . . 27
Bluetooth profiles . . . . . . . . . . . . . . . . . . . . . . . . 27
Bluetooth settings . . . . . . . . . . . . . . . . . . . . . . . 34
call lists . . . . . . . . . . . . . . . . . . . . . . . . . . . . . . . . 33
call mailbox . . . . . . . . . . . . . . . . . . . . . . . . . . . . . 31
connect and disconnect the telephone man-agement system . . . . . . . . . . . . . . . . . . . . . . . 34
connection via the Infotainment system . . . . . . 28
contacts . . . . . . . . . . . . . . . . . . . . . . . . . . . . . . . . 32
description of the function . . . . . . . . . . . . . . . . 27
dial . . . . . . . . . . . . . . . . . . . . . . . . . . . . . . . . 31, 32
Display and symbols . . . . . . . . . . . . . . . . . . . . . 30
enter telephone number . . . . . . . . . . . . . . . . . . 31
Explosion risk areas . . . . . . . . . . . . . . . . . . . . . . 27
favourites (shortcut buttons) . . . . . . . . . . . . . . . 33
general information . . . . . . . . . . . . . . . . . . . . . . 26
GSM network . . . . . . . . . . . . . . . . . . . . . . . . . . . 27
HFP . . . . . . . . . . . . . . . . . . . . . . . . . . . . . . . . . . . 27
main menu . . . . . . . . . . . . . . . . . . . . . . . . . . . . . 29
mobile telephone pairing . . . . . . . . . . . . . . . . . 28
pairing of mobile telephone . . . . . . . . . . . . . . . 28
pairing via the Infotainment system . . . . . . . . . 28
phonebook . . . . . . . . . . . . . . . . . . . . . . . . . . . . . 32 settings . . . . . . . . . . . . . . . . . . . . . . . . . . . . . . . . 34
tel
ephone management system . . . . . . . . . 26, 29
user profile settings . . . . . . . . . . . . . . . . . . . . . . 35
Play AUX-IN . . . . . . . . . . . . . . . . . . . . . . . . . . . . . . . . . 25
external data storage device (USB) . . . . . . . . . . 22
Pop-up window . . . . . . . . . . . . . . . . . . . . . . . . . . . . . 8
Q Quick reference guide . . . . . . . . . . . . . . . . . . . . . . . 6
R
Radio . . . . . . . . . . . . . . . . . . . . . . . . . . . . . . . . . . . . 11
RADIO filter by station type (PTY) . . . . . . . . . . . . . . . . . 12
frequency bands . . . . . . . . . . . . . . . . . . . . . . . . . 14
Main menu . . . . . . . . . . . . . . . . . . . . . . . . . . . . . 11
memory buttons . . . . . . . . . . . . . . . . . . . . . . . . . 14
radio data services RDS . . . . . . . . . . . . . . . . . . . 12
radio text . . . . . . . . . . . . . . . . . . . . . . . . . . . . . . . 12
scan function (SCAN) . . . . . . . . . . . . . . . . . . . . . 15
select, tune and store stations to memory . . . . 14
station name and automatic station tracking . . 12
RDS TP (Traffic Program) . . . . . . . . . . . . . . . . . . . 15, 16
Requirements for memory cards . . . . . . . . . . . . . . . . . . . . . . . . . . . 18
SD cards . . . . . . . . . . . . . . . . . . . . . . . . . . . . . . . 18
Rewind . . . . . . . . . . . . . . . . . . . . . . . . . . . . . . . . . . 21
Rotary/push knobs . . . . . . . . . . . . . . . . . . . . . . . . . 8
Rotary knobs . . . . . . . . . . . . . . . . . . . . . . . . . . . . . . . 7
S Safety notes . . . . . . . . . . . . . . . . . . . . . . . . . . . . . . . 6
SCAN see scan function . . . . . . . . . . . . . . . . . . . . . . . . 15 Scan function (SCAN)
Ra dio mode . . . . . . . . . . . . . . . . . . . . . . . . . . . . . 15
SD card . . . . . . . . . . . . . . . . . . . . . . . . . . . . . . . . . . 21
Settings Bluetooth . . . . . . . . . . . . . . . . . . . . . . . . . . . . . . 34
PHONE . . . . . . . . . . . . . . . . . . . . . . . . . . . . . . . . . 34
user profile settings . . . . . . . . . . . . . . . . . . . . . . 35
SETUP see: "Setup (SETUP)" . . . . . . . . . . . . . . . . . . 39, 41
Setup (SETUP) . . . . . . . . . . . . . . . . . . . . . . . . . . 39, 41 Bluetooth setup . . . . . . . . . . . . . . . . . . . . . . . . . 39
Date and Time . . . . . . . . . . . . . . . . . . . . . . . . . . . 39
factory settings . . . . . . . . . . . . . . . . . . . . . . . . . . 39
language . . . . . . . . . . . . . . . . . . . . . . . . . . . . . . . 39
screen setup . . . . . . . . . . . . . . . . . . . . . . . . . . . . 39
sound . . . . . . . . . . . . . . . . . . . . . . . . . . . . . . . . . 41
system . . . . . . . . . . . . . . . . . . . . . . . . . . . . . . . . . 39
units . . . . . . . . . . . . . . . . . . . . . . . . . . . . . . . . . . 39
volume distribution . . . . . . . . . . . . . . . . . . . . . . 41
Shortcut button see PHONE . . . . . . . . . . . . . . . . . . . . . . . . . . . . . 33
Sound distribution (Balance/Fader) . . . . . . . . . . . 41
Sound setup . . . . . . . . . . . . . . . . . . . . . . . . . . . . . . 41
Sound (treble/midrange/bass) . . . . . . . . . . . . . . . 41
Station search see scan function . . . . . . . . . . . . . . . . . . . . . . . . 15
Switch-on volume . . . . . . . . . . . . . . . . . . . . . . . . . . 41
Switching off . . . . . . . . . . . . . . . . . . . . . . . . . . . . . . . 7
Switching on . . . . . . . . . . . . . . . . . . . . . . . . . . . . . . . 7
Symbols used in this manual . . . . . . . . . . . . . . . . . 8
T
Things to note AUX mode . . . . . . . . . . . . . . . . . . . . . . . . . . . . . . 25
Touchscreen . . . . . . . . . . . . . . . . . . . . . . . . . . . . . . . 8
44