radiator SKODA CITIGO 2012 1.G Owner's Manual
[x] Cancel search | Manufacturer: SKODA, Model Year: 2012, Model line: CITIGO, Model: SKODA CITIGO 2012 1.GPages: 157, PDF Size: 3.9 MB
Page 18 of 157
Engine oil pressure
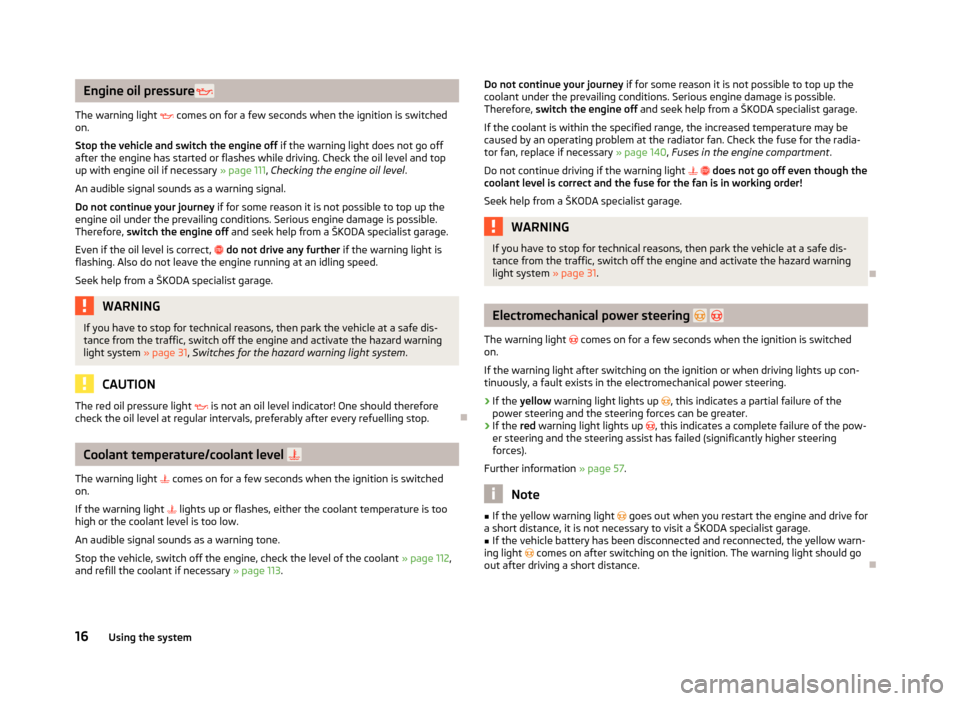
The warning light comes on for a few seconds when the ignition is switched
on.
Stop the vehicle and switch the engine off if the warning light does not go off
after the engine has started or flashes while driving. Check the oil level and top
up with engine oil if necessary » page 111, Checking the engine oil level .
An audible signal sounds as a warning signal.
Do not continue your journey if for some reason it is not possible to top up the
engine oil under the prevailing conditions. Serious engine damage is possible.
Therefore, switch the engine off and seek help from a
ŠKODA specialist garage.
Even if the oil level is correct, do not drive any further if the warning light is
flashing. Also do not leave the engine running at an idling speed.
Seek help from a ŠKODA specialist garage. WARNING
If you have to stop for technical reasons, then park the vehicle at a safe dis-
tance from the traffic, switch off the engine and activate the hazard warning
light system » page 31, Switches for the hazard warning light system .CAUTION
The red oil pressure light is not an oil level indicator! One should therefore
check the oil level at regular intervals, preferably after every refuelling stop. ÐCoolant temperature/coolant level
The warning light comes on for a few seconds when the ignition is switched
on.
If the warning light lights up or flashes, either the coolant temperature is too
high or the coolant level is too low.
An audible signal sounds as a warning tone.
Stop the vehicle, switch off the engine, check the level of the coolant » page 112,
and refill the coolant if necessary » page 113. Do not continue your journey
if for some reason it is not possible to top up the
coolant under the prevailing conditions. Serious engine damage is possible.
Therefore, switch the engine off and seek help from a
ŠKODA specialist garage.
If the coolant is within the specified range, the increased temperature may be
caused by an operating problem at the radiator fan. Check the fuse for the radia-
tor fan, replace if necessary » page 140, Fuses in the engine compartment .
Do not continue driving if the warning light does not go off even though the
coolant level is correct and the fuse for the fan is in working order!
Seek help from a ŠKODA specialist garage. WARNING
If you have to stop for technical reasons, then park the vehicle at a safe dis-
tance from the traffic, switch off the engine and activate the hazard warning
light system » page 31. Ð Electromechanical power steering
The warning light comes on for a few seconds when the ignition is switched
on.
If the warning light after switching on the ignition or when driving lights up con-
tinuously, a fault exists in the electromechanical power steering.
› If the
yellow warning light lights up , this indicates a partial failure of the
power steering and the steering forces can be greater.
› If the
red warning light lights up , this indicates a complete failure of the pow-
er steering and the steering assist has failed (significantly higher steering
forces).
Further information » page 57. Note
■ If the yellow warning light goes out when you restart the engine and drive for
a short distance, it is not necessary to visit a
ŠKODA specialist garage.
■ If the vehicle battery has been disconnected and reconnected, the yellow warn-
ing light comes on after switching on the ignition. The warning light should go
out after driving a short distance. Ð
16 Using the system
Page 59 of 157
Note
■ The engine can only be started with a genuine ŠKODA key with the matching
code. ■ The engine running noises may louder at first be louder for a short time after
starting the cold engine. This is quite normal and is not an operating problem. ■ After switching off the ignition, the radiator fan can intermittently continue to
operate for approx. 10
minutes.
■ If the engine does not start up after a second attempt, the fuse for the fuel
pump may have a fault. Check the fuse and replace, if necessary » page 138,
Fuses on the underside of the dash panel or seek assistance from a ŠKODA
spe-
cialist garage.
■ We recommend locking the steering wheel whenever leaving the vehicle. This
acts as a deterrent against the attempted theft of your car. ÐAdjusting the steering wheel position
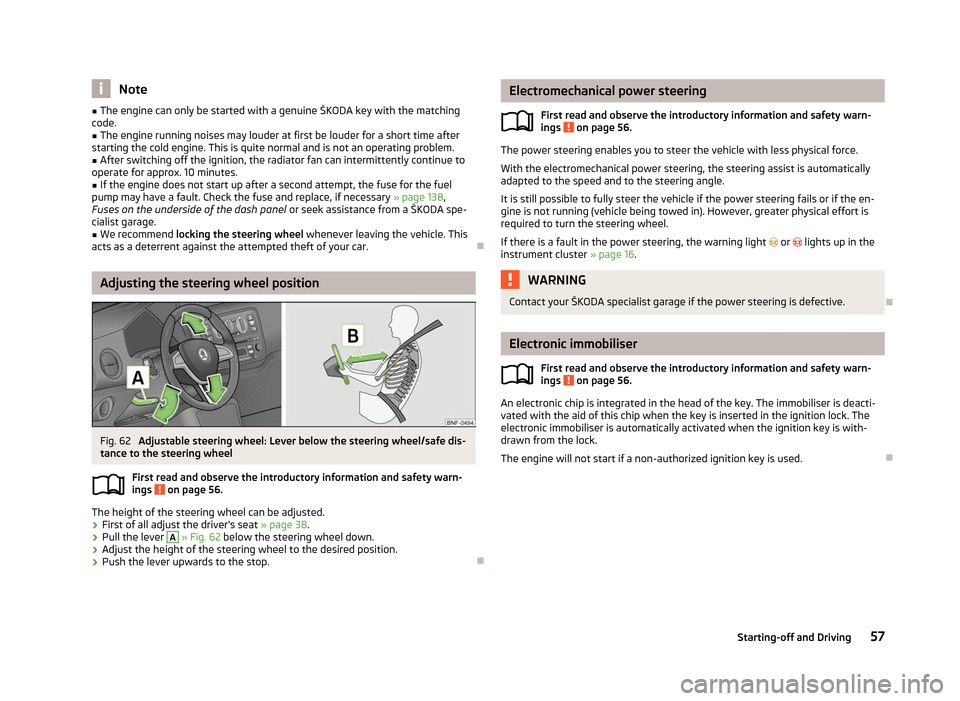
Fig. 62
Adjustable steering wheel: Lever below the steering wheel/safe dis-
tance to the steering wheel
First read and observe the introductory information and safety warn-
ings on page 56.
The height of the steering wheel can be adjusted.
› First of all adjust the driver's seat
» page 38.
› Pull the lever A
» Fig. 62 below the steering wheel down.
› Adjust the height of the steering wheel to the desired position.
› Push the lever upwards to the stop. Ð
ä Electromechanical power steering
First read and observe the introductory information and safety warn-
ings on page 56.
The power steering enables you to steer the vehicle with less physical force.
With the electromechanical power steering, the steering assist is automatically
adapted to the speed and to the steering angle.
It is still possible to fully steer the vehicle if the power steering fails or if the en-
gine is not running (vehicle being towed in). However, greater physical effort is
required to turn the steering wheel.
If there is a fault in the power steering, the warning light or lights up in the
instrument cluster » page 16. WARNING
Contact your ŠKODA specialist garage if the power steering is defective. Ð Electronic immobiliser
First read and observe the introductory information and safety warn-
ings on page 56.
An electronic chip is integrated in the head of the key. The immobiliser is deacti-
vated with the aid of this chip when the key is inserted in the ignition lock. The
electronic immobiliser is automatically activated when the ignition key is with-
drawn from the lock.
The engine will not start if a non-authorized ignition key is used. Ð
ä
ä
57
Starting-off and Driving
Page 110 of 157
Regular inspections of gas systems
First read and observe the introductory information and safety warn-
ings on page 106.
Every two years, the following inspections must be carried out:
› Check solenoid valves on the gas tanks for proper function.
› Check natural gas tank and lines for leaks and fixing, if necessary look for dam-
ages.
› Check the condition of fuel filler cap, filler tube and sealing ring, clean sealing
ring if necessary. ÐSafe natural gas
First read and observe the introductory information and safety warn-
ings on page 106.
The safety concept of the natural gas system ensures safe operation. It is equip-
ped with the following security features.
› At each natural gas tank, there is a solenoid valve that closes automatically af-
ter turning off the ignition or when running in petrol mode.
› A thermal fuse prevents uncontrolled rise in pressure in the natural gas tank in
case of fire.
› A flow limiter prevents sudden emptying of the natural gas tank in case the
pressure system is damaged.
› All the attachment points and materials are designed for maximum safety. ÐNatural gas quality and consumption
First read and observe the introductory information and safety warn-
ings on page 106.
Natural gas is divided into quality groups H-gas and L-gas. The two types of gas
are subdivided according to their calorific value and nitrogen and carbon dioxide
contents. H-gas has a higher calorific value and lower nitrogen or carbon dioxide
content than L-gas.ä
ä
ä The higher the calorific value of natural gas, the lower is the consumption. How-
ever, the calorific value and the nitrogen and carbon dioxide contents can vary
within a quality group. Therefore, the consumption of the vehicle may even vary
when driving with only one natural gas quality (either only H-gas or L-gas).
The engine control of your vehicle automatically adjusts to the different natural
gas qualities. Therefore both natural gas qualities can be mixed in the fuel tank. It
is therefore not necessary to run the natural gas tank completely empty to fill up
another quality. Ð Engine compartment
ä
Introduction
This chapter contains information on the following subjects:
Opening and closing the bonnet 110
Engine compartment overview 110
Checking the engine oil level 111
Replenishing the engine oil 111
Changing engine oil 112
Coolant 112
Checking the coolant level 112
Replenishing the coolant 113
Radiator fan 113
Checking the brake fluid 113
Changing the brake fluid 114
Windscreen washer system 114
There is a risk of injuries, scalding, accidents and fire when working in the en-
gine compartment, e.g. inspecting and replenishing oil and other fluids. For this
reason, it is essential to comply with the warning instructions stated below and
with the general applicable rules of safety. The vehicle's engine compartment is
a hazardous area . £
108 General Maintenance
Page 111 of 157
WARNING
■ Never open the bonnet if you can see steam or coolant flowing out of the
engine compartment – risk of scalding! Wait until the steam or coolant has
stopped escaping.
■ Turn off the engine and withdraw the ignition key.
■ If the vehicle is fitted with a manual gearbox, move the gearshift lever into
Neutral, or if the vehicle is fitted with an automatic gearbox, move the selec-
tor lever into position P .
■ Firmly apply the handbrake.
■ Allow the engine to cool.
■ For safety reasons, the bonnet must always be properly closed when driving.
This is why after closing the bonnet, the lock must always be checked to en-
sure it has engaged properly. ■ If you notice that the lock is not properly engaged while driving, stop the ve-
hicle immediately and close the bonnet – risk of an accident!
■ Keep children clear of the engine compartment.
■ Do not touch any hot engine parts – risk of burns!
■ Never spill fluids on the hot engine. Such fluids (e.g. the antifreeze con-
tained in the coolant) may ignite!
■ Avoid short circuits in the electrical system – particularly on the vehicle's
battery.
■ Never touch the radiator fan while the engine is still warm. The fan might
suddenly start running! ■ Never open the end cover of the coolant expansion reservoir while the en-
gine is still warm. The cooling system is pressurized! ■ When opening the end cover of the coolant expansion reservoir, cover it
with a cloth to protect your face, hands and arms from hot steam or hot cool-
ant.
■ Do not leave any items such as cloths or tools in the engine compartment.
■ If you wish to work under the vehicle, you must secure the vehicle from roll-
ing away and support it with suitable supporting blocks: the car jack is not
sufficient for this – risk of injury! WARNING (Continued)
■ If any inspection work has to be carried out when the engine is running,
there is an additional risk from rotating parts (e.g. V-belt, alternator, radiator
fan) and the high-voltage ignition system. The following must also be ob-
served: ■Never touch the electric wiring on the ignition system.
■ Always make sure that no jewellery, loose clothing or long hair can get
caught in rotating engine parts – hazard! Always remove any jewellery, tie
back long hair and wear tight fitting clothing before completing any work.
■ Additionally, the following warning instructions must be observed if work
has to be carried out on the fuel or electrical system. ■Always disconnect the vehicle battery from the electrical system.
■ Do not smoke.
■ Never work near open flames.
■ Always have a functioning fire extinguisher nearby. CAUTION
Always top up using the correct specification of fluids. This may result in major
operating problems and also vehicle damage! For the sake of the environment
In view of the environmentally friendly disposal of fluids, the specials tools and
knowledge required for such work, we recommend that fluids are changed by a
Škoda
Service Partner as part of the inspection service. Note
■ If you have any questions regarding the fluids, visit a
ŠKODA Service Partner.
■ Fluids with the correct specifications can be purchased from ŠKODA Original Ac-
cessories. Ð
109
Inspecting and replenishing
Page 115 of 157
Loss of coolant
A loss of coolant is first and foremost an
indication of a leak in the system. Do
not merely top up the coolant. Have the cooling system checked by a
ŠKODA spe-
cialist garage immediately. CAUTION
If a fault causes the engine to overheat, we recommend visiting a ŠKODA Service
Partner immediately, otherwise serious engine damage may occur. ÐReplenishing the coolant
First read and observe the introductory information and safety warn-
ings on page 108.
›
Switch off the engine.
› Allow the engine to cool.
› Place a cloth over the cap of the coolant expansion reservoir
» Fig. 101 on
page 112 and unscrew the cap carefully.
› Replenish the coolant.
› Turn the cap until it clicks into place.
Do not use an alternative additive if the specified coolant is not available in an
emergency. In this case, just use water and have the correct mixing ratio of water
and the coolant additive restored by a ŠKODA
specialist garage as soon as possi-
ble.
Only use new coolant to top up the system.
Do not fill the coolant above the mark “MAX” » Fig. 101 on page 112! Excess cool-
ant heats up and then is forced out of the cooling system through the pressure
relief valve in the cap. WARNING
■ The coolant additive and thus all of the coolant is harmful to your health.
Avoid contact with the coolant. Coolant vapours are also harmful to health.
Therefore always safely store the coolant additive in its original container out
of the reach of children – risk of poisoning!
■ If any coolant splashes into your eyes, immediately rinse out your eyes with
clear water and contact a doctor as soon as possible.
■ You should also consult a doctor without delay if you have inadvertently
swallowed coolant.
ä CAUTION
Do not continue your journey, if it is not possible to top up the coolant under
the prevailing conditions . Contact a
ŠKODA Service Partner to avoid the risk of
serious engine. Ð Radiator fan
First read and observe the introductory information and safety warn-
ings on page 108.
The radiator fan is driven by an electric motor and controlled according to the
coolant temperature.
After switching off the ignition, the radiator fan can intermittently continue to op-
erate for approx. 10 minutes.
Ð Checking the brake fluid
Fig. 102
Engine compartment: Brake fluid
reservoir
First read and observe the introductory information and safety warn-
ings on page 108.
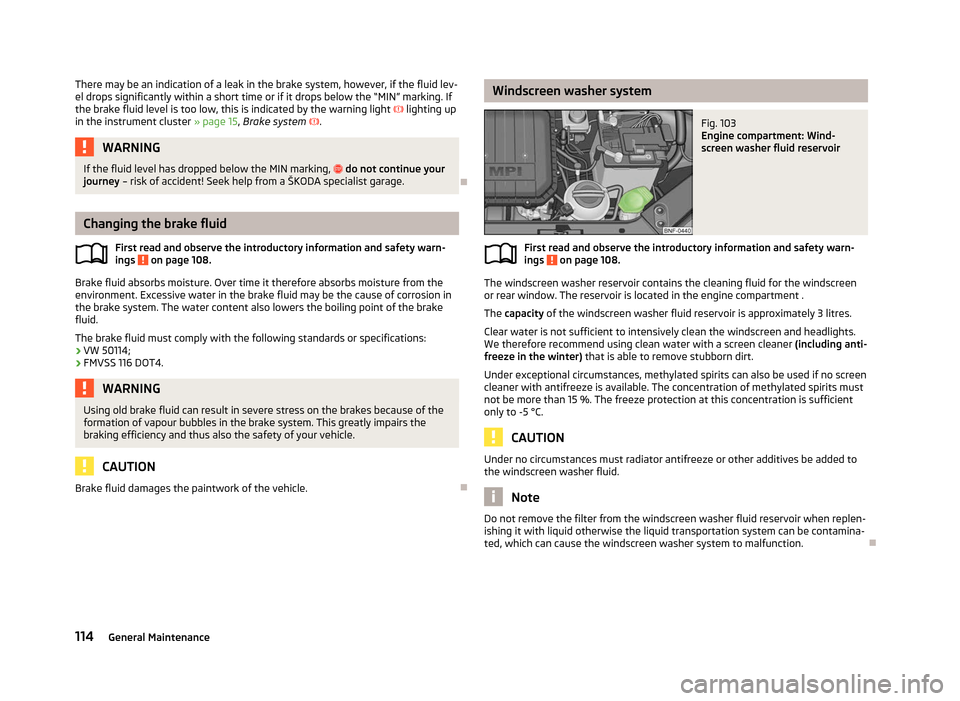
The brake fluid reservoir is located in the engine compartment.
›
Switch off the engine.
› Open the bonnet
» page 110.
› Check the level of brake fluid in the reservoir
» Fig. 102. The level must be be-
tween the
“MIN” and “MAX” markings.
When driving, a slight drop in the fluid level is caused by the wear-and-tear and
automatic adjustment of the brake pads, and is therefore perfectly normal. £
ä
ä
113
Inspecting and replenishing
Page 116 of 157
There may be an indication of a leak in the brake system, however, if the fluid lev-
el drops significantly within a short time or if it drops below the
“MIN” marking. If
the brake fluid level is too low, this is indicated by the warning light lighting up
in the instrument cluster » page 15, Brake system .WARNING
If the fluid level has dropped below the MIN marking, do not continue your
journey – risk of accident! Seek help from a
ŠKODA specialist garage.ÐChanging the brake fluid
First read and observe the introductory information and safety warn-
ings on page 108.
Brake fluid absorbs moisture. Over time it therefore absorbs moisture from the
environment. Excessive water in the brake fluid may be the cause of corrosion in
the brake system. The water content also lowers the boiling point of the brake
fluid.
The brake fluid must comply with the following standards or specifications:
› VW 50114;
› FMVSS 116 DOT4. WARNING
Using old brake fluid can result in severe stress on the brakes because of the
formation of vapour bubbles in the brake system. This greatly impairs the
braking efficiency and thus also the safety of your vehicle. CAUTION
Brake fluid damages the paintwork of the vehicle. Ð
ä Windscreen washer system
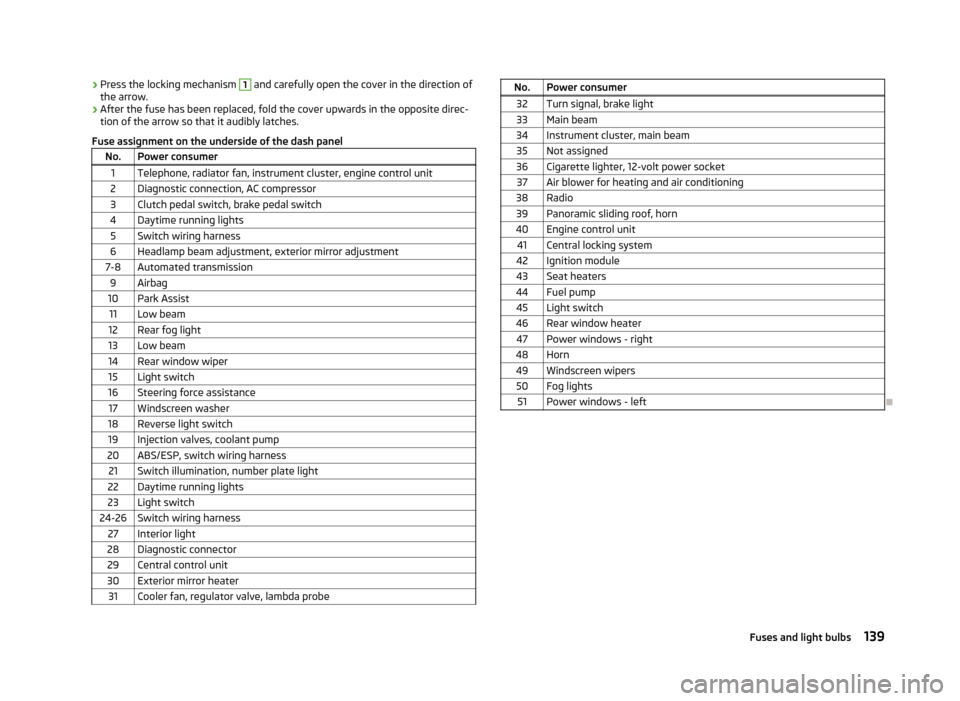
Fig. 103
Engine compartment: Wind-
screen washer fluid reservoir
First read and observe the introductory information and safety warn-
ings on page 108.
The windscreen washer reservoir contains the cleaning fluid for the windscreen
or rear window. The reservoir is located in the engine compartment .
The capacity
of the windscreen washer fluid reservoir is approximately 3
litres.
Clear water is not sufficient to intensively clean the windscreen and headlights.
We therefore recommend using clean water with a screen cleaner (including anti-
freeze in the winter) that is able to remove stubborn dirt.
Under exceptional circumstances, methylated spirits can also be used if no screen
cleaner with antifreeze is available. The concentration of methylated spirits must
not be more than 15 %. The freeze protection at this concentration is sufficient
only to -5 °C. CAUTION
Under no circumstances must radiator antifreeze or other additives be added to
the windscreen washer fluid. Note
Do not remove the filter from the windscreen washer fluid reservoir when replen-
ishing it with liquid otherwise the liquid transportation system can be contamina-
ted, which can cause the windscreen washer system to malfunction. Ð
ä
114 General Maintenance
Page 141 of 157
›
Press the locking mechanism 1
and carefully open the cover in the direction of
the arrow.
› After the fuse has been replaced, fold the cover upwards in the opposite direc-
tion of the arrow so that it audibly latches.
Fuse assignment on the underside of the dash panel No. Power consumer
1 Telephone, radiator fan, instrument cluster, engine control unit
2 Diagnostic connection, AC compressor
3 Clutch pedal switch, brake pedal switch
4 Daytime running lights 5 Switch wiring harness
6 Headlamp beam adjustment, exterior mirror adjustment
7-8 Automated transmission 9 Airbag
10 Park Assist 11 Low beam
12 Rear fog light
13 Low beam
14 Rear window wiper 15 Light switch
16 Steering force assistance 17 Windscreen washer
18 Reverse light switch 19 Injection valves, coolant pump
20 ABS/ESP, switch wiring harness 21 Switch illumination, number plate light
22 Daytime running lights
23 Light switch
24-26 Switch wiring harness 27 Interior light
28 Diagnostic connector 29 Central control unit
30 Exterior mirror heater 31 Cooler fan, regulator valve, lambda probe No. Power consumer
32 Turn signal, brake light
33 Main beam
34 Instrument cluster, main beam 35 Not assigned
36 Cigarette lighter, 12-volt power socket 37 Air blower for heating and air conditioning
38 Radio 39 Panoramic sliding roof, horn
40 Engine control unit 41 Central locking system
42 Ignition module
43 Seat heaters
44 Fuel pump 45 Light switch
46 Rear window heater 47 Power windows - right
48 Horn 49 Windscreen wipers50 Fog lights 51 Power windows - left Ð
139
Fuses and light bulbs
Page 142 of 157
Fuses in the engine compartment
Fig. 120
Engine compartment: Distribution board cover/fuses
First read and observe the introductory information and safety warn-
ings on page 138.
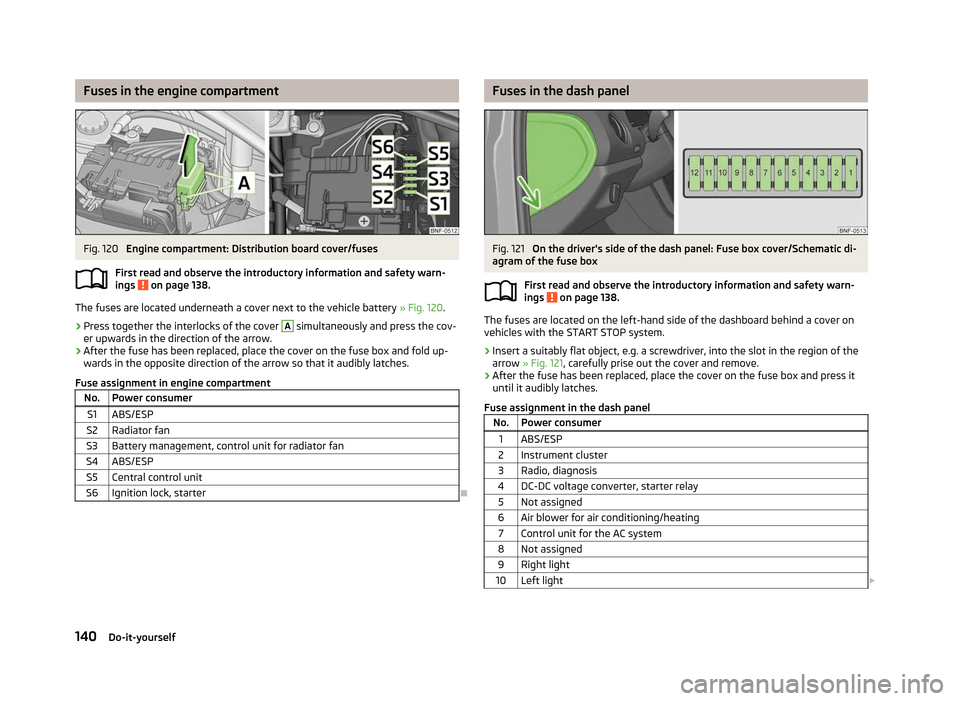
The fuses are located underneath a cover next to the vehicle battery
» Fig. 120.
› Press together the interlocks of the cover A
simultaneously and press the cov-
er upwards in the direction of the arrow.
› After the fuse has been replaced, place the cover on the fuse box and fold up-
wards in the opposite direction of the arrow so that it audibly latches.
Fuse assignment in engine compartment No. Power consumer
S1 ABS/ESP
S2 Radiator fan
S3 Battery management, control unit for radiator fan
S4 ABS/ESP S5 Central control unit
S6 Ignition lock, starter Ð
ä Fuses in the dash panel
Fig. 121
On the driver's side of the dash panel: Fuse box cover/Schematic di-
agram of the fuse box
First read and observe the introductory information and safety warn-
ings on page 138.
The fuses are located on the left-hand side of the dashboard behind a cover on
vehicles with the
START STOP system.
› Insert a suitably flat object, e.g. a screwdriver, into the slot in the region of the
arrow » Fig. 121, carefully prise out the cover and remove.
› After the fuse has been replaced, place the cover on the fuse box and press it
until it audibly latches.
Fuse assignment in the dash panel No. Power consumer
1 ABS/ESP
2 Instrument cluster
3 Radio, diagnosis
4 DC-DC voltage converter, starter relay 5 Not assigned
6 Air blower for air conditioning/heating 7 Control unit for the AC system
8 Not assigned 9 Right light
10 Left light £ ä
140 Do-it-yourself
Page 152 of 157
Head-Thorax 84
Headlights Driving abroad 95
Head restraint 40
Heating 52
Exterior mirror 36
Rear window 33
recommended settings 53
Seats 39
Heating rear window 33
Horn 7
I
Ignition 58
Ignition lock 58
Immobiliser 57
Instrument cluster 8
ISOFIX 89
J
Jacking points Raise vehicle 131
Jump-starting 134
L
Lever Main beam 31
Turn signal 31
Light Cockpit 32
Daytime running light 30
Fog lights 30
Hazard warning light system 31
Headlight beam adjustment 30
Headlight flasher 32
Low beam 29
Main beam 31
Parking light 29, 30Rear fog light 30
Replacing bulbs 141
Turn signal 31
Lights Switching lights on and off 29
Loads 145
Lock Central locking system 22
Locking Door opening lever 22
Emergency locking 25
Remote control 24
Locking and unlocking from the inside 23
luggage compartment see luggage compartment lid 25
Luggage compartment Bag hooks 42
cover 43
Emergency unlocking 26
Fixing nets 43
Lashing eyes 42
Unlocking the luggage compartment lid 26
Luggage compartment lid 25
M
Mirror Additional interior mirror 36
Exterior 36
Vanity 33
Mobile phone 72
Multifunction display Functions 11
Memory 11
Operation 12
O
Oil refer to Engine oil 111Onboard computer
see Multifunction display 11
Operation in winter De-icing windows 100
Vehicle battery 117
Outside temperature 12
Overview Engine compartment 110
Warning lights 14
P
Paint see Paint damage 99
Paint damage 99
Parking Parking aid 62
Visual parking system 63
Parking ticket holder 50
Passive Safety 74
Periodic wiping 34
Petrol refer to Fuel 105
Polishing the paintwork refer to Taking care of your vehicle 99
Power steering 57
Power windows Button in the driver's door 27
Preservation refer to Taking care of your vehicle 99
R
Radiator fan 113
Radio reception Operating problem 100
Raise vehicle 131
Rear mirror Exterior 36
Interior 35
150 Index