oil pressure SKODA CITIGO 2015 1.G Owner's Manual
[x] Cancel search | Manufacturer: SKODA, Model Year: 2015, Model line: CITIGO, Model: SKODA CITIGO 2015 1.GPages: 160, PDF Size: 23.1 MB
Page 4 of 160
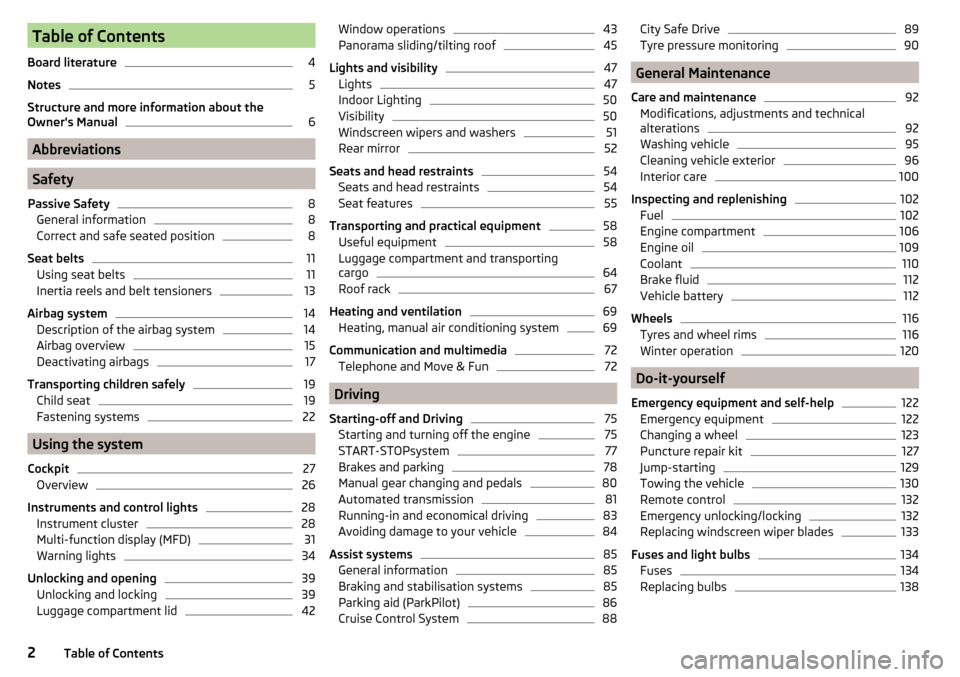
Table of Contents
Board literature4
Notes
5
Structure and more information about the
Owner's Manual
6
Abbreviations
Safety
Passive Safety
8
General information
8
Correct and safe seated position
8
Seat belts
11
Using seat belts
11
Inertia reels and belt tensioners
13
Airbag system
14
Description of the airbag system
14
Airbag overview
15
Deactivating airbags
17
Transporting children safely
19
Child seat
19
Fastening systems
22
Using the system
Cockpit
27
Overview
26
Instruments and control lights
28
Instrument cluster
28
Multi-function display (MFD)
31
Warning lights
34
Unlocking and opening
39
Unlocking and locking
39
Luggage compartment lid
42Window operations43Panorama sliding/tilting roof45
Lights and visibility
47
Lights
47
Indoor Lighting
50
Visibility
50
Windscreen wipers and washers
51
Rear mirror
52
Seats and head restraints
54
Seats and head restraints
54
Seat features
55
Transporting and practical equipment
58
Useful equipment
58
Luggage compartment and transporting
cargo
64
Roof rack
67
Heating and ventilation
69
Heating, manual air conditioning system
69
Communication and multimedia
72
Telephone and Move & Fun
72
Driving
Starting-off and Driving
75
Starting and turning off the engine
75
START-STOPsystem
77
Brakes and parking
78
Manual gear changing and pedals
80
Automated transmission
81
Running-in and economical driving
83
Avoiding damage to your vehicle
84
Assist systems
85
General information
85
Braking and stabilisation systems
85
Parking aid (ParkPilot)
86
Cruise Control System
88City Safe Drive89Tyre pressure monitoring90
General Maintenance
Care and maintenance
92
Modifications, adjustments and technical
alterations
92
Washing vehicle
95
Cleaning vehicle exterior
96
Interior care
100
Inspecting and replenishing
102
Fuel
102
Engine compartment
106
Engine oil
109
Coolant
110
Brake fluid
112
Vehicle battery
112
Wheels
116
Tyres and wheel rims
116
Winter operation
120
Do-it-yourself
Emergency equipment and self-help
122
Emergency equipment
122
Changing a wheel
123
Puncture repair kit
127
Jump-starting
129
Towing the vehicle
130
Remote control
132
Emergency unlocking/locking
132
Replacing windscreen wiper blades
133
Fuses and light bulbs
134
Fuses
134
Replacing bulbs
1382Table of Contents
Page 10 of 160
Safety
Passive Safety
General information
Introduction
This chapter contains information on the following subjects:
Before setting off
8
Driving safety
8
In this section of the instructions you will find important information, tips and
notes on the subject of passive safety.
We have combined everything here which you should be familiar with, for ex-
ample, regarding seat belts, airbags, safety of children and anything similar.
You can find further information on safety concerning you and those travelling
with you in the following chapters of this Owner's Manual.
The complete on-board literature should therefore always be in the vehicle.
This applies in particular, if you rent out or sell the vehicle.
Before setting off
For your own safety and the safety of the people travelling with you, please
pay attention to the following points before setting off.
▶ Ensure that the lighting and the turn signal system are functioning properly.
▶ Ensure that the function of the wipers and the condition of the wiper blades
are free of any defects.
▶ Ensure that all of the windows offer good visibility to the outside.
▶ Adjust the rear-view mirror so that vision to the rear is guaranteed.
▶ Ensure that the mirrors are not covered.
▶ Check the tyre inflation pressure.
▶ Check the engine oil, brake fluid and coolant level.
▶ Secure all items of luggage.
▶ Do not exceed the permissible axle loads and permissible gross weight of the
vehicle.
▶ Close all doors as well as the bonnet and boot lid.
▶ Ensure that no objects can obstruct the pedals.
▶
Protect children in suitable child seats with correctly fastened seat belts
» page 19 , Transporting children safely .
▶ Adopt the correct seated position » page 8, Correct and safe seated posi-
tion . Tell your passengers to assume the correct seated position.
Driving safety
The driver is fully responsible for himself and passengers, especially children. If
your driving safety is effected, you place yourself and the oncoming traffic at
risk.
The following guidelines must therefore be observed. ▶ Do not become distracted from concentrating on the traffic situation, (e.g. by
your passengers or mobile phone calls).
▶ Never drive when your driving ability is impaired, (e.g. due to medication, al-
cohol or drugs).
▶ Keep to the traffic regulations and the permissible speed limit.
▶ Always adjust the driving speed to the road, traffic and weather conditions.
▶ Take regular breaks on long journeys (at least every two hours).
The following list contains instructions for the Passenger which, if not ob-
served, may cause serious injuries or death. ▶ Do not lean against the dash panel.
▶ Do not put your feet on the dash panel.
The following list contains instructions for all Passengers which, if not ob-
served, may cause serious injuries or death. ▶ Do not sit only on the front part of the seat.
▶ Do not sit facing to the side.
▶ Do not lean out of the window.
▶ Do not put your limbs out of the window.
▶ Do not put your feet on the seat cushion.
Correct and safe seated position
Introduction
This chapter contains information on the following subjects:
Correct seat position of the driver
9
Adjusting the steering wheel position
9
Correct seated position for the front passenger
10
Correct seated position for the passengers in the rear seats
10
8Safety
Page 36 of 160
Warning lights
Introduction
This chapter contains information on the following subjects:
Handbrake
34
Braking system
34
Seat belt warning light
34
Alternator
35
Engine oil pressure too low
35
Coolant
35
Automated transmission
35
Power steering
36
Stability Control (ESC) / traction control (ASR)
36
Antilock brake system (ABS)
36
Tyre pressure
36
Rear fog light
37
Exhaust inspection system
37
Checking the engine electronics
37
Airbag system
37
Handbrake - automatic transmission
38
Brake pedal (automatic transmission)
38
Turn signal system
38
Cruise control system
38
Main beam
38
/
Rear seat belt warning light
38
City Safe Drive
38
/
START-STOP
38
The warning lights indicate certain functions or faults.
The lighting up of some warning lights may be accompanied by acoustic sig-
nals.
After switching on the ignition, some warning lights light up briefly as a func-
tion test.
If the tested systems are OK, the corresponding warning lights extinguishes
for a few seconds after switching on the ignition or after starting the engine.
WARNING■ Ignoring light-up indicator lamps in the instrument cluster and the control
symbols in the display may cause serious injury or damage to the vehicle.■
If you have to stop for technical reasons, then park the vehicle at a safe
distance from the traffic, switch off the engine and activate the hazard
warning light system » page 49. Place the warning triangle at the prescri-
bed distance.
■
The engine compartment of your car is a hazardous area. The following
warning instructions must be followed at all times when working in the en-
gine compartment » page 106, Engine compartment .
Handbrake
Read and observe
on page 34 first.
lights up - the hand brake is engaged.
An audible warning is also given if you drive the vehicle for at least 3 seconds
at a speed of more than 6 km/h.
Braking system
Read and observe
on page 34 first.
lights up - the brake fluid level in the brake system is too low or there is an
ABS fault.
›
Stop the vehicle, switch off the engine, and check the level of the brake fluid
» page 112 .
WARNING■
If the warning light illuminates together with the warning light
» page 36 , Antilock brake system (ABS) , stop driving! Seek help from
a specialist garage.■
A fault to the ABS system or the braking system can increase the vehi-
cle's braking distance – risk of accident!
Seat belt warning light
Read and observe
on page 34 first.
lights up - the driver or front passenger has not fastened their seat belt.
34Using the system
Page 37 of 160
At a speed of more than approximately 20 km/h the warning light flashes
and an audible warning sounds at a time.
The warning signal is switched of and the
indicator light is permanently lit if
the driver and front passenger have not fastened their seat belts within the
next 90 seconds.
Alternator
Read and observe
on page 34 first.
illuminates - the battery is not being charged whilst the engine is running.
Seek help from a specialist garage.
CAUTION
If in addition to the symbol the symbol » page 35 illuminates while driv-
ing, stop driving - risk of engine damage! Switch off the engine and seek as-
sistance from a specialist garage.
Engine oil pressure too low
Read and observe
on page 34 first.
lights up or flashes - the engine oil pressure is too low.
An audible signal sounds as a warning.
›
Stop the vehicle, switch off the engine, and check the engine oil level
» page 109 , Checking the oil level .
If the warning light illuminates or flashes, do not drive any further, even if
the oil level is correct! Switch off the engine and seek assistance from a spe-
cialist garage.
CAUTION
■ The oil pressure light is not an oil level indicator! One should therefore
check the oil level at regular intervals, preferably after every refuelling stop.■
If for some reason, it is not possible to top up the engine oil under the cur-
rent circumstances,
do not continue driving! Switch off the engine and seek
assistance from a specialist garage.
Coolant
Read and observe
on page 34 first.
lights up or flashes - the coolant temperature is too high or the coolant lev-
el is too low.
An audible signal sounds as a warning tone.
›
Stop the vehicle, switch off the engine, and allow the engine to cool down.
›
Check the coolant level, if necessary top up the coolant.
If the coolant is within the specified range, the cooling fan may be malfunc-
tioning.
›
Switch off the ignition.
›
Check the fuse for the cooling fan, replace if necessary.
If the coolant level and fan fuse are both OK but the warning light is still
illuminated ,
do not drive any further!
Seek help from a specialist garage.
Automated transmission
Read and observe
on page 34 first.
fault
lights up - there is a fault in the automatic transmission.
An audible signal sounds as a warning tone.
Do not continue to drive! Switch off the engine and seek assistance from a
specialist garage.
Functional impairment
lights up and gear change is not possible - for technical reasons there may
be an impairment of the automatic transmission.
›
Stop the car, turn the ignition off and on again.
If the warning light lights up after you again switch on the ignition, seek as-
sistance from a specialist garage.
Gearbox overheating
and is possibly also
illuminated - the automatic transmission is overheat-
ing.
An audible signal sounds as a warning tone.
35Instruments and control lights
Page 98 of 160
Clean wheels, door sills and similar parts last. Use a second sponge for such
areas.
Give the vehicle a good rinse after washing it and dry it off using a chamois
leather.WARNINGProtect your hands and arms from sharp-edged metal parts when cleaning
the underfloor or the inside of the wheel housings or the wheel trims – risk
of cuts!
CAUTION
■ Only apply slight pressure when cleaning the vehicle's paintwork.■Do not wash your vehicle in bright sunlight – risk of paint damage.
Automatic car wash systems
Read and observe
and on page 95 first.
The usual precautionary measures must be taken before washing the vehicle
in an automatic car wash system (e.g. closing the windows and the sliding/tilt-
ing roof etc.).
If your vehicle is fitted with any particular attached parts, such as a spoiler,
roof rack system etc., it is best to consult the operator of the car wash system
beforehand.
After an automatic wash with wax treatment, the lips of the wipers should be
cleaned with cleaning agents specially designed for the purpose, and then de-
greased.
CAUTION
■ Before driving through a car wash fold in the exterior mirrors - there is a risk
of damage.■
Before driving through a car wash unscrew the antenna - there is a risk of
damage.
Washing the vehicle with high-pressure cleaners
Read and observe
and on page 95 first.
When washing the vehicle with a high-pressure cleaner, the instructions foruse of the equipment must be observed. This applies in particular to the pres-
sure used and to the spraying distance .
Maintain a sufficiently large distance to the parking aid sensors and soft mate-
rials such as rubber hoses or insulation material.
CAUTION
■ The films should not be washed with any high-pressure cleaners - there is
risk of damage » page 97.■
Do not aim the water jet directly at the lock cylinders or the door or opening
joints when washing the vehicle in the winter – there is a risk of freezing.
■
The sensors of the parking aid can be sprayed only for a short time and there
must be a minimum distance of 10 cm - there is a risk of damage.
Cleaning vehicle exterior
Introduction
This chapter contains information on the following subjects:
Vehicle paintwork
97
Films
97
Plastic parts
98
Rubber seals
98
Chrome and anodized parts
98
Windows and external mirrors
98
Headlight glasses
98
Door closing cylinder
99
Cavity protection
99
Jack
99
Wheels
99
Under-body protection
99
Wiper blades
100
We recommend using vehicle care products from ŠKODA Original Accessories.
These are available from ŠKODA Partners. The usage instructions on the pack-
age must be observed.
96General Maintenance
Page 121 of 160
Tyre damageRead and observe
on page 116 first.
We recommend checking your tyres and wheel rims for damage (punctures,
cuts, splits and bulges, etc.) on a regular basis. Remove foreign bodies (e.g.
small stones) from the tyre tread immediately.
Drive over kerbs and other such obstacles slowly and at right angles wherever
possible in order to avoid damage to tyres and wheel trims.
Immediately replace damaged wheel rims or tyres.
WARNINGNever drive with damaged tyres – risk of accident.
CAUTION
The tyres must be protected from contact with substances such as oil, grease
and fuel, which could damage them. If the tyres come into contact with these
substances, then we recommend you have this checked out in a specialist
workshop.
Unidirectional tyres
Read and observe
on page 116 first.
The direction of rotation of the tyres is marked by arrows on the wall of the
tyre .
The indicated direction of rotation must be adhered to in order to ensure the
optimal characteristics of these tyres.
These characteristics mainly relate to the following: ▶ Increased driving stability.
▶ Reduced risk of aquaplaning.
▶ Reduced tyre noise and tyre wear.
Spare wheel
Read and observe
on page 116 first.
The size of the spare wheel is identical to that of the vehicle factory installedwheels.
After changing the spare wheel, the tyre pressure should be adjusted.
In vehicles with tyre pressure monitoring, the tyre pressure values should be
saved » page 91 .WARNING■
If, you get a puncture and a spare tyre has to be mounted with opposite
direction of rotation, then drive carefully. The best properties of the tyre
are no longer present in this situation.■
If the dimensions or design of the spare wheel differ from the tyres fitted
to the vehicle (e.g. winter tyres or low-profile tyres), it must only be used
briefly in the event of a puncture and if an appropriately cautious style of
driving is adopted.
■
Never use the temporary spare wheel if it is damaged.
Spare wheel
Read and observe
on page 116 first.
A yellow warning label is always displayed on the rim of the temporary spare
wheel.
Please note the following if you intend to use the temporary spare wheel. ▶ The warning label must not be covered after installing the wheel.
▶ Be particularly observant when driving.
▶ The temporary spare wheel is inflated to the maximum inflation pressure for
the vehicle » page 117.
▶ Only use this temporary spare wheel to reach the nearest specialist garage,
since it is not intended for permanent use.
If you need to use a spare wheel, make sure to fit a standard wheel of the ap-
propriate dimensions and design as soon as possible.
In vehicles with tyre pressure monitoring, the tyre pressure values should be
saved » page 91 .
WARNING■
Never drive with more than one temporary spare wheel mounted!■Only use the temporary spare wheel when absolutely necessary.■
Avoid accelerating at full throttle, sharp braking and fast cornering.
■
The snow chains cannot be used on the temporary spare wheel.
■
If the dimensions or design of the temporary spare wheel differ from the
tyres fitted, never drive faster than 80 km/h (or 50 mph).
119Wheels
Page 128 of 160
The mounting points are located on the metal bar of the lower sill on the un-
derside of your vehicle. The positions of these are embossed by means of
markings on the side surface of the lower sill » Fig. 122.›
Support the base plate of the jack with its full area resting on level ground
and ensure that the jack is located in a vertical position at the jacking point
» Fig. 123 -
.
›
Position the lifting jack below the jacking point with the crank and move it up
until its claw encloses the web » Fig. 123 -
.
›
Continue turning up the jack until the wheel is just about lifted off the
ground.
WARNING■ If the wheel has to be changed on a slope, first of all block the opposite
wheel with a stone or similar object to prevent the vehicle from unexpect-
edly rolling away.■
Secure the base plate of the lifting jack with suitable means to prevent
possible moving. A soft and slippery ground under the base plate may move
the lifting jack, causing the vehicle to fall down. It is therefore always nec-
essary to place the lifting jack on a solid surface or use a wide and stable
base. If the surface is smooth, such as on cobbled stones, tiled floor etc.,
use a non-slip base (e.g. a rubber foot mat).
■
Only attach the lifting jack to the attachment points provided for this pur-
pose.
■
Always raise the vehicle with the doors closed.
■
Never position any body parts, such as arms or legs under the vehicle,
while the vehicle is raised with a lifting jack.
■
When the vehicle is raised, never start the engine.
CAUTION
It is important to ensure that the jack is correctly attached to the web of the
lower fork leg - risk of damage to the vehicle.
Remove the wheel / fix
When changing a wheel, the following instructions must be followed.
›
Remove the full wheel trim or the caps of the wheel bolts.
›
First of all slacken the anti-theft wheel bolt and then the other wheel bolts.
›
Jack up the vehicle until the wheel that needs changing is clear of the
ground.
› Unscrew the wheel bolts and place them on a clean surface (cloth, paper,
etc.).›
Remove the wheel carefully.
›
Attach the wheel and slightly screw on the wheel bolts.
›
Lower the vehicle.
›
Alternately tighten wheel bolts opposite (diagonally) with the wheel wrench.
Tighten the anti-theft wheel bolt last.
›
Replace the wheel trim or the caps.
When fitting unidirectional tyres, ensure that the direction of rotation is cor-
rect » page 119 .
All bolts must be clean and must turn easily.
If it is established when changing a wheel that the wheel bolts are corroded and difficult to move, then these must be replaced.
Under no circumstances grease or oil the wheel bolts!
WARNINGUndo the wheel bolts only a little (about one turn) provided that the vehicle
has not yet been jacked up. Otherwise the wheel could become loose and
fall off.
Follow-up work
After changing the wheel, the following work must be carried out.
›
Stow the replaced wheel in the wheel well and secure it with a special nut.
›
Stow the tool kit in the space provided and secure using the band.
›
Check the tyre pressure on the fitted wheel as soon as possible.
›
Have the tightening torque of the wheel bolts checked with a torque wrench
as soon as possible.
After changing the wheel, the tyre pressure should be adjusted. In vehicles
with tyre pressure monitoring, save tyre pressure values » page 91.
Replace the damaged wheel or consult a specialist garage about repair op-
tions.
The prescribed tightening torque of the wheel bolts is 110 Nm.
126Do-it-yourself
Page 153 of 160
Locking the door without a locking cylinderEmergency132
Low tyre pressure warning refer to the tyre pressure monitoring
90
Luggage compartment64
Cover66
Fixing nets65
Lashing eyes65
Lighting64
unlock manually133
Unlock the boot lid133
Variable loading floor67
Luggage compartment cover66
Luggage compartment lid42
Luggage storage Bag hooks
65
M
Main beam
48
Warning light38
Manual gear changing see gear changing
80
Maximum permissible weights
142
Mechanical window lifter open and close
44
Mechanical window lifters43
Media see Radio
4
MFD see multi-function display
31
Mirror Exterior mirrors
53
Interior mirror53
Mirrors Vanity
51
Mobile phone72
Modes of automated transmission81
Modifications92
Modifications and technical alterations Airbags94
Service93
Spoiler94
Trailer operation95
Move & Fun72
install/remove72
operation73
Multi-function display Functions
31
Memory33
Operation31
Multi-function display operation31
Multimedia holder62
N
N1
67
Nameplate142
Natural gas vehicles see CNG
105
Nets65
Notes for driving with repaired tyres129
Notes on using wheels116
O
Oil See Engine oil
109
On-board computer see multi-function display
31
Operate wiper
52
Operating weight143
Operation in winter Vehicle battery
114
Original accessories93
Outside temperature32
Overview Engine compartment
108
Warning lights34
P
Parking
80
Parking aid86
Visual parking system87
Parking aid86
Function87
Parking space80
Parking vehicle80
ParkPilot86
Part replacement92
Passive safety Before setting off
8
Driving safety8
Passive Safety8
Pedals80
Footmats80
Petrol see fuel
103
Photo holder62
Plastic parts98
Pocket holder63
Pockets on the front seat rests64
Polishing the vehicle paintwork see vehicle care
97
Power outlet 12 V
61
Power steering Warning light
36
Power windows43
Practical equipment Net pockets on the front seat rests
64
Photo holder62
Pocket holder63
Reflective vest122
Practical features 12-Volt power outlet
61
Waste container59
Protective films97
151Index
Page 155 of 160
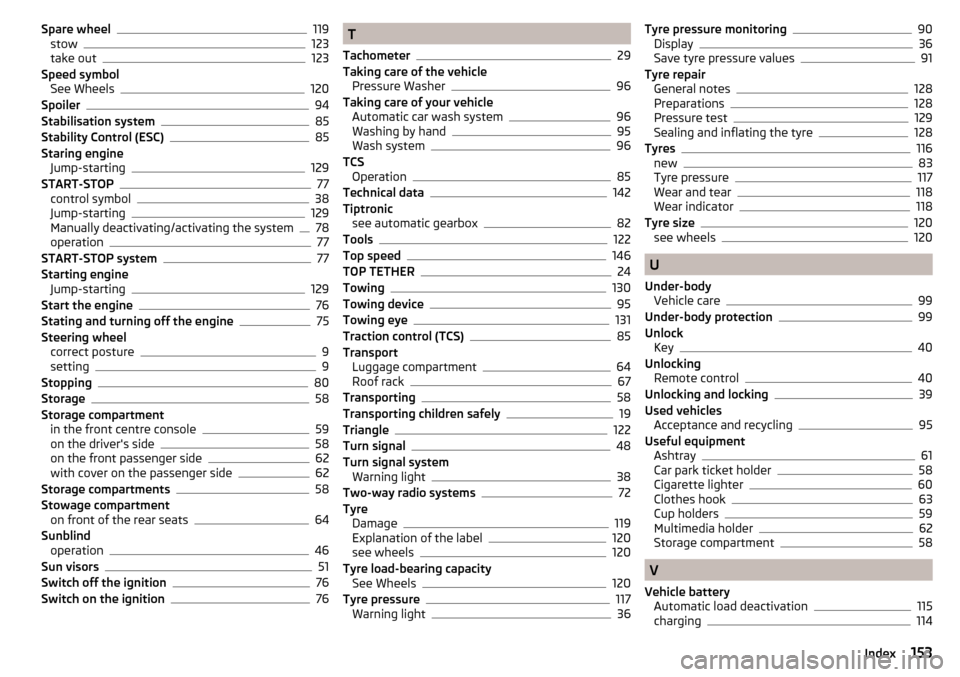
Spare wheel119
stow123
take out123
Speed symbol See Wheels
120
Spoiler94
Stabilisation system85
Stability Control (ESC)85
Staring engine Jump-starting
129
START-STOP77
control symbol38
Jump-starting129
Manually deactivating/activating the system78
operation77
START-STOP system77
Starting engine Jump-starting
129
Start the engine76
Stating and turning off the engine75
Steering wheel correct posture
9
setting9
Stopping80
Storage58
Storage compartment in the front centre console
59
on the driver's side58
on the front passenger side62
with cover on the passenger side62
Storage compartments58
Stowage compartment on front of the rear seats
64
Sunblind operation
46
Sun visors51
Switch off the ignition76
Switch on the ignition76
T
Tachometer
29
Taking care of the vehicle Pressure Washer
96
Taking care of your vehicle Automatic car wash system
96
Washing by hand95
Wash system96
TCS Operation
85
Technical data142
Tiptronic see automatic gearbox
82
Tools122
Top speed146
TOP TETHER24
Towing130
Towing device95
Towing eye131
Traction control (TCS)85
Transport Luggage compartment
64
Roof rack67
Transporting58
Transporting children safely19
Triangle122
Turn signal48
Turn signal system Warning light
38
Two-way radio systems72
Tyre Damage
119
Explanation of the label120
see wheels120
Tyre load-bearing capacity See Wheels
120
Tyre pressure117
Warning light36
Tyre pressure monitoring90
Display36
Save tyre pressure values91
Tyre repair General notes
128
Preparations128
Pressure test129
Sealing and inflating the tyre128
Tyres116
new83
Tyre pressure117
Wear and tear118
Wear indicator118
Tyre size120
see wheels120
U
Under-body Vehicle care
99
Under-body protection99
Unlock Key
40
Unlocking Remote control
40
Unlocking and locking39
Used vehicles Acceptance and recycling
95
Useful equipment Ashtray
61
Car park ticket holder58
Cigarette lighter60
Clothes hook63
Cup holders59
Multimedia holder62
Storage compartment58
V
Vehicle battery Automatic load deactivation
115
charging114
153Index