roof SKODA CITIGO 2015 1.G Owner's Manual
[x] Cancel search | Manufacturer: SKODA, Model Year: 2015, Model line: CITIGO, Model: SKODA CITIGO 2015 1.GPages: 160, PDF Size: 23.1 MB
Page 4 of 160
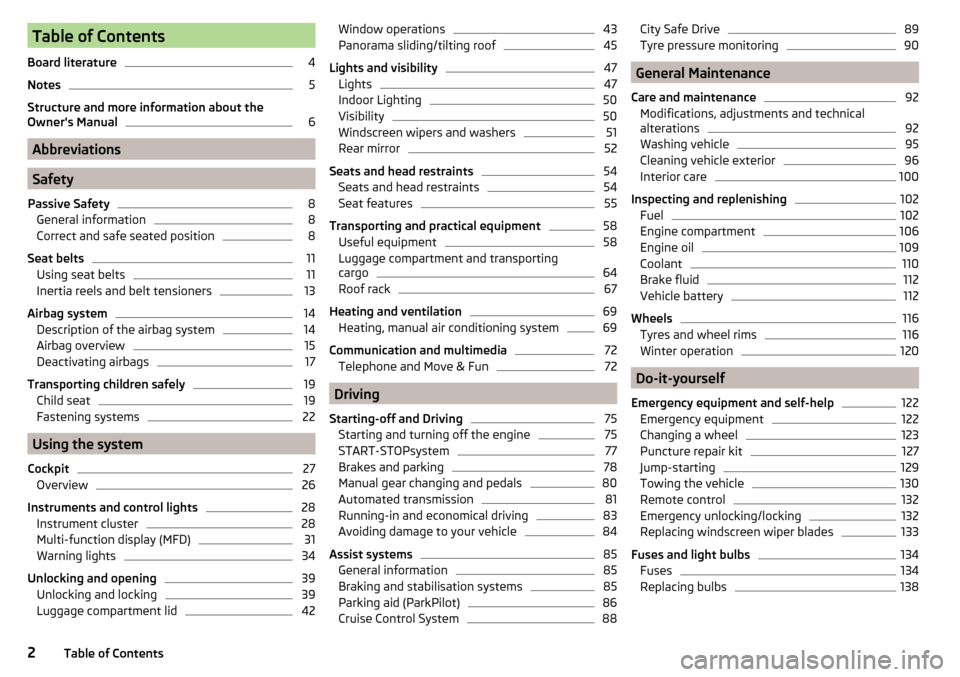
Table of Contents
Board literature4
Notes
5
Structure and more information about the
Owner's Manual
6
Abbreviations
Safety
Passive Safety
8
General information
8
Correct and safe seated position
8
Seat belts
11
Using seat belts
11
Inertia reels and belt tensioners
13
Airbag system
14
Description of the airbag system
14
Airbag overview
15
Deactivating airbags
17
Transporting children safely
19
Child seat
19
Fastening systems
22
Using the system
Cockpit
27
Overview
26
Instruments and control lights
28
Instrument cluster
28
Multi-function display (MFD)
31
Warning lights
34
Unlocking and opening
39
Unlocking and locking
39
Luggage compartment lid
42Window operations43Panorama sliding/tilting roof45
Lights and visibility
47
Lights
47
Indoor Lighting
50
Visibility
50
Windscreen wipers and washers
51
Rear mirror
52
Seats and head restraints
54
Seats and head restraints
54
Seat features
55
Transporting and practical equipment
58
Useful equipment
58
Luggage compartment and transporting
cargo
64
Roof rack
67
Heating and ventilation
69
Heating, manual air conditioning system
69
Communication and multimedia
72
Telephone and Move & Fun
72
Driving
Starting-off and Driving
75
Starting and turning off the engine
75
START-STOPsystem
77
Brakes and parking
78
Manual gear changing and pedals
80
Automated transmission
81
Running-in and economical driving
83
Avoiding damage to your vehicle
84
Assist systems
85
General information
85
Braking and stabilisation systems
85
Parking aid (ParkPilot)
86
Cruise Control System
88City Safe Drive89Tyre pressure monitoring90
General Maintenance
Care and maintenance
92
Modifications, adjustments and technical
alterations
92
Washing vehicle
95
Cleaning vehicle exterior
96
Interior care
100
Inspecting and replenishing
102
Fuel
102
Engine compartment
106
Engine oil
109
Coolant
110
Brake fluid
112
Vehicle battery
112
Wheels
116
Tyres and wheel rims
116
Winter operation
120
Do-it-yourself
Emergency equipment and self-help
122
Emergency equipment
122
Changing a wheel
123
Puncture repair kit
127
Jump-starting
129
Towing the vehicle
130
Remote control
132
Emergency unlocking/locking
132
Replacing windscreen wiper blades
133
Fuses and light bulbs
134
Fuses
134
Replacing bulbs
1382Table of Contents
Page 47 of 160
Opening›Lightly press the button down and hold it until the window has moved into
the desired position.
Releasing the button causes the window to halt immediately.
Closing›
Pull gently on the top edge of the button and hold until the window has
moved into the desired position.
Releasing the button causes the window to halt immediately.
Manually opening/closing rear windows
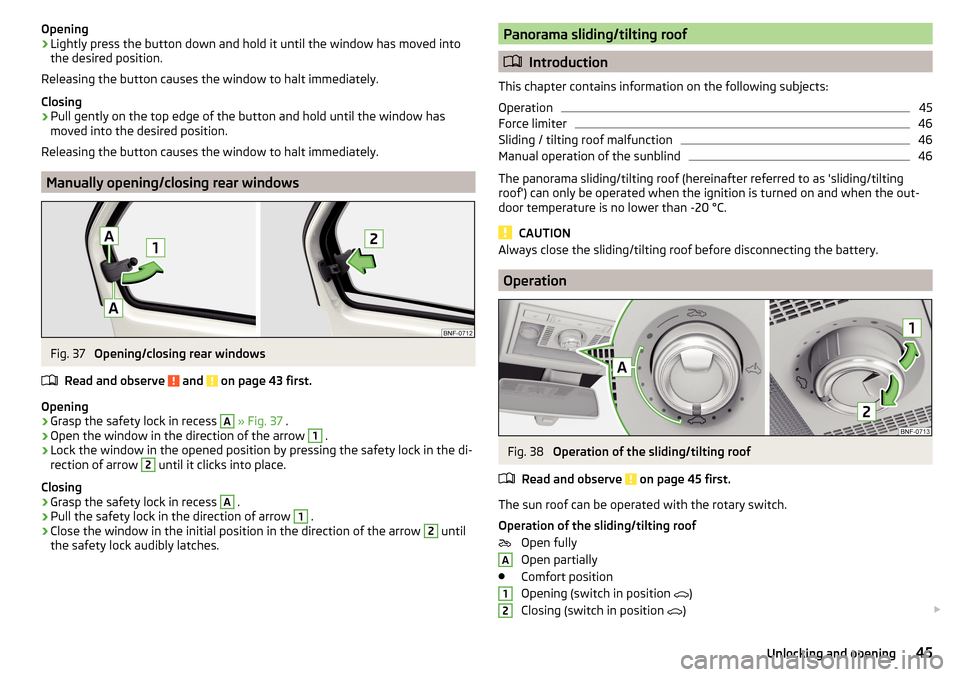
Fig. 37
Opening/closing rear windows
Read and observe
and on page 43 first.
Opening
›
Grasp the safety lock in recess
A
» Fig. 37 .
›
Open the window in the direction of the arrow
1
.
›
Lock the window in the opened position by pressing the safety lock in the di-
rection of arrow
2
until it clicks into place.
Closing
›
Grasp the safety lock in recess
A
.
›
Pull the safety lock in the direction of arrow
1
.
›
Close the window in the initial position in the direction of the arrow
2
until
the safety lock audibly latches.
Panorama sliding/tilting roof
Introduction
This chapter contains information on the following subjects:
Operation
45
Force limiter
46
Sliding / tilting roof malfunction
46
Manual operation of the sunblind
46
The panorama sliding/tilting roof (hereinafter referred to as 'sliding/tilting
roof') can only be operated when the ignition is turned on and when the out-
door temperature is no lower than -20 °C.
CAUTION
Always close the sliding/tilting roof before disconnecting the battery.
Operation
Fig. 38
Operation of the sliding/tilting roof
Read and observe
on page 45 first.
The sun roof can be operated with the rotary switch.
Operation of the sliding/tilting roof Open fully
Open partially
Comfort position
Opening (switch in position
)
Closing (switch in position
)
A1245Unlocking and opening
Page 48 of 160
WARNINGBe careful when operating the sliding/tilting roof to avoid crushing injuries
– risk of injury!
CAUTION
During the winter it may be necessary to remove any ice and snow in the vicin-
ity of the sliding/tilting roof before opening it to prevent any damage to the
opening mechanism.
Force limiter
Read and observe
on page 45 first.
The sliding/tilting roof is fitted with a force limiter.
The sliding/tilting roof stops and moves back several centimetres when it can-
not be closed because there is something in the way (e.g. ice).
The sliding/tilting roof only closes without the force limiter activated at the
third attempt at closing. The time interval between the individual closing at-
tempts should not exceed 5 s - the sliding/tilting roof closes with full force! .
Sliding / tilting roof malfunction
Read and observe
on page 45 first.
If the battery has been disconnected and reconnected, it is possible that the
sliding/tilting roof will not operate. The sun roof must be activated.
Activation sequence
›
Switch on the ignition.
›
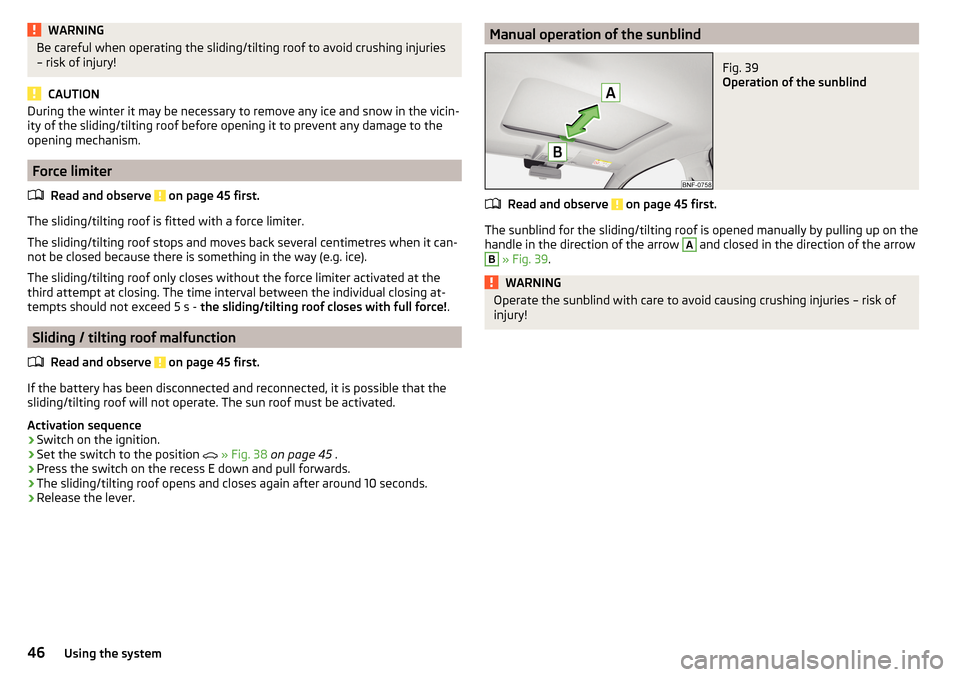
Set the switch to the position
» Fig. 38 on page 45 .
›
Press the switch on the recess E down and pull forwards.
›
The sliding/tilting roof opens and closes again after around 10 seconds.
›
Release the lever.
Manual operation of the sunblindFig. 39
Operation of the sunblind
Read and observe on page 45 first.
The sunblind for the sliding/tilting roof is opened manually by pulling up on the
handle in the direction of the arrow
A
and closed in the direction of the arrow
B
» Fig. 39 .
WARNINGOperate the sunblind with care to avoid causing crushing injuries – risk of
injury!46Using the system
Page 69 of 160
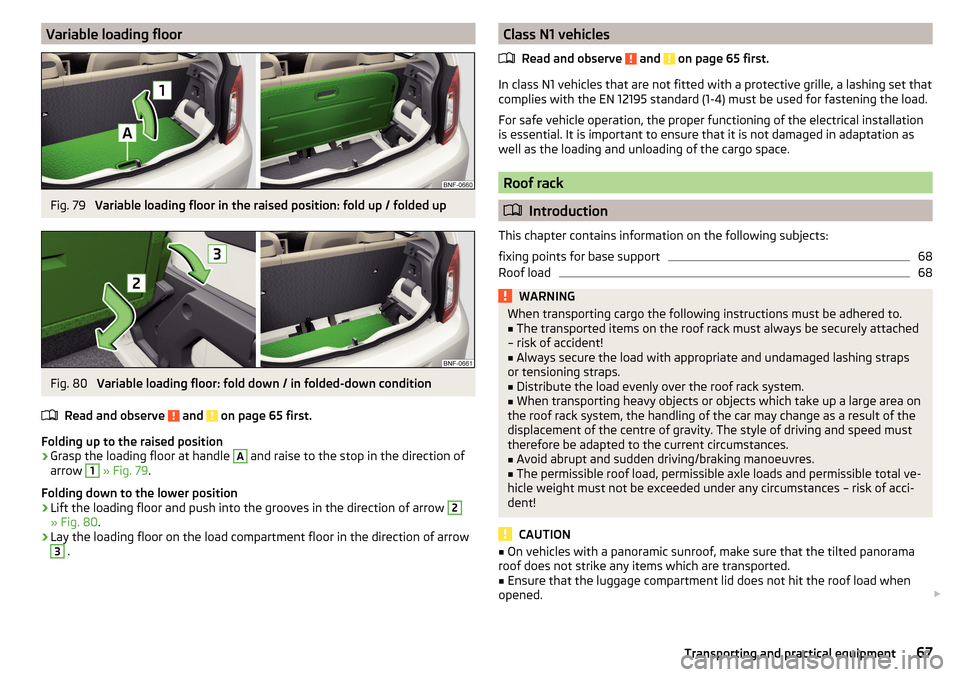
Variable loading floorFig. 79
Variable loading floor in the raised position: fold up / folded up
Fig. 80
Variable loading floor: fold down / in folded-down condition
Read and observe
and on page 65 first.
Folding up to the raised position
›
Grasp the loading floor at handle
A
and raise to the stop in the direction of
arrow
1
» Fig. 79 .
Folding down to the lower position
›
Lift the loading floor and push into the grooves in the direction of arrow
2
» Fig. 80 .
›
Lay the loading floor on the load compartment floor in the direction of arrow
3
.
Class N1 vehicles
Read and observe
and on page 65 first.
In class N1 vehicles that are not fitted with a protective grille, a lashing set that
complies with the EN 12195 standard (1-4) must be used for fastening the load.
For safe vehicle operation, the proper functioning of the electrical installation
is essential. It is important to ensure that it is not damaged in adaptation as
well as the loading and unloading of the cargo space.
Roof rack
Introduction
This chapter contains information on the following subjects:
fixing points for base support
68
Roof load
68WARNINGWhen transporting cargo the following instructions must be adhered to.■The transported items on the roof rack must always be securely attached
– risk of accident!■
Always secure the load with appropriate and undamaged lashing straps
or tensioning straps.
■
Distribute the load evenly over the roof rack system.
■
When transporting heavy objects or objects which take up a large area on
the roof rack system, the handling of the car may change as a result of the
displacement of the centre of gravity. The style of driving and speed must
therefore be adapted to the current circumstances.
■
Avoid abrupt and sudden driving/braking manoeuvres.
■
The permissible roof load, permissible axle loads and permissible total ve-
hicle weight must not be exceeded under any circumstances – risk of acci-
dent!
CAUTION
■ On vehicles with a panoramic sunroof, make sure that the tilted panorama
roof does not strike any items which are transported.■
Ensure that the luggage compartment lid does not hit the roof load when
opened.
67Transporting and practical equipment
Page 70 of 160
■The height of the vehicle changes after mounting a roof rack system plus the
load to be transported. Compare the vehicle height with available clearances,
such as underpasses and garage doors.■
Ensure the roof aerial is not impaired by the load being transported.
Note
We recommend that you use a roof rack from ŠKODA Original Accessories.
fixing points for base support
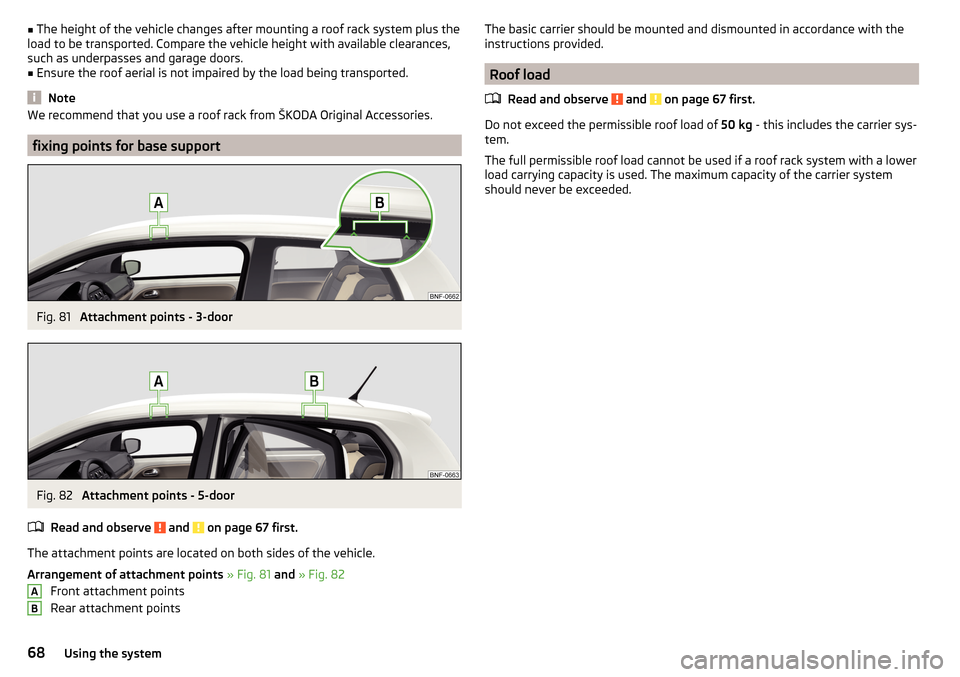
Fig. 81
Attachment points - 3-door
Fig. 82
Attachment points - 5-door
Read and observe
and on page 67 first.
The attachment points are located on both sides of the vehicle.
Arrangement of attachment points » Fig. 81 and » Fig. 82
Front attachment points
Rear attachment points
ABThe basic carrier should be mounted and dismounted in accordance with the
instructions provided.
Roof load
Read and observe
and on page 67 first.
Do not exceed the permissible roof load of 50 kg - this includes the carrier sys-
tem.
The full permissible roof load cannot be used if a roof rack system with a lower
load carrying capacity is used. The maximum capacity of the carrier system
should never be exceeded.
68Using the system
Page 85 of 160
The gearbox shifts down one or more gears depending on the vehicle speed
and engine speed, and the vehicle accelerates.
The gearbox does not shift up into the highest gear until the engine has
reached its maximum revolutions for this gear range.WARNINGRapid acceleration, particularly on slippery roads, can lead to loss of vehicle
control – risk of accident!
Running-in and economical driving
Introduction
This chapter contains information on the following subjects:
Running-in
83
Tips for economical driving
83
The fuel consumption, degree of pollution and vehicle wear depend on driving
style, road condition, weather conditions and the like.
Running-in
Driving in the engine
The engine has to be run in during the first 1 500 kilometres. During this peri-
od, the driving style decides on the quality of the driving-in process.
During the first 1 000 km we recommend not driving faster than 3/4 of the
maximum permissible engine speed, not to drive at full throttle and to dis-
pense with the trailer.
In the area of 1,000 to 1,500 kilometres the engine load can be increased up
to the maximum permitted engine speed.
New tyres
New tyres must firstly be “run in” since they do not offer optimal grip at first.
Therefore, drive especially carefully for the first 500 km or so.
New brake pads
New brake pads have to first “grind in” because these do not initially have the
best possible braking effect.
Therefore, drive especially carefully for the first 200 km or so.
Tips for economical driving
To achieve the lowest possible fuel consumption, the following instructions
must be observed.
Looking ahead when driving
Avoid unnecessary acceleration and braking.
Switch in an energy saving and timely manner Observe the recommended gear » page 30.
Avoid full throttle and high speeds
Fuel consumption can be reduced by half if only three-quarters of the possible
top speed of your vehicle is used.
Reducing idling
If the vehicle is fitted with the START - STOP system there is an automatic re-
duction of the idling. If the engine is stopped on vehicles without START-STOP
system, such as when waiting in a traffic jam, the fuel economy is already
greater after 30 - 40 s than the fuel quantity which is required for engine re-
start.
Avoid short distances
When driving a short distance of less than about 4 km, the engine cannot
reach its operating temperature. As long as the engine has not reached oper-
ating temperature, the fuel consumption is significantly higher than with the
engine hot.
Pay attention to the correct tyre inflation pressure being maintained
Further information » page 117.
Avoid unnecessary ballast
Per 100 kg of weight, consumption increases by about 0.3 l/100 km. At a speed
of 100 - 120 km/h, a vehicle fitted with a roof rack cross member without a load
will use about 10 % more fuel than normal due to the increased aerodynamic
drag.
Saving electricity
Only turn on electrical consumers (e.g. seat, window and mirror heating and
similar) for as long as necessary.
Use the cooling system economically
The air conditioning system compressor uses power from the engine when in
cooling mode, which will affect the fuel consumption. 83Starting-off and Driving
Page 92 of 160
▶When the laser sensor is dirty or obscured.
▶ When the vehicles are very dirty and have a low level of reflection.
If the system is not available or there is a system malfunction, the indicator
symbol flashes
slowly in the display of the instrument cluster.WARNING■
The windscreen may be neither blocked nor covered with dirt in the area
of the laser sensor. This can lead to impaired function of the sensor - risk of
accidents!WARNINGThe laser beam from the laser sensor can cause serious eye injuries. The la-
ser beam is not visible to the human eye.■
Never use optical devices, e.g. a range-finder camera or magnifying glass
to look into the laser sensor.
■
The laser beam can also be active when the system is disabled or is not
available.
CAUTION
■ Remove the snow from the windscreen in the area of the laser sensor with a
hand brush and the ice with a solvent-free de-icing spray.■
If the laser sensor range on the windscreen has scratches, cracks, etc, re-
place the windscreen. Only use windscreens approved by the manufacturer.
■
When replacing the windscreen wiper blades, only use windscreen wiper
blades approved by the manufacturer.
Note
If an automatic brake intervention is triggered by the system, the pressure in
the brake system increases and the brake pedal cannot be operated with the
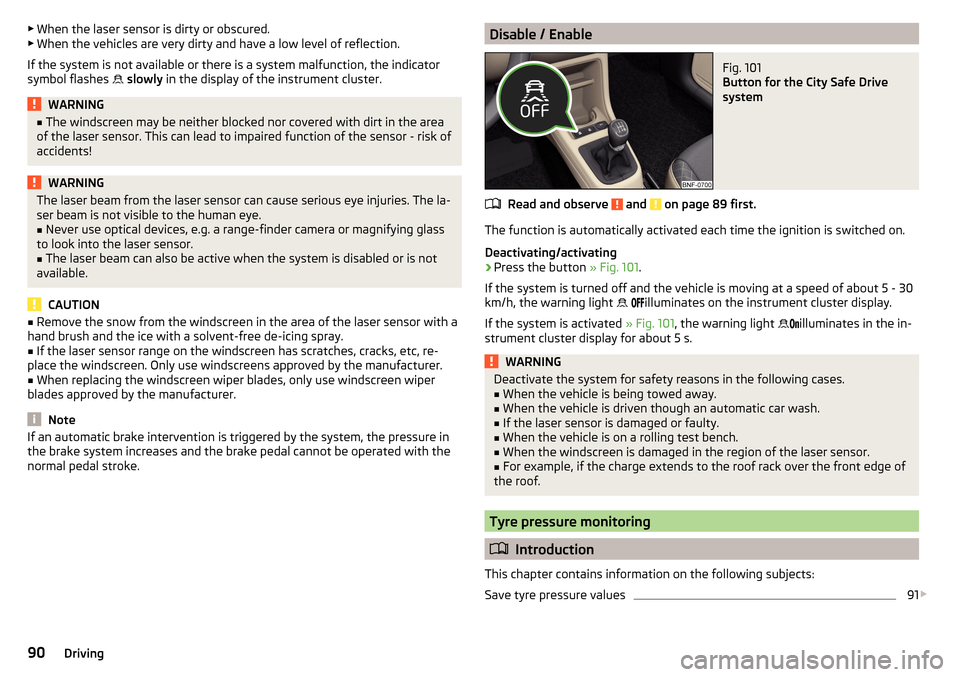
normal pedal stroke.Disable / EnableFig. 101
Button for the City Safe Drive
system
Read and observe and on page 89 first.
The function is automatically activated each time the ignition is switched on.
Deactivating/activating
›
Press the button » Fig. 101.
If the system is turned off and the vehicle is moving at a speed of about 5 - 30
km/h, the warning light
illuminates on the instrument cluster display.
If the system is activated » Fig. 101, the warning light
illuminates in the in-
strument cluster display for about 5 s.
WARNINGDeactivate the system for safety reasons in the following cases.■When the vehicle is being towed away.■
When the vehicle is driven though an automatic car wash.
■
If the laser sensor is damaged or faulty.
■
When the vehicle is on a rolling test bench.
■
When the windscreen is damaged in the region of the laser sensor.
■
For example, if the charge extends to the roof rack over the front edge of
the roof.
Tyre pressure monitoring
Introduction
This chapter contains information on the following subjects:
Save tyre pressure values
91
90Driving
Page 97 of 160
WARNINGThe airbag system operates using pressure sensors located in the front
doors. For this reason, no adjustments may be carried out to the doors or
door panels (e.g. installation of additional loudspeakers). Resulting damage
can have a negative impact on the function of the airbag system. Any work
on the front doors and their door panels must be carried out by a specialist
garage. The following instructions must be observed.■
Never drive with inner door panels removed.
■
Never drive if parts of the inner door panel have been removed and the
resulting openings have not been properly sealed.
■
Never drive if the loudspeakers in the doors have been removed, unless
the loudspeaker openings have been properly sealed.
■
Always make sure that the openings are covered or filled if additional
loudspeakers or other equipment parts have been installed in the inner
door panels.
Trailer operation
Read and observe
on page 92 first.
The vehicle is not approved for towing a trailer. The vehicle is not factory-
equipped with a towing device and it cannot be retrofitted with a towing de-
vice.
WARNINGNever attach a towing device to the vehicle.
Acceptance and recycling of used vehicles
Read and observe
on page 92 first.
ŠKODA meets the requirements of the brand and its products with regard to
protecting the environment and the preserving resources. All new ŠKODA ve-
hicles are 95% recyclable.
Note
You can find more detailed information about the trade-in and recycling of old
cars from a specialist garage.Washing vehicle
Introduction
This chapter contains information on the following subjects:
Washing by hand
95
Automatic car wash systems
96
Washing the vehicle with high-pressure cleaners
96
The best way to protect your vehicle against harmful environmental influences
is frequent washing.
The longer insect residues, bird droppings, road salt and other aggressive de-
posits remain on the paintwork of your vehicle, the more detrimental their de-
structive effect can be. High temperatures, such as those caused by intensive
sun's rays, accentuate this caustic effect.
It is essential to also thoroughly clean the underside of the vehicle at the end
of the winter.
WARNINGWhen washing your vehicle in the winter: Water and ice in the braking sys-
tem can affect the braking efficiency – risk of accident!
CAUTION
The temperature of the water used for cleaning must not exceed 60 °C – risk
of damaging the vehicle.
For the sake of the environment
Only wash the vehicle at washing bays intended for this purpose.
Washing by hand
Read and observe
and on page 95 first.
Soak the dirt with plenty of water and rinse as well as possible.
Clean the vehicle with a soft sponge, a washing glove or a washing brush.
Work from the top to the bottom – starting with the roof.
For stubborn dirt, agents specifically intended for this purpose are to be used. Wash out the sponge or washing glove thoroughly at short intervals.
95Care and maintenance
Page 98 of 160
Clean wheels, door sills and similar parts last. Use a second sponge for such
areas.
Give the vehicle a good rinse after washing it and dry it off using a chamois
leather.WARNINGProtect your hands and arms from sharp-edged metal parts when cleaning
the underfloor or the inside of the wheel housings or the wheel trims – risk
of cuts!
CAUTION
■ Only apply slight pressure when cleaning the vehicle's paintwork.■Do not wash your vehicle in bright sunlight – risk of paint damage.
Automatic car wash systems
Read and observe
and on page 95 first.
The usual precautionary measures must be taken before washing the vehicle
in an automatic car wash system (e.g. closing the windows and the sliding/tilt-
ing roof etc.).
If your vehicle is fitted with any particular attached parts, such as a spoiler,
roof rack system etc., it is best to consult the operator of the car wash system
beforehand.
After an automatic wash with wax treatment, the lips of the wipers should be
cleaned with cleaning agents specially designed for the purpose, and then de-
greased.
CAUTION
■ Before driving through a car wash fold in the exterior mirrors - there is a risk
of damage.■
Before driving through a car wash unscrew the antenna - there is a risk of
damage.
Washing the vehicle with high-pressure cleaners
Read and observe
and on page 95 first.
When washing the vehicle with a high-pressure cleaner, the instructions foruse of the equipment must be observed. This applies in particular to the pres-
sure used and to the spraying distance .
Maintain a sufficiently large distance to the parking aid sensors and soft mate-
rials such as rubber hoses or insulation material.
CAUTION
■ The films should not be washed with any high-pressure cleaners - there is
risk of damage » page 97.■
Do not aim the water jet directly at the lock cylinders or the door or opening
joints when washing the vehicle in the winter – there is a risk of freezing.
■
The sensors of the parking aid can be sprayed only for a short time and there
must be a minimum distance of 10 cm - there is a risk of damage.
Cleaning vehicle exterior
Introduction
This chapter contains information on the following subjects:
Vehicle paintwork
97
Films
97
Plastic parts
98
Rubber seals
98
Chrome and anodized parts
98
Windows and external mirrors
98
Headlight glasses
98
Door closing cylinder
99
Cavity protection
99
Jack
99
Wheels
99
Under-body protection
99
Wiper blades
100
We recommend using vehicle care products from ŠKODA Original Accessories.
These are available from ŠKODA Partners. The usage instructions on the pack-
age must be observed.
96General Maintenance
Page 99 of 160
WARNING■Vehicle care products may be harmful to your health if not used according
to the instructions.■
Always keep the vehicle care products safe from people who are not com-
pletely independent, e.g. children - there is a danger of poisoning!
■
Protect your hands and arms from sharp-edged metal parts when clean-
ing the underfloor, the inside of the wheel housings or the wheel trims –
risk of cuts!
CAUTION
■ Do not use any insect sponges, rough kitchen sponges or similar cleaning
products – risk of damaging the paintwork surface.■
Cleaner that contain solvents can damage the material being cleaned.
Note
Due to the special tools and knowledge required, and to avoid any potential
problems with the cleaning and care of your vehicle's exterior, we recommend
that the cleaning and care of your vehicle be carried out by a ŠKODA Service
Partner.
Vehicle paintwork
Read and observe
and on page 97 first.
Preserving the vehicle paintwork
A thorough wax treatment provides the vehicle's paintwork with highly effec-
tive protection against harmful environmental influences.
The vehicle must be treated with a high-quality hard wax polish at the latest, when no more drops form on the clean paintwork.
A new layer of a high-quality hard wax polish can be applied to the clean body- work after it has dried thoroughly.
Even if you use a wax preserver regularly we still recommend that you treat
the paintwork of the vehicle at least twice a year with hard wax.
Polishing
Polishing is necessary if the vehicle's paintwork has become unattractive and
if it is no longer possible to achieve a gloss with wax preservatives.
If the polish does not contain any preserving elements, the paint must be trea- ted with a preservative afterwards.
CAUTION■ Paint damage is to be repaired immediately.■Never apply wax to the windows.■
Mat painted or plastic parts must not be treated with polishing products or
hard waxes.
■
Do not polish the paintwork in a dusty environment - risk of paint scratches.
■
Do not apply any paint care products to door seals or window guides.
■
If possible, do not apply any paint care products to parts of the bodywork
that come into contact with door seals or window guides.
Films
Read and observe
and on page 97 first.
Cleaning
Films (eg. roofing, decorative, protective films and similar) require more careful
cleaning than paintwork cleaning.
The films may not be washed with a high-pressure cleaner.
Wash the films only with a soft sponge, mild soap solution and clean, warm
water.
Life
Environmental influences (eg. sunlight, humidity, air pollution, chipping) will af-
fect the life of the films.
The sunlight may also affect the strength of the film colour.
Films will age and become brittle - this is entirely normal; this is not a fault.
CAUTION
■ Never use aggressive cleaning agents or chemical solvents for the glued sur-
faces with films - there is a danger of film damage.■
Never use dirty cloths or chemical solvents for the glued surfaces with films -
there is a danger of damaging the film.
■
In the winter months, do not use an ice scraper to remove ice and snow from
the areas with films. Do not use any other objects to remove frozen layers of
snow or ice – risk of film damage.
■
Do not polish the films - risk of damage!
■
When transporting a load on the roof rack (e.g. roof box or similar) there is an
increased risk of film damage (e.g. of chipping from the secured load).
97Care and maintenance