insp SKODA CITIGO 2016 1.G Owner's Manual
[x] Cancel search | Manufacturer: SKODA, Model Year: 2016, Model line: CITIGO, Model: SKODA CITIGO 2016 1.GPages: 172, PDF Size: 24.59 MB
Page 6 of 172

Inspecting and replenishing117Fuel117
Engine compartment
120
Engine oil
123
Coolant
124
Brake fluid
125
Vehicle battery
126
Wheels
128
Wheels and tyres
128
Operating in winter conditions
131
Do-it-yourself
Emergency equipment and self-help
133
Emergency equipment
133
Changing a wheel
134
Breakdown kit
137
Jump-starting
139
Towing the vehicle
140
Remote
142
Emergency unlocking / unlocking of doors
142
Replacing windscreen wiper blades
143
Fuses and light bulbs
144
Fuses
144
Bulbs
147
Technical data
Technical data
152
Basic vehicle data
152
Vehicle-specific data depending on the
engine
156
Index
4Table of Contents
Page 18 of 172

Fastening and unfastening seat beltsFig. 5
Fastening/unfastening the seat belt
Read and observe
on page 14 first.
Before fastening the belt
›
Adjust the head restraint properly (does not apply to seats with integrated
head restraints).
›
Adjust the seat (applies to the front seats).
Fastening
›
Use the lock tongue to slowly pull the webbing over your chest and pelvis.
›
Insert the lock tongue into the belt buckle » Fig. 5 –
that is part of the seat
until it clicks into place.
›
Pull on the belt to check that it has engaged correctly in the lock.
Releasing
›
Grip the lock tongue and press the red button in the buckle » Fig. 5 -
, the
lock tongue pops out.
›
Guide the belt back by hand so that the seat belt does not twist and the
webbing rolls up fully.
WARNINGThe reel opening for the lock tongue must not be blocked otherwise the
lock tongue will not lock into place properly.Inertia reels and belt tensioners
Introduction
This chapter contains information on the following subjects:
Inertia reels
16
Belt tensioners
16
Inertia reels
Each seat belt is equipped with an inertia reel.
When pulling slowly on the seat belt, the belt can move freely. When pulling
sharply on the seat belt, the movement is locked by the inertia reel. The belts
also lock when full braking, when the car accelerates, when driving downhill
and when cornering.
WARNINGIf the seat belt does not lock when pulling sharply on it, have it inspected
immediately by a specialist garage.
Belt tensioners
Safety for the driver and front passenger wearing their seat belts is enhanced
by the belt tensioners fitted to the inertia reels of the front three-point seat
belts.
If there is a collision of a certain severity, the seat belts are tightened by the
belt tensioner so that unwanted body motion is prevented.
Belt tensioners are not activated in the event of minor collisions, in the case
of a roll-over and also not in accidents in which no major forces are produced.
WARNING■ Any work on the belt tensioner system, including the removal and instal-
lation of system components because of other repair work, must only be
carried out by a specialist garage.■
If the belt tensioners have been deployed, it is then necessary to replace
the entire system.
16Safety
Page 112 of 172

General Maintenance
Care and maintenance
Service work, adjustments and technical alterations
Introduction
This chapter contains information on the following subjects:
Vehicle operating under different weather conditions
110
Statutory checks
110
ŠKODA service partner
110
ŠKODA Original parts
111
ŠKODA Original accessories
111
Spoiler
111
Airbags
111
Trailer operation
112
Acceptance and recycling of used vehicles
112
The instructions and guidelines from ŠKODA AUTO a.s. must be observed when
using accessories or carrying out any modifications, repairs or technical altera-
tions to your vehicle.
Adhering to these instructions and guidelines helps ensure road safety and
helps keep your vehicle in a good technical condition.
WARNING■ Adjustments, repairs and technical changes to the vehicle should only be
carried out by a specialist. Work carried out incorrectly (including work on
the electronic components and their software) can result in malfunctions -
there is a risk of accident and, potentially, increased wear on parts!■
We recommend that you use only ŠKODA Original Accessories and ŠKODA
Original Parts which have been expressly approved for use on your vehicle.
Reliability, safety and suitability for your vehicle are guaranteed with these.
■
Do not use any products which have not been approved by ŠKODA AUTO,
even though these may be products with a type approval or which have
been approved by a nationally recognised testing laboratory.
Vehicle operating under different weather conditions
Read and observe
on page 110 first.
If you would like to operate your vehicle in countries other than those with itsintended weather conditions, you should contact a ŠKODA Partner. He or she
will advise you if certain precautions need to be taken to ensure the full func-
tioning of the vehicle or to prevent damage (e.g. coolant, changing the battery
or similar).
Statutory checks
Read and observe
on page 110 first.
Many countries have legislation requiring the operational reliability, safety and,where applicable, roadworthiness and/or exhaust gas properties of a vehicle
to be tested at regular intervals. These tests can be carried out by workshops
or checking stations that have been legally authorized for this purpose.
The ŠKODA Service partners can prepare your vehicle for the official inspec-
tions, so as to ensure that it passes.
Even if you want to take your vehicle to an officially approved test centre for
prior checking in preparation for a legally required test, we recommend that
you consult your ŠKODA Service Partner beforehand.
ŠKODA service partner
Read and observe
on page 110 first.
All ŠKODA service partners work according to the instructions and guidelines
from ŠKODA AUTO a.s. All service and repair work is therefore carried out on
time and at the appropriate quality. Adhering to these guidelines and instruc-
tions helps ensure road safety and helps keep your vehicle in a good technical
condition.
We therefore advise you to have all modifications, repairs and technical altera-
tions to your vehicle carried out by a ŠKODA Service Partner.
110General Maintenance
Page 115 of 172

Overview of service intervalsFig. 131
Vehicle data carrier: service in-
terval
The service interval specified by the manufacturer is indicated on the vehicle
data carrier » Fig. 131 which can be found both in this Owner's Manual as well
as in the vehicle.
One of the following service intervals applies for your vehicle: ▶ Fixed service interval QI1.
▶ Fixed service interval QI2.
▶ Fixed service interval QI3.
▶ Fixed service interval QI4.
Fixed service intervals QI1 - QI4
Oil change serv-
ice
QI1Every 5,000 km or every 1 year a)
.QI2Every 7,500 km or every 1 year a)
.QI3Every 10,000 km or every 1 year a)
.QI4Every 15,000 km or every 1 year a)
.Inspection b)
Variant 1
QI1 - QI4
After the first 30,000 km or 2 years a)
, then every
30,000 km or every 1 year a)
.Inspection b)
Variant 2Every 15,000 km or every 1 year a)
.Inspection b)
Variant 3Every 10,000 km or every 1 year a)
.Brake fluid
changeQI1 - QI4First change after 3 years, then every 2 years.a)
Depending on which comes first.
b)
For information about the variant that applies to your vehicle, please contact a ŠKODA partner.
WARNINGThe brake fluid must always be changed after the first 3 years and then ev-
ery 2 years. Longer intervals between changing the brake fluid can cause
vapour bubbles to form in the brake system when braking sharply. This can
impair the efficiency of the brakes – risk of accident!
Digital Service Plan
A specialist garage will not record the work carried out in a service evidence in
this Owner's Manual, but in the service information system called Digital Serv-
ice Plan.
We therefore recommend that you always have the record of work carried out
in a service printed out for you.
Benefits of the Digital Service Plan
▶ High level of security preventing manipulation of the entries.
▶ Transparent documentation of service work carried out.
▶ Protection against loss or damage of the entries – you receive a complete re-
cord of the work carried out, if required.
▶ Option to receive the record in electronic form.
▶ The vehicle can be serviced in any specialist garage (also abroad) – the data-
base is accessible worldwide.
▶ Increased transparency when purchasing a used vehicle due to entries being
stored centrally.
▶ The system entries support you in making a claim on the ŠKODA extended
warranty and mobility guarantees.
Cleaning and care
Introduction
This chapter contains information on the following subjects:
Car washing
114
Exterior car care
115
Caring for the interior
116
Regular and thorough care helps to retain the value of your vehicle.
The instructions for use on the packaging must be observed when using care
products. We recommend that you use ŠKODA Original Accessories care prod-
ucts.
113Care and maintenance
Page 119 of 172
■Covers on electrically heated seats
■ Do not clean either with water or with other liquids - risk of damage to the
heating system.
■ Do not dry by switching on the heating.■
Seat belts
■ After cleaning the belts, allow them to dry before retracting them.
Note
During vehicle use, some minor changes may become visible on the leather
and Alcantara ®
(due to e.g. folds, discolouration).Inspecting and replenishing
Fuel
Introduction
Fig. 132
Stickers showing the prescribed
fuel
This chapter contains information on the following subjects:
Petrol Refuelling
118
Unleaded petrol
118
Refuelling with CNG (compressed natural gas)
119
CNG
120
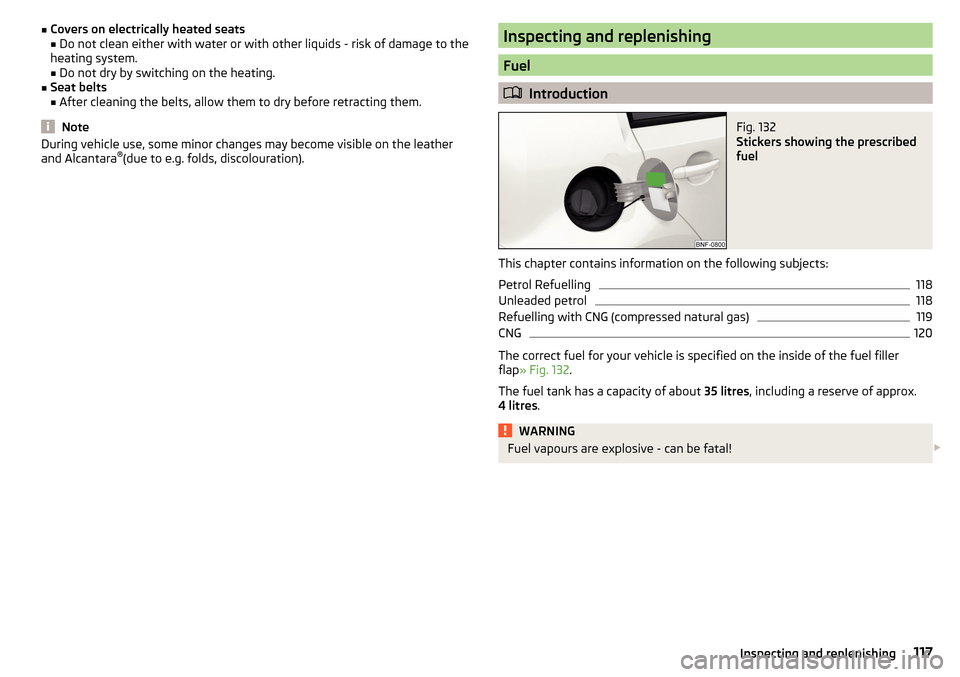
The correct fuel for your vehicle is specified on the inside of the fuel filler
flap » Fig. 132 .
The fuel tank has a capacity of about 35 litres, including a reserve of approx.
4 litres .
WARNINGFuel vapours are explosive - can be fatal! 117Inspecting and replenishing
Page 121 of 172
CAUTIONPetrol additives (additives)■Unleaded petrol complying with the EN 228 standard1)
meets all the condi-
tions for problem-free engine operation. We therefore do not recommend mix-
ing fuel additives into the petrol - risk of engine damage or damage to the ex-
haust system.■
The following additives may not be used - risk of engine damage or damage
to the exhaust system! ■ Additives with metal components (metallic additives), in particular with
manganese and iron content.
■ Fuels with metallic content (e.g. LRP - lead replacement petrol).
Note
■Unleaded petrol that has a higher octane number than that required by the
engine can be used without limitations.■
On vehicles using the prescribed unleaded petrol of min. 95 RON, the use of
petrol with a higher octane number than 95 RON can lead to an increase in
power and reduction in fuel consumption.
Refuelling with CNG (compressed natural gas)
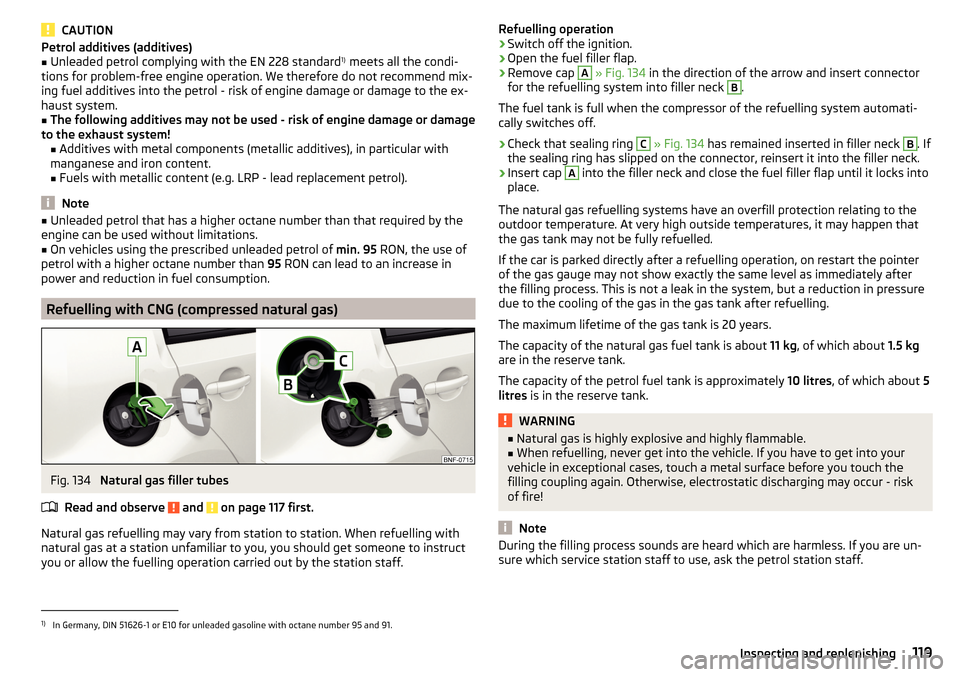
Fig. 134
Natural gas filler tubes
Read and observe
and on page 117 first.
Natural gas refuelling may vary from station to station. When refuelling with natural gas at a station unfamiliar to you, you should get someone to instruct
you or allow the fuelling operation carried out by the station staff.
Refuelling operation›Switch off the ignition.›
Open the fuel filler flap.
›
Remove cap
A
» Fig. 134 in the direction of the arrow and insert connector
for the refuelling system into filler neck
B
.
The fuel tank is full when the compressor of the refuelling system automati-
cally switches off.
›
Check that sealing ring
C
» Fig. 134 has remained inserted in filler neck
B
. If
the sealing ring has slipped on the connector, reinsert it into the filler neck.
›
Insert cap
A
into the filler neck and close the fuel filler flap until it locks into
place.
The natural gas refuelling systems have an overfill protection relating to the
outdoor temperature. At very high outside temperatures, it may happen that
the gas tank may not be fully refuelled.
If the car is parked directly after a refuelling operation, on restart the pointer
of the gas gauge may not show exactly the same level as immediately after
the filling process. This is not a leak in the system, but a reduction in pressure
due to the cooling of the gas in the gas tank after refuelling.
The maximum lifetime of the gas tank is 20 years.
The capacity of the natural gas fuel tank is about 11 kg, of which about 1.5 kg
are in the reserve tank.
The capacity of the petrol fuel tank is approximately 10 litres, of which about 5
litres is in the reserve tank.
WARNING■
Natural gas is highly explosive and highly flammable.■When refuelling, never get into the vehicle. If you have to get into your
vehicle in exceptional cases, touch a metal surface before you touch the
filling coupling again. Otherwise, electrostatic discharging may occur - risk
of fire!
Note
During the filling process sounds are heard which are harmless. If you are un-
sure which service station staff to use, ask the petrol station staff.1)
In Germany, DIN 51626-1 or E10 for unleaded gasoline with octane number 95 and 91.
119Inspecting and replenishing
Page 122 of 172
CNGFig. 135
Position of the CNG label(s).
Read and observe
and on page 117 first.
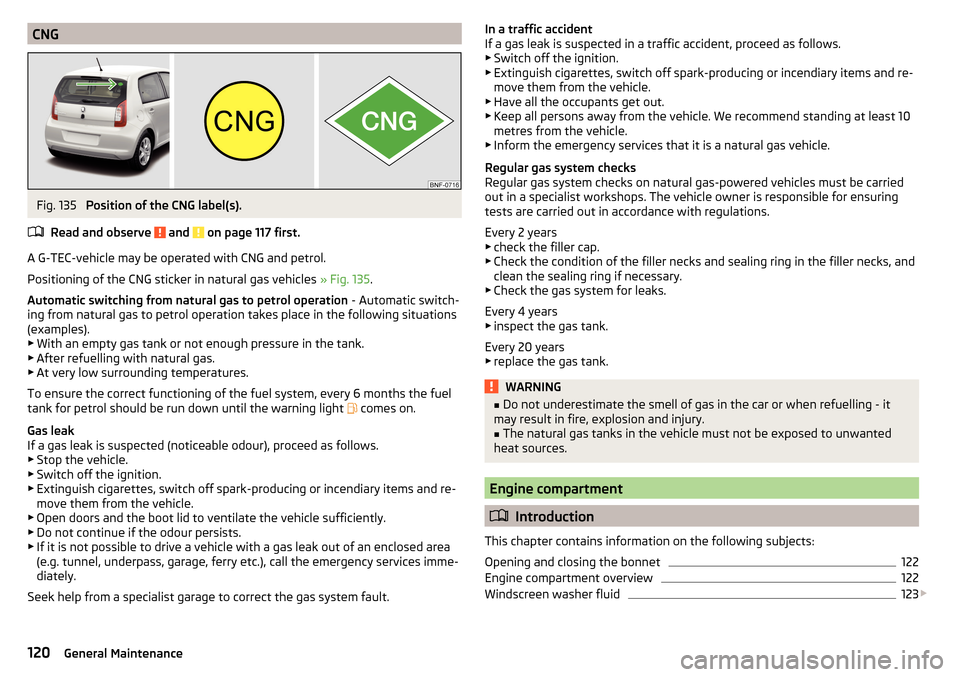
A G-TEC-vehicle may be operated with CNG and petrol.
Positioning of the CNG sticker in natural gas vehicles » Fig. 135.
Automatic switching from natural gas to petrol operation - Automatic switch-
ing from natural gas to petrol operation takes place in the following situations
(examples). ▶ With an empty gas tank or not enough pressure in the tank.
▶ After refuelling with natural gas.
▶ At very low surrounding temperatures.
To ensure the correct functioning of the fuel system, every 6 months the fuel tank for petrol should be run down until the warning light comes on.
Gas leak
If a gas leak is suspected (noticeable odour), proceed as follows. ▶ Stop the vehicle.
▶ Switch off the ignition.
▶ Extinguish cigarettes, switch off spark-producing or incendiary items and re-
move them from the vehicle.
▶ Open doors and the boot lid to ventilate the vehicle sufficiently.
▶ Do not continue if the odour persists.
▶ If it is not possible to drive a vehicle with a gas leak out of an enclosed area
(e.g. tunnel, underpass, garage, ferry etc.), call the emergency services imme-
diately.
Seek help from a specialist garage to correct the gas system fault.
In a traffic accident
If a gas leak is suspected in a traffic accident, proceed as follows.
▶ Switch off the ignition.
▶ Extinguish cigarettes, switch off spark-producing or incendiary items and re-
move them from the vehicle.
▶ Have all the occupants get out.
▶ Keep all persons away from the vehicle. We recommend standing at least 10
metres from the vehicle.
▶ Inform the emergency services that it is a natural gas vehicle.
Regular gas system checks
Regular gas system checks on natural gas-powered vehicles must be carried
out in a specialist workshops. The vehicle owner is responsible for ensuring
tests are carried out in accordance with regulations.
Every 2 years ▶ check the filler cap.
▶ Check the condition of the filler necks and sealing ring in the filler necks, and
clean the sealing ring if necessary.
▶ Check the gas system for leaks.
Every 4 years ▶ inspect the gas tank.
Every 20 years
▶ replace the gas tank.WARNING■ Do not underestimate the smell of gas in the car or when refuelling - it
may result in fire, explosion and injury.■
The natural gas tanks in the vehicle must not be exposed to unwanted
heat sources.
Engine compartment
Introduction
This chapter contains information on the following subjects:
Opening and closing the bonnet
122
Engine compartment overview
122
Windscreen washer fluid
123
120General Maintenance
Page 123 of 172

WARNINGNever cover the engine with additional insulation material (e.g. with a cov-
er) – risk of fire!WARNINGWhen working in the engine compartment, the following instructions must
be observed - otherwise risk of injury or fire. The engine compartment of
your car is a hazardous area!WARNINGInstructions before beginning work in the engine compartment■Turn off the engine and remove the ignition key.■
Firmly apply the handbrake.
■
For vehicles with manual transmission the lever into the neutral position.
For vehicles with automated manual transmission shift the lever to posi-
tion N.
■
Allow the engine to cool.
■
Never open the bonnet if you can see steam or coolant flowing out of the
engine compartment – risk of scalding! Wait until the steam or coolant has
stopped escaping.
WARNINGInformation for working in the engine compartment■Keep everyone away from the engine compartment.■
Do not touch any hot engine parts – risk of burns!
■
Never touch the radiator fan. The radiator fan may still turn suddenly
about 10 minutes after switching off the ignition!
■
Do not smoke in the vicinity of the engine and avoid the use of open
flames or sparks.
■
Do not leave any items (e.g. cloths or tools) in the engine compartment.
This presents a fire hazard and the risk of engine damage.
■
Read and observe the information and warning instructions on the fluid
containers.
WARNINGInformation for working in the engine compartment with the engine run-
ning■
If it is necessary to work on the engine with the engine running, beware
of rotating engine parts and electrical plants - they can be fatal!
■
Never touch the electric wiring on the ignition system.
■
Avoid short circuits in the electrical system, particularly on the vehicle's
battery.
CAUTION
Only refill using fluids with the proper specification - risk of damage to the ve-
hicle!
Note
■ Fluids with the proper specifications can be purchased from the ŠKODA Origi-
nal Accessories or from the ŠKODA Genuine Parts ranges.■
We recommend you have the operating fluids replaced by a specialist garage.
121Inspecting and replenishing
Page 125 of 172
Windscreen washer fluidFig. 138
Windscreen washer fluid reser-
voir
Read and observe and on page 121 first.
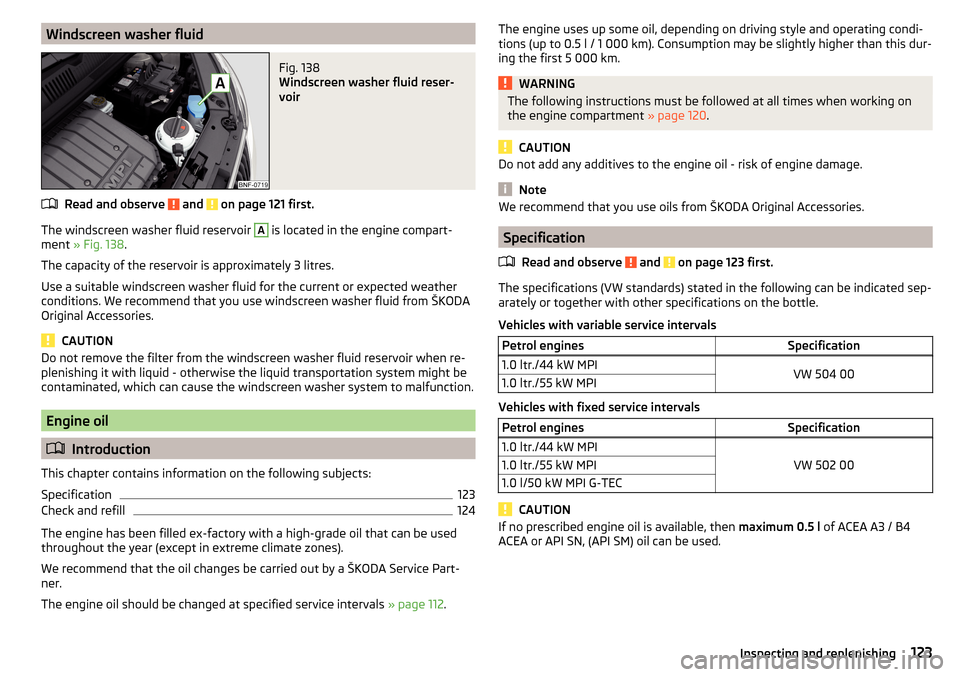
The windscreen washer fluid reservoir
A
is located in the engine compart-
ment » Fig. 138 .
The capacity of the reservoir is approximately 3 litres.
Use a suitable windscreen washer fluid for the current or expected weather
conditions. We recommend that you use windscreen washer fluid from ŠKODA
Original Accessories.
CAUTION
Do not remove the filter from the windscreen washer fluid reservoir when re-
plenishing it with liquid - otherwise the liquid transportation system might be
contaminated, which can cause the windscreen washer system to malfunction.
Engine oil
Introduction
This chapter contains information on the following subjects:
Specification
123
Check and refill
124
The engine has been filled ex-factory with a high-grade oil that can be used
throughout the year (except in extreme climate zones).
We recommend that the oil changes be carried out by a ŠKODA Service Part-
ner.
The engine oil should be changed at specified service intervals » page 112.
The engine uses up some oil, depending on driving style and operating condi-
tions (up to 0.5 l / 1 000 km). Consumption may be slightly higher than this dur-
ing the first 5 000 km.WARNINGThe following instructions must be followed at all times when working on
the engine compartment » page 120.
CAUTION
Do not add any additives to the engine oil - risk of engine damage.
Note
We recommend that you use oils from ŠKODA Original Accessories.
Specification
Read and observe
and on page 123 first.
The specifications (VW standards) stated in the following can be indicated sep-arately or together with other specifications on the bottle.
Vehicles with variable service intervals
Petrol enginesSpecification1.0 ltr./44 kW MPIVW 504 001.0 ltr./55 kW MPI
Vehicles with fixed service intervals
Petrol enginesSpecification1.0 ltr./44 kW MPI
VW 502 00
1.0 ltr./55 kW MPI1.0 l/50 kW MPI G-TEC
CAUTION
If no prescribed engine oil is available, then maximum 0.5 l of ACEA A3 / B4
ACEA or API SN, (API SM) oil can be used.123Inspecting and replenishing
Page 127 of 172
Checking and refillingFig. 140
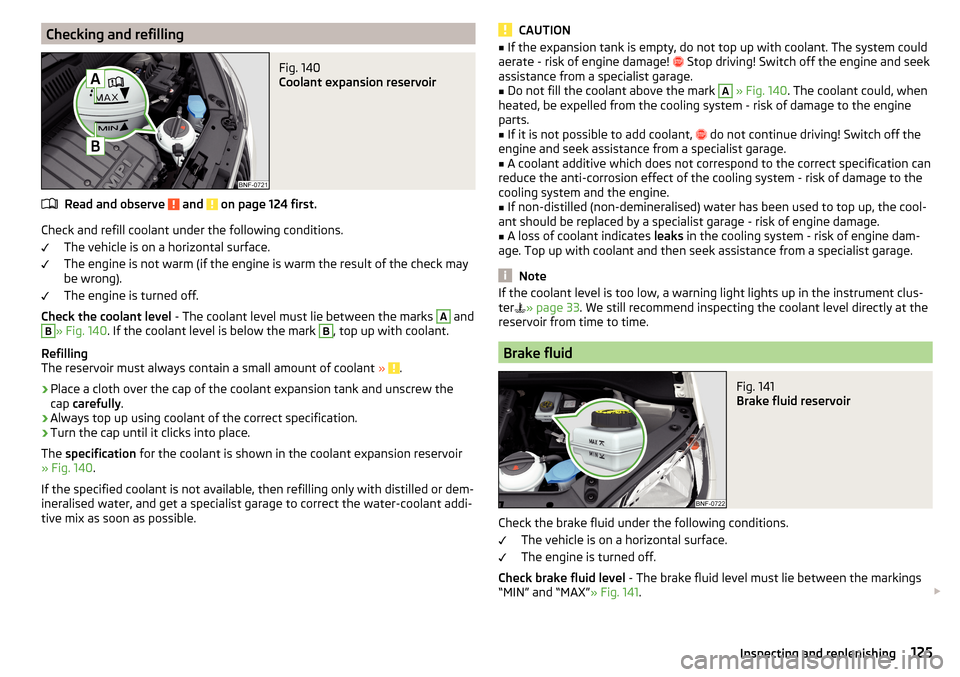
Coolant expansion reservoir
Read and observe and on page 124 first.
Check and refill coolant under the following conditions.The vehicle is on a horizontal surface.
The engine is not warm (if the engine is warm the result of the check may
be wrong).
The engine is turned off.
Check the coolant level - The coolant level must lie between the marks
A
and
B
» Fig. 140. If the coolant level is below the mark
B
, top up with coolant.
Refilling
The reservoir must always contain a small amount of coolant »
.
›
Place a cloth over the cap of the coolant expansion tank and unscrew the
cap carefully .
›
Always top up using coolant of the correct specification.
›
Turn the cap until it clicks into place.
The specification for the coolant is shown in the coolant expansion reservoir
» Fig. 140 .
If the specified coolant is not available, then refilling only with distilled or dem-
ineralised water, and get a specialist garage to correct the water-coolant addi-
tive mix as soon as possible.
CAUTION■ If the expansion tank is empty, do not top up with coolant. The system could
aerate - risk of engine damage! Stop driving! Switch off the engine and seek
assistance from a specialist garage.■
Do not fill the coolant above the mark
A
» Fig. 140 . The coolant could, when
heated, be expelled from the cooling system - risk of damage to the engine
parts.
■
If it is not possible to add coolant,
do not continue driving! Switch off the
engine and seek assistance from a specialist garage.
■
A coolant additive which does not correspond to the correct specification can
reduce the anti-corrosion effect of the cooling system - risk of damage to the
cooling system and the engine.
■
If non-distilled (non-demineralised) water has been used to top up, the cool-
ant should be replaced by a specialist garage - risk of engine damage.
■
A loss of coolant indicates leaks in the cooling system - risk of engine dam-
age. Top up with coolant and then seek assistance from a specialist garage.
Note
If the coolant level is too low, a warning light lights up in the instrument clus-
ter » page 33 . We still recommend inspecting the coolant level directly at the
reservoir from time to time.
Brake fluid
Fig. 141
Brake fluid reservoir
Check the brake fluid under the following conditions.
The vehicle is on a horizontal surface.
The engine is turned off.
Check brake fluid level - The brake fluid level must lie between the markings
“MIN” and “MAX” » Fig. 141.
125Inspecting and replenishing