fuel pump SKODA CITIGO 2017 Owners Manual
[x] Cancel search | Manufacturer: SKODA, Model Year: 2017, Model line: CITIGO, Model: SKODA CITIGO 2017Pages: 172, PDF Size: 24.54 MB
Page 120 of 172

CAUTION■Never drive until the fuel tank is completely empty! Irregular supply of fuel
can cause misfiring, which can result in damage to parts of the engine and the
exhaust system.■
Immediately remove any fuel that has spilled onto the vehicle's paintwork –
risk of paint damage.
■
If you would like to operate your vehicle in a country other than the one for
which it was intended, please talk to a ŠKODA Partner. They will tell you
whether the fuel specified by the manufacturer is offered in that country
and/or whether the manufacturer will sanction operating the vehicle with
another fuel.
Petrol Refuelling
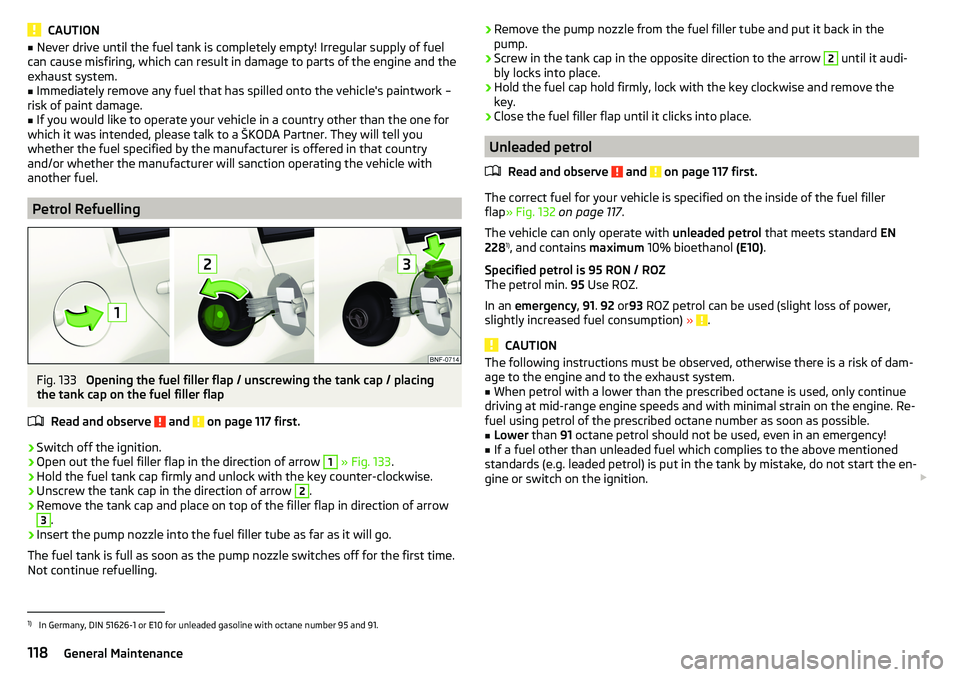
Fig. 133
Opening the fuel filler flap / unscrewing the tank cap / placing
the tank cap on the fuel filler flap
Read and observe
and on page 117 first.
›
Switch off the ignition.
›
Open out the fuel filler flap in the direction of arrow
1
» Fig. 133 .
›
Hold the fuel tank cap firmly and unlock with the key counter-clockwise.
›
Unscrew the tank cap in the direction of arrow
2
.
›
Remove the tank cap and place on top of the filler flap in direction of arrow
3
.
›
Insert the pump nozzle into the fuel filler tube as far as it will go.
The fuel tank is full as soon as the pump nozzle switches off for the first time.
Not continue refuelling.
› Remove the pump nozzle from the fuel filler tube and put it back in the
pump.›
Screw in the tank cap in the opposite direction to the arrow
2
until it audi-
bly locks into place.
›
Hold the fuel cap hold firmly, lock with the key clockwise and remove the
key.
›
Close the fuel filler flap until it clicks into place.
Unleaded petrol
Read and observe
and on page 117 first.
The correct fuel for your vehicle is specified on the inside of the fuel filler
flap » Fig. 132 on page 117 .
The vehicle can only operate with unleaded petrol that meets standard EN
228 1)
, and contains maximum 10% bioethanol (E10).
Specified petrol is 95 RON / ROZ
The petrol min. 95 Use ROZ.
In an emergency , 91 . 92 or 93 ROZ petrol can be used (slight loss of power,
slightly increased fuel consumption) »
.
CAUTION
The following instructions must be observed, otherwise there is a risk of dam-
age to the engine and to the exhaust system.■
When petrol with a lower than the prescribed octane is used, only continue
driving at mid-range engine speeds and with minimal strain on the engine. Re-
fuel using petrol of the prescribed octane number as soon as possible.
■
Lower than 91 octane petrol should not be used, even in an emergency!
■
If a fuel other than unleaded fuel which complies to the above mentioned
standards (e.g. leaded petrol) is put in the tank by mistake, do not start the en-
gine or switch on the ignition.
1)
In Germany, DIN 51626-1 or E10 for unleaded gasoline with octane number 95 and 91.
118General Maintenance
Page 148 of 172

No.Consumer28Selector lever for the automatic transmission29Fuel pump30Engine control unit, instrument cluster, rain sensor, control lever un-
der the steering wheel31Vehicle lighting32Central control system33Vehicle lighting34Interior lighting35Vehicle lighting36Vehicle lighting37ESC38Key bar39Control lever under the steering wheel, front and rear window wash- er40Lambda probe, radiator fan, gas valve, oil pressure valve, valve for
activated charcoal filter41Brake pedal switch, cooling fan42Engine control system43Fuel pump44Injection valves45Ignition coils4612 volt power socket47Air blower for air conditioning/heating48Seat heaters49Electric windows50Vehicle lighting51Electric power windowsFuses on the side of the dash panelFig. 167
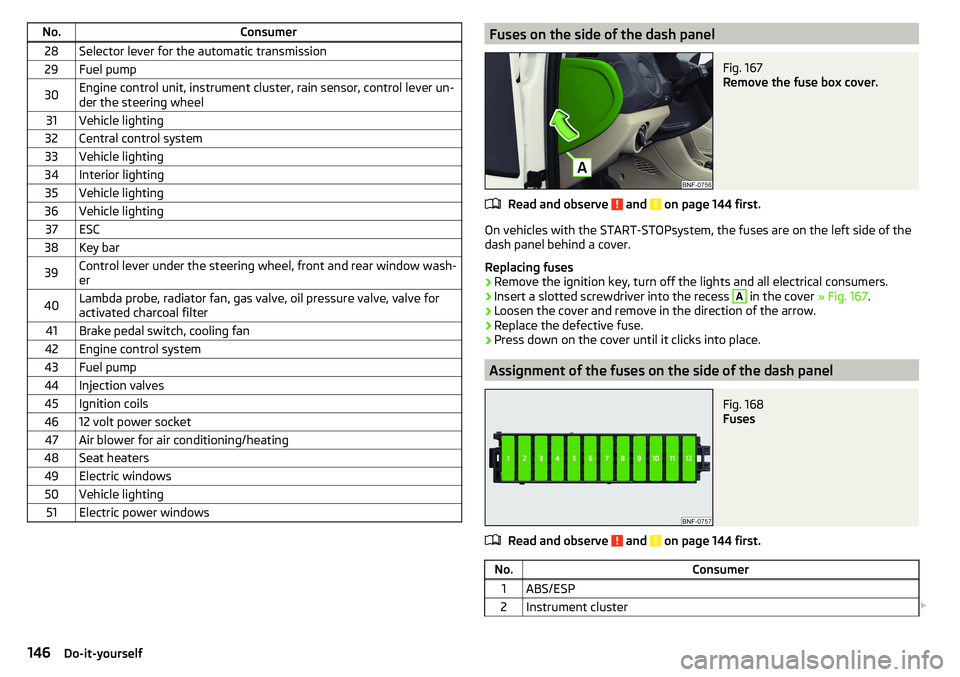
Remove the fuse box cover.
Read and observe and on page 144 first.
On vehicles with the START-STOPsystem, the fuses are on the left side of the
dash panel behind a cover.
Replacing fuses
›
Remove the ignition key, turn off the lights and all electrical consumers.
›
Insert a slotted screwdriver into the recess
A
in the cover » Fig. 167.
›
Loosen the cover and remove in the direction of the arrow.
›
Replace the defective fuse.
›
Press down on the cover until it clicks into place.
Assignment of the fuses on the side of the dash panel
Fig. 168
Fuses
Read and observe and on page 144 first.
No.Consumer1ABS/ESP2Instrument cluster 146Do-it-yourself