warning light SKODA FABIA 2003 1.G / 6Y Service Manual
[x] Cancel search | Manufacturer: SKODA, Model Year: 2003, Model line: FABIA, Model: SKODA FABIA 2003 1.G / 6YPages: 233, PDF Size: 32.04 MB
Page 58 of 233
Lights and Visibility57
Using the systemSafetyDriving TipsGeneral MaintenanceBreakdown assist-
anceTechnical DataFabia Praktik
Interior lighting at the rear* (estate vehicle, sedan)
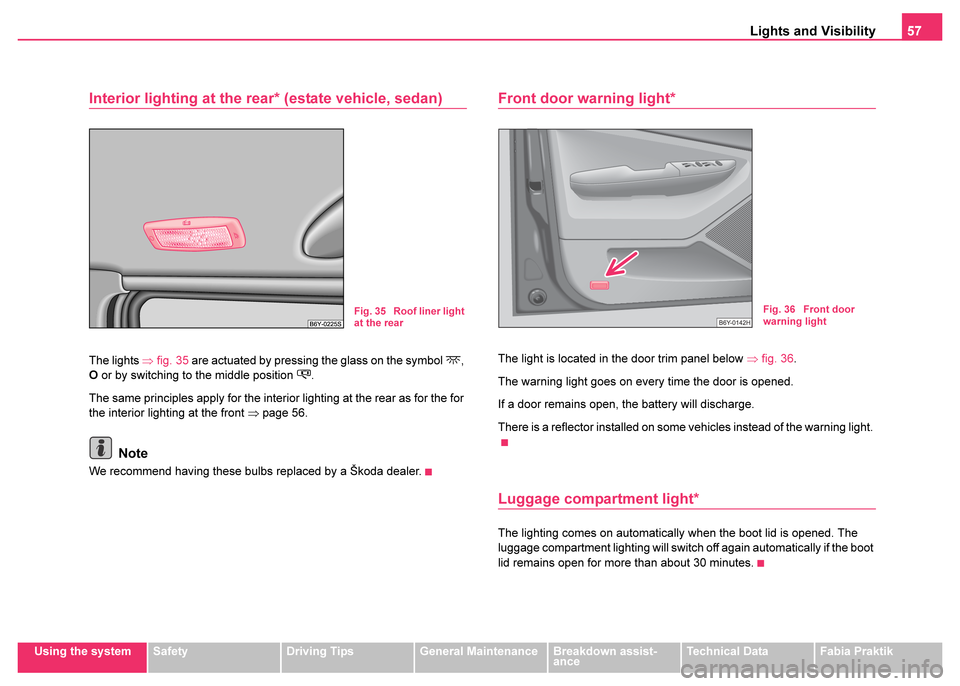
The lights ⇒fig. 35 are actuated by pressing the glass on the symbol ,
O or by switching to the middle position .
The same principles apply for the interior lighting at the rear as for the for
the interior lighting at the front ⇒page 56.
Note
We recommend having these bulbs replaced by a Škoda dealer.
Front door warning light*
The light is located in the door trim panel below ⇒fig. 36 .
The warning light goes on every time the door is opened.
If a door remains open, the battery will discharge.
There is a reflector installed on some vehicles instead of the warning light.
Luggage compartment light*
The lighting comes on automatically when the boot lid is opened. The
luggage compartment lighting will switch off again automatically if the boot
lid remains open for more than about 30 minutes.
Fig. 35 Roof liner light
at the rearFig. 36 Front door
warning light
Page 61 of 233
Lights and Visibility
60
Switching windscreen wipers off
– Move the lever back into its home position .
The windscreen wipers and the windscreen washer system only operate
if the ignition is switched on.
The rear window will be wiped again if the window wipers are on when
reverse gear is selected.
The windscreen washer nozzles are heated* when the ignition is switched
on.
Top up with wash liquid ⇒page 185.
Caution
In frosty weather, please first of all check whether the windscreen wiper
blades are not frozen to the windscreen before switching them on.
Switching on windscreen wipers when the blades are frozen to the wind-
screen may result in damage both to the blades and the motor of the wind-
screen wipers!
Headlight cleaning system*
Washing of the headlights lenses occurs for approximately 1 second
about 3 seconds after movement of the lever into position ⇒page 59,
fig. 39. You should remove stubborn dirt (such as insect residues) from the head-
light lenses at regular intervals, for example when refuelling. Please refer
to the notes
⇒page 162.
You should remove any snow from the fixtures of the washer nozzles and
clear ice in winter with a de-icing spray in order to ensure proper operation
of the cleaning system.
Replacing wiper blades on the windscreen wipers
Taking off the wiper blade
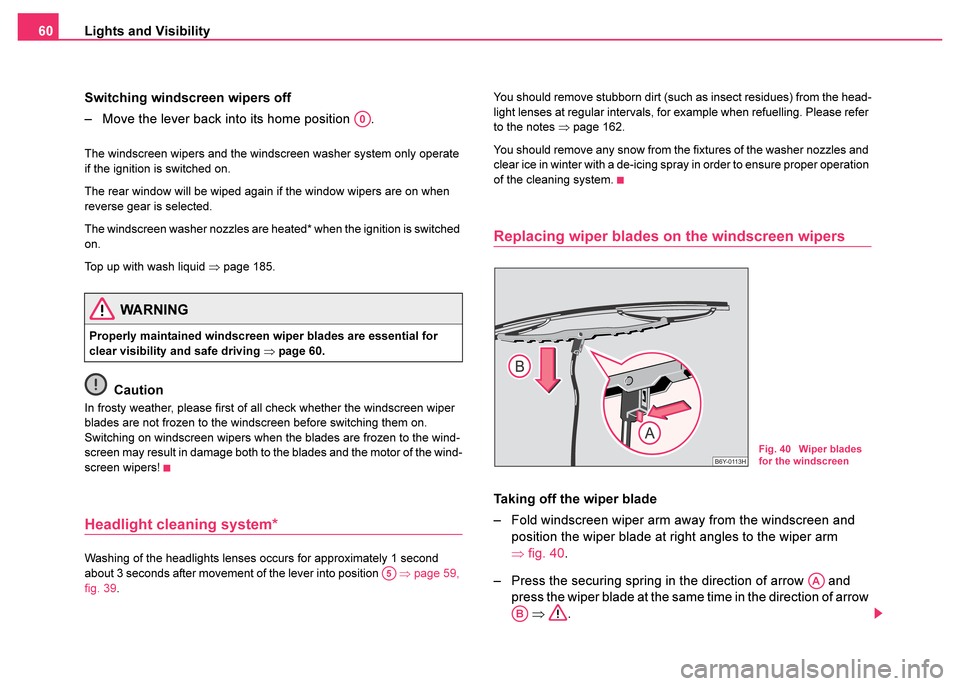
– Fold windscreen wiper arm away from the windscreen and position the wiper blade at right angles to the wiper arm
⇒fig. 40 .
– Press the securing spring in the direction of arrow and press the wiper blade at the same time in the direction of arrow ⇒ .
WARNING
Properly maintained windscreen wiper blades are essential for
clear visibility and safe driving ⇒page 60.
A0
A5
Fig. 40 Wiper blades
for the windscreen
AA
AB
Page 62 of 233
Lights and Visibility61
Using the systemSafetyDriving TipsGeneral MaintenanceBreakdown assist-
anceTechnical DataFabia Praktik
Attaching a wiper blade
– Push the wiper blade over the wiper arm. The securing spring
must click into place audibly.
Windscreen wiper blades in proper condition are essential to obtain good
visibility. Wiper blades should not be allowed to become dirtied by dust,
insect remains and preserving wax.
Juddering or smearing of the wiper blades could be due to wax residues
left on the windscreen by vehicle washing in automatic vehicle wash
systems. It is therefore important to degrease the lips of the winscreen
wiper blades after every pass through an automatic vehicle wash
system .
Replacing the wiper blade on the rear window wiper
Taking off the wiper blade
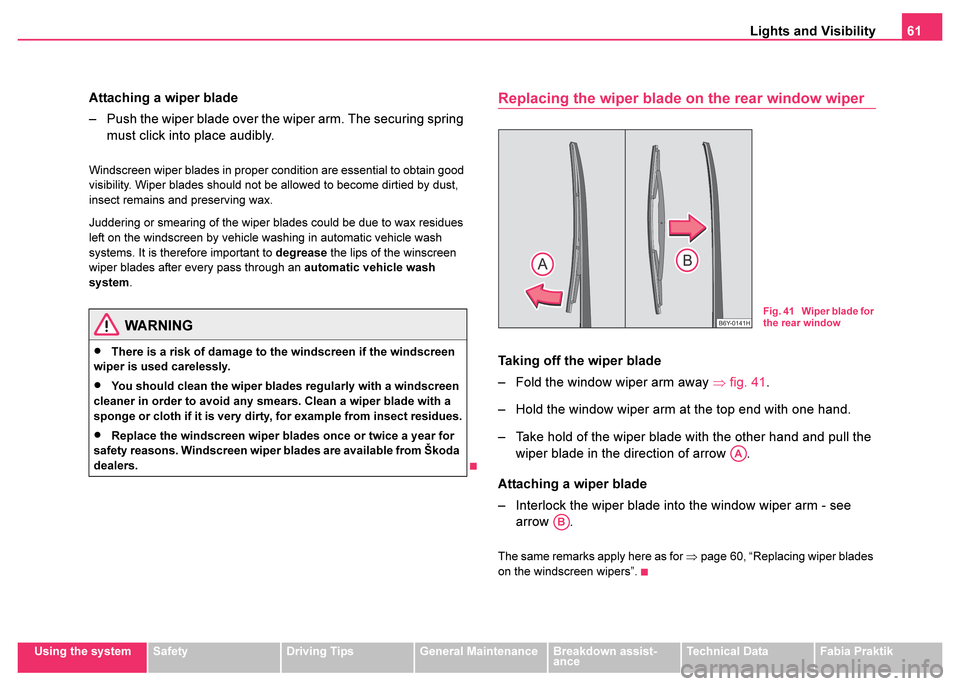
– Fold the window wiper arm away ⇒fig. 41 .
– Hold the window wiper arm at the top end with one hand.
– Take hold of the wiper blade with the other hand and pull the wiper blade in the direction of arrow .
Attaching a wiper blade
– Interlock the wiper blade into the window wiper arm - see arrow .
The same remarks apply here as for ⇒page 60, “Replacing wiper blades
on the windscreen wipers”.
WARNING
•There is a risk of damage to the windscreen if the windscreen
wiper is used carelessly.
•You should clean the wiper blades regularly with a windscreen
cleaner in order to avoid any smears. Clean a wiper blade with a
sponge or cloth if it is very dirty, for example from insect residues.
•Replace the windscreen wiper blades once or twice a year for
safety reasons. Windscreen wiper blades are available from Škoda
dealers.
Fig. 41 Wiper blade for
the rear window
AA
AB
Page 63 of 233
Lights and Visibility
62
Rear-view mirror
You can adjust the exterior mirrors electrically*.
Adjust the reverse view mirror before commencing to drive so
that there is a clear view to the rear.
Dimming the interior mirror
– Pull the lever on the bottom edge of the mirror toward rear (the
lever on the interior mirror must point forwards in it home posi-
tion).
Heating of the external mirror*
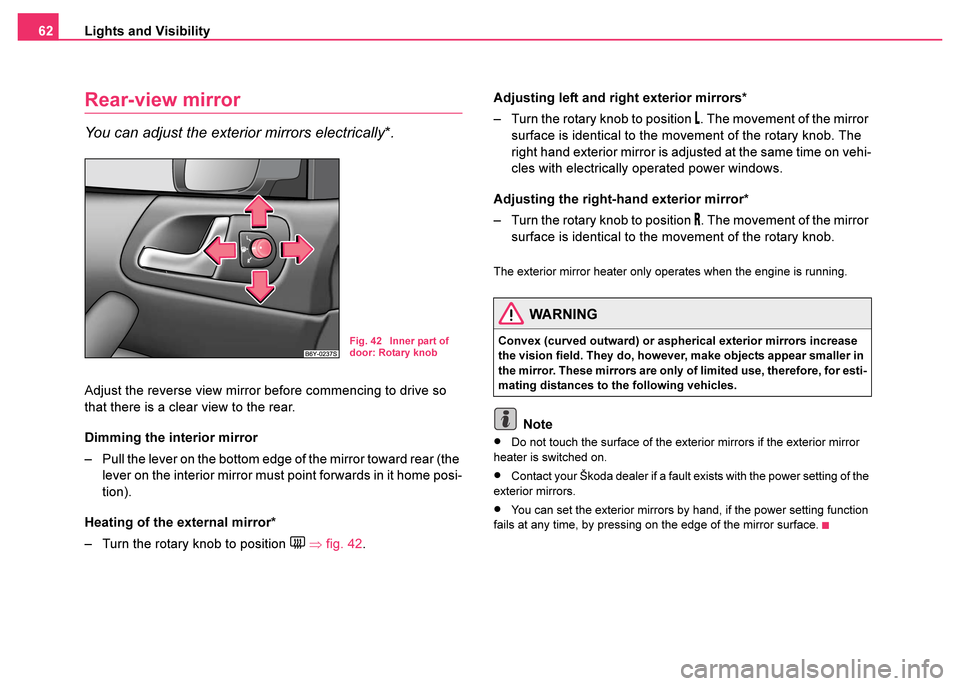
– Turn the rotary knob to position
⇒ fig. 42 . Adjusting left and right exterior mirrors*
– Turn the rotary knob to position
. The movement of the mirror
surface is identical to the movement of the rotary knob. The
right hand exterior mirror is adjusted at the same time on vehi-
cles with electrically operated power windows.
Adjusting the right-hand exterior mirror*
– Turn the rotary knob to position
. The movement of the mirror
surface is identical to the movement of the rotary knob.
The exterior mirror heater only operates when the engine is running.
Note
•Do not touch the surface of the exterior mirrors if the exterior mirror
heater is switched on.
•Contact your Škoda dealer if a fault exists with the power setting of the
exterior mirrors.
•You can set the exterior mirrors by hand, if the power setting function
fails at any time, by pressing on the edge of the mirror surface.
Fig. 42 Inner part of
door: Rotary knob
WARNING
Convex (curved outward) or aspherical exterior mirrors increase
the vision field. They do, however, make objects appear smaller in
the mirror. These mirrors are only of limited use, therefore, for esti-
mating distances to the following vehicles.
Page 65 of 233
Seats and Stowage
64
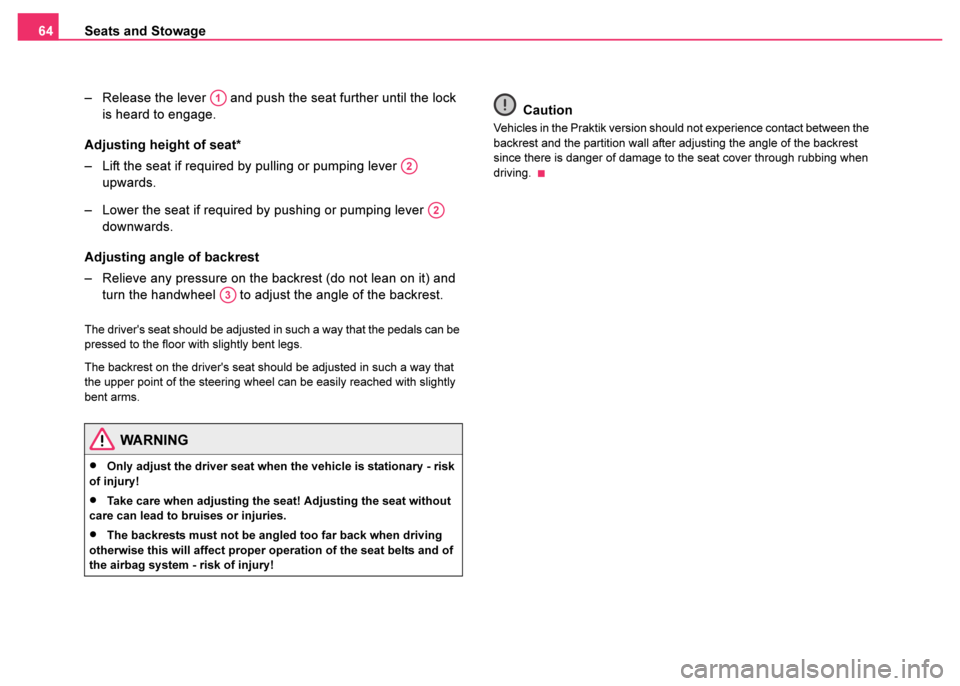
– Release the lever and push the seat further until the lock is heard to engage.
Adjusting height of seat*
– Lift the seat if required by pulling or pumping lever upwards.
– Lower the seat if required by pushing or pumping lever downwards.
Adjusting angle of backrest
– Relieve any pressure on the backrest (do not lean on it) and turn the handwheel to adjust the angle of the backrest.
The driver's seat should be adjusted in such a way that the pedals can be
pressed to the floor with slightly bent legs.
The backrest on the driver's seat should be adjusted in such a way that
the upper point of the steering wheel can be easily reached with slightly
bent arms.
Caution
Vehicles in the Praktik version should not experience contact between the
backrest and the partition wall after adjusting the angle of the backrest
since there is danger of damage to the seat cover through rubbing when
driving.
WARNING
•Only adjust the driver seat when the vehicle is stationary - risk
of injury!
•Take care when adjusting the seat! Adjusting the seat without
care can lead to bruises or injuries.
•The backrests must not be angled too far back when driving
otherwise this will affect proper operation of the seat belts and of
the airbag system - risk of injury!
A1
A2
A2
A3
Page 71 of 233
Seats and Stowage
70
– Distribute the items of luggage as evenly as possible.
– Heavy objects should be transported as near to the rear axle as possible or better still between the axles.
– Attach the items of luggage to the lashing eyes or the safety net* ⇒page 70.
Caution
Please ensure that the heating elements of the rear window heater are not
damaged as a result of objects sliding in this area.
Note
•Tyre pressure must be adjusted to the load ⇒page 187, fig. 135.
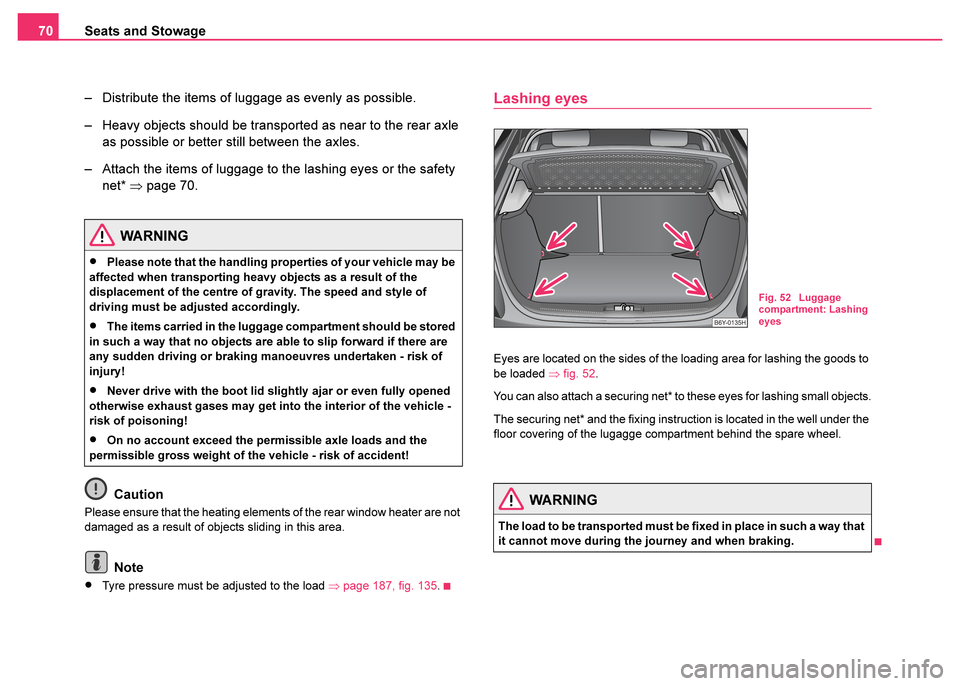
Lashing eyes
Eyes are located on the sides of the loading area for lashing the goods to
be loaded ⇒fig. 52 .
You can also attach a securing net* to these eyes for lashing small objects.
The securing net* and the fixing instruction is located in the well under the
floor covering of the lugagge compartment behind the spare wheel.
WARNING
•Please note that the handling properties of your vehicle may be
affected when transporting heavy objects as a result of the
displacement of the centre of gravity. The speed and style of
driving must be adjusted accordingly.
•The items carried in the luggage compartment should be stored
in such a way that no objects are able to slip forward if there are
any sudden driving or braking manoeuvres undertaken - risk of
injury!
•Never drive with the boot lid slightly ajar or even fully opened
otherwise exhaust gases may get into the interior of the vehicle -
risk of poisoning!
•On no account exceed the permissible axle loads and the
permissible gross weight of the vehicle - risk of accident!
WARNING
The load to be transported must be fixed in place in such a way that
it cannot move during the journey and when braking.
Fig. 52 Luggage
compartment: Lashing
eyes
Page 73 of 233
Seats and Stowage
72
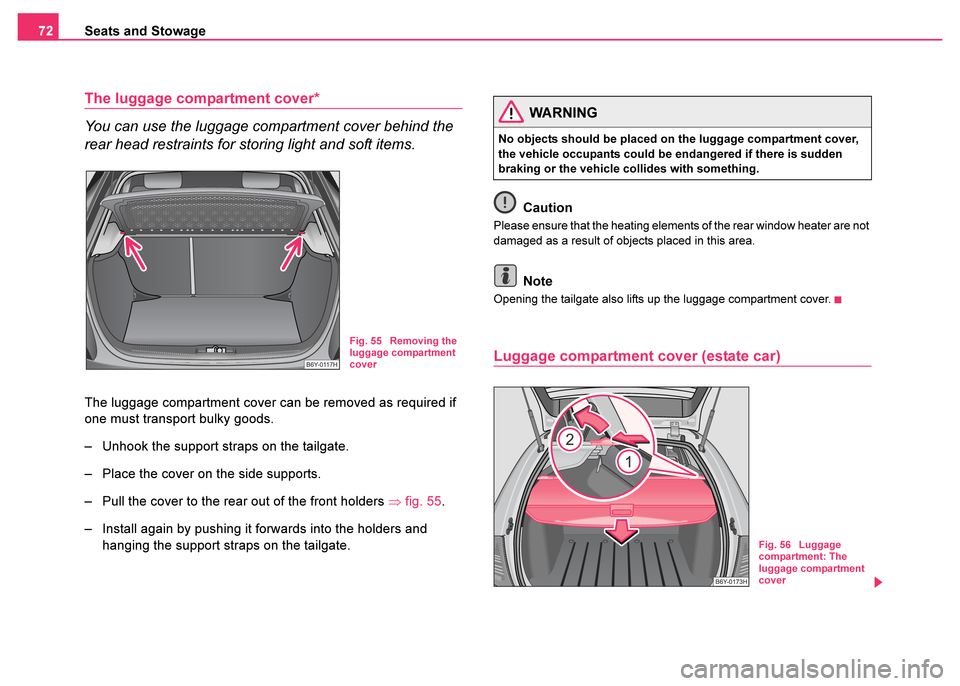
The luggage compartment cover*
You can use the luggage compartment cover behind the
rear head restraints for storing light and soft items.
The luggage compartment cover can be removed as required if
one must transport bulky goods.
– Unhook the support straps on the tailgate.
– Place the cover on the side supports.
– Pull the cover to the rear out of the front holders ⇒fig. 55 .
– Install again by pushing it forwards into the holders and hanging the support straps on the tailgate. Caution
Please ensure that the heating elements of the rear window heater are not
damaged as a result of objects placed in this area.
Note
Opening the tailgate also lifts up the luggage compartment cover.
Luggage compartment cover (estate car)
Fig. 55 Removing the
luggage compartment
cover
WARNING
No objects should be placed on the luggage compartment cover,
the vehicle occupants could be endangered if there is sudden
braking or the vehicle collides with something.
Fig. 56 Luggage
compartment: The
luggage compartment
cover
Page 75 of 233
Seats and Stowage
74
Unrolling
– Fold the backrests of the rear seats slightly forwards ⇒page 67, which makes it possible to clear the access for
unrolling the net partition.
– Pull the net partition at the bracket out of the housing in direction of the holders ⇒page 73, fig. 57 .
– Insert the cross rod into one of the mounts and push the cross rod forward.
– In the same way, fix the cross rod to the other side of the vehicle, mount .
– Then push the seat backrest back into the upright position until it clicks into place - check by pulling on it ⇒.
Rolling up
– Pull the cross rod back slightly, first on the one side then on the other side and take the cross rod out of the mount
⇒page 73, fig. 58 .
– Hold the cross rod in such a way that the net partition can roll
up slowily and without damage into housing .
If you wish to use the entire luggage compartment, you can remove the
luggage compartment cover ⇒page 72, fig. 56 .
AAAB
AC
AC
AC
AC
AB
WARNING
•Ensure that the seat backrest on the rear seats is securely inter-
locked in position when the vehicle is fitted with three-point safety
belts for the middle rear seat place. It is only then that the three-
point seat belt can reliably fulfil its function.
•First check for yourself that the cross road is inserted into the
mounts in the front position!AC
Page 76 of 233
Seats and Stowage75
Using the systemSafetyDriving TipsGeneral MaintenanceBreakdown assist-
anceTechnical DataFabia Praktik
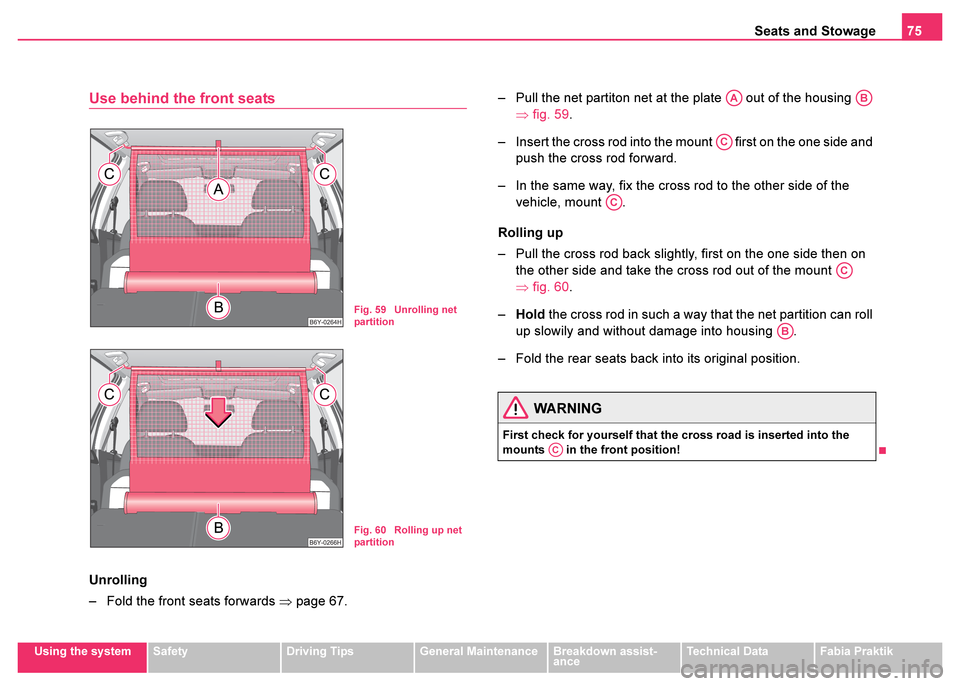
Use behind the front seats
Unrolling
– Fold the front seats forwards ⇒page 67. – Pull the net partiton net at the plate out of the housing
⇒fig. 59 .
– Insert the cross rod into the mount first on the one side and push the cross rod forward.
– In the same way, fix the cross rod to the other side of the vehicle, mount .
Rolling up
– Pull the cross rod back slightly, first on the one side then on the other side and take the cross rod out of the mount
⇒fig. 60 .
– Hold the cross rod in such a way that the net partition can roll
up slowily and without damage into housing .
– Fold the rear seats back into its original position.
Fig. 59 Unrolling net
partition
Fig. 60 Rolling up net
partition
WARNING
First check for yourself that the cross road is inserted into the
mounts in the front position!
AAAB
AC
AC
AC
AB
AC
Page 81 of 233

Seats and Stowage
80
Cigarette lighter* and power socket*
Cigarette lighter
You can also use the socket on the cigarette lighter for
other electrical appliances.
Using the cigarette lighter
– Press in the button of the cigarette lighter ⇒fig. 67 .
– Wait until the button jumps forward.
– Remove the cigarette lighter immediately and use it.
– Insert the cigarette lighter again into the socket.
Using the power socket
– Take out the cigarette lighter. – Insert the plug of the electrical appliance into the socket of the
cigarette lighter.
The 12 volt power socket or the lighter holder can also be used for further
electrical appliance with a power uptake of up to 180 watts.
Caution
Only use matching plugs, which fulfils the DIN - ISO Standard 4165, to
avoid damaging the power sockets.
Note
Connecting electrical components when the engine is not running
will drain the battery of the vehicle - risk of battery draining!
Fig. 67 Centre
console: Cigarette
lighter
WARNING
•Take care when using the cigarette lighter! Not paying proper
attention or incorrect use the cigarette lighter in an uncontrolled
manner may result in burns.
•The cigarette lighter and the power socket also operates when
the ignition is switched off or the ignition key withdrawn. This is
why you should never leave children unattended in the vehicle.