tailgate SKODA FABIA 2003 1.G / 6Y Owner's Manual
[x] Cancel search | Manufacturer: SKODA, Model Year: 2003, Model line: FABIA, Model: SKODA FABIA 2003 1.G / 6YPages: 233, PDF Size: 32.04 MB
Page 72 of 233
Seats and Stowage71
Using the systemSafetyDriving TipsGeneral MaintenanceBreakdown assist-
anceTechnical DataFabia Praktik
Folding double hooks*
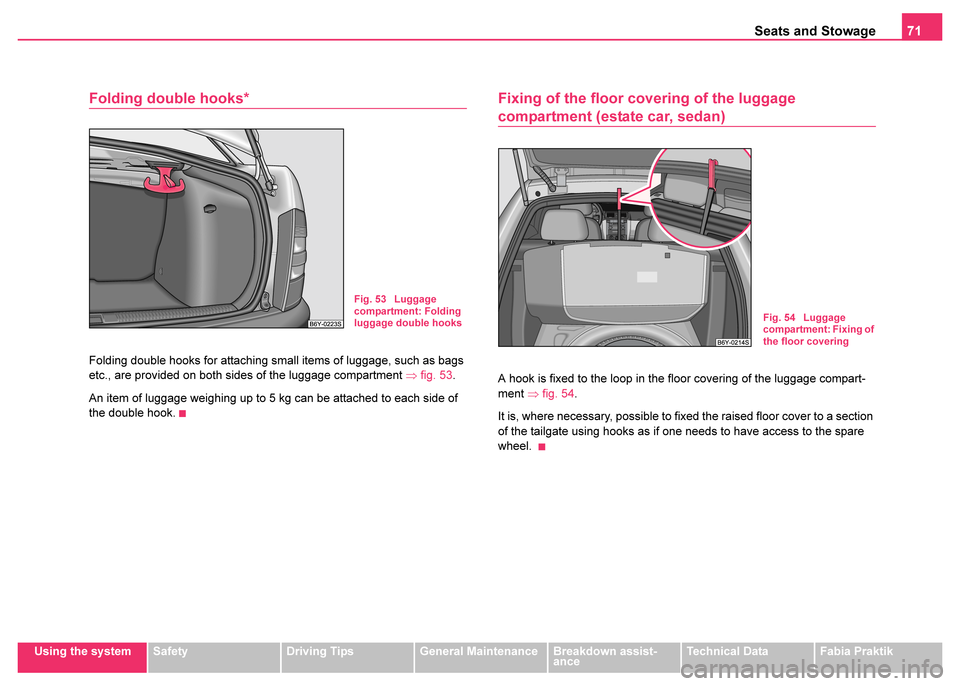
Folding double hooks for attaching small items of luggage, such as bags
etc., are provided on both sides of the luggage compartment ⇒fig. 53 .
An item of luggage weighing up to 5 kg can be attached to each side of
the double hook.
Fixing of the floor covering of the luggage
compartment (estate car, sedan)
A hook is fixed to the loop in the floor covering of the luggage compart-
ment ⇒fig. 54 .
It is, where necessary, possible to fixed the raised floor cover to a section
of the tailgate using hooks as if one needs to have access to the spare
wheel.
Fig. 53 Luggage
compartment: Folding
luggage double hooks
Fig. 54 Luggage
compartment: Fixing of
the floor covering
Page 73 of 233
Seats and Stowage
72
The luggage compartment cover*
You can use the luggage compartment cover behind the
rear head restraints for storing light and soft items.
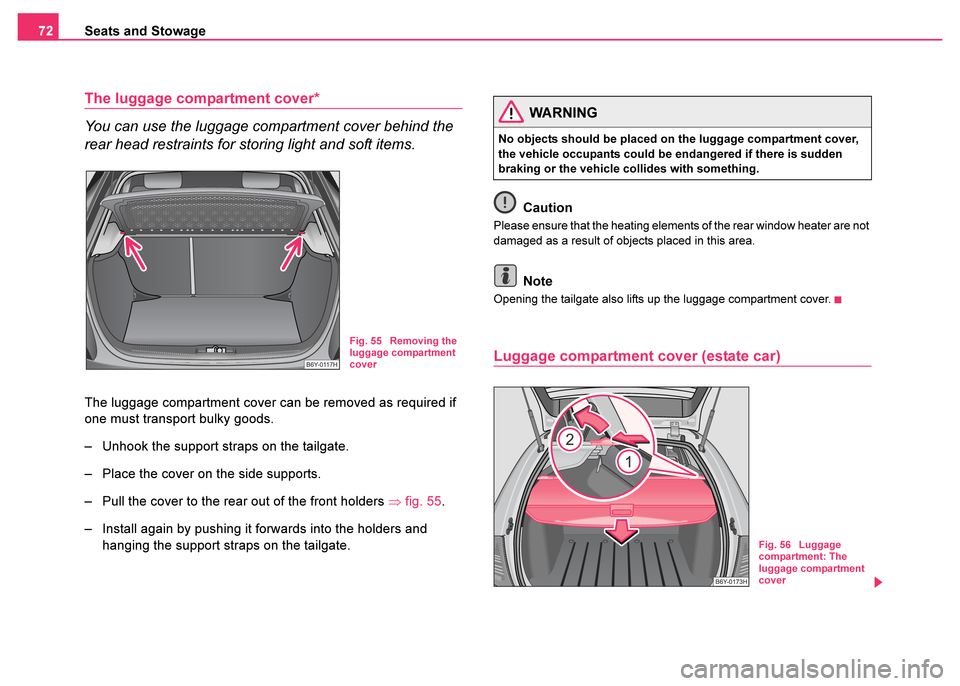
The luggage compartment cover can be removed as required if
one must transport bulky goods.
– Unhook the support straps on the tailgate.
– Place the cover on the side supports.
– Pull the cover to the rear out of the front holders ⇒fig. 55 .
– Install again by pushing it forwards into the holders and hanging the support straps on the tailgate. Caution
Please ensure that the heating elements of the rear window heater are not
damaged as a result of objects placed in this area.
Note
Opening the tailgate also lifts up the luggage compartment cover.
Luggage compartment cover (estate car)
Fig. 55 Removing the
luggage compartment
cover
WARNING
No objects should be placed on the luggage compartment cover,
the vehicle occupants could be endangered if there is sudden
braking or the vehicle collides with something.
Fig. 56 Luggage
compartment: The
luggage compartment
cover
Page 77 of 233
Seats and Stowage
76
Removing and installing net partition housing
Removing
– Fold the front seats forwards ⇒page 67.
– Open the right rear door.
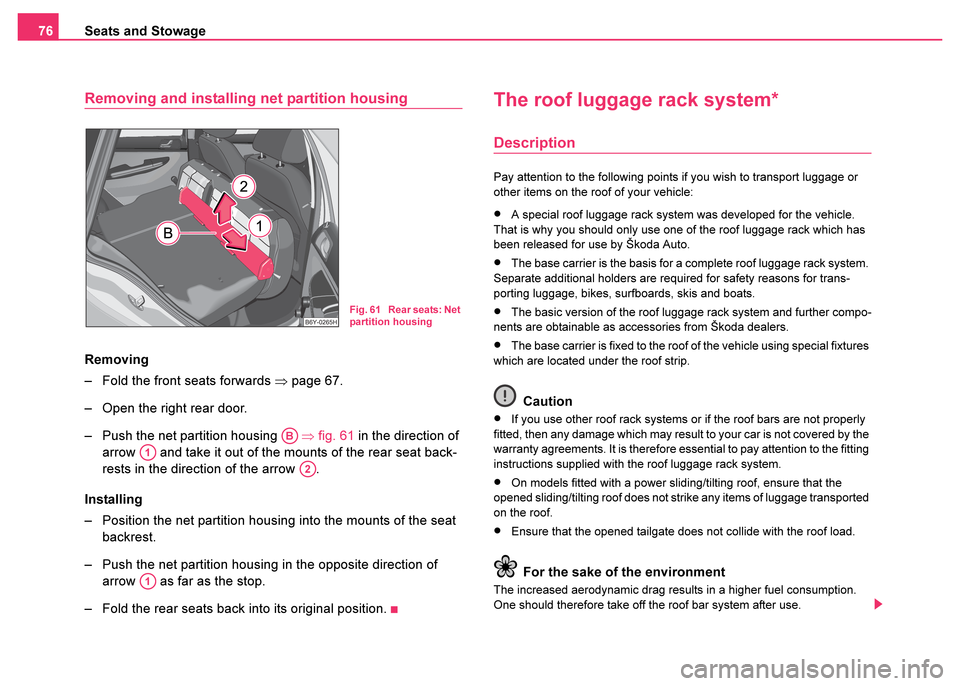
– Push the net partition housing ⇒fig. 61 in the direction of
arrow and take it out of the mounts of the rear seat back-
rests in the direction of the arrow .
Installing
– Position the net partition housing into the mounts of the seat backrest.
– Push the net partition housing in the opposite direction of arrow as far as the stop.
– Fold the rear seats back into its original position.
The roof luggage rack system*
Description
Pay attention to the following points if you wish to transport luggage or
other items on the roof of your vehicle:
•A special roof luggage rack system was developed for the vehicle.
That is why you should only use one of the roof luggage rack which has
been released for use by Škoda Auto.
•The base carrier is the basis for a complete roof luggage rack system.
Separate additional holders are required for safety reasons for trans-
porting luggage, bikes, surfboards, skis and boats.
•The basic version of the roof luggage rack system and further compo-
nents are obtainable as accessories from Škoda dealers.
•The base carrier is fixed to the roof of the vehicle using special fixtures
which are located under the roof strip.
Caution
•If you use other roof rack systems or if the roof bars are not properly
fitted, then any damage which may result to your car is not covered by the
warranty agreements. It is therefore essential to pay attention to the fitting
instructions supplied with the roof luggage rack system.
•On models fitted with a power sliding/tilting roof, ensure that the
opened sliding/tilting roof does not strike any items of luggage transported
on the roof.
•Ensure that the opened tailgate does not collide with the roof load.
For the sake of the environment
The increased aerodynamic drag results in a higher fuel consumption.
One should therefore take off the roof bar system after use.
Fig. 61 Rear seats: Net
partition housing
AB
A1
A2
A1
Page 220 of 233
Fuses and light bulbs219
Using the systemSafetyDriving TipsGeneral MaintenanceBreakdown assist-
anceTechnical DataFabia Praktik
– Take the faulty light bulb out of the interior light and insert a
new one.
– Pull the light bulb out of its holder and insert the new one.
– Press the diffusion disk back into the housing until it clicks into
place (ensure that it is in the right position).
Licence plate light
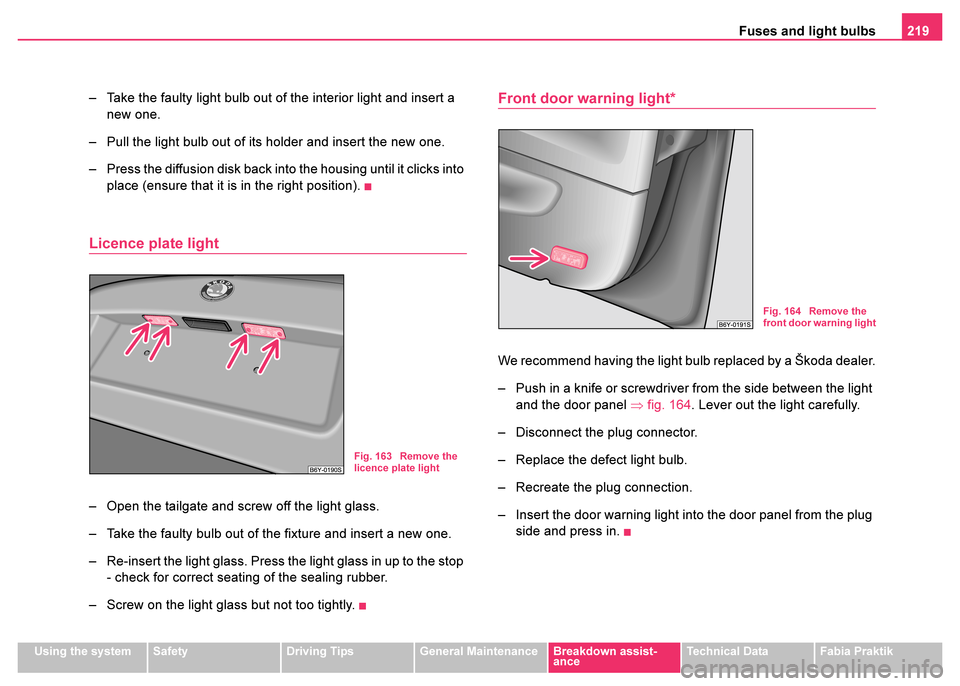
– Open the tailgate and screw off the light glass.
– Take the faulty bulb out of the fixture and insert a new one.
– Re-insert the light glass. Press the light glass in up to the stop - check for correct seating of the sealing rubber.
– Screw on the light glass but not too tightly.
Front door warning light*
We recommend having the light bulb replaced by a Škoda dealer.
– Push in a knife or screwdriver from the side between the light and the door panel ⇒fig. 164 . Lever out the light carefully.
– Disconnect the plug connector.
– Replace the defect light bulb.
– Recreate the plug connection.
– Insert the door warning light into the door panel from the plug side and press in.
Fig. 163 Remove the
licence plate light
Fig. 164 Remove the
front door warning light
Page 222 of 233
Fuses and light bulbs221
Using the systemSafetyDriving TipsGeneral MaintenanceBreakdown assist-
anceTechnical DataFabia Praktik
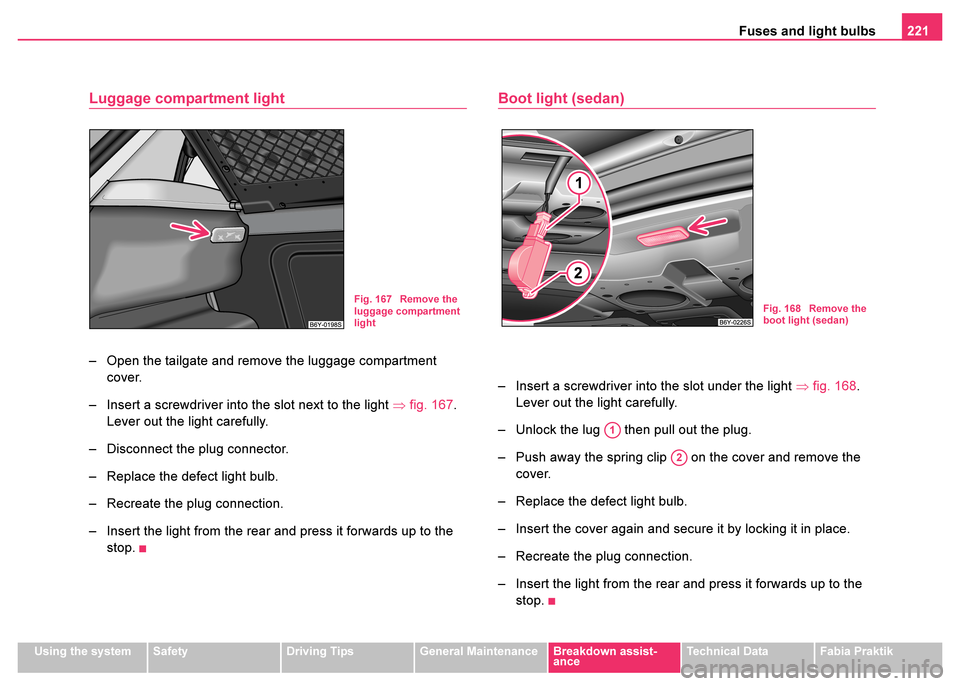
Luggage compartment light
– Open the tailgate and remove the luggage compartment
cover.
– Insert a screwdriver into the slot next to the light ⇒fig. 167 .
Lever out the light carefully.
– Disconnect the plug connector.
– Replace the defect light bulb.
– Recreate the plug connection.
– Insert the light from the rear and press it forwards up to the stop.
Boot light (sedan)
– Insert a screwdriver into the slot under the light ⇒fig. 168 .
Lever out the light carefully.
– Unlock the lug then pull out the plug.
– Push away the spring clip on the cover and remove the cover.
– Replace the defect light bulb.
– Insert the cover again and secure it by locking it in place.
– Recreate the plug connection.
– Insert the light from the rear and press it forwards up to the stop.
Fig. 167 Remove the
luggage compartment
lightFig. 168 Remove the
boot light (sedan)
A1
A2
Page 227 of 233

Praktik
226
Fixing the loading area floor in place
It is possible, where necessary, to fixed the raised loading area
floor to a section of the tailgate using plastic hooks. One example
is a need to have access to the spare wheel.
– First unlock the floor by folding back the lever in position
⇒fig. 172 .
– Lift the loading area floor on the grip then fix at tailgate cutout using plastic hooks (located under the loading area
floor) ⇒fig. 173 .
WARNING
•The load to be transported must be fixed in place in such a way
that it cannot move during the journey and when braking.
•The left door of the loading area on vehicles fitted with Praktik
equipment for certain countries cannot be opened for safety
reasons. Never seek to open this door by force since this could
damage the door lock or the door.
Fig. 172 Securing the
loading area floor
Fig. 173 Fixing the
loading area floor in
place using plastic
hooks
A1
AA
AB