belt SKODA FABIA 2004 1.G / 6Y Owner's Manual
[x] Cancel search | Manufacturer: SKODA, Model Year: 2004, Model line: FABIA, Model: SKODA FABIA 2004 1.G / 6YPages: 247
Page 6 of 247
Contents5
Contents
Layout of this Owner's Manual
(explanations)
. . . . . . . . . . . . . . . . . . .
Using the system . . . . . . . . . . . . . . .
Cockpit . . . . . . . . . . . . . . . . . . . . . . . . . . . . . . .
An overview . . . . . . . . . . . . . . . . . . . . . . . . . .
Instruments and Indicator/Warning LightsGeneral view of the instrument cluster . . . . . .
Engine revolutions counter . . . . . . . . . . . . . . .
Coolant temperature gauge . . . . . . . . . . . . . .
Fuel gauge . . . . . . . . . . . . . . . . . . . . . . . . . . .
Speedometer with counter for distance driven
Service Interval Display . . . . . . . . . . . . . . . . .
Digital clock . . . . . . . . . . . . . . . . . . . . . . . . . .
Multi-functional indicator* (onboard computer)
Information display* . . . . . . . . . . . . . . . . . . . .
Auto Check Control . . . . . . . . . . . . . . . . . . . .
Warning lights . . . . . . . . . . . . . . . . . . . . . . . . .
Unlocking and locking . . . . . . . . . . . . . . . . . .
Keys . . . . . . . . . . . . . . . . . . . . . . . . . . . . . . . .
Locking . . . . . . . . . . . . . . . . . . . . . . . . . . . . . .
Child safety locks . . . . . . . . . . . . . . . . . . . . . .
Central locking system* . . . . . . . . . . . . . . . . .
Remote control* . . . . . . . . . . . . . . . . . . . . . . .
Anti-theft alarm system* . . . . . . . . . . . . . . . . .
Power windows* . . . . . . . . . . . . . . . . . . . . . . .
Electric sliding/tilting roof* . . . . . . . . . . . . . . .
Lights and Visibility. . . . . . . . . . . . . . . . . . . . .
Lights . . . . . . . . . . . . . . . . . . . . . . . . . . . . . . .
Interior lighting . . . . . . . . . . . . . . . . . . . . . . . .
Visibility . . . . . . . . . . . . . . . . . . . . . . . . . . . . . The windscreen wiper and washing system .
Rear-view mirror . . . . . . . . . . . . . . . . . . . . . .
Seats and Stowage . . . . . . . . . . . . . . . . . . . .
Front seats . . . . . . . . . . . . . . . . . . . . . . . . . . .
Head restraints . . . . . . . . . . . . . . . . . . . . . . . .
Middle rear head restraint* . . . . . . . . . . . . . . .
Heating the front seats* . . . . . . . . . . . . . . . . .
Rear seats . . . . . . . . . . . . . . . . . . . . . . . . . . .
Pedals . . . . . . . . . . . . . . . . . . . . . . . . . . . . . .
Luggage compartment . . . . . . . . . . . . . . . . . .
Net partition (Estate)* . . . . . . . . . . . . . . . . . . .
The roof luggage rack system* . . . . . . . . . . .
Drinks can holder* . . . . . . . . . . . . . . . . . . . . .
Note holder . . . . . . . . . . . . . . . . . . . . . . . . . .
Ashtray at the front* . . . . . . . . . . . . . . . . . . . .
Ashtray at the rear* . . . . . . . . . . . . . . . . . . . .
Cigarette lighter* and power socket* . . . . . . .
Storage compartments . . . . . . . . . . . . . . . . . .
Heating and air conditioning system . . . . .
Heating . . . . . . . . . . . . . . . . . . . . . . . . . . . . . .
The air conditioning system* . . . . . . . . . . . . .
Starting-off and Driving. . . . . . . . . . . . . . . . .
Setting steering wheel position* . . . . . . . . . . .
Ignition lock . . . . . . . . . . . . . . . . . . . . . . . . . .
Starting engine . . . . . . . . . . . . . . . . . . . . . . . .
Switching the engine off . . . . . . . . . . . . . . . . .
Shifting (manual gearbox) . . . . . . . . . . . . . . .
Handbrake . . . . . . . . . . . . . . . . . . . . . . . . . . .
Parking aid* . . . . . . . . . . . . . . . . . . . . . . . . . .
Cruise control system (CCS)* . . . . . . . . . . . .
Automatic gearbox*. . . . . . . . . . . . . . . . . . . .
4-speed automatic gearbox . . . . . . . . . . . . . .
Communication . . . . . . . . . . . . . . . . . . . . . . .
Universal telephone connection* . . . . . . . . . .
Mobile phones and two-way radio systems . .
The CD changer* . . . . . . . . . . . . . . . . . . . . . .
Safety. . . . . . . . . . . . . . . . . . . . . . . . . . . . . .
Passive Safety . . . . . . . . . . . . . . . . . . . . . . . .
Basic information . . . . . . . . . . . . . . . . . . . . . .
Correct seated position . . . . . . . . . . . . . . . . .
Seat belts. . . . . . . . . . . . . . . . . . . . . . . . . . . . .
Why seat belts? . . . . . . . . . . . . . . . . . . . . . . .
The physical principle of a frontal collision . .
Important safety information regarding the use
of seat belts . . . . . . . . . . . . . . . . . . . . . . . . . .
How are seat belts correctly fastened? . . . . .
Belt tensioners . . . . . . . . . . . . . . . . . . . . . . . .
Airbag system. . . . . . . . . . . . . . . . . . . . . . . . .
Description of the airbag system . . . . . . . . . .
Front airbags . . . . . . . . . . . . . . . . . . . . . . . . .
Side airbags* . . . . . . . . . . . . . . . . . . . . . . . . .
Deactivating an airbag . . . . . . . . . . . . . . . . . .
Transporting children safely . . . . . . . . . . . .
What you should know about transporting
children! . . . . . . . . . . . . . . . . . . . . . . . . . . . . .
Child seat . . . . . . . . . . . . . . . . . . . . . . . . . . . .
Attaching a child seat using the “ISOFIX”*
system . . . . . . . . . . . . . . . . . . . . . . . . . . . . . .
8
9
11
11
12
12
13
13
13
14
15
16
17
21
23
27
37
37
39
40
40
45
48
49
51
54
54
58
60 61
65
66
66
68
69
69
70
72
72
77
80
82
82
83
83
84
85
91
91
94
100
100
101
102
103
104
105
106
107 11 0
11 0 11 5
11 5
11 6
11 6
11 7
11 7
11 7
11 9
123
123
124
125
126
129
130
130
132
134
137
140
140
144
148
Page 29 of 247
Instruments and Indicator/Warning Lights
28
WARNING
•If you do not pay attention to the warning lights coming on and
the corresponding descriptions and warning notes, this may result
in severe body injuries or major vehicle damage.
•The engine compartment of your car is a hazardous area. There
is a risk of injuries, scalding, accid ents and fire when working in the
engine compartment, e.g. inspecting and replenishing oil and other
fluids. It is also essential to observe all warnings ⇒page 183.
Note
•Arrangement of the indicator lights depends on the model and model
version. The symbols shown in the following functional description are to
be found as indicator lights in the instrument cluster.
•Operational faults are shown in the instrument cluster as red symbols
(priority 1 - danger) or yellow symbols (priority 2 - warning).
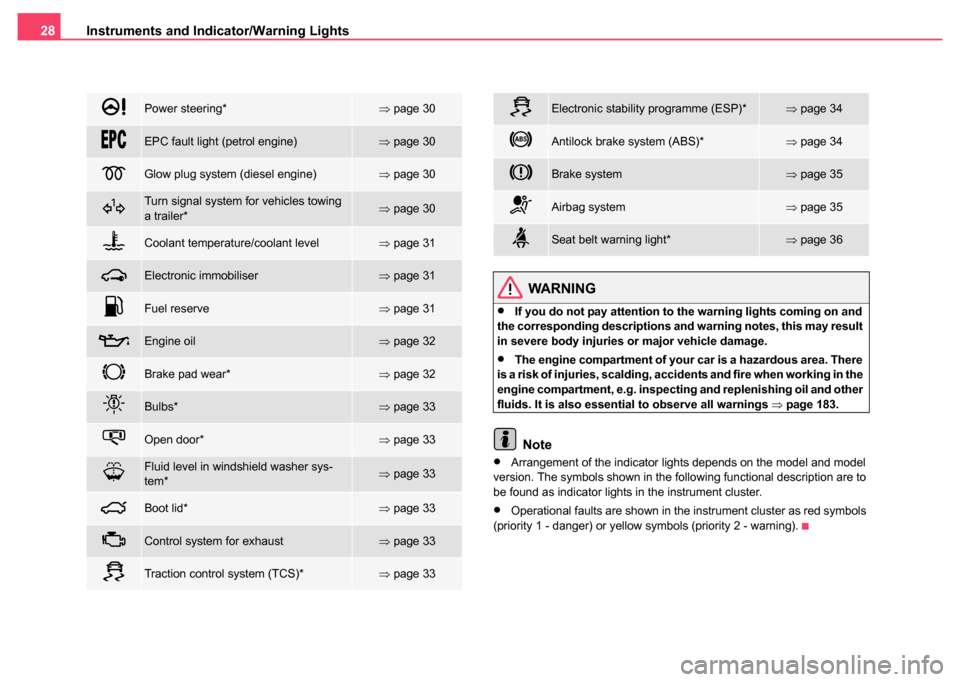
Power steering*⇒ page 30
EPC fault light (petrol engine)⇒page 30
Glow plug system (diesel engine)⇒page 30
Turn signal system for vehicles towing
a trailer*⇒page 30
Coolant temperature/coolant level⇒page 31
Electronic immobiliser⇒page 31
Fuel reserve⇒page 31
Engine oil⇒page 32
Brake pad wear*⇒page 32
Bulbs*⇒page 33
Open door*⇒page 33
Fluid level in windshield washer sys-
tem*⇒page 33
Boot lid*⇒page 33
Control system for exhaust⇒page 33
Traction control system (TCS)*⇒page 33
Electronic stability programme (ESP)*⇒page 34
Antilock brake system (ABS)*⇒page 34
Brake system⇒page 35
Airbag system⇒page 35
Seat belt warning light*⇒page 36
Page 30 of 247
Instruments and Indicator/Warning Lights29
Using the systemSafetyDriving TipsGeneral MaintenanceBreakdown assistanceTechnical Data
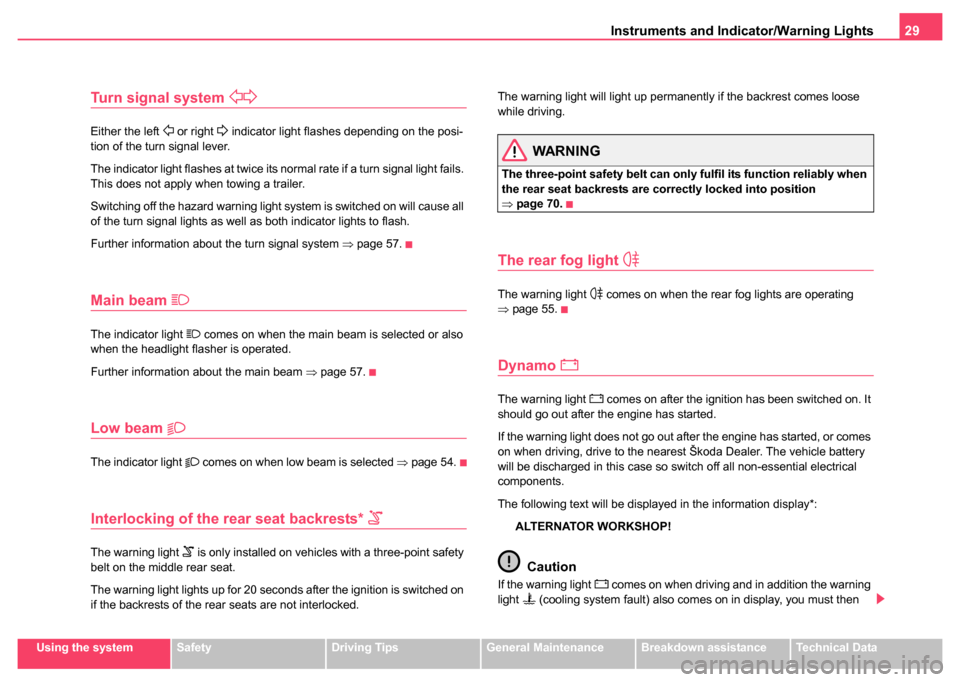
Turn signal system
Either the left or right indicator light flashes depending on the posi-
tion of the turn signal lever.
The indicator light flashes at twice its normal rate if a turn signal light fails.
This does not apply when towing a trailer.
Switching off the hazard warning light system is switched on will cause all
of the turn signal lights as well as both indicator lights to flash.
Further information about the turn signal system ⇒page 57.
Main beam
The indicator light comes on when the main beam is selected or also
when the headlight flasher is operated.
Further information about the main beam ⇒page 57.
Low beam
The indicator light comes on when low beam is selected ⇒page 54.
Interlocking of the rear seat backrests*
The warning light is only installed on vehicles with a three-point safety
belt on the middle rear seat.
The warning light lights up for 20 seconds after the ignition is switched on
if the backrests of the rear seats are not interlocked. The warning light will light up permanently if the backrest comes loose
while driving.
WARNING
The three-point safety belt can only fulfil its function reliably when
the rear seat backrests are correctly locked into position
⇒
page 70.
The rear fog light
The warning light comes on when the rear fog lights are operating
⇒ page 55.
Dynamo
The warning light comes on after the ignition has been switched on. It
should go out after the engine has started.
If the warning light does not go out after the engine has started, or comes
on when driving, drive to the nearest Škoda Dealer. The vehicle battery
will be discharged in this case so switch off all non-essential electrical
components.
The following text will be displayed in the information display*:
ALTERNATOR WORKSHOP!
Caution
If the warning light comes on when driving and in addition the warning
light (cooling system fault) also comes on in display, you must then
Page 37 of 247
Instruments and Indicator/Warning Lights
36
The following text will be displayed in the information display*:
AIRBAG FAULT
The functionality of the airbag system is also monitored electronically,
when one airbag has been switched off
The passenger front airbag and also possibly the passenger side
airbag which have been switched off by a Skoda dealer using the
vehicle system tester:
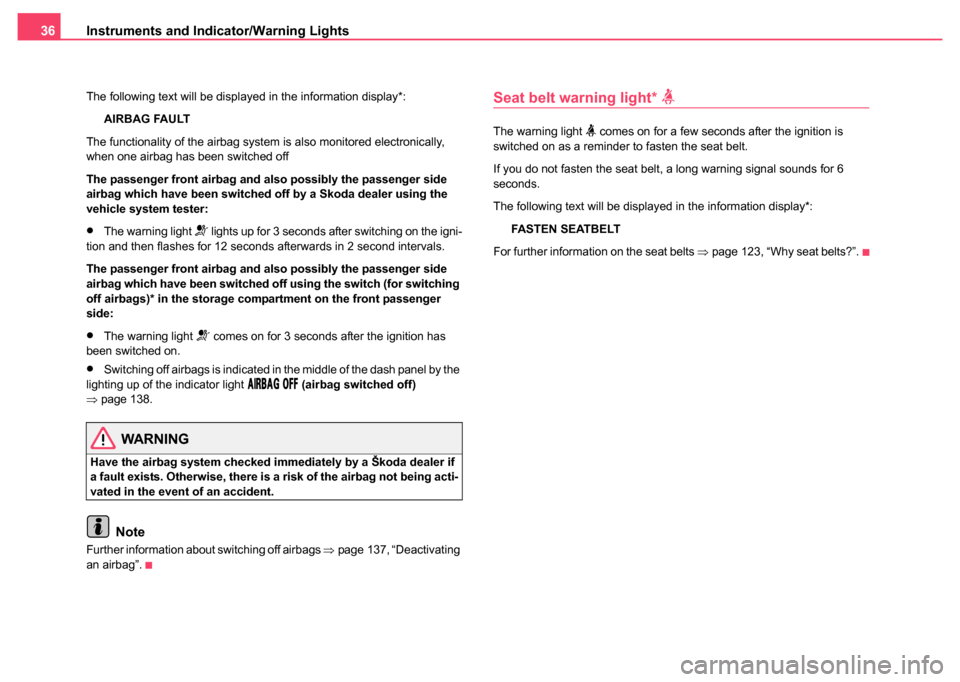
•The warning light lights up for 3 seconds after switching on the igni-
tion and then flashes for 12 seconds afterwards in 2 second intervals.
The passenger front airbag and also possibly the passenger side
airbag which have been switched off using the switch (for switching
off airbags)* in the storage compartment on the front passenger
side:
•The warning light comes on for 3 seconds after the ignition has
been switched on.
•Switching off airbags is indicated in the middle of the dash panel by the
lighting up of the indicator light (airbag switched off)
⇒ page 138.
WARNING
Have the airbag system checked immediately by a Škoda dealer if
a fault exists. Otherwise, there is a risk of the airbag not being acti-
vated in the event of an accident.
Note
Further information about switching off airbags ⇒page 137, “Deactivating
an airbag”.
Seat belt warning light*
The warning light comes on for a few seconds after the ignition is
switched on as a reminder to fasten the seat belt.
If you do not fasten the seat belt, a long warning signal sounds for 6
seconds.
The following text will be displayed in the information display*:
FASTEN SEATBELT
For further information on the seat belts ⇒page 123, “Why seat belts?”.
Page 67 of 247
Seats and Stowage
66
Seats and Stowage
Front seats
Basic information
The front seats have a wide range of different settings and can thus be
matched to the physical characteristics of the driver and front passenger.
Correct adjustment of the seats is particularly important for
•safely and quickly reaching the controls,
•a relaxed, fatigue-free body position,
•achieving the maximum protection offered by the seat belts and
the airbag system.
The chapters which follow describe the procedure which you should adopt
for adjusting the seats.
WARNING
•Never transport more occupants than the maximum seating in
the vehicle.
•Each occupant must correctly fasten the seat belt belonging to
the seat. Children must be fastened ⇒page 140, “Transporting
children safely” with a suitable restraint system.
•The front seats and the head restraints must always be adjusted
to match the body size of the seat occupant as well as the seat belts
must always be correctly fastened in order to provide an optimal
protection for you and your occupants.
•Always keep your feet in the footwell when the car is being
driven - never place your feet on the instrument panel, out of the
window or on the surfaces of the seats. This is particularly impor- tant for the front seat passenger. You will be exposed to increased
risk of injury if it becomes nece
ssary to apply the brake or in the
event of an accident. If an airbag is deployed, you may suffer fatal
injuries when adopting an incorrect seated position!
•It is important for the driver and front passenger to maintain a
distance of at least 25 cm from the steering wheel or dash panel.
Not maintaining this minimum distance will mean that the airbag
system will not be able to properly protect you - hazard! The front
seats and the head restraints must always also be correctly
adjusted to match the body size of the occupant.
•Ensure that there are no objects in the footwell as any objects
may get behind the pedals during a driving or braking manoeuvre.
You would then no longer be able to operate the clutch, to brake or
accelerate.
WARNING (continued)
Page 68 of 247
Seats and Stowage67
Using the systemSafetyDriving TipsGeneral MaintenanceBreakdown assistanceTechnical Data
Adjusting the front seats
Adjusting a seat in a forward/back direction
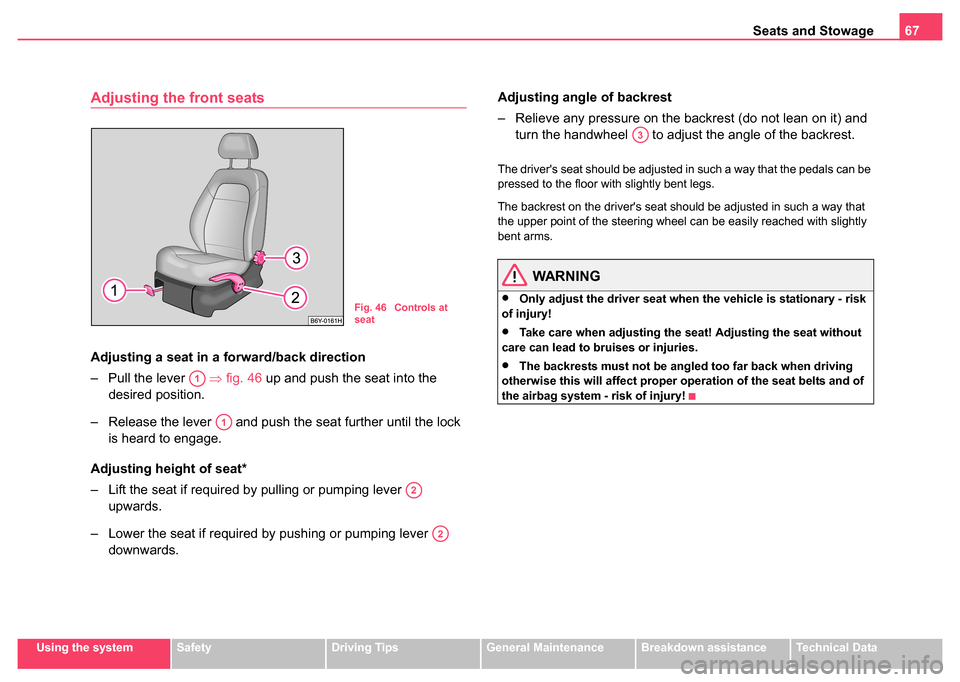
– Pull the lever ⇒fig. 46 up and push the seat into the
desired position.
– Release the lever and push the seat further until the lock is heard to engage.
Adjusting height of seat*
– Lift the seat if required by pulling or pumping lever upwards.
– Lower the seat if required by pushing or pumping lever downwards. Adjusting angl
e of backrest
– Relieve any pressure on the backrest (do not lean on it) and turn the handwheel to adjust the angle of the backrest.
The driver's seat should be adjusted in such a way that the pedals can be
pressed to the floor with slightly bent legs.
The backrest on the driver's seat should be adjusted in such a way that
the upper point of the steering wheel can be easily reached with slightly
bent arms.
WARNING
•Only adjust the driver seat when the vehicle is stationary - risk
of injury!
•Take care when adjusting the seat! Adjusting the seat without
care can lead to bruises or injuries.
•The backrests must not be angled too far back when driving
otherwise this will affect proper operation of the seat belts and of
the airbag system - risk of injury!
Fig. 46 Controls at
seat
A1
A1
A2
A2
A3
Page 69 of 247
Seats and Stowage
68
Head restraintsAdjusting the height of a head restraint
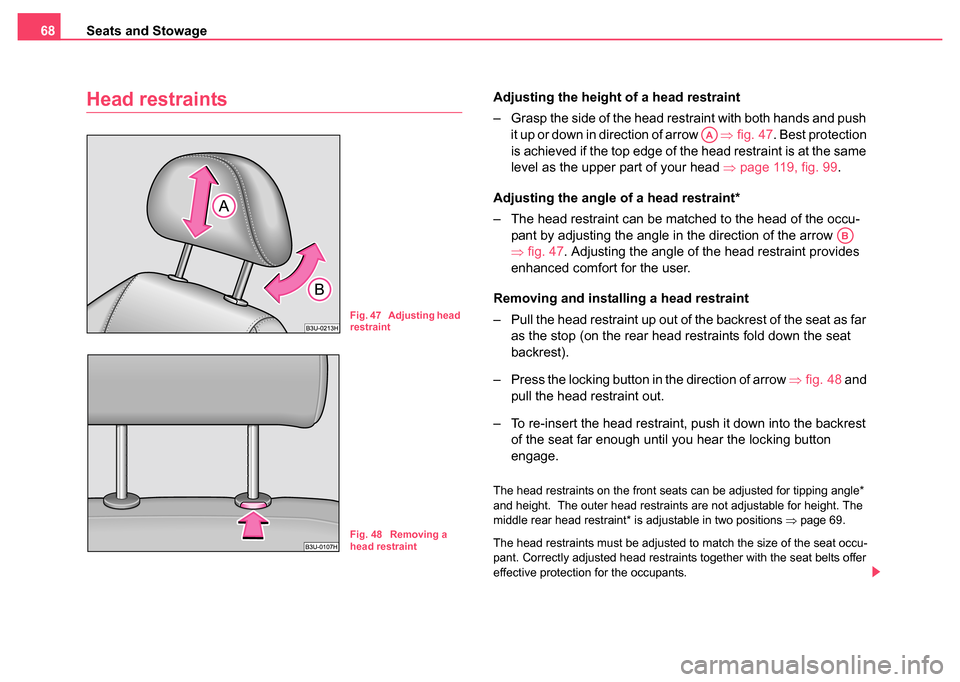
– Grasp the side of the head restraint with both hands and push
it up or down in direction of arrow ⇒fig. 47 . Best protection
is achieved if the top edge of the head restraint is at the same
level as the upper part of your head ⇒page 119, fig. 99 .
Adjusting the angle of a head restraint*
– The head restraint can be matched to the head of the occu- pant by adjusting the angle in the direction of the arrow
⇒fig. 47. Adjusting the angle of the head restraint provides
enhanced comfort for the user.
Removing and installing a head restraint
– Pull the head restraint up out of the backrest of the seat as far as the stop (on the rear head restraints fold down the seat
backrest).
– Press the locking button in the direction of arrow ⇒fig. 48 and
pull the head restraint out.
– To re-insert the head restraint, push it down into the backrest of the seat far enough until you hear the locking button
engage.
The head restraints on the front seats can be adjusted for tipping angle*
and height. The outer head restraints are not adjustable for height. The
middle rear head restraint* is adjustable in two positions ⇒page 69.
The head restraints must be adjusted to match the size of the seat occu-
pant. Correctly adjusted head restraints together with the seat belts offer
effective protection for the occupants.
Fig. 47 Adjusting head
restraint
Fig. 48 Removing a
head restraint
AA
AB
Page 72 of 247

Seats and Stowage71
Using the systemSafetyDriving TipsGeneral MaintenanceBreakdown assistanceTechnical Data
The rear seats and the seat ba ckrest can be folded forwards to
increase the volume of the luggage compartment ⇒page 72.
Both parts of the bank can be folded forward individually on vehi-
cles with a divided rear seat*.
Folding the rear seat forwards
– In order to avoid causing any damage when folding the rear seat forward it is important to adjust the front seats so that no
damage can occur when this is done.
– Pull up the rear seats in the direction of arrow ⇒page 70,
fig. 51 and fold forwards in direction of arrow .
– Pull up the unlocking knob on the seat backrest and fold the seat backrest forwards ⇒page 70, fig. 52.
– Pull the head restraints out of the seat backrest.
– The head restraints can be inserted into the relevant holes of the folded forwards rear seats ⇒fig. 53 .
– Fold the seat backrest forwards completely.
Folding the rear seat back into position
– Install the head restraints in the partially lifted rear seat back- rest.
– Then push the seat backrest back into the upright position until it clicks into place - check by pulling on it.
– Fold the rear seats back into its original position. WARNING
•The belt lock and pelvic belt must be in their original position
after folding back the rear seats and seat backrest - they must be
ready to use.
•The seat backrests must be securely interlocked in position so
that no objects in the luggage compartment can slide forward if
there is sudden braking - risk of injury.
•Ensure that the seat backrest on the rear seats is securely inter-
locked in position when the vehicle is fitted with three-point safety
belts for the middle rear seat. It is only then that the three-point seat
belt can reliably fulfil its function.
Inserting a head restraint in the rear seats
– The rear head restraints can be inserted into the relevant holes of the folded forwards rear seats.
A1
A2
Fig. 53 Rear seats:
Head restraint in rear
seats
Page 79 of 247

Seats and Stowage
78
Unrolling
– Fold down the rear seat backrests slightly forwards ⇒page 70, which makes it possible to clear the access for
unrolling the net partition.
– Pull the net partition at the bracket out of the housing in direction of the holders ⇒page 77, fig. 61.
– Insert the cross rod into one of the mounts and push the cross rod forward.
– In the same way, fix the cross rod to the other side of the vehicle, mount .
– Then push the seat backrest back into the upright position until it clicks into place - check by pulling on it ⇒.
Rolling up
– Pull the cross rod back slightly, first on the one side then on the other side and take the cross rod out of the mount
⇒page 77, fig. 62 .
– Hold the cross rod in such a way that the net partition can roll
up slowily and without damage into housing .
If you wish to use the entire luggage compartment, you can remove the
luggage compartment cover ⇒page 76, fig. 60 .
WARNING
•Ensure that the seat backrest on the rear seats is securely inter-
locked in position when the vehicle is fitted with three-point safety
belts for the middle rear seat. It is only then that the three-point seat
belt can reliably fulfil its function.
•First check for yourself that the cross road is inserted into the
mounts in the front position!
AAAB
AC
AC
AC
AC
AB
WARNING (continued)
AC
Page 118 of 247
Passive Safety117
Using the systemSafetyDriving TipsGeneral MaintenanceBreakdown assistanceTechnical Data
Safety
Passive Safety
Basic information
Driving the safe way
Passive safety measures reduce the risk of injury in acci-
dent situations.
In this section you will find important information, tips and notes on the
subject of passive safety in your vehicle. We have combined everything
here which you should be familiar with, for example, regarding seat belts,
airbags, child seats and safety of children. It is therefore important, in
particular, to comply with the notes and warnings in this section for your
own interest and in the interest of those travelling with you.
WARNING
•This chapter contains important information on how to use the
vehicle for the driver and his occupants. You will find further infor-
mation on safety, which concerns you and those travelling with
you, in the following chapters of this Owner's Manual.
•The complete on-board literature should always be in the
vehicle. This applies in particular, if you rent out or sell the
vehicle.
Safety equipment
The safety equipment is part of the occupant protection
and it can reduce the risk of injuries in accident situations.
“Do not put at risk” your safety and the safety of those travelling with you
. In the event of an accident, the safety equipment can reduce the risk of
injuries. The following list contains part of the safety equipment in your
vehicle:
•Three-point seat belts for all the seats,*,
•belt force limiter for front seats*,
•belt tensioner for front seats,
•seat belt height adjuster for front seats,
•front airbags*,
•Side airbags*,
•anchoring points for child seat using the “ISOFIX” system,
•head restraint adjustable for height,
•adjustable steering column.
The specified safety equipment works together, in order to optimally
protect you and those travelling with you in accident situations. The safety
equipment does not protect you or the people travelling with you, if you or
your occupants adopt an incorrect seated position or the equipment is not
correctly adjusted or used.
For this reason you will be provided with information on why this equip-
ment is very important, how it protects you and the occupants, what