SKODA FABIA 2007 1.G / 6Y DX Navigation System Manual
Manufacturer: SKODA, Model Year: 2007, Model line: FABIA, Model: SKODA FABIA 2007 1.G / 6YPages: 66, PDF Size: 3.45 MB
Page 21 of 66
Audio
20
•RDS evaluation is not possible if the signal is too weak. In this case it
is the frequncy which appears in the status bar or in the info field instead
of the RDS station name.
•If there are unfavourable reception conditions (e.g. in the mountains)
the unit checks very often the alternative frequencies. This can cause brief
mutings.
•If this causes mutings and tone distortions in extremely poor reception
locations, the RDS function is temporarily switched off.
Traffic radio reception
Many stations in the FM range regularly transmit the current traffic reports
within their transmitting range.
After selecting a station, check if the set station has traffic reports.
If the set station is a TP station (station with traffic radio reception), the
identification “ TP” appears in addition to the station name in the info field
of the radio basic menu. The station remains set. The functions “ traffic
information standby ” and “EON” are active.
If the set station has no traffic radio station or cannot be received, the unit
searches automatically for another traffic radio station in the reception
area (start station finding). The message “ TP SEEK” (searching traffic
radio station) appears in the radio information display.
Listening to traffic information
A traffic information is detected by the unit using the traffic information
identification. Even if the radio is set very low or in the CD mode you can
listen to a traffic information. The play function is performed in Mono. The
message “ Info” appears in the radio information display. Simultaneously
the traffic information is recorded in the traffic information memory (TIM)
⇒ page 20. Interrupting a traffic information
If a traffic information was interrupted, press the button . A new
traffic information can be emitted.
Cancel traffic information standby
The traffic information standby is cancelled in the menu “
Select source”
when switching over to FM or AM level.
Traffic information memory - Traffic Memo (TIM)
The radio navigation system has a digital voice memory with which upto
nine traffic reports with a total duration of maximum four minutes can be
automatically recorded.
If the radio is switched on each traffic report of the set station is
recorded, if the show “ TP” is present in the info field.
If the unit is switched off traffic reports are recorded for as long as they
were selected in the menu “ Audio Settings” under “TIM-Standby”
⇒ page 14. This function can also be switched off.
Replaying the traffic reports
If you press the button , the replay of the traffic reports starts with
the last recorded traffic information and continues to the oldest traffic infor-
mation. The show “ TIM Track 4 Time 14:10 TP ” appears in the info field:
TIM - Play function of a recorded traffic information
Tra ck 4 - There are four traffic information. The play function begins with
the latest information.
Time 14:10 - Recording time
TP - TP station
TIMA1
TIMA1
20.book Page 20 Tuesday, December 6, 2005 2:26 PM
Page 22 of 66
Audio21
Replaying the random traffic report
The traffic reports can also be replayed in the random order.
•replaying older traffic report - press the rocker button on the left for
two seconds.
•replaying latest traffic report - press the rocker button on the right
for two seconds.
Fast replay of the traffic reports
If the rocker button on the right is held pressed, the reports are quickly
replayed with time details ( 3 - 5 times faster).
Repeating the traffic report
A traffic report is repeated, if the rocker button on the left is pressed
again (last pressing was carried out more than two seconds ago).
Ending TIM function
The function is ended by pressing again the button and the radio
basic menu is called up.
Erasing the traffic reports
The traffic reports are automatically erased six seconds after ending the
memory standby, which is 24 hours.
Note
•Select a radio station before switching off the unit, otherwise no traffic
reports can be stored.
•The storing can be activated for 24 hours or until the next switching on
by pressing the button if the unit is switched off. In the process
and if it is necessary a radio station is automatically set.
•The oldest announcement will be overwritten if the traffic information
memory is full.
•The beginning is overwritten, if a report lasts more than four minutes.
A signal tone sounds as information that the entire report could not be
stored.
•If a traffic report is stored when the unit is switched on, this action
continues until the end. Then the last selected setting is effective.
•If no traffic reports were stored, the message “ No Messages” appears
in the radio information display after pressing the button and a
signal tone sounds.
CD mode
Switching over to CD mode
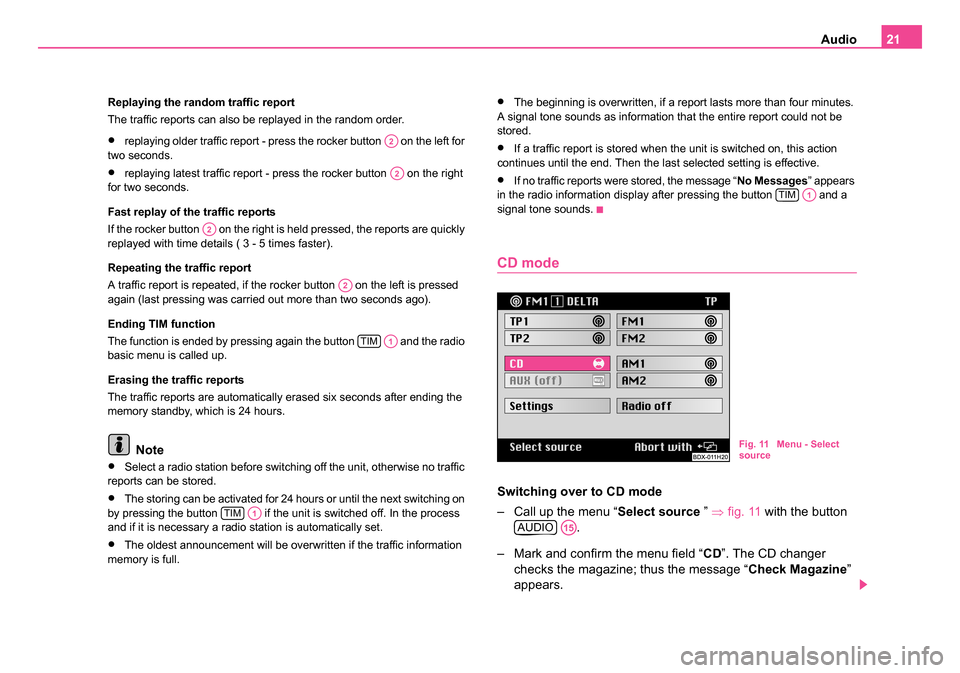
– Call up the menu “ Select source ” ⇒fig. 11 with the button
.
– Mark and confirm the menu field “ CD”. The CD changer
checks the magazine; thus the message “ Check Magazine”
appears.
A2
A2
A2
A2
TIMA1
TIMA1
TIMA1
Fig. 11 Menu - Select
source
AUDIOA15
20.book Page 21 Tuesday, December 6, 2005 2:26 PM
Page 23 of 66
Audio
22
– Afterwards the play function starts in the order of the CDs inserted in the magazine.
Interrupting the CD play function
The play function of a CD is interrupted in the event of a traffic information.
At the same time the identification “ Info” is indicated in the info field of the
CD menu.
End CD play function
The CD play function is ended when selecting another tone source in the
menu “ Select source ”. The unit changes to radio mode.
Note
•If no music CD is inserted or when driving in difficult regions ⇒page 23
the error message “ CD ERROR” or “CD1 ERROR ” appears in the info
field.
•The selected CD with the current track (“ Tr a c k”) is displayed in the CD
information display. The menu fields besides the station buttons indi-
cate the assignment of the magazine with CDs.
•The message “ CD1 Track1 Play ” appears in the status bar if the
navigation is active.
CD functions
Select CD
– Select the desired CD using the corresponding station button . Select track
– Press the rocker button to se
lect the track. If the rocker
button on the right is pressed, the play function of the following
track starts. The current track starts from the beginning by
pressing the rocker button on the left. Press the rocker button
on the left briefly in succession, in order to reach the previous
track.
Scan
– Press the button for a brief playing of the tracks (ten seconds) of one CD. Press this button once again in order to
abort this function.
Playing track in random sequence
– Press the button in order to play the track of a CD in the random sequence. Press this button once again in order
to abort this function.
CD MIX
– This function makes it possible to play in the random sequence not only the track of a CD but also the CDs inserted
in the CD changer. For this step mark and confirm the menu
field “ CD Shuffle ” in the menu “ Audio Settings ”. Switch back
and forth between the options “ Disc” and “ Magazine ” by
pressing the menu knob .
A12
1
A12
A2
SCANA14
CD MIXA11
A18
20.book Page 22 Tuesday, December 6, 2005 2:26 PM
Page 24 of 66
Audio23
Information on how to use a CD changer
CD to jump
Uneven road surfaces and strong vibrations may cause the CD to jump.
In such cases wait with the CD mode until there is a better road surface to
drive on.
Formation of condensation
When it is cold and after rain showers, moisture can deposit in the CD
changer housing (condensation). This can effect the CD jump or impair
the play function. In such cases wait until the moisture has dissipated.
Notes for the care of the CDs
If a CD is soiled, please never clean the CD in the direction of a circle but
rather with a soft fluffly cloth from inside to outside. In case of severe
layers of dirt we recommend to clean the CD with a commercially available
CD cleaner. Also in this case do not clean the CD in the direction of a circle
but rather from inside to outside and then let it dry off.
Caution
•Never use liquids such as gasoline, paint thinner or disk cleaner, other-
wise the surface of the CD could get damaged.
•Never expose CDs to direct sun rays!
•Please never write or affix the CD!
Note
Dirt or damage of a CD can lead to difficulties when “ reading” the infor-
mation. The difficulty in reading the error depends on the dirt or on the
severity of the mechanical damage. Severe scratches cause reading
errors which can make the CD jump or “ get stuck”. All CDs must be
treated carefully and always be stored in a protective case.
20.book Page 23 Tuesday, December 6, 2005 2:26 PM
Page 25 of 66
Navigation
24
Navigation
Overview of navigation basic menu
Call up navigation basic menu
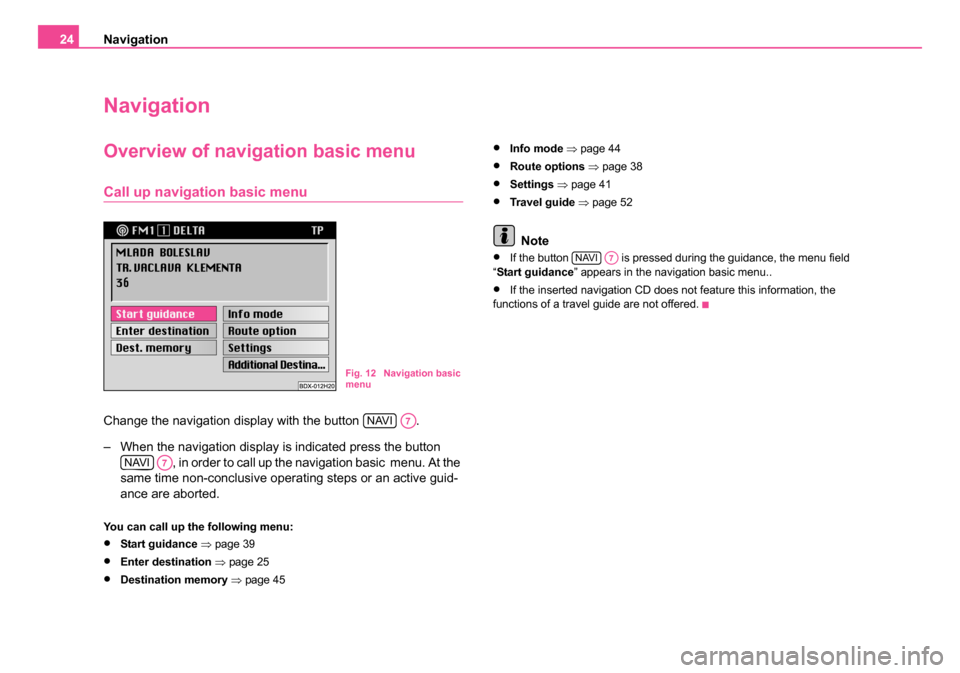
Change the navigation display with the button .
– When the navigation display is indicated press the button
, in order to call up the navigation basic menu. At the
same time non-conclusive operating steps or an active guid-
ance are aborted.
You can call up the following menu:
•Start guidance ⇒ page 39
•Enter destination ⇒ page 25
•Destination memory ⇒ page 45
•Info mode ⇒ page 44
•Route options ⇒page 38
•Settings ⇒ page 41
•Travel guide ⇒ page 52
Note
•If the button is pressed during the guidance, the menu field
“ Start guidance ” appears in the navigation basic menu..
•If the inserted navigation CD does not feature this information, the
functions of a travel guide are not offered.
Fig. 12 Navigation basic
menu
NAVIA7
NAVIA7
NAVIA7
20.book Page 24 Tuesday, December 6, 2005 2:26 PM
Page 26 of 66
Navigation25
Enter destination
Overview
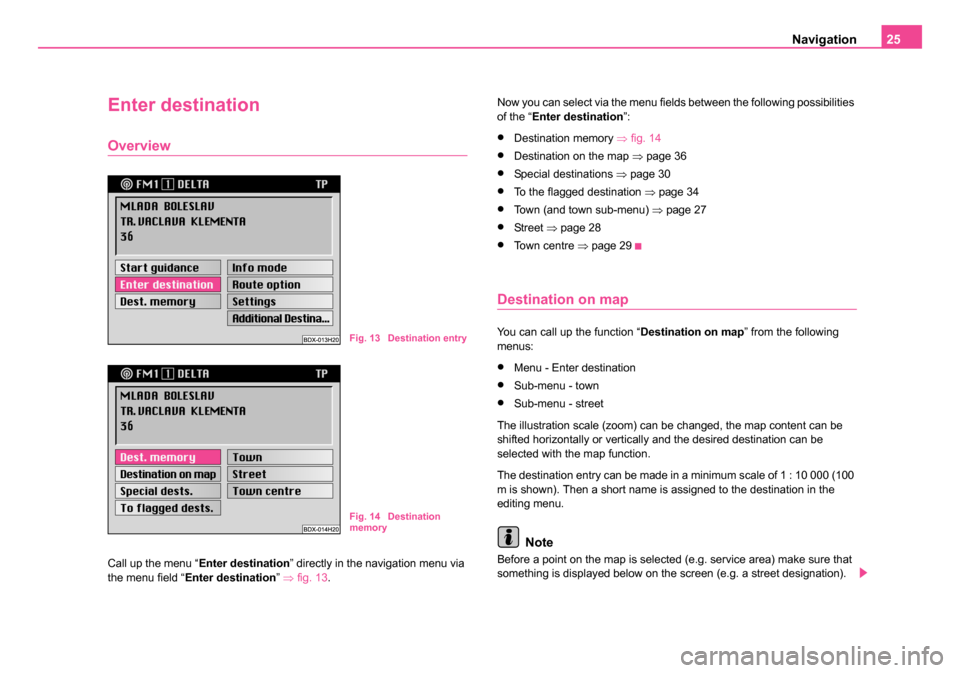
Call up the menu “ Enter destination ” directly in the navigation menu via
the menu field “ Enter destination ” ⇒ fig. 13 . Now you can select via the menu fields between the following possibilities
of the “
Enter destination ”:
•Destination memory ⇒fig. 14
•Destination on the map ⇒page 36
•Special destinations ⇒page 30
•To the flagged destination ⇒page 34
•Town (and town sub-menu) ⇒page 27
•St re et ⇒page 28
•To w n c e n t r e ⇒page 29
Destination on map
You can call up the function “ Destination on map” from the following
menus:
•Menu - Enter destination
•Sub-menu - town
•Sub-menu - street
The illustration scale (zoom) can be changed, the map content can be
shifted horizontally or vertically and the desired destination can be
selected with the map function.
The destination entry can be made in a minimum scale of 1 : 10 000 (100
m is shown). Then a short name is assigned to the destination in the
editing menu.
Note
Before a point on the map is selected (e.g. service area) make sure that
something is displayed below on the screen (e.g. a street designation).
Fig. 13 Destination entry
Fig. 14 Destination
memory
20.book Page 25 Tuesday, December 6, 2005 2:26 PM
Page 27 of 66
Navigation
26
Therefore ensure that the destination is detected by the navigation system
and a route is calculated.
Editing menu
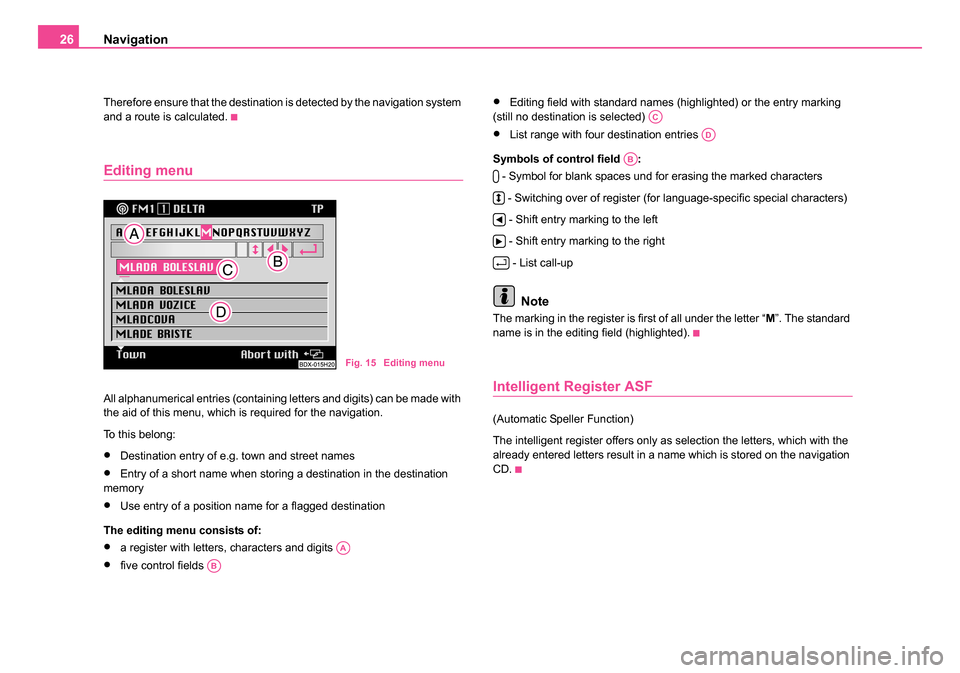
All alphanumerical entries (containing letters and digits) can be made with
the aid of this menu, which is required for the navigation.
To this belong:
•Destination entry of e.g. town and street names
•Entry of a short name when storing a destination in the destination
memory
•Use entry of a position name for a flagged destination
The editing menu consists of:
•a register with letters, characters and digits
•five control fields
•Editing field with standard names (highlighted) or the entry marking
(still no destination is selected)
•List range with four destination entries
Symbols of control field : - Symbol for blank spaces und for erasing the marked characters
- Switching over of register (for language-specific special characters) - Shift entry marking to the left
- Shift entry marking to the right - List call-up
Note
The marking in the register is first of all under the letter “ M”. The standard
name is in the editing field (highlighted).
Intelligent Register ASF
(Automatic Speller Function)
The intelligent register offers only as selection the letters, which with the
already entered letters result in a name which is stored on the navigation
CD.
Fig. 15 Editing menu
AA
AB
AC
AD
AB
20.book Page 26 Tuesday, December 6, 2005 2:26 PM
Page 28 of 66
Navigation27
Enter destination - Town
Select a town as destination
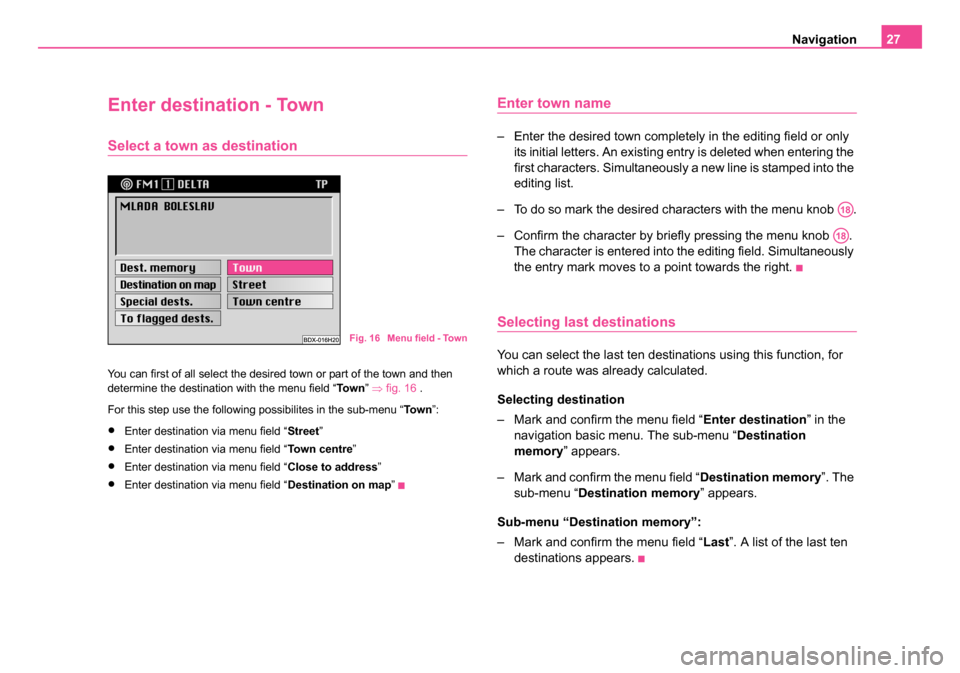
You can first of all select the desired town or part of the town and then
determine the destination with the menu field “ To w n” ⇒ fig. 16 .
For this step use the following possibilites in the sub-menu “ To w n”:
•Enter destination via menu field “ Street”
•Enter destination via menu field “To w n c e n t r e”
•Enter destination via menu field “ Close to address”
•Enter destination via menu field “Destination on map”
Enter town name
– Enter the desired town completely in the editing field or only
its initial letters. An existing entry is deleted when entering the
first characters. Simultaneously a new line is stamped into the
editing list.
– To do so mark the desired characters with the menu knob .
– Confirm the character by briefly pressing the menu knob . The character is entered into the editing field. Simultaneously
the entry mark moves to a point towards the right.
Selecting last destinations
You can select the last ten destinations using this function, for
which a route was already calculated.
Selecting destination
– Mark and confirm the menu field “ Enter destination” in the
navigation basic menu. The sub-menu “ Destination
memory ” appears.
– Mark and confirm the menu field “ Destination memory”. The
sub-menu “ Destination memory ” appears.
Sub-menu “Destination memory”:
– Mark and confirm the menu field “ Last”. A list of the last ten
destinations appears.
Fig. 16 Menu field - Town
A18
A18
20.book Page 27 Tuesday, December 6, 2005 2:26 PM
Page 29 of 66
Navigation
28
Enter destination - Street and
Intersection
Select a street as destination
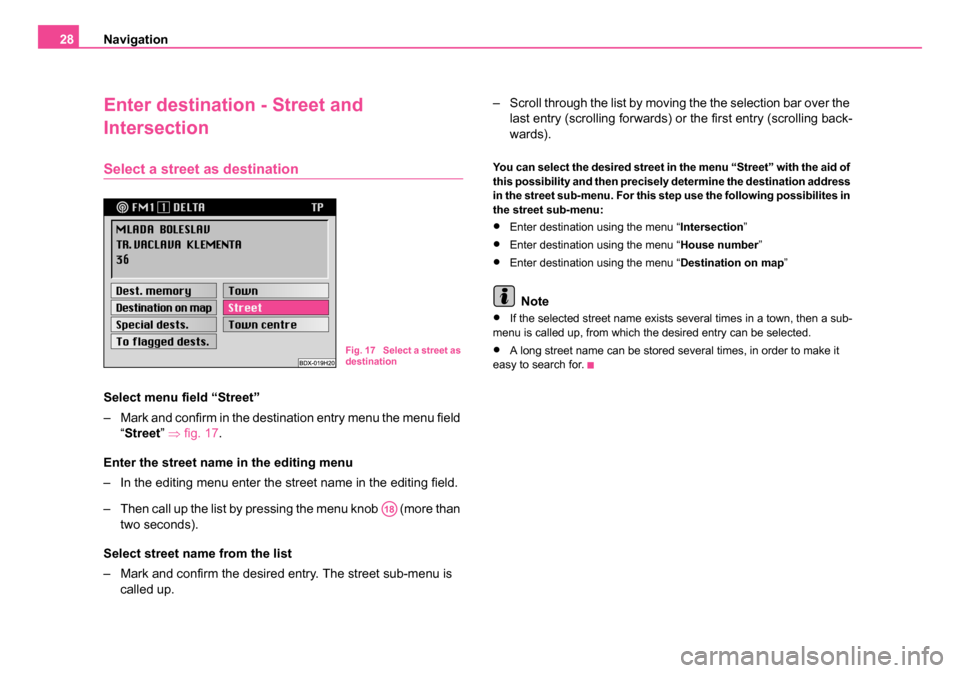
Select menu field “Street”
– Mark and confirm in the destination entry menu the menu field
“Street ” ⇒ fig. 17.
Enter the street name in the editing menu
– In the editing menu enter the street name in the editing field.
– Then call up the list by pressing the menu knob (more than two seconds).
Select street name from the list
– Mark and confirm the desired entry. The street sub-menu is called up. – Scroll through the list by moving the the selection bar over the
last entry (scrolling forwards) or the first entry (scrolling back-
wards).
You can select the desired street in the menu “Street” with the aid of
this possibility and then precisely determine the destination address
in the street sub-menu. For this step use the following possibilites in
the street sub-menu:
•Enter destination using the menu “ Intersection”
•Enter destination using the menu “ House number”
•Enter destination using the menu “ Destination on map”
Note
•If the selected street name exists several times in a town, then a sub-
menu is called up, from which the desired entry can be selected.
•A long street name can be stored several times, in order to make it
easy to search for.Fig. 17 Select a street as
destination
A18
20.book Page 28 Tuesday, December 6, 2005 2:26 PM
Page 30 of 66
Navigation29
Select an intersection as destination
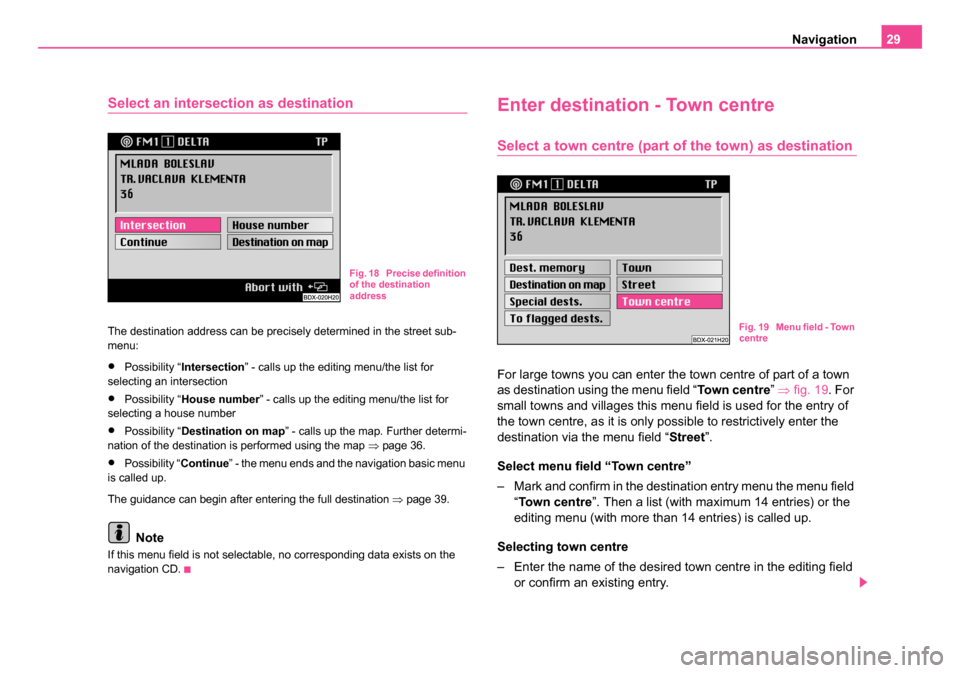
The destination address can be precisely determined in the street sub-
menu:
•Possibility “Intersection ” - calls up the editing menu/the list for
selecting an intersection
•Possibility “ House number ” - calls up the editing menu/the list for
selecting a house number
•Possibility “ Destination on map ” - calls up the map. Further determi-
nation of the destination is performed using the map ⇒page 36.
•Possibility “ Continue” - the menu ends and the navigation basic menu
is called up.
The guidance can begin after entering the full destination ⇒ page 39.
Note
If this menu field is not selectable, no corresponding data exists on the
navigation CD.
Enter destination - Town centre
Select a town centre (part of the town) as destination
For large towns you can enter the town centre of part of a town
as destination using the menu field “ Town centre” ⇒ fig. 19. For
small towns and villages this menu field is used for the entry of
the town centre, as it is only possible to restrictively enter the
destination via the menu field “Street ”.
Select menu field “Town centre”
– Mark and confirm in the destination entry menu the menu field “Town centre ”. Then a list (with maximum 14 entries) or the
editing menu (with more than 14 entries) is called up.
Selecting town centre
– Enter the name of the desired town centre in the editing field or confirm an existing entry.
Fig. 18 Precise definition
of the destination
address
Fig. 19 Menu field - Town
centre
20.book Page 29 Tuesday, December 6, 2005 2:26 PM