ESP SKODA FABIA 2007 1.G / 6Y Sat Compass Navigation System Manual
[x] Cancel search | Manufacturer: SKODA, Model Year: 2007, Model line: FABIA, Model: SKODA FABIA 2007 1.G / 6YPages: 43, PDF Size: 2.92 MB
Page 4 of 43
Layout of this Owner's Manual (explanations)3
Layout of this Owner's Manual (explanations)
The Owner's Manual has been systematically designed, in order to make it easy for
you to find and absorb the information you require.
Chapters, table of contents and subject index
The text of the booklet are divided into short sections which are combined into
easy-to-read chapters.
The Table of contents is arranged according to th e chapters and the detailed
Subject index at the end of this booklet helps you to rapidly find the information
you are looking for.
Brief information and instructions
Each section has a Heading.
This is followed by Brief information (in large italic lettering), which tells you the
subject which is dealt with in this section.
Most of the illustrations are accompanied by an Instruction (in large letters) which
explains to you in a straightforward way the action you have to take. Work steps
which have to be carried out begin with a hyphen.
Special equipment
Equipment which is marked * is only standa rd on certain vehicle model versions or
only suppliable as special equipment for certain models.
Notes
All three kinds of notes (WARNING! Caution! and Note), which are contained in the
text, are stated at the end of the respective section.
WARNING
The most important notes are marked with the heading WARNING!. These
Warning notes draw your attention to a serious risk of accident or injury.
Caution
A Caution! note draws your attention to the possibility of damage to your vehicle
or points out general risks of an accident.
Note
A normal Note draws your attention in a general way to important information for
the operation of your unit.
s2ck.7.book Page 3 Friday, April 20, 2007 12:38 PM
Page 7 of 43
General comments
6
Important information
Warranty
The same warranty terms apply for the equipment as for new vehicles.
Note
A damage in the sense of the warranty must not be the result from improper
handling of the system or from unprofe ssional repair attempts. In addition, no
external damage must be present.
Replacement possibility
After the expiration of the warranty, a unit in need of repair will be replaced inex-
pensively with a reconditioned, original unit with spare part warranty. However it is
required that there is no housing damage and no unauthorised repair attempts
have been made.
Note
In the case of a warranty or a replacement service, the Škoda Service Partner must
be presented with the unit card wi th code number and serial number! The unit
card can be found at the back of the operating instructions.
Information on how to operate the navigation system
The requirements of today's street traffic demand from the driver that he always
concentrates fully when driving.
The extensive and fastidious equipment details of this system offer - besides the
possibilites of entertainment - also a wide range of information which will help you
reach the trip destination quickly and reliably.
Only if the traffic situation allows it, should you operate the navigation system
with its wide range of possibilites. The volume settings must be selected in su
ch a way that acoustic signals from the
outside, such as e.g. a Martins horn from utility vehicles (police cars, ambulances
and fire brigade), can be heard at any time.
WARNING
Please always pay full attention to the traffic situation around you! As the
driver you are fully responsible for the traffic safety. Only use the functions
in such a way that you always maintain the control over your vehicle in all
traffic situations!
Anti-theft coding
After removing the unit, the anti-theft coding prevents electronically the use of the
unit by an unauthorised person.
If the information “SAFE ” appears in the display after switching on the unit, it can
only be operated again by entering the correct code ⇒page 15.
Before using the navigation system
•Please observe the respective traffic regulations when driving.
•Street and location names can be changed. There are exceptional cases in
which the names stored on the CD migh t not correspond to the changed names.
•The route calculated by the navigation system is a recommendation for
reaching the trip destination. While driving please pay attention to stopping restric-
tions, traffic lights, one-way streets, toe change restrictions, channels and ferries.
WARNING
The road traffic legislation (StVO) is always applicable, also if a driving
recommendation does not comply with the StVO.
s2ck.7.book Page 6 Friday, April 20, 2007 12:38 PM
Page 9 of 43
General comments
8
•If the information “ SAFE” appears in the display afte r switching on the unit, it
can only be operated again by entering the correct code ⇒page 15.
Button
With the navigation system there is the poss ibility to record traffic information over
a period of 2 and/or 24 hours. Up to nine traffic reports with a total duration of
maximum 4 minutes can be automatically recorded.
The TP stations always record traffic report s during operation, also if the play func-
tion is aborted by pressing the button . In the case of EON stations, also the
recording is aborted.
If the system is switched off, the reports are only recorded if the function TIM is acti-
vated.
Activate 24 hour TIM readiness
•If the system is switched off and the ignition key is withdrawn, hold the button pressed for a few seconds.
Activate 2 hour TIM readiness
•Withdraw the ignition key when the system is switched on and the vehicle is
stationary. The recording readiness is deactivated by switching the system on.
Note
•The 24 hour TIM readiness leads to an increased power consumption over 24
hours. This can lead to problems with th e voltage of the vehicle battery, if the
vehicle is only driven on short distance s. In this case the 24 hour TIM readiness
should not be activated.
•The oldest traffic information will be overwritten if the traffic information
memory is full. If a report lasts more than four minutes, the beginning of this report
is overwritten.
Button
The display contrast can be set with the button . – Press the button .
– The contrast can be set by pressing the menu knob .
– Confirm the set value by pressing the menu knob .
Button
With the button incoming traffic re
ports can be displayed in the display
via the TMC (T raffic Message Channel - traffic message ch annel). These reports are
used by the navigation system for the dy namic route guidance, if this option is
active ⇒page 29.
The number of received traffic repo rts is shown below the display “TMC” through
corresponding points.
If the button is pressed, a text appears in the display. In the standard field
- background - of the display ⇒ page 9, fig. 2 the number of the indicated report
and the number of stored re ports is shown behind “TRAFFIC INFO”.
To change in-between individual reports, turn the menu knob .
Note
The TMC function is only available if a navigation CD has been inserted. Reports are
deleted after 15 minutes, if they are not rece ived again. If there is no report, a corre-
sponding note is displayed in the display.
Button
Mute the audio sources by pressing the button . “ AUDIO OFF”
is shown on the display.
– Press the button again or turn the rotary/push knob to switch the mute function on/off.
TIM
FMA2
TIMA3
DSP
DSPA9
DSP
A25
A25
TELE
TELEA13
TELEA13
A25
MUTE
MUTEA15
MUTEA15A19
s2ck.7.book Page 8 Friday, April 20, 2007 12:38 PM
Page 10 of 43
General comments9
Button
All receivable stations in each band can be played for 5 seconds with the
function radio scan.
– Select with the buttons , or the band in
which you wish to carry out the scan finding.
– Press the button briefly.
– If you wish to select the scanned station, press again the button .
Note
If you have selected no stat ion, the function radio scan is repeated after a frequency
process.
Button
– Press the button to receive more information about the current destination or the list entr ies, which are marked with continu-
ation points.
After pressing the button the current destination is shown in the standard
field - foreground - of the display ⇒fig. 2 and a repetition of the last voice response
of the navigation is performed if th e route guidance function is active.
A detailed display of the list entries shown with continuation points is given in list
menus.
Other list entries can be retrieved by pressing the menu knob .
Note
If further information is avai lable on your navigation CD, it can be called up in the
menu “ TRAVEL GUIDE ”.
Display
Display
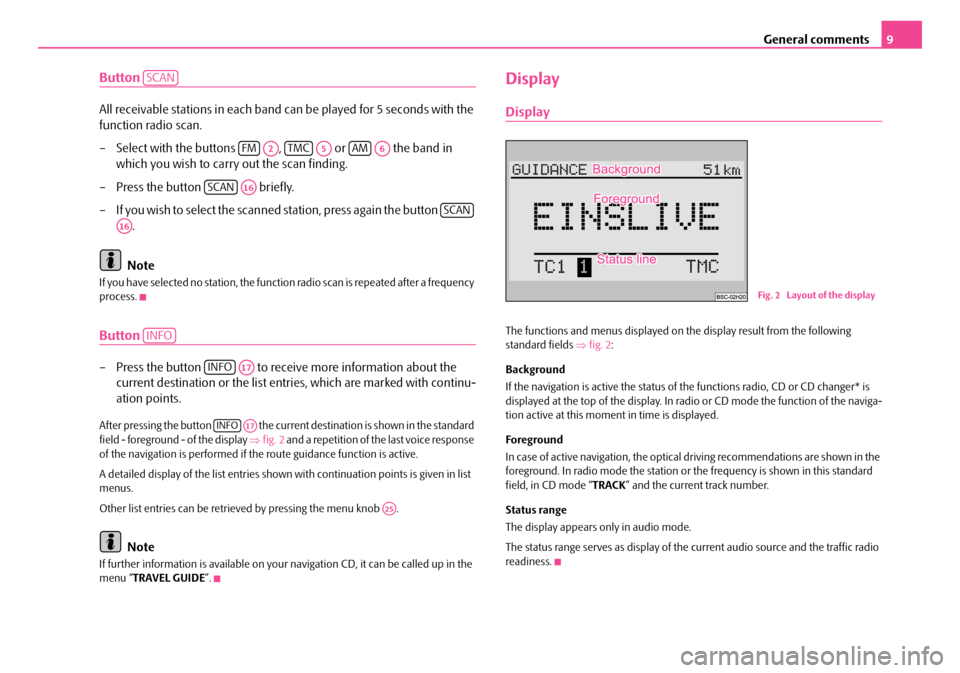
The functions and menus displayed on th e display result from the following
standard fields ⇒fig. 2 :
Background
If the navigation is active the status of the functions radio, CD or CD changer* is
displayed at the top of the display. In radi o or CD mode the function of the naviga-
tion active at this moment in time is displayed.
Foreground
In case of active navigation, the optical driving recommendations are shown in the
foreground. In radio mode the station or th e frequency is shown in this standard
field, in CD mode “ TRACK” and the current track number.
Status range
The display appears only in audio mode.
The status range serves as display of the current audio source and the traffic radio
readiness.
SCAN
FMA2TMCA5AMA6
SCANA16
SCAN
A16
INFO
INFOA17
INFOA17
A25
Fig. 2 Layout of the display
s2ck.7.book Page 9 Friday, April 20, 2007 12:38 PM
Page 11 of 43
General comments
10
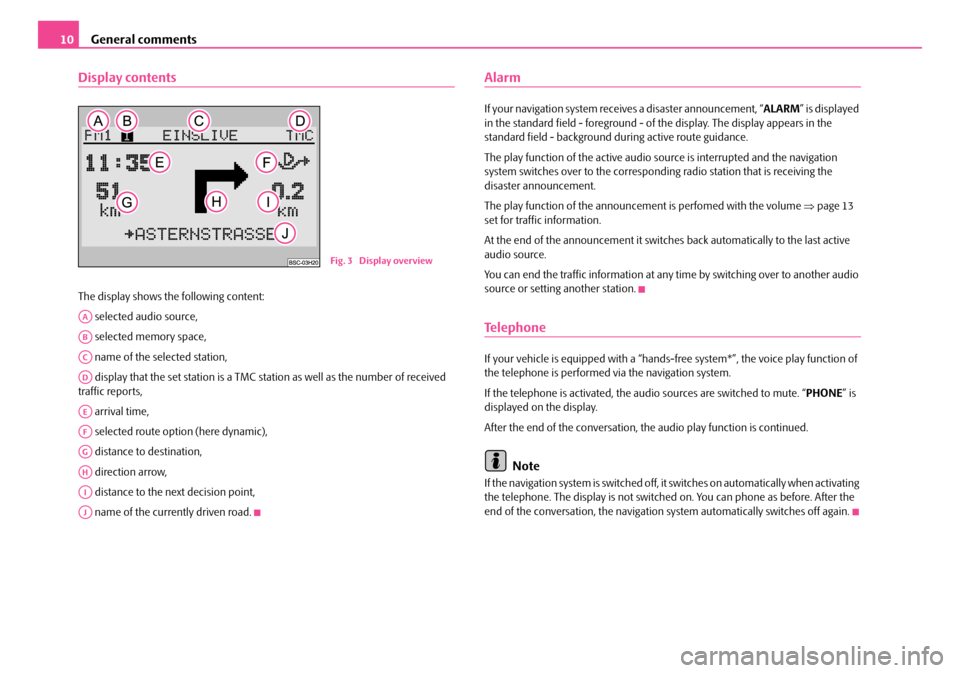
Display contents
The display shows the following content:
selected audio source,
selected memory space,
name of the selected station,
display that the set station is a TMC station as well as the number of received
traffic reports,
arrival time,
selected route option (here dynamic),
distance to destination,
direction arrow,
distance to the next decision point,
name of the currently driven road.
Alarm
If your navigation system rece ives a disaster announcement, “ ALARM” is displayed
in the standard field - foreground - of the display. The display appears in the
standard field - background du ring active route guidance.
The play function of the active audio so urce is interrupted and the navigation
system switches over to the correspond ing radio station that is receiving the
disaster announcement.
The play function of the announceme nt is perfomed with the volume ⇒page 13
set for traffic information.
At the end of the announcement it switches back automatically to the last active
audio source.
You can end the traffic information at any time by switching over to another audio
source or setting another station.
Te l e p h o n e
If your vehicle is eq uipped with a “hands-free system*” , the voice play function of
the telephone is performed via the navigation system.
If the telephone is activated, the au dio sources are switched to mute. “ PHONE” is
displayed on the display.
After the end of the conversation, the audio play function is continued.
Note
If the navigation system is switched off, it switches on automatically when activating
the telephone. The display is not switched on. You can phone as before. After the
end of the conversation, the navigation system automatically switches off again.
Fig. 3 Display overview
AA
AB
AC
AD
AE
AF
AG
AH
AI
AJ
s2ck.7.book Page 10 Friday, April 20, 2007 12:38 PM
Page 13 of 43
General comments
12
“SETTINGS”
Here you will reach a sub-menu for determining the system settings:
•“ TIME INFO ” - here you can select if the “ ARRIVAL TIME” at destination or the
“ REMAINING TRAVEL TIME ” to the destination should be displayed.
•“LANGUAGE ” - if the route guidance should be performed without voice
response, then select the option “ OFF”. In case of deactivated voice response, the
route guidance can only be performed wi th optical driving recommendations on
the display or the instrument cluster.
•“ REMEMB. DEST. ” - automatically stores the last 10 destinations in the
memory “ LAST DESTINATIONS ” switch on or off.
•“DRIVING SYMBOLS ” - if you wish the display of optical driving recommenda-
tions only in the instrument cluster, then select the option “ OFF”.
“LOCATION”
If no GPS reception ⇒ page 5 is possible, the location can be entered here manu-
ally.
“TYRE CHANGE”
If new tyres were mounted ⇒ page 7, select this menu point.
Audio settings
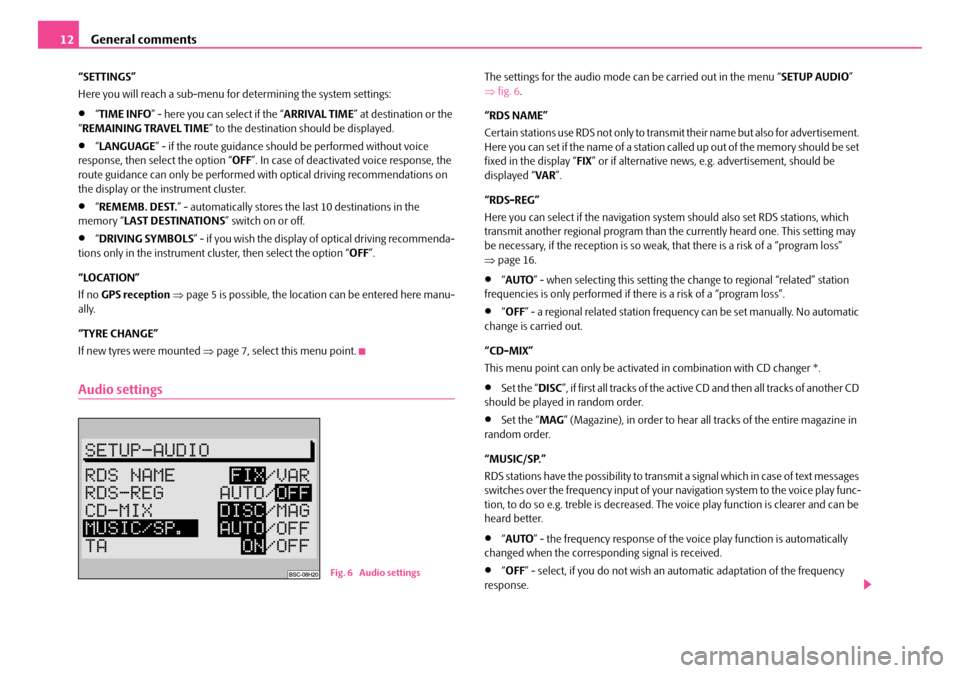
The settings for the audio mode ca n be carried out in the menu “SETUP AUDIO”
⇒ fig. 6 .
“RDS NAME”
Certain stations use RDS not only to transm it their name but also for advertisement.
Here you can set if the name of a station called up out of the memory should be set
fixed in the display “ FIX” or if alternative news, e.g. advertisement, should be
displayed “ VAR”.
“RDS-REG”
Here you can select if the navigation sy stem should also set RDS stations, which
transmit another regional program than the currently heard one. This setting may
be necessary, if the reception is so weak, that there is a risk of a “program loss”
⇒ page 16.
•“AUTO ” - when selecting this setting the change to regional “related” station
frequencies is only performed if there is a risk of a “program loss”.
•“ OFF ” - a regional related station frequency can be set manually. No automatic
change is carried out.
“CD-MIX”
This menu point can only be activate d in combination with CD changer *.
•Set the “DISC”, if first all tracks of the active CD and then all tracks of another CD
should be played in random order.
•Set the “ MAG” (Magazine), in order to hear all tracks of the entire magazine in
random order.
“MUSIC/SP.”
RDS stations have the possibility to transmit a signal which in case of text messages
switches over the frequency input of your navigation system to the voice play func-
tion, to do so e.g. treble is decreased. The voice play function is clearer and can be
heard better.
•“ AUTO ” - the frequency response of the vo ice play function is automatically
changed when the corresponding signal is received.
•“ OFF ” - select, if you do not wish an automatic adaptation of the frequency
response.Fig. 6 Audio settings
s2ck.7.book Page 12 Friday, April 20, 2007 12:38 PM
Page 14 of 43
General comments13
“TA”
Here you can set if your na vigation system should repl ay incoming traffic informa-
tion.
•“ ON ” - all incoming traffic information is replayed. If TA is switched on, only TP
stations can be set.
•“ OFF ” - Traffic information is not replayed.
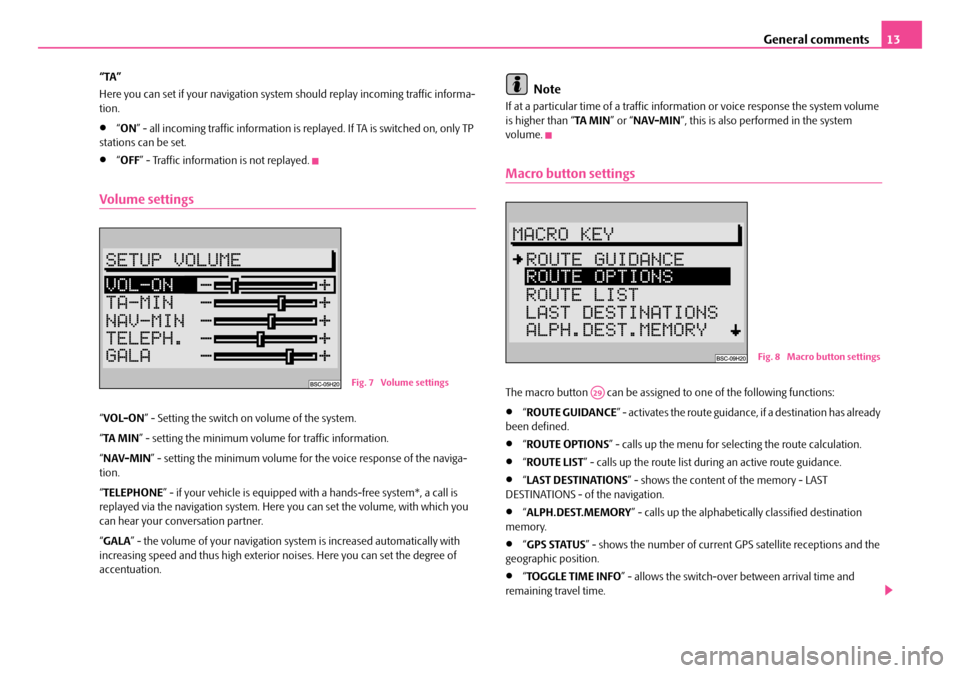
Volume settings
“VOL-ON ” - Setting the switch on volume of the system.
“ TA MI N ” - setting the minimum volume for traffic information.
“ NAV-MIN ” - setting the minimum volume for the voice response of the naviga-
tion.
“ TELEPHONE ” - if your vehicle is equipped with a hands-fr ee system*, a call is
replayed via the navigation system. Here you can set the volume, with which you
can hear your conv ersation partner.
“ GALA ” - the volume of your navigation sy stem is increased automatically with
increasing speed and thus high exterior noises. Here you can set the degree of
accentuation.
Note
If at a particular time of a traffic information or voice response the system volume
is higher than “ TA MIN” or “NAV-MIN ”, this is also performed in the system
volume.
Macro button settings
The macro button can be assigned to one of the following functions:
•“ ROUTE GUIDANCE ” - activates the route guidance, if a destination has already
been defined.
•“ ROUTE OPTIONS ” - calls up the menu for se lecting the route calculation.
•“ROUTE LIST ” - calls up the route list during an active route guidance.
•“LAST DESTINATIONS ” - shows the content of the memory - LAST
DESTINATIONS - of the navigation.
•“ ALPH.DEST.MEMORY ” - calls up the alphabetica lly classified destination
memory.
•“ GPS STATUS ” - shows the number of current GPS satellite receptions and the
geographic position.
•“ TOGGLE TIME INFO ” - allows the switch-over between arrival time and
remaining travel time.
Fig. 7 Volume settings
Fig. 8 Macro button settings
A29
s2ck.7.book Page 13 Friday, April 20, 2007 12:38 PM
Page 24 of 43
Navigation23
Call up list
The desired town is selected as destination with the aid of a list.
You have two possibilities to call up the list via the editing menu.
– Press the menu knob more than two seconds or
– mark and confirm the control field with the menu knob .
Select street names from the list
Select and confirm the desired entry with the menu knob .
Note
•Scroll the list: by turning the menu knob first move the selection marking
onto the arrow and then over the first or last entry.
•Scroll line by line by moving the selection marking onto the arrow and then
press the menu knob .
•With the button you can complete ly display a shortened list entry
with ...
Determine the destination exactly
The sub-menu “ ADDRESS ENTRY ” is displayed, if the destination town is deter-
mined.
In this sub-menu you can determine your destination:
•“ STREET ” - allows the selection of a street and an intersection stated below,
•“TOWN CENTRE ” - allows the selection of a town centre of the selected village,
•“CLOSE TO ADDRESS ” - allows the selection of a destination close to the last
entered destination. The selection is performed via columns, e.g. motorway
connection point or shopping centre. The requirement is that the corresponding
data is available on the navigation CD.
Enter destination - Street - Intersection
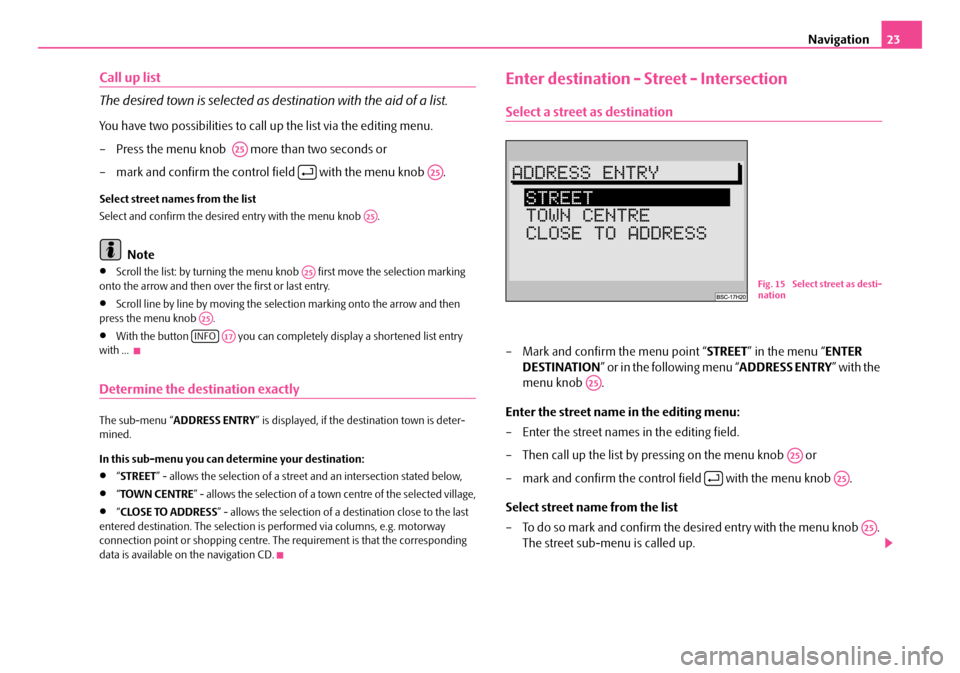
Select a street as destination
– Mark and confirm the menu point “ STREET” in the menu “ ENTER
DESTINATION ” or in the following menu “ ADDRESS ENTRY” with the
menu knob .
Enter the street name in the editing menu:
– Enter the street names in the editing field.
– Then call up the list by pressing on the menu knob or
– mark and confirm the control field with the menu knob .
Select street name from the list
– To do so mark and confirm the de sired entry with the menu knob .
The street sub-menu is called up.
A25
A25
A25
A25
A25
INFOA17
Fig. 15 Select street as desti-
nation
A25
A25
A25
A25
s2ck.7.book Page 23 Friday, April 20, 2007 12:38 PM
Page 31 of 43
Navigation
30
• fast route,
• short route.
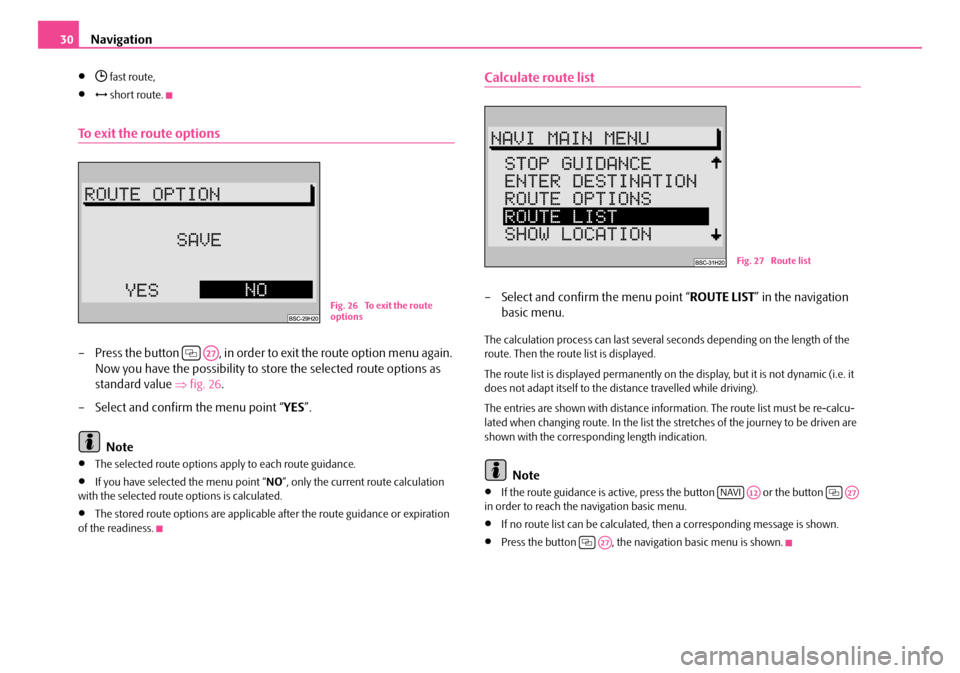
To exit the route options
– Press the button , in order to exit the route option menu again.
Now you have the possibility to st ore the selected route options as
standard value ⇒fig. 26 .
– Select and confirm the menu point “ YES”.
Note
•The selected route options apply to each route guidance.
•If you have selected the menu point “ NO”, only the current route calculation
with the selected route options is calculated.
•The stored route options are applicable after the route guidance or expiration
of the readiness.
Calculate route list
– Select and confirm the menu point “ ROUTE LIST” in the navigation
basic menu.
The calculation process can last several seconds depending on the length of the
route. Then the route list is displayed.
The route list is displayed permanently on the display, but it is not dynamic (i.e. it
does not adapt itself to the distance travelled while driving).
The entries are shown with distance information. The route list must be re-calcu-
lated when changing route. In the list the stretches of the journey to be driven are
shown with the correspond ing length indication.
Note
•If the route guidance is active, press the button or the button
in order to reach the navigation basic menu.
•If no route list can be calculated, then a corresponding message is shown.
•Press the button , the naviga tion basic menu is shown.
Fig. 26 To exit the route
options
A27
Fig. 27 Route list
NAVIA12A27
A27
s2ck.7.book Page 30 Friday, April 20, 2007 12:38 PM
Page 32 of 43
Navigation31
Route guidance
Begin guidance
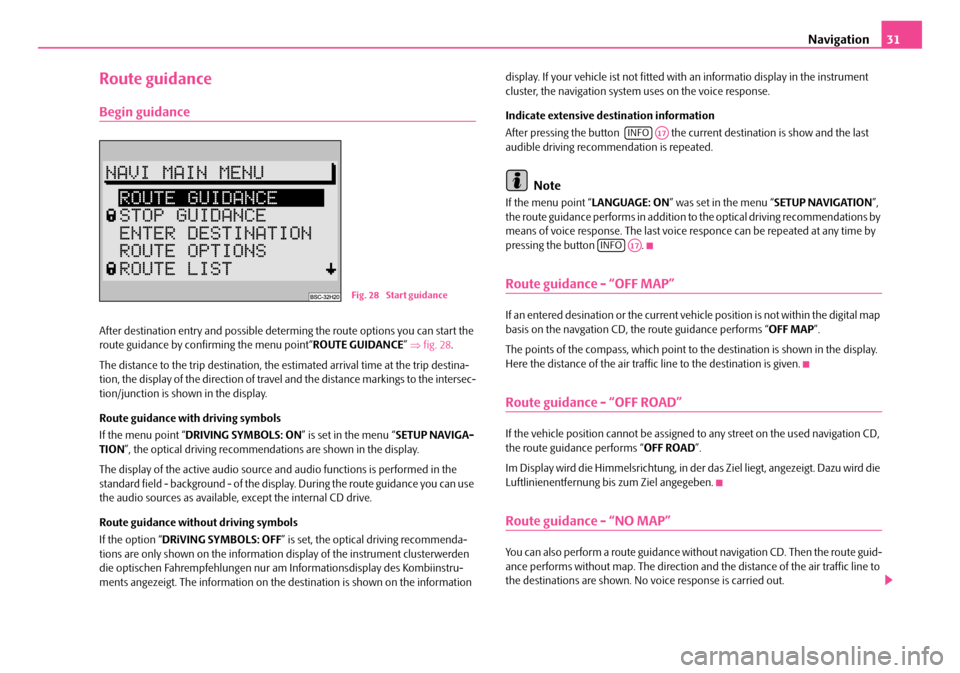
After destination entry and possible determing the route options you can start the
route guidance by confirming the menu point“ ROUTE GUIDANCE” ⇒ fig. 28 .
The distance to the trip destination, the estimated arrival time at the trip destina-
tion, the display of the direction of travel and the distance markings to the intersec-
tion/junction is shown in the display.
Route guidance with driving symbols
If the menu point “ DRIVING SYMBOLS: ON ” is set in the menu “SETUP NAVIGA-
TION ”, the optical driving recommendations are shown in the display.
The display of the active audio source and audio functions is performed in the
standard field - background - of the displa y. During the route guidance you can use
the audio sources as available, except the internal CD drive.
Route guidance without driving symbols
If the option “ DRiVING SYMBOLS: OFF” is set, the optical driving recommenda-
tions are only shown on the information display of the instrument clusterwerden
die optischen Fahrempfehl ungen nur am Informations display des Kombiinstru-
ments angezeigt. The information on the destination is shown on the information display. If your vehicle ist not fitted with an informatio display in the instrument
cluster, the navigation system uses on the voice response.
Indicate extensive destination information
After pressing the button the curr
ent destination is show and the last
audible driving recommendation is repeated.
Note
If the menu point “ LANGUAGE: ON” was set in the menu “ SETUP NAVIGATION”,
the route guidance performs in addition to the optical driving recommendations by
means of voice response. The last voice responce can be repeated at any time by
pressing the button .
Route guidance - “OFF MAP”
If an entered desination or the current vehicle position is not within the digital map
basis on the navgation CD, th e route guidance performs “OFF MAP”.
The points of the compass, which point to the destination is shown in the display.
Here the distance of the air traffi c line to the destination is given.
Route guidance - “OFF ROAD”
If the vehicle position cannot be assigned to any street on the used navigation CD,
the route guidance performs “ OFF ROAD”.
Im Display wird die Himmelsrichtung, in der das Ziel liegt, angezeigt. Dazu wird die
Luftlinienentfernung bis zum Ziel angegeben.
Route guidance - “NO MAP”
You can also perform a route guidance with out navigation CD. Then the route guid-
ance performs without map. The direction an d the distance of the air traffic line to
the destinations are shown. No voice response is carried out.
Fig. 28 Start guidance
INFOA17
INFOA17
s2ck.7.book Page 31 Friday, April 20, 2007 12:38 PM