key SKODA FABIA 2008 2.G / 5J User Guide
[x] Cancel search | Manufacturer: SKODA, Model Year: 2008, Model line: FABIA, Model: SKODA FABIA 2008 2.G / 5JPages: 252, PDF Size: 40.88 MB
Page 38 of 252
Unlocking and locking37
Using the systemSafetyDriving TipsGeneral MaintenanceBreakdown assistanceTechnical Data
•Do not press on the rear window when closing the boot lid, it could crack - risk of injury!
Note
•After closing the boot lid, it is automatically locked within 1 seconds and the anti-theft alarm system* is activated. This applies only if the vehicle was locked before closing the boot lid.
•The function of the hand grip above the licence plate is deactivated when starting off or as of a speed of more than 5 km/hour for vehicles with central locking. The function of the hand grip is activated again when the vehicle has stopped and a door is opened.
•Hold the boot lid when opening.
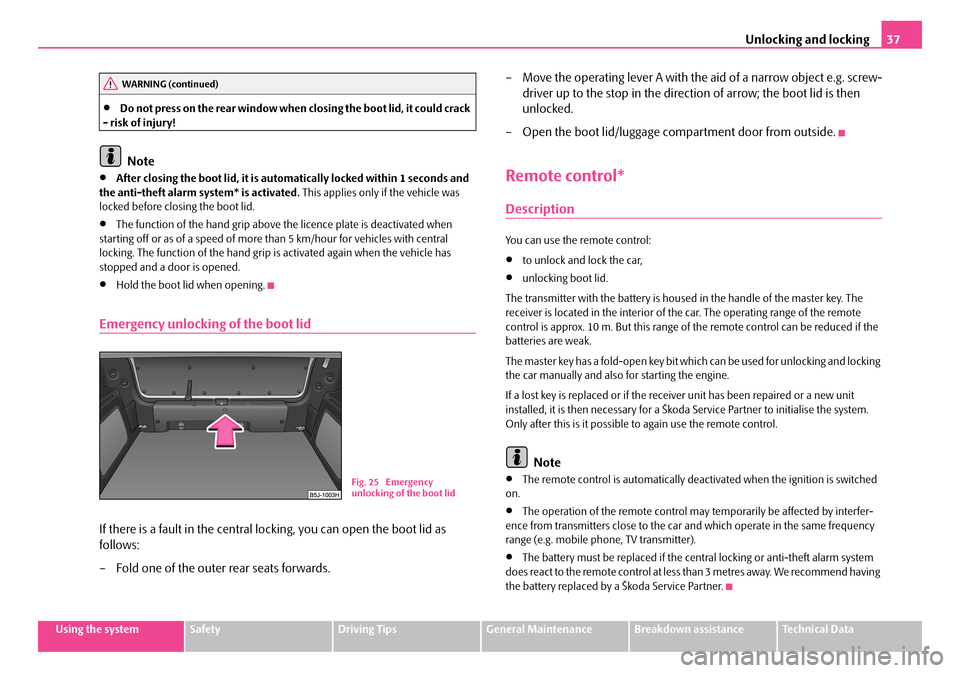
Emergency unlocking of the boot lid
If there is a fault in the central locking, you can open the boot lid as
follows:
– Fold one of the outer rear seats forwards.
– Move the operating lever A with the aid of a narrow object e.g. screw-
driver up to the stop in the direction of arrow; the boot lid is then
unlocked.
– Open the boot lid/luggage compartment door from outside.
Remote control*
Description
You can use the remote control:
•to unlock and lock the car,
•unlocking boot lid.
The transmitter with the battery is housed in the handle of the master key. The receiver is located in the interior of the car. The operating range of the remote control is approx. 10 m. But this range of the remote control can be reduced if the batteries are weak.
The master key has a fold-open key bit which can be used for unlocking and locking the car manually and also for starting the engine.
If a lost key is replaced or if the receiver unit has been repaired or a new unit installed, it is then necessary for a Škoda Service Partner to initialise the system. Only after this is it possible to again use the remote control.
Note
•The remote control is automatically deactivated when the ignition is switched on.
•The operation of the remote control may temporarily be affected by interfer-ence from transmitters close to the car and which operate in the same frequency range (e.g. mobile phone, TV transmitter).
•The battery must be replaced if the central locking or anti-theft alarm system does react to the remote control at less than 3 metres away. We recommend having the battery replaced by a Škoda Service Partner.
WARNING (continued)
Fig. 25 Emergency unlocking of the boot lid
NKO A05F 20.book Page 37 Wednesday, April 2, 2008 1:02 PM
Page 39 of 252
Unlocking and locking38
Unlocking and locking car
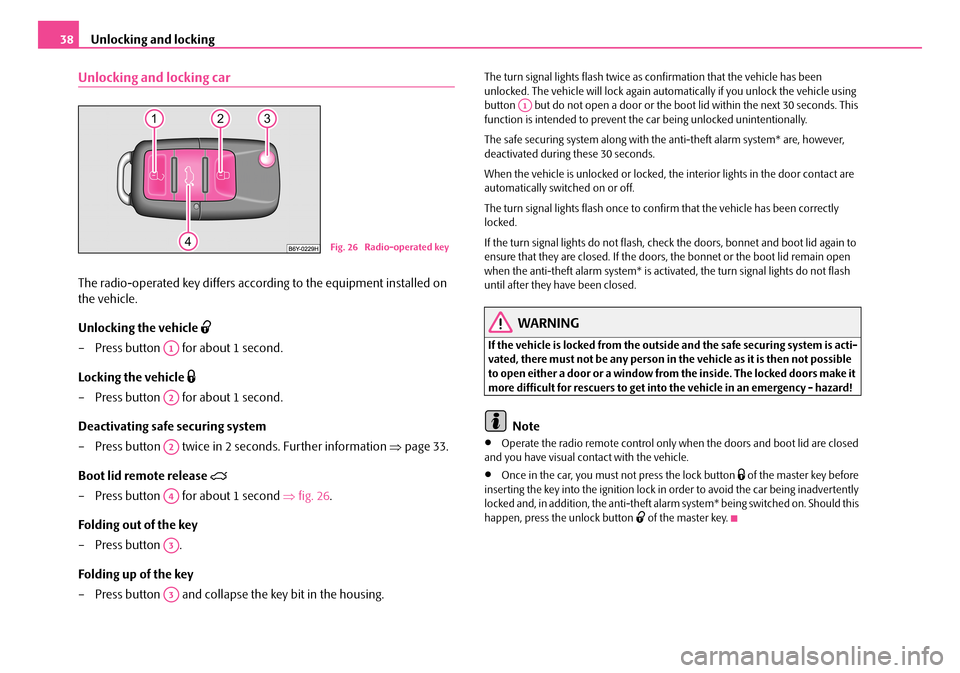
The radio-operated key differs according to the equipment installed on
the vehicle.
Unlocking the vehicle
– Press button for about 1 second.
Locking the vehicle
– Press button for about 1 second.
Deactivating safe securing system
– Press button twice in 2 seconds. Further information ⇒page 33.
Boot lid remote release
– Press button for about 1 second ⇒fig. 26.
Folding out of the key
– Press button .
Folding up of the key
– Press button and collapse the key bit in the housing.
The turn signal lights flash twice as confirmation that the vehicle has been unlocked. The vehicle will lock again automatically if you unlock the vehicle using button but do not open a door or the boot lid within the next 30 seconds. This function is intended to prevent the car being unlocked unintentionally.
The safe securing system along with the anti-theft alarm system* are, however, deactivated during these 30 seconds.
When the vehicle is unlocked or locked, the interior lights in the door contact are automatically switched on or off.
The turn signal lights flash once to confirm that the vehicle has been correctly locked.
If the turn signal lights do not flash, check the doors, bonnet and boot lid again to ensure that they are closed. If the doors, the bonnet or the boot lid remain open when the anti-theft alarm system* is activated, the turn signal lights do not flash until after they have been closed.
WARNING
If the vehicle is locked from the outside and the safe securing system is acti-vated, there must not be any person in the vehicle as it is then not possible to open either a door or a window from the inside. The locked doors make it more difficult for rescuers to get into the vehicle in an emergency - hazard!
Note
•Operate the radio remote control only when the doors and boot lid are closed and you have visual contact with the vehicle.
•Once in the car, you must not press the lock button of the master key before inserting the key into the ignition lock in order to avoid the car being inadvertently locked and, in addition, the anti-theft alarm system* being switched on. Should this happen, press the unlock button of the master key.
Fig. 26 Radio-operated key
A1
A2
A2
A4
A3
A3
A1
NKO A05F 20.book Page 38 Wednesday, April 2, 2008 1:02 PM
Page 40 of 252
Unlocking and locking39
Using the systemSafetyDriving TipsGeneral MaintenanceBreakdown assistanceTechnical Data
Synchonisation of the remote control
If the vehicle cannot be unlocked by actuating the remote control system then it is possible that the code in the key and the control unit in the vehicle are no longer synchronised. This can occur when the buttons on the radio-operated key are actu-ated a number of times outside of the operative range of the equipment or the battery on the remote control was replaced.
This means it is necessary to synchronise the code as follows:
•Press any button on the remote control.
•pressing of the button means that the door will unlock with the key within 1 minute.
Anti-theft alarm system*
The anti-theft alarm system increases the level of protection against people seeking to break into the vehicle. The system triggers audible and visual warning signals if an attempt is made to break into the vehicle.
How is the alarm system switched on?
The anti-theft alarm system is activated automatically when the vehicle is locked with the key on the closed driver's door or by using the remote control. It is acti-vated 30 seconds after closing the door.
How is the alarm system switched off?
The anti-theft alarm system is switched off if the vehicle is unlocked by only using the remote control. The vehicle is automatically locked again if the vehicle is not opened within 30 seconds after reactivating the anti-theft alarm system.
Once you unlock the vehicle by inserting the key into the driver door you then have to insert the key into the ignition lock and switch the ignition on within 15 seconds after unlocking the door in order to deactivate the anti-theft alarm system. The alarm will be triggered if you do not switch on the ignition within 15 seconds.
When is the alarm triggered?
The following security areas of the locked vehicle are monitored:
•Bonnet,
•Boot lid,
•Doors,
•Ignition lock,
•Vehicle interior* ⇒page 40,
•Angle of the vehicle*,
•A drop in voltage of the on-board power supply.
An alarm is immediately triggered if either of the two battery terminals is discon-nected while the anti-theft alarm system is activated.
How is the alarm switched off?
You switch the alarm off if you unlock the car with the radio remote control in the key or if you switch the ignition on.
Note
•The working life of the alarm siren is 5 years. More detailed information is avail-able from your Škoda Service Partner.
•Before leaving the car, check that all the doors, windows and the electric sliding/tilting roof* are properly closed in order to ensure that the anti-theft alarm system is fully operational.
•Coding of the radio remote control and the receptor part precludes the use of the radio remote control from other vehicles.
NKO A05F 20.book Page 39 Wednesday, April 2, 2008 1:02 PM
Page 41 of 252
Unlocking and locking40
Interior monitor* and towing protection
monitoring*
The interior monitor and the towing protection monitoring detect
movements inside the vehicle interior and then trigger the alarm.
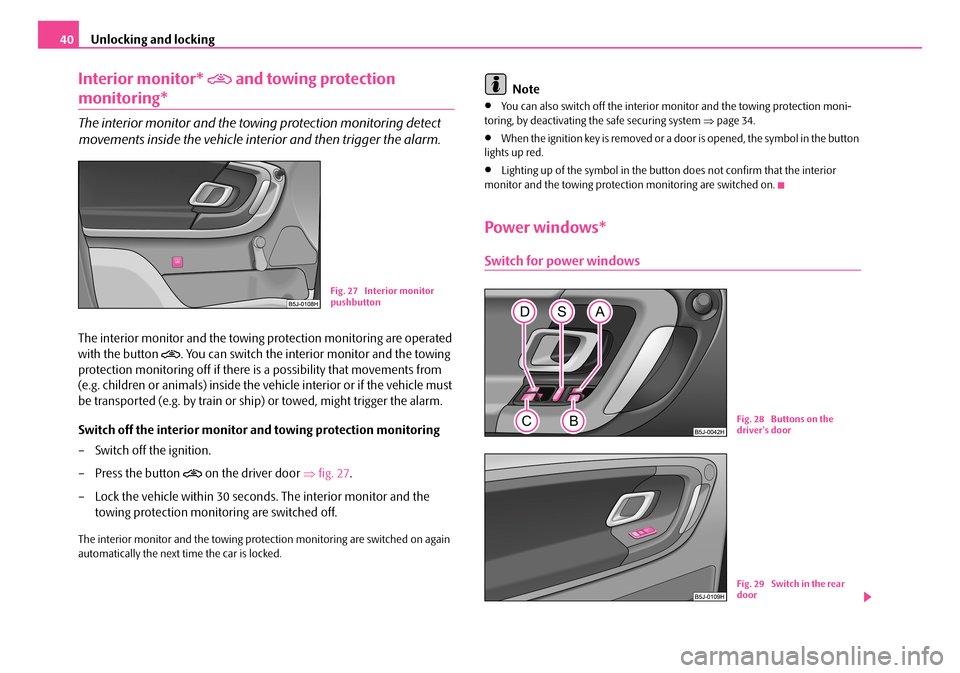
The interior monitor and the towing protection monitoring are operated
with the button . You can switch the interior monitor and the towing
protection monitoring off if there is a possibility that movements from
(e.g. children or animals) inside the vehicle interior or if the vehicle must
be transported (e.g. by train or ship) or towed, might trigger the alarm.
Switch off the interior monitor and towing protection monitoring
– Switch off the ignition.
– Press the button on the driver door ⇒fig. 27.
– Lock the vehicle within 30 seconds. The interior monitor and the
towing protection monitoring are switched off.
The interior monitor and the towing protection monitoring are switched on again automatically the next time the car is locked.
Note
•You can also switch off the interior monitor and the towing protection moni-toring, by deactivating the safe securing system ⇒page 34.
•When the ignition key is removed or a door is opened, the symbol in the button lights up red.
•Lighting up of the symbol in the button does not confirm that the interior monitor and the towing protection monitoring are switched on.
Power windows*
Switch for power windows
Fig. 27 Interior monitor pushbutton
Fig. 28 Buttons on the driver's door
Fig. 29 Switch in the rear door
NKO A05F 20.book Page 40 Wednesday, April 2, 2008 1:02 PM
Page 43 of 252
Unlocking and locking42
You must try to close the window again within 10 seconds, even if the obstacle was not yet removed, the closing process is stopped. During this time it is not possible to automatically close the window. The force limiter is still switched on.
The force limiter is only switched off, if you attempt to close the window within the next 10 seconds - the window closes now with full strength!
If you wait longer than 10 seconds, the force limiter is switched on again.
WARNING
You should take particular care when closing the windows! You may other-wis e su ffe r s ev e re inj uri e s a s a re sul t o f g e t tin g an a rm , fo r e xa m pl e, j am m e d in the window!
Window convenience operation
You can open and close the window with power windows as follows
when unlocking and locking the vehicle.
Opening windows with the key
– Turn the key in the lock of the driver door into the opening position
and hold it until all the windows are open.
Closing windows with the key
– Turn the key in the lock of the driver door into the closing position and
hold it there until all of the windows are closed.
You can interrupt the opening or closing operation of the windows immediately by releasing the key.
WARNING
•Obstruction protection is not active during the convenience operating feature ⇒ in “Switch for power windows” on page 40.
•You should take particular care when closing the windows! You may otherwise suffer severe injuries as a result of getting an arm, for example, jammed in the window!
Operational faults
Electrically operated power windows do not operate
If the battery of the car has been disconnected and then reconnected, the electri-cally operated power windows do not operate. The system must be activated. Proceed as follows in order to re-establish the function:
•turn the key in the lock of the driver door into the closing position and hold it there until all of the windows are closed,
•release the key,
•Once again insert the key and turn it into the closing position for about 3 seconds.
Operation in winter
Ice accumulating on the surface of the windows during the winter may result in a greater resistance when closing the windows and the window may stop and move back several centimetres
Proceed as follows to close the window fully:
•turn the key in the lock of the driver door into the closing position and hold it there until all of the windows are closed,
•repeat this operation until the window stops.
WARNING
•Obstruction protection is not active during the closing of the windows ⇒ in “Switch for power windows” on page 40.
•You should take particular care when closing the windows! You may otherwise suffer severe injuries as a result of getting an arm, for example, jammed in the window!
WARNING (continued)
NKO A05F 20.book Page 42 Wednesday, April 2, 2008 1:02 PM
Page 44 of 252
Unlocking and locking43
Using the systemSafetyDriving TipsGeneral MaintenanceBreakdown assistanceTechnical Data
Electric sliding/tilting roof*
Description
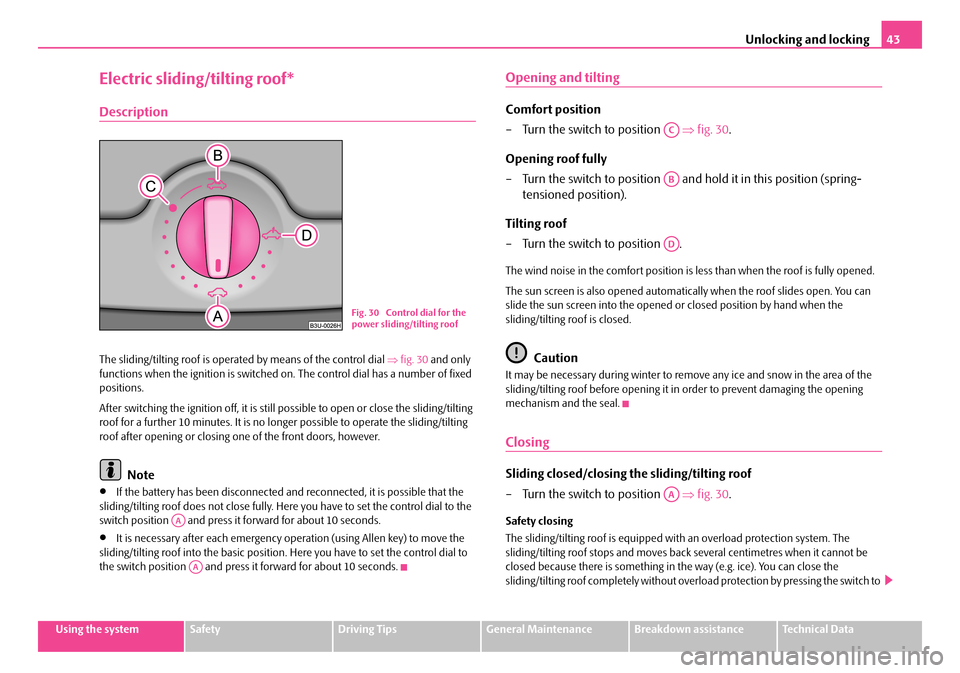
The sliding/tilting roof is operated by means of the control dial ⇒fig. 30 and only functions when the ignition is switched on. The control dial has a number of fixed positions.
After switching the ignition off, it is still possible to open or close the sliding/tilting roof for a further 10 minutes. It is no longer possible to operate the sliding/tilting roof after opening or closing one of the front doors, however.
Note
•If the battery has been disconnected and reconnected, it is possible that the sliding/tilting roof does not close fully. Here you have to set the control dial to the switch position and press it forward for about 10 seconds.
•It is necessary after each emergency operation (using Allen key) to move the sliding/tilting roof into the basic position. Here you have to set the control dial to the switch position and press it forward for about 10 seconds.
Opening and tilting
Comfort position
– Turn the switch to position ⇒fig. 30.
Opening roof fully
– Turn the switch to position and hold it in this position (spring-
tensioned position).
Tilting roof
– Turn the switch to position .
The wind noise in the comfort position is less than when the roof is fully opened.
The sun screen is also opened automatically when the roof slides open. You can slide the sun screen into the opened or closed position by hand when the sliding/tilting roof is closed.
Caution
It may be necessary during winter to remove any ice and snow in the area of the sliding/tilting roof before opening it in order to prevent damaging the opening mechanism and the seal.
Closing
Sliding closed/closing the sliding/tilting roof
– Turn the switch to position ⇒fig. 30.
Safety closing
The sliding/tilting roof is equipped with an overload protection system. The sliding/tilting roof stops and moves back several centimetres when it cannot be closed because there is something in the way (e.g. ice). You can close the sliding/tilting roof completely without overload protection by pressing the switch to
Fig. 30 Control dial for the power sliding/tilting roof
AA
AA
AC
AB
AD
AA
NKO A05F 20.book Page 43 Wednesday, April 2, 2008 1:02 PM
Page 45 of 252
Unlocking and locking44
the position ⇒fig. 30 at the front or rear for as long as it takes for the sliding/tilting roof to shut completely ⇒.
WARNING
Close the sliding/tilting roof carefully - risk of injury!
Convenience operation
You can also close an open sliding/tilting roof from the outside.
– Turn the key in the lock of the driver door into the closing position and
hold until the sliding/tilting roof is closed ⇒.
The closing process stops when one releases the key.
WARNING
Close the sliding/tilting roof carefully - risk of injury! The overload protec-tion system does not function with the convenience closing.
Emergency operation
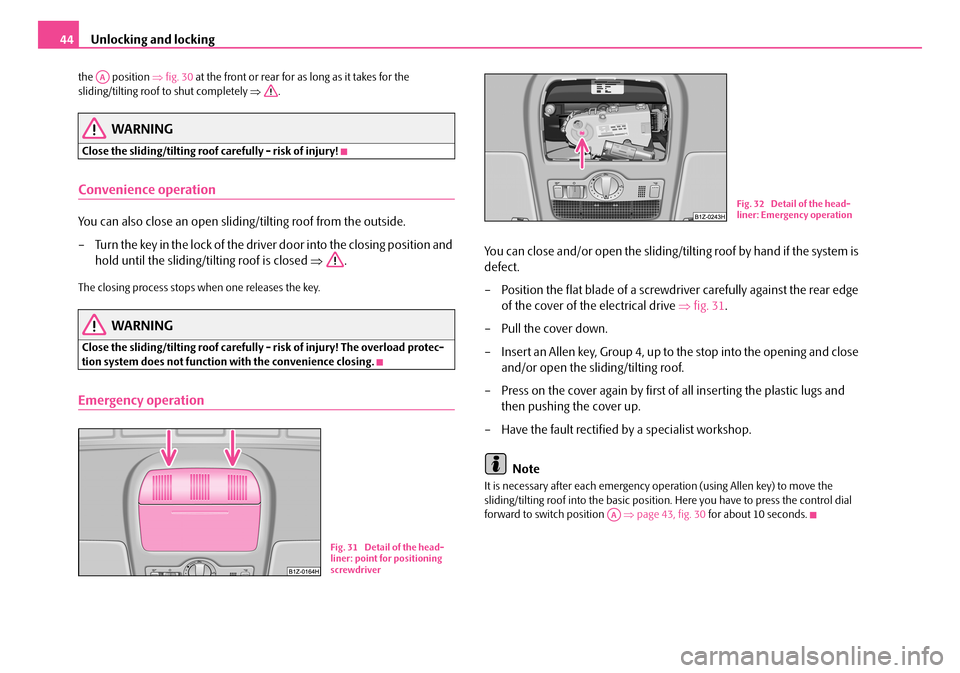
You can close and/or open the sliding/tilting roof by hand if the system is
defect.
– Position the flat blade of a screwdriver carefully against the rear edge
of the cover of the electrical drive ⇒fig. 31.
– Pull the cover down.
– Insert an Allen key, Group 4, up to the stop into the opening and close
and/or open the sliding/tilting roof.
– Press on the cover again by first of all inserting the plastic lugs and
then pushing the cover up.
– Have the fault rectified by a specialist workshop.
Note
It is necessary after each emergency operation (using Allen key) to move the sliding/tilting roof into the basic position. Here you have to press the control dial forward to switch position ⇒page 43, fig. 30 for about 10 seconds.
AA
Fig. 31 Detail of the head-liner: point for positioning screwdriver
Fig. 32 Detail of the head-liner: Emergency operation
AA
NKO A05F 20.book Page 44 Wednesday, April 2, 2008 1:02 PM
Page 47 of 252
Lights and Visibility46
WARNING
Never drive with side lights on - risk of accident! The side lights are not bright enough to light up the road sufficiently in front of you or to be seen by other oncoming traffic. In this case, always switch on the low beam when it is dark or if visibility is poor.
Note
•An audible warning will sound if you withdraw the ignition key and open the driver's door when the vehicle lights are still on.
•The acoustic warning signal is switched off over the door contact when the driver's door is closed (ignition off). The vehicle can be parked with the side lights on.
•If the car is parked for a lengthy period, we recommend switching off all lights, or leaving only the parking lights switched on.
•The switching on of the described lights should only be undertaken in accord-ance with the legal requirements.
•In the event of cool or humid weather conditions, the headlights can be misted up from inside.
−The temperature difference between interior and external area of the head-light lenses is decisive.
−When the driving lights are switched on, the light outlet surfaces are free from mist after a short period. The headlight lenses can possibly mist up at the border areas.
−It also concerns reverse light and turn signal lights.
−This mist has no influence on the life of the lighting system.
Cornering lights*
For a better cornering illumination the cornering lights are controlled in the optimal position in line with the vehicle speed and the steering angle.
If the warning light flashes for 1 minute while driving or after switching on the ignition and a warning signal sounds, a fault is confirmed.
WARNING
If there is a fault in the cornering lights, the warning light flashes in the instrument cluster. The cornering lights are automatically lowered to the emergency position, which prevents a possible dazzling of oncoming traffic. Thus the illuminated length of the road is shortened. Drive carefully and have the car inspected immediately by a specialist garage.
Fog lights*
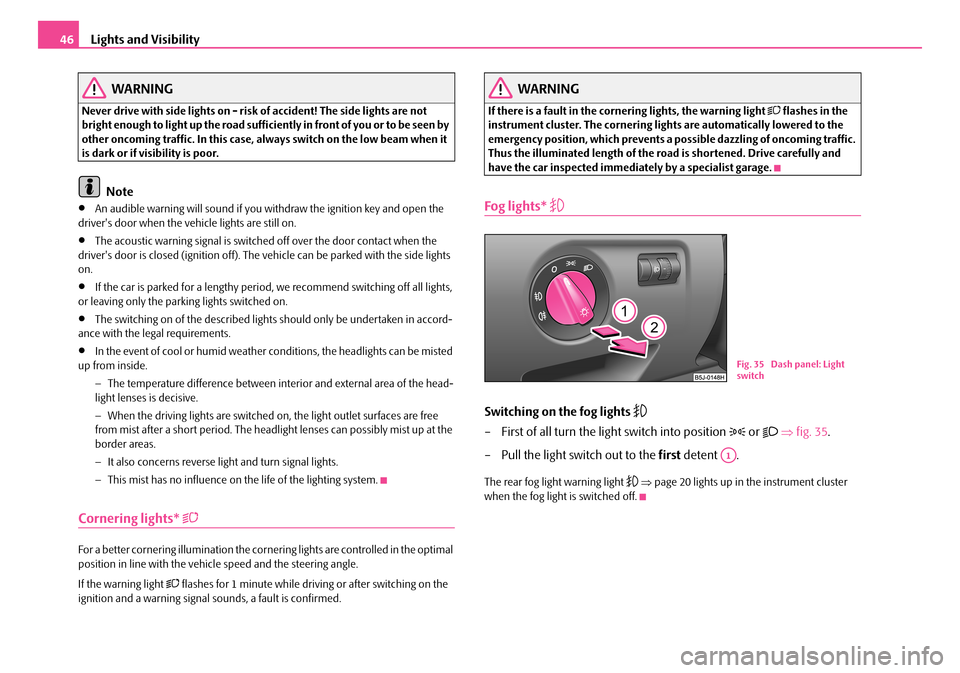
Switching on the fog lights
– First of all turn the light switch into position or ⇒fig. 35.
– Pull the light switch out to the first detent .
The rear fog light warning light ⇒page 20 lights up in the instrument cluster when the fog light is switched off.
Fig. 35 Dash panel: Light switch
A1
NKO A05F 20.book Page 46 Wednesday, April 2, 2008 1:02 PM
Page 50 of 252
Lights and Visibility49
Using the systemSafetyDriving TipsGeneral MaintenanceBreakdown assistanceTechnical Data
– Pull the lever back into the initial position in order to switch the main
beam off again.
Headlight flasher
– Pull on the lever of the steering wheel (sprung position) - the main
beam and warning light in the instrument cluster come on.
Parking light
– Switch off the ignition.
– Push the lever up or down - the right-hand or left-hand parking light
is switched on.
Information concerning the function of the lights.
•The turn signal system only operates when the ignition is switched on. The corresponding indicator light or in the instrument cluster also flashes.
•The turn signal is automatically cancelled after negotiating a curve.
•The side light and rear light on the appropriate side of the vehicle are switched on when the parking light is selected. The parking light function only operates if the ignition is switched off.
•An acoustic warning signal will sound when the driver's door is opened if the lever is not in the middle position after removing the ignition key. The acoustic warning signal will stop just as soon as the driver's door is closed.
Caution
Use main beam or the headlight flasher only if this does not risk dazzling other road users.
Note
Use only in accordance with the legal requirements the described lighting and signal systems.
Interior lighting
Front interior lighting and storage compartment on front
passenger side
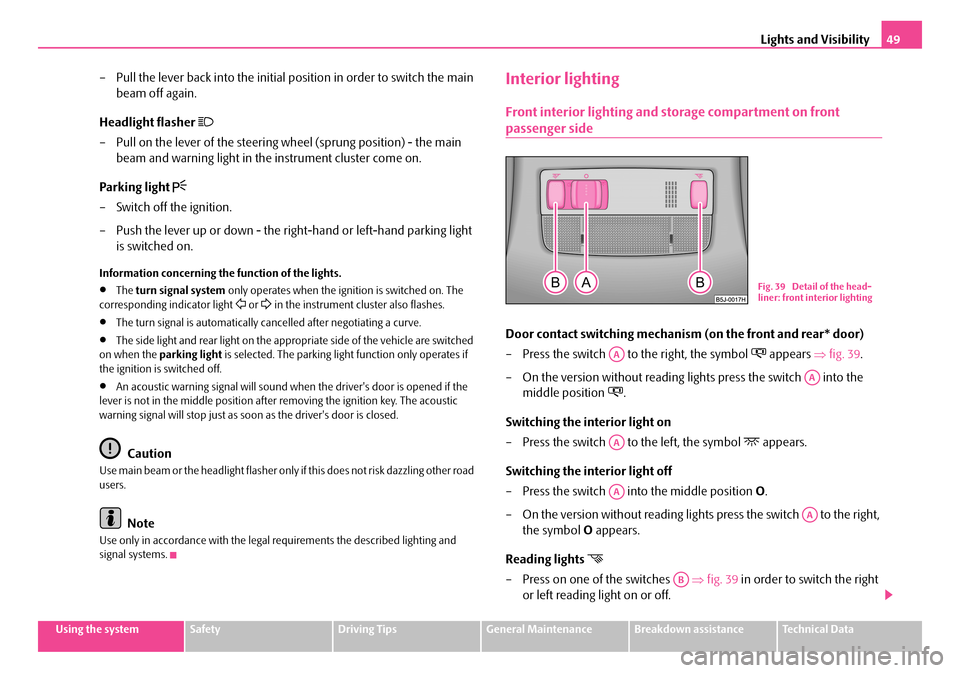
Door contact switching mechanism (on the front and rear* door)
– Press the switch to the right, the symbol appears ⇒fig. 39.
– On the version without reading lights press the switch into the
middle position .
Switching the interior light on
– Press the switch to the left, the symbol appears.
Switching the interior light off
– Press the switch into the middle position O.
– On the version without reading lights press the switch to the right,
the symbol O appears.
Reading lights
– Press on one of the switches ⇒fig. 39 in order to switch the right
or left reading light on or off.
Fig. 39 Detail of the head-liner: front interior lighting
AA
AA
AA
AA
AA
AB
NKO A05F 20.book Page 49 Wednesday, April 2, 2008 1:02 PM
Page 51 of 252
Lights and Visibility50
The interior light is switched on for about 20 seconds when a vehicle with a central locking system is unlocked, when a door is opened or when the ignition key is removed. The requirement for this is that the switch is in the door contact position. The inner light goes out out immediately after the ignition is switched on.
A time delay switch* causes the inner lighting on vehicles without a central locking system stays on for a few seconds after the doors have been closed. The inner light goes out out immediately after the ignition is switched on.
The interior lighting is switched off after about 30 minutes when a door has been left open in order to avoid discharging the battery of the vehicle.
Rear interior lighting* - type 1
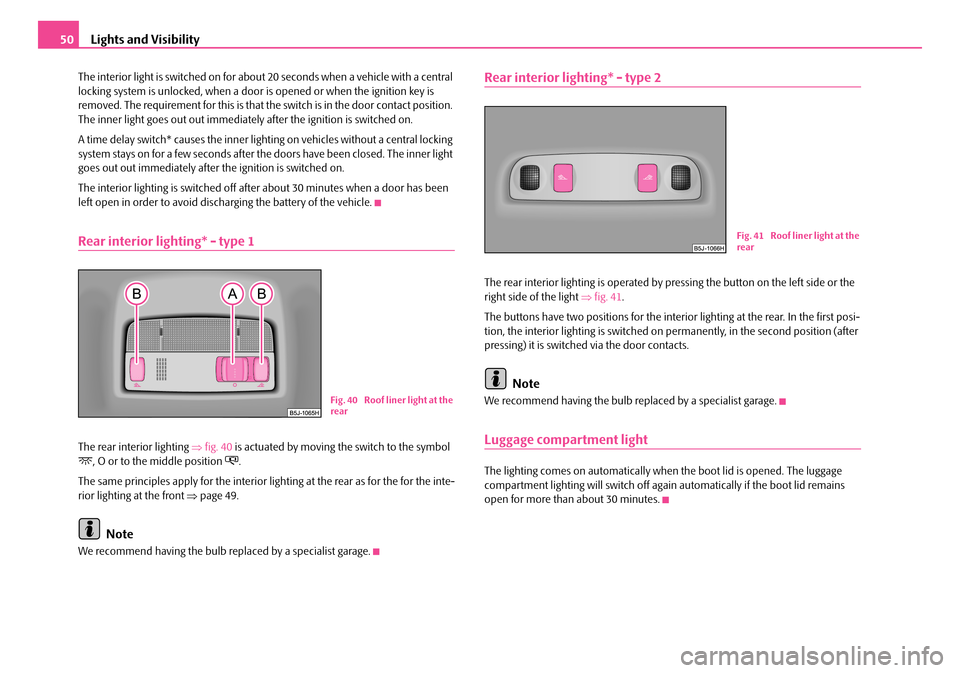
The rear interior lighting ⇒fig. 40 is actuated by moving the switch to the symbol , O or to the middle position .
The same principles apply for the interior lighting at the rear as for the for the inte-rior lighting at the front ⇒page 49.
Note
We recommend having the bulb replaced by a specialist garage.
Rear interior lighting* - type 2
The rear interior lighting is operated by pressing the button on the left side or the right side of the light ⇒fig. 41.
The buttons have two positions for the interior lighting at the rear. In the first posi-tion, the interior lighting is switched on permanently, in the second position (after pressing) it is switched via the door contacts.
Note
We recommend having the bulb replaced by a specialist garage.
Luggage compartment light
The lighting comes on automatically when the boot lid is opened. The luggage compartment lighting will switch off again automatically if the boot lid remains open for more than about 30 minutes.
Fig. 40 Roof liner light at the rear
Fig. 41 Roof liner light at the rear
NKO A05F 20.book Page 50 Wednesday, April 2, 2008 1:02 PM