inflation pressure SKODA FABIA 2008 2.G / 5J Owner's Manual
[x] Cancel search | Manufacturer: SKODA, Model Year: 2008, Model line: FABIA, Model: SKODA FABIA 2008 2.G / 5JPages: 252, PDF Size: 40.88 MB
Page 5 of 252
Contents4
How are seat belts correctly fastened? . . . . . . . . . . Belt tensioner . . . . . . . . . . . . . . . . . . . . . . . . . . . . . . . .
Airbag system . . . . . . . . . . . . . . . . . . . . . . . . . . . . . . . . . Description of the airbag system . . . . . . . . . . . . . . . Front airbags . . . . . . . . . . . . . . . . . . . . . . . . . . . . . . . . . Side airbags* . . . . . . . . . . . . . . . . . . . . . . . . . . . . . . . . . Head airbags* . . . . . . . . . . . . . . . . . . . . . . . . . . . . . . . . Deactivating an airbag . . . . . . . . . . . . . . . . . . . . . . . .
Transporting children safely . . . . . . . . . . . . . . . . . . What you should know about transporting children!Child seat . . . . . . . . . . . . . . . . . . . . . . . . . . . . . . . . . . . . Attaching a child seat using the “ISOFIX” system*Attaching child seat using the “Top Tether” system
Driving Tips. . . . . . . . . . . . . . . . . . . . . . . . . . . . . .
Intelligent Technology . . . . . . . . . . . . . . . . . . . . . . . . Electronic stability programme (ESP)* . . . . . . . . . . Brakes . . . . . . . . . . . . . . . . . . . . . . . . . . . . . . . . . . . . . . . Brake booster . . . . . . . . . . . . . . . . . . . . . . . . . . . . . . . . Antilock brake system (ABS)* . . . . . . . . . . . . . . . . . . Brake Assist* . . . . . . . . . . . . . . . . . . . . . . . . . . . . . . . . . Electrohydraulic power steering . . . . . . . . . . . . . . . Tyre inflation pressure-control system* . . . . . . . . . Diesel particle filter* (diesel engine) . . . . . . . . . . . .
Driving and the Environment. . . . . . . . . . . . . . . . . The first 1 500 kilometres and then afterwards . . Catalytic converter . . . . . . . . . . . . . . . . . . . . . . . . . . . . Driving in an economical and environmentally conscious manner . . . . . . . . . . . . . . . . . . . . . . . . . . . . Environmental compatibility . . . . . . . . . . . . . . . . . . . Motoring abroad . . . . . . . . . . . . . . . . . . . . . . . . . . . . . Avoiding damage to your vehicle . . . . . . . . . . . . . .
To w i n g a t r a i l e r. . . . . . . . . . . . . . . . . . . . . . . . . . . . . . . . Towing a trailer . . . . . . . . . . . . . . . . . . . . . . . . . . . . . . .
General Maintenance. . . . . . . . . . . . . . .
Taking care of your vehicle and cleaning the vehicle. . . . . . . . . . . . . . . . . . . . . . . . . . . . . . . . . . . . . . . . .General . . . . . . . . . . . . . . . . . . . . . . . . . . . . . . . . . . . . . .Care of the exterior of vehicle . . . . . . . . . . . . . . . . . .Care of the interior of vehicle . . . . . . . . . . . . . . . . . .
Fuel. . . . . . . . . . . . . . . . . . . . . . . . . . . . . . . . . . . . . . . . . . . .Petrol . . . . . . . . . . . . . . . . . . . . . . . . . . . . . . . . . . . . . . . .Diesel . . . . . . . . . . . . . . . . . . . . . . . . . . . . . . . . . . . . . . . .Refuelling . . . . . . . . . . . . . . . . . . . . . . . . . . . . . . . . . . . .
Inspecting and Replenishing. . . . . . . . . . . . . . . . . .Engine compartment . . . . . . . . . . . . . . . . . . . . . . . . .Engine oil . . . . . . . . . . . . . . . . . . . . . . . . . . . . . . . . . . . .Cooling system . . . . . . . . . . . . . . . . . . . . . . . . . . . . . . .Brake fluid . . . . . . . . . . . . . . . . . . . . . . . . . . . . . . . . . . .Battery . . . . . . . . . . . . . . . . . . . . . . . . . . . . . . . . . . . . . . .Windshield washer system . . . . . . . . . . . . . . . . . . . .
Wheels and Tyres. . . . . . . . . . . . . . . . . . . . . . . . . . . . . .Wheels . . . . . . . . . . . . . . . . . . . . . . . . . . . . . . . . . . . . . .
Accessories, changes and replacement of partsAccessories and replacement parts . . . . . . . . . . . . .Technical changes . . . . . . . . . . . . . . . . . . . . . . . . . . . .
Breakdown assistance. . . . . . . . . . . . . .
Breakdown assistance . . . . . . . . . . . . . . . . . . . . . . . .First-aid box* and Warning triangle* . . . . . . . . . . .Fire extinguisher* . . . . . . . . . . . . . . . . . . . . . . . . . . . . .Vehicle tool kit . . . . . . . . . . . . . . . . . . . . . . . . . . . . . . . .Tyre repair kit* . . . . . . . . . . . . . . . . . . . . . . . . . . . . . . . .Spare wheel* . . . . . . . . . . . . . . . . . . . . . . . . . . . . . . . . .Changing a wheel . . . . . . . . . . . . . . . . . . . . . . . . . . . . .Jump-starting . . . . . . . . . . . . . . . . . . . . . . . . . . . . . . . .Tow-starting and towing vehicle . . . . . . . . . . . . . . .
Fuses and light bulbs. . . . . . . . . . . . . . . . . . . . . . . . . .Electric fuses . . . . . . . . . . . . . . . . . . . . . . . . . . . . . . . . .Bulbs . . . . . . . . . . . . . . . . . . . . . . . . . . . . . . . . . . . . . . . .
Technical Data . . . . . . . . . . . . . . . . . . . . . . . . . .
Technical Data. . . . . . . . . . . . . . . . . . . . . . . . . . . . . . . . .General information . . . . . . . . . . . . . . . . . . . . . . . . . . .Used abbreviations . . . . . . . . . . . . . . . . . . . . . . . . . . .Performances . . . . . . . . . . . . . . . . . . . . . . . . . . . . . . . . .Weight . . . . . . . . . . . . . . . . . . . . . . . . . . . . . . . . . . . . . . .Identification details . . . . . . . . . . . . . . . . . . . . . . . . . .Fuel consumption according to the regulations (99/100/EU) . . . . . . . . . . . . . . . . . . . . . . . . . . . . . . . . . .Dimensions . . . . . . . . . . . . . . . . . . . . . . . . . . . . . . . . . .1.2 l/44 kW - EU 4/EU 2DDK . . . . . . . . . . . . . . . . . . .1.2 l/51 kW - EU 4/EU 2DDK . . . . . . . . . . . . . . . . . . .1,4 l/63 kW - EU 4/EU 2DDK . . . . . . . . . . . . . . . . . . .1,6 l/77 kW - EU 4/EU 2DDK . . . . . . . . . . . . . . . . . . .1.4 ltr./51 kW TDI PD - EU 4 . . . . . . . . . . . . . . . . . . . .1.4 ltr./59 kW TDI PD - EU 4 . . . . . . . . . . . . . . . . . . . .1.9 ltr./77 kW TDI PD - EU 4 . . . . . . . . . . . . . . . . . . . .Vehicles of the group Fabia N1 . . . . . . . . . . . . . . . . .Vehicles of the group Combi N1 . . . . . . . . . . . . . . . .
Index . . . . . . . . . . . . . . . . . . . . . . . . . . . . . . . . . . . . . . . .
128130
132132133136138139
142142145148149
151
151151154154155155156156158
159159160
160163164165
166166
169
169169169174
177177177178
180180183186188189193
194194
200200200
201
201201201202202202203208209
213213217
223
223223223223223223
224225226228230232234236238240241
243
NKO A05F 20.book Page 4 Wednesday, April 2, 2008 1:02 PM
Page 27 of 252
Instruments and Indicator/Warning Lights26
The warning light comes on even when the ignition is switched off. The warning light goes out 5 minutes after switching off the ignition if one or several doors, the bonnet or boot lid is opened. The warning light goes out after closing the doors.
Windshield washer fluid level*
The warning light comes on when the ignition is switched on if there is insuffi-cient fluid in the windshield washer system. Top up with liquid ⇒page 193.
A peep sounds as an additional warning signal.
The following text will be displayed in the information display*:
REFILL WASHER LIQUID
Control system for exhaust
The warning light comes on after the ignition has been switched on.
If the warning light does not go out after starting the engine or it lights up or flashes when driving, a fault exists in an exhaust relevant component. The engine manage-ment system selects an emergency programme which enables you to drive to the nearest specialist garage by adopting a gentle style of driving.
The following text will be displayed in the information display*:
EXHAUST WORKSHOP!
Traction control system (TCS) *
The warning light comes on for a few seconds when the ignition is switched on.
The warning light comes on when driving when a control cycle is activated.
The warning light will come on and remains on if the TCS is switched off or if there is a fault in the system.
The fact that the TCS system operates together with the ABS means that the TCS warning light will also come on if the ABS system is not operating properly.
If the warning light comes on immediately after starting the engine, the TCS system can be switched off for technical reasons. In this case, the TCS system can be switched on again by switching the ignition on and off. If the warning light goes out, the TCS system is fully functional again.
Further information about the TCS ⇒page 152.
Note
If the battery has been disconnected and reconnected, the warning light comes on after switching on the ignition. The warning light must go out after driving a short distance.
Tyre inflation pressure*
The warning light lights up, if there is a substantial drop in inflation pressure in one of the tyres. Reduce the speed and check or correct as soon as possible the inflation pressure in the tyres ⇒page 194.
A peep sounds as an additional warning signal.
If the warning light flashes, there is a system fault. Visit the nearest specialist garage and have the fault rectified.
Further information about tyre pressure-control system ⇒page 156.
WARNING
•When the warning light lights up, immediately reduce the speed and avoid sudden steering and brake manoeuvres. Please stop the vehicle without delay at the nearest possible stop and inspect the tyres and their inflation pressures.
•Under certain circumstances (e.g. sporty style of driving, wintry or unpaved roads) the warning light can be delayed or does not light up at all.
•The tyre inflation pressure-control system does not take away the responsability from the driver for the correct tyre inflation pressure.
NKO A05F 20.book Page 26 Wednesday, April 2, 2008 1:02 PM
Page 123 of 252
Passive Safety122
Before setting off
The driver is always fully responsible for his occupants and for the
operating safety of the vehicle.
For your own safety and the safety of the people travelling with you, please pay attention to the following points before setting off.
•Ensure that the lighting and the turn signal system are functioning properly.
•Inspect the tyre inflation pressure.
•Ensure that all the windows offer a good visibility to the outside.
•Safely attach the items of luggage ⇒page 61, “Loading the luggage compart-ment”.
•Ensure that no objects can obstruct the pedal.
•Adjust the mirror, the front seat and the head restraint to match your body size.
•Point out to your occupants that the head restraints must be adjusted to match their body size.
•Protect the children in suitable child seats with correctly fastened seat belts ⇒page 142, “Transporting children safely”.
•Adopt the correct seated position. Also inform your occupants to adopt the correct seated position.
•Fasten the seat belt correctly. Also inform your occupants to properly fasten the seat belts ⇒page 128, “How are seat belts correctly fastened?”.
What influences the driving safety?
The driving safety is primarily determined by the style of driving and
the personal behaviour of all the occupants.
The driver is fully responsible for himself and his occupants. If your driving safety is effected, you place yourself and the oncoming traffic at risk. Please refer to the following guidelines.
•Do not get distracted from concentrating on the traffic situation, e.g. by your occupants or mobile phone calls.
•Never drive when your driving ability is impaired, e.g. through medication, alcohol, drugs.
•Keep to the traffic regulations and the permissible speed limit.
•Adjust the driving speed at all times to the road condition as well as to the traffic and weather conditions.
•Take regular breaks on long journeys - at the latest every two hours.
Correct seated position
Correct seated position for the driver
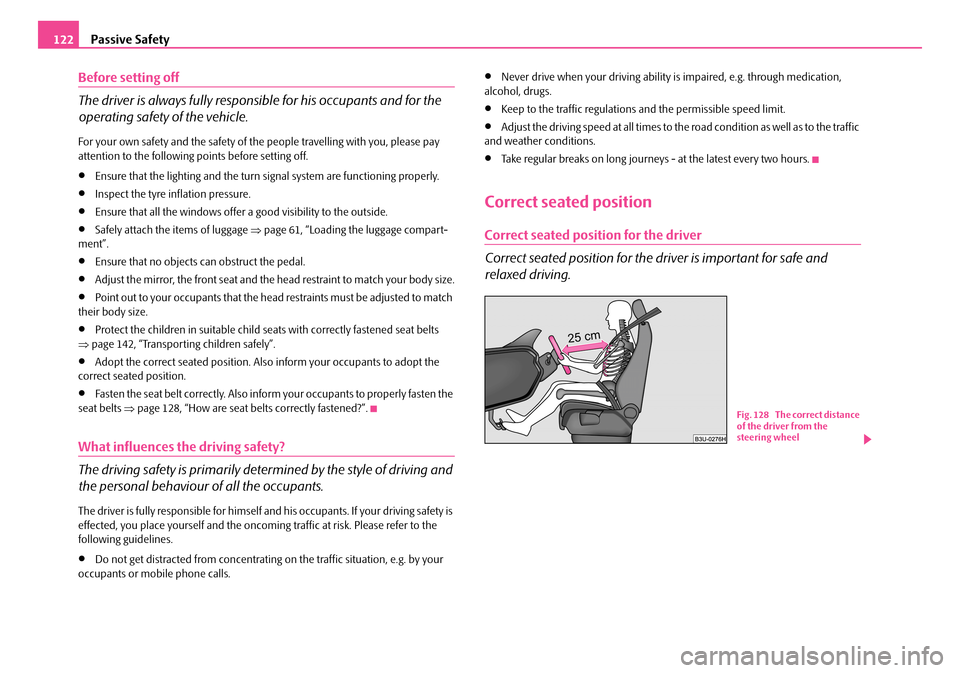
Correct seated position for the driver is important for safe and
relaxed driving.
Fig. 128 The correct distance of the driver from the steering wheel
NKO A05F 20.book Page 122 Wednesday, April 2, 2008 1:02 PM
Page 157 of 252
Intelligent Technology156
pedal firmly and hold it in this position in order to achieve the shortest possible braking distance.
The Brake Assist is able to help you achieve a shorter braking distance in emergency situations by rapidly producing the pressure required in the brake system. It fully exploits the attributes of the ABS. After you release the brake pedal, the function of the Brake Assist is automatically switched off and the brakes operate in the normal way.
The Brake Assist is part of the ESP system. If a fault occurs in the ESP, the Brake Assist function is also not available. Further information on the ESP ⇒page 151.
WARNING
•The Brake Assist is also not able to overcome the physical limits of your car in terms of the braking distance required.
•Adapt your speed to the conditions of the road surface and to the traffic situation.
•The increased safety offered by the Brake Assist must not tempt you to take a greater safety risk than otherwise.
Electrohydraulic power steering
The power steering enables you to steer the vehicle with less physical force.
The steering characteristics can be changed by a specialist garage.
You will place great stresses on the power steering system if the steering is turned to full lock when the vehicle is stationary. Turning the steering to full lock in such a situation will be accompanied by noises.
It is still possible to fully steer the vehicle if the power steering fails or if the engine is not running (vehicle being towed in). The only difference is that greater physical effort is required.
It is possible that the hydraulic pump of the power steering will not run due to the low vehicle network voltage if the battery has gone flat and the engine must started with the help off jump leads. This condition will be indicated by lighting up of the warning light.
The power steering operates again if the battery is charged to a specific range when engine is running. It also operates again, if the engine can be started with its own battery.
Caution
Do not leave the steering at full lock for more than 15 seconds when the engine is running - risk of damaging the power steering!
Note
Have the steering inspected as soon as possible by a specialist garage if there is a leak or fault in the system.
Tyre inflation pressure-control system*
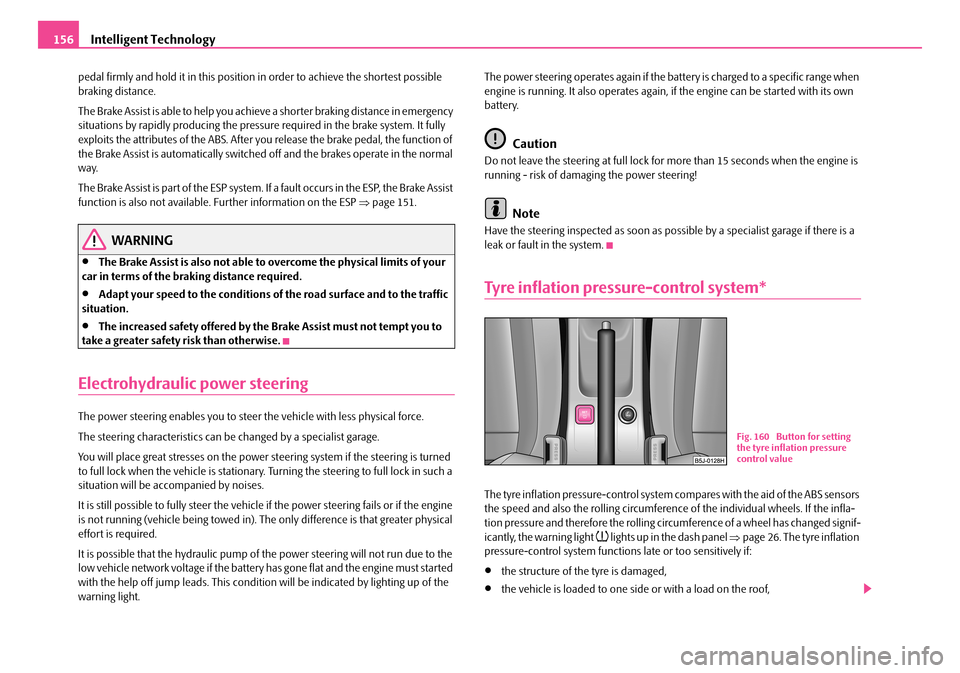
The tyre inflation pressure-control system compares with the aid of the ABS sensors the speed and also the rolling circumference of the individual wheels. If the infla-tion pressure and therefore the rolling circumference of a wheel has changed signif-icantly, the warning light lights up in the dash panel ⇒page 26. The tyre inflation pressure-control system functions late or too sensitively if:
•the structure of the tyre is damaged,
•the vehicle is loaded to one side or with a load on the roof,
Fig. 160 Button for setting the tyre inflation pressure control value
NKO A05F 20.book Page 156 Wednesday, April 2, 2008 1:02 PM
Page 158 of 252
Intelligent Technology157
Using the systemSafetyDriving TipsGeneral MaintenanceBreakdown assistanceTechnical Data
•the wheels of an axle are loaded heavily (e.g. when towing a trailer or when driving uphill or downhill),
•the vehicle is operated in unfavourable winter conditions or on an unfirm ground,
•snow chains or emergency wheel are mounted,
•the driver has a sporty style of driving (with sharp acceleration and high speed when cornering).
Basic setting of tyre inflation pressure-control system
After changing the tyre inflation pressures or after changing one or several wheels, a basic setting of the system must be carried out as follows.
•Inflate all tyres to the specified inflation pressure ⇒page 194.
•Switch on the ignition.
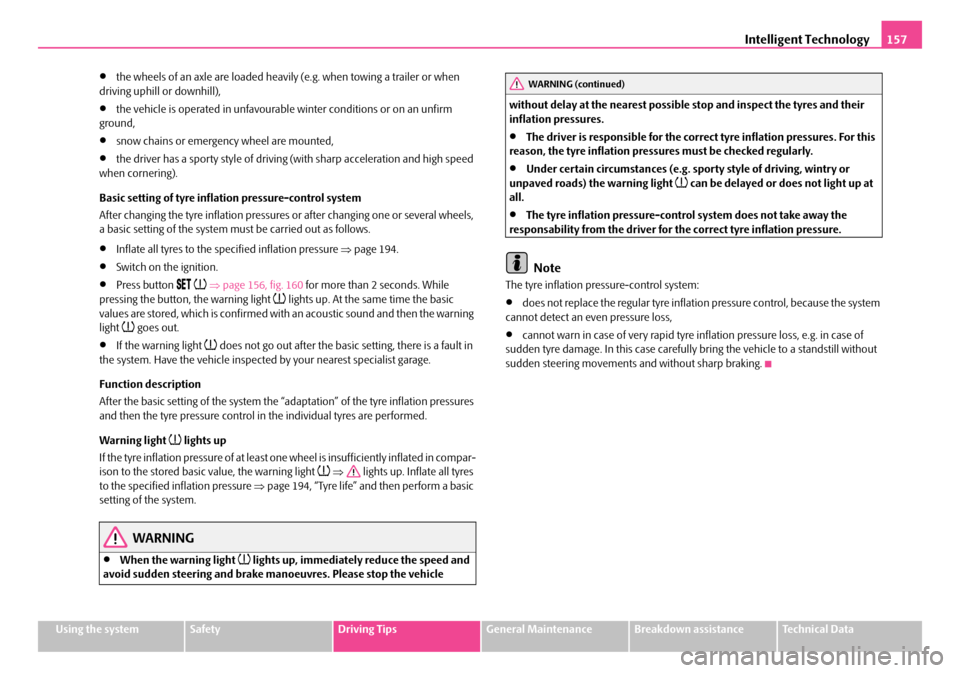
•Press button ⇒page 156, fig. 160 for more than 2 seconds. While pressing the button, the warning light lights up. At the same time the basic values are stored, which is confirmed with an acoustic sound and then the warning light goes out.
•If the warning light does not go out after the basic setting, there is a fault in the system. Have the vehicle inspected by your nearest specialist garage.
Function description
After the basic setting of the system the “adaptation” of the tyre inflation pressures and then the tyre pressure control in the individual tyres are performed.
Warning light lights up
If the tyre inflation pressure of at least one wheel is insufficiently inflated in compar-ison to the stored basic value, the warning light ⇒ lights up. Inflate all tyres to the specified inflation pressure ⇒page 194, “Tyre life” and then perform a basic setting of the system.
WARNING
•When the warning light lights up, immediately reduce the speed and avoid sudden steering and brake manoeuvres. Please stop the vehicle
without delay at the nearest possible stop and inspect the tyres and their inflation pressures.
•The driver is responsible for the correct tyre inflation pressures. For this reason, the tyre inflation pressures must be checked regularly.
•Under certain circumstances (e.g. sporty style of driving, wintry or unpaved roads) the warning light can be delayed or does not light up at all.
•The tyre inflation pressure-control system does not take away the responsability from the driver for the correct tyre inflation pressure.
Note
The tyre inflation pressure-control system:
•does not replace the regular tyre inflation pressure control, because the system cannot detect an even pressure loss,
•cannot warn in case of very rapid tyre inflation pressure loss, e.g. in case of sudden tyre damage. In this case carefully bring the vehicle to a standstill without sudden steering movements and without sharp braking.
WARNING (continued)
NKO A05F 20.book Page 157 Wednesday, April 2, 2008 1:02 PM
Page 164 of 252
Driving and the Environment163
Using the systemSafetyDriving TipsGeneral MaintenanceBreakdown assistanceTechnical Data
The cold engine vehicle consumes approx. 15 - 20 litres/100 km of fuel immediately after starting. Fuel consumption drops to 10 litres/100 km after just 1 kilometre. The engine reaches its operating temperature (outside temperature and engine dependent) only after about 4 to 10 kilometres and the fuel consumption then stabilizes. You should therefore avoid driving short distances whenever possible.
An important factor in this connection is also the ambient temperature. The ⇒page 162, fig. 164 shows the different fuel consumptions for the same distance, on the one hand at +20°C and on the other hand at -10°C. Your vehicle has a higher fuel consumption in winter than in summer.
Checking tyre inflation pressures
Tyres which are correctly inflated save fuel.
Always ensure that your tyres are inflated to the correct pressure at all times. The rolling resistance will be increased if the tyre filling pressure is too low. This will not only increase fuel consumption but also tyre wear and the driving behaviour will worsen.
Always check the inflation pressure of the tyres when cold.
Do not drive with winter tyres all year round for this costs about 10 % more fuel. Winter tyres are also louder.
No unnecessary ballast
Transporting ballast costs fuel.
The fact that every kilogram of extra weight increases your fuel consumption means that it is worth taking a look in the luggage compartment to avoid trans-porting any unnecessary ballast.
It is par ticularly i n town tra ffi c, whe n one is accelerating quite often, that the vehicle weight will have a significant effect upon the fuel consumption. A rule of thumb here is that an increase in weight of 100 kilograms will cause an increase in fuel consumption of about 1 litre/100 kilometres.
You may frequently also leave a roof rack fitted on just out of convenience, although you no longer need it. The increased aerodynamic drag of your vehicle
causes it to use about 1 l more fuel than normal at a speed of 100 - 120 km/h, even when you are not carrying a load on the roof.
Saving electricity
Generating electricity costs fuel.
– Switch off electrical components as soon as you no longer need them.
When the engine is running, the alternator generates and supplies electrical power. If more electrical components are switched on, more fuel is needed to operate the alternator.
Keeping a log of your fuel consumption
If you really wish to keep a close check on your fuel consumption, it is best to enter the figures in a logbook. This does not take much time but is a very worthwhile exer-cise. It enables you to detect any change (positive and negative) at an early stage and to take any appropriate action.
If you find that your fuel consumption is too high, you should reflect on how, where and in what conditions you have driven the vehicle since you last refuelled.
Environmental compatibility
Environmental protection has played a major role in the design, selection of mate-rials and manufacture of your new Škoda. Particular emphasis has been paid to a number of aspects, including:
Design measures
•joints designed to be easily detached
•simplified disassembly due to the modular structure system
•improved purity of different classes of materials
•Identification of all plastic parts in accordance with VDA Recommendation 260
•Reduced fuel consumption and exhaust emission CO2
NKO A05F 20.book Page 163 Wednesday, April 2, 2008 1:02 PM
Page 167 of 252
Towing a trailer166
Towing a trailer
To w i n g a t r a i l e r
Technical requirements
The towing device must satisfy certain technical requirements.
Your vehicle is designed primarily for transporting persons and luggage. It can, however, also be used for towing a trailer - provided certain technical equipment is fitted.
If your vehicle has been equipped with a towing device from Škoda Original Acces-sories, then the towing device satisfies all technical and legal requirements.
Your vehicle is fitted with a 13-pin power socket for the electrical connection between the vehicle and trailer. If the trailer which you wish to tow has a 7-pin connector, you can use a suitable adapter 6) from Škoda original accessories.
This work must be carried out in accordance with the manufacturer's specifications if a towing device is retrofitted.
Škoda Service Partners are familiar with details relating to retrofitting a towing device and for any necessary modifications to the cooling system.
WARNING
We recommend that you have the towing device from Škoda original acces-sories installed by a Škoda Service Partner. He is familiar with all the relevant details relating to retrofitting such equipment. There is a risk of an accident if the towing device is not properly fitted!
General Maintenance
There are a number of points to pay attention to when towing a
trailer.
Trailer load
The permissible trailer load must on no account be exceeded.
You can negotiate appropriately steeper inclines and descents if you do not make full use of the permissible trailer load.
The trailer loads specified only apply for altitudes up to 1 000 metres above mean sea level. The fact that the engine power output drops with increasing height due to a lowering of air pressure and thus the ability to climb, means that the trailer load must be reduced by 10% for every further increase of 1 000 metres in height above sea level. The towed weight is the weight of the (laden) vehicle and the (laden) trailer together. One should take this into account before driving up to higher alti-tudes.
The trailer and drawbar load information on the type plate of the towing device are merely test data for the towing device The data relating to your vehicle, which is often less than this test data, can be found in your vehicle registration documents or in the brochure - Technical Data.
Distribution of the load
Distribute the load in the trailer in such a way that any heavy items are located as close as possible to the axle. Secure the items to prevent them slipping.
Tyre pressure
Correct the tyre inflation pressure on your vehicle for that of “fully laden”, ⇒page 194. The inflation pressure of the tyres fitted to the trailer adjust in accord-ance with the manufacturer's recommendation.
Exterior mirrors
You have to have additional exterior mirrors fitted if you are not able to see the traffic behind the trailer with the standard rear-view mirrors. Both exterior mirrors 6)In some countries the adapter is supplied with the towing device.
NKO A05F 20.book Page 166 Wednesday, April 2, 2008 1:02 PM
Page 195 of 252
Wheels and Tyres194
Wheels and Tyres
Wheels
General information
•New tyres do not offer optimal grip at first and should therefore be run in for about 500 km at a moderate speed and an appropriately cautious style of driving. You will also profit from longer tyre life.
•The tread depth of new tyres may differ because of design features and the configuration of the tread (depending on the type of tyre and the manufacturer).
•Drive over curbs on the side of the road and other such obstacles slowly and, where possible, at a right angles in order to avoid damage to tyres and wheel trims.
•Inspect your tyres from time to time for damage (punctures, cuts, splits and bulges). Remove foreign bodies from the tyre profile.
•Damage to tyres and wheels is frequently not visible. Unusual vibrations or pulling of the vehicle to one side could be a sign of tyre damage. Please reduce your speed immediately and stop if you suspect that a wheel is damaged. Inspect the tyres for signs of damage (bulges, splits, etc.). If no visible damage is present, please drive at an appropriately slow speed and carefully to the nearest specialist garage in order to have your vehicle inspected.
•Also protect your tyres from contact with oil, grease and fuel.
•Immediately replace any dust caps of the valves which have got lost.
•Mark wheels before removing them so that their previous direction of running can be maintained when mounted them again.
•Always store wheels or tyres which been removed in a cool, dry and, where possible, dark place. Tyres which are not fixed to a wheel trim should be stored upright.
Unidirectional tyres*
The direction of rotation of the tyres is marked by arrows on the wall of the tyre. This indicates the direction of rotation of the tyre, and it is essential that the tyres are fitted on to run in this direction. Only then are the tyres able to provide the optimal properties in terms of grip, low noise, wear-and-tear and aquaplaning.
Further information concerning the use of unidirectional tyres ⇒page 198.
WARNING
•New tyres during the first 500 km do not offer optimal grip and should therefore be run appropriately - risk of accident!
•Never drive with damaged tyres - risk of accident!
Note
Please observe the various differing legal requirements regarding tyres.
Tyre life
The life of your tyres very much depends on the following points:
Tyre pressure
The working life of tyres will be shortened considerably if the tyres are insufficiently or over-inflated and this will have an adverse effect on the handling of your vehicle.
Correctly inflated tyres are of particular importance when travelling at high speeds. It is therefore good to check the pressure at least once a month and also before
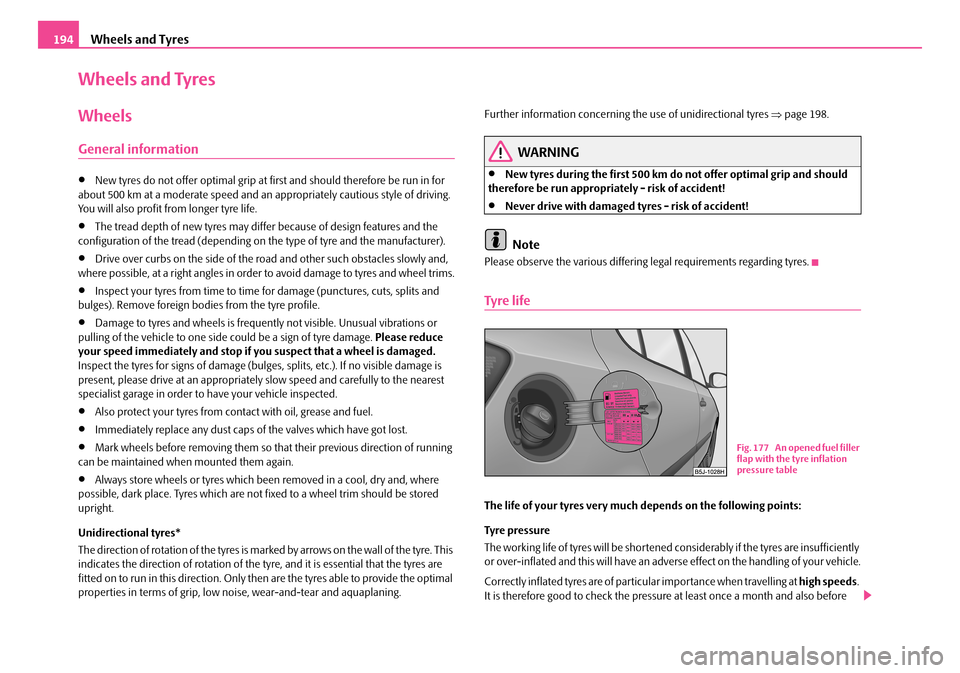
Fig. 177 An opened fuel filler flap with the tyre inflation pressure table
NKO A05F 20.book Page 194 Wednesday, April 2, 2008 1:02 PM
Page 196 of 252
Wheels and Tyres195
Using the systemSafetyDriving TipsGeneral MaintenanceBreakdown assistanceTechnical Data
setting off on a long trip. Please do not forget the spare wheel when checking the tyres.
The tyre inflation pressures for summer tyres are indicated on the inside of the fuel filler flap ⇒page 194, fig. 177. The inflation pressures for winter tyres are 20 kPa (0.2 bar) higher than those for summer tyres ⇒page 198.
The tyre pressure should be at the highest pressure specified for your vehicle at all times.
Always check the inflation pressure of tyres when cold. Do not reduce the higher pressure of warm tyres. Adapt the inflation pressure of the tyres accordingly if your vehicle is carrying a significantly higher payload.
Driving style
Fast cornering, sharp acceleration and braking (squealing tyres) increase wear-and-tear on your tyres.
Balancing wheels
The wheels of a new vehicle are balanced. There are a wide range of influences when driving which may result in an imbalance and which makes themselves felt through vibration in the steering.
You should have the wheels rebalanced since any imbalance increases wear-and-tear on the steering, the suspension and tyres. A wheel must also be rebalanced when a new tyre is fitted and each time a tyre is repaired.
Wheel alignment errors
Incorrect wheel alignment at the front and rear will not only increase wear-and-tear on the tyres but will also has an adverse effect on vehicle safety. Contact your specialist garage if you notice any unusual tyre wear.
WARNING
•If the inflation pressure is too low, the tyre must perform a greater rolling resistance. At higher speeds the tyre will warm up as a result of this. This can result in tread separation and even a tyre blowout.
•Immediately replace the damaged rims or tyres.
•Tyres which are 6 years old or more should only be fitted in exceptional cases and when adopting an appropriately cautious style of driving.
For the sake of the environment
Tyres which are insufficiently inflated increase your fuel consumption.
Wear indicators
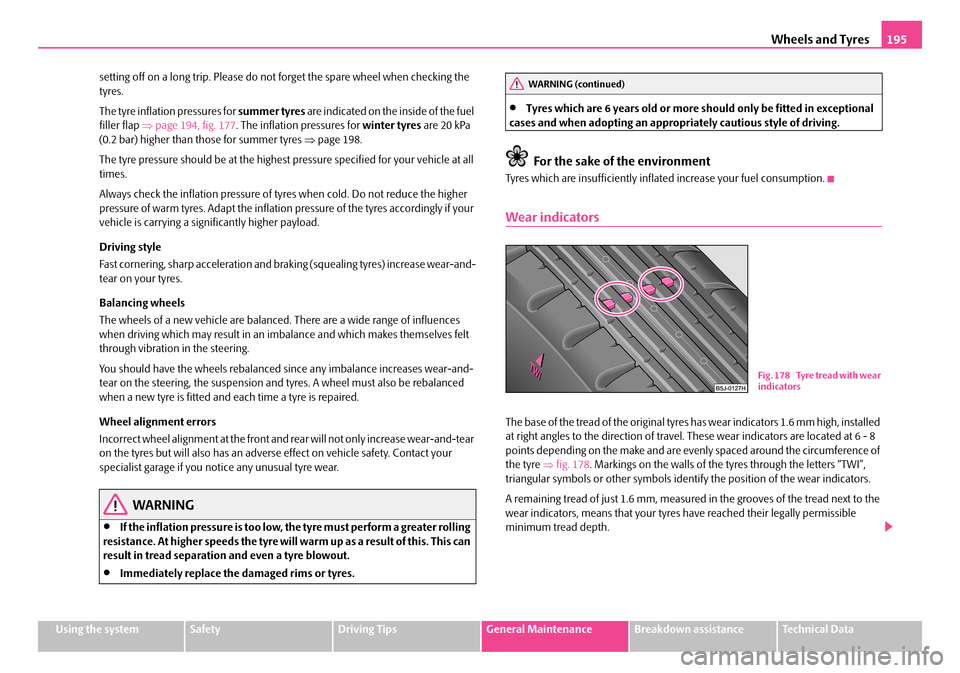
The base of the tread of the original tyres has wear indicators 1.6 mm high, installed at right angles to the direction of travel. These wear indicators are located at 6 - 8 points depending on the make and are evenly spaced around the circumference of the tyre ⇒fig. 178. Markings on the walls of the tyres through the letters “TWI”, triangular symbols or other symbols identify the position of the wear indicators.
A remaining tread of just 1.6 mm, measured in the grooves of the tread next to the wear indicators, means that your tyres have reached their legally permissible minimum tread depth.
WARNING (continued)
Fig. 178 Tyre tread with wear indicators
NKO A05F 20.book Page 195 Wednesday, April 2, 2008 1:02 PM
Page 203 of 252
Breakdown assistance202
Vehicle tool kit
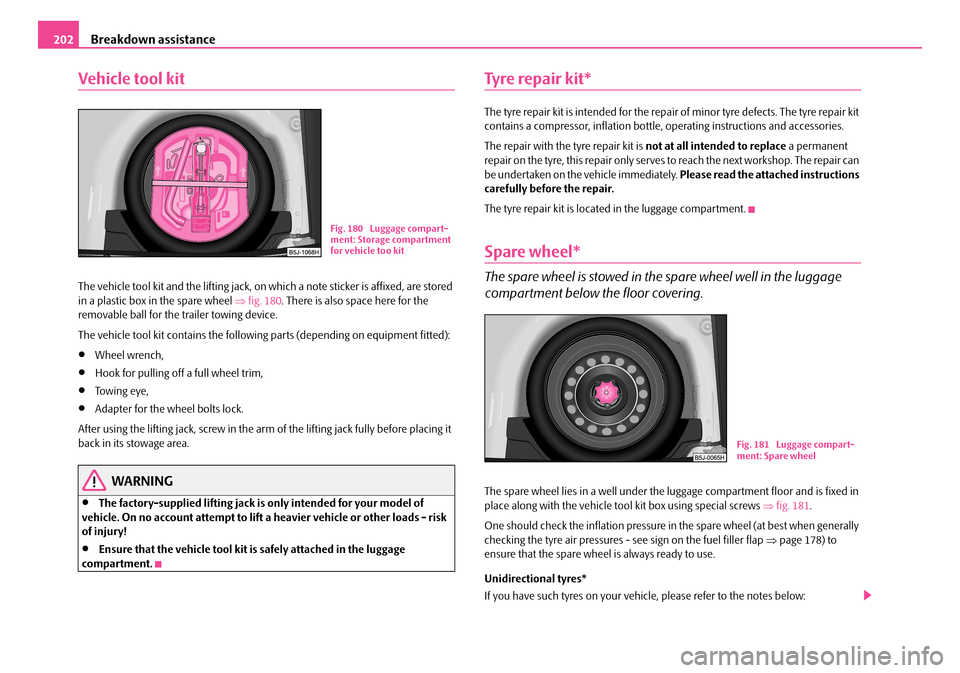
The vehicle tool kit and the lifting jack, on which a note sticker is affixed, are stored in a plastic box in the spare wheel ⇒fig. 180. There is also space here for the removable ball for the trailer towing device.
The vehicle tool kit contains the following parts (depending on equipment fitted):
•Wheel wrench,
•Hook for pulling off a full wheel trim,
•Towing eye,
•Adapter for the wheel bolts lock.
After using the lifting jack, screw in the arm of the lifting jack fully before placing it back in its stowage area.
WARNING
•The factory-supplied lifting jack is only intended for your model of vehicle. On no account attempt to lift a heavier vehicle or other loads - risk of injury!
•Ensure that the vehicle tool kit is safely attached in the luggage compartment.
Tyre repair kit*
The tyre repair kit is intended for the repair of minor tyre defects. The tyre repair kit contains a compressor, inflation bottle, operating instructions and accessories.
The repair with the tyre repair kit is not at all intended to replace a permanent re pair on the tyre, this repai r only s er v es to reach the next w orks hop. T he re pa ir can be undertaken on the vehicle immediately. Please read the attached instructions carefully before the repair.
The tyre repair kit is located in the luggage compartment.
Spare wheel*
The spare wheel is stowed in the spare wheel well in the luggage
compartment below the floor covering.
The spare wheel lies in a well under the luggage compartment floor and is fixed in place along with the vehicle tool kit box using special screws ⇒fig. 181.
One should check the inflation pressure in the spare wheel (at best when generally checking the tyre air pressures - see sign on the fuel filler flap ⇒page 178) to ensure that the spare wheel is always ready to use.
Unidirectional tyres*
If you have such tyres on your vehicle, please refer to the notes below:
Fig. 180 Luggage compart-ment: Storage compartment for vehicle too kit
Fig. 181 Luggage compart-ment: Spare wheel
NKO A05F 20.book Page 202 Wednesday, April 2, 2008 1:02 PM