weight SKODA FABIA 2008 2.G / 5J Owner's Manual
[x] Cancel search | Manufacturer: SKODA, Model Year: 2008, Model line: FABIA, Model: SKODA FABIA 2008 2.G / 5JPages: 252, PDF Size: 40.88 MB
Page 5 of 252
Contents4
How are seat belts correctly fastened? . . . . . . . . . . Belt tensioner . . . . . . . . . . . . . . . . . . . . . . . . . . . . . . . .
Airbag system . . . . . . . . . . . . . . . . . . . . . . . . . . . . . . . . . Description of the airbag system . . . . . . . . . . . . . . . Front airbags . . . . . . . . . . . . . . . . . . . . . . . . . . . . . . . . . Side airbags* . . . . . . . . . . . . . . . . . . . . . . . . . . . . . . . . . Head airbags* . . . . . . . . . . . . . . . . . . . . . . . . . . . . . . . . Deactivating an airbag . . . . . . . . . . . . . . . . . . . . . . . .
Transporting children safely . . . . . . . . . . . . . . . . . . What you should know about transporting children!Child seat . . . . . . . . . . . . . . . . . . . . . . . . . . . . . . . . . . . . Attaching a child seat using the “ISOFIX” system*Attaching child seat using the “Top Tether” system
Driving Tips. . . . . . . . . . . . . . . . . . . . . . . . . . . . . .
Intelligent Technology . . . . . . . . . . . . . . . . . . . . . . . . Electronic stability programme (ESP)* . . . . . . . . . . Brakes . . . . . . . . . . . . . . . . . . . . . . . . . . . . . . . . . . . . . . . Brake booster . . . . . . . . . . . . . . . . . . . . . . . . . . . . . . . . Antilock brake system (ABS)* . . . . . . . . . . . . . . . . . . Brake Assist* . . . . . . . . . . . . . . . . . . . . . . . . . . . . . . . . . Electrohydraulic power steering . . . . . . . . . . . . . . . Tyre inflation pressure-control system* . . . . . . . . . Diesel particle filter* (diesel engine) . . . . . . . . . . . .
Driving and the Environment. . . . . . . . . . . . . . . . . The first 1 500 kilometres and then afterwards . . Catalytic converter . . . . . . . . . . . . . . . . . . . . . . . . . . . . Driving in an economical and environmentally conscious manner . . . . . . . . . . . . . . . . . . . . . . . . . . . . Environmental compatibility . . . . . . . . . . . . . . . . . . . Motoring abroad . . . . . . . . . . . . . . . . . . . . . . . . . . . . . Avoiding damage to your vehicle . . . . . . . . . . . . . .
To w i n g a t r a i l e r. . . . . . . . . . . . . . . . . . . . . . . . . . . . . . . . Towing a trailer . . . . . . . . . . . . . . . . . . . . . . . . . . . . . . .
General Maintenance. . . . . . . . . . . . . . .
Taking care of your vehicle and cleaning the vehicle. . . . . . . . . . . . . . . . . . . . . . . . . . . . . . . . . . . . . . . . .General . . . . . . . . . . . . . . . . . . . . . . . . . . . . . . . . . . . . . .Care of the exterior of vehicle . . . . . . . . . . . . . . . . . .Care of the interior of vehicle . . . . . . . . . . . . . . . . . .
Fuel. . . . . . . . . . . . . . . . . . . . . . . . . . . . . . . . . . . . . . . . . . . .Petrol . . . . . . . . . . . . . . . . . . . . . . . . . . . . . . . . . . . . . . . .Diesel . . . . . . . . . . . . . . . . . . . . . . . . . . . . . . . . . . . . . . . .Refuelling . . . . . . . . . . . . . . . . . . . . . . . . . . . . . . . . . . . .
Inspecting and Replenishing. . . . . . . . . . . . . . . . . .Engine compartment . . . . . . . . . . . . . . . . . . . . . . . . .Engine oil . . . . . . . . . . . . . . . . . . . . . . . . . . . . . . . . . . . .Cooling system . . . . . . . . . . . . . . . . . . . . . . . . . . . . . . .Brake fluid . . . . . . . . . . . . . . . . . . . . . . . . . . . . . . . . . . .Battery . . . . . . . . . . . . . . . . . . . . . . . . . . . . . . . . . . . . . . .Windshield washer system . . . . . . . . . . . . . . . . . . . .
Wheels and Tyres. . . . . . . . . . . . . . . . . . . . . . . . . . . . . .Wheels . . . . . . . . . . . . . . . . . . . . . . . . . . . . . . . . . . . . . .
Accessories, changes and replacement of partsAccessories and replacement parts . . . . . . . . . . . . .Technical changes . . . . . . . . . . . . . . . . . . . . . . . . . . . .
Breakdown assistance. . . . . . . . . . . . . .
Breakdown assistance . . . . . . . . . . . . . . . . . . . . . . . .First-aid box* and Warning triangle* . . . . . . . . . . .Fire extinguisher* . . . . . . . . . . . . . . . . . . . . . . . . . . . . .Vehicle tool kit . . . . . . . . . . . . . . . . . . . . . . . . . . . . . . . .Tyre repair kit* . . . . . . . . . . . . . . . . . . . . . . . . . . . . . . . .Spare wheel* . . . . . . . . . . . . . . . . . . . . . . . . . . . . . . . . .Changing a wheel . . . . . . . . . . . . . . . . . . . . . . . . . . . . .Jump-starting . . . . . . . . . . . . . . . . . . . . . . . . . . . . . . . .Tow-starting and towing vehicle . . . . . . . . . . . . . . .
Fuses and light bulbs. . . . . . . . . . . . . . . . . . . . . . . . . .Electric fuses . . . . . . . . . . . . . . . . . . . . . . . . . . . . . . . . .Bulbs . . . . . . . . . . . . . . . . . . . . . . . . . . . . . . . . . . . . . . . .
Technical Data . . . . . . . . . . . . . . . . . . . . . . . . . .
Technical Data. . . . . . . . . . . . . . . . . . . . . . . . . . . . . . . . .General information . . . . . . . . . . . . . . . . . . . . . . . . . . .Used abbreviations . . . . . . . . . . . . . . . . . . . . . . . . . . .Performances . . . . . . . . . . . . . . . . . . . . . . . . . . . . . . . . .Weight . . . . . . . . . . . . . . . . . . . . . . . . . . . . . . . . . . . . . . .Identification details . . . . . . . . . . . . . . . . . . . . . . . . . .Fuel consumption according to the regulations (99/100/EU) . . . . . . . . . . . . . . . . . . . . . . . . . . . . . . . . . .Dimensions . . . . . . . . . . . . . . . . . . . . . . . . . . . . . . . . . .1.2 l/44 kW - EU 4/EU 2DDK . . . . . . . . . . . . . . . . . . .1.2 l/51 kW - EU 4/EU 2DDK . . . . . . . . . . . . . . . . . . .1,4 l/63 kW - EU 4/EU 2DDK . . . . . . . . . . . . . . . . . . .1,6 l/77 kW - EU 4/EU 2DDK . . . . . . . . . . . . . . . . . . .1.4 ltr./51 kW TDI PD - EU 4 . . . . . . . . . . . . . . . . . . . .1.4 ltr./59 kW TDI PD - EU 4 . . . . . . . . . . . . . . . . . . . .1.9 ltr./77 kW TDI PD - EU 4 . . . . . . . . . . . . . . . . . . . .Vehicles of the group Fabia N1 . . . . . . . . . . . . . . . . .Vehicles of the group Combi N1 . . . . . . . . . . . . . . . .
Index . . . . . . . . . . . . . . . . . . . . . . . . . . . . . . . . . . . . . . . .
128130
132132133136138139
142142145148149
151
151151154154155155156156158
159159160
160163164165
166166
169
169169169174
177177177178
180180183186188189193
194194
200200200
201
201201201202202202203208209
213213217
223
223223223223223223
224225226228230232234236238240241
243
NKO A05F 20.book Page 4 Wednesday, April 2, 2008 1:02 PM
Page 62 of 252
Seats and Stowage61
Using the systemSafetyDriving TipsGeneral MaintenanceBreakdown assistanceTechnical Data
Removing
– Fold the rear seat forwards.
– Press the wire clamps in the direction of the arrow ⇒fig. 56 and
remove the rear seat from its holder.
Installing
– Press the wire clamp in the direction of the arrow and place the seat
upholstery in its holder.
– Fold the rear seat back into its original position.
Pedals
You should use only footmats which do not obstruct the movement of the pedals and have an anti-slip protection.
We recommend only to use footmats from Škoda genuine accessories offered by your Škoda dealer.
Operation of the pedals must not be hindered!
WARNING
•Greater pedal distances may be needed when there is a fault in the brake system.
•Do not place any footmats or other additional floor coverings in the area of the pedals in order to ensure that all the pedals can be fully depressed and are able to return unobstructed to their initial position - risk of accident!
•There must be no objects on the floor which could roll under the pedals. You would then no longer be able to apply the brakes, operate the clutch or accelerator - risk of accident!
luggage compartment
Loading the luggage compartment
Please observe the following in the interest of having good handling char-
acteristics of your vehicle:
– Distribute the items of luggage as evenly as possible.
– Place heavy objects as far forward as possible.
– Attach the items of luggage to the lashing eyes or the safety net*
⇒page 62.
In the event of an accident, there is such a high kinetic energy which is produced by small and light objects that they can cause severe injuries. The magnitude of the kinetic energy depends on the speed at which the vehicle is travelling and on the weight of the object. The speed at which the vehicle is travelling is in this case the more significant factor.
Example: In the event of a frontal collision at a speed of 50 km/h, an unsecured object with a weight of 4.5 kg produces an energy, which corresponds to 20 times its own weight. This means that it results in a weight of approx. 90 kg. You can imagine the injuries that can occur, if this “bullet” is flying through the interior compartment and hits an occupant.
WARNING
•Store the objects in the luggage compartment and attach them to the lashing eyes.
•Loose objects in the passenger compartment can be thrown forward during a sudden manoeuvre or in case of an accident and can injure the occupants or other oncoming traffic. This risk is still increased, if the objects which are flying around are hit by a deployed airbag. In this case, the objects which are thrown back can injure the occupants - hazard.
•Please note that the handling properties of your vehicle may be affected when transporting heavy objects as a result of the displacement of the
NKO A05F 20.book Page 61 Wednesday, April 2, 2008 1:02 PM
Page 63 of 252
Seats and Stowage62
centre of gravity. The speed and style of driving must be adjusted accord-ingly.
•The items carried in the luggage compartment should be stored in such a way that no objects are able to slip forward if there are any sudden driving or braking manoeuvres undertaken - risk of injury!
•When transporting fastened objects which are sharp and dangerous in the luggage compartment enlarged by folding the rear seats forward or removing the rear seats, ensure the safety of the passengers transported on the other rear seats ⇒page 124, “Correct seated position for the occupants on the rear seats”.
•If the rear seats next to the folded forward seat are occupied, ensure maximum safety, e.g. by placing the goods to be transported in such a way that a folding back of the seat is prevented in case of a rear collision.
•Never drive with the boot lid fully opened or slightly ajar otherwise exhaust gases may get into the interior of the vehicle - risk of poisoning!
•On no account exceed the permissible axle loads and the permissible gross weight of the vehicle - risk of accident!
•Never transport occupants in the luggage compartment.
Caution
Please ensure that the heating elements of the rear window heater are not damaged as a result of objects sliding in this area.
Note
•Tyre pressure must be adjusted to the load ⇒page 194, fig. 177.
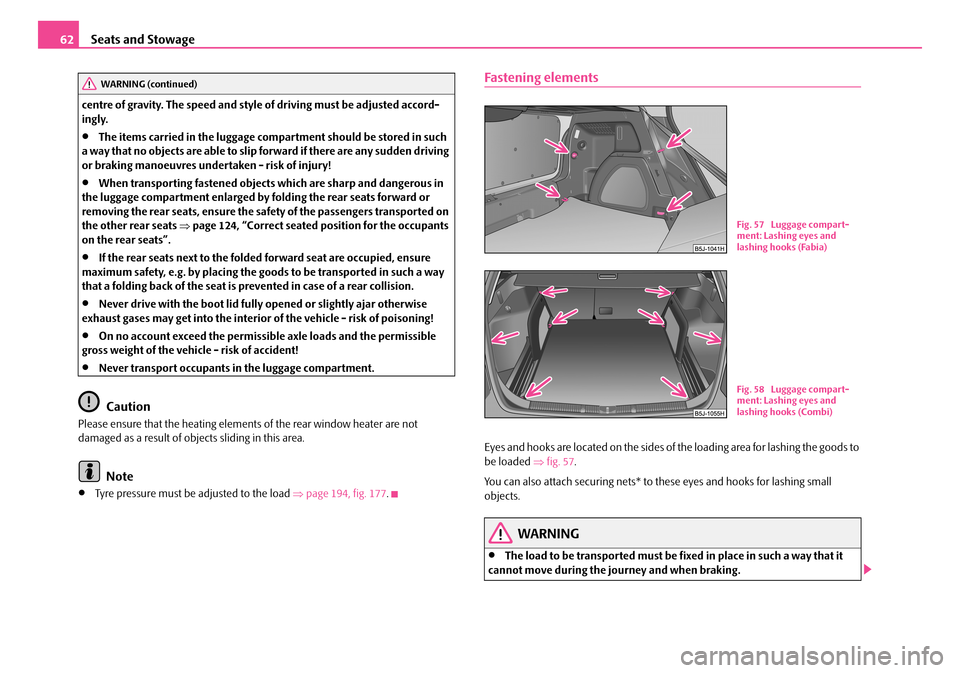
Fastening elements
Eyes and hooks are located on the sides of the loading area for lashing the goods to be loaded ⇒fig. 57.
You can also attach securing nets* to these eyes and hooks for lashing small objects.
WARNING
•The load to be transported must be fixed in place in such a way that it cannot move during the journey and when braking.
WARNING (continued)
Fig. 57 Luggage compart-ment: Lashing eyes and lashing hooks (Fabia)
Fig. 58 Luggage compart-ment: Lashing eyes and lashing hooks (Combi)
NKO A05F 20.book Page 62 Wednesday, April 2, 2008 1:02 PM
Page 64 of 252

Seats and Stowage63
Using the systemSafetyDriving TipsGeneral MaintenanceBreakdown assistanceTechnical Data
•If the items of luggage or objects are attached to the lashing eyes with unsuitable or damaged lashing straps, injuries can occur in the event of braking manoeuvres or accidents. In order to prevent the items of luggage being thrown forward, always use suitable lashing straps which are firmly attached to the lashing eyes.
•The load to be transported must be fixed in place in such a way that it cannot move during the journey and when braking.
Fixing nets - Net programme Combi*
Fixing examples of the fixing nets as horizontal pocket, floor fixing net ⇒fig. 59 and double vertical pockets⇒fig. 60.
The fixing nets* for small items of luggage and the installation instruction are located in the luggage compartment.
WARNING
•The whole strength of the net makes it possible to load the pocket with objects of up to 5 kg in weight. Heavy objects are not secured sufficiently - risk of injury and net damage!
•The load to be transported must be fixed in place in such a way that it cannot move during the journey and when braking.
•Do not place any objects with sharp edges in the nets - risk of net damage.
Folding hooks*
WARNING (continued)
Fig. 59 Fixing net: double horizontal pocket, floor fixing net
Fig. 60 Fixing net: double vertical pockets
Fig. 61 Luggage compart-ment: folding hook (Fabia)
NKO A05F 20.book Page 63 Wednesday, April 2, 2008 1:02 PM
Page 65 of 252
Seats and Stowage64
A folding hook* for attaching small items of luggage, such as bags etc., is provided on both sides of the luggage compartment.
WARNING
An item of luggage weighing up to 10 kg can be attached to the hook.
Luggage compartment cover
You can use the luggage compartment cover behind the head
restraints for storing light and soft items.
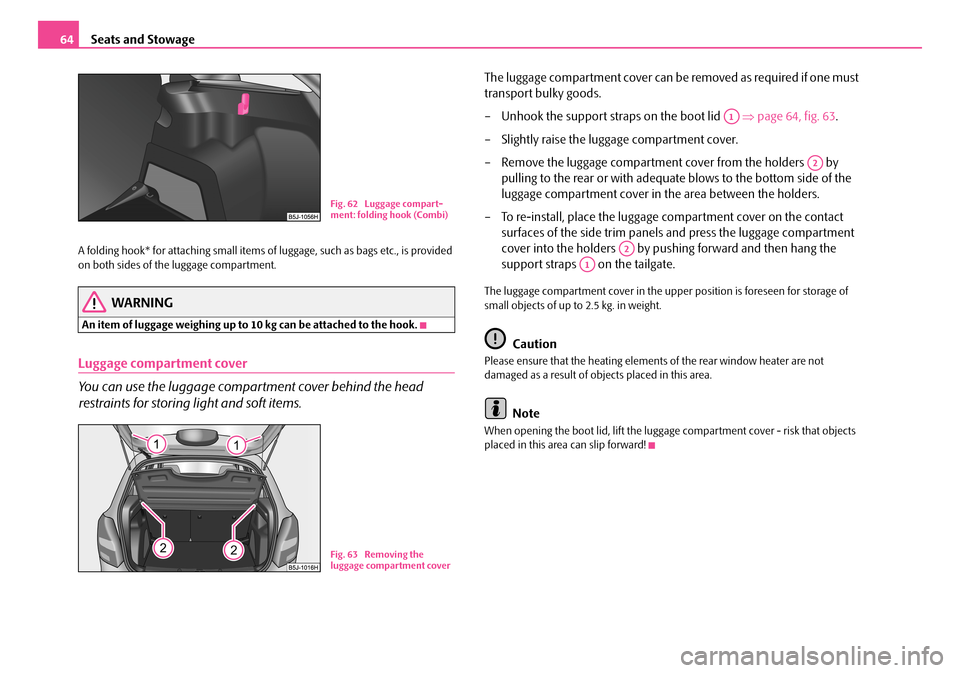
The luggage compartment cover can be removed as required if one must
transport bulky goods.
– Unhook the support straps on the boot lid ⇒page 64, fig. 63.
– Slightly raise the luggage compartment cover.
– Remove the luggage compartment cover from the holders by
pulling to the rear or with adequate blows to the bottom side of the
luggage compartment cover in the area between the holders.
– To re-install, place the luggage compartment cover on the contact
surfaces of the side trim panels and press the luggage compartment
cover into the holders by pushing forward and then hang the
support straps on the tailgate.
The luggage compartment cover in the upper position is foreseen for storage of small objects of up to 2.5 kg. in weight.
Caution
Please ensure that the heating elements of the rear window heater are not damaged as a result of objects placed in this area.
Note
When opening the boot lid, lift the luggage compartment cover - risk that objects placed in this area can slip forward!
Fig. 62 Luggage compart-ment: folding hook (Combi)
Fig. 63 Removing the luggage compartment cover
A1
A2
A2
A1
NKO A05F 20.book Page 64 Wednesday, April 2, 2008 1:02 PM
Page 66 of 252

Seats and Stowage65
Using the systemSafetyDriving TipsGeneral MaintenanceBreakdown assistanceTechnical Data
Further positions of the luggage compartment cover
You can use the luggage compartment cover behind the head
restraints for storing light and soft items.
The luggage compartment cover can also be put into the lower position on the supporting elements ⇒fig. 64.
The luggage compartment cover in the lower position is foreseen for storage of small objects of up to 6 kg. in weight.
The luggage compartment cover can also be stowed behind the rear seats ⇒fig. 65.
WARNING
No objects should be placed on the luggage compartment cover, the vehicle occupants could be endangered if there is sudden braking or the vehicle collides with something.
Caution
Please ensure that the heating elements of the rear window heater are not damaged as a result of objects placed in this area.
Note
When opening the boot lid, lift the luggage compartment cover - risk that objects placed in this area can slip forward!
Luggage compartment cover (Combi)
Fig. 64 Luggage compart-ment cover in the lower posi-tion
Fig. 65 Luggage compart-ment cover stowed behind the rear seats.
Fig. 66 Luggage compart-ment: The luggage compart-ment cover
NKO A05F 20.book Page 65 Wednesday, April 2, 2008 1:02 PM
Page 75 of 252
Seats and Stowage74
Attachment points
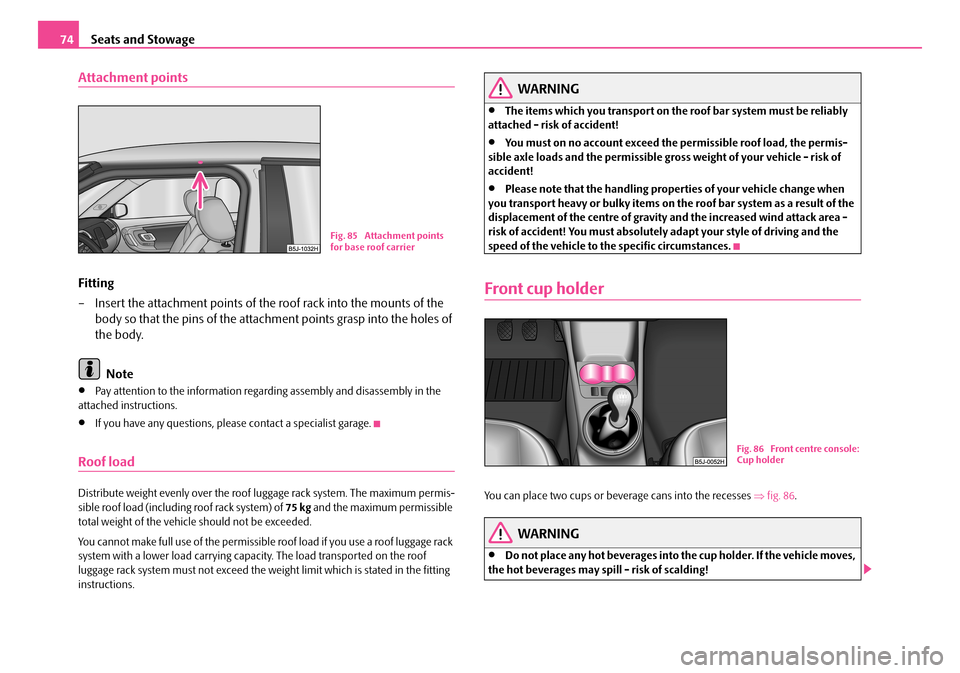
Fitting
– Insert the attachment points of the roof rack into the mounts of the
body so that the pins of the attachment points grasp into the holes of
the body.
Note
•Pay attention to the information regarding assembly and disassembly in the attached instructions.
•If you have any questions, please contact a specialist garage.
Roof load
Distribute weight evenly over the roof luggage rack system. The maximum permis-sible roof load (including roof rack system) of 75 kg and the maximum permissible total weight of the vehicle should not be exceeded.
You cannot make full use of the permissible roof load if you use a roof luggage rack system with a lower load carrying capacity. The load transported on the roof luggage rack system must not exceed the weight limit which is stated in the fitting instructions.
WARNING
•The items which you transport on the roof bar system must be reliably attached - risk of accident!
•You must on no account exceed the permissible roof load, the permis-sible axle loads and the permissible gross weight of your vehicle - risk of accident!
•Please note that the handling properties of your vehicle change when you transport heavy or bulky items on the roof bar system as a result of the displacement of the centre of gravity and the increased wind attack area - risk of accident! You must absolutely adapt your style of driving and the speed of the vehicle to the specific circumstances.
Front cup holder
You can place two cups or beverage cans into the recesses ⇒fig. 86.
WARNING
•Do not place any hot beverages into the cup holder. If the vehicle moves, the hot beverages may spill - risk of scalding!
Fig. 85 Attachment points for base roof carrier
Fig. 86 Front centre console: Cup holder
NKO A05F 20.book Page 74 Wednesday, April 2, 2008 1:02 PM
Page 81 of 252
Seats and Stowage80
The storage compartment is foreseen for storing small objects of up to 1
kg. in weight.
– Tilt the lock to open the flap and pull out the flap ⇒fig. 98.
– Tilt the lock to close the flap and press flap close.
Front seat armrest with storage compartment*
Fold the armrest
– Press the lower button on the end face of the armrest ⇒page 80,
fig. 99 in order to fold the armrest. Fold the armrest forwards and
release the button.
Opening stowage compartment
– The armrest includes a stowage compartment. The storage compart-
ment is unlocked by pressing the upper button and then can be
opened to the top.
Note
The moving space of the arms can be restricted if the armrest is folded down. In city traffic the armrest should not be folded down.
Storage compartment in the front doors
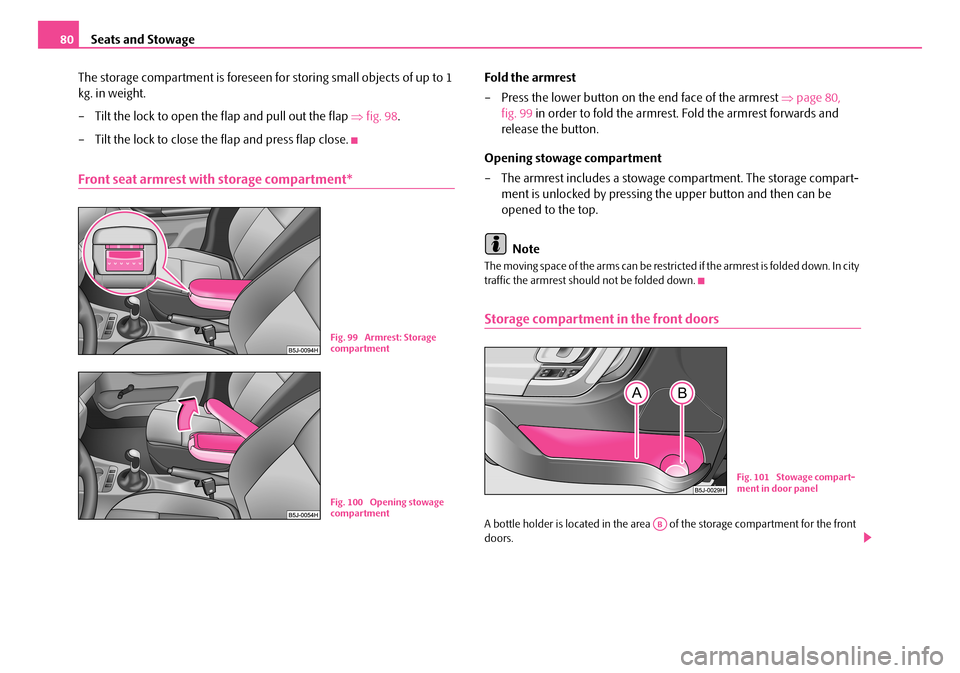
A bottle holder is located in the area of the storage compartment for the front doors.
Fig. 99 Armrest: Storage compartment
Fig. 100 Opening stowage compartment
Fig. 101 Stowage compart-ment in door panel
AB
NKO A05F 20.book Page 80 Wednesday, April 2, 2008 1:02 PM
Page 82 of 252

Seats and Stowage81
Using the systemSafetyDriving TipsGeneral MaintenanceBreakdown assistanceTechnical Data
WARNING
Use the area ⇒fig. 101 of the storage compartment only for storing objects which do not project so that the effectiveness of the side airbag is not impaired.
Removeable storage compartments in the luggage
compartment*
A removeable storage compartment*⇒fig. 102 is located on both sides in the side trim panel of the luggage compartment.
The removeable storage compartments* are intended for storing small objects of up to 2.5 kg in weight.
Flexible storage compartment*
A flexible storage compartment is located on the right side of the luggage
compartment. The flexible storage compartment is foreseen for storing
small objects of up to 8 kg. in weight.
Removing
– Take hold of the flexible storage compartment at both upper corners.
– Press the upper corners to the inside and release the storage compart-
ment by pulling upwards.
– Remove by pulling towards you.
Installing
– Insert both ends of the flexible storage compartment into the open-
ings of the right side trim panel of the luggage compartment and push
it downwards until it locks.
Note
If the variable loading floor* is installed ⇒page 66 in the luggage compartment, no flexible storage compartment can be installed.
AA
Fig. 102 Removeable storage compartments
Fig. 103 Flexible storage compartment
NKO A05F 20.book Page 81 Wednesday, April 2, 2008 1:02 PM
Page 100 of 252
Starting-off and Driving99
Using the systemSafetyDriving TipsGeneral MaintenanceBreakdown assistanceTechnical Data
Range of sensors
The clearance warning begins at a distance of about 160 cm from the obstacle (area ⇒page 98, fig. 116). The interval between the warning signals becomes shorter as the clearance is reduced.
A continuous tone sounds from a clearance of just 30 cm (Bereich ) - danger area. You should not reverse any further after this signal sounds!
Activating
The parking aid is activated automatically when reverse gear is engaged and the ignition is turned on. This is confirmed by a brief acknowledgement signal.
Deactivating
The parking aid is deactivated by removing the reverse gear.
WARNING
•The parking aid is not a substitute for the driver paying proper attention and it is always the driver's responsibility to take care when parking the vehicle or carrying out similar manoeuvres.
•You should therefore satisfy yourself, before reversing, that there is no small obstacle, such as a rock, thin post, trailer drawbar etc., behind your vehicle. Such an obstacle might not be within the range detected by the sensors.
Note
•When operating with a trailer, the parking aid is without function.
•A system fault is indicated if a warning signal sounds for about 5 seconds after switching the ignition on and engaging reverse gear and there is no obstacle close to your vehicle. It is possible that the audible warning does not function correctly (an obstacle behind the vehicle may not be detected - take extra care). Have the fault rectified by a specialist workshop.
•The sensors must be kept clean and free of ice to enable the parking aid to operate properly.
•If the parking aid is activated and the selector lever of the automatic gearbox is in the position , warning signal indicates interruption (vehicle can no longer move).
Cruise control system (CCS)*
Introduction
The cruise control system (CCS) maintains a constant speed, more than 30 km/h, once it has been set, without you having to depress the accelerator pedal. This is only possible within the range which is permitted by the power output and braking power of the engine. The cruise control system makes it possible - particularly on long journeys - for you to rest your “accelerator foot”.
WARNING
•The cruise control system must not, for safety reasons, be used in dense traffic or on unfavourable road surfaces (such as icy roads, slippery roads or loose chippings) - risk of accident!
•In order to prevent unintentional use of the cruise control system, always switch off the system after use.
Note
•Models fitted with a manual gearbox: Always depress the clutch pedal if you switch on the cruise control system when the gearbox is in Neutral. Otherwise the engine can rev up unintentionally.
•The cruise control system is not able to maintain a constant speed when driving on steep downhill sections. The weight of the vehicle increases the speed at which it travels. One should shift down in good time to a lower gear or slow the vehicle down by applying the foot brake.
•It is not possible on vehicles fitted with an automatic gearbox to switch on the cruise control system if the selector lever is in the position P, N or R.
AA
AB
AP
NKO A05F 20.book Page 99 Wednesday, April 2, 2008 1:02 PM