ignition SKODA FABIA 2015 3.G / NJ Owner's Guide
[x] Cancel search | Manufacturer: SKODA, Model Year: 2015, Model line: FABIA, Model: SKODA FABIA 2015 3.G / NJPages: 220, PDF Size: 32.46 MB
Page 54 of 220
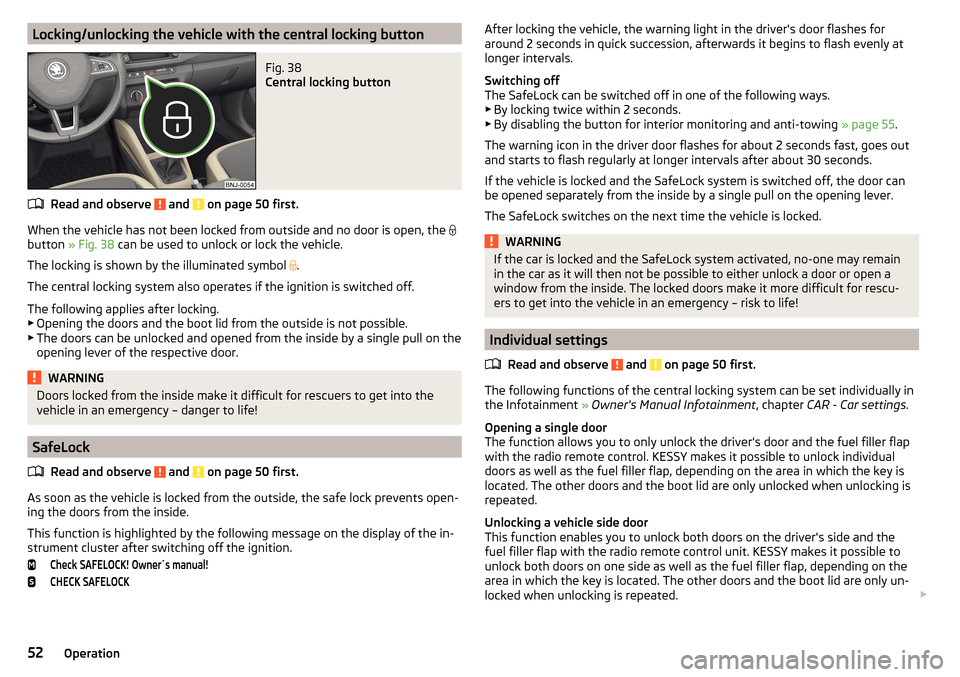
Locking/unlocking the vehicle with the central locking buttonFig. 38
Central locking button
Read and observe and on page 50 first.
When the vehicle has not been locked from outside and no door is open, the
button » Fig. 38 can be used to unlock or lock the vehicle.
The locking is shown by the illuminated symbol .
The central locking system also operates if the ignition is switched off.
The following applies after locking. ▶ Opening the doors and the boot lid from the outside is not possible.
▶ The doors can be unlocked and opened from the inside by a single pull on the
opening lever of the respective door.
WARNINGDoors locked from the inside make it difficult for rescuers to get into the
vehicle in an emergency – danger to life!
SafeLock
Read and observe
and on page 50 first.
As soon as the vehicle is locked from the outside, the safe lock prevents open-
ing the doors from the inside.
This function is highlighted by the following message on the display of the in-
strument cluster after switching off the ignition.
Check SAFELOCK! Owner´s manual!CHECK SAFELOCKAfter locking the vehicle, the warning light in the driver's door flashes for
around 2 seconds in quick succession, afterwards it begins to flash evenly at
longer intervals.
Switching off
The SafeLock can be switched off in one of the following ways. ▶ By locking twice within 2 seconds.
▶ By disabling the button for interior monitoring and anti-towing » page 55.
The warning icon in the driver door flashes for about 2 seconds fast, goes out
and starts to flash regularly at longer intervals after about 30 seconds.
If the vehicle is locked and the SafeLock system is switched off, the door can
be opened separately from the inside by a single pull on the opening lever.
The SafeLock switches on the next time the vehicle is locked.WARNINGIf the car is locked and the SafeLock system activated, no-one may remain
in the car as it will then not be possible to either unlock a door or open a
window from the inside. The locked doors make it more difficult for rescu-
ers to get into the vehicle in an emergency – risk to life!
Individual settings
Read and observe
and on page 50 first.
The following functions of the central locking system can be set individually inthe Infotainment » Owner's Manual Infotainment , chapter CAR - Car settings.
Opening a single door
The function allows you to only unlock the driver's door and the fuel filler flap
with the radio remote control. KESSY makes it possible to unlock individual
doors as well as the fuel filler flap, depending on the area in which the key is
located. The other doors and the boot lid are only unlocked when unlocking is
repeated.
Unlocking a vehicle side door
This function enables you to unlock both doors on the driver's side and the
fuel filler flap with the radio remote control unit. KESSY makes it possible to
unlock both doors on one side as well as the fuel filler flap, depending on the
area in which the key is located. The other doors and the boot lid are only un-
locked when unlocking is repeated.
52Operation
Page 55 of 220
Unlock all doors
The function allows you to unlock all doors, the boot lid and the fuel filler flap.
Automatic locking/unlocking
The function allows you to lock all doors and the boot lid from a speed of
about 15 km/h. The button in the handle of the boot lid is deactivated.
All doors and the luggage compartment is unlocked again when the ignition key is removed or by opening any of the doors. In vehicles with the KESSY sys-
tem, this is when any door is opened.
The vehicle can also be unlocked by pressing the central locking button
in
the centre console » page 52.
Acoustic signals when locking/unlocking
For vehicles with an anti-theft alarm system, the acoustic signals can be ena-
bled/disabled in the Infotainment » Owner's Manual Infotainment , chap-
ter CAR - Vehicle Settings .
Opening/closing the door
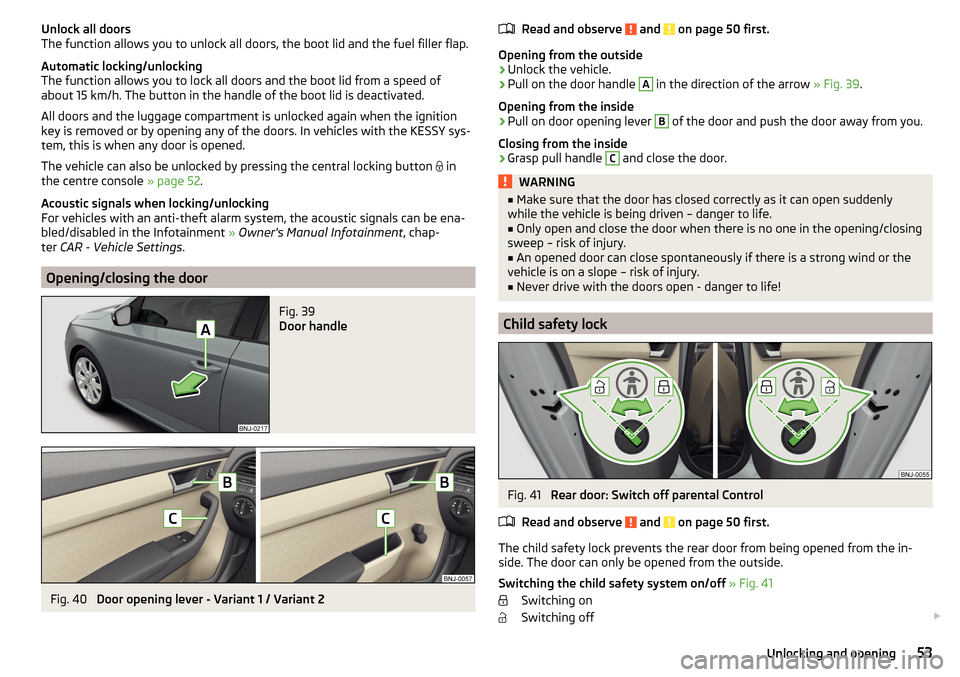
Fig. 39
Door handle
Fig. 40
Door opening lever - Variant 1 / Variant 2
Read and observe and on page 50 first.
Opening from the outside
›
Unlock the vehicle.
›
Pull on the door handle
A
in the direction of the arrow » Fig. 39.
Opening from the inside
›
Pull on door opening lever
B
of the door and push the door away from you.
Closing from the inside
›
Grasp pull handle
C
and close the door.
WARNING■ Make sure that the door has closed correctly as it can open suddenly
while the vehicle is being driven – danger to life.■
Only open and close the door when there is no one in the opening/closing
sweep – risk of injury.
■
An opened door can close spontaneously if there is a strong wind or the
vehicle is on a slope – risk of injury.
■
Never drive with the doors open - danger to life!
Child safety lock
Fig. 41
Rear door: Switch off parental Control
Read and observe
and on page 50 first.
The child safety lock prevents the rear door from being opened from the in- side. The door can only be opened from the outside.
Switching the child safety system on/off » Fig. 41
Switching on
Switching off
53Unlocking and opening
Page 56 of 220
You can switch the child safety lock on and off using the vehicle key.
MalfunctionsRead and observe
and on page 50 first.
Fault with the central locking
If the warning icon in the driver's door initially flashes quickly for around 2 sec-
onds, and then lights up for 30 seconds without interruption before flashing
again slowly, you will need to seek the assistance of a specialist garage.
If the central locking system has failed, only the driver's door can be
locked/unlocked using the key. The other doors and the boot lid can be man-
ually locked or unlocked.
▶ Lock/unlock the driver's door » page 178.
▶ Locking door » page 178.
▶ Unlocking the boot lid » page 179.
Failure of the KESSY system
If the following message is shown in the instrument cluster display, seek help
from a specialist company.
Keyless access system faulty.KEYLESS ACCESS SYSTEM FAULTY
Key battery flat
If the key battery voltage is too low, the following message appears in the in-
strument cluster display.
Change the key battery!KEY BATTERY PLEASE CHANGE
Replace the battery » page 177.
Anti-theft alarm system
Introduction
This chapter contains information on the following subjects:
Interior monitor and towing protection
55
The anti-theft alarm system (hereinafter referred to as alarm system) increa-
ses protection against theft and break-in attempts into the vehicle.
The alarm system is activated automatically approximately 30 seconds after
the vehicle is locked. This is automatically disabled after release.
The alarm system triggers audible and visual signals if an attempt is made to
break into the vehicle (hereafter referred to as alarm).
Triggering the alarm
The alarm is triggered when the following unauthorized actions are carried out
on the locked vehicle. ▶ Opening the bonnet.
▶ Opening the boot lid.
▶ Opening the doors.
▶ Manipulation of the ignition lock.
▶ Towing the vehicle.
▶ Movement in the vehicle.
▶ Sudden and significant voltage failure of the electrical system.
▶ Uncoupling the trailer.
If the driver's door of a vehicle is unlocked and opened by the lock cylinder,
then the alarm is triggered.
Switching off the alarm
The alarm is turned off by pressing the button on the key or switching on
the ignition.
CAUTION
Before leaving the vehicle, check that the doors and windows are closed in or-
der to ensure that the alarm system is fully operational.
Note
The alarm system has its own power source. The working life of the power
source is 5 years.54Operation
Page 57 of 220
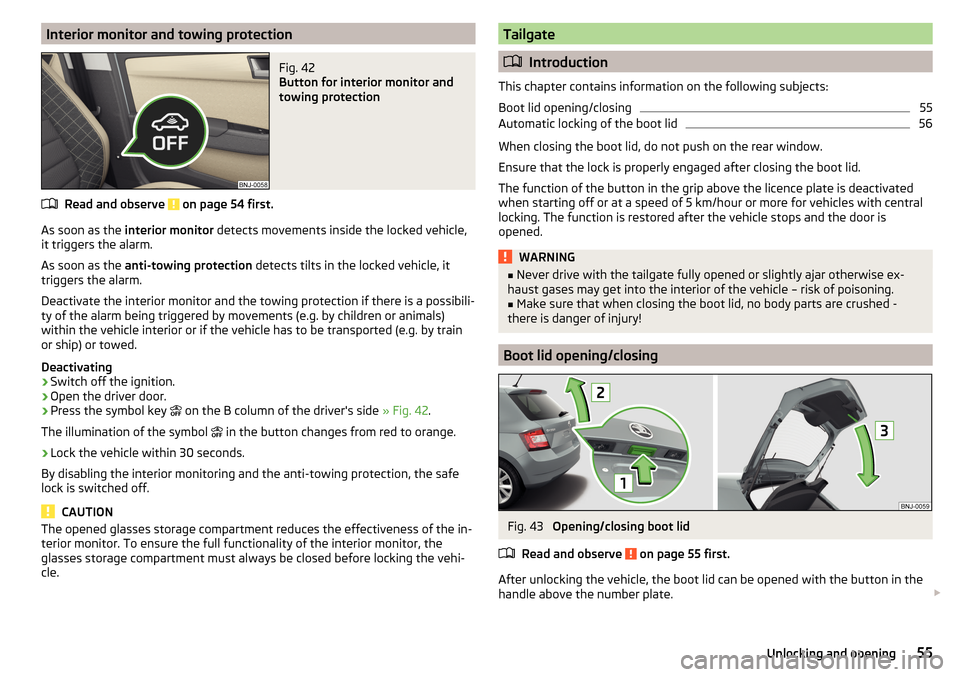
Interior monitor and towing protectionFig. 42
Button for interior monitor and
towing protection
Read and observe on page 54 first.
As soon as the interior monitor detects movements inside the locked vehicle,
it triggers the alarm.
As soon as the anti-towing protection detects tilts in the locked vehicle, it
triggers the alarm.
Deactivate the interior monitor and the towing protection if there is a possibili-
ty of the alarm being triggered by movements (e.g. by children or animals)
within the vehicle interior or if the vehicle has to be transported (e.g. by train
or ship) or towed.
Deactivating
›
Switch off the ignition.
›
Open the driver door.
›
Press the symbol key on the B column of the driver's side
» Fig. 42.
The illumination of the symbol in the button changes from red to orange.
›
Lock the vehicle within 30 seconds.
By disabling the interior monitoring and the anti-towing protection, the safe
lock is switched off.
CAUTION
The opened glasses storage compartment reduces the effectiveness of the in-
terior monitor. To ensure the full functionality of the interior monitor, the
glasses storage compartment must always be closed before locking the vehi-
cle.Tailgate
Introduction
This chapter contains information on the following subjects:
Boot lid opening/closing
55
Automatic locking of the boot lid
56
When closing the boot lid, do not push on the rear window.
Ensure that the lock is properly engaged after closing the boot lid.
The function of the button in the grip above the licence plate is deactivated
when starting off or at a speed of 5 km/hour or more for vehicles with central
locking. The function is restored after the vehicle stops and the door is
opened.
WARNING■ Never drive with the tailgate fully opened or slightly ajar otherwise ex-
haust gases may get into the interior of the vehicle – risk of poisoning.■
Make sure that when closing the boot lid, no body parts are crushed -
there is danger of injury!
Boot lid opening/closing
Fig. 43
Opening/closing boot lid
Read and observe
on page 55 first.
After unlocking the vehicle, the boot lid can be opened with the button in the
handle above the number plate.
55Unlocking and opening
Page 59 of 220
Mechanical window lefterFig. 44
Operating the window: left/right
Read and observe
and on page 56 first.
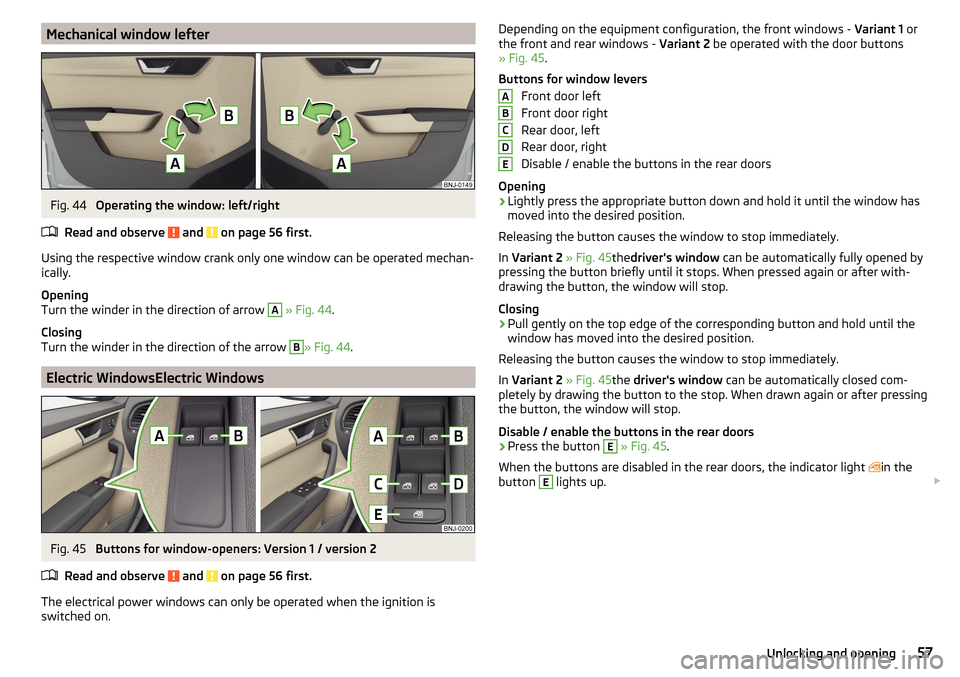
Using the respective window crank only one window can be operated mechan-
ically.
Opening
Turn the winder in the direction of arrow
A
» Fig. 44 .
Closing
Turn the winder in the direction of the arrow
B
» Fig. 44 .
Electric WindowsElectric Windows
Fig. 45
Buttons for window-openers: Version 1 / version 2
Read and observe
and on page 56 first.
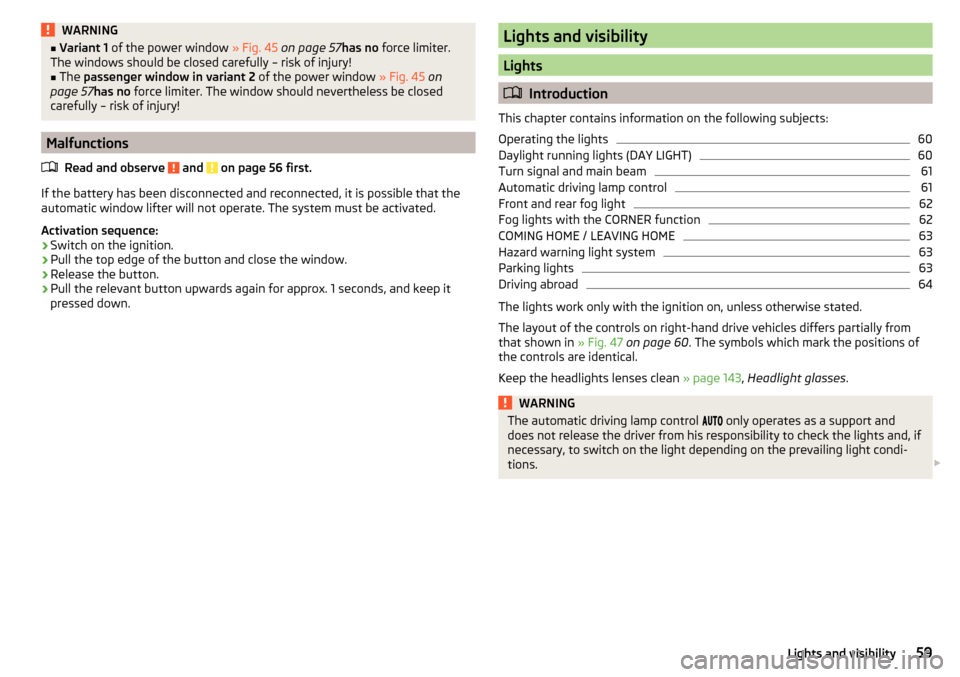
The electrical power windows can only be operated when the ignition is
switched on.
Depending on the equipment configuration, the front windows - Variant 1 or
the front and rear windows - Variant 2 be operated with the door buttons
» Fig. 45 .
Buttons for window levers Front door left
Front door right
Rear door, left
Rear door, right
Disable / enable the buttons in the rear doors
Opening›
Lightly press the appropriate button down and hold it until the window has
moved into the desired position.
Releasing the button causes the window to stop immediately.
In Variant 2 » Fig. 45thedriver's window can be automatically fully opened by
pressing the button briefly until it stops. When pressed again or after with-
drawing the button, the window will stop.
Closing
›
Pull gently on the top edge of the corresponding button and hold until the
window has moved into the desired position.
Releasing the button causes the window to stop immediately.
In Variant 2 » Fig. 45the driver's window can be automatically closed com-
pletely by drawing the button to the stop. When drawn again or after pressing
the button, the window will stop.
Disable / enable the buttons in the rear doors
›
Press the button
E
» Fig. 45 .
When the buttons are disabled in the rear doors, the indicator light in the
button
E
lights up.
ABCDE57Unlocking and opening
Page 61 of 220
WARNING■Variant 1 of the power window » Fig. 45 on page 57 has no force limiter.
The windows should be closed carefully – risk of injury!■
The passenger window in variant 2 of the power window » Fig. 45 on
page 57 has no force limiter. The window should nevertheless be closed
carefully – risk of injury!
Malfunctions
Read and observe
and on page 56 first.
If the battery has been disconnected and reconnected, it is possible that theautomatic window lifter will not operate. The system must be activated.
Activation sequence:
›
Switch on the ignition.
›
Pull the top edge of the button and close the window.
›
Release the button.
›
Pull the relevant button upwards again for approx. 1 seconds, and keep it
pressed down.
Lights and visibility
Lights
Introduction
This chapter contains information on the following subjects:
Operating the lights
60
Daylight running lights (DAY LIGHT)
60
Turn signal and main beam
61
Automatic driving lamp control
61
Front and rear fog light
62
Fog lights with the CORNER function
62
COMING HOME / LEAVING HOME
63
Hazard warning light system
63
Parking lights
63
Driving abroad
64
The lights work only with the ignition on, unless otherwise stated.
The layout of the controls on right-hand drive vehicles differs partially from
that shown in » Fig. 47 on page 60 . The symbols which mark the positions of
the controls are identical.
Keep the headlights lenses clean » page 143, Headlight glasses .
WARNINGThe automatic driving lamp control only operates as a support and
does not release the driver from his responsibility to check the lights and, if
necessary, to switch on the light depending on the prevailing light condi-
tions. 59Lights and visibility
Page 62 of 220
Note■The headlights may mist up temporarily. When the driving lights are switched
on, the light outlet areas are free from condensation after a short time, al-
though the headlight lenses may still be misted up around the edge. This mist
has no influence on the life of the lighting system.■
If the visibility is poor and the lights are not on (except daytime running
light), the brightness of the instrument lighting reduces to alert the driver to
switch on the lights in due time.
■
The brightness of the instrument lighting with the lights on (except daytime
running lights) can be set in the Infotainment » Owner's Manual Infotainment ,
chapter CAR - Vehicle Settings .
Operating the lights
Fig. 47
Light switch and control dial for
headlight range adjustment
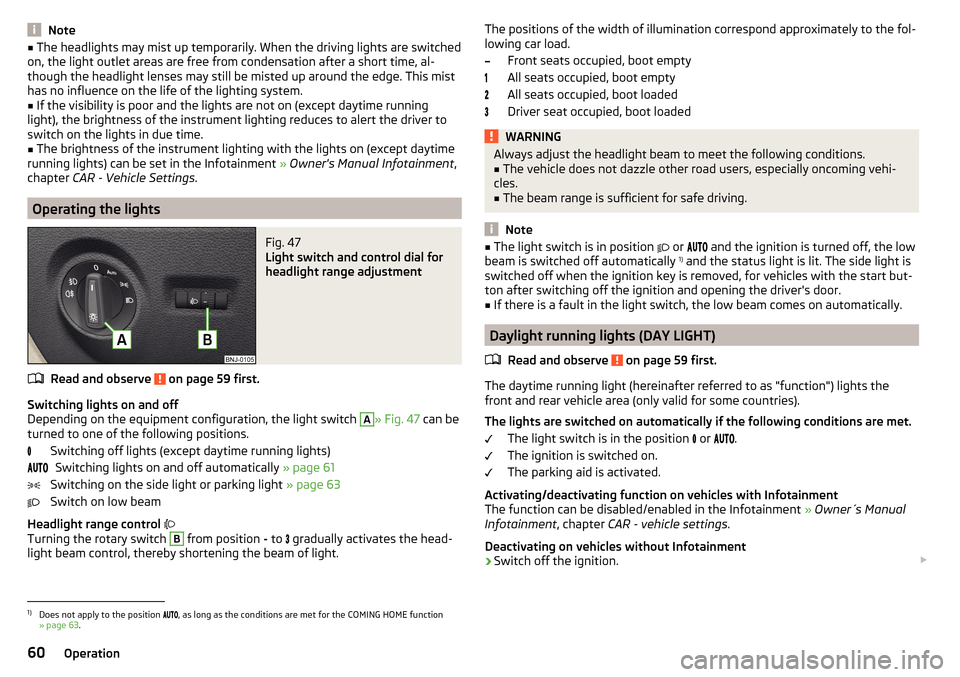
Read and observe on page 59 first.
Switching lights on and off
Depending on the equipment configuration, the light switch
A
» Fig. 47 can be
turned to one of the following positions.
Switching off lights (except daytime running lights)Switching lights on and off automatically » page 61
Switching on the side light or parking light » page 63
Switch on low beam
Headlight range control
Turning the rotary switch
B
from position - to
gradually activates the head-
light beam control, thereby shortening the beam of light.
The positions of the width of illumination correspond approximately to the fol-
lowing car load.
Front seats occupied, boot empty
All seats occupied, boot empty
All seats occupied, boot loaded
Driver seat occupied, boot loadedWARNINGAlways adjust the headlight beam to meet the following conditions.■The vehicle does not dazzle other road users, especially oncoming vehi-
cles.■
The beam range is sufficient for safe driving.
Note
■ The light switch is in position or and the ignition is turned off, the low
beam is switched off automatically 1)
and the status light is lit. The side light is
switched off when the ignition key is removed, for vehicles with the start but-
ton after switching off the ignition and opening the driver's door.■
If there is a fault in the light switch, the low beam comes on automatically.
Daylight running lights (DAY LIGHT)
Read and observe
on page 59 first.
The daytime running light (hereinafter referred to as "function") lights the
front and rear vehicle area (only valid for some countries).
The lights are switched on automatically if the following conditions are met. The light switch is in the position
or
.
The ignition is switched on.
The parking aid is activated.
Activating/deactivating function on vehicles with Infotainment
The function can be disabled/enabled in the Infotainment » Owner´s Manual
Infotainment , chapter CAR - vehicle settings .
Deactivating on vehicles without Infotainment
›
Switch off the ignition.
1)
Does not apply to the position
, as long as the conditions are met for the COMING HOME function
» page 63 .
60Operation
Page 63 of 220
›Pull the indicator / main beam lever towards the steering wheel, push down
and hold in this position.›
Switch on the ignition.
›
Hold the operating lever in this position for min. 3 seconds after switching on
the ignition.
The deactivation of the function is confirmed by an audible signal.
Activating on vehicles without Infotainment
›
Switch off the ignition.
›
Pull the indicator / main beam lever towards the steering wheel, push up and
hold in this position.
›
Switch on the ignition.
›
Hold the operating lever in this position for min. 3 seconds after switching on
the ignition.
The activation of the function is confirmed by an audible signal.
WARNINGAlways switch on the low beam when the visibility is poor.
Turn signal and main beam
Fig. 48
Operating lever: Turn signal and
main beam operation
Read and observe on page 59 first.
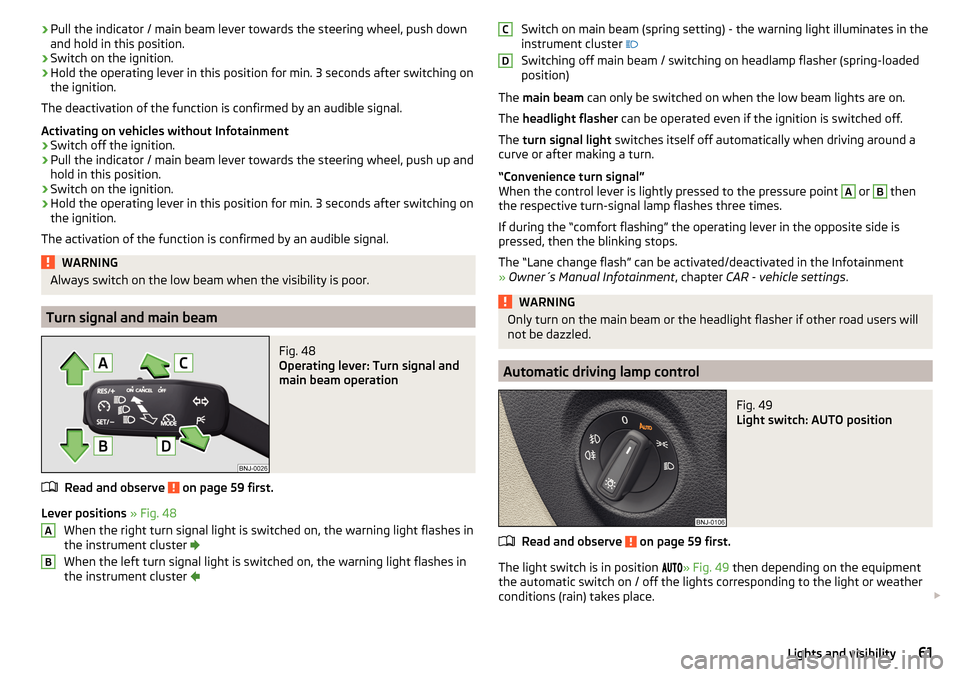
Lever positions » Fig. 48
When the right turn signal light is switched on, the warning light flashes in
the instrument cluster
When the left turn signal light is switched on, the warning light flashes in
the instrument cluster
ABSwitch on main beam (spring setting) - the warning light illuminates in the
instrument cluster
Switching off main beam / switching on headlamp flasher (spring-loaded
position)
The main beam can only be switched on when the low beam lights are on.
The headlight flasher can be operated even if the ignition is switched off.
The turn signal light switches itself off automatically when driving around a
curve or after making a turn.
“Convenience turn signal”
When the control lever is lightly pressed to the pressure point A
or
B
then
the respective turn-signal lamp flashes three times.
If during the “comfort flashing” the operating lever in the opposite side is
pressed, then the blinking stops.
The “Lane change flash” can be activated/deactivated in the Infotainment
» Owner´s Manual Infotainment , chapter CAR - vehicle settings .
WARNINGOnly turn on the main beam or the headlight flasher if other road users will
not be dazzled.
Automatic driving lamp control
Fig. 49
Light switch: AUTO position
Read and observe on page 59 first.
The light switch is in position
» Fig. 49 then depending on the equipment
the automatic switch on / off the lights corresponding to the light or weather
conditions (rain) takes place.
CD61Lights and visibility
Page 65 of 220
COMING HOME / LEAVING HOMERead and observe
on page 59 first.
The function COMING HOME ensures that the vehicle's environment is illumi-
nated after switching off the ignition and opening the driver's door.
The function LEAVING HOME ensures that the vehicle's environment is illumi-
nated after unlocking the vehicle with the radio remote control unit.
The function switches the light on only if there is poorer visibility and the light
switch is in the position
.
Enabling / disabling and setting functions
The functions and setting of the lighting duration can be activated or deactiva-
ted in the Infotainment system » Owner´s Manual Infotainment , chap-
ter CARVehicle settings .
CAUTION
■
Poorer visibility is detected by a sensor mounted below the windscreen in
the holder of the inside mirror or in the control panel. Do not attach any stick-
ers or similar objects in front of the sensor in order to avoid impairing the func-
tion or its reliability.■
If this option is always enabled, then the battery is heavily loaded.
Hazard warning light system
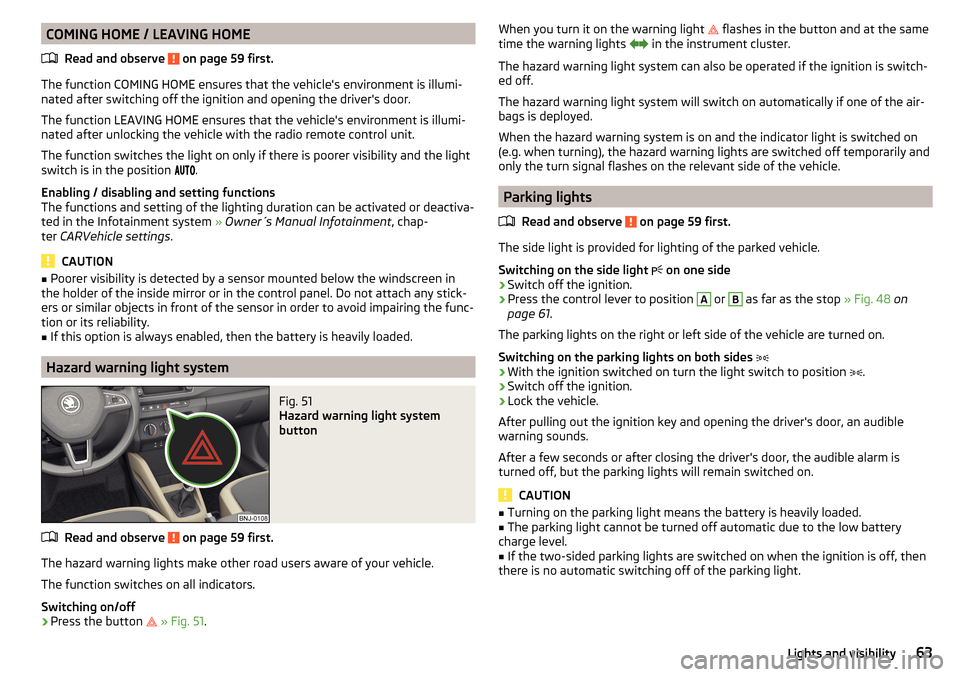
Fig. 51
Hazard warning light system
button
Read and observe on page 59 first.
The hazard warning lights make other road users aware of your vehicle.
The function switches on all indicators.
Switching on/off
›
Press the button
» Fig. 51 .
When you turn it on the warning light flashes in the button and at the same
time the warning lights in the instrument cluster.
The hazard warning light system can also be operated if the ignition is switch-
ed off.
The hazard warning light system will switch on automatically if one of the air-
bags is deployed.
When the hazard warning system is on and the indicator light is switched on
(e.g. when turning), the hazard warning lights are switched off temporarily and
only the turn signal flashes on the relevant side of the vehicle.
Parking lights
Read and observe
on page 59 first.
The side light is provided for lighting of the parked vehicle.
Switching on the side light on one side
›
Switch off the ignition.
›
Press the control lever to position
A
or
B
as far as the stop
» Fig. 48 on
page 61 .
The parking lights on the right or left side of the vehicle are turned on.
Switching on the parking lights on both sides
›
With the ignition switched on turn the light switch to position .
›
Switch off the ignition.
›
Lock the vehicle.
After pulling out the ignition key and opening the driver's door, an audible
warning sounds.
After a few seconds or after closing the driver's door, the audible alarm is
turned off, but the parking lights will remain switched on.
CAUTION
■ Turning on the parking light means the battery is heavily loaded.■The parking light cannot be turned off automatic due to the low battery
charge level.■
If the two-sided parking lights are switched on when the ignition is off, then
there is no automatic switching off of the parking light.
63Lights and visibility
Page 66 of 220
Driving abroadRead and observe
on page 59 first.
When driving in countries with opposing traffic system (traffic on the
left/right), your headlights may dazzle oncoming traffic. To prevent oncoming
traffic from being dazzled, the headlights must be adjusted by a specialist ga-
rage.
Interior lights
Introduction
This chapter contains information on the following subjects:
Front interior light
64
Rear interior light
64
The inner lighting also works if the ignition is switched off.
The light turns off automatically 10 minutes after switching off the ignition or
opening a door unless otherwise specified.
Front interior light
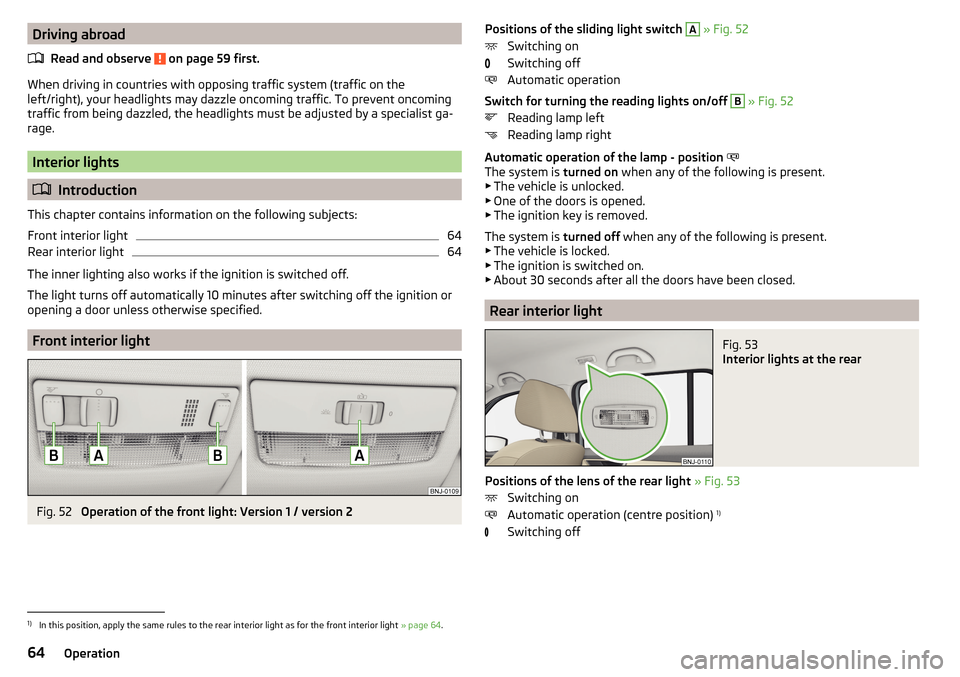
Fig. 52
Operation of the front light: Version 1 / version 2
Positions of the sliding light switch A » Fig. 52
Switching on
Switching off
Automatic operation
Switch for turning the reading lights on/off B
» Fig. 52
Reading lamp left
Reading lamp right
Automatic operation of the lamp - position
The system is turned on when any of the following is present.
▶ The vehicle is unlocked.
▶ One of the doors is opened.
▶ The ignition key is removed.
The system is turned off when any of the following is present.
▶ The vehicle is locked.
▶ The ignition is switched on.
▶ About 30 seconds after all the doors have been closed.
Rear interior light
Fig. 53
Interior lights at the rear
Positions of the lens of the rear light » Fig. 53
Switching on
Automatic operation (centre position) 1)
Switching off
1)
In this position, apply the same rules to the rear interior light as for the front interior light » page 64.
64Operation