Android SKODA FABIA 2016 3.G / NJ Amundsen Bolero Infotainment System Navigation Manual
[x] Cancel search | Manufacturer: SKODA, Model Year: 2016, Model line: FABIA, Model: SKODA FABIA 2016 3.G / NJPages: 76, PDF Size: 9.64 MB
Page 4 of 76
Table of Contents
Important information about this Owner's
Manual3
Explanations and further information
4
Abbreviations
Introductory information
Important notes
6
Device overview
7
Device operation and settings
Device operation
11
Voice control
13
Device settings
15
Radio
Operation
19
Settings
21
Media
Operation
22
Audio sources
24
Pictures
Image viewer
27
Media Command
Using the system
29Telephone
Introductory information31
Pair and connect
32
Telephone functions
34
Text messages (SMS)
37
Hotspot (WLAN) and data connection
Hotspot (WLAN)
39
Data connection
40
SmartLink
Introductory information
41
Android Auto ™
42
Apple CarPlay ™
43
MirrorLink®
43
Navigation
Introductory information
46
Search for destination and enter
47
Import my destinations
51
Map
52
Route guidance
54
Route
57
Traffic reports
58
Settings
59
Vehicle systems
CAR - vehicle setting
62
Index
2Table of Contents
Page 13 of 76
Menu Telephone » page 31
Target-oriented traffic information (TMC) (applies to Amundsen)
» page 58
Media Command menu » page 29
Menu SmartLink » page 41
When connecting a supported external device instead of the symbol
the actual connection is shown instead of a symbol
▶ -Android Auto
» page 42
▶ -
Apple CarPlay
» page 43
▶ -
MirrorLink®
» page 43
Adjusting the volume
Every change in volume is displayed on the screen.
›
To increase the volume , turn the controller clockwise.
›
To
reduce volume , turn the controller anticlockwise.
›
To
mute , turn the controller to the left to 0.
›
or:
Press the key (applies to Bolero in the Yeti model ).
The following symbol appears in the display when the sound is muted: .
If, at the time of muting, sound is played from the source in the media menu,
then the playback is interrupted (pause) 1)
.
CAUTION
■ High volumes can cause sound resonance in the vehicle.■When changing or connecting an audio source, this may cause sudden
changes in volume. Reduce the volume before changing or connecting an au-
dio source.Device operation and settings
Device operation
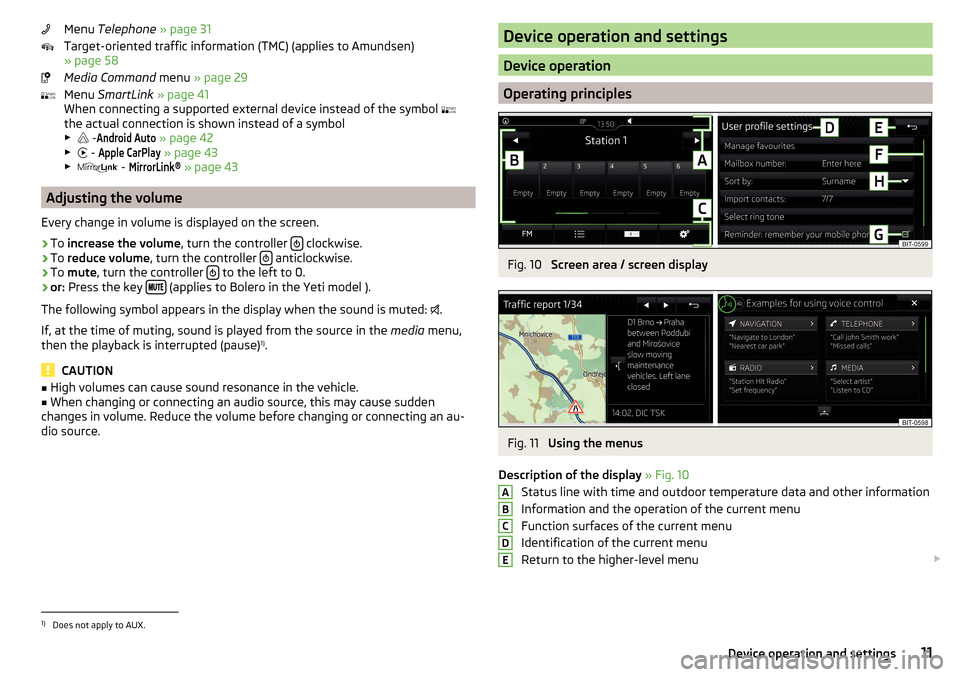
Operating principles
Fig. 10
Screen area / screen display
Fig. 11
Using the menus
Description of the display » Fig. 10
Status line with time and outdoor temperature data and other information
Information and the operation of the current menu
Function surfaces of the current menu
Identification of the current menu
Return to the higher-level menu
ABCDE1)
Does not apply to AUX.
11Device operation and settings
Page 28 of 76
Automatic playback stop and disconnection
If an Apple device is connected as a Bluetooth ®
player, and this is connected to
the USB input, then the Bluetooth ®
connection is not dropped. If playback is
cancelled, playback must be started again. Only if USB is selected as the audio
source will the Apple device disconnect as a Bluetooth ®
player. In this regard,
an appropriate warning message appears on the device screen.
If the USB audio source is an Apple device, this unit cannot be connected as a
Bluetooth ®
player. In this regard, an appropriate warning message appears on
the device screen.
If the Bluetooth ®
player audio source is connected to the AUX input, then the
audio output is switched from the AUX input of the external connected device.
For further playback the audio source is to be switched to AUX.
Replace the Bluetooth ®
player
If you would like to replace a Bluetooth ®
Player which is connected to the ma-
chine as a phone at the same time, , then a relevant information message ap-
pears in the device screen.›
End the connection to the currently connected Bluetooth ®
player and repeat
the pairing procedure » page 33, Managing paired external devices .
CAUTION
If an external device is connected to the device using Apple CarPlay ™
orAndroid Auto ™
, then it cannot be connected using Bluetooth ®
.
WLAN
Applies to Amundsen (Does not apply to Yeti).
The device allows you to play audio files from one of the external devices con-
nected to the device WLAN.
›
connect an external device that supports the DLNA (Digital Living Network
Alliance), with the device WLAN » page 39.
›
If necessary use the UPnP application (Universal Plug and Play) in the con-
nected device, which allows playback to start.
›
Select the audio source Select WLAN.
Supported audio sources and file formats
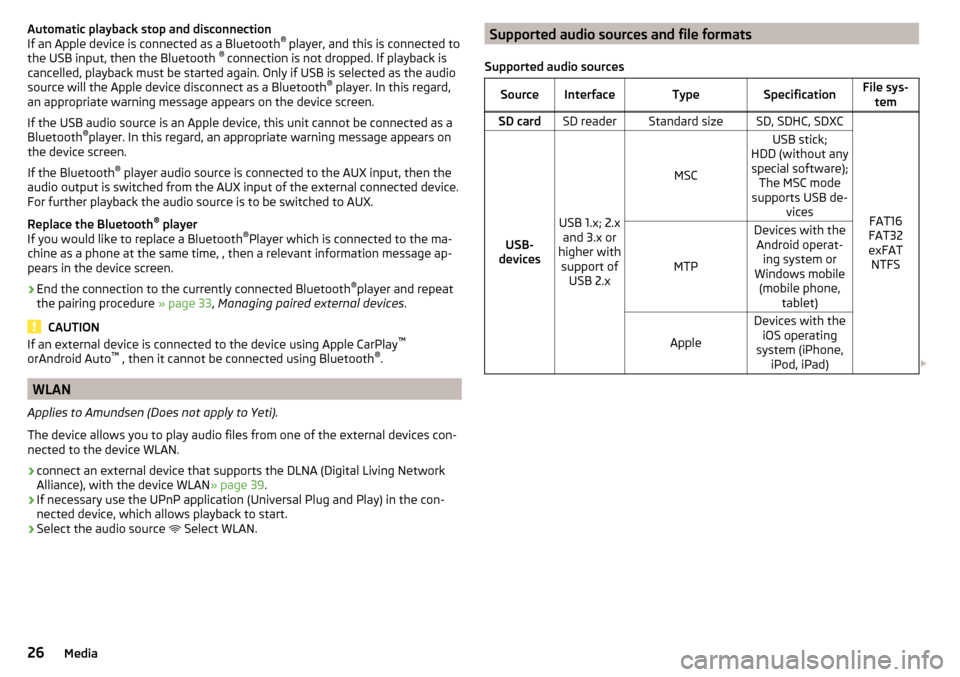
Supported audio sourcesSourceInterfaceTypeSpecificationFile sys- temSD cardSD readerStandard sizeSD, SDHC, SDXC
FAT16
FAT32
exFAT NTFSUSB-
devices
USB 1.x; 2.x and 3.x or
higher with support of USB 2.x
MSC
USB stick;
HDD (without any special software); The MSC mode
supports USB de- vices
MTP
Devices with theAndroid operat- ing system or
Windows mobile (mobile phone, tablet)
Apple
Devices with theiOS operating
system (iPhone, iPod, iPad) 26Media
Page 31 of 76
Media Command
Using the system
Introduction to the subject
Applies to Amundsen (Does not apply to Yeti).
The Media Commandfunction allows playback of audio files or videos in up to
two Tablets That are connected to the device via WLAN, to control the device.
The Media Command function enables operation of tablets with the operating
system Android or iOS and with the running application ŠKODA Media
Command.
Connect tablet with device
›
Turn on the device hotspot (WLAN) (press the button then the functional
surface Tap on
→
WLAN
→
Mobile hotspot
→
Mobile hotspot
).
›
Turn on WiFi in tablet.
›
The hotspot of the device (if necessary, enter the password for the connec-
tion setup according to the setting of the device hotspots » page 39).
›
In the tablet, start the application ŠKODA Media Command.
CAUTION
If several devices are connected to the device via WLAN, there is a risk that the
quality of the WLAN connection, and thus the function of Media Command may
be affected.
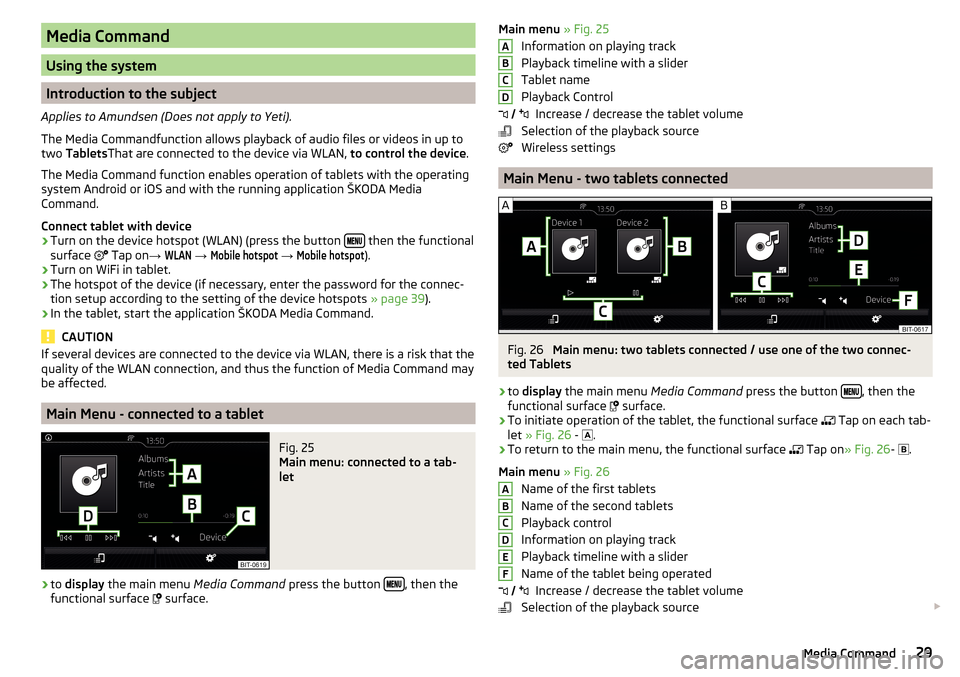
Main Menu - connected to a tablet
Fig. 25
Main menu: connected to a tab-
let
›
to display the main menu Media Command press the button , then the
functional surface
surface.
Main menu » Fig. 25
Information on playing track
Playback timeline with a slider
Tablet name
Playback Control Increase / decrease the tablet volume
Selection of the playback source
Wireless settings
Main Menu - two tablets connected
Fig. 26
Main menu: two tablets connected / use one of the two connec-
ted Tablets
›
to display the main menu Media Command press the button , then the
functional surface surface.
›
To initiate operation of the tablet, the functional surface
Tap on each tab-
let » Fig. 26 -
.
›
To return to the main menu, the functional surface
Tap on
» Fig. 26 -
.
Main menu » Fig. 26
Name of the first tablets
Name of the second tablets
Playback control
Information on playing track
Playback timeline with a slider
Name of the tablet being operated Increase / decrease the tablet volume
Selection of the playback source
ABCD
ABCDEF 29Media Command
Page 32 of 76
WLAN settings
Initiation of Tablet-operation
Return to main menu
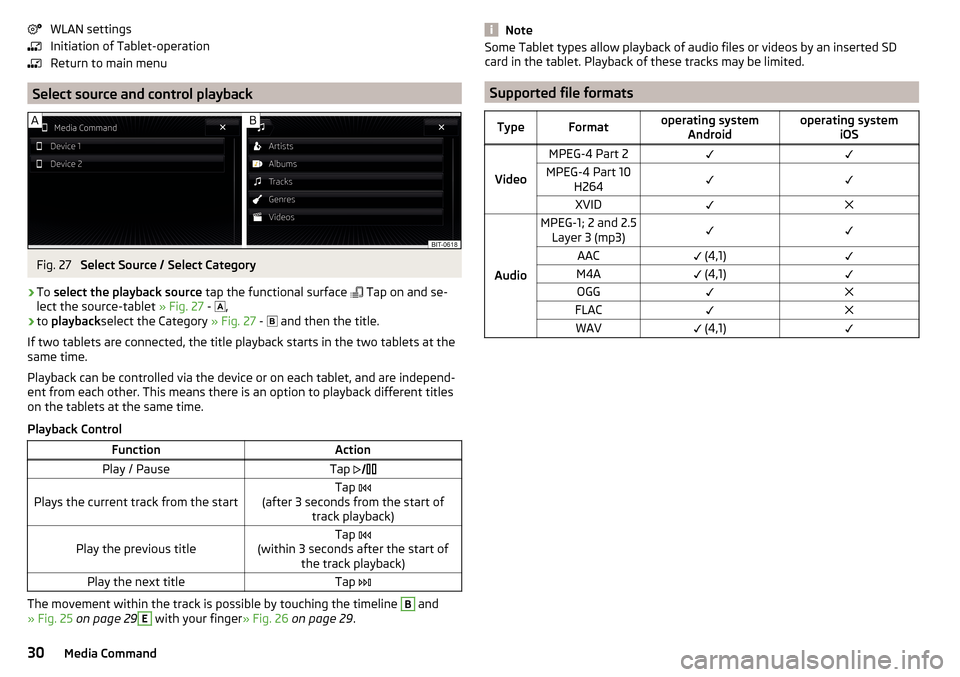
Select source and control playback
Fig. 27
Select Source / Select Category
›
To select the playback source tap the functional surface
Tap on and se-
lect the source-tablet » Fig. 27 -
,
›
to
playback select the Category » Fig. 27 -
and then the title.
If two tablets are connected, the title playback starts in the two tablets at the
same time.
Playback can be controlled via the device or on each tablet, and are independ-
ent from each other. This means there is an option to playback different titles
on the tablets at the same time.
Playback Control
FunctionActionPlay / PauseTap Plays the current track from the startTap
(after 3 seconds from the start of track playback)Play the previous titleTap
(within 3 seconds after the start of the track playback)Play the next titleTap
The movement within the track is possible by touching the timeline
B
and
» Fig. 25 on page 29
E
with your finger » Fig. 26 on page 29 .
NoteSome Tablet types allow playback of audio files or videos by an inserted SD
card in the tablet. Playback of these tracks may be limited.
Supported file formats
TypeFormatoperating system Androidoperating system iOS
Video
MPEG-4 Part 2MPEG-4 Part 10H264XVID
Audio
MPEG-1; 2 and 2.5Layer 3 (mp3)AAC (4,1)M4A (4,1)OGGFLACWAV (4,1)30Media Command
Page 33 of 76
Telephone
Introductory information
Introduction to the subject
This chapter covers the operation of a Bluetooth ®
device connected to the tel-
ephone.
Depending on the Bluetooth ®
-profile used it is possible to connect to a tele-
phone or two phones simultaneously to the device.
If telephones are connected to the device with multiple SIM cards, then calls
can be accepted by all SIM cards of the connected telephones.
For outgoing calls, it depends on the type of connected telephone, either only
the primary SIM card or one of the other SIM cards can be selected.
The device allows you to work with text messages from the main telephone, (if
supported by the telephone).
If the device to is connected to an external device via Apple CarPlay ™
, then the
use of the Bluetooth ®
Connection is not possible and the phone menu is not
available.
If the device is connected to an external device via Android Auto ™
then the
connected phones and the Bluetooth ®
player are automatically disconnected
by connecting to external device and it connects to the device via Bluetooth ®
.
Connecting an extension phone while the timer using Android car ™
is not pos-
sible. If the Bluetooth ®
Feature was not turned on in external device to be con-
nected, it will be automatically switched on usingAndroid Auto ™
switched
when setting up the connection.WARNINGThe general binding country-specific regulations for operating mobile
phones in the vehicle must be observed.
Possible connection typesDepending on the number of connected Bluetooth ®
Devices and the connection type, the following functions are available.The first device (main phone)The second device (additional phone)HFP (Incoming / outgoing calls), SMS,
Phone contacts,
Bluetooth ®
player a)HFP
(incoming calls),
Bluetooth ®
player a)a)
Only an external device can be connected to the device as a Bluetooth
®
player.
Telephone
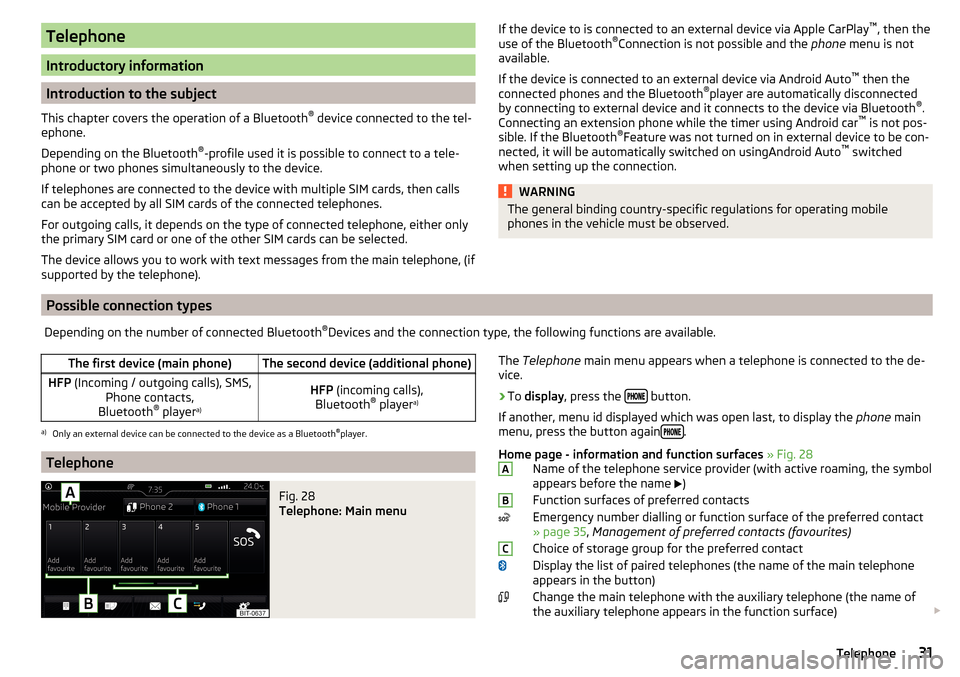
Fig. 28
Telephone: Main menu
The Telephone main menu appears when a telephone is connected to the de-
vice.›
To display , press the button.
If another, menu id displayed which was open last, to display the phone main
menu, press the button again
.
Home page - information and function surfaces » Fig. 28
Name of the telephone service provider (with active roaming, the symbol
appears before the name
)
Function surfaces of preferred contacts
Emergency number dialling or function surface of the preferred contact
» page 35 , Management of preferred contacts (favourites)
Choice of storage group for the preferred contact
Display the list of paired telephones (the name of the main telephone appears in the button)
Change the main telephone with the auxiliary telephone (the name of
the auxiliary telephone appears in the function surface)
ABC31Telephone
Page 43 of 76
SmartLink
Introductory information
Introduction to the subject
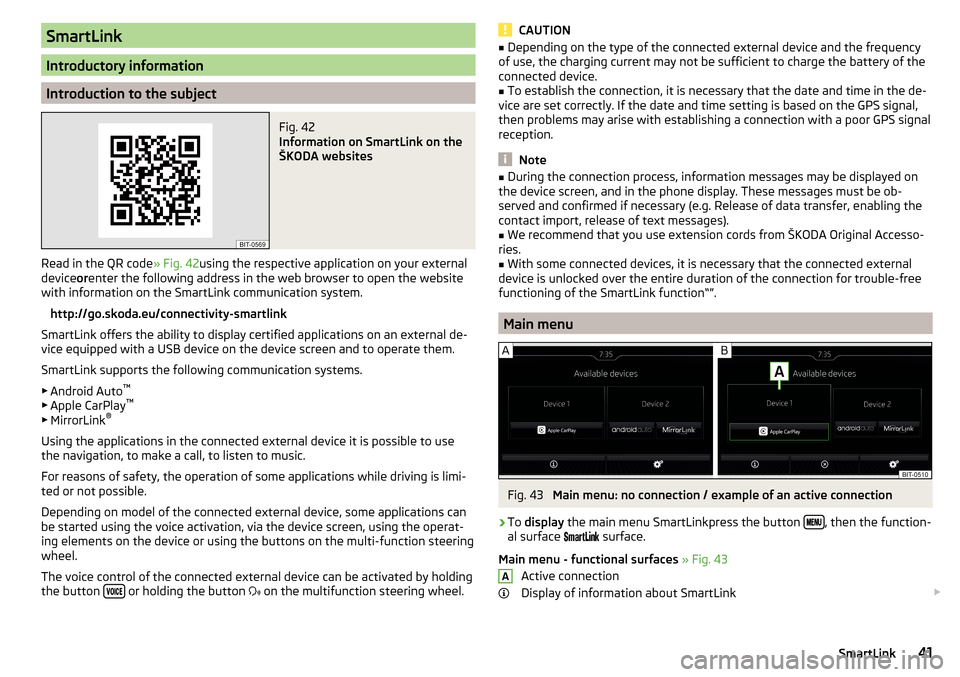
Fig. 42
Information on SmartLink on the
ŠKODA websites
Read in the QR code » Fig. 42using the respective application on your external
device orenter the following address in the web browser to open the website
with information on the SmartLink communication system.
http://go.skoda.eu/connectivity-smartlink
SmartLink offers the ability to display certified applications on an external de-
vice equipped with a USB device on the device screen and to operate them.
SmartLink supports the following communication systems. ▶ Android Auto ™
▶ Apple CarPlay ™
▶ MirrorLink ®
Using the applications in the connected external device it is possible to use the navigation, to make a call, to listen to music.
For reasons of safety, the operation of some applications while driving is limi-
ted or not possible.
Depending on model of the connected external device, some applications can
be started using the voice activation, via the device screen, using the operat-
ing elements on the device or using the buttons on the multi-function steering
wheel.
The voice control of the connected external device can be activated by holding
the button
or holding the button
on the multifunction steering wheel.
CAUTION■
Depending on the type of the connected external device and the frequency
of use, the charging current may not be sufficient to charge the battery of the
connected device.■
To establish the connection, it is necessary that the date and time in the de-
vice are set correctly. If the date and time setting is based on the GPS signal,
then problems may arise with establishing a connection with a poor GPS signal
reception.
Note
■ During the connection process, information messages may be displayed on
the device screen, and in the phone display. These messages must be ob-
served and confirmed if necessary (e.g. Release of data transfer, enabling the
contact import, release of text messages).■
We recommend that you use extension cords from ŠKODA Original Accesso-
ries.
■
With some connected devices, it is necessary that the connected external
device is unlocked over the entire duration of the connection for trouble-free
functioning of the SmartLink function“”.
Main menu
Fig. 43
Main menu: no connection / example of an active connection
›
To display the main menu SmartLinkpress the button , then the function-
al surface
surface.
Main menu - functional surfaces » Fig. 43
Active connection
Display of information about SmartLink
A41SmartLink
Page 44 of 76
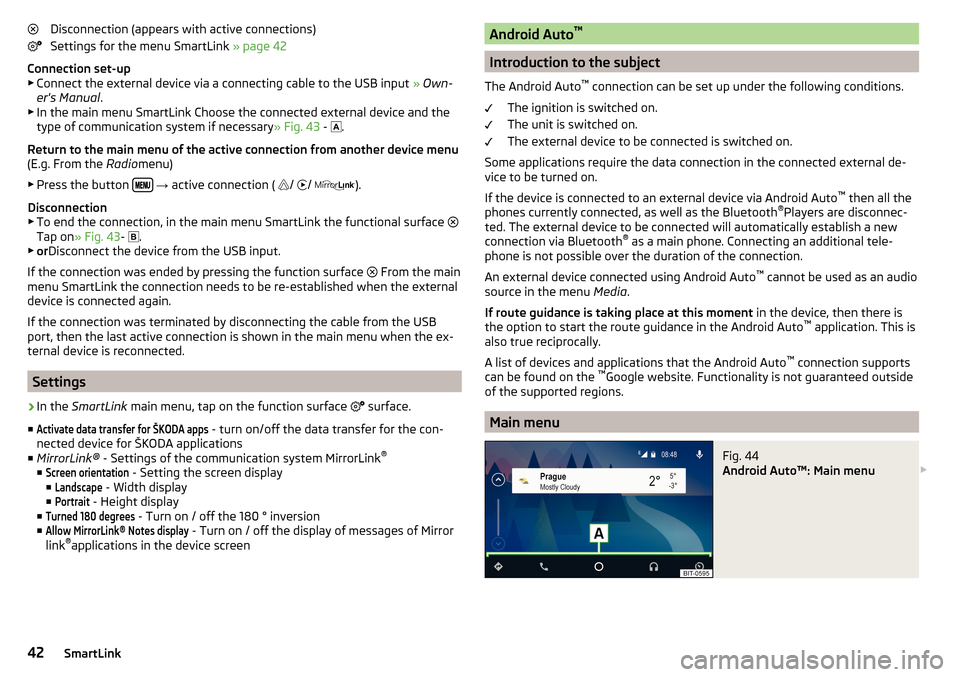
Disconnection (appears with active connections)
Settings for the menu SmartLink » page 42
Connection set-up ▶ Connect the external device via a connecting cable to the USB input » Own-
er's Manual .
▶ In the main menu SmartLink Choose the connected external device and the
type of communication system if necessary » Fig. 43 -
.
Return to the main menu of the active connection from another device menu
(E.g. From the Radiomenu)
▶ Press the button
→ active connection (
/
/
).
Disconnection
▶ To end the connection, in the main menu SmartLink the functional surface
Tap on » Fig. 43 -
.
▶ or Disconnect the device from the USB input.
If the connection was ended by pressing the function surface From the main
menu SmartLink the connection needs to be re-established when the external
device is connected again.
If the connection was terminated by disconnecting the cable from the USB
port, then the last active connection is shown in the main menu when the ex-
ternal device is reconnected.
Settings
›
In the SmartLink main menu, tap on the function surface
surface.
■
Activate data transfer for ŠKODA apps
- turn on/off the data transfer for the con-
nected device for ŠKODA applications
■ MirrorLink® - Settings of the communication system MirrorLink ®
■
Screen orientation
- Setting the screen display
■
Landscape
- Width display
■
Portrait
- Height display
■
Turned 180 degrees
- Turn on / off the 180 ° inversion
■
Allow MirrorLink® Notes display
- Turn on / off the display of messages of Mirror
link ®
applications in the device screen
Android Auto ™
Introduction to the subject
The Android Auto ™
connection can be set up under the following conditions.
The ignition is switched on.
The unit is switched on.
The external device to be connected is switched on.
Some applications require the data connection in the connected external de-
vice to be turned on.
If the device is connected to an external device via Android Auto ™
then all the
phones currently connected, as well as the Bluetooth ®
Players are disconnec-
ted. The external device to be connected will automatically establish a new
connection via Bluetooth ®
as a main phone. Connecting an additional tele-
phone is not possible over the duration of the connection.
An external device connected using Android Auto ™
cannot be used as an audio
source in the menu Media.
If route guidance is taking place at this moment in the device, then there is
the option to start the route guidance in the Android Auto ™
application. This is
also true reciprocally.
A list of devices and applications that the Android Auto ™
connection supports
can be found on the ™
Google website. Functionality is not guaranteed outside
of the supported regions.
Main menu
Fig. 44
Android Auto™: Main menu
42SmartLink
Page 68 of 76
Index
A
A2DP/AVRCP
33
Abort route guidance56
Adaptive Cruise Control63
Additional keyboard languages17
Additional windows Audio
47
Compass47
Manoeuvre47, 56
Map47
Menus47
Most frequent routes47
Satellite data47
Turn on/off47
Waypoint tour47
Aim Enter destination using the address
48
entered in map49
Search47
Alphanumeric with keyboard12
Alternative routes59
Android Auto™42
Connection establishment42
Disconnection42
Home Page42
Apple CarPlay™43
Connection establishment43
disconnection43
Main menu43
Assistance systems63
AT THE19
Audio Media
22
Radio19
Audio source24
Automatic driving lights when raining63
Automatic locking64
Automatic rear window wipe64
Automatic windscreen wiping with rain64
AUX25
Settings24
B
Bluetooth A2DP / AVRCP
17
Name17
on / off17
Paired external devices17
set to17, 32
Set to17
Update10, 18
Visibility17
Bluetooth Player25
Bluetooth profile33
Breakdown service34
Broadcasting19
See main menu19
Button CAR62
C
Call list Call list
36
CAR62
Central locking64
Clear calls32
Close64
Comfort flashing63
COMING HOME63
Compatible sources Pictures
28
Conditions for coupling32
Conference call37
Configuration wizard15
Custom destination51
D
DAB
19
Additional information19
Radio Text and image presentation19
Settings21
DAB slideshow19
Data connection40
Data transfer of external devices13
Date16
Daytime running lights63
Default settings17
Delete destination54
Demo mode55, 61
Destination Custom destination
51
Favourite50, 54
final destinations49
Flagged destination50
Home address50
Image with GPS51
Memory54
Saved destination50
Telephone contact50
vCard50
Destination details54
Destination management Destination details
54
Favourite54
Storage54
Destination memory50
Detail of the traffic report59
device Restart
10
Device connect to the telephone
32
Software update10
Device Description - Amundsen7, 8
Device Hotspot39
Device language16
66Index
Page 69 of 76
Device menuCAR62
Media Command29
Media (Audio)22
Navigation46
Radio19
Sound16
Device Menu Pictures
27
SmartLink41
Telephone31
Device operation11
Device screen11
Device operation using an application in the ex- ternal device
13
device screen keyboard
12
Device screen16
Areas11
Important information9
Maintenance9
Operation11
Disclaimer6
Diverting calls32
Door locking64
Doors - Operation64
Door unlocking64
DriveGreen62
Driver assistance63
Driving data Display
62
Power on/off64
Driving lights when raining63
Dynamic route switch on / off
59
E
Edit route
57
Elevation46
Emergency call34
Enter destination address
48
Destination on the map49
Equalizer16
ESC system63
external device data transfer17
External devices6
External module SD card
24
F
Factory settings
65
Favourite50, 54
file formats media
26
Requirements and Restrictions26
File formats Pictures
28
Finish route guidance56
Flagged destination50
FM19
Settings21
Front Assist63
Fuel options60
Function surfaces11
G
Gas station
49
GPS46
Graphical driving recommendations56
H
Home address
50, 60
Home menu MirrorLink®
44
Home Page Android Auto™
42
I
Images Display
28
Main menu27
safe removal of the data source17
Select Image Source27
service27
Settings28
Image viewer27
Important notes6
Import contacts32
Import destinations51
Import my destinations51
Information service34
Input screen with keyboard12
Inspection64
Instrument cluster64
Instrument lighting63
Intermediate target54
Introductory information6
K
keyboard
12
L
L-band
22
Lane recommendation56
Language characters17
Last destinations49
Latitude46
LEAVING HOME63
Light63
Light assistance63
Light sensor - Switching on the light63
List of available stations
20
of telephone contacts34
With folder / track list23
67Index