navigation system SKODA FABIA 2016 3.G / NJ Amundsen Bolero Infotainment System Navigation Manual
[x] Cancel search | Manufacturer: SKODA, Model Year: 2016, Model line: FABIA, Model: SKODA FABIA 2016 3.G / NJPages: 76, PDF Size: 9.64 MB
Page 4 of 76
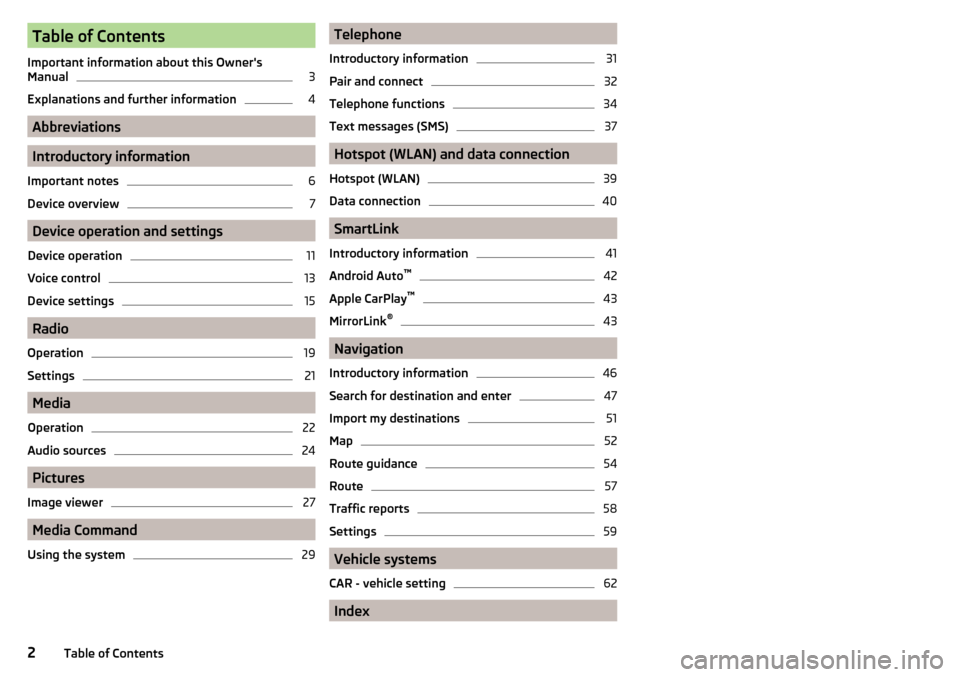
Table of Contents
Important information about this Owner's
Manual3
Explanations and further information
4
Abbreviations
Introductory information
Important notes
6
Device overview
7
Device operation and settings
Device operation
11
Voice control
13
Device settings
15
Radio
Operation
19
Settings
21
Media
Operation
22
Audio sources
24
Pictures
Image viewer
27
Media Command
Using the system
29Telephone
Introductory information31
Pair and connect
32
Telephone functions
34
Text messages (SMS)
37
Hotspot (WLAN) and data connection
Hotspot (WLAN)
39
Data connection
40
SmartLink
Introductory information
41
Android Auto ™
42
Apple CarPlay ™
43
MirrorLink®
43
Navigation
Introductory information
46
Search for destination and enter
47
Import my destinations
51
Map
52
Route guidance
54
Route
57
Traffic reports
58
Settings
59
Vehicle systems
CAR - vehicle setting
62
Index
2Table of Contents
Page 7 of 76
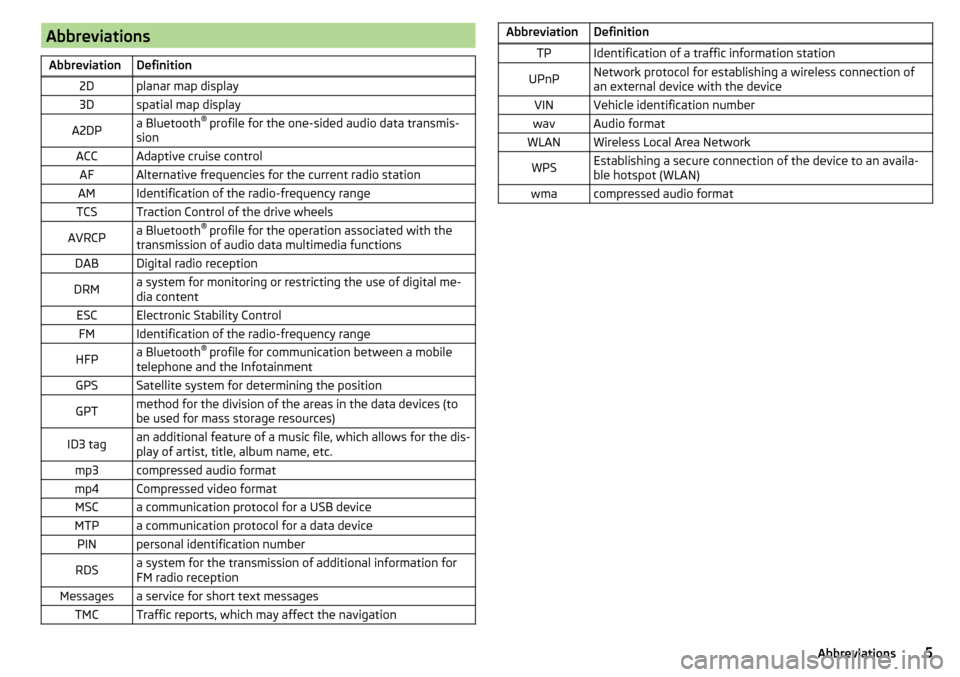
AbbreviationsAbbreviationDefinition2Dplanar map display3Dspatial map displayA2DPa Bluetooth®
profile for the one-sided audio data transmis-
sionACCAdaptive cruise controlAFAlternative frequencies for the current radio stationAMIdentification of the radio-frequency rangeTCSTraction Control of the drive wheelsAVRCPa Bluetooth ®
profile for the operation associated with the
transmission of audio data multimedia functionsDABDigital radio receptionDRMa system for monitoring or restricting the use of digital me-
dia contentESCElectronic Stability ControlFMIdentification of the radio-frequency rangeHFPa Bluetooth ®
profile for communication between a mobile
telephone and the InfotainmentGPSSatellite system for determining the positionGPTmethod for the division of the areas in the data devices (to
be used for mass storage resources)ID3 tagan additional feature of a music file, which allows for the dis-
play of artist, title, album name, etc.mp3compressed audio formatmp4Compressed video formatMSCa communication protocol for a USB deviceMTPa communication protocol for a data devicePINpersonal identification numberRDSa system for the transmission of additional information for
FM radio receptionMessagesa service for short text messagesTMCTraffic reports, which may affect the navigationAbbreviationDefinitionTPIdentification of a traffic information stationUPnPNetwork protocol for establishing a wireless connection of
an external device with the deviceVINVehicle identification numberwavAudio formatWLANWireless Local Area NetworkWPSEstablishing a secure connection of the device to an availa-
ble hotspot (WLAN)wmacompressed audio format5Abbreviations
Page 9 of 76
ŠKODA AUTO does not accept any liability for any damage to the device or ve-
hicle due to the use of incorrect or illegal applications or the improper or unau-
thorized use of mobile phones.
Applications
Applications can be installed in external devices (e.g. Mobile, tablet) making it
possible to display additional information in the device screen or to operate
the device.
Due to the large number of applications and communication systems (e.g..
SmartLink » page 41) As well as the ongoing development of these devices,
the applications may not be functional in all external devices. ŠKODA AUTO can
accept no liability for their proper function.
Applications, their use and the required data connection may be chargeable.
The range of available applications and their functionality is dependent on the
device, vehicle and region.
The function of mobile applications can be influenced by the quality of the In-
ternet connection.
Some applications are dependent on the availability of services that are provi-
ded by third parties.Device overview
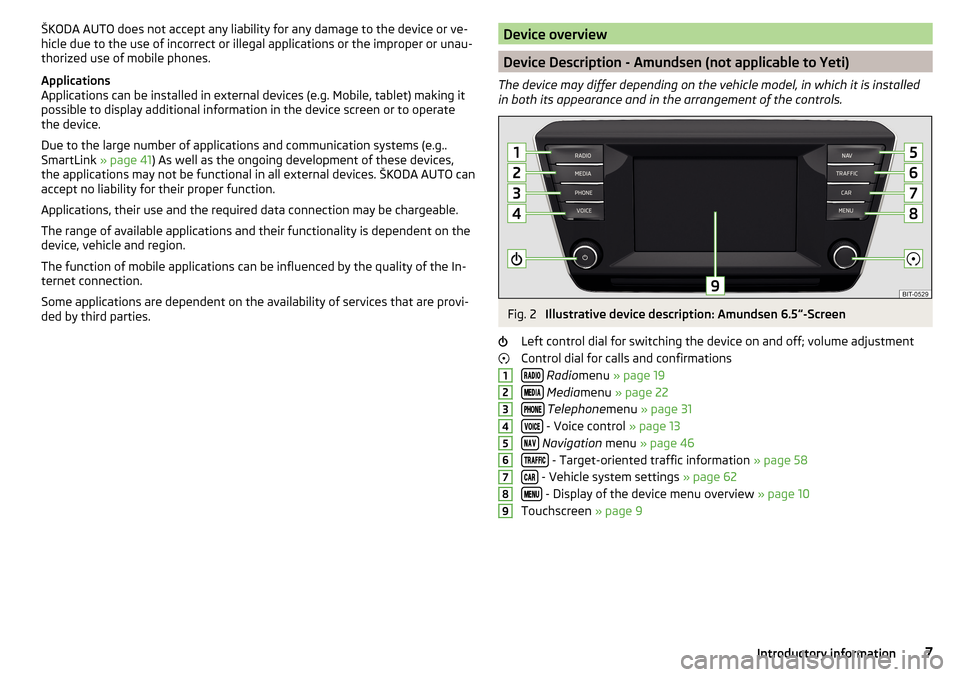
Device Description - Amundsen (not applicable to Yeti)
The device may differ depending on the vehicle model, in which it is installed
in both its appearance and in the arrangement of the controls.
Fig. 2
Illustrative device description: Amundsen 6.5 -Screen
Left control dial for switching the device on and off; volume adjustment
Control dial for calls and confirmations
Radio menu » page 19
Media menu » page 22
Telephone menu » page 31
- Voice control » page 13
Navigation menu » page 46
- Target-oriented traffic information » page 58
- Vehicle system settings » page 62
- Display of the device menu overview » page 10
Touchscreen » page 9
1234567897Introductory information
Page 10 of 76
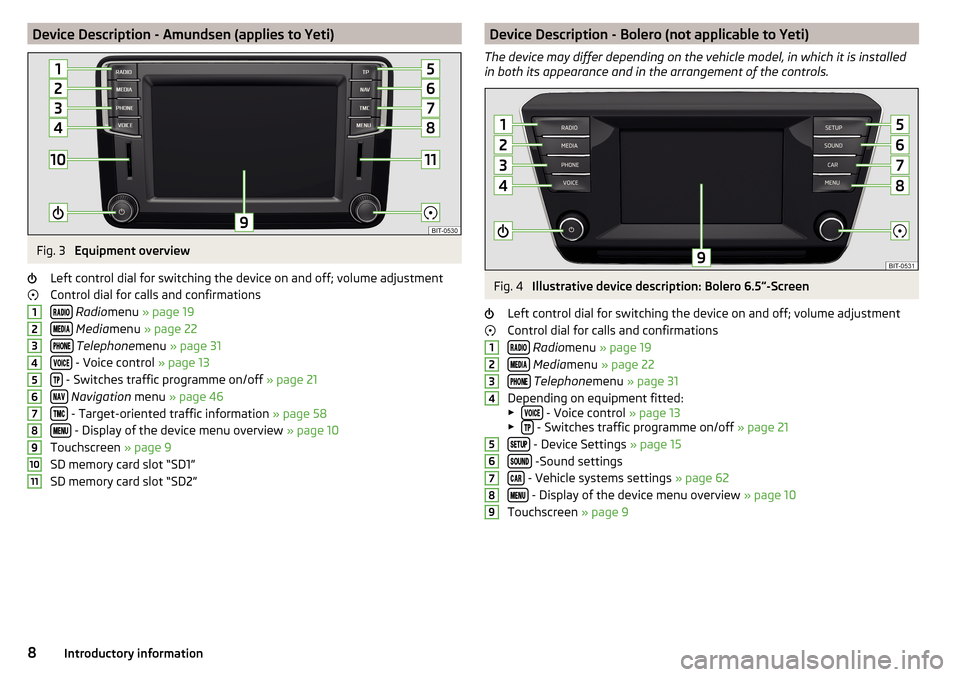
Device Description - Amundsen (applies to Yeti)Fig. 3
Equipment overview
Left control dial for switching the device on and off; volume adjustment
Control dial for calls and confirmations
Radio menu » page 19
Media menu » page 22
Telephone menu » page 31
- Voice control » page 13
- Switches traffic programme on/off » page 21
Navigation menu » page 46
- Target-oriented traffic information » page 58
- Display of the device menu overview » page 10
Touchscreen » page 9
SD memory card slot “SD1”
SD memory card slot “SD2”
1234567891011Device Description - Bolero (not applicable to Yeti)
The device may differ depending on the vehicle model, in which it is installed
in both its appearance and in the arrangement of the controls.Fig. 4
Illustrative device description: Bolero 6.5 -Screen
Left control dial for switching the device on and off; volume adjustment Control dial for calls and confirmations
Radio menu » page 19
Media menu » page 22
Telephone menu » page 31
Depending on equipment fitted:
▶
- Voice control » page 13
▶ - Switches traffic programme on/off » page 21
- Device Settings » page 15
-Sound settings
- Vehicle systems settings » page 62
- Display of the device menu overview » page 10
Touchscreen » page 9
1234567898Introductory information
Page 12 of 76
The brightness level of the screen can be set in the menu →
→ screen →Brightness level:
.
CAUTION
■
It is not possible to operate the screen with your fingernails or while wearing
gloves.■
To protect the screen, you can use a suitable screen protector for touchpads
that does not affect its functionality.
■
Dirt can be removed from the screen by using a soft cloth and, if necessary,
methylated spirits.
Software update
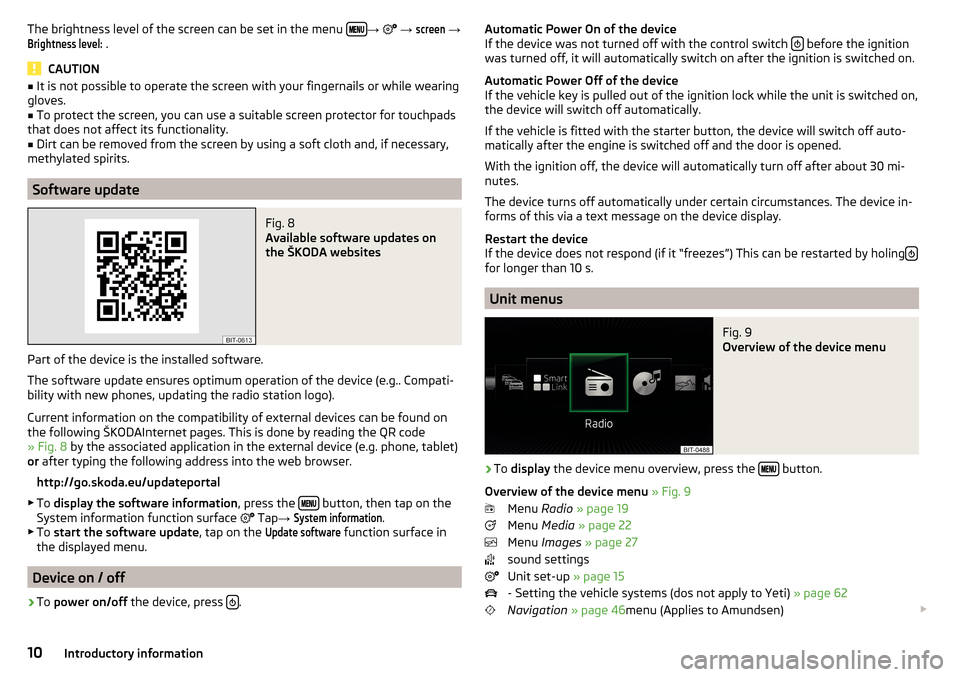
Fig. 8
Available software updates on
the ŠKODA websites
Part of the device is the installed software.
The software update ensures optimum operation of the device (e.g.. Compati-
bility with new phones, updating the radio station logo).
Current information on the compatibility of external devices can be found on
the following ŠKODAInternet pages. This is done by reading the QR code
» Fig. 8 by the associated application in the external device (e.g. phone, tablet)
or after typing the following address into the web browser.
http://go.skoda.eu/updateportal
▶ To display the software information , press the
button, then tap on the
System information function surface
Tap →
System information
.
▶ To start the software update , tap on the
Update software
function surface in
the displayed menu.
Device on / off
›
To power on/off the device, press .
Automatic Power On of the device
If the device was not turned off with the control switch before the ignition
was turned off, it will automatically switch on after the ignition is switched on.
Automatic Power Off of the device
If the vehicle key is pulled out of the ignition lock while the unit is switched on,
the device will switch off automatically.
If the vehicle is fitted with the starter button, the device will switch off auto-
matically after the engine is switched off and the door is opened.
With the ignition off, the device will automatically turn off after about 30 mi-
nutes.
The device turns off automatically under certain circumstances. The device in-
forms of this via a text message on the device display.
Restart the device
If the device does not respond (if it “freezes”) This can be restarted by holing
for longer than 10 s.
Unit menus
Fig. 9
Overview of the device menu
›
To
display the device menu overview, press the button.
Overview of the device menu » Fig. 9
Menu Radio » page 19
Menu Media » page 22
Menu Images » page 27
sound settings
Unit set-up » page 15
- Setting the vehicle systems (dos not apply to Yeti) » page 62
Navigation » page 46 menu (Applies to Amundsen)
10Introductory information
Page 15 of 76
Search
While entering characters, a search is made for corresponding entries.
The entry such as a telephone contact to be searched for must be entered
along with the special characters (diacritics).
By tapping on the function surface
a list of matching entries opens. If less
than 5 entries were found, a list of the found entries opens automatically.
Operating using an application in the external device
Applies to Amundsen (not applicable to Yeti).
Several device functions can be operated using an application in the supported
external device.
›
Enable the data transfer in the device. To do this, press and then tap on
Tap
→
Mobile device data transfer
→
Enable data transmission for ŠKODA Apps
.
›
Release the device operation using the application. To do this, press and
then tap on Tap
→
Mobile device data transfer
→
Use apps to operate:
→
Con-firm
/
Allow
.
›
Connect the equipment to an external device via WLAN » page 39.
›
In the external device, install an application for the device operation (e.g.
Start ŠKODA Media Command).
Note
The description of the device operation ŠKODA Media Command is part of the
application.
Voice control
Introduction to the subject
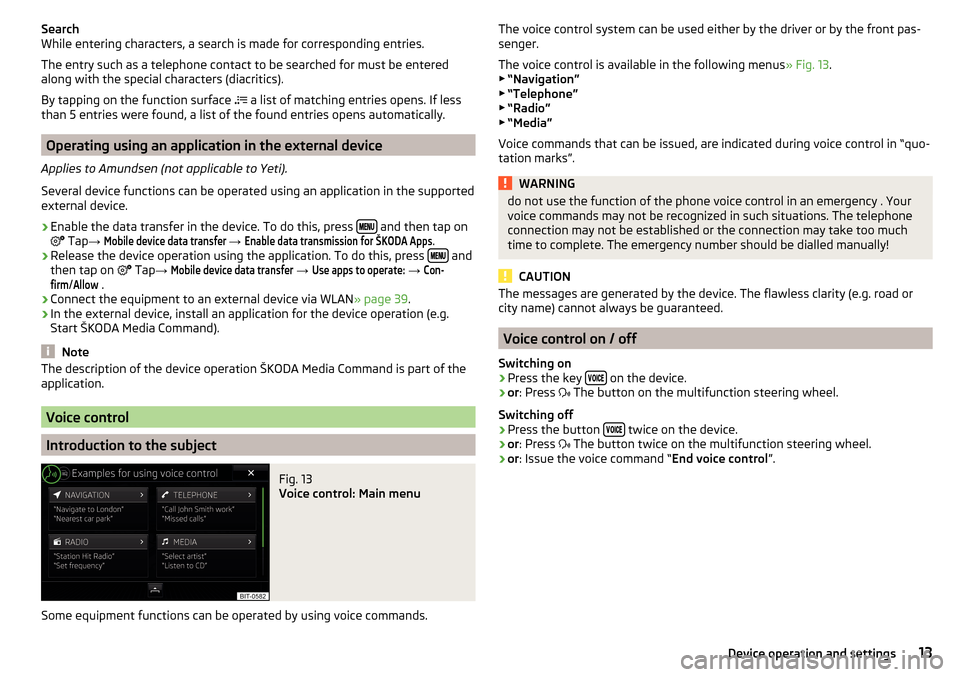
Fig. 13
Voice control: Main menu
Some equipment functions can be operated by using voice commands.
The voice control system can be used either by the driver or by the front pas-
senger.
The voice control is available in the following menus » Fig. 13.
▶ “Navigation”
▶ “Telephone”
▶ “Radio”
▶ “Media”
Voice commands that can be issued, are indicated during voice control in “quo- tation marks”.WARNINGdo not use the function of the phone voice control in an emergency . Your
voice commands may not be recognized in such situations. The telephone
connection may not be established or the connection may take too much
time to complete. The emergency number should be dialled manually!
CAUTION
The messages are generated by the device. The flawless clarity (e.g. road or
city name) cannot always be guaranteed.
Voice control on / off
Switching on
›
Press the key on the device.
›
or
: Press
The button on the multifunction steering wheel.
Switching off
›
Press the button twice on the device.
›
or
: Press
The button twice on the multifunction steering wheel.
›
or: Issue the voice command “ End voice control”.
13Device operation and settings
Page 18 of 76
Sound settings
The scope of the following menu is dependent on the vehicle equipment with the sound system.›
Press the button, then tap on the function surface
surface.
■
Volume
- Volume settings
■
Announcements
- Adjustment of traffic announcements volume (TP)
■
Navigation announcements
- sets the volume for the navigation announce-
ments
■
Voice control
- volume setting for voice output
■
Maximum switch-on volume
- Sets the maximum volume after switching on the
device
■
Speed-dependent vol. adjustment
- increases the volume as speed increases
■
AUX volume:
- Sets the volume for the device connected via AUX
■
Quiet
- low volume
■
Medium
- Medium volume
■
Loud
- High volume
■
Bluetooth audio:
- Volume setting of the device connected via Bluetooth ®
au-
dio profile of the connected external device
■
Entertainment fading while parking
- Lowers the audio volume (e.g. radio volume)
with activated parking aid
■
Entertainment fading (nav. announcements)
- Lowers the audio volume (e.g. radio
volume) in the event of a nav. announcements
■
Bass - Mid - Treble
- setting the equalizer
■
Balance - Fader
- Sets the balance between left and right, front and rear
■
Subwoofer
- Subwoofer volume settings
■
ŠKODA Surround
- Turn surround sound on/off (Cannot be used in Radio mode)
■
Virtual Subwoofer
-Turn virtual subwoofer on/off (Cannot be used in Radio
mode)
■
Sound Character
- Select the sound character (applies to Yeti)
■
Surround
- Optimising the sound for the room (applies to Yeti)
■
Sound focus
-Setting the optimum room sound perception
■
All
- Optimising the sound for the entire vehicle interior
■
Driver
- Optimising the sound for the driver
■
Touchscreen tone
- Switch on/off audible tone when touching the screen
■
No navigation announcements during call
- Switches on or off the navigation
prompts during a telephone conversation
Screen settings
›
Press the button, then tap on the function surface
Tap
→
screen
.
■Switch off screen (in 10 seconds) - Enable / disable the automatic power off func-
tion
■Brightness:
- Adjusts the brightness of the screen
■
Touchscreen tone
- Switch on/off audible tone when touching the screen
■
Proximity sensor
- Turn the proximity sensors on/off (When the function is on,
e.g. Navigation will be shown in the main menu when moving a finger to-
wards the bottom bar with the functional surfaces on the screen)
■
Show clock in standby mode
- Time and date displayed on the screen when the
ignition is switched on and the unit is switched off
Time and date settings
›
Press the button, then tap on the function surface
Tap on
→
Time anddate
.
■
Clock time source:
- Setting the time source: manual / GPS (applies to Amund-
sen)
■
Time:
- Time settings
■
Summer (DST)
- Switches the summer time setting on/off (applies to Amund-
sen)
■
automatically adjust DST
- Turn on / off the automatic switch to daylight saving
time
■
Time zone:
- Select the time zone
■
Time format:
- Set the time format
■
Date:
- Date settings
■
Date format:
- Set the date format
Note
With the Yeti model, the time and date settings are set via the MAXI DOT dis-
play » Owner's Manual .
Setting the device language
›
Press the button, then tap on the function surface
Tap on
→
Language
.
›
Select the device language or tap the function surface
Automatic
to set the
MAXI DOT display matching language (applies to the Yeti).
In some languages, after selecting the function surface
Female
and
Male
are dis-
played for the choice of voice prompts for the device.
16Device operation and settings
Page 20 of 76
■Find devices - searches for available devices
■Bluetooth audio (A2DP/AVRCP)
- Turn on/off the ability to connect an audio device
(e.g. MP3 player, tablet etc.)
Wireless settings
Applies to Amundsen (does not apply to Yeti).
›
Press the button, then tap on the function surface
Tap on →
WLAN
.
■
WLAN
- List of available hotspots of external devices
■
WLAN
- Turn on / off the device wireless
■
WPS Quick Connect (WPS button)
- Establishing a secure connection to the hot-
spot of the external device using WPS
■
Manual settings
- Setting the parameters for search and connection to the
hotspot of the external device ■
Network name
- Enter the Hotspot name
■
Network key
- Setting the access password
■
Security level:
- Adjusting the security
■
WPA2
- WPA2 security
■
WPA
- WPA security
■
No security level
- No coverage (without required entry of the access pass-
word)
■
Connect
- Connection establishment
■
Search
- Search / Restore the list of available hotspots
■
Mobile hotspot
- Setting device hotspots (in the functional surface the symbol
displayed with the number of connected external devices)
■
Mobile hotspot
- Turn on / off device hotspots
■
WPS Quick Connect (WPS button)
- Establishing a secure connection to the de-
vice via hotspot WPS
■
Hotspot settings
- Setting the parameters for the connection to the device
hotspot
■
Security level:
- Setting the connection security
■
WPA2
- WPA2 security
■
WPA
- WPA security
■
No security level
- No coverage (without required entry of the access pass-
word)
■
Network key
- Entering the access password
■
SSID: ...
- Name of the device hotspot
■
Do not send network name (SSID)
-Switch WLAN hotspot security on/off
■
Storage
- Storage of the device hotspot parameters
System information›
Press the button, then tap on the function surface
Tap on →
systeminformation
.
›
To perform a Software Update (Z. B. Bluetooth®
or radio station logo) Tap
the functional surface
Update software
.
Displaying system information.
▶ Device part number: ... - Part number of the device
▶ Hardware: ... - Version of the hardware used
▶ Software: ... - Version of the software used
▶ Navigation database: ... - Version of the navigation data
▶ Media Codec: ... - Media codec version
▶ Bluetooth version: ... - Version of the Bluetooth ®
software used
The information on available software updates is to be obtained from a ŠKODA
partner or on the following ŠKODA Internet pages.
http://go.skoda.eu/infotainment
18Device operation and settings
Page 43 of 76
SmartLink
Introductory information
Introduction to the subject
Fig. 42
Information on SmartLink on the
ŠKODA websites
Read in the QR code » Fig. 42using the respective application on your external
device orenter the following address in the web browser to open the website
with information on the SmartLink communication system.
http://go.skoda.eu/connectivity-smartlink
SmartLink offers the ability to display certified applications on an external de-
vice equipped with a USB device on the device screen and to operate them.
SmartLink supports the following communication systems. ▶ Android Auto ™
▶ Apple CarPlay ™
▶ MirrorLink ®
Using the applications in the connected external device it is possible to use the navigation, to make a call, to listen to music.
For reasons of safety, the operation of some applications while driving is limi-
ted or not possible.
Depending on model of the connected external device, some applications can
be started using the voice activation, via the device screen, using the operat-
ing elements on the device or using the buttons on the multi-function steering
wheel.
The voice control of the connected external device can be activated by holding
the button
or holding the button
on the multifunction steering wheel.
CAUTION■
Depending on the type of the connected external device and the frequency
of use, the charging current may not be sufficient to charge the battery of the
connected device.■
To establish the connection, it is necessary that the date and time in the de-
vice are set correctly. If the date and time setting is based on the GPS signal,
then problems may arise with establishing a connection with a poor GPS signal
reception.
Note
■ During the connection process, information messages may be displayed on
the device screen, and in the phone display. These messages must be ob-
served and confirmed if necessary (e.g. Release of data transfer, enabling the
contact import, release of text messages).■
We recommend that you use extension cords from ŠKODA Original Accesso-
ries.
■
With some connected devices, it is necessary that the connected external
device is unlocked over the entire duration of the connection for trouble-free
functioning of the SmartLink function“”.
Main menu
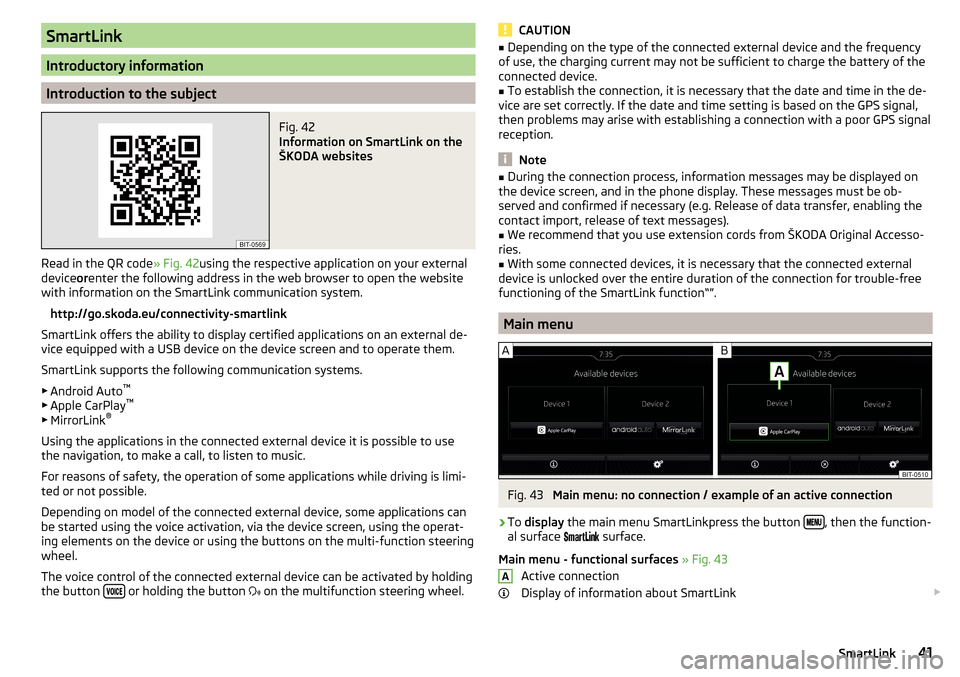
Fig. 43
Main menu: no connection / example of an active connection
›
To display the main menu SmartLinkpress the button , then the function-
al surface
surface.
Main menu - functional surfaces » Fig. 43
Active connection
Display of information about SmartLink
A41SmartLink
Page 48 of 76
Navigation
Introductory information
Navigation - function sequence
Applies to Amundsen.
Route guidance is started as follows.
›
Search for/ enter a new destination or Select one of the stored destinations.
›
Confirm the route calculation in the destination details or if necessary, adjust
the route options.
›
Select the preferred route type, if this is requested by the device.
A route calculation occurs and route guidance starts.
The route guidance is provided by graphical driving recommendations and nav- igation announcements.
The is an option to add additional destinations during route guidance, or to
adapt the route.
If a traffic radio station is available, information concerning traffic delays is
evaluated by the device and, if necessary, an alternative route is offered.
If you deviate from the route, then a new route calculation is carried out.
GPS satellite signal
The unit uses the GPS (Global Positioning System) satellite signal for route
guidance.
Outside the range of the GPS satellite signal (e.g. in dense vegetation, in tun-
nels, parking garages, etc.), the unit navigates only with restrictions using ve-
hicle sensors.
The unit offers the possibility to show in the split screen display the following
Position
» Fig. 50 on page 47 information about the current geographical posi-
tion of the vehicle and the satellite signal.
Geographical longitude
Geographical latitude
Elevation
Number of received/available satellites
If no GPS satellite signal is available, no values are displayed.
Navigation data
Navigation data source
The navigation data is stored on an Original SD Card .
In order to ensure the function of the navigation, the Original SD card, with the
navigation data, must be inserted in the respective slot » page 24, SD card .
If the original SD card should be damaged or lost, a new original SD card can be
purchased from the ŠKODA Original Accessories.
With a Non-original SD Card, the navigation does not work .
Finding out the version of the navigation data›
In the Navigation main menu, tap on the function surface,
Tap
→
versioninformation
.
Update navigation data
We recommend that you update the navigation data on a regular basis (e.g.
Due to newly developed roads and changed traffic signs).
The information on updating the navigation data is to be obtained from a
ŠKODA partner or on the following ŠKODA Internet pages.
http://go.skoda.eu/infotainment
Main menu
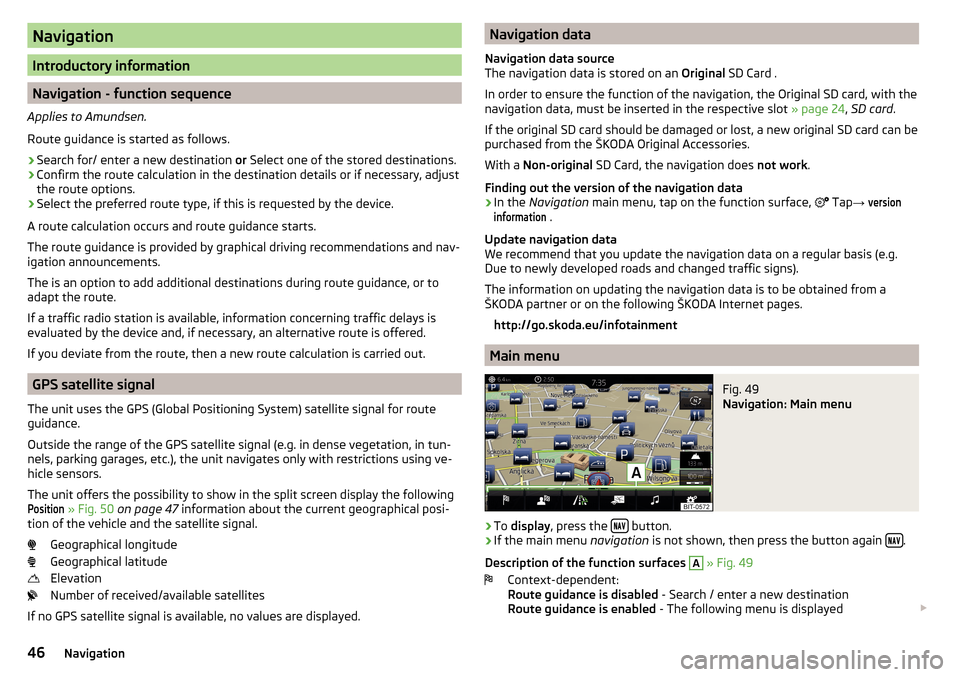
Fig. 49
Navigation: Main menu
›
To display , press the button.
›
If the main menu
navigation is not shown, then press the button again .
Description of the function surfaces
A
» Fig. 49
Context-dependent:
Route guidance is disabled - Search / enter a new destination
Route guidance is enabled - The following menu is displayed
46Navigation