carplay SKODA FABIA 2016 3.G / NJ Columbus Amundsen Bolero Infotainment System Navigation Manual
[x] Cancel search | Manufacturer: SKODA, Model Year: 2016, Model line: FABIA, Model: SKODA FABIA 2016 3.G / NJPages: 100, PDF Size: 12.8 MB
Page 4 of 100
Table of Contents
Important information about this Owner's
Manual3
Explanations and further information
4
Abbreviations
Introductory information
Important notes
6
Device overview
7
Device operation and settings
Device operation
12
Voice control
14
Device settings
16
Radio
Operation
21
Settings
23
Media
Operation
24
Audio sources
26
Pictures
Image viewer
31
Video DVD
Video player
32
TV tuner
TV function
34Media Command
Using the system36
Phone
Introductory information
39
Pair and connect
42
Use the SIM card in the external module
45
rSAP
46
Telephone functions
46
Text messages (SMS)
50
Hotspot (WLAN) and data connection
Hotspot (WLAN)
52
data connection
53
SmartLink
Introductory information
54
Android Auto ™
55
Apple CarPlay ™
56
MirrorLink®
56
Navigation
Introductory information
59
Search for destination and enter
60
Import my destinations
64
Map
65
Route guidance
68
Route
70
Waypoint mode
72Traffic reports74
Settings
76
Vehicle systems
CAR - vehicle setting
78
Adjustment of the heating and cooling system
82
Index
2Table of Contents
Page 13 of 100
Software updateFig. 12
QR code with reference to the
ŠKODA websites
Part of the device is the installed software.
The software update ensures optimum operation of the device (e.g.. Compati-
bility with new phones, updating the radio station logo).
Current information on the compatibility of external devices can be found on
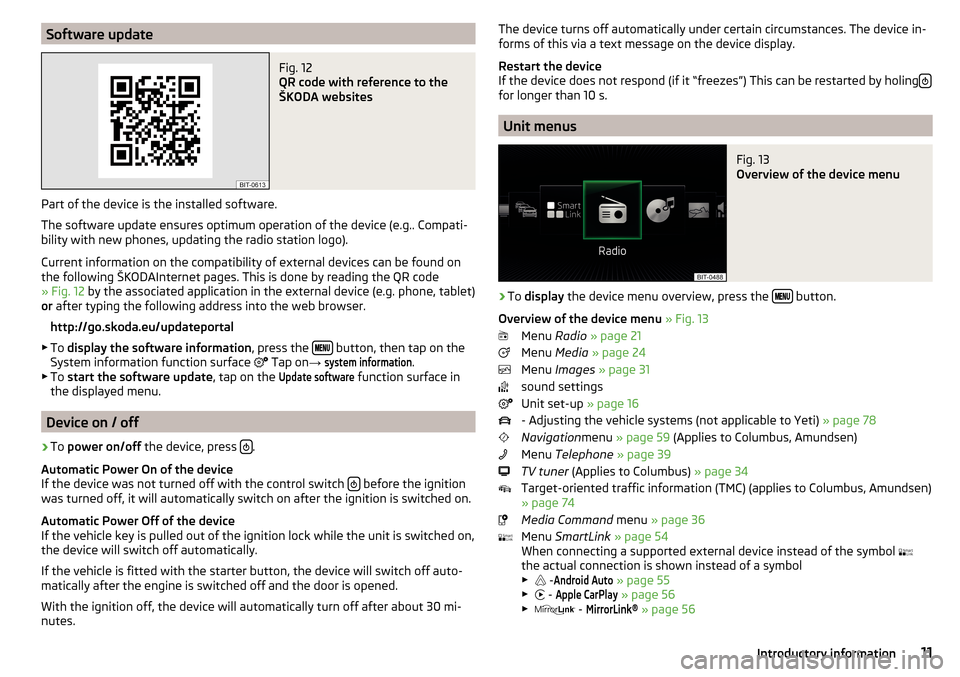
the following ŠKODAInternet pages. This is done by reading the QR code
» Fig. 12 by the associated application in the external device (e.g. phone, tablet)
or after typing the following address into the web browser.
http://go.skoda.eu/updateportal
▶ To display the software information , press the
button, then tap on the
System information function surface Tap on
→
system information
.
▶ To start the software update , tap on the
Update software
function surface in
the displayed menu.
Device on / off
›
To power on/off the device, press .
Automatic Power On of the device
If the device was not turned off with the control switch
before the ignition
was turned off, it will automatically switch on after the ignition is switched on.
Automatic Power Off of the device
If the vehicle key is pulled out of the ignition lock while the unit is switched on,
the device will switch off automatically.
If the vehicle is fitted with the starter button, the device will switch off auto-
matically after the engine is switched off and the door is opened.
With the ignition off, the device will automatically turn off after about 30 mi-
nutes.
The device turns off automatically under certain circumstances. The device in-
forms of this via a text message on the device display.
Restart the device
If the device does not respond (if it “freezes”) This can be restarted by holing
for longer than 10 s.
Unit menus
Fig. 13
Overview of the device menu
›
To
display the device menu overview, press the button.
Overview of the device menu » Fig. 13
Menu Radio » page 21
Menu Media » page 24
Menu Images » page 31
sound settings
Unit set-up » page 16
- Adjusting the vehicle systems (not applicable to Yeti) » page 78
Navigation menu » page 59 (Applies to Columbus, Amundsen)
Menu Telephone » page 39
TV tuner (Applies to Columbus) » page 34
Target-oriented traffic information (TMC) (applies to Columbus, Amundsen)
» page 74
Media Command menu » page 36
Menu SmartLink » page 54
When connecting a supported external device instead of the symbol
the actual connection is shown instead of a symbol
▶ -
Android Auto
» page 55
▶ -
Apple CarPlay
» page 56
▶ -
MirrorLink®
» page 56
11Introductory information
Page 31 of 100
AUX - input
The AUX input (marked with the
lettering) is located in the front centre
console. The exact installation location of the input » Owner's Manual .›
To connect , insert the plug of the AUX audio source into the appropriate con-
nector.
›
To disconnect , pull the plug out of the AUX audio source.
CAUTION
■
The AUX input must only be used for audio devices!■If an external audio source is connected to the AUX input, which is equipped
with an adapter for external power supply, the sound may be impaired.
Note
■ The 3.5 mm stereo jack plug is used for the AUX input.■We recommend that you use extension cords from ŠKODA Original Accesso-
ries.
Bluetooth ®
player
The unit allows audio files of a connected Bluetooth ®
player to play using the
A2DP and AVRCP audio profile.
With the device, multiple devices can be paired using Bluetooth ®
, but only one
of them can be used as a Bluetooth ®
player.
Connect the Bluetooth ®
player
›
Connect the player to the device - follow the same instructions as for pairing
the device with a telephone » page 43.
Separate the Bluetooth ®
player
›
Terminate the connection in the list of paired devices » page 44.
Automatic playback stop and disconnection
If an Apple device is connected as a Bluetooth ®
player, and this is connected to
the USB input, then the Bluetooth ®
connection is not dropped. If playback is
cancelled, playback must be started again. Only if USB is selected as the audio
source will the Apple device disconnect as a Bluetooth ®
player. In this regard,
an appropriate warning message appears on the device screen.
If the USB audio source is an Apple device, this unit cannot be connected as a
Bluetooth ®
player. In this regard, an appropriate warning message appears on
the device screen.
If the Bluetooth ®
player audio source is connected to the AUX input, then the
audio output is switched from the AUX input of the external connected device.
For further playback the audio source is to be switched to AUX.
Replace Bluetooth ®
player(applies to Amundsen, Bolero)
If you would like to replace a Bluetooth ®
Player which is connected to the ma-
chine as a phone at the same time, , then a relevant information message ap-
pears in the device screen.›
End the connection to the currently connected Bluetooth ®
player and repeat
the pairing procedure » page 44, Managing paired external devices .
CAUTION
If an external device is connected to the device using Apple CarPlay ™
orAndroid Auto ™
, then it cannot be connected using Bluetooth ®
.
WLAN
Applies to Columbus, Amundsen (does not apply to Yeti).
The device allows you to play audio files from one of the external devices con-
nected to the device WLAN.
›
connect an external device that supports the DLNA (Digital Living Network
Alliance), with the device WLAN » page 52.
›
If necessary use the UPnP application (Universal Plug and Play) in the con-
nected device, which allows playback to start.
›
Select the audio source Select
WLAN
.
29Media
Page 41 of 100
Phone
Introductory information
Introduction to the subject
This chapter deals with the operation of a device with the telephone connec- ted via Bluetooth ®
as well as the use of the SIM-card in the external module.
Depending on the Bluetooth ®
-profile used it is possible to connect to a tele-
phone or two phones simultaneously to the device.
The SIM card in the external module can be used for data and telephone serv-
ices (applies to Columbus).
If telephones are connected to the device with multiple SIM cards, then calls
can be accepted by all SIM cards of the connected telephones.
For outgoing calls, it depends on the type of connected telephone, either only
the primary SIM card or one of the other SIM cards can be selected.
The device makes it possible to choose if you want to work with text messag-
es on the main phone (if supported by phone), or work with text messages in-
serted in the external module.
If the device to is connected to an external device via Apple CarPlay ™
, then the
use of the Bluetooth ®
Connection is not possible and the phone menu is not
available. A possible data connection via the SIM card remains operational
» page 53 .
If the device is connected to an external device via Android Auto ™
then the
connected phones and the Bluetooth ®
player are automatically disconnected
by connecting to external device and it connects to the device via Bluetooth ®
.
Connecting an additional telephone and the use of telephone services on the
SIM card via Android Auto ™
is not possible over the duration of the connection.
If the Bluetooth ®
Feature was not turned on in external device to be connec-
ted, it will be automatically switched on usingAndroid Auto ™
switched when
setting up the connection. A possible data connection via the SIM card remains
operational » page 53.
Phonebox
The storage compartment in the front centre console can be equipped with
the Phonebox function » Owner's Manual .
If a telephone is directed, with its rear side downwards, on the pad in the stor-
age compartment, the phone signal is amplified by the roof antenna.
Telephones that support the Qi standard for wireless charging, can also be charged wirelessly in the storage compartment.WARNINGThe general binding country-specific regulations for operating mobile
phones in the vehicle must be observed.WARNINGWhile wireless charging is taking place, no objects may be between the pad
and the telephone being charged.■
Metal objects can become hot due to the action of the induction field -
There is a risk of injury. If there is a metal object in the storage compart-
ment that has become hot, then take out the telephone and let the object
cool in the storage compartment!
CAUTION
While wireless charging is taking place, there may be noobjects between the
pad and the telephone being charged - thePhoneboxFunction could be im-
paired.■
With cards with a magnetic strip or chip, SD card, USB flash drives and similar
devices, there is a risk of data loss and damage to the disk.
■
Metal objects can become hot due to the action of the induction field - there
is a risk of damage to the telephone.
Note
■ At the start of the wireless charging, the appropriate message appears on
the device screen.■
For optimum telephone signal strength and uninterrupted wireless charging,
we recommend placing the phone in the storage compartment without the
protective sleeve, if possible.
■
It is normal for the telephone to heat up during the wireless charging.
39Phone
Page 45 of 100
Up to 20 external devices can be paired with the device. After reaching the
maximum number, the pairing of the next external device will replace that of
the device that has not been used for the longest period of time.
A connection with a telephone that is already paired does not require coupling. It is enough to find the telephone that has been coupled in the list of coupled
phones and make the connection.WARNINGPair and connect a telephone to the device only when the vehicle is at a
standstill - there is risk of accident!
conditions for coupling
Fig. 38
QR code with reference to the
ŠKODA websites
The telephone can be coupled with the device under the following conditions.
The ignition is switched on.
The Bluetooth ®
function of the device and the telephone is switched on.
The visibility of the device and the telephone is switched on.
The telephone is within range of the Bluetooth ®
signal of the device.
The telephone is compatible with the device.
There is no external device connected to the device using Apple CarPlay ™
.
The pairing can be initiated from the device or from the telephone.
During the pairing and connection process, information messages are dis-
played in the device screen and the telephone screen. These messages must
be observed and if necessary confirmed (e.g. enabling the contact import or
connecting the Bluetooth ®
player etc).
By reading the QR code » Fig. 38 using the associated application in the exter-
nal device (e.g. phone, tablet) or after typing the following address into the
web browser, information about the compatibility of phones and updates are
available for Bluetooth ®
device can be displayed.
http://go.skoda.eu/compatibility
Pairing and connection process
Pair the telephone with the device
›
Search available Bluetooth ®
devices in your telephone.
›
Select the device (name of the device
→
Bluetooth
→
Name:
).
›
Confirm or enter the PIN code to confirm the pairing.
The Telephone is connected to the device or merely paired, depending on the
number of already connected external devices and the use of the SIM card in-
serted in the external module (applies to Columbus).
Pair the device with the telephone
›
If there is no telephone connected to the device, then press the button
then tap the function surface
Find telephone
.
›
or: If a telephone is to the device, then tap the function surface in the phone
main menu
→ Tap
Find telephone
.
›
or: If a SIM card with activated telephone services is connected to the exter-
nal module, then in the main menu phone the functional surface
Tap
→
Findtelephone
.
›
Select the desired telephone from the list of selected external Bluetooth ®
devices.
›
Confirm the PIN code (enter and confirm if necessary to confirm the pairing.
If external Bluetooth ®
devices are already connected to the device, then dur-
ing the pairing and connection process messages and options for the possible
connection type (e.g. replacement of the connected external Bluetooth ®
de-
vice) are displayed.
Possible connection types for phones, for the SIM card in the external module
if necessary » page 40.
43Phone
Page 55 of 100
Functional surfaces of the available hotspots
Disconnection from the currently connected hotpot by deleting the de-
vice memory access password (The functional surface will only be shown
when connected)
Current connection
Wi-Fi strength of the external device
Connect ▶ WLAN in device on.
▶ Show the list of available hotspots, if necessary, update the list by tapping
the functional surfaceSearch
.
▶ Select the desired hotspot
▶ If the access to the hotspot is password protected, then enter the required
password.
Search for connection manually and connect ▶ Turn on WLAN in the device.
▶ Display list of available hotspots.
▶ Tap on the functional surface
Manual settings
and set the required hotspot pa-
rameters.
▶ Tap the function surface
Connect
.
▶ If the parameters for the search are set correctly and the hotspot is available,
then the connection will take place.
Establish secure connection using WPS (applies to Amundsen)
▶ Turn on WLAN in the device.
▶ In the external device, turn on the option to connect to the external device
via WPS.
▶ Press the
button, then tap on the function surface
Tap on
→
WLAN
→
Portable hotspot
→
WPS Quick Connect (WPS button)
.
End connection to the hotspot ▶ Press button when the desired Hotspot (WLAN) is found
,then the func-
tional surface →
Tap
→
WLAN
→
WLAN
→
Delete
.
data connection
Using the data connection, the device can be connected to the Internet. The
data connection can be established in one of the following ways.
Data connection using rSAP (applies to Columbus)
›
Connect the device via Bluetooth ®
profile rSAP to a telephone with activated
data services » page 46.
EFData connection using the SIM card in the external module (applies to
Columbus)›
Insert a SIM card with activated data services into the external module
» page 45 .
Data connection via WLAN
›
Connect the equipment to the hotspot of an external device with activated
data services » page 52, Connect device to the hotspot (WLAN) of the exter-
nal device .
Note
If the device is connected to an external device via Apple CarPlay ™
or Android
car ™
, then using the data connection by means of rSAP is not possible.53Hotspot (WLAN) and data connection
Page 56 of 100
SmartLink
Introductory information
Introduction to the subject
Fig. 54
QR code with reference to the
ŠKODA websites
Read in the QR code » Fig. 54using the respective application on your external
device orenter the following address in the web browser to open the website
with information on the SmartLink communication system.
http://go.skoda.eu/connectivity-smartlink
SmartLink offers the ability to display certified applications on an external de-
vice equipped with a USB device on the device screen and to operate them.
SmartLink supports the following communication systems. ▶ Android Auto ™
▶ Apple CarPlay ™
▶ MirrorLink ®
Using the applications in the connected external device it is possible to use
the navigation, to make a call, to listen to music.
For reasons of safety, the operation of some applications while driving is limi-
ted or not possible.
Depending on model of the connected external device, some applications can
be started using the voice activation, via the device screen, using the operat-
ing elements on the device or using the buttons on the multi-function steering
wheel.
The voice control of the connected external device can be activated by holding
the button
or holding the button
on the multifunction steering wheel.
CAUTION■
Depending on the type of the connected external device and the frequency
of use, the charging current may not be sufficient to charge the battery of the
connected device.■
To establish the connection, it is necessary that the date and time in the de-
vice are set correctly. If the date and time setting is based on the GPS signal,
then problems may arise with establishing a connection with a poor GPS signal
reception.
Note
■ During the connection process, information messages may be displayed on
the device screen, and in the phone display. These messages must be ob-
served and confirmed if necessary (e.g. Release of data transfer, enabling the
contact import, release of text messages).■
We recommend that you use extension cords from ŠKODA Original Accesso-
ries.
■
With some connected devices, it is necessary that the connected external
device is unlocked over the entire duration of the connection for trouble-free
functioning of the SmartLink function“”.
Main menu
Fig. 55
Main menu: no connection / example of an active connection
›
To display the main menu SmartLinkpress the button , then the function-
al surface
surface.
Main menu - functional surfaces » Fig. 55
Active connection
Display of information about SmartLink
A54SmartLink
Page 58 of 100
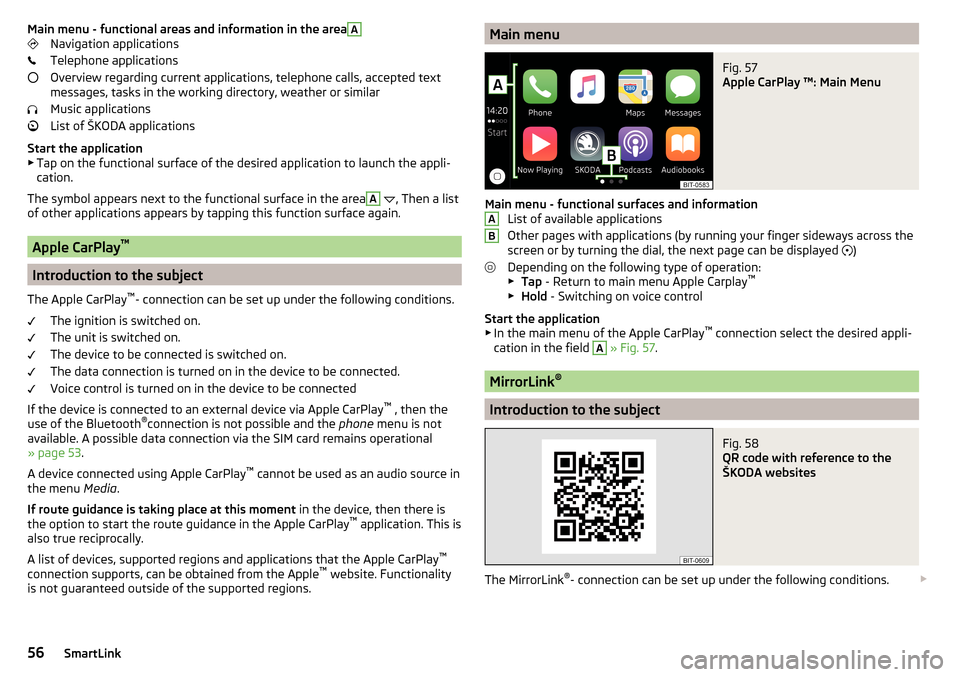
Main menu - functional areas and information in the areaANavigation applications
Telephone applications
Overview regarding current applications, telephone calls, accepted text
messages, tasks in the working directory, weather or similar
Music applications
List of ŠKODA applications
Start the application ▶ Tap on the functional surface of the desired application to launch the appli-
cation.
The symbol appears next to the functional surface in the areaA
, Then a list
of other applications appears by tapping this function surface again.
Apple CarPlay ™
Introduction to the subject
The Apple CarPlay ™
- connection can be set up under the following conditions.
The ignition is switched on.
The unit is switched on.
The device to be connected is switched on.
The data connection is turned on in the device to be connected.
Voice control is turned on in the device to be connected
If the device is connected to an external device via Apple CarPlay ™
, then the
use of the Bluetooth ®
connection is not possible and the phone menu is not
available. A possible data connection via the SIM card remains operational
» page 53 .
A device connected using Apple CarPlay ™
cannot be used as an audio source in
the menu Media.
If route guidance is taking place at this moment in the device, then there is
the option to start the route guidance in the Apple CarPlay ™
application. This is
also true reciprocally.
A list of devices, supported regions and applications that the Apple CarPlay ™
connection supports, can be obtained from the Apple ™
website. Functionality
is not guaranteed outside of the supported regions.
Main menuFig. 57
Apple CarPlay ™: Main Menu
Main menu - functional surfaces and information List of available applications
Other pages with applications (by running your finger sideways across the
screen or by turning the dial, the next page can be displayed )
Depending on the following type of operation: ▶ Tap - Return to main menu Apple Carplay ™
▶ Hold - Switching on voice control
Start the application ▶ In the main menu of the Apple CarPlay ™
connection select the desired appli-
cation in the field
A
» Fig. 57 .
MirrorLink ®
Introduction to the subject
Fig. 58
QR code with reference to the
ŠKODA websites
The MirrorLink ®
- connection can be set up under the following conditions.
AB56SmartLink
Page 87 of 100
Index
A
A2DP/AVRCP
44
Abort route guidance70
ACC80
Adaptive Cruise Control80
Additional keyboard languages18
Additional windows Audio
60
Compass60
Manoeuvre60, 69
Map60
Menus60
Most frequent routes60
Satellite data60
Turn on/off60
Waypoint tour60
Aim Enter destination using the address
61
entered in map62
Search60
Air conditioning83
Alphanumeric with keyboard13
Alternative routes76
Android Auto™55
Connection establishment55
Disconnection55
Home Page55
APN19
Apple CarPlay™56
Connection establishment56
disconnection56
Main menu56
Assistance systems80
AT THE21
Audio Media
24
Radio21
Audio source26
Auto-locking81
Automatic air conditioning83
Automatic air recirculation mode83
Automatic driving light when raining79
Automatic rear window wiper81
Automatic wiping when raining81
AUX29
Settings26
Auxiliary heating83
B
Background lighting
81
Blind spot monitoring80
Bluetooth A2DP / AVRCP
19
Name19
on / off19
Paired external devices19
rSAP46
set to19, 41
Set to19
Update11, 19
Visibility19
Bluetooth Player29
Bluetooth profile44
Breakdown service46
Broadcasting21
See main menu21
Button CAR78
C
Call list Call list
48
CAR78
CD27
Central locking81
Clear calls41
Climatronic display83
setting83
Close81
Comfort turn signal79
COMING HOME79
Compatible sources Pictures
32
Video DVD33
Conditions for coupling43
Conference call49
Configuration wizard16
Convenience consumer78
Cooling system82
Custom destination64
D
DAB
21
Additional information21
Radio Text and image presentation21
Settings23
DAB slideshow21
Data connection53
Data roaming19
Data transfer of external devices14
Date17
Daytime running light79
Daytime running light when raining79
Default settings18
Delete destination68
Demo mode69, 77
Destination Custom destination
64
Favourite63, 68
final destinations62
Flagged destination63
Home address63
Image with GPS64
Memory68
85Index
Page 89 of 100
Home address63, 76
Home menu MirrorLink®
57
Home Page Android Auto™
55
I
Images Display
32
Main menu31
safe removal of the data source18
Select Image Source31
service31
Settings32
Image viewer31
Important notes6
Import contacts41
Import destinations64
Import my destinations64
Information service46
Input screen with keyboard13
Inspection82
Instrument cluster82
Instrument lighting79
Interior - lighting81
Interior lighting81
Intermediate target68
Introductory information6
J
Jukebox
27
K
Key - memory function
81
keyboard13
L
L-band
24
Lane Assist80
Lane recommendation69
Language characters18
Last destinations62
Latitude59
LEAVING HOME79
Light79
Light assistance79
Light sensor - switch-on the lights79
List of available channels (TV tuner)
35
of available stations22
of telephone contacts47
With folder / track list25
List of paired external devices44
List of traffic reports74
Longitude59
Luggage compartment- Open81
Luggage compartment cover81
M
main menu Apple CarPlay™
56
Main menu CAR
78
DVD video32
Images31
Media24
Media Command36
Navigation59
Radio21
SmartLink54
SMS50
TV tuner34
Waypoint mode72
Manage Favourites41
Manage memory76
Managing paired devices44
Manoeuvre Graphical driving recommendations69
Nav. announcements70
Manoeuvring80
Map automatic scale
66
Display65
Display of traffic signs76
Display options66
Display options in the split screen67
Fast Map66
Lane recommendation76
Main menu65
Manual scale66
Map alignment67
Operation65
POI display76
Road sign67
Show POI65
|Alignment66
media Compatible sources
30
file formats30
Requirements and Restrictions30
Media24
Audio source26
AUX29
Bluetooth Audio29
Browser25
CD / DVD27
Foreword24
Jukebox27
List25
Main menu24
Multimedia database26
Operation24
safe removal of the data source18
SD card28
Select audio source25
Settings26
USB28
87Index