sat nav SKODA FABIA 2016 3.G / NJ Columbus Amundsen Bolero Infotainment System Navigation Manual
[x] Cancel search | Manufacturer: SKODA, Model Year: 2016, Model line: FABIA, Model: SKODA FABIA 2016 3.G / NJPages: 100, PDF Size: 12.8 MB
Page 7 of 100
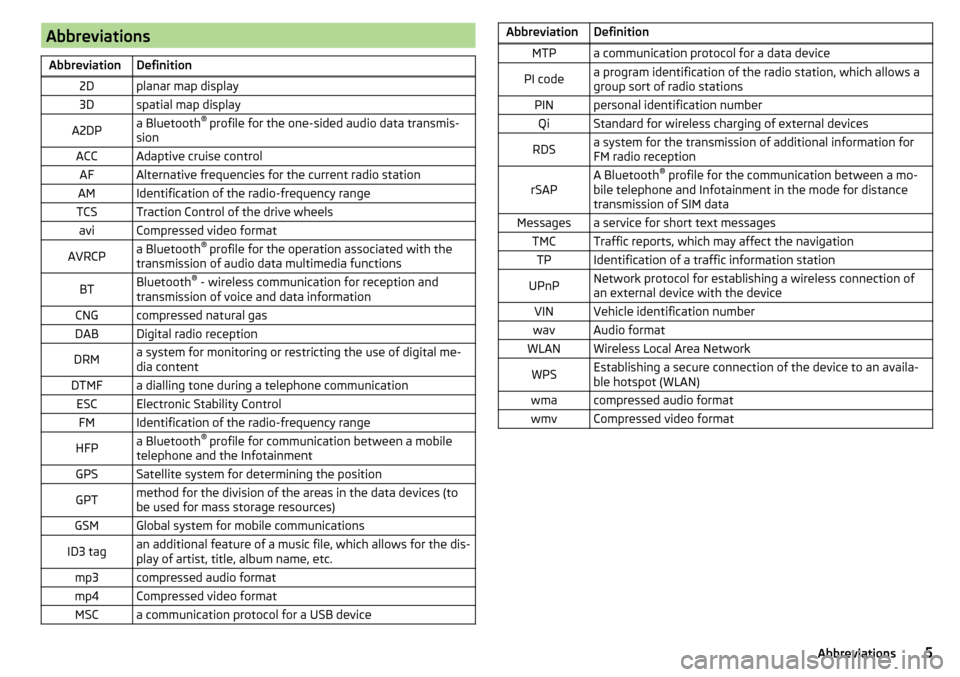
AbbreviationsAbbreviationDefinition2Dplanar map display3Dspatial map displayA2DPa Bluetooth®
profile for the one-sided audio data transmis-
sionACCAdaptive cruise controlAFAlternative frequencies for the current radio stationAMIdentification of the radio-frequency rangeTCSTraction Control of the drive wheelsaviCompressed video formatAVRCPa Bluetooth ®
profile for the operation associated with the
transmission of audio data multimedia functionsBTBluetooth ®
- wireless communication for reception and
transmission of voice and data informationCNGcompressed natural gasDABDigital radio receptionDRMa system for monitoring or restricting the use of digital me-
dia contentDTMFa dialling tone during a telephone communicationESCElectronic Stability ControlFMIdentification of the radio-frequency rangeHFPa Bluetooth ®
profile for communication between a mobile
telephone and the InfotainmentGPSSatellite system for determining the positionGPTmethod for the division of the areas in the data devices (to
be used for mass storage resources)GSMGlobal system for mobile communicationsID3 tagan additional feature of a music file, which allows for the dis-
play of artist, title, album name, etc.mp3compressed audio formatmp4Compressed video formatMSCa communication protocol for a USB deviceAbbreviationDefinitionMTPa communication protocol for a data devicePI codea program identification of the radio station, which allows a
group sort of radio stationsPINpersonal identification numberQiStandard for wireless charging of external devicesRDSa system for the transmission of additional information for
FM radio receptionrSAPA Bluetooth ®
profile for the communication between a mo-
bile telephone and Infotainment in the mode for distance
transmission of SIM dataMessagesa service for short text messagesTMCTraffic reports, which may affect the navigationTPIdentification of a traffic information stationUPnPNetwork protocol for establishing a wireless connection of
an external device with the deviceVINVehicle identification numberwavAudio formatWLANWireless Local Area NetworkWPSEstablishing a secure connection of the device to an availa-
ble hotspot (WLAN)wmacompressed audio formatwmvCompressed video format5Abbreviations
Page 18 of 100
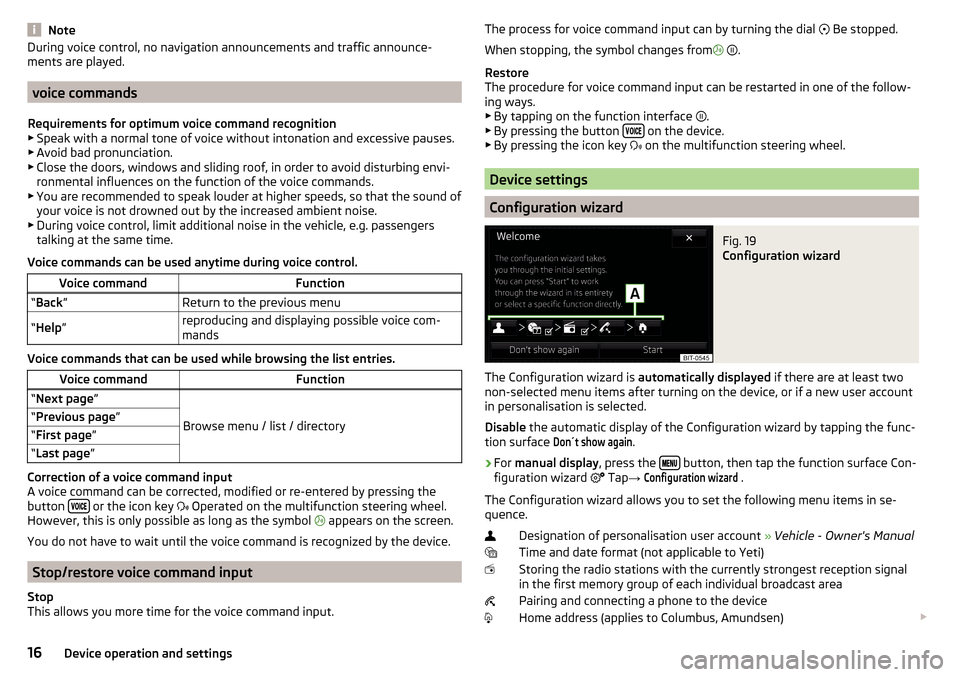
NoteDuring voice control, no navigation announcements and traffic announce-
ments are played.
voice commands
Requirements for optimum voice command recognition
▶ Speak with a normal tone of voice without intonation and excessive pauses.
▶ Avoid bad pronunciation.
▶ Close the doors, windows and sliding roof, in order to avoid disturbing envi-
ronmental influences on the function of the voice commands.
▶ You are recommended to speak louder at higher speeds, so that the sound of
your voice is not drowned out by the increased ambient noise.
▶ During voice control, limit additional noise in the vehicle, e.g. passengers
talking at the same time.
Voice commands can be used anytime during voice control.
Voice commandFunction“ Back ”Return to the previous menu“Help ”reproducing and displaying possible voice com-
mands
Voice commands that can be used while browsing the list entries.
Voice commandFunction“ Next page ”
Browse menu / list / directory
“Previous page ”“First page ”“Last page ”
Correction of a voice command input
A voice command can be corrected, modified or re-entered by pressing the
button
or the icon key
Operated on the multifunction steering wheel.
However, this is only possible as long as the symbol appears on the screen.
You do not have to wait until the voice command is recognized by the device.
Stop/restore voice command input
Stop
This allows you more time for the voice command input.
The process for voice command input can by turning the dial Be stopped.
When stopping, the symbol changes from
.
Restore
The procedure for voice command input can be restarted in one of the follow-
ing ways.
▶ By tapping on the function interface
.
▶ By pressing the button
on the device.
▶ By pressing the icon key
on the multifunction steering wheel.
Device settings
Configuration wizard
Fig. 19
Configuration wizard
The Configuration wizard is automatically displayed if there are at least two
non-selected menu items after turning on the device, or if a new user account
in personalisation is selected.
Disable the automatic display of the Configuration wizard by tapping the func-
tion surface
Don´t show again
.
›
For manual display , press the button, then tap the function surface Con-
figuration wizard Tap
→
Configuration wizard
.
The Configuration wizard allows you to set the following menu items in se-
quence.
Designation of personalisation user account » Vehicle - Owner's Manual
Time and date format (not applicable to Yeti)
Storing the radio stations with the currently strongest reception signal in the first memory group of each individual broadcast area
Pairing and connecting a phone to the device
Home address (applies to Columbus, Amundsen)
16Device operation and settings
Page 19 of 100
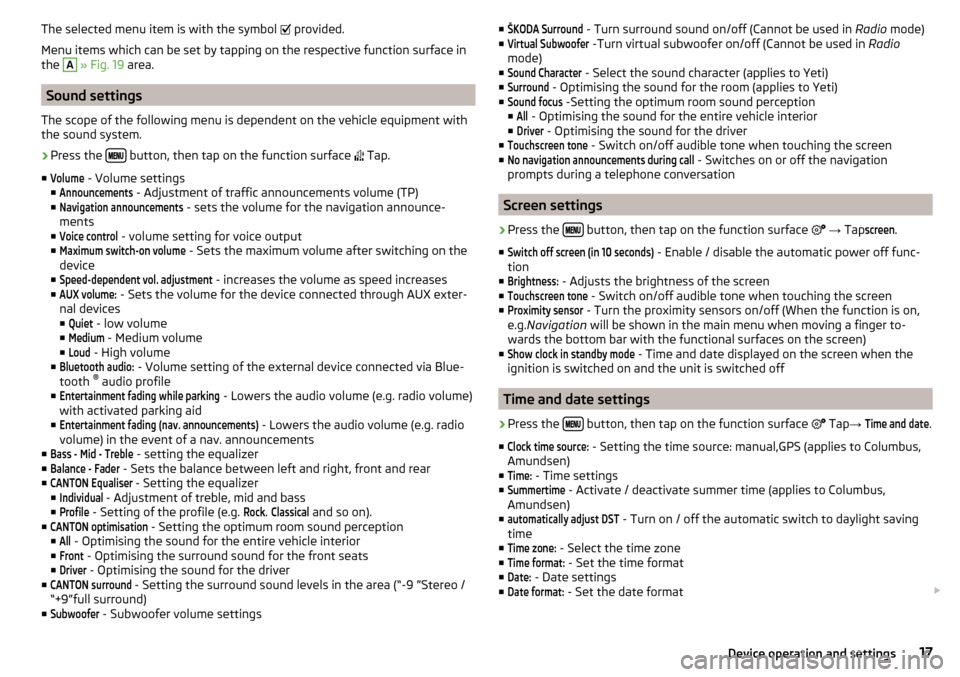
The selected menu item is with the symbol provided.
Menu items which can be set by tapping on the respective function surface in
the A
» Fig. 19 area.
Sound settings
The scope of the following menu is dependent on the vehicle equipment with the sound system.
›
Press the button, then tap on the function surface
Tap.
■
Volume
- Volume settings
■
Announcements
- Adjustment of traffic announcements volume (TP)
■
Navigation announcements
- sets the volume for the navigation announce-
ments
■
Voice control
- volume setting for voice output
■
Maximum switch-on volume
- Sets the maximum volume after switching on the
device
■
Speed-dependent vol. adjustment
- increases the volume as speed increases
■
AUX volume:
- Sets the volume for the device connected through AUX exter-
nal devices
■
Quiet
- low volume
■
Medium
- Medium volume
■
Loud
- High volume
■
Bluetooth audio:
- Volume setting of the external device connected via Blue-
tooth ®
audio profile
■
Entertainment fading while parking
- Lowers the audio volume (e.g. radio volume)
with activated parking aid
■
Entertainment fading (nav. announcements)
- Lowers the audio volume (e.g. radio
volume) in the event of a nav. announcements
■
Bass - Mid - Treble
- setting the equalizer
■
Balance - Fader
- Sets the balance between left and right, front and rear
■
CANTON Equaliser
- Setting the equalizer
■
Individual
- Adjustment of treble, mid and bass
■
Profile
- Setting of the profile (e.g.
Rock
.
Classical
and so on).
■
CANTON optimisation
- Setting the optimum room sound perception
■
All
- Optimising the sound for the entire vehicle interior
■
Front
- Optimising the surround sound for the front seats
■
Driver
- Optimising the sound for the driver
■
CANTON surround
- Setting the surround sound levels in the area (“-9 ”Stereo /
“+9”full surround)
■
Subwoofer
- Subwoofer volume settings
■ŠKODA Surround - Turn surround sound on/off (Cannot be used in Radio mode)
■Virtual Subwoofer
-Turn virtual subwoofer on/off (Cannot be used in Radio
mode)
■
Sound Character
- Select the sound character (applies to Yeti)
■
Surround
- Optimising the sound for the room (applies to Yeti)
■
Sound focus
-Setting the optimum room sound perception
■
All
- Optimising the sound for the entire vehicle interior
■
Driver
- Optimising the sound for the driver
■
Touchscreen tone
- Switch on/off audible tone when touching the screen
■
No navigation announcements during call
- Switches on or off the navigation
prompts during a telephone conversation
Screen settings
›
Press the button, then tap on the function surface
→ Tap
screen
.
■
Switch off screen (in 10 seconds)
- Enable / disable the automatic power off func-
tion
■
Brightness:
- Adjusts the brightness of the screen
■
Touchscreen tone
- Switch on/off audible tone when touching the screen
■
Proximity sensor
- Turn the proximity sensors on/off (When the function is on,
e.g. Navigation will be shown in the main menu when moving a finger to-
wards the bottom bar with the functional surfaces on the screen)
■
Show clock in standby mode
- Time and date displayed on the screen when the
ignition is switched on and the unit is switched off
Time and date settings
›
Press the button, then tap on the function surface
Tap
→
Time and date
.
■
Clock time source:
- Setting the time source: manual,GPS (applies to Columbus,
Amundsen)
■
Time:
- Time settings
■
Summertime
- Activate / deactivate summer time (applies to Columbus,
Amundsen)
■
automatically adjust DST
- Turn on / off the automatic switch to daylight saving
time
■
Time zone:
- Select the time zone
■
Time format:
- Set the time format
■
Date:
- Date settings
■
Date format:
- Set the date format
17Device operation and settings
Page 61 of 100
Navigation
Introductory information
Navigation - function sequence
Applies to Columbus, Amundsen.
Route guidance is started as follows.
›
Search for/ enter a new destination or Select one of the stored destinations.
›
Confirm the route calculation in the destination details or if necessary, adjust
the route options.
›
Select the preferred route type, if this is requested by the device.
A route calculation occurs and route guidance starts.
The route guidance is provided by graphical driving recommendations and nav- igation announcements.
The is an option to add additional destinations during route guidance, or to
adapt the route.
If a traffic radio station is available, information concerning traffic delays is
evaluated by the device and, if necessary, an alternative route is offered.
If you deviate from the route, then a new route calculation is carried out.
GPS satellite signal
The unit uses the GPS (Global Positioning System) satellite signal for route
guidance.
Outside the range of the GPS satellite signal (e.g. in dense vegetation, in tun-
nels, parking garages, etc.), the unit navigates only with restrictions using ve-
hicle sensors.
The unit offers the possibility to show in the split screen display the following
Position
» Fig. 62 on page 60 information about the current geographical posi-
tion of the vehicle and the satellite signal.
Geographical longitude
Geographical latitude
Elevation
Number of received/available satellites
If no GPS satellite signal is available, no values are displayed.
Navigation data
Columbus navigation data source
The navigation data is stored in the internal memory.
Amundsen navigation data source
The navigation data is stored on an Original SD Card .
In order to ensure the function of the navigation, the Original SD card, with the
navigation data, must be inserted in the respective slot » page 28, SD card .
If the original SD card should be damaged or lost, a new original SD card can be
purchased from the ŠKODA Original Accessories.
With a Non-original SD Card, the navigation does not work .
Finding out the version of the navigation data›
In the Navigation main menu, tap on the function surface,
Tap
→
Versioninformation
.
Update navigation data
We recommend that you update the navigation data on a regular basis (e.g.
Due to newly developed roads and changed traffic signs).
The information on updating the navigation data is to be obtained from a
ŠKODA partner or on the following ŠKODA Internet pages.
http://go.skoda.eu/infotainment
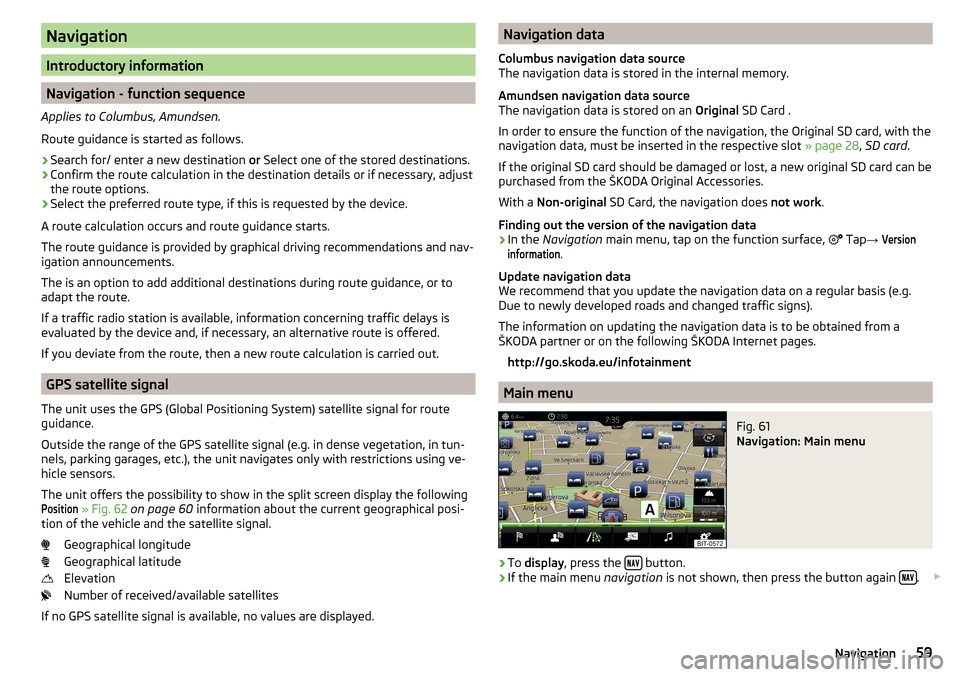
Main menu
Fig. 61
Navigation: Main menu
›
To display , press the button.
›
If the main menu
navigation is not shown, then press the button again .
59Navigation
Page 79 of 100
■No navigation sound during call - Enable / disable the playback of navigation
prompts during a telephone conversation
■Note: “My POIs”
- Turn on/off an audible indication when approaching a custom
POI (if supported by the imported custom POI) (applies to Columbus)
Fuel options
›
In the Navigation main menu, tap on the functional surface
Tap →
tank op-tions
.
■
Select preferred fuel station
- Select your preferred fuel station brand (the selec-
ted station brand will be displayed in the first three positions of the list)
■
Tank warning
-Turn on- / Off the display of a warning message with the option
to visit the nearest petrol station when the fuel level reaches the reserve
area
Advanced settings
›
In the Navigation main menu, tap on the functional surface
Tap
→
Advancedsettings
.
■
Time display:
- Select the time display in the status line
■ -Estimated arrival time at destination
■ -Estimated travelling time to the destination
■
Status line:
- Selection of the target type for which the route and travel time
are displayed in the status line (Thereby it is also determined which destina-
tion type by the choice of
→
is displayed in the map)
■ - Route destination
■ - Next waypoint
■
Note: national border crossed
- Switching on/off the display for information on na-
tional speed limits when crossing the national border
■
Demo mode
- Switch on/off guidance in demo mode
■
Define the starting point demo mode
- Specifying the start point of the route guid-
ance in the demo mode by entering the address or the current vehicle posi-
tion
77Navigation