sensor SKODA FABIA 2016 3.G / NJ Columbus Amundsen Bolero Infotainment System Navigation Manual
[x] Cancel search | Manufacturer: SKODA, Model Year: 2016, Model line: FABIA, Model: SKODA FABIA 2016 3.G / NJPages: 100, PDF Size: 12.8 MB
Page 19 of 100
The selected menu item is with the symbol provided.
Menu items which can be set by tapping on the respective function surface in
the A
» Fig. 19 area.
Sound settings
The scope of the following menu is dependent on the vehicle equipment with the sound system.
›
Press the button, then tap on the function surface
Tap.
■
Volume
- Volume settings
■
Announcements
- Adjustment of traffic announcements volume (TP)
■
Navigation announcements
- sets the volume for the navigation announce-
ments
■
Voice control
- volume setting for voice output
■
Maximum switch-on volume
- Sets the maximum volume after switching on the
device
■
Speed-dependent vol. adjustment
- increases the volume as speed increases
■
AUX volume:
- Sets the volume for the device connected through AUX exter-
nal devices
■
Quiet
- low volume
■
Medium
- Medium volume
■
Loud
- High volume
■
Bluetooth audio:
- Volume setting of the external device connected via Blue-
tooth ®
audio profile
■
Entertainment fading while parking
- Lowers the audio volume (e.g. radio volume)
with activated parking aid
■
Entertainment fading (nav. announcements)
- Lowers the audio volume (e.g. radio
volume) in the event of a nav. announcements
■
Bass - Mid - Treble
- setting the equalizer
■
Balance - Fader
- Sets the balance between left and right, front and rear
■
CANTON Equaliser
- Setting the equalizer
■
Individual
- Adjustment of treble, mid and bass
■
Profile
- Setting of the profile (e.g.
Rock
.
Classical
and so on).
■
CANTON optimisation
- Setting the optimum room sound perception
■
All
- Optimising the sound for the entire vehicle interior
■
Front
- Optimising the surround sound for the front seats
■
Driver
- Optimising the sound for the driver
■
CANTON surround
- Setting the surround sound levels in the area (“-9 ”Stereo /
“+9”full surround)
■
Subwoofer
- Subwoofer volume settings
■ŠKODA Surround - Turn surround sound on/off (Cannot be used in Radio mode)
■Virtual Subwoofer
-Turn virtual subwoofer on/off (Cannot be used in Radio
mode)
■
Sound Character
- Select the sound character (applies to Yeti)
■
Surround
- Optimising the sound for the room (applies to Yeti)
■
Sound focus
-Setting the optimum room sound perception
■
All
- Optimising the sound for the entire vehicle interior
■
Driver
- Optimising the sound for the driver
■
Touchscreen tone
- Switch on/off audible tone when touching the screen
■
No navigation announcements during call
- Switches on or off the navigation
prompts during a telephone conversation
Screen settings
›
Press the button, then tap on the function surface
→ Tap
screen
.
■
Switch off screen (in 10 seconds)
- Enable / disable the automatic power off func-
tion
■
Brightness:
- Adjusts the brightness of the screen
■
Touchscreen tone
- Switch on/off audible tone when touching the screen
■
Proximity sensor
- Turn the proximity sensors on/off (When the function is on,
e.g. Navigation will be shown in the main menu when moving a finger to-
wards the bottom bar with the functional surfaces on the screen)
■
Show clock in standby mode
- Time and date displayed on the screen when the
ignition is switched on and the unit is switched off
Time and date settings
›
Press the button, then tap on the function surface
Tap
→
Time and date
.
■
Clock time source:
- Setting the time source: manual,GPS (applies to Columbus,
Amundsen)
■
Time:
- Time settings
■
Summertime
- Activate / deactivate summer time (applies to Columbus,
Amundsen)
■
automatically adjust DST
- Turn on / off the automatic switch to daylight saving
time
■
Time zone:
- Select the time zone
■
Time format:
- Set the time format
■
Date:
- Date settings
■
Date format:
- Set the date format
17Device operation and settings
Page 61 of 100
Navigation
Introductory information
Navigation - function sequence
Applies to Columbus, Amundsen.
Route guidance is started as follows.
›
Search for/ enter a new destination or Select one of the stored destinations.
›
Confirm the route calculation in the destination details or if necessary, adjust
the route options.
›
Select the preferred route type, if this is requested by the device.
A route calculation occurs and route guidance starts.
The route guidance is provided by graphical driving recommendations and nav- igation announcements.
The is an option to add additional destinations during route guidance, or to
adapt the route.
If a traffic radio station is available, information concerning traffic delays is
evaluated by the device and, if necessary, an alternative route is offered.
If you deviate from the route, then a new route calculation is carried out.
GPS satellite signal
The unit uses the GPS (Global Positioning System) satellite signal for route
guidance.
Outside the range of the GPS satellite signal (e.g. in dense vegetation, in tun-
nels, parking garages, etc.), the unit navigates only with restrictions using ve-
hicle sensors.
The unit offers the possibility to show in the split screen display the following
Position
» Fig. 62 on page 60 information about the current geographical posi-
tion of the vehicle and the satellite signal.
Geographical longitude
Geographical latitude
Elevation
Number of received/available satellites
If no GPS satellite signal is available, no values are displayed.
Navigation data
Columbus navigation data source
The navigation data is stored in the internal memory.
Amundsen navigation data source
The navigation data is stored on an Original SD Card .
In order to ensure the function of the navigation, the Original SD card, with the
navigation data, must be inserted in the respective slot » page 28, SD card .
If the original SD card should be damaged or lost, a new original SD card can be
purchased from the ŠKODA Original Accessories.
With a Non-original SD Card, the navigation does not work .
Finding out the version of the navigation data›
In the Navigation main menu, tap on the function surface,
Tap
→
Versioninformation
.
Update navigation data
We recommend that you update the navigation data on a regular basis (e.g.
Due to newly developed roads and changed traffic signs).
The information on updating the navigation data is to be obtained from a
ŠKODA partner or on the following ŠKODA Internet pages.
http://go.skoda.eu/infotainment
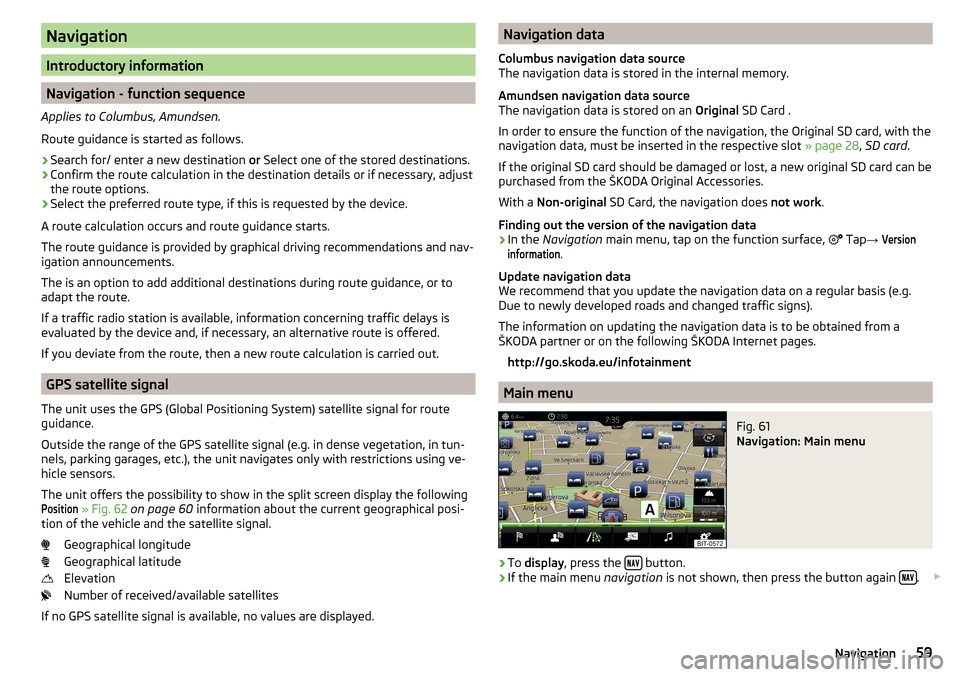
Main menu
Fig. 61
Navigation: Main menu
›
To display , press the button.
›
If the main menu
navigation is not shown, then press the button again .
59Navigation
Page 81 of 100
DriveGreen›
Press the button, then tap on the function surface
→
DriveGreen
.
DriveGreen
- the driving efficiency is evaluated based on the information regard-
ing the driving style.
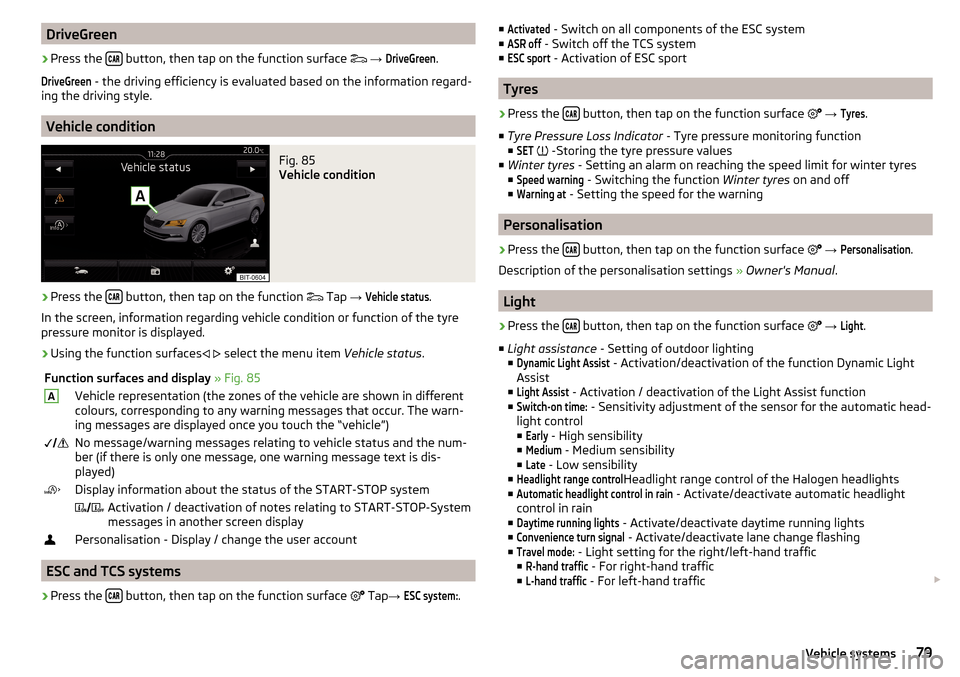
Vehicle condition
Fig. 85
Vehicle condition
›
Press the button, then tap on the function
Tap
→
Vehicle status
.
In the screen, information regarding vehicle condition or function of the tyre
pressure monitor is displayed.
›
Using the function surfaces
select the menu item
Vehicle status.
Function surfaces and display » Fig. 85AVehicle representation (the zones of the vehicle are shown in different
colours, corresponding to any warning messages that occur. The warn-
ing messages are displayed once you touch the “vehicle”) No message/warning messages relating to vehicle status and the num-
ber (if there is only one message, one warning message text is dis-
played)Display information about the status of the START-STOP system Activation / deactivation of notes relating to START-STOP-System
messages in another screen displayPersonalisation - Display / change the user account
ESC and TCS systems
›
Press the button, then tap on the function surface
Tap
→
ESC system:
.
■Activated - Switch on all components of the ESC system
■ASR off
- Switch off the TCS system
■
ESC sport
- Activation of ESC sport
Tyres
›
Press the button, then tap on the function surface
→
Tyres
.
■ Tyre Pressure Loss Indicator - Tyre pressure monitoring function
■
SET
-Storing the tyre pressure values
■ Winter tyres - Setting an alarm on reaching the speed limit for winter tyres
■
Speed warning
- Switching the function Winter tyres on and off
■
Warning at
- Setting the speed for the warning
Personalisation
›
Press the button, then tap on the function surface
→
Personalisation
.
Description of the personalisation settings » Owner's Manual .
Light
›
Press the button, then tap on the function surface
→
Light
.
■ Light assistance - Setting of outdoor lighting
■
Dynamic Light Assist
- Activation/deactivation of the function Dynamic Light
Assist
■
Light Assist
- Activation / deactivation of the Light Assist function
■
Switch-on time:
- Sensitivity adjustment of the sensor for the automatic head-
light control ■
Early
- High sensibility
■
Medium
- Medium sensibility
■
Late
- Low sensibility
■
Headlight range control
Headlight range control of the Halogen headlights
■
Automatic headlight control in rain
- Activate/deactivate automatic headlight
control in rain
■
Daytime running lights
- Activate/deactivate daytime running lights
■
Convenience turn signal
- Activate/deactivate lane change flashing
■
Travel mode:
- Light setting for the right/left-hand traffic
■
R-hand traffic
- For right-hand traffic
■
L-hand traffic
- For left-hand traffic
79Vehicle systems
Page 83 of 100
■Front tone setting - Setting the pitch of the beeps for obstacle detection in
front
■Rear volume
- Set the volume level of the beeps for the rear obstacle detec-
tion
■
Rear tone setting
- Setting the pitch of the beeps for the rear obstacle detec-
tion
■
Entertainment fading (parking)
- Lowers the audio volume (e.g. radio volume)
with activated parking aid
■ Rear Traffic Alert - Activate/deactivate the Rear Traffic Alert
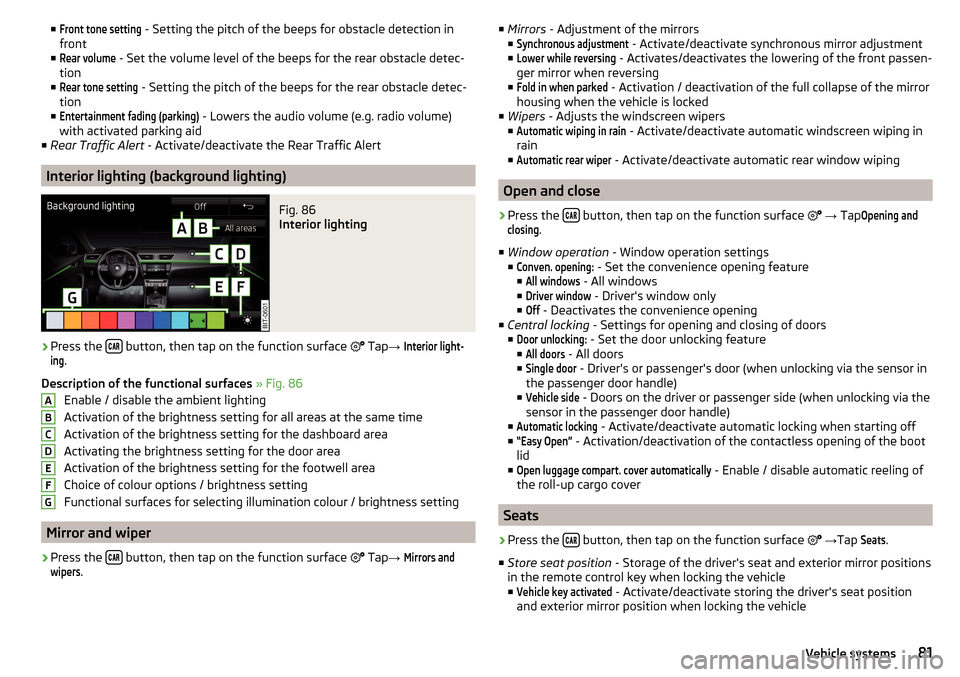
Interior lighting (background lighting)
Fig. 86
Interior lighting
›
Press the button, then tap on the function surface
Tap
→
Interior light-ing
.
Description of the functional surfaces » Fig. 86
Enable / disable the ambient lighting
Activation of the brightness setting for all areas at the same time
Activation of the brightness setting for the dashboard area
Activating the brightness setting for the door area
Activation of the brightness setting for the footwell area
Choice of colour options / brightness setting
Functional surfaces for selecting illumination colour / brightness setting
Mirror and wiper
›
Press the button, then tap on the function surface
Tap
→
Mirrors andwipers
.
ABCDEFG■
Mirrors - Adjustment of the mirrors
■Synchronous adjustment
- Activate/deactivate synchronous mirror adjustment
■
Lower while reversing
- Activates/deactivates the lowering of the front passen-
ger mirror when reversing
■
Fold in when parked
- Activation / deactivation of the full collapse of the mirror
housing when the vehicle is locked
■ Wipers - Adjusts the windscreen wipers
■
Automatic wiping in rain
- Activate/deactivate automatic windscreen wiping in
rain
■
Automatic rear wiper
- Activate/deactivate automatic rear window wiping
Open and close
›
Press the button, then tap on the function surface
→ Tap
Opening andclosing
.
■ Window operation - Window operation settings
■
Conven. opening:
- Set the convenience opening feature
■
All windows
- All windows
■
Driver window
- Driver's window only
■
Off
- Deactivates the convenience opening
■ Central locking - Settings for opening and closing of doors
■
Door unlocking:
- Set the door unlocking feature
■
All doors
- All doors
■
Single door
- Driver's or passenger's door (when unlocking via the sensor in
the passenger door handle)
■
Vehicle side
- Doors on the driver or passenger side (when unlocking via the
sensor in the passenger door handle)
■
Automatic locking
- Activate/deactivate automatic locking when starting off
■
“Easy Open”
- Activation/deactivation of the contactless opening of the boot
lid
■
Open luggage compart. cover automatically
- Enable / disable automatic reeling of
the roll-up cargo cover
Seats
›
Press the button, then tap on the function surface
→ Tap
Seats
.
■ Store seat position - Storage of the driver's seat and exterior mirror positions
in the remote control key when locking the vehicle
■
Vehicle key activated
- Activate/deactivate storing the driver's seat position
and exterior mirror position when locking the vehicle
81Vehicle systems
Page 89 of 100
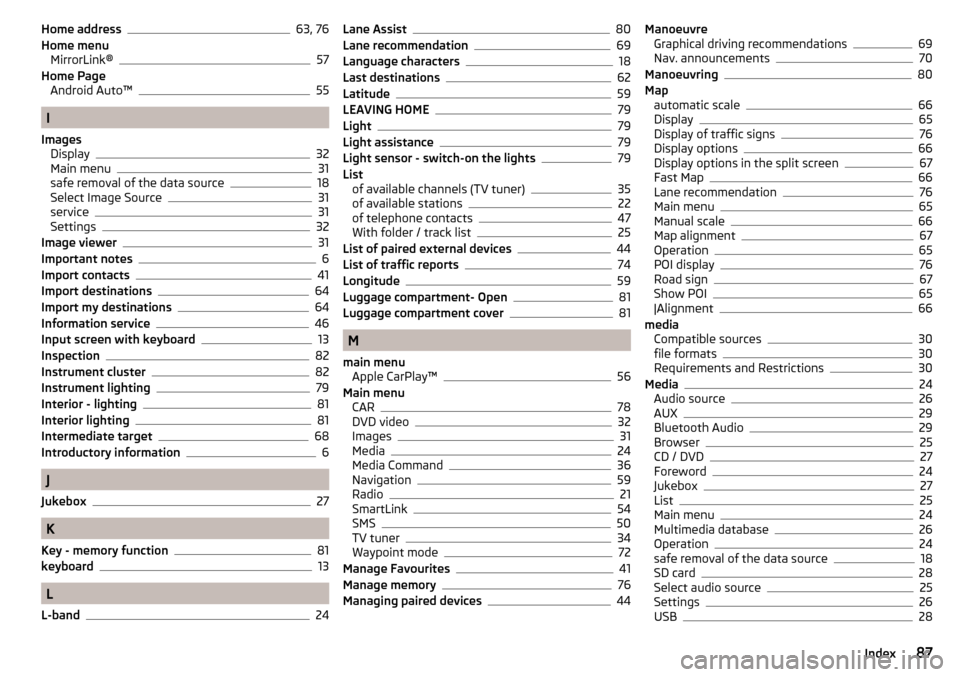
Home address63, 76
Home menu MirrorLink®
57
Home Page Android Auto™
55
I
Images Display
32
Main menu31
safe removal of the data source18
Select Image Source31
service31
Settings32
Image viewer31
Important notes6
Import contacts41
Import destinations64
Import my destinations64
Information service46
Input screen with keyboard13
Inspection82
Instrument cluster82
Instrument lighting79
Interior - lighting81
Interior lighting81
Intermediate target68
Introductory information6
J
Jukebox
27
K
Key - memory function
81
keyboard13
L
L-band
24
Lane Assist80
Lane recommendation69
Language characters18
Last destinations62
Latitude59
LEAVING HOME79
Light79
Light assistance79
Light sensor - switch-on the lights79
List of available channels (TV tuner)
35
of available stations22
of telephone contacts47
With folder / track list25
List of paired external devices44
List of traffic reports74
Longitude59
Luggage compartment- Open81
Luggage compartment cover81
M
main menu Apple CarPlay™
56
Main menu CAR
78
DVD video32
Images31
Media24
Media Command36
Navigation59
Radio21
SmartLink54
SMS50
TV tuner34
Waypoint mode72
Manage Favourites41
Manage memory76
Managing paired devices44
Manoeuvre Graphical driving recommendations69
Nav. announcements70
Manoeuvring80
Map automatic scale
66
Display65
Display of traffic signs76
Display options66
Display options in the split screen67
Fast Map66
Lane recommendation76
Main menu65
Manual scale66
Map alignment67
Operation65
POI display76
Road sign67
Show POI65
|Alignment66
media Compatible sources
30
file formats30
Requirements and Restrictions30
Media24
Audio source26
AUX29
Bluetooth Audio29
Browser25
CD / DVD27
Foreword24
Jukebox27
List25
Main menu24
Multimedia database26
Operation24
safe removal of the data source18
SD card28
Select audio source25
Settings26
USB28
87Index