turn signal SKODA FABIA 2016 3.G / NJ Columbus Amundsen Bolero Infotainment System Navigation Manual
[x] Cancel search | Manufacturer: SKODA, Model Year: 2016, Model line: FABIA, Model: SKODA FABIA 2016 3.G / NJPages: 100, PDF Size: 12.8 MB
Page 18 of 100
NoteDuring voice control, no navigation announcements and traffic announce-
ments are played.
voice commands
Requirements for optimum voice command recognition
▶ Speak with a normal tone of voice without intonation and excessive pauses.
▶ Avoid bad pronunciation.
▶ Close the doors, windows and sliding roof, in order to avoid disturbing envi-
ronmental influences on the function of the voice commands.
▶ You are recommended to speak louder at higher speeds, so that the sound of
your voice is not drowned out by the increased ambient noise.
▶ During voice control, limit additional noise in the vehicle, e.g. passengers
talking at the same time.
Voice commands can be used anytime during voice control.
Voice commandFunction“ Back ”Return to the previous menu“Help ”reproducing and displaying possible voice com-
mands
Voice commands that can be used while browsing the list entries.
Voice commandFunction“ Next page ”
Browse menu / list / directory
“Previous page ”“First page ”“Last page ”
Correction of a voice command input
A voice command can be corrected, modified or re-entered by pressing the
button
or the icon key
Operated on the multifunction steering wheel.
However, this is only possible as long as the symbol appears on the screen.
You do not have to wait until the voice command is recognized by the device.
Stop/restore voice command input
Stop
This allows you more time for the voice command input.
The process for voice command input can by turning the dial Be stopped.
When stopping, the symbol changes from
.
Restore
The procedure for voice command input can be restarted in one of the follow-
ing ways.
▶ By tapping on the function interface
.
▶ By pressing the button
on the device.
▶ By pressing the icon key
on the multifunction steering wheel.
Device settings
Configuration wizard
Fig. 19
Configuration wizard
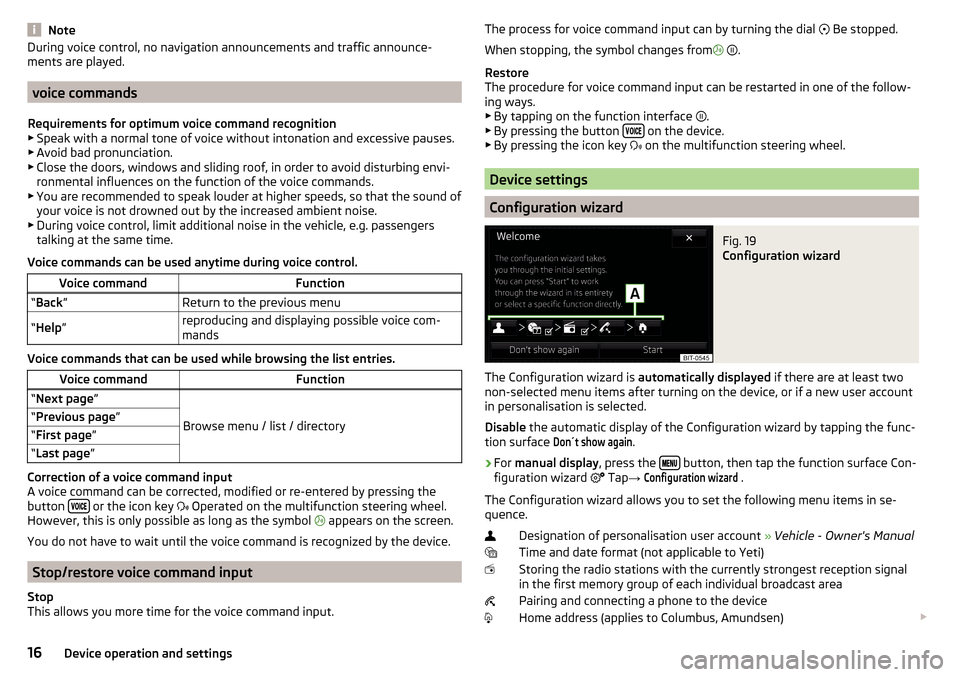
The Configuration wizard is automatically displayed if there are at least two
non-selected menu items after turning on the device, or if a new user account
in personalisation is selected.
Disable the automatic display of the Configuration wizard by tapping the func-
tion surface
Don´t show again
.
›
For manual display , press the button, then tap the function surface Con-
figuration wizard Tap
→
Configuration wizard
.
The Configuration wizard allows you to set the following menu items in se-
quence.
Designation of personalisation user account » Vehicle - Owner's Manual
Time and date format (not applicable to Yeti)
Storing the radio stations with the currently strongest reception signal in the first memory group of each individual broadcast area
Pairing and connecting a phone to the device
Home address (applies to Columbus, Amundsen)
16Device operation and settings
Page 20 of 100
NoteWith the Yeti model, the time and date settings are set via the MAXI DOT dis-
play » Owner's Manual .
Setting the device language
›
Press the button, then tap on the function surface
Tap
→
Language
.
›
Select the device language or tap the function surface
Automatic
to set the
MAXI DOT display matching language (applies to the Yeti).
In some languages, after selecting the function key
Female
and
Male
are dis-
played for the choice of voice prompts for the device.
Note
■ When a language is selected which does not support voice control, the de-
vice will indicate with a message on the screen .■
The messages are generated by the device. The flawless clarity (e.g. road or
city name) cannot always be guaranteed.
Additional keypad language settings
›
Press the button, then tap on the function surface
Tap →
Additionalkeypad languages
.
In this menu, a keyboard language set can be added to allow the entering of
characters other than those in the currently selected language (function sur-
face
).
Unit settings
›
Press the button, then tap on the function surface
Tap →
units
.
■
Distance:
- Distance units
■
Speed:
- Speed units
■
Temperature:
- Temperature units
■
Volume:
- Volume units
■
Consumption:
- Consumption units
■
CNG consumption:
- CNG consumption units (compressed natural gas)
■
Pressure:
- Pressure units for tyre pressure
Note
With the Yetimodel setting the device units is carried out via the MAXI DOT
display. » Owner's Manual .Setting data transfer
An active data transfer allows data transfer between the device and the exter-
nal device (e.g. MirrorLink ®
application) or the operation of some device func-
tions using the application of the external device (e.g. ŠKODA Media
Command).›
Press the button, then tap on the function surface
Tap →
Mobile devicedata transfer
.
■
Enable data transfer for ŠKODA apps
- Turning data transfer on and off
■
Operation by Apps:
- Setting device operation via the applications of the exter-
nal device (applies to Columbus)
■
Deactivate
- Prohibition of device operation through an external device
■
Confirm
- Device operation with required confirmation
■
Allow
- Device operation without any restriction
Voice control settings
›
Press the button, then tap on the function surface
Tap
→
voice control
.
■
Example commands (Infotainment system)
-Display available commands - Switch
on/off the menu display containing basic voice commands when voice con-
trol is activated
■
Voice control session start tone
- Switch on/off the audible signal when turning on
the voice control
■
Voice control session end tone
- Switch on/off the audible signal when voice con-
trol ends
■
Input tone in voice dialogue
- Switch on/off the audible signal for the voice input
■
End tone in voice dialog
- Turn on / off the acoustic signal after the end of a voice
command
Safe removal of the external device
›
Press the button, then tap on the function surface
→
Remove safely:
Tap and select the external device to be removed.
Reset to factory settings
›
Press the button, then tap on the function surfaces
→
Factory settings
.
In this menu, all or only chosen settings can be restored.
18Device operation and settings
Page 23 of 100
Radio
Operation
Introduction to the subject
The device allows analogue radio reception of FM and AM frequency ranges as
well as DAB digital radio reception.
CAUTION
■ For vehicles with window antennas do not stick foil or metal coated stickers
to the window - Radio signal reception could be affected.■
Car parks, tunnels, tall buildings or mountains can interfere with the radio
signal even causing it to fail completely.
Main menu
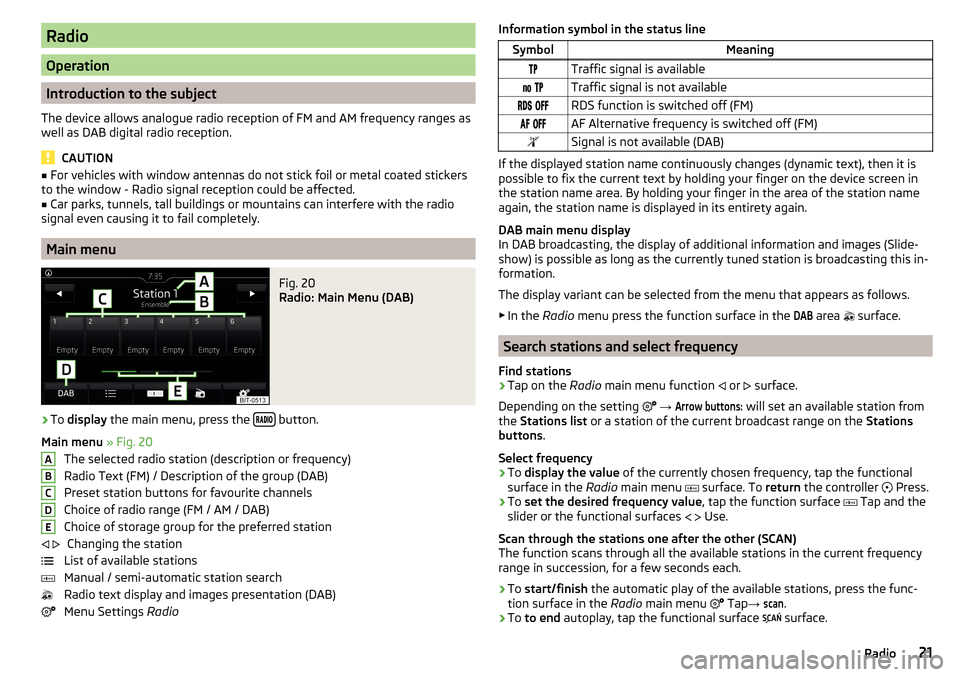
Fig. 20
Radio: Main Menu (DAB)
›
To display the main menu, press the button.
Main menu » Fig. 20
The selected radio station (description or frequency)
Radio Text (FM) / Description of the group (DAB)
Preset station buttons for favourite channels
Choice of radio range (FM / AM / DAB) Choice of storage group for the preferred station Changing the station
List of available stations
Manual / semi-automatic station search
Radio text display and images presentation (DAB)
Menu Settings Radio
ABCDE Information symbol in the status lineSymbolMeaningTraffic signal is available Traffic signal is not available RDS function is switched off (FM) AF Alternative frequency is switched off (FM)Signal is not available (DAB)
If the displayed station name continuously changes (dynamic text), then it is
possible to fix the current text by holding your finger on the device screen in
the station name area. By holding your finger in the area of the station name
again, the station name is displayed in its entirety again.
DAB main menu display
In DAB broadcasting, the display of additional information and images (Slide-
show) is possible as long as the currently tuned station is broadcasting this in-
formation.
The display variant can be selected from the menu that appears as follows. ▶ In the Radio menu press the function surface in the
DAB
area
surface.
Search stations and select frequency
Find stations
›
Tap on the Radio main menu function
or
surface.
Depending on the setting
→
Arrow buttons:
will set an available station from
the Stations list or a station of the current broadcast range on the Stations
buttons .
Select frequency
›
To display the value of the currently chosen frequency, tap the functional
surface in the Radio main menu
surface. To
return the controller
Press.
›
To
set the desired frequency value , tap the function surface
Tap and the
slider or the functional surfaces
Use.
Scan through the stations one after the other (SCAN)
The function scans through all the available stations in the current frequency
range in succession, for a few seconds each.
›
To start/finish the automatic play of the available stations, press the func-
tion surface in the Radio main menu
Tap
→
scan
.
›
To to end autoplay, tap the functional surface
surface.
21Radio
Page 25 of 100
Remove channel logo manually›Tap on the Radio main menu function →
Station logos
.›
Tap on the station button from which you want to remove a logo.
Update station logos
Current information on the on available software, the components of which
are also station logos, can be found on the following ŠKODAwebsite.
http://go.skoda.eu/infotainment
Note
■ The following image formats are supported: jpg, gif, png, bmp.■We recommend a resolution of up to 500 x 500 pixels.
TP Traffic programme
›
To switch on/off the traffic monitoring in the main menu Radio, tap on the
function surface
→
Traffic programme (TP)
.
During a traffic announcement, it is possible to cancel the current announce-
ment if necessary by deactivating the traffic monitoring.
Note
■ Should this station not transmit traffic reports or the signal is not available,
then the device automatically searches in the background for another TP sta-
tion.■
During playback in menu Media or a station in the AM radio range, traffic
news is received from the previously selected FM radio range.
Settings
Settings for all broadcasting areas
›
Tap on the Radio main menu function
surface.
■
Sound
- sound settings
■
Scan
- Auto-play all available stations in the current frequency band, each sta-
tion for around 5 seconds
■
Arrow buttons:
- setting the function of the station change (function surfaces
)
■
Preset list
- Change between stations stored under the preset buttons
■
Station list
- Change between all available stations of the selected broad-
casting range
■
Traffic programme (TP)
- Switches TP traffic programme on/off
■Delete presets - Deletes the preset buttons
■Station logos
- manual assignment /removal of station logos
■
Radio text
- Switching the text display radio (valid only for FM and DAB) on and
off
■
Advanced settings
- further settings that are different depending on the selec-
ted broadcasting range(valid only for FM and DAB)
Advanced Settings (FM)
›
Select the FM band in the Radio main menu and tap on the function surface
Tap →
Advanced settings
.
■
Auto-save station logos
- Automatic storage of the station logos
■
Region for station logo
- Clarification of the station logo region
■
Automatic frequency control (AF)
- Search for alternative frequencies of the station
currently being played to on/off
■
Radio Data System (RDS)
- enable/disable RDS function (receiving additional in-
formation from the station)
■
RDS Regional:
- Setting of the automatic change to a regional related stations
with stronger reception signal
■
Fix
- Turn off the automatic change
■
Automatic
- Switching on the automatic change
Advanced settings (DAB)
›
In the Radio main menu, select the DAB range and tap on the function sur-
face Tap
→
Advanced settings
.
■
Auto-save station logos
- Automatic storage of the station logos
■
DAB traffic announcements
- Switch on/off DAB traffic announcements
■
Other DAB announcements
- Switch on/off other announcements (e.g., warnings,
regional weather, sports reports, financial news)
■
DAB - DAB station tracking
- Switch on/off automatic DAB station tracking on an-
other frequency or in other station groups
■
Automatic DAB - FM switching
- Switch on/off auto-switching from DAB to the FM
broadcasting range if the DAB signal is lost
■
L-band
- Enable / disable the availability of L-band
DAB station tracking
When a DAB transmitter is a part of several broadcast stations and if the cur-
rent station group is not available on any other frequency, then when the sig-
nal is poor, the same station will be searched in another channel group.
23Radio
Page 37 of 100
Note■For safety reasons, the image display is switched off at speeds over 5 km/h.
Only the sound continues. The message: Vehicle is in motion.
appears on the
screen.
The display has been switched off for your safety.■
Tap on the function
Also offers the option to select AV (Audio Video Sig-
nal) as a signal source. However, no input is present in the vehicle for this
source.
List of available stations and preset list
In the list of available stations, stations that have an adequately strong signal
are presented in alphabetical order.
›
to Display the list of available stations From theTV tuner main menu , tap on
the functional surface Tap or the controller
Turn.
›
To
Store a station on a station button in the list of available stations first
tap on the functional surface
Save
and then the corresponding preset button.
Up to 99 stations can be stored in the preset list.
Find available stations and select
The unit has a TV tuner to receive digital TV channels DVB-T and DVB-T2 (only
Codec h. 264).
Setting stations
›
In the main menu TV tuner press the function surface
→
or
surface.
A search commences in the selected direction and stops at the next station
group with sufficient signal strength.
The search is performed again by pressing the function surface or
stopped.
Select a station from the preset list
›
In the main menu TV tuner press the function surface
surface.
›
Select the desired station.
Select the station from the station list
›
In the main menu TV tuner turn the control
turn or the functional surface
surface.
›
Select the desired station.
EPG and teletextFig. 33
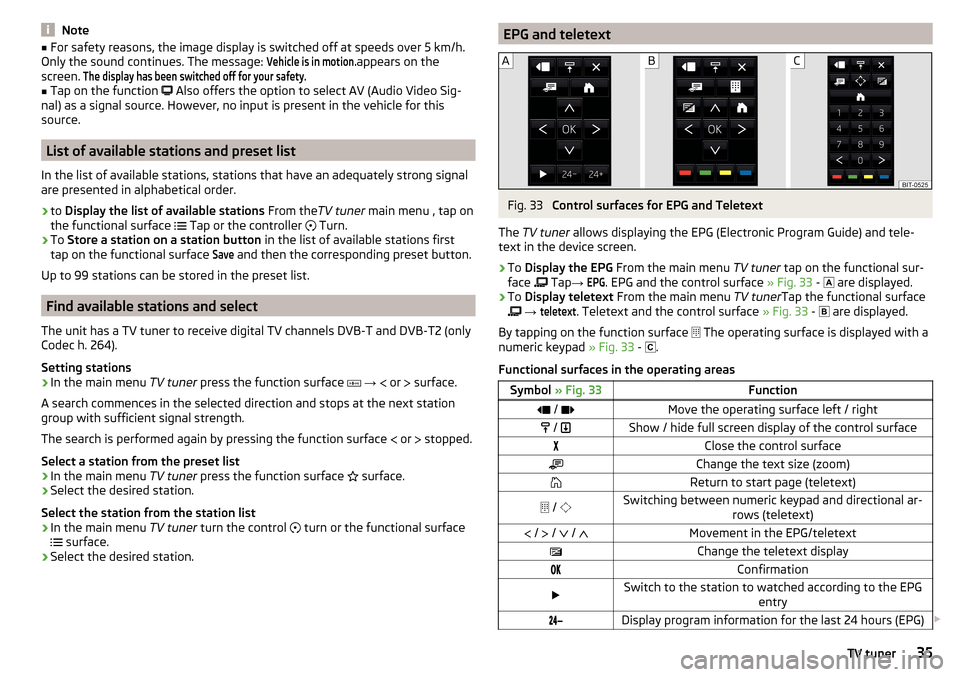
Control surfaces for EPG and Teletext
The TV tuner allows displaying the EPG (Electronic Program Guide) and tele-
text in the device screen.
›
To Display the EPG From the main menu TV tuner tap on the functional sur-
face Tap
→
EPG
. EPG and the control surface » Fig. 33 -
are displayed.
›
To
Display teletext From the main menu TV tunerTap the functional surface
→
teletext
. Teletext and the control surface » Fig. 33 -
are displayed.
By tapping on the function surface The operating surface is displayed with a
numeric keypad » Fig. 33 -
.
Functional surfaces in the operating areas
Symbol » Fig. 33Function / Move the operating surface left / right / Show / hide full screen display of the control surfaceClose the control surfaceChange the text size (zoom)Return to start page (teletext) / Switching between numeric keypad and directional ar-
rows (teletext) / / / Movement in the EPG/teletextChange the teletext displayConfirmationSwitch to the station to watched according to the EPG
entryDisplay program information for the last 24 hours (EPG) 35TV tuner
Page 41 of 100
Phone
Introductory information
Introduction to the subject
This chapter deals with the operation of a device with the telephone connec- ted via Bluetooth ®
as well as the use of the SIM-card in the external module.
Depending on the Bluetooth ®
-profile used it is possible to connect to a tele-
phone or two phones simultaneously to the device.
The SIM card in the external module can be used for data and telephone serv-
ices (applies to Columbus).
If telephones are connected to the device with multiple SIM cards, then calls
can be accepted by all SIM cards of the connected telephones.
For outgoing calls, it depends on the type of connected telephone, either only
the primary SIM card or one of the other SIM cards can be selected.
The device makes it possible to choose if you want to work with text messag-
es on the main phone (if supported by phone), or work with text messages in-
serted in the external module.
If the device to is connected to an external device via Apple CarPlay ™
, then the
use of the Bluetooth ®
Connection is not possible and the phone menu is not
available. A possible data connection via the SIM card remains operational
» page 53 .
If the device is connected to an external device via Android Auto ™
then the
connected phones and the Bluetooth ®
player are automatically disconnected
by connecting to external device and it connects to the device via Bluetooth ®
.
Connecting an additional telephone and the use of telephone services on the
SIM card via Android Auto ™
is not possible over the duration of the connection.
If the Bluetooth ®
Feature was not turned on in external device to be connec-
ted, it will be automatically switched on usingAndroid Auto ™
switched when
setting up the connection. A possible data connection via the SIM card remains
operational » page 53.
Phonebox
The storage compartment in the front centre console can be equipped with
the Phonebox function » Owner's Manual .
If a telephone is directed, with its rear side downwards, on the pad in the stor-
age compartment, the phone signal is amplified by the roof antenna.
Telephones that support the Qi standard for wireless charging, can also be charged wirelessly in the storage compartment.WARNINGThe general binding country-specific regulations for operating mobile
phones in the vehicle must be observed.WARNINGWhile wireless charging is taking place, no objects may be between the pad
and the telephone being charged.■
Metal objects can become hot due to the action of the induction field -
There is a risk of injury. If there is a metal object in the storage compart-
ment that has become hot, then take out the telephone and let the object
cool in the storage compartment!
CAUTION
While wireless charging is taking place, there may be noobjects between the
pad and the telephone being charged - thePhoneboxFunction could be im-
paired.■
With cards with a magnetic strip or chip, SD card, USB flash drives and similar
devices, there is a risk of data loss and damage to the disk.
■
Metal objects can become hot due to the action of the induction field - there
is a risk of damage to the telephone.
Note
■ At the start of the wireless charging, the appropriate message appears on
the device screen.■
For optimum telephone signal strength and uninterrupted wireless charging,
we recommend placing the phone in the storage compartment without the
protective sleeve, if possible.
■
It is normal for the telephone to heat up during the wireless charging.
39Phone
Page 44 of 100
■Profile Name: - Rename the profile of the SIM card inserted in the external
module
■Import contacts:
- Import phone contacts
■
Select device contacts
- Open the paired telephones menu (if the SIM card is in-
serted in the external module) (applies to Columbus)
■
Select ring tone
- Selecting the ring tone
■
Reminder: Remember your mobile
- Turn on/off the warning mode before forget-
ting the phone in the vehicle (if the phone was connected to the device)
■
Show pictures for contacts
- Switch on/off the display of the image assigned to
the contact
■
Conference
- Activates/deactivates conference calls
■
Call settings
- Setting the phone features of the inserted in the external mod-
ule SIM card during a call (applies to Columbus) ■
Hold call
Switch on/off the display of the option for answering an incoming
call during a call, determining the current divert setting
■
On
- Turn on the display
■
Off
- Turn off the display
■
Request status
- Checking the settings of the SIM card function
■
Send own number
- Setting the phone number display on the call recipient
■
On
- Turn on the display
■
Off
- Turn off the display
■
Network dependent
- Telephone service provider dependent display
■
Request status
- Checking the settings of the SIM card function
■
Clear calls
- Deleting the selected type of called carried out using the SIM card
inserted in the external module (applies to Columbus)
■
All
- Delete all calls
■
Missed calls
- Delete list of missed calls
■
Dialled numbers
- Deletion of outgoing calls
■
Received calls
- list of received calls
■
SMS settings
- Adjustment of text messages of the SIM card inserted in the ex-
ternal module (applies to Columbus)
■
Standard account
- Setting for the use of text messages on the SIM card or the
connected telephone
■
No standard account
- Without priority (selection of the SIM card or the con-
nected telephone required)
■
SIM
- A list of text messages on the SIM card
■
MAP
- A list of text messages of the connected telephone
■
Service centre number:
- Setting the number of SMS services of the telephone
service provider
■
Store sent text messages
- Enable / disable the storage of the text message on
the SIM card
■Period of validity- Adjustment of the period in which the telephone service
provider will try to send the text message (for example, when power is off.)
■Delete text messages
- Delete the text message stored on the SIM card
■
All
- Delete all text messages
■
Inbox
- Delete the text messages received
■
Outbox
- Delete draft text messages
■
Sent
- Delete sent text messages
■
Phone Interface “Business”
- Turn on / off the phone function of the external
module (applies to Columbus)
■
Use SIM card only for data connection
- Switch on - activation of only data services /
Switch off - Activation of data and voice services of the inserted SIM card
(applies to Columbus)
■
network
- Setting the telephone service provider network of the SIM card in-
serted in the external module (applies to Columbus) » page 19
■
settings PIN
- Setting the PIN code of the SIM card inserted in the external
module (applies to Columbus) ■
Automatic PIN entry
- Enable / disable the storage of the PIN code of the SIM
card
■
Change PIN
- Change the PIN code of the SIM card
■
Add PIN 2
- Enter the second PIN code of the SIM card (when the function
Automatic PIN entry
is on or when the SIM card supports another telephone
service provider)
■
Forward calls
- Setting the forwarding of incoming calls (applies to Columbus)
■
All calls
- Forward all incoming calls
■
If engaged
- Forwarding incoming calls during a telephone conversation
■
If not available
- Forwarding the incoming calls when the vehicle is outside
the reach of the telephone service provider signal
■
If no answer
- Redirecting incoming calls when the incoming call is not an-
swered
Pair and connect
Introduction to the subject
The range of the connection to the hands-free system is limited to the passen-
ger compartment.
To connect a telephone with the device, the two devices must be paired via
Bluetooth ®
.
The pairing procedure is dependent on the number of telephones already con-
nected, whether using the SIM card inserted in the external module or via the
telephone using the rSAP profile » page 40, Possible connection types .
42Phone
Page 81 of 100
DriveGreen›
Press the button, then tap on the function surface
→
DriveGreen
.
DriveGreen
- the driving efficiency is evaluated based on the information regard-
ing the driving style.
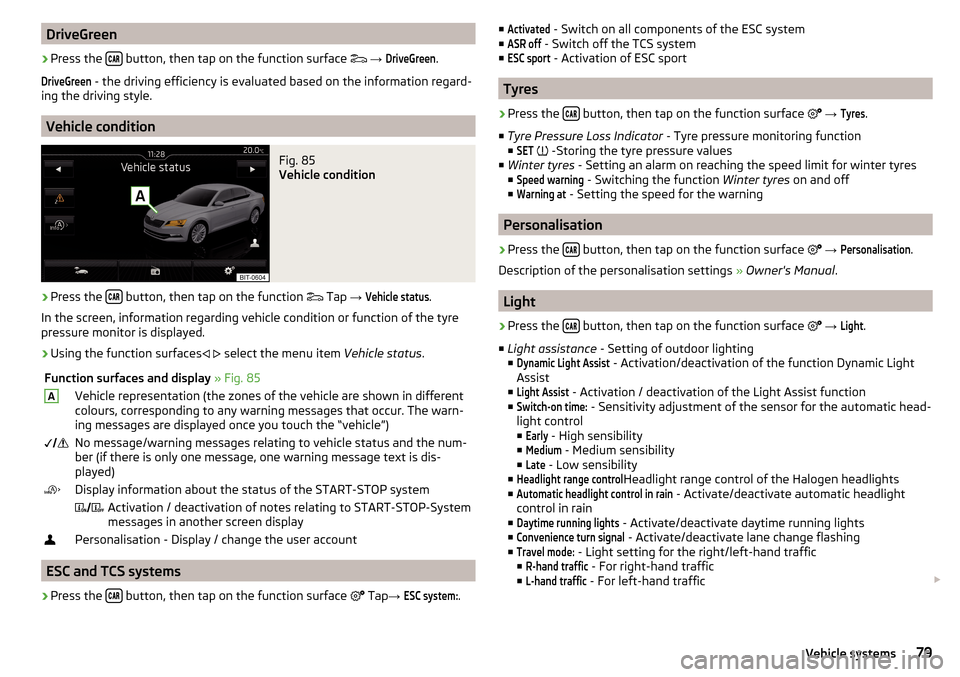
Vehicle condition
Fig. 85
Vehicle condition
›
Press the button, then tap on the function
Tap
→
Vehicle status
.
In the screen, information regarding vehicle condition or function of the tyre
pressure monitor is displayed.
›
Using the function surfaces
select the menu item
Vehicle status.
Function surfaces and display » Fig. 85AVehicle representation (the zones of the vehicle are shown in different
colours, corresponding to any warning messages that occur. The warn-
ing messages are displayed once you touch the “vehicle”) No message/warning messages relating to vehicle status and the num-
ber (if there is only one message, one warning message text is dis-
played)Display information about the status of the START-STOP system Activation / deactivation of notes relating to START-STOP-System
messages in another screen displayPersonalisation - Display / change the user account
ESC and TCS systems
›
Press the button, then tap on the function surface
Tap
→
ESC system:
.
■Activated - Switch on all components of the ESC system
■ASR off
- Switch off the TCS system
■
ESC sport
- Activation of ESC sport
Tyres
›
Press the button, then tap on the function surface
→
Tyres
.
■ Tyre Pressure Loss Indicator - Tyre pressure monitoring function
■
SET
-Storing the tyre pressure values
■ Winter tyres - Setting an alarm on reaching the speed limit for winter tyres
■
Speed warning
- Switching the function Winter tyres on and off
■
Warning at
- Setting the speed for the warning
Personalisation
›
Press the button, then tap on the function surface
→
Personalisation
.
Description of the personalisation settings » Owner's Manual .
Light
›
Press the button, then tap on the function surface
→
Light
.
■ Light assistance - Setting of outdoor lighting
■
Dynamic Light Assist
- Activation/deactivation of the function Dynamic Light
Assist
■
Light Assist
- Activation / deactivation of the Light Assist function
■
Switch-on time:
- Sensitivity adjustment of the sensor for the automatic head-
light control ■
Early
- High sensibility
■
Medium
- Medium sensibility
■
Late
- Low sensibility
■
Headlight range control
Headlight range control of the Halogen headlights
■
Automatic headlight control in rain
- Activate/deactivate automatic headlight
control in rain
■
Daytime running lights
- Activate/deactivate daytime running lights
■
Convenience turn signal
- Activate/deactivate lane change flashing
■
Travel mode:
- Light setting for the right/left-hand traffic
■
R-hand traffic
- For right-hand traffic
■
L-hand traffic
- For left-hand traffic
79Vehicle systems
Page 87 of 100
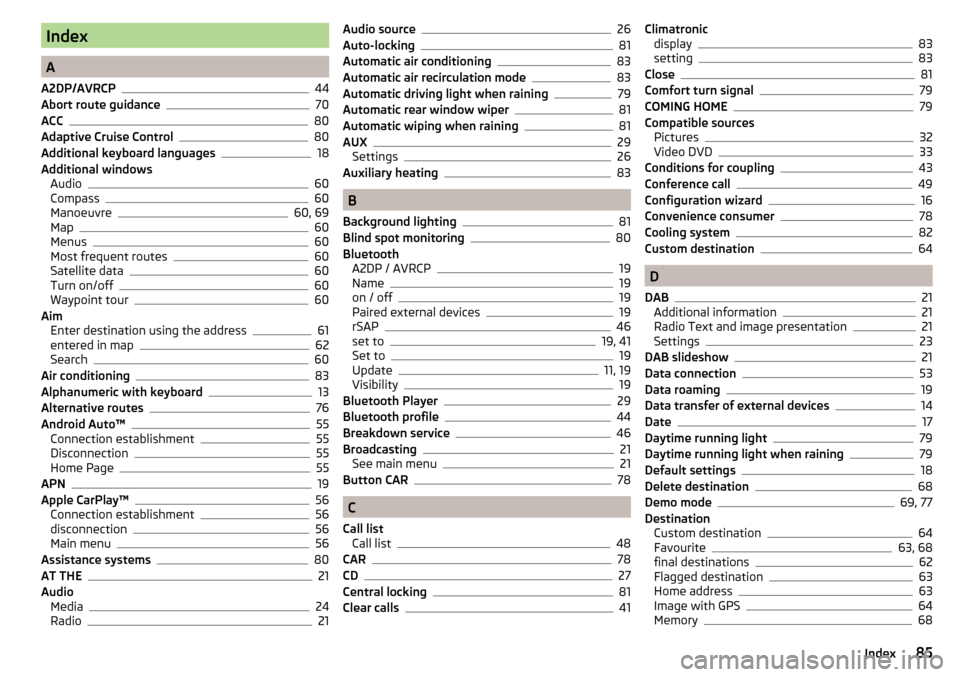
Index
A
A2DP/AVRCP
44
Abort route guidance70
ACC80
Adaptive Cruise Control80
Additional keyboard languages18
Additional windows Audio
60
Compass60
Manoeuvre60, 69
Map60
Menus60
Most frequent routes60
Satellite data60
Turn on/off60
Waypoint tour60
Aim Enter destination using the address
61
entered in map62
Search60
Air conditioning83
Alphanumeric with keyboard13
Alternative routes76
Android Auto™55
Connection establishment55
Disconnection55
Home Page55
APN19
Apple CarPlay™56
Connection establishment56
disconnection56
Main menu56
Assistance systems80
AT THE21
Audio Media
24
Radio21
Audio source26
Auto-locking81
Automatic air conditioning83
Automatic air recirculation mode83
Automatic driving light when raining79
Automatic rear window wiper81
Automatic wiping when raining81
AUX29
Settings26
Auxiliary heating83
B
Background lighting
81
Blind spot monitoring80
Bluetooth A2DP / AVRCP
19
Name19
on / off19
Paired external devices19
rSAP46
set to19, 41
Set to19
Update11, 19
Visibility19
Bluetooth Player29
Bluetooth profile44
Breakdown service46
Broadcasting21
See main menu21
Button CAR78
C
Call list Call list
48
CAR78
CD27
Central locking81
Clear calls41
Climatronic display83
setting83
Close81
Comfort turn signal79
COMING HOME79
Compatible sources Pictures
32
Video DVD33
Conditions for coupling43
Conference call49
Configuration wizard16
Convenience consumer78
Cooling system82
Custom destination64
D
DAB
21
Additional information21
Radio Text and image presentation21
Settings23
DAB slideshow21
Data connection53
Data roaming19
Data transfer of external devices14
Date17
Daytime running light79
Daytime running light when raining79
Default settings18
Delete destination68
Demo mode69, 77
Destination Custom destination
64
Favourite63, 68
final destinations62
Flagged destination63
Home address63
Image with GPS64
Memory68
85Index