spare wheel SKODA FABIA 2016 3.G / NJ Owner's Manual
[x] Cancel search | Manufacturer: SKODA, Model Year: 2016, Model line: FABIA, Model: SKODA FABIA 2016 3.G / NJPages: 196, PDF Size: 31.86 MB
Page 121 of 196

Towing device and trailer
Hitch
Introduction
This chapter contains information on the following subjects:
Description
119
Adjusting the ready position
120
Check the setting of the standby position
120
Assembling the bar ball - Step 1
120
Assembling the bar ball - Step 2
121
Check proper fitting
121
Removing the bar ball - Step 1
122
Removing the bar ball - Step 2
122
Vertical load with mounted accessories
123
The maximum trailer nose weight when towing a trailer is 50 kg. Other data
(e.g. shown onthe nameplate of the hitch) on provides information about the
test values of the device .
WARNING■ Check that the ball head is seated correctly and is secured in the mount-
ing recess before starting any journey.■
When the knee-joint bar is not used and properly secured in the receiving
shaft, it is damaged or incomplete, this must not be used - there is a risk of
an accident.
■
Do not modify or adapt the towing equipment in any way.
■
Keep the mounting recess of the towing equipment clean at all times.
Such dirt prevents the ball head from being attached securely.
DescriptionFig. 150
Carrier for the towing device / tow bar
Read and observe
on page 119 first.
The knee-joint bar is detachable and is located in the storage compartment for
the spare / emergency wheel.
Support for the towing device and tow bar » Fig. 150
Cover for the mounting recess
Mounting recess
Dust cap
Ball head
Operating lever
Lock cap
Release pin
Key
Locking ball
123456789119Towing device and trailer
Page 133 of 196

WARNINGThe brake fluid must always be changed after the first 3 years and then ev-
ery 2 years. Longer intervals between changing the brake fluid can cause
vapour bubbles to form in the brake system when braking sharply. This can
impair the efficiency of the brakes –There is a risk of accident!
Digital Service Plan
A specialist garage will not record the work carried out in a service evidence in
this Owner's Manual, but in the service information system called Digital Serv-
ice Plan.
We therefore recommend that you always have the record of work carried out
in a service printed out for you.
Benefits of the Digital Service Plan
▶ High level of security preventing manipulation of the entries.
▶ Transparent documentation of service work carried out.
▶ Protection against loss or damage of the entries – you receive a complete
service record of the work carried out, if required.
▶ Option to receive the record in electronic form.
▶ The vehicle can be serviced in any specialist garage (also abroad) – the data-
base is accessible worldwide.
▶ Increased transparency when purchasing a used vehicle due to entries being
stored centrally.
▶ The system entries support you in making a claim on the ŠKODA extended
warranty and mobility guarantees.
Cleaning and care
Introduction
This chapter contains information on the following subjects:
Car washing
131
Exterior car care
132
Removing ice and snow from the windows
133
Caring for the interior
134
Regular and thorough care helps to retain the value of your vehicle.
The instructions for use on the packaging must be observed when using care
products. We recommend that you use ŠKODA Original Accessories care prod-
ucts.WARNING■ Vehicle care products may be harmful to your health if not used according
to the instructions.■
Always keep the vehicle care products safe from people who are not com-
pletely independent, e.g. children - There is a danger of poisoning!
CAUTION
■ Do not use any insect sponges, kitchen scrubbers or similar cleaning prod-
ucts – there is a risk of damaging the paintwork finish.■
Do not use aggressive cleaning agents or chemical solvents - danger of dam-
aging the surface to be cleaned.
Note
We recommend that the vehicle is cleaned and maintained at a ŠKODA service
partner.
Car washing
Read and observe
and on page 131 first.
The best way to protect your vehicle against harmful environmental influences
is frequent washing.
The longer insect residues, bird droppings, road salt and other aggressive de-
posits remain adhering to your vehicle, the more detrimental their destructive
effect can be. High temperatures, such as those caused by intensive sun's
rays, accentuate this caustic effect.
It is also essential to thoroughly clean the underside of the vehicle at the end
of the winter.
Washing by hand
Wash the vehicle from top to bottom, with a soft sponge or a wash mitt and
plenty of water, and, if necessary, with the appropriate detergents. Wash out
the sponge or washing glove thoroughly at short intervals.
For wheels, door sills and lower areas of the vehicle use a different sponge.
Give the vehicle a good rinse after washing it and dry it off using a chamois
leather.
131Care and maintenance
Page 147 of 196
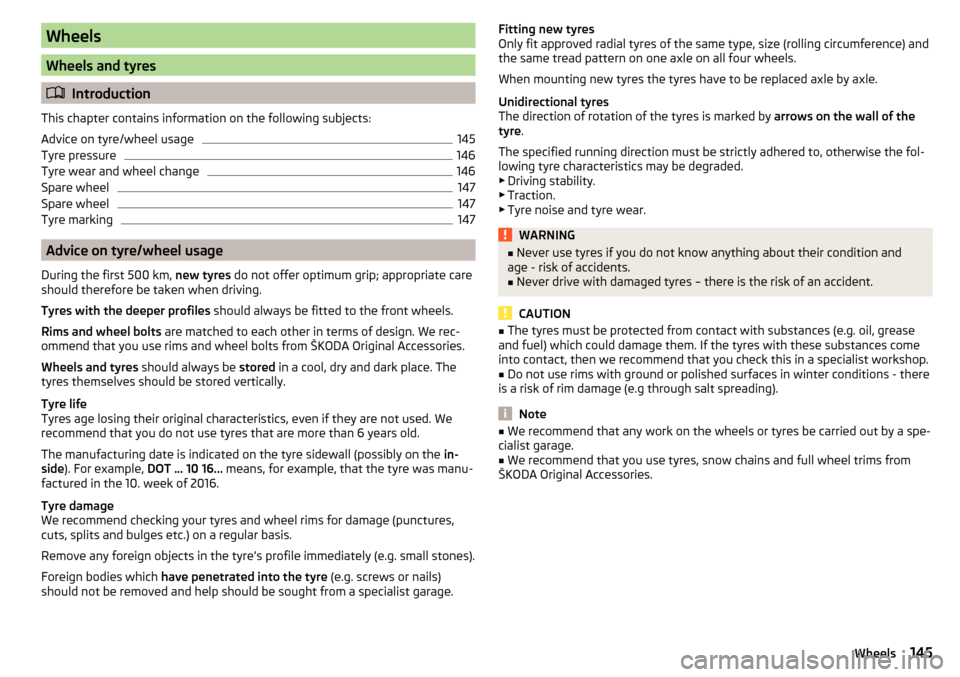
Wheels
Wheels and tyres
Introduction
This chapter contains information on the following subjects:
Advice on tyre/wheel usage
145
Tyre pressure
146
Tyre wear and wheel change
146
Spare wheel
147
Spare wheel
147
Tyre marking
147
Advice on tyre/wheel usage
During the first 500 km, new tyres do not offer optimum grip; appropriate care
should therefore be taken when driving.
Tyres with the deeper profiles should always be fitted to the front wheels.
Rims and wheel bolts are matched to each other in terms of design. We rec-
ommend that you use rims and wheel bolts from ŠKODA Original Accessories.
Wheels and tyres should always be stored in a cool, dry and dark place. The
tyres themselves should be stored vertically.
Tyre life
Tyres age losing their original characteristics, even if they are not used. We
recommend that you do not use tyres that are more than 6 years old.
The manufacturing date is indicated on the tyre sidewall (possibly on the in-
side ). For example, DOT ... 10 16... means, for example, that the tyre was manu-
factured in the 10. week of 2016.
Tyre damage
We recommend checking your tyres and wheel rims for damage (punctures,
cuts, splits and bulges etc.) on a regular basis.
Remove any foreign objects in the tyre’s profile immediately (e.g. small stones).
Foreign bodies which have penetrated into the tyre (e.g. screws or nails)
should not be removed and help should be sought from a specialist garage.
Fitting new tyres
Only fit approved radial tyres of the same type, size (rolling circumference) and
the same tread pattern on one axle on all four wheels.
When mounting new tyres the tyres have to be replaced axle by axle.
Unidirectional tyres
The direction of rotation of the tyres is marked by arrows on the wall of the
tyre .
The specified running direction must be strictly adhered to, otherwise the fol-
lowing tyre characteristics may be degraded. ▶ Driving stability.
▶ Traction.
▶ Tyre noise and tyre wear.WARNING■Never use tyres if you do not know anything about their condition and
age - risk of accidents.■
Never drive with damaged tyres – there is the risk of an accident.
CAUTION
■ The tyres must be protected from contact with substances (e.g. oil, grease
and fuel) which could damage them. If the tyres with these substances come
into contact, then we recommend that you check this in a specialist workshop.■
Do not use rims with ground or polished surfaces in winter conditions - there
is a risk of rim damage (e.g through salt spreading).
Note
■ We recommend that any work on the wheels or tyres be carried out by a spe-
cialist garage.■
We recommend that you use tyres, snow chains and full wheel trims from
ŠKODA Original Accessories.
145Wheels
Page 148 of 196

Tyre pressureFig. 174
Label with a table of tyre sizes and tyre pressure value / inflate
tyres
The prescribed tyre inflation is on the sticker with pictograms
A
» Fig. 174 (for
some countries, the pictograms are replaced with a text).
Tyre pressure is always to match the load .
Inflation pressure for half load
Inflation pressure for environmentally friendly operation (slightly lower
fuel consumption and emissions)
Inflation pressure for full load
Tyre diameter in inches
This information serves merely as information for the prescribed tyre pres-
sure. This is not a list of shared tyre sizes for your vehicle. These are in the
vehicle's technical documentation, in the declaration of conformity (in so-
called COC document) and listed on the vehicle data » page 173.
Tyre pressure value on the front axle
Tyre pressure value on the rear axle
Check tyre pressures
Check the tyre pressure (including that of the emergency or spare wheel) at
least once a month and also before setting off on a long journey.
Always check the inflation pressure when the tyres are cold. Do not reduce the
higher pressure of warm tyres.
In vehicles with tyre pressure monitoring, tyre pressure values must be saved
each time the pressures are changed » page 117.
BCDEFGWARNING■
Do not drive with incorrect tyre pressure - risk of accident.■In the event of very rapid pressure loss (e.g. in the event of tyre damage)
an attempt should be made to bring the vehicle carefully to a stop without
sudden steering movements and without any hard braking - risk of acci-
dent.
Note
The declaration of conformity (the COC document) can be obtained from a
ŠKODA partner 1)
.
Tyre wear and wheel change
Fig. 175
Tyre wear indicator / wheel change
Tyre wear increases in the following circumstances.
▶ Incorrect tyre pressures.
▶ Driving style (e.g. fast cornering, rapid acceleration / braking).
▶ Incorrect wheel balancing (you should have the wheels balanced after
changing/repair tyres or if the steering “is drifting”).
▶ Wheel alignment errors.
There are wear indicator markers in the tyre profiles, indicating whether the
minimum permissible tread depth has been reached » Fig. 175 -
. A tyre
should be regarded as worn out when this indicator is flush with the tread.
Markings on the walls of the tyres through the letters “TWI” and/or other sym- bols (e.g. ), identify the position of the wear indicators.
To ensure uniform wear on all tyres, we recommend that you change the
wheels every 10 000 km, in line with the schedule » Fig. 175 -
.
1)
Only valid for some countries and some models.
146General Maintenance
Page 149 of 196

WARNING■Change the tyres at the latest when they are worn down to the wear indi-
cators - risk of accident.■
Faulty wheel alignment affects handling - risk of accident.
■
Unusual vibrations or the vehicle“pulling” to one side could be a sign of
tyre damage. Reduce speed and stop! If there are no external signs of tyre
damage, seek the help of a specialist garage.
Spare wheel
The size of the spare wheel is identical to that of the vehicle factory installed
wheels.
After changing the spare wheel, the tyre pressure should be adjusted.
In vehicles with tyre pressure monitoring, save the tyre pressure values in the
system » page 117 .
WARNING■
If, you get a puncture and a spare tyre has to be mounted with opposite
direction of rotation, then drive carefully. In this situation the best proper-
ties of the tyre are no longer present.■
If the dimensions or design of the spare wheel differ from the tyres fitted
to the vehicle (e.g. winter tyres or low-profile tyres), it must only be used
briefly in the event of a puncture and if an appropriately cautious style of
driving is adopted.
Spare wheel
Only use this emergency spare wheel to reach the nearest specialist garage, as
it is not intended for permanent use .
A warning label is always placed on the rim of the temporary spare wheel.
Please note the following if you intend to use the temporary spare wheel. ▶ Do not cover the warning sign.
▶ Be specially attentive when driving.
▶ Inflate the emergency spare to the maximum inflation pressure for the vehi-
cle » page 146 .
In vehicles with tyre pressure monitoring, save the tyre pressure values in the
system » page 117 .
WARNING■
Never drive with more than one spare wheel mounted!■Avoid full throttle acceleration, sharp braking and fast cornering when
driving with the temporary spare wheel.■
Do not use snow chains on the temporary spare wheel.
■
Observe the instructions on the warning sign of the temporary spare
wheel.
Tyre marking
Explanation of tyre markings - e.g. 185/60 R 15 84 H
185Tyre width in mm60Height/width ratio in %RCode letter for the type of tyre – Radial15Diameter of wheel in inches84load indexHSpeed symbol
Load index - indicates the maximum permissible load for each individual tyre
load index838485868788Load
(In kg)487500515530545560
Speed symbol - indicates the maximum permissible speed for a vehicle fitted
with tyres in a given category
Speed symbolSTUHVWTopspeed (in km/h)180190200210240270WARNINGNever exceed the maximum permissible load bearing capacity and speed
for the tyres fitted – risk of accident.147Wheels
Page 152 of 196

Fire extinguisherFig. 179
Release the fire extinguisher
The fire extinguisher is attached by two straps in a bracket under the front
passenger's seat.
›
To remove the fire extinguisher, release the safety catches on the two belts
in the direction of arrow » Fig. 179and remove the fire extinguisher.
›
To secure , place the fire extinguisher back in the mount and secure with the
belts.
The Owner´s Manual is fitted next to the fire extinguisher.
Pay attention to the expiration date of the fire extinguisher. After this date,
the correct function of the device is not guaranteed.
WARNINGAlways properly secure the fire extinguisher, there is a risk of injury in the
event of sudden braking or a vehicle collision.Vehicle tool kitFig. 180
Vehicle tool kit
The box with the tool kit is located in the storage compartment for the spare
wheel and may be secured with tape, depending on specification.
Depending on the equipment, not all of the following components in the on-
board tool kit have to be contained in it.
Screwdriver
Top section for the anti-theft wheel bolts
Towing eye
Clamps for removing the wheel trims
Jack with sign
Wheel brace
Extraction pliers for the wheel bolt caps
Breakdown kit
WARNING■ The factory-supplied lifting jack is only intended for your model of vehicle.
Under no circumstances attempt to lift other vehicles or loads with it –
there is a risk of injury.■
Always stow the tool safely in the box and make sure that it is attached
with the belt to the spare wheel - otherwise it could cause injury to the oc-
cupants if breaking suddenly or colliding with another vehicle.
12345678150Do-it-yourself
Page 153 of 196
CAUTIONScrew the jack back to its starting position prior to putting it back in its box -
risk of damage to the box.
Note
The declaration of conformity is included with the jack or the log folder.
Changing a wheel
Preliminary work
For safety's sake, the following instructions must be observed before
changing a wheel on the road.
›
Park the vehicle as far as possible away from the traffic flow - choose a place
with a flat and firm surface.
›
Switch off the engine.
›
For vehicles with manual transmission select1, gear .
›
For vehicles with automatic transmission , place the selector lever in the P
position.
›
Firmly apply the handbrake.
›
Switch on the hazard warning lights and set up the warning triangle at the
prescribed distance.
›
Have all the occupants get out . The passengers should not stand on the
road while the wheel is being changed (they should remain behind a crash
barrier, for instance).
›
Uncouple any trailers.
Changing a wheel
›
Take out the emergency or spare wheel » page 152.
›
Remove the full wheel trim » page 152or caps» page 152 .
›
Loosen the wheel bolts » page 153 » .
›
Jack up the vehicle » page 153 until the wheel that needs changing is clear of
the ground.
›
Unscrew the wheel bolts and place them on a clean surface (cloth, paper,
etc.).
›
Remove the wheel carefully.
›
Attach the spare wheel and slightly screw on the wheel bolts.
›
Lower the vehicle.
›
Tighten the wheel bolts opposite each other using the wheel wrench (“pull- ing crossways”) » page 153.
›Replace the wheel trim
» page 152and caps» page 152 .
When fitting unidirectional tyres, ensure that the direction of rotation is cor-
rect » page 145 .
All bolts must be clean and must turn easily. If screws are corroded and diffi-
cult to move, these must be replaced.WARNING■ Undo the wheel bolts just a little (about one turn), provided the vehicle
has not yet been jacked up. Otherwise the wheel could come loose and fall
off – risk of injury.■
Under no circumstances must the bolts be greased or oiled - cause an ac-
cident.
Subsequent steps
After changing the wheel, the following work should be carried out.
›
Stow the replaced wheel in the well under the floor covering of the luggage
compartment and secure it with a nut.
›
Stow the tool kit in the space provided and secure using the strap.
›
Check tyre pressure on the mounted wheel and adjust if necessary and, with
vehicles with tyre pressure monitoring, save the tyre pressure values in the
system » page 117 .
›
Have the tightening torque of the wheel bolts checked as soon as possible.
The prescribed tightening torque is 120 Nm.
Change the damaged wheel or consult a specialist garage about repair possi-
bilities.
WARNINGTightening torque which is too high can damage the threads and this can
result in permanent deformation of the contact surfaces on the rim. Where
tightening torque is too low, the wheels may become loose while driving -
risk of accident. Therefore drive cautiously and only at a moderate speed
until the tightening torque has been checked.151Emergency equipment, and self-help
Page 154 of 196
Removing/stowing the emergency or spare wheelFig. 181
Taking the wheel out
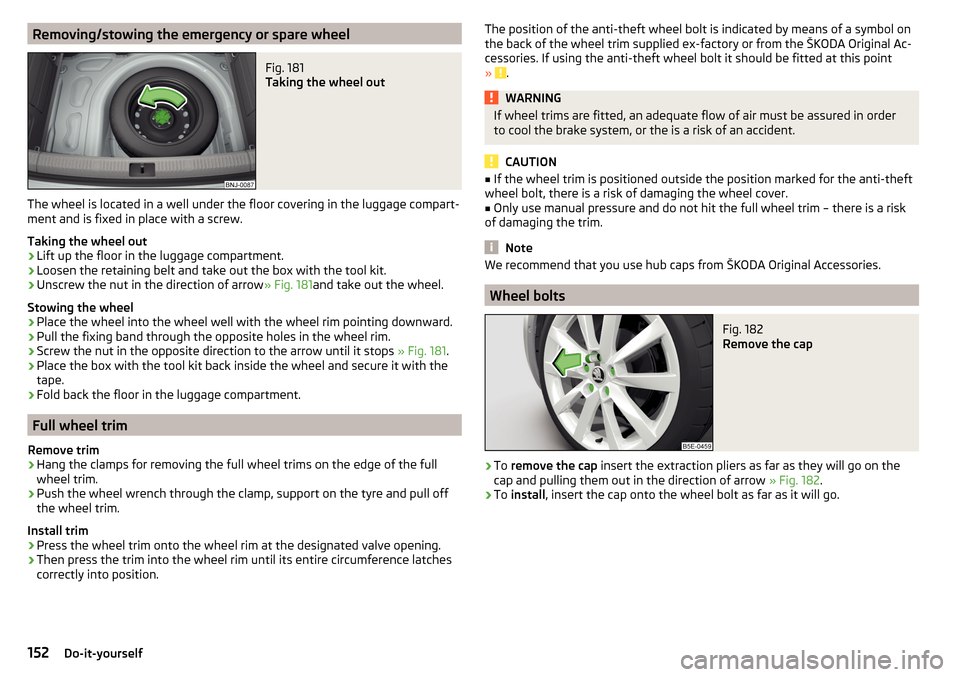
The wheel is located in a well under the floor covering in the luggage compart-
ment and is fixed in place with a screw.
Taking the wheel out
›
Lift up the floor in the luggage compartment.
›
Loosen the retaining belt and take out the box with the tool kit.
›
Unscrew the nut in the direction of arrow » Fig. 181and take out the wheel.
Stowing the wheel
›
Place the wheel into the wheel well with the wheel rim pointing downward.
›
Pull the fixing band through the opposite holes in the wheel rim.
›
Screw the nut in the opposite direction to the arrow until it stops » Fig. 181.
›
Place the box with the tool kit back inside the wheel and secure it with the
tape.
›
Fold back the floor in the luggage compartment.
Full wheel trim
Remove trim
›
Hang the clamps for removing the full wheel trims on the edge of the full
wheel trim.
›
Push the wheel wrench through the clamp, support on the tyre and pull off
the wheel trim.
Install trim
›
Press the wheel trim onto the wheel rim at the designated valve opening.
›
Then press the trim into the wheel rim until its entire circumference latches
correctly into position.
The position of the anti-theft wheel bolt is indicated by means of a symbol on
the back of the wheel trim supplied ex-factory or from the ŠKODA Original Ac-
cessories. If using the anti-theft wheel bolt it should be fitted at this point
»
.
WARNINGIf wheel trims are fitted, an adequate flow of air must be assured in order
to cool the brake system, or the is a risk of an accident.
CAUTION
■ If the wheel trim is positioned outside the position marked for the anti-theft
wheel bolt, there is a risk of damaging the wheel cover.■
Only use manual pressure and do not hit the full wheel trim – there is a risk
of damaging the trim.
Note
We recommend that you use hub caps from ŠKODA Original Accessories.
Wheel bolts
Fig. 182
Remove the cap
›
To remove the cap insert the extraction pliers as far as they will go on the
cap and pulling them out in the direction of arrow » Fig. 182.
›
To install , insert the cap onto the wheel bolt as far as it will go.
152Do-it-yourself
Page 176 of 196

Maximum permissible front axle load
Maximum permissible rear axle load
Vehicle identification number (VIN)
The vehicle identification number - VIN (vehicle body number) is stamped on
the right hand suspension strut dome in the engine compartment. This num-
ber is also located on a sign on the lower left hand edge below the windscreen
(together with a VIN bar code), together with a nameplate.
The VIN number can also be displayed in Infotainment » Owner´s Manual Info-
tainment .
Engine number
The engine number (three-digit code letter and serial number) is stamped onto
the engine block.
Supplementary Information (applies to Russia)
The full type approval number of the means of transport is indicated in the
registration documents, field 17.
Maximum permissible trailer weight
The listed maximum permissible trailer weight is only valid for altitudes up to
1000 m above sea level.
The engine output falls as altitude increases, as does the ability to climb.
Therefore, for every additional 1,000 m in height (or part), the maximum per-
missible towed weight must be reduced by 10 %.
The towed weight comprises the actual weights of the (loaded) towing vehicle and the (loaded) trailer.WARNINGDo not exceed the specified maximum permissible weights – risk of an acci-
dent and damage.
Operating weight
This value is only a guide value and corresponds to the lowest possible operat-
ing weight without any equipment added that would also increase the weight
(e.g. air conditioning, emergency or spare wheel etc.). It also includes a weight
allowance for the driver (75 kg), the weight of the operating fluids, the tool kit
and a fuel tank filled to 90 % capacity.
1011Operating weight - FabiaEngineGearboxOperating weight (kg)1.0 l/44 kW MPIMG10551.0 l/55 kW MPIMG (EU6)1055MG (EU4)10501.2 l./66 kW TSIMG11091.2 ltr./81 kW TSIMG1129DSG11541.6 l./66 kW MPIMG10861.6 l./81 kW MPIAG11261.4 l/55 kW TDI CRMG11561.4 l/66 kW TDI CRMG1156DSG11861.4 l/77 kW TDI CRMG1165
Operating weight - Fabia Combi
EngineGearboxOperating weight (kg)1.0 l/55 kW MPIMG (EU6)1079MG (EU4)10741.2 ltr./66 kW TSIMG11331.2 ltr./81 kW TSIMG1153DSG11781.6 l./66 kW MPIMG11101.6 l./81 kW MPIAG11501.4 l/55 kW TDI CRMG11801.4 l/66 kW TDI CRMG1180DSG12101.4 l/77 kW TDI CRMG1189
Note
If required, you can find out the precise weight of your vehicle by contacting a
specialist garage.174Technical data
Page 190 of 196
Seat belts13
Belt tensioners15
fastening and unfastening14
Seatbelts Inertia reels
15
Seat belts Warning light
29
Seats Adjusting the front seats
62
front62
Front armrest63
Headrests64
Heating65
Rear63
Rear seat64
Rear seat backrests63
Setting62
Seats and headrest62
see Instrument cluster see Instrument cluster
27
Selector lever96
Selector lever control96
Selector lever lock Warning light
33
service127
Service Service interval display
41
Warning light36
Service intervals129, 130
Service Plan131
Setting Headrests
64
Mirror61
Seat belt height14
Seats62
Setting the Clock
37
Set to lower position of the variable loading floor
81
upper position of the variable loading floor81
shifting Tiptronic97
SmartGate connection using Wi-Fi direct
43
Connection via Wi-Fi42
introductory information42
Password/PIN code change43
Setting43
SmartLink See Owner´s Manual -Infotainment
6
Snow chains148
sockets 12-volt power socket in the luggage compart-ment
70
12-volt socket in the interior70
Sound See Owner´s Manual -Infotainment
6
Spare wheel147
Removing / stowing152
Speed limiter108
Warning light33
Speed regulating system Warning light
33
Speed symbol147
Spoiler128
Stabilisation system101
Stability Control (ESC)101
START-STOP92
Jump-starting157
Manually deactivating/activating the system93
operation92
Warning light35
START-STOP system92
Start engine Immobilizer
90
Starter button Lock / unlock the steering lock
90
Problems with the engine start92
Starting / stopping the engine91
Switch on/off ignition91
Starting engine Jump-starting156
Starting the engine Jump-starting
157
Key91
Starter button91
Steering lock (KESSY system) Warning light
30
steering wheel Correct posture
11
Steering wheel Buttons
38
setting11
Stopping see Parking
94
Stopping the engine Key
91
Starter button91
Storage66
storage compartment Glasses compartment
71
under the passenger seat72
Storage compartment in the doors
67
in the front arm rest71
in the front centre console67
in the rear centre console73
on the dash panel68
on the front passenger side71
on the side of the front seat72
Storage compartments66
sun visor59
Sun visors59
Switch Car battery
144
Switching the lights on and off53
Switch off Alarm
49
Switch off ignition91
Key91
188Index