transmission oil SKODA FABIA 2016 3.G / NJ Owner's Manual
[x] Cancel search | Manufacturer: SKODA, Model Year: 2016, Model line: FABIA, Model: SKODA FABIA 2016 3.G / NJPages: 196, PDF Size: 31.86 MB
Page 4 of 196

Table of Contents
Materials defect liability and ŠKODA warranty
for new cars4
On-board literature
6
Notes
7
Structure of the Owner's Manual and further
information
8
Abbreviations
Safety
Passive Safety
10
General information
10
Correct and safe seated position
10
Seat belts
13
Wearing seat belts
13
Inertia reel and belt pre-tensioners
15
Airbag system
16
Description of the airbag system
16
Airbag deactivation
18
Transporting children safely
20
Child seat
20
Fastening systems
23
Operation
cockpit
26
Overview
25
Instruments and warning lights
27
Instrument cluster
27
Warning lights
28
Information system
36
Driver information system
36
Operation of the information system
38Driving data (Multifunction display)38MAXI DOT display40
Service interval display
41
SmartGate
42
Unlocking and opening
44
Unlocking and locking
44
Anti-theft alarm system
49
Tailgate
50
window operation
50
Lights and visibility
53
Lights
53
Interior lighting
57
Visibility
58
Windscreen wipers and washers
59
Rear view mirror
61
Seats and headrests
62
Front seats
62
Rear seats
63
Headrests
64
Front seat heater
65
Useful features
66
Interior fittings
66
Tablet holder
73
Transport of cargo
75
Luggage compartment and transporting
objects
75
Variable loading floor in the luggage
compartment
81
Bicycle carrier in the luggage compartment
82
Transportation on the roof rack
84
Heating and ventilation
85
Heating, manual air conditioning system,
Climatronic
85Driving
Starting-off and driving90
Starting and stopping the engine
90
START-STOPsystem
92
Brakes and Parking
93
Manual gear shifting and pedals
95
Automatic transmission
96
Running in and economical driving
98
Avoiding damage to your vehicle
99
Assist systems
100
General information
100
Braking and stabilisation systems
101
Parking aid (ParkPilot)
103
Reversing camera
105
Cruise Control System
107
Speed limiter
108
Adaptive Cruise Control (ACC)
110
Front Assist
114
Fatigue detection
116
Tyre pressure monitoring
117
Towing device and trailer
119
Hitch
119
Using hitch
123
General Maintenance
Care and maintenance
127
Service work, adjustments and technical
alterations
127
Service intervals
129
Cleaning and care
131
Inspecting and replenishing
135
Fuel
135
Engine compartment
137
Engine oil
139
Coolant
1402Table of Contents
Page 96 of 196

Before negotiating a long or steep gradient , reduce speed and shift down a
gear. As a result, the braking effect of the engine will be used, reducing the
load on the brakes. If, nevertheless, there is a need for additional braking, it
should be carried out at intervals.
Emergency braking warning - If it is necessary to brake hard, the system may
cause the brake lights to automatically flash, to alert the traffic behind.
New brake pads must first be““run in”” because these do not initially have the
best possible braking effect. Drive especially carefully for the first 200 km or
so.
If the brake fluid level is too low, it can cause faults in the braking system ;
the warning light will light up in the instrument cluster » page 29
,
Braking
system . If the warning light does not light up, yet the stopping distance is per-
ceived to be longer than before, the driving style should be adapted in view of
the unknown cause of the problem, and braking kept to a minimum - seek the
help of a specialist garage without delay.
The brake booster increases the pressure generated with the brake pedal. The
brake booster only operates when the engine is running.WARNING■ Greater physical effort is required for braking when the engine is switch-
ed off – risk of accident.■
The clutch pedal must be depressed when braking on a vehicle with man-
ual transmission, when the vehicle is in gear and at low revs. Otherwise,
the functionality of the brake system may be impaired – risk of accident!
■
Do not depress the brake pedal, if there is no requirement to slow down.
This causes the brakes to overheat and can also result in a longer braking
distance and excessive wear - The is a risk of an accident!
■
Only brake for the purpose of drying and cleaning the brake discs if the
traffic conditions permit this. Do not place any other road users in jeopardy.
■
Recommendations for new brake pads should be followed.
■
When stopping and parking, the parking brake should always be applied
firmly, otherwise the vehicle could move off - The is a risk of an accident!
■
If a front spoiler, full wheel trim, etc. is mounted retrospectively, it must
be ensured that the air supply to the front wheel brakes is not reduced.
Otherwise, the front brakes could be in danger of overheating – The is a
risk of an accident!
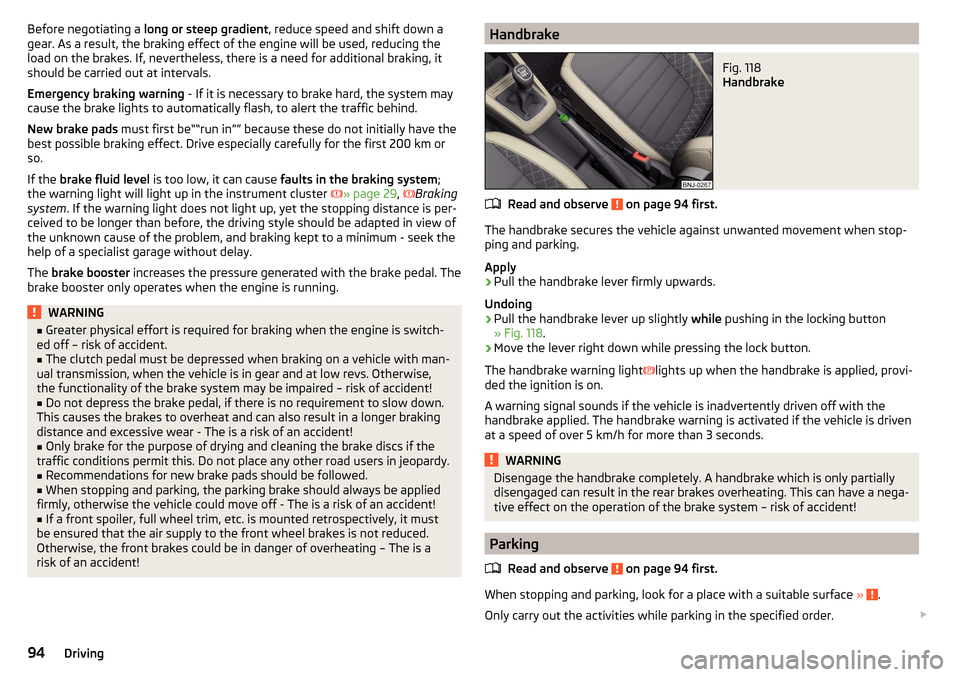
HandbrakeFig. 118
Handbrake
Read and observe on page 94 first.
The handbrake secures the vehicle against unwanted movement when stop-
ping and parking.
Apply
›
Pull the handbrake lever firmly upwards.
Undoing
›
Pull the handbrake lever up slightly while pushing in the locking button
» Fig. 118 .
›
Move the lever right down while pressing the lock button.
The handbrake warning light lights up when the handbrake is applied, provi-
ded the ignition is on.
A warning signal sounds if the vehicle is inadvertently driven off with the
handbrake applied. The handbrake warning is activated if the vehicle is driven
at a speed of over 5 km/h for more than 3 seconds.
WARNINGDisengage the handbrake completely. A handbrake which is only partially
disengaged can result in the rear brakes overheating. This can have a nega-
tive effect on the operation of the brake system – risk of accident!
Parking
Read and observe
on page 94 first.
When stopping and parking, look for a place with a suitable surface » .
Only carry out the activities while parking in the specified order.
94Driving
Page 153 of 196

CAUTIONScrew the jack back to its starting position prior to putting it back in its box -
risk of damage to the box.
Note
The declaration of conformity is included with the jack or the log folder.
Changing a wheel
Preliminary work
For safety's sake, the following instructions must be observed before
changing a wheel on the road.
›
Park the vehicle as far as possible away from the traffic flow - choose a place
with a flat and firm surface.
›
Switch off the engine.
›
For vehicles with manual transmission select1, gear .
›
For vehicles with automatic transmission , place the selector lever in the P
position.
›
Firmly apply the handbrake.
›
Switch on the hazard warning lights and set up the warning triangle at the
prescribed distance.
›
Have all the occupants get out . The passengers should not stand on the
road while the wheel is being changed (they should remain behind a crash
barrier, for instance).
›
Uncouple any trailers.
Changing a wheel
›
Take out the emergency or spare wheel » page 152.
›
Remove the full wheel trim » page 152or caps» page 152 .
›
Loosen the wheel bolts » page 153 » .
›
Jack up the vehicle » page 153 until the wheel that needs changing is clear of
the ground.
›
Unscrew the wheel bolts and place them on a clean surface (cloth, paper,
etc.).
›
Remove the wheel carefully.
›
Attach the spare wheel and slightly screw on the wheel bolts.
›
Lower the vehicle.
›
Tighten the wheel bolts opposite each other using the wheel wrench (“pull- ing crossways”) » page 153.
›Replace the wheel trim
» page 152and caps» page 152 .
When fitting unidirectional tyres, ensure that the direction of rotation is cor-
rect » page 145 .
All bolts must be clean and must turn easily. If screws are corroded and diffi-
cult to move, these must be replaced.WARNING■ Undo the wheel bolts just a little (about one turn), provided the vehicle
has not yet been jacked up. Otherwise the wheel could come loose and fall
off – risk of injury.■
Under no circumstances must the bolts be greased or oiled - cause an ac-
cident.
Subsequent steps
After changing the wheel, the following work should be carried out.
›
Stow the replaced wheel in the well under the floor covering of the luggage
compartment and secure it with a nut.
›
Stow the tool kit in the space provided and secure using the strap.
›
Check tyre pressure on the mounted wheel and adjust if necessary and, with
vehicles with tyre pressure monitoring, save the tyre pressure values in the
system » page 117 .
›
Have the tightening torque of the wheel bolts checked as soon as possible.
The prescribed tightening torque is 120 Nm.
Change the damaged wheel or consult a specialist garage about repair possi-
bilities.
WARNINGTightening torque which is too high can damage the threads and this can
result in permanent deformation of the contact surfaces on the rim. Where
tightening torque is too low, the wheels may become loose while driving -
risk of accident. Therefore drive cautiously and only at a moderate speed
until the tightening torque has been checked.151Emergency equipment, and self-help
Page 188 of 196

Operation of the information system38
Speed regulating system109
Windscreen wipers60
light Flash
54
Fog lights/rear fog light55
Light COMING HOME / LEAVING HOME
56
Replacing bulbs165
Turn signal/main beam54
Lighting Interior lighting
57
Luggage compartment75
Lights53
Abroad57
Automatic driving light control55
Cockpit57
Daylight running54
Dipped beam53
Fog lights with the CORNER function56
Hazard warning light system56
Headlight cleaning system60
Headlight range control53
Parking lights53, 56
Switching on and off53
Warning lights28
Load175
Lock Individual settings
47
Locking Central locking button
46
in case of emergency160
KESSY46
Key45
Remote control45
Lock steering lock90
Luggage compartment75
Cover78
Fastening elements76
Fixing nets76
Flexible storage compartment80
Lighting75
Net partition79
Storage compartments under the floor80
unlock manually160
Unlock the boot lid160
Variable loading floor81
Luggage compartment cover78
Other positions78
Roll-up cover79
Luggage Storage bike carriers
82
Roll-up cover79
Storage compartments77
M
Main beam
54
Warning light33
Manual air conditioning Controls
86
Recirculated air mode88
Manual gear changing see Gear changing
95
Materials defect liability4
MAXI DOT See MAXI DOT display
40
MAXI DOT display assist systems menu item
41
Audio menu item40
Main menu40
Navigation menu item40
Operation38
telephone menu item41
Maximum speed178
MCB103
Mechanical window lifter open/close
51
Mechanical windows50
Media AUX67
See Owner´s Manual -Infotainment6
USB67
Memory39
Mirror61
Vanity59
mobility warranty5
Modes of the automatic transmission96
Modifications and technical alterations127
MSR101
Multi collision brake (MCB)103
Multifunction display Data
39
Functions38
Memory39
Multifunction pocket77
Multifunction steering wheel38
Multimedia holder70
N
N1
80
Nameplate173
Navigation S Owner´s Manual -Infotainment
6
Net partition79
Nets76
O
oil see Engine oil
140
Oil Information messages
34
Oil changing Engine oil
139
Onboard computer see multifunction display
38
Operating weight174
186Index