child seat SKODA KODIAQ 2016 1.G User Guide
[x] Cancel search | Manufacturer: SKODA, Model Year: 2016, Model line: KODIAQ, Model: SKODA KODIAQ 2016 1.GPages: 344, PDF Size: 58.96 MB
Page 27 of 344

Adjust the height of the front passenger seat belt so that the belt does not
“jam” in the return pulley. In the event of an accident, there is the risk of in-
jury to the neck of the child carried due to the seat belt!WARNING■ Never use a rear-facing child seat on the front passenger seat if the pas-
senger airbag is activated. This child safety seat is positioned in the deploy-
ment area of the front passenger airbag. The airbag may cause the child se-
vere, or even fatal injuries, in the event of it being deployed.■
As soon as the child seat, in which the child is transported with their back
in the direction of travel, is no longer used in the front passenger seat, the
front passenger airbag should be switched on again.
Use of a child seat on the front passenger seat (variant 2)
Applies to Taiwan
Fig. 14
Warning stickers
Read and observe on page 23 first.
No babies, infants or children to be carried on the passenger seat.
A sticker to this effect can also be found on the front passenger's sun visor
» Fig. 14 .
Use of a child seat on the front passenger seat (variant 3)
Applies to South KoreaFig. 15
Warning labels
Read and observe on page 23 first.
No babies, infants or children are to be carried on the front passenger seat.
A label to this effect can also be found on the front passenger's sun visor
» Fig. 15 .
Child safety and the side airbag
Fig. 16
Incorrect seated position of a
child who is not properly secured
– risk from the side airbag/Child
properly protected by safety seat
Read and observe on page 23 first.
The child must not be positioned in the deployment area of the side airbag » Fig. 16 -
.
There must be sufficient room between the child and the area into which the
side airbag will deploy to allow the airbag to provide as much protection as
possible » Fig. 16 -
.
25Transporting children safely
Page 28 of 344

Classification of child seatsRead and observe
on page 23 first.
Classification of child seats according to the ECE-R 44 standard.
GroupWeight of the child0up to 10 kg0+up to 13 kgGroupWeight of the child19-18 kg215-25 kg322-36 kgUse of child safety seats which are secured using a seat belt
Never use a rear-facing child seat on the front passenger seat if the passenger airbag is activated. This child safety seat is positioned in the deployment area of the front passenger airbag. The airbag may cause the child severe, or even fatal injuries, in the event of it being deployed.
Read and observe
on page 23 first.
Overview of the usability of child seats secured with a seat belt on seats in accordance with the ECE-R 16 standard.GroupPassenger seat with activa- ted front airbagPassenger seat with de-activated front airbagSecond row of seats - outer seatsSecond row of seats -center seat a)Third row of seats
a)
b)0
up to 10 kgXU c)UUL0+
up to 13 kgXU c)UUL1
9-18 kgUFUUUL2
15-25 kgUFUUUL3
22-36 kgUFUUULa)
It is prohibited to attach a child seat with support leg in the middle of the second row and in the third row.
b)
Adjust the longitudinally adjustable seat in the second row of seats as far forward as possible.
c)
Set the height-adjustable front passenger seat as high up as possible.
UThe “Universal” category is suitable for the use of child seats approved in this weight group.UFThe “Universal” category is suitable for the use of forward-facing child seats approved in this weight group.LOnly suitable for recommended child seats of Category 2-3» page 29, Recommended child seats .XThe seat is not suitable for children in this weight group.26Safety
Page 29 of 344
Fastening systems
Introduction
This chapter contains information on the following subjects:
attachment points of the
system
27
Use of child safety seats with the
system
27
Using child seats with the
system
28
Attachment points of the
system
28
Recommended child seats
29
attachment points of the system
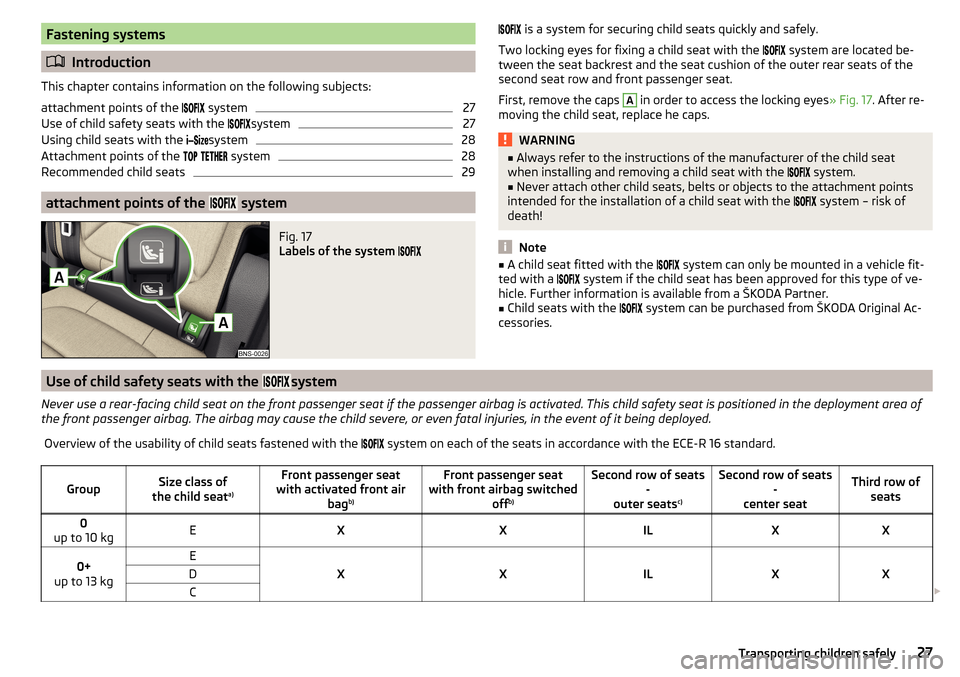
Fig. 17
Labels of the system
is a system for securing child seats quickly and safely.
Two locking eyes for fixing a child seat with the
system are located be-
tween the seat backrest and the seat cushion of the outer rear seats of the
second seat row and front passenger seat.
First, remove the caps A
in order to access the locking eyes » Fig. 17. After re-
moving the child seat, replace he caps.
WARNING■ Always refer to the instructions of the manufacturer of the child seat
when installing and removing a child seat with the system.■
Never attach other child seats, belts or objects to the attachment points
intended for the installation of a child seat with the
system – risk of
death!
Note
■ A child seat fitted with the system can only be mounted in a vehicle fit-
ted with a system if the child seat has been approved for this type of ve-
hicle. Further information is available from a ŠKODA Partner.■
Child seats with the
system can be purchased from ŠKODA Original Ac-
cessories.
Use of child safety seats with the system
Never use a rear-facing child seat on the front passenger seat if the passenger airbag is activated. This child safety seat is positioned in the deployment area of
the front passenger airbag. The airbag may cause the child severe, or even fatal injuries, in the event of it being deployed.Overview of the usability of child seats fastened with the system on each of the seats in accordance with the ECE-R 16 standard.GroupSize class of
the child seat a)Front passenger seat
with activated front air bagb)Front passenger seat
with front airbag switched offb)Second row of seats
-
outer seats c)Second row of seats
-
center seatThird row of seats0
up to 10 kgEXXILXX0+
up to 13 kgE
XXILXX
DC 27Transporting children safely
Page 30 of 344

GroupSize class of
the child seat a)Front passenger seat
with activated front air bagb)Front passenger seat
with front airbag switched offb)Second row of seats
-
outer seats c)Second row of seats
-
center seatThird row of seats
1
9-18 kg
D
XXIL
IUFXX
CBB1A2
15-25 kg-XXILXX3
22-36 kg-XXILXXa)
The size category is shown on the label attached to the child seat.
b)
If the front passenger seat is fitted with system attachment points, it is suitable for the installation of an
child seat with “Semi-Universal” approval.
c)
The seat is suitable for the
fixing system.
ILThe seat is suitable for installation of a
child seat with the “Semi-Universal” approval. The “Semi-Universal” category means that the child seat
with the
system is approved for your vehicle. Observe the list of vehicles that comes with the child seat.IUFThe seat is suitable for the use of forward-facing child seats approved in this weight group.XThe seat is not fitted with system attachment points.
Using child seats with the
system
Front passenger seat
with activated front air bagFront passenger seat
with front airbag switched offSecond row of seats - outer seatsSecond row of seats - center seatThird row ofseatsXXi-UXXThe seat is suitable for forward and backward facing child seats of
the category “Universal”.
The seat is not suitable for the
child seat of the category “Universal”.i-UXAttachment points of the systemFig. 18
Attachment points of the
-system
28Safety
Page 31 of 344
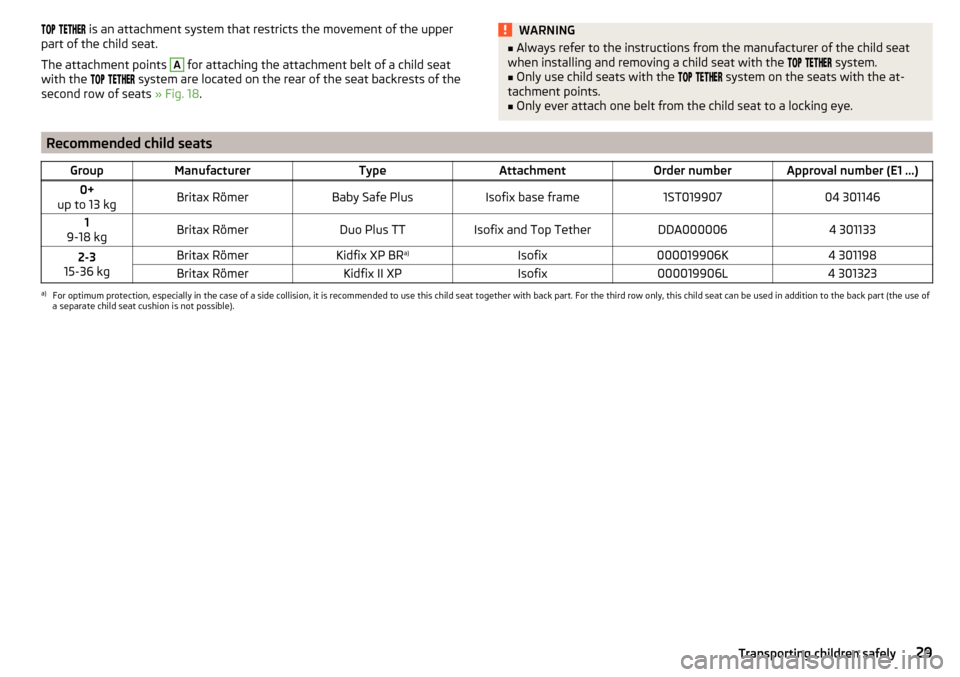
is an attachment system that restricts the movement of the upper
part of the child seat.
The attachment points A
for attaching the attachment belt of a child seat
with the
system are located on the rear of the seat backrests of the
second row of seats » Fig. 18.
WARNING■
Always refer to the instructions from the manufacturer of the child seat
when installing and removing a child seat with the system.■
Only use child seats with the
system on the seats with the at-
tachment points.
■
Only ever attach one belt from the child seat to a locking eye.
Recommended child seatsGroupManufacturerTypeAttachmentOrder numberApproval number (E1 ...)0+
up to 13 kgBritax RömerBaby Safe PlusIsofix base frame1ST01990704 3011461
9-18 kgBritax RömerDuo Plus TTIsofix and Top TetherDDA0000064 3011332-3
15-36 kgBritax RömerKidfix XP BR a)Isofix000019906K4 301198Britax RömerKidfix II XPIsofix000019906L4 301323a)
For optimum protection, especially in the case of a side collision, it is recommended to use this child seat together with back part. For the third row only, this child seat can be used in addition to the back part (the use of
a separate child seat cushion is not possible).
29Transporting children safely
Page 64 of 344
WARNING■Always close the window carefully and controlled. Otherwise, you may
cause considerable crushing injuries to yourself or fellow passengers.■
The system is fitted with a force limiter » page 63. If there is an obstacle
(e.g. If a body part gets trapped), the closing process is stopped and the
window goes down by several centimetres. However, the windows should
be closed carefully – risk of injury.
CAUTION
■ Keep the windows clean to ensure the correct functionality of the electric
power windows.■
Always close the windows before disconnecting the battery.
Note
If the windows are opened, dust and other dirt can get into the vehicle and the
wind noise is more at certain speeds.
Open / close Window
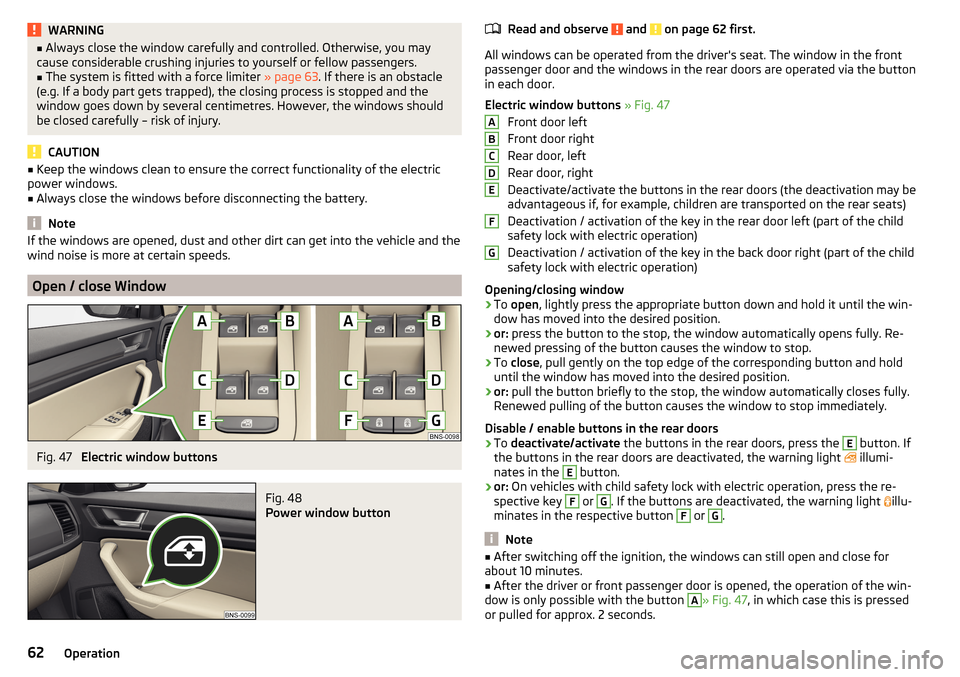
Fig. 47
Electric window buttons
Fig. 48
Power window button
Read and observe and on page 62 first.
All windows can be operated from the driver's seat. The window in the front
passenger door and the windows in the rear doors are operated via the button
in each door.
Electric window buttons » Fig. 47
Front door left
Front door right
Rear door, left
Rear door, right
Deactivate/activate the buttons in the rear doors (the deactivation may be
advantageous if, for example, children are transported on the rear seats)
Deactivation / activation of the key in the rear door left (part of the child
safety lock with electric operation)
Deactivation / activation of the key in the back door right (part of the child
safety lock with electric operation)
Opening/closing window
›
To open , lightly press the appropriate button down and hold it until the win-
dow has moved into the desired position.
›
or: press the button to the stop, the window automatically opens fully. Re-
newed pressing of the button causes the window to stop.
›
To close , pull gently on the top edge of the corresponding button and hold
until the window has moved into the desired position.
›
or: pull the button briefly to the stop, the window automatically closes fully.
Renewed pulling of the button causes the window to stop immediately.
Disable / enable buttons in the rear doors
›
To deactivate/activate the buttons in the rear doors, press the
E
button. If
the buttons in the rear doors are deactivated, the warning light illumi-
nates in the
E
button.
›
or: On vehicles with child safety lock with electric operation, press the re-
spective key
F
or
G
. If the buttons are deactivated, the warning light illu-
minates in the respective button
F
or
G
.
Note
■ After switching off the ignition, the windows can still open and close for
about 10 minutes.■
After the driver or front passenger door is opened, the operation of the win-
dow is only possible with the button
A
» Fig. 47 , in which case this is pressed
or pulled for approx. 2 seconds.
ABCDEFG62Operation
Page 80 of 344
Seats and head restraints
Front seats
Introduction
This chapter contains information on the following subjects:
Manual adjustment
78
Electrical adjustment
78
Memory Function of the electrically adjustable seat
79
Memory function of the remote control key
79
Folding front passenger seat
80
Armrest setting
80WARNING■ Only adjust the driver's seat when the vehicle is stationary – risk of acci-
dent!■
Caution when adjusting the seat! You may suffer injuries or bruises as a
result of adjusting the seat without paying proper attention.
Manual adjustment
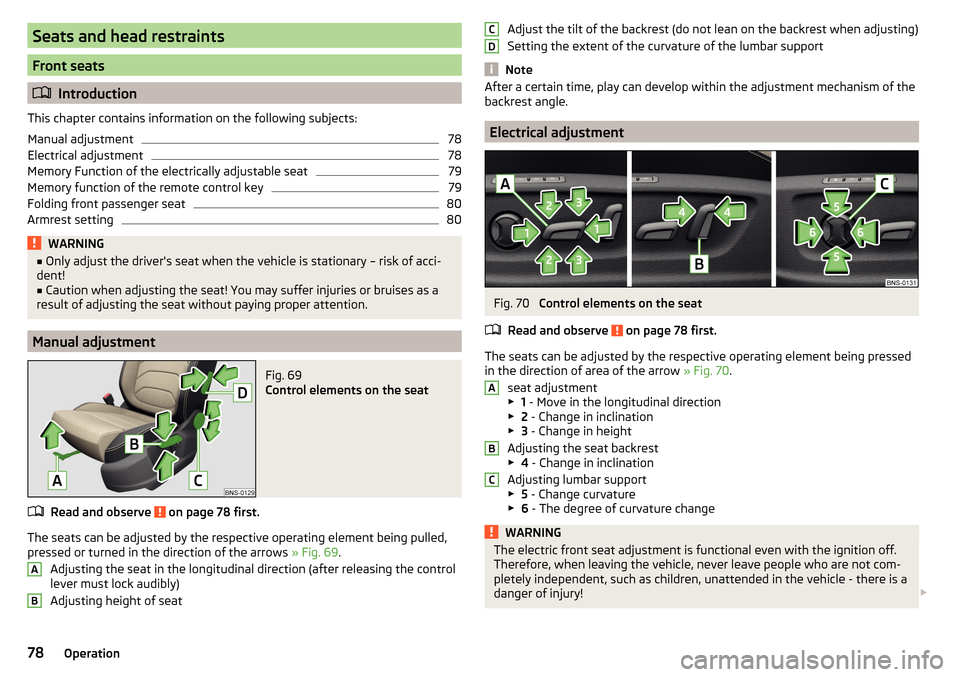
Fig. 69
Control elements on the seat
Read and observe on page 78 first.
The seats can be adjusted by the respective operating element being pulled,
pressed or turned in the direction of the arrows » Fig. 69.
Adjusting the seat in the longitudinal direction (after releasing the control
lever must lock audibly)
Adjusting height of seat
ABAdjust the tilt of the backrest (do not lean on the backrest when adjusting)
Setting the extent of the curvature of the lumbar support
Note
After a certain time, play can develop within the adjustment mechanism of the
backrest angle.
Electrical adjustment
Fig. 70
Control elements on the seat
Read and observe
on page 78 first.
The seats can be adjusted by the respective operating element being pressed in the direction of area of the arrow » Fig. 70.
seat adjustment
▶ 1 - Move in the longitudinal direction
▶ 2 - Change in inclination
▶ 3 - Change in height
Adjusting the seat backrest
▶ 4 - Change in inclination
Adjusting lumbar support
▶ 5 - Change curvature
▶ 6 - The degree of curvature change
WARNINGThe electric front seat adjustment is functional even with the ignition off.
Therefore, when leaving the vehicle, never leave people who are not com-
pletely independent, such as children, unattended in the vehicle - there is a
danger of injury! CDABC78Operation
Page 87 of 344
Seat heating and ventilation
Introduction
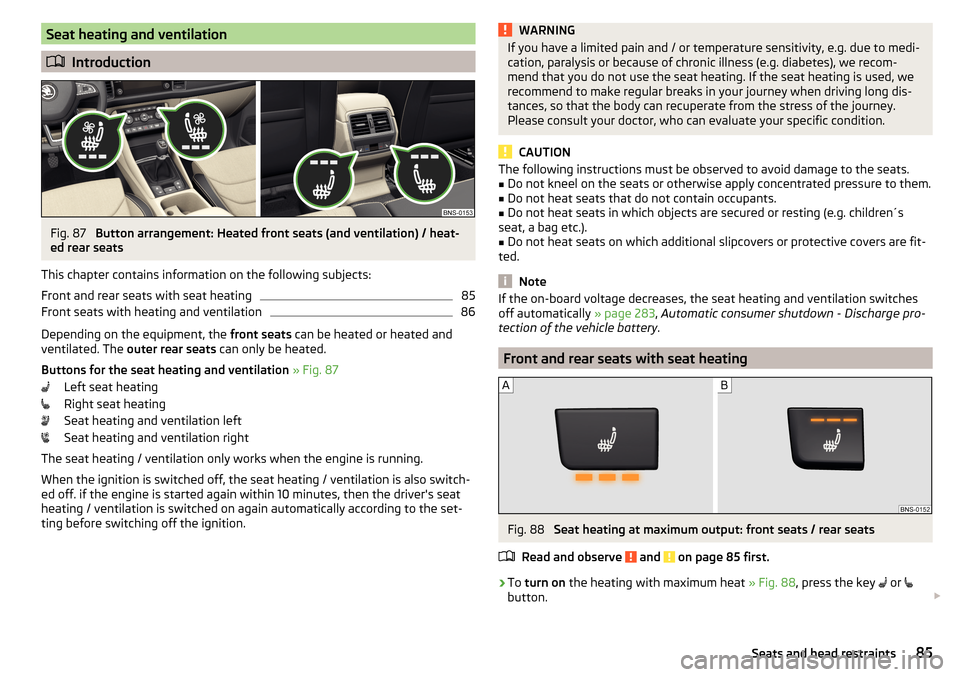
Fig. 87
Button arrangement: Heated front seats (and ventilation) / heat-
ed rear seats
This chapter contains information on the following subjects:
Front and rear seats with seat heating
85
Front seats with heating and ventilation
86
Depending on the equipment, the front seats can be heated or heated and
ventilated. The outer rear seats can only be heated.
Buttons for the seat heating and ventilation » Fig. 87
Left seat heating
Right seat heating
Seat heating and ventilation left
Seat heating and ventilation right
The seat heating / ventilation only works when the engine is running. When the ignition is switched off, the seat heating / ventilation is also switch-ed off. if the engine is started again within 10 minutes, then the driver's seat
heating / ventilation is switched on again automatically according to the set-
ting before switching off the ignition.
WARNINGIf you have a limited pain and / or temperature sensitivity, e.g. due to medi-
cation, paralysis or because of chronic illness (e.g. diabetes), we recom-
mend that you do not use the seat heating. If the seat heating is used, we
recommend to make regular breaks in your journey when driving long dis-
tances, so that the body can recuperate from the stress of the journey.
Please consult your doctor, who can evaluate your specific condition.
CAUTION
The following instructions must be observed to avoid damage to the seats.■Do not kneel on the seats or otherwise apply concentrated pressure to them.■
Do not heat seats that do not contain occupants.
■
Do not heat seats in which objects are secured or resting (e.g. children´s
seat, a bag etc.).
■
Do not heat seats on which additional slipcovers or protective covers are fit-
ted.
Note
If the on-board voltage decreases, the seat heating and ventilation switches
off automatically » page 283, Automatic consumer shutdown - Discharge pro-
tection of the vehicle battery .
Front and rear seats with seat heating
Fig. 88
Seat heating at maximum output: front seats / rear seats
Read and observe
and on page 85 first.
›
To turn on the heating with maximum heat » Fig. 88, press the key
or
button.
85Seats and head restraints
Page 89 of 344
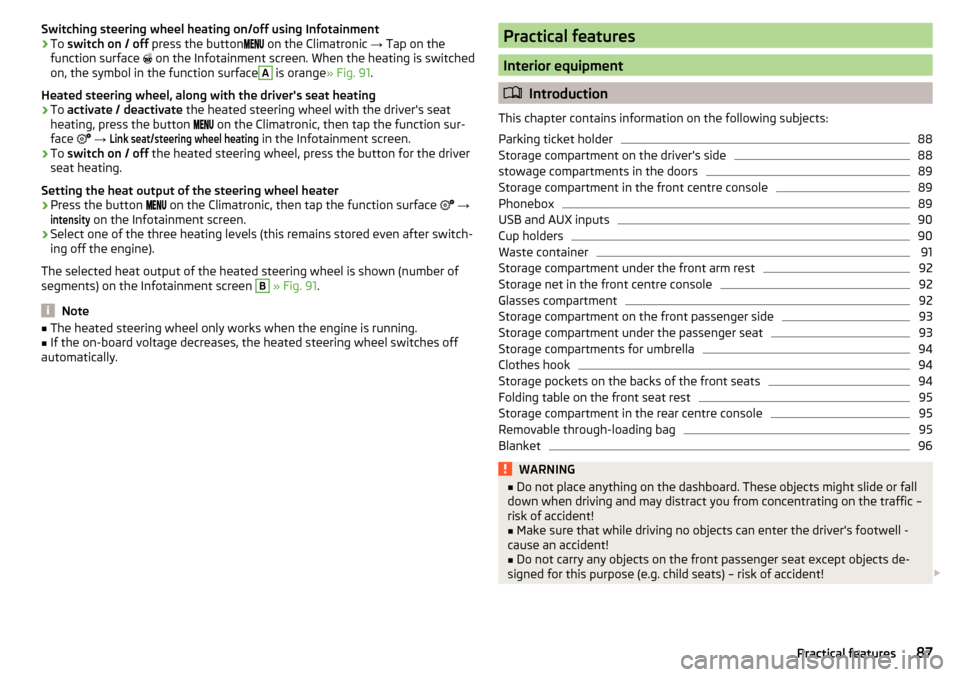
Switching steering wheel heating on/off using Infotainment›To switch on / off press the button on the Climatronic → Tap on the
function surface
on the Infotainment screen. When the heating is switched
on, the symbol in the function surfaceA
is orange » Fig. 91.
Heated steering wheel, along with the driver's seat heating
›
To activate / deactivate the heated steering wheel with the driver's seat
heating, press the button
on the Climatronic, then tap the function sur-
face
→
Link seat/steering wheel heating
in the Infotainment screen.
›
To switch on / off the heated steering wheel, press the button for the driver
seat heating.
Setting the heat output of the steering wheel heater
›
Press the button on the Climatronic, then tap the function surface
→
intensity
on the Infotainment screen.
›
Select one of the three heating levels (this remains stored even after switch-
ing off the engine).
The selected heat output of the heated steering wheel is shown (number of
segments) on the Infotainment screen
B
» Fig. 91 .
Note
■
The heated steering wheel only works when the engine is running.■If the on-board voltage decreases, the heated steering wheel switches off
automatically.Practical features
Interior equipment
Introduction
This chapter contains information on the following subjects:
Parking ticket holder
88
Storage compartment on the driver's side
88
stowage compartments in the doors
89
Storage compartment in the front centre console
89
Phonebox
89
USB and AUX inputs
90
Cup holders
90
Waste container
91
Storage compartment under the front arm rest
92
Storage net in the front centre console
92
Glasses compartment
92
Storage compartment on the front passenger side
93
Storage compartment under the passenger seat
93
Storage compartments for umbrella
94
Clothes hook
94
Storage pockets on the backs of the front seats
94
Folding table on the front seat rest
95
Storage compartment in the rear centre console
95
Removable through-loading bag
95
Blanket
96WARNING■ Do not place anything on the dashboard. These objects might slide or fall
down when driving and may distract you from concentrating on the traffic –
risk of accident!■
Make sure that while driving no objects can enter the driver's footwell -
cause an accident!
■
Do not carry any objects on the front passenger seat except objects de-
signed for this purpose (e.g. child seats) – risk of accident!
87Practical features
Page 98 of 344
›Place the empty through-loading bag in the opening in such a way that the
end of the bag with the zip is in the luggage compartment.
Securing through-loading bag and skis›
Tighten the strap
A
around the skis in front of the bindings » Fig. 114. The
strap must hold the skis tight.
›
Insert the lock tongue
B
into the belt buckle of the middle seat.
›
The carabiners on the two sides latch into the lashing eyes
C
. To better ac-
cess the eyelets, fold forward the seat backrests of the second seat row
» page 81 .
›
Pull the belt
D
taut.
WARNING■
The total weight of the skis which are transported must not exceed 10 kg.■Always stow and secure the skis and the bag securely - otherwise there is
a risk of injury or accident!
CAUTION
Never fold and stow the through-loading bag when it is wet - risk of damaging
the through-loading bag.
Blanket
Read and observe
and on page 87 first.
To increase comfort for the occupants, the vehicle may be equipped with a
blanket.
The blanket is in a bag that can be attached to one of the following locations.
▶ On the guide rods of the front headrests.
▶ On operating lever for adjusting the second seat row in the longitudinal di-
rection.
▶ In the storage pockets on the backs of the front seats.
Electrical sockets
Introduction
This chapter contains information on the following subjects:
12-volt socket in the front centre console
97
12 volt socket in the rear centre console
9712 volt socket in luggage compartment97230-volt socket in the rear centre console97WARNING■ Do not place anything on the dashboard. These objects might slide or fall
down when driving and may distract you from concentrating on the traffic –
risk of accident!■
Make sure that while driving no objects can enter the driver's footwell -
cause an accident!
■
Safely stow all devices during the journey to prevent them from being
thrown around the interior in the event of a sudden braking manoeuvre or
an accident – risk of death!
■
The devices may warm up during operation – risk of injury or fire!
■
Improper use of the power sockets and the electrical accessories can
cause fires, burns and other serious injuries.
■
The 12-Volt sockets also work if the ignition is switched off. When leaving
the vehicle, never leave persons who are not completely independent, such
as children, unattended in the vehicle.
CAUTION
When using the 12 volt power outlets the following notes are to be observed.■The sockets can only be used for the connection of approved electrical ac-
cessories with a total power consumption of up to 120 watts, otherwise the
electrical system of the vehicle may be damaged.■
Connecting appliances when the engine is not running will drain the battery
of the vehicle!
■
Before switching the ignition on / off or before starting the engine, switch
off the devices which are connected to the sockets - there is a risk of damage
to the equipment due to voltage fluctuations.
96Operation