fuel type SKODA KODIAQ 2016 1.G Owner's Manual
[x] Cancel search | Manufacturer: SKODA, Model Year: 2016, Model line: KODIAQ, Model: SKODA KODIAQ 2016 1.GPages: 344, PDF Size: 58.96 MB
Page 53 of 344
NoteVehicles with the personalisation function are provided with three vehicle
keys.
Overview of some personalized functions
Read and observe
on page 50 first.
▶Driving mode - the last selected mode, mode setting
Individual
▶Setting the electrically adjustable driver's seat.
▶ Exterior mirror adjustment.
▶ Assistance systems - Lane Assist, parking aid (Park Pilot).
▶ Light - ambient lighting, convenience turn signal, COMING HOME / LEAVING
HOME.
▶ Climatronic - temperature in each individual area, fan speed, recirculation
mode.
▶ Infotainment settings - brightness level of the screen, keyboard arrange-
ment.
▶ Radio - sound settings, station sorting.
▶ Media - shuffle / repeat title, selected video format.
▶ Voice control - acoustic signals.
▶ Navigation - home address, alternative routes, recommended route, remind-
er of the lack of fuel.
Note
The scope of the personalisation functions is dependent on the type of Info-
tainment package.
Setting the personalization
Read and observe
on page 50 first.
›
On Infotainment, press the button, then tap the function surface
→
Personalisation
.
The following menu items are displayed.
Personalisation
Active
- activate/deactivate the personalisation
Select a user account
A list of user accounts with the option to manage user accounts and to switch
to another account.
■ - Account management with the following options:
■Rename user account
- rename the user account (not applicable to the
Guest
account)
■
Copy settings to another account
- copy the settings of an active user account to
another user account
■
Reset user account
- reset the selected user account to factory settings
Adjusting ■
Key assignment:
- options for assigning the vehicle key to the user account:
■
Manual
- detected vehicle key must be assigned to the active user account
manually
■
Automatic
- detected vehicle key automatically assigned to a different ac-
count of the active user account
■
Assign vehicle key to current user account
- manual assignment of the detected ve-
hicle key to the active user account - follow the instructions on the Infotain-
ment screen
■
Reset all
- reset the personalisation and the user accounts to factory settings
51Information system
Page 57 of 344
All doors
The function allows you to unlock all doors, the boot lid and the fuel filler flap.
Single door
The function allows you to unlock only the driver's door and the fuel filler flap
with the radio remote control. KESSY allows the unlocking of a single door
which is in the vicinity of the key, as well as the fuel filler flap. The other doors
and the boot lid are only unlocked once the door handle is unlocked or
touched.
Doors on a vehicle side
This function enables you to unlock both doors on the driver's side and the
fuel filler flap with the radio remote control unit. KESSY allows the unlocking of
both doors which are in the vicinity of the key, as well as the fuel filler flap. The
other doors and the boot lid are only unlocked once the door handle is un-
locked or touched.
Automatic locking/unlocking
This function enables the locking of all doors and the boot lid from a speed of
15 km/h. Opening the doors and the boot lid from the outside is not possible.
The renewed unlocking of the doors and the boot lid is carried out when the
ignition key is removed or when the door is opened from inside (depending on
the individual setting for the central locking system).
Note
The individual adjustment of the central locking system is stored (depending
on the Infotainment type) in the active user account personalisation
» page 50 .
Opening / closing door
Fig. 38
Door handle/door opening lever
Read and observe and on page 52 first.›
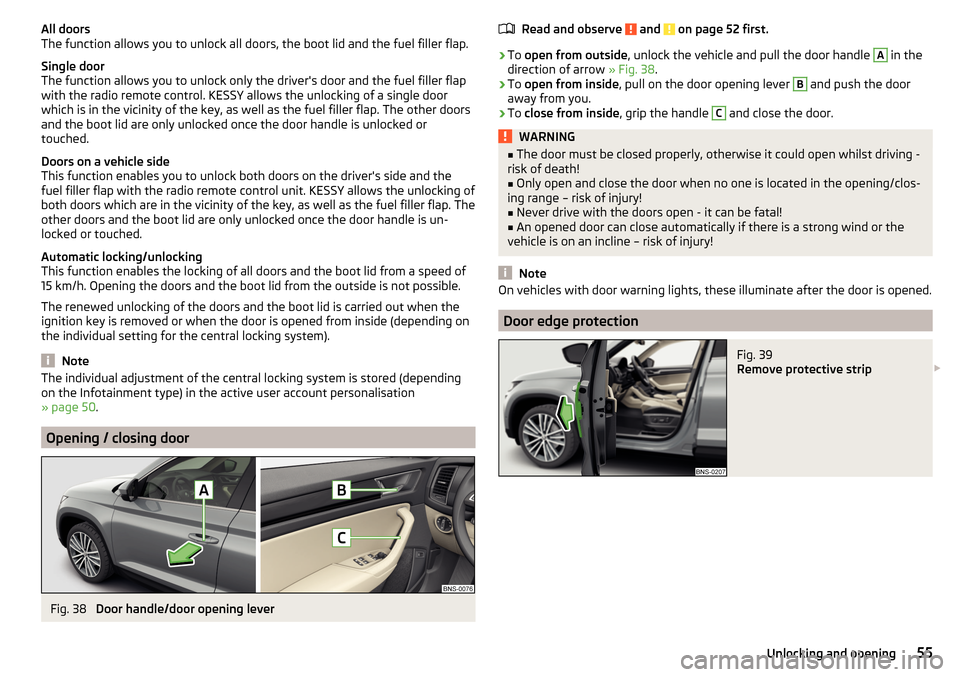
To open from outside , unlock the vehicle and pull the door handle
A
in the
direction of arrow » Fig. 38.
›
To open from inside , pull on the door opening lever
B
and push the door
away from you.
›
To close from inside , grip the handle
C
and close the door.
WARNING■
The door must be closed properly, otherwise it could open whilst driving -
risk of death!■
Only open and close the door when no one is located in the opening/clos-
ing range – risk of injury!
■
Never drive with the doors open - it can be fatal!
■
An opened door can close automatically if there is a strong wind or the
vehicle is on an incline – risk of injury!
Note
On vehicles with door warning lights, these illuminate after the door is opened.
Door edge protection
Fig. 39
Remove protective strip
55Unlocking and opening
Page 270 of 344
WARNING■No changes may be made to parts of the airbag system, the front bumper
and the body.■
Any work on the airbag system including the installation and removal of
system components due to other repair work (e.g. removal of the steering
wheel) must only be carried out by a specialist garage.
■
Do not manipulate individual parts of the airbag system, as this might re-
sult in the airbag being deployed.
■
If the airbag is triggered, the airbag system must be exchanged.
WARNINGThe airbag system operates using pressure sensors located in the front
doors. For this reason, no adjustments may be carried out to the doors or
door panels (e.g. installation of additional loudspeakers). The resulting
damage can negatively affect the function of the airbag system - there is a
risk of accidents and fatal injuries! The following guidelines must be ob-
served.■
Any work on the front doors and their door panels must be carried out by
a specialist garage.
■
Never drive with removed inner door panels or openings in the panels.
Acceptance and recycling of used vehicles
Read and observe
on page 266 first.
All new ŠKODA vehicles are 95% recyclable.
Service intervals
Introduction
This chapter contains information on the following subjects:
Overview of service intervals
269
Fixed service intervals QI1 - QI4
269
Flexible service interval QI6
269
Digital Service Plan
270
The service interval display in the display of the instrument cluster will remind
you to carry out every service stipulated by the manufacturer at the right time
in order to prevent you from forgetting them » page 49.
The completion of services can be verified through the printed verification
from the digital service schedule and the respective receipts.
The specified service intervals are tailored to normal operating conditions.
In the case of difficult operating conditions, it is necessary to have some serv-
ice work performed before the date of the next service or between the speci-
fied service intervals. This applies mainly to the cleaning or the replacement of
the air filter insert in regions with heavy dust pollution as well as checking and
replacing the toothed belt, but also to vehicles with diesel particle filters,
which can put greater strain on the engine oil.
The following is understood under difficult conditions:
▶ Fuel containing sulphur.
▶ Frequent short trips.
▶ Longer periods of engine idling (e.g. taxis).
▶ Operation in areas with heavy dust pollution.
▶ Frequent trailer operation.
▶ Predominantly stop-and-go traffic as is often the case in city driving, for ex-
ample.
▶ Operation predominantly during winter.
You will be told at the specialist garage whether the operating conditions of your vehicle may make it necessary for service work to be carried out between
the normal service intervals.
Different service charges may apply from the particular scope of work required,
depending on the vehicle type and equipment and the status of your vehicle.
Note
■ The customer is responsible for covering the cost of all services including
changing or replenishing the oil, even during the warranty period, unless sta-
ted otherwise in the ŠKODA AUTO. warranty terms or other agreements.■
You will be informed about the current service scopes for the particular serv-
ice work by the specialist garage.
268General Maintenance
Page 288 of 344
Installation of new tyres
Only fit radial tyres of the same type, size (rolling circumference) and the same
tread pattern on one axle on all 4 wheels.
When mounting new tires the tires have to be replaced axle by axle.
Unidirectional tyres
Some tires may be directional. The direction of rotation of the tyres is marked by arrows on the wall of the tyre .
The specified running direction must be strictly adhered to, otherwise the fol-
lowing tyre characteristics may be degraded. ▶ Driving stability.
▶ Traction.
▶ Tyre noise and tyre wear.
Tires with increased resistance to air loss when punctured
Some vehicles may be fitted with tyres at the factory that have increased
puncture resistance (so-called “SEAL” tyres). For some countries, vehicles are
equipped with “SEAL” tyres delivered without a spare wheel and appropriate
tools.
If “SEAL”tyres are replaced with standard tyres, the vehicle must be retrofitted
with a puncture repair kit or spare wheel and appropriate hand tools.WARNING■ Never use tyres if you do not know anything about the condition and age.■Never drive with damaged tyres – risk of accident.
CAUTION
■The tyres must be protected from contact with substances such as oil,
grease and fuel, which could damage them. If the tyres come into contact with
these substances, then we recommend you have this checked out in a special-
ist workshop.■
Do not use rims with ground or polished surface in winter conditions - there
is a risk of wheel damage (e.g. from the road grit).
Note
■ We recommend that any work on the wheels or tyres is carried out by a spe-
cialist garage.■
We recommend that you use wheel rims, tyres, full wheel trims and snow
chains from ŠKODA Original Accessories.
Tyre pressureFig. 336
Label with a table of tyre sizes and tyre pressure value / inflate
tyres
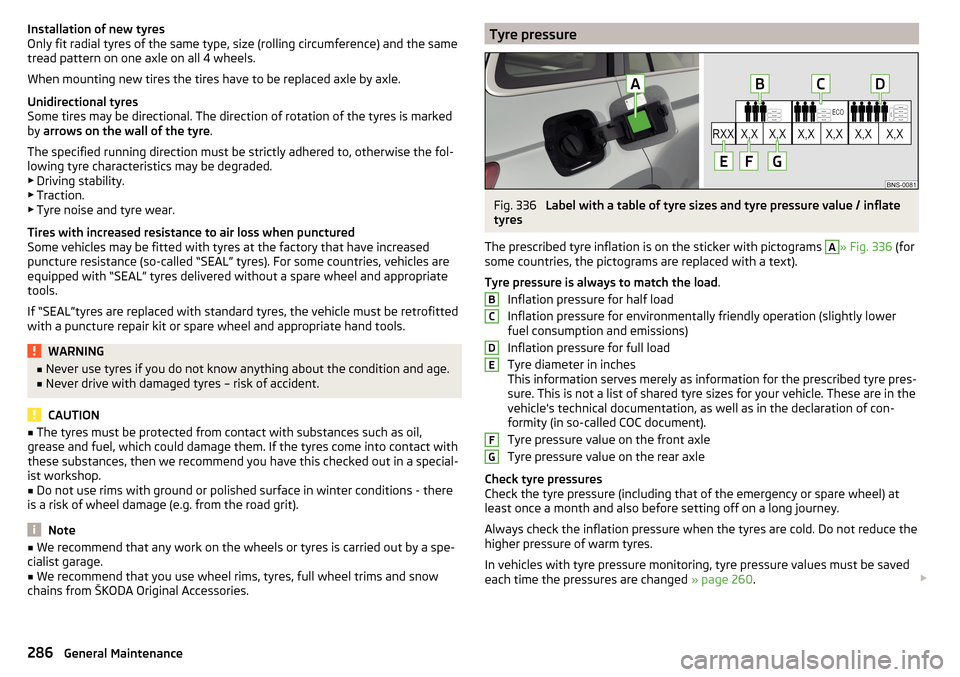
The prescribed tyre inflation is on the sticker with pictograms
A
» Fig. 336 (for
some countries, the pictograms are replaced with a text).
Tyre pressure is always to match the load .
Inflation pressure for half load
Inflation pressure for environmentally friendly operation (slightly lower
fuel consumption and emissions)
Inflation pressure for full load
Tyre diameter in inches
This information serves merely as information for the prescribed tyre pres-
sure. This is not a list of shared tyre sizes for your vehicle. These are in the
vehicle's technical documentation, as well as in the declaration of con-
formity (in so-called COC document).
Tyre pressure value on the front axle
Tyre pressure value on the rear axle
Check tyre pressures
Check the tyre pressure (including that of the emergency or spare wheel) at
least once a month and also before setting off on a long journey.
Always check the inflation pressure when the tyres are cold. Do not reduce the
higher pressure of warm tyres.
In vehicles with tyre pressure monitoring, tyre pressure values must be saved
each time the pressures are changed » page 260.
BCDEFG286General Maintenance
Page 310 of 344
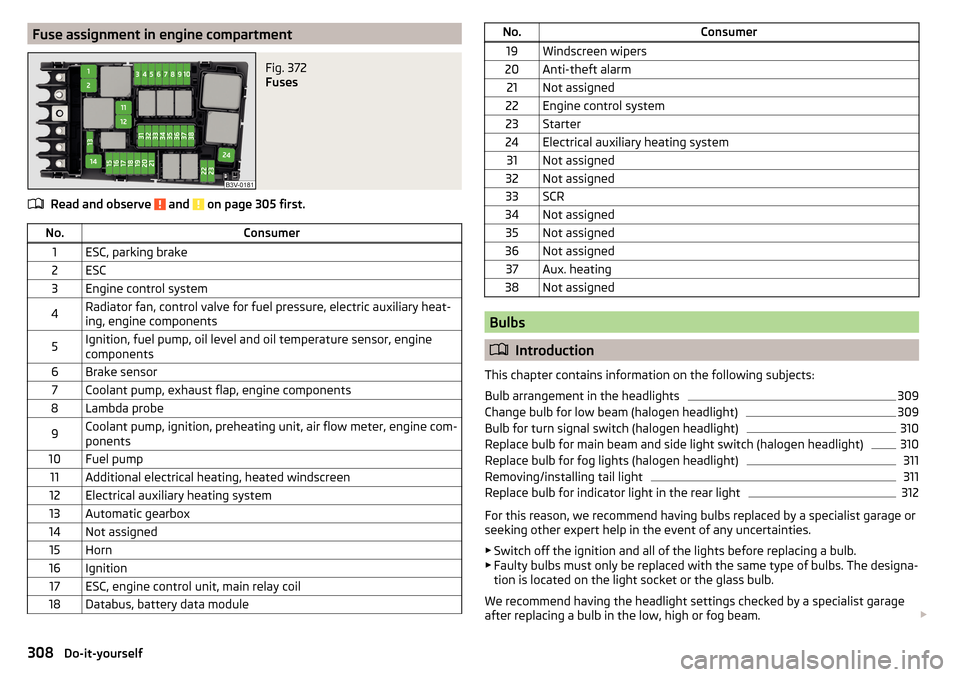
Fuse assignment in engine compartmentFig. 372
Fuses
Read and observe and on page 305 first.
No.Consumer1ESC, parking brake2ESC3Engine control system4Radiator fan, control valve for fuel pressure, electric auxiliary heat-
ing, engine components5Ignition, fuel pump, oil level and oil temperature sensor, engine
components6Brake sensor7Coolant pump, exhaust flap, engine components8Lambda probe9Coolant pump, ignition, preheating unit, air flow meter, engine com-
ponents10Fuel pump11Additional electrical heating, heated windscreen12Electrical auxiliary heating system13Automatic gearbox14Not assigned15Horn16Ignition17ESC, engine control unit, main relay coil18Databus, battery data moduleNo.Consumer19Windscreen wipers20Anti-theft alarm21Not assigned22Engine control system23Starter24Electrical auxiliary heating system31Not assigned32Not assigned33SCR34Not assigned35Not assigned36Not assigned37Aux. heating38Not assigned
Bulbs
Introduction
This chapter contains information on the following subjects:
Bulb arrangement in the headlights
309
Change bulb for low beam (halogen headlight)
309
Bulb for turn signal switch (halogen headlight)
310
Replace bulb for main beam and side light switch (halogen headlight)
310
Replace bulb for fog lights (halogen headlight)
311
Removing/installing tail light
311
Replace bulb for indicator light in the rear light
312
For this reason, we recommend having bulbs replaced by a specialist garage or
seeking other expert help in the event of any uncertainties.
▶ Switch off the ignition and all of the lights before replacing a bulb.
▶ Faulty bulbs must only be replaced with the same type of bulbs. The designa-
tion is located on the light socket or the glass bulb.
We recommend having the headlight settings checked by a specialist garage
after replacing a bulb in the low, high or fog beam.
308Do-it-yourself
Page 315 of 344
Technical data
Technical data
Basic vehicle data
Introduction
This chapter contains information on the following subjects:
Vehicle data
313
Operating weight
314
Payload
314
Measurement of fuel consumption and CO 2 emissions according to ECE
Regulations and EU Directives
315
Dimensions
316
Overhang angle
317
The details given in the vehicle's technical documentation always take prece-
dence over the details in the Owner's Manual.
The listed performance values were determined without performance-reduc- ing equipment, e.g. air conditioning system.
The values given have been determined in accordance with the rules and con-
ditions specified in statutory or technical regulations for determining opera-
tional and technical data for motor vehicles.
The values listed are for the basic model without any optional equipment.
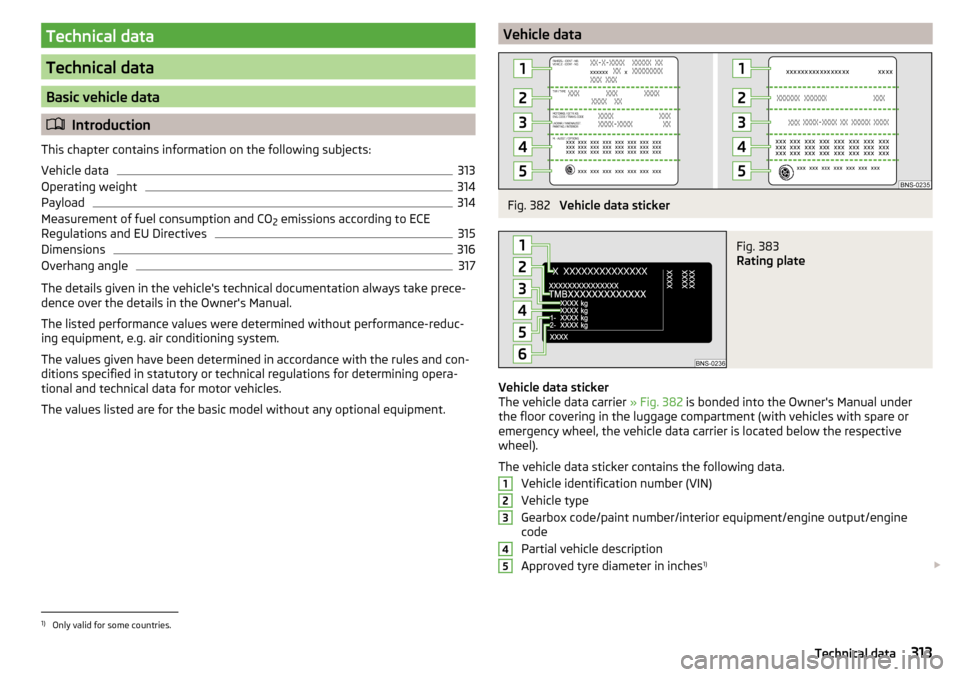
Vehicle dataFig. 382
Vehicle data sticker
Fig. 383
Rating plate
Vehicle data sticker
The vehicle data carrier » Fig. 382 is bonded into the Owner's Manual under
the floor covering in the luggage compartment (with vehicles with spare or
emergency wheel, the vehicle data carrier is located below the respective
wheel).
The vehicle data sticker contains the following data. Vehicle identification number (VIN)
Vehicle type
Gearbox code/paint number/interior equipment/engine output/engine code
Partial vehicle description
Approved tyre diameter in inches 1)
123451)
Only valid for some countries.
313Technical data
Page 316 of 344
The approved tyres and rim sizes for your vehicle are listed in the vehicle's
technical documentation (the so called COC document) and this also states the
declaration of conformity.
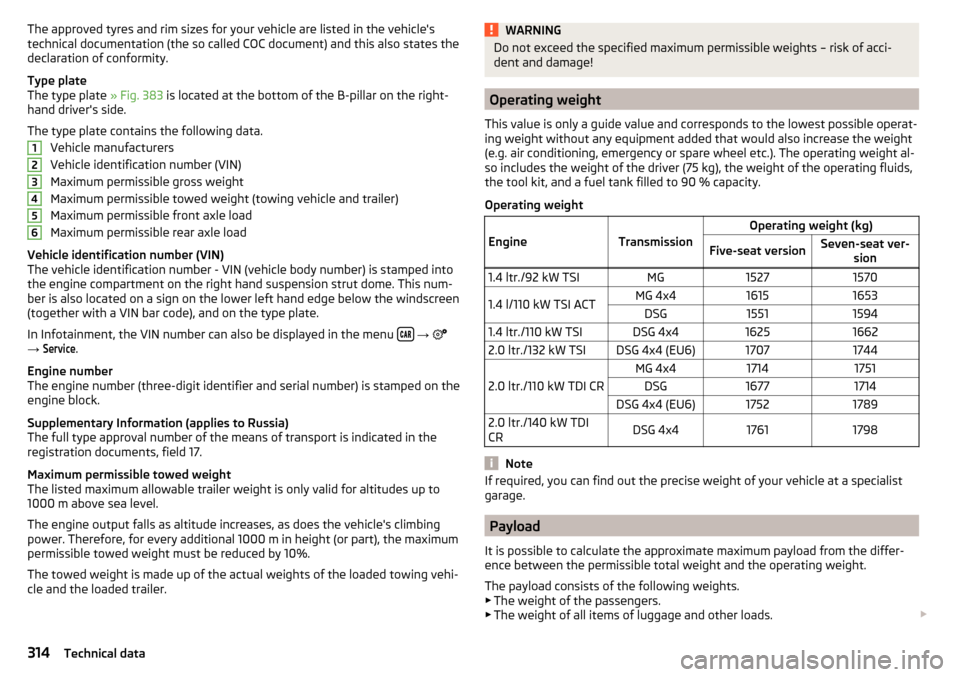
Type plate
The type plate » Fig. 383 is located at the bottom of the B-pillar on the right-
hand driver's side.
The type plate contains the following data. Vehicle manufacturers
Vehicle identification number (VIN)
Maximum permissible gross weight
Maximum permissible towed weight (towing vehicle and trailer)
Maximum permissible front axle load
Maximum permissible rear axle load
Vehicle identification number (VIN)
The vehicle identification number - VIN (vehicle body number) is stamped into
the engine compartment on the right hand suspension strut dome. This num-
ber is also located on a sign on the lower left hand edge below the windscreen
(together with a VIN bar code), and on the type plate.
In Infotainment, the VIN number can also be displayed in the menu
→
→
Service
.
Engine number
The engine number (three-digit identifier and serial number) is stamped on the
engine block.
Supplementary Information (applies to Russia)
The full type approval number of the means of transport is indicated in the
registration documents, field 17.
Maximum permissible towed weight
The listed maximum allowable trailer weight is only valid for altitudes up to
1000 m above sea level.
The engine output falls as altitude increases, as does the vehicle's climbing
power. Therefore, for every additional 1000 m in height (or part), the maximum
permissible towed weight must be reduced by 10%.
The towed weight is made up of the actual weights of the loaded towing vehi-
cle and the loaded trailer.
123456WARNINGDo not exceed the specified maximum permissible weights – risk of acci-
dent and damage!
Operating weight
This value is only a guide value and corresponds to the lowest possible operat-
ing weight without any equipment added that would also increase the weight
(e.g. air conditioning, emergency or spare wheel etc.). The operating weight al-
so includes the weight of the driver (75 kg), the weight of the operating fluids,
the tool kit, and a fuel tank filled to 90 % capacity.
Operating weight
EngineTransmission
Operating weight (kg)Five-seat versionSeven-seat ver- sion1.4 ltr./92 kW TSIMG152715701.4 l/110 kW TSI ACTMG 4x416151653DSG155115941.4 ltr./110 kW TSIDSG 4x4162516622.0 ltr./132 kW TSIDSG 4x4 (EU6)17071744
2.0 ltr./110 kW TDI CR
MG 4x417141751DSG16771714DSG 4x4 (EU6)175217892.0 ltr./140 kW TDI
CRDSG 4x417611798
Note
If required, you can find out the precise weight of your vehicle at a specialist
garage.
Payload
It is possible to calculate the approximate maximum payload from the differ-
ence between the permissible total weight and the operating weight.
The payload consists of the following weights.
▶ The weight of the passengers.
▶ The weight of all items of luggage and other loads.
314Technical data
Page 331 of 344
Final destinations184
Finish route guidance194
Foreword178
Fuel options137
GPS178
Graphical driving recommendations193
Home address185
Image with GPS189
Imported destinations137
Intermediate target192
Main menu179
Manage memory137
Map136
Map alignment191
Map scale190
Most common routes194
Navigation data178
Navigation data update178
nav. announcements137
Nav. announcements194
Options for map display in the split screen191
Preferred type of route136
Route192
Route calculation192
Route change195
Route details194
Route display in the split screen191
Route guidance192
Route information194
Route options136
Set to136
Status line138
Top speeds137
Trailer towing193
Transit point195
Update the navigation data137
Version information137
Voice control127
Waypoint mode196, 197
navigation data179
Navigation data178
Navigation data update178
nav. announcements137
Nav. announcements194
Net in the front centre console92
Net partition104
Nets101
Network Data connection
132
Data roaming132
Set132
set to134
Values of the downloaded data132
New route196
O
obstruction of traffic
200
OFF ROAD42, 218
Hill Descent Assistant219
Infotainment display220
OFF ROAD mode See OFF ROAD
218
oil see Engine oil
281
Oil changing Engine oil
280
On-board computer see multifunction display
46
On-line Care Connect services
118
consult Parking184
destination search182
Detail of the traffic report200
enable online services117
Google Earth ™ card180
Google Street View ™180
Import POI categories179, 188
Infotainment online services118
route import196
seek gas station184
ŠKODA Connect117
ŠKODA Connect Portal117
target import185, 188
Update navigation data179
Online Destinationdetails
192
List of traffic reports199
Navigation data update178
Online goals185
Online Owner's Manual8
Online services117
Introduction to the subject117
Online services ŠKODA Connect enable service
133, 139
register133
Operating weight314
Operation Images
152
Telephone158, 159
Original accessories267
Overhang angle317
Overview Cockpit
31
Engine compartment279
Fuses305
Warning lights33
Own POI categories187, 188
P
Pairing process
160
Park Area View (AreaView)
230
Rear traffic alert224
Park assist Parking
235
Park Assist233
Automatic brake assist237
Leaving a parallel parking space237
Malfunctions237
Operation234
329Index
Page 337 of 344
Tyre Pressure MonitoringStoring the tyre pressure values and Infotain- ment display
260
Tyre repair295
Tyres285
damage285
Explanation of the label288
new285
Tyre pressure286
Tyre size288
U
Umbrella Tray
94
Units131, 139
Unlatch KESSY
53
Unlock Individual settings
54
Unlocking Central locking button
54
In case of emergency302
Remote control52
Unlocking and locking52
Unlock steering lock202
Update navigation data179
Update the navigation data137
USB90, 148
Safe removal139
Used vehicles Acceptance and recycling
268
Useful equipment Clothes hook
94
Cup holders90
Glasses compartment92
Removable through-loading bag95
User account Configuration wizard
126
User profile134, 140
V
Variable loading floor
106
vCard185, 187
Vehicle - Settings201
Vehicle battery charging
284
Safety instructions283
Warning light39
Vehicle care270
Outside271
Vehicle cleaning270
Vehicle condition Auto Check Control
45
Vehicle data carrier269
Vehicle data sticker313
Vehicle data sticker and type plate Vehicle data sticker and type plate
313
Vehicle dimensions316
Vehicle height316
Vehicle identification number (VIN)313
Vehicle length316
vehicle systems201
Vehicle tool kit291
Vehicle width316
Ventilation Seats
85
Verwaltung gekoppelter Geräte160
Vest290
Video DVD Playback
153
Set to134
video player153
VIN Vehicle identification number
313
Virtual pedal61
Visibility72
Visors73
Voice control127
Commands128
Correction of a voice command input128
Help128
Not recognising a voice command128
on / off128
Operation principle128
Settings132
Stop / restore command128
Voicemail164
Volume125
Volume setting125
W
Waiter Voice control
128
Warning lights33
Warning symbols see Warning lights
33
Warning triangle290
Warning when speeding47
Warranty5
Washing the vehicle270
Waste container91
Water in the fuel filter42
Waypoint mode196
Main menu197
Record waypoints197
Set waypoint manually197
Waypoint tour memory198
Waypoint tour memory198
Weather conditions266
Weights313, 314
Wheel bolts Anti-theft wheel bolts
294
Caps294
Loosening and tightening294
335Index