service SKODA KODIAQ 2016 1.G Owner's Manual
[x] Cancel search | Manufacturer: SKODA, Model Year: 2016, Model line: KODIAQ, Model: SKODA KODIAQ 2016 1.GPages: 344, PDF Size: 58.96 MB
Page 4 of 344
Table of Contents
Liability for defects and ŠKODA warranty for
new cars5
Printed Owner's Manual
7
Online Owner's Manual
8
Notes
9
Structure of the Owner´s Manual and further
information
10
Abbreviations
Safety
Passive Safety
12
General information
12
Correct and safe seated position
12
emergency call
14
Seat belts
15
Using seat belts
15
Inertia reel and belt tensioners
18
Airbag system
19
Description of the airbag system
19
Airbag deactivation
22
Transporting children safely
23
Child seat
23
Fastening systems
27
Operation
Cockpit
31
Overview
30
Instruments and warning lights
32
Instrument cluster
32
Warning lights
33Information system43Driver information system43
Operation of the information system
45
Driving data (Multifunction display)
46
MAXI DOT display
48
Service interval display
49
Personalization
50
Unlocking and opening
52
Unlocking and locking
52
Anti-theft alarm system
57
Manually operated tailgate
58
Electric boot lid
59
Window operation
61
Panoramic tilt / slide sunroof
63
Lights and visibility
65
Light
65
Interior lighting
71
Viisibility
72
Windscreen wipers and washers
73
Rear view mirror
75
Seats and head restraints
78
Front seats
78
Rear seats
80
Headrests
83
Seat heating and ventilation
85
Heated steering wheel
86
Practical features
87
Interior equipment
87
Electrical sockets
96
Ashtray and cigarette lighter
98
Tablet holder
99Transport of cargo100Luggage compartment100
Variable loading floor in the luggage
compartment (Estate)
106
Transportation on the roof rack
108
Heating and ventilation
109
Heating, manual air conditioning system,
Climatronic
109
Auxiliary heating (auxiliary heating and
ventilation)
114
Online services ŠKODA Connect
117
Introductory information
117
Care Connect-Services
118
infotainment online-Services
118
Infotainment
Introductory information
120
Important information
120
Infotainment Overview
121
Infotainment operation
124
Infotainment operation
124
Voice control
127
Updating the Infotainment software
129
Infotainment settings - Columbus, Amundsen,
Bolero
130
Infotainment system settings
130
Radio menu settings
133
Media menu settings
134
Image menu settings
134
Video DVD menu settings
134
Settings
134
SmartLink menu settings
136
Navigation menu settings
1362Table of Contents
Page 5 of 344
Infotainment settings - Swing138Infotainment system settings138
Radio menu settings
140
Media menu settings
140
Import contactsTelephone menu settings
140
SmartLink menu settings
141
Radio
141
service
141
Media
144
service
144
Audio sources
146
Images
151
Image viewer
151
Video DVD
153
video player
153
Media Command
154
Operation
154
Telephone
156
Introductory information
156
Pairing and connecting
159
Use the SIM card in the external module
162
rSAP
163
Telephone functions
164
Text messages (SMS)
168
Hotspot (WLAN) and data connection
170
Hotspot (WLAN)
170
Data Connection
171
SmartLink
172
Introductory information
172
Android Auto
173
Apple CarPlay
174
MirrorLink®
175
application ŠKODA One App
176Navigation 178Introductory information178
Search for destination and enter
182
Import your own goals
187
Map
189
Route guidance
192
Route
194
Waypoint mode
196
Traffic reports
199
Vehicle systems
201
CAR - Vehicle settings
201
Driving
Starting-off and Driving
202
Starting and stopping the engine
202
START-STOP-System
204
Brakes and Parking
206
Manual gear changing and pedals
208
Automatic transmission
209
Running in the engine and economical
driving
212
Avoiding damage to your vehicle
213
Assist systems
215
General information
215
Braking and stabilisation systems
215
OFF ROAD mode
218
Parking aid (ParkPilot)
220
Rear traffic alert and wizard for “Blind
spot”Monitoring
224
Rear View Camera
227
Area View (AreaView)
230
Park Assist
233
Trailer manoeuvring assistant (Trailer Assist)
237
Cruise Control System
239
Speed limiter
241
Adaptive Cruise Control (ACC)
243Front Assist248Select the driving mode (Driving Mode
Selection)251
Proactive passenger protection (Crew Protect
Assist)
253
Spurhalteassistent (Lane Assist)
254
Traffic jam assistant
256
Assistant for emergencies
257
Traffic sign recognition
257
Fatigue detection
259
Tyre pressure monitoring
260
Towing device and trailer
261
Hitch
261
Using hitch
263
General Maintenance
Care and maintenance
266
Service work, adjustments and technical
alterations
266
Service intervals
268
Cleaning and care
270
Inspecting and replenishing
274
Fuel
274
AdBlue ®
and its refilling
277
Engine compartment
278
Engine oil
280
Coolant
281
Brake fluid
282
Vehicle battery
283
Wheels
285
Wheels and tyres
285
Operating in winter conditions
2883Table of Contents
Page 7 of 344
Liability for defects and ŠKODA warranty for new cars
Materials defect liability
Your ŠKODA Partner, as a vendor, is liable to you for material damage to your
new ŠKODA car, ŠKODA Genuine Parts or ŠKODA Genuine Accessories in ac-
cordance with statutory regulations and the purchase agreement.
ŠKODA warranty for new cars
As well as the materials defect liability, ŠKODA AUTO a.s. grants you the
ŠKODA warranty for new cars (hereinafter referred to as “ŠKODA warranty),”
according to the conditions described below.
As part of the ŠKODA warranty, ŠKODA AUTO will ensure the following serv- ices.
▶ Free repair of faulty components or vehicle defects that occur within two
years from the start of the ŠKODA warranty.
▶ Free repair of paintwork defects on your vehicle that occur within three years
from the start of the ŠKODA warranty.
▶ Free repair of rust perforation to the bodywork of your vehicle that occurs
within twelve years from the start of the warranty. Only rust perforation of
body panels from the inside to the outside is included in the definition of rust
perforation on bodywork and covered by the ŠKODA warranty.
The start of warranty is the date on which the first buyer purchases the new
cars from the ŠKODA Partner 1)
. This date must be noted accordingly by the
ŠKODA Partner in the Owner´s Manual for your vehicle » Documentation of ve-
hicle handover .
Vehicle repairs may be carried out either by replacing the faulty part or by re-
pairing it. Replaced parts become the property of the ŠKODA Service Partner.
There shall be no further claims arising from the ŠKODA warranty. In particular,
there shall be no claims for replacement, cancellation, provision of a courtesy
vehicle for the duration of repairs or compensation for damages.If your ŠKODA vehicle was purchased from a ŠKODA Partner in a country in the
European Economic Area (i.e. the countries of the European Union, Norway,
Iceland and Liechtenstein) or in Switzerland, claims arising from the ŠKODA
warranty must also be made through a ŠKODA Service Partner in one of these
countries.
If your ŠKODA vehicle was purchased from a ŠKODA Partner outside the Euro-
pean Economic Area and Switzerland, claims arising from the ŠKODA warranty
must also be made through a ŠKODA Service Partner outside the European
Economic Area and Switzerland.
One of the conditions for service from the ŠKODA warranty is that all service
work has been carried out in a timely and adequate manner and in accordance
with ŠKODA AUTO provisions. It must be proven that service work has been
carried out properly and in accordance with the ŠKODA AUTO provisions when
raising a claim from the ŠKODA warranty. In the event of a missed service or
failure to carry out a service according to the ŠKODA AUTO provisions, you may
still be entitled to warranty claims as long as you can prove that the missed
service or the failure to carry out a service according to the ŠKODA AUTO provi-
sions was not the cause of the defect.
Natural wear and tear to your vehicle is not covered by the ŠKODA warranty.
The ŠKODA warranty also does not cover faults to bodywork, installations or
conversions provided by third-parties, or vehicle faults caused as a result. The
same applies to accessories that are not factory installed and/or delivered.
In addition, this warranty does not apply if the defect was caused by one of
the following: ▶ Unauthorized use, improper handling (e.g. use in racing competitions or over-
loading), improper care and maintenance or unapproved modification to your
vehicle.
▶ Non-compliance with provisions in the Owner's Manual or other factory-sup-
plied instructions.
▶ External causes or influences (e.g. accidents, hail, flooding etc.).
▶ Parts fitted on or in the vehicle whose use has not been approved by ŠKODA
AUTO, or modification of the vehicle in a manner not approved by ŠKODA
AUTO (e.g. tuning).
▶ Damage caused by you that was not immediately seen to by a specialist ga-
rage or was not rectified properly. 1)
Due to the requirements of generally binding country-specific regulations,
the date of first registration can be specified instead of the date the vehicle
handover.
5Liability for defects and ŠKODA warranty for new cars
Page 8 of 344
It is the customer's responsibility to prove that it was not the cause.
This ŠKODA warranty does not affect the purchaser's statutory rights from ma-
terials defect liability from the vehicle vendor and other potential claims from
product liability laws.
Mobility warranty
The mobility warranty provides a sense of security when travelling in your ve-
hicle.
If your vehicle breaks down on the road due to an unexpected defect, services
can be rendered under you mobility warranty to ensure that you remain mo-
bile. These services include: breakdown call at breakdown location and towing
away to ŠKODA service partner, technical assistance on the phone or starting-
up at the location of breakdown.
If your vehicle is not repaired on the same day, the ŠKODA Service Partner may
provide further services as required, such as replacement transportation (bus,
train etc.) or a courtesy vehicle etc.
More information regarding terms and conditions for the provision of a mobility
warranty for your vehicle can be obtained from your ŠKODA Partner. They will
also provide you with detailed terms and conditions for the mobility warranty
with respect to your vehicle. In the event that there is no mobility warranty
coverage available for your vehicle, you should check with any ŠKODA Service
Partner about the possibility of a subsequent agreement.
Optional ŠKODA extended warranty
If you opted for a ŠKODA extended warranty when purchasing your new car,
the two-year ŠKODA warranty with regards to all free warranty repairs is ex-
tended by the period you chose or until the chosen mileage limit has been
reached, whichever occurs first.
The previously mentioned paint warranty and the warranty against rust perfo-
ration are unaffected by the ŠKODA extended warranty.
The ŠKODA extended warranty does not apply to external and internal foils.
The information on the detailed conditions of the ŠKODA extended warranty is
provided by your ŠKODA partner.
Note
The ŠKODA extended warranty is only available in some countries.6Liability for defects and ŠKODA warranty for new cars
Page 11 of 344
Notes
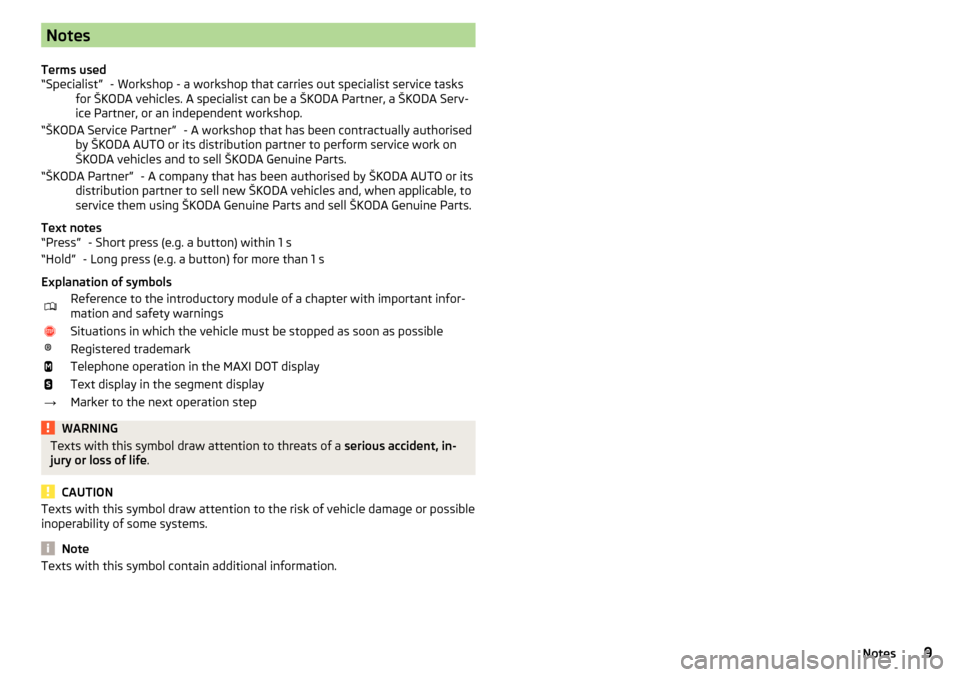
Terms used - Workshop - a workshop that carries out specialist service tasks
for ŠKODA vehicles. A specialist can be a ŠKODA Partner, a ŠKODA Serv- ice Partner, or an independent workshop.
- A workshop that has been contractually authorised
by ŠKODA AUTO or its distribution partner to perform service work on
ŠKODA vehicles and to sell ŠKODA Genuine Parts.
- A company that has been authorised by ŠKODA AUTO or its
distribution partner to sell new ŠKODA vehicles and, when applicable, to
service them using ŠKODA Genuine Parts and sell ŠKODA Genuine Parts.
Text notes - Short press (e.g. a button) within 1 s
- Long press (e.g. a button) for more than 1 s
Explanation of symbolsReference to the introductory module of a chapter with important infor-
mation and safety warningsSituations in which the vehicle must be stopped as soon as possible®Registered trademarkTelephone operation in the MAXI DOT displayText display in the segment display→Marker to the next operation stepWARNINGTexts with this symbol draw attention to threats of a serious accident, in-
jury or loss of life .
CAUTION
Texts with this symbol draw attention to the risk of vehicle damage or possible
inoperability of some systems.
Note
Texts with this symbol contain additional information.“Specialist”“ŠKODA Service Partner”“ŠKODA Partner”“Press”“Hold”9Notes
Page 12 of 344
Structure of the Owner´s Manual and further
information
Structure of the manual
The Owner's Manual is hierarchically divided into the following areas.
■ Paragraph (e.g. Operating instructions) - the title of the paragraph is always
indicated on the lower left-hand side ■ Main chapter (e.g. Checking and refilling) - the title of the main chapter is
always indicated on the lower right-hand side ■ Chapter (e.g. Engine oil)
■ Introductory information
- Module overview within the chapter, in-
troductory information about the chapter content and, where appropri-
ate, information relevant to the whole chapter
■ Module (e.g. Checking and refilling)
Information search
When searching for information in the Owner´s Manual, we recommend using
the Index at the end of the Owner's Manual.
Direction indications
All direction indications such as “left”, “right”, “front”, “rear” relate to the for- ward direction of travel of the vehicle.
Units
The volume, weight, speed and length data are given in metric units, unless
otherwise indicated.
Display
In this Owner's Manual, the MAXI DOT display is used as the display in the in-
strument cluster unless otherwise stated.
Emergency assistance
In the case of a breakdown, the required breakdown service contact informa- tion can be found in the following locations.
▶ Contact information from ŠKODA Partner (e.g. window sticker)
▶ Infotainment (Phone - breakdown service / information service menu)
▶ Mobile application ŠKODA
▶ ŠKODA websites10Structure of the Owner´s Manual and further information
Page 16 of 344
›Adjust the steering wheel to the desired position. The steering wheel can be
adjusted in direction of arrow 2.›
Pull the holder in arrow direction
3
until the stop.
WARNING■ Never adjust the steering wheel when the vehicle is moving only when
the vehicle is stationary!■
The safety lever must always be locked after adjusting so that the steer-
ing wheel cannot accidentally change position – risk of accident!
Passenger’s correct seating position
Read and observe
on page 13 first.
For passenger safety and to reduce the risk of injury in an accident, the follow-
ing instructions must be observed.
Position the front passenger seat back as far as possible. The front pas-
senger must maintain a distance of at least 25 cm to the dash panel so
that the airbag offers the greatest possible safety if it is deployed.
Adjust the headrests so that the top edge of the headrest is at the same
level as the upper part of your head » Fig. 2 on page 13 -
C
(not for seats
with integrated headrests).
Correctly fasten the seat belt » page 15, Using seat belts .
WARNING■
Ensure a distance of at least 25 cm to the dashboard, otherwise the air-
bag system will not be able to protect you properly - risk of death!■
Always keep your feet in the footwell when the car is being driven – nev-
er place your feet on the instrument panel, out of the window or on the
surface of the seats! You will be exposed to increased risk of injury if it be-
comes necessary to apply the brake or in the event of an accident. If an air-
bag is deployed, you could suffer fatal injuries by adopting an incorrect
seated position!
Passengers’ correct seating position on the rear seats
Read and observe
on page 13 first.
For passenger safety on the rear seats and to reduce the risk of injury in the
event of an accident, the following information must be observed.
Adjust the headrests so that the top edge of the headrest is at the same
level as the upper part of the head » Fig. 2 on page 13 -
C
.
Correctly fasten the seat belt » page 15, Using seat belts .
emergency call
Only valid for some countries.
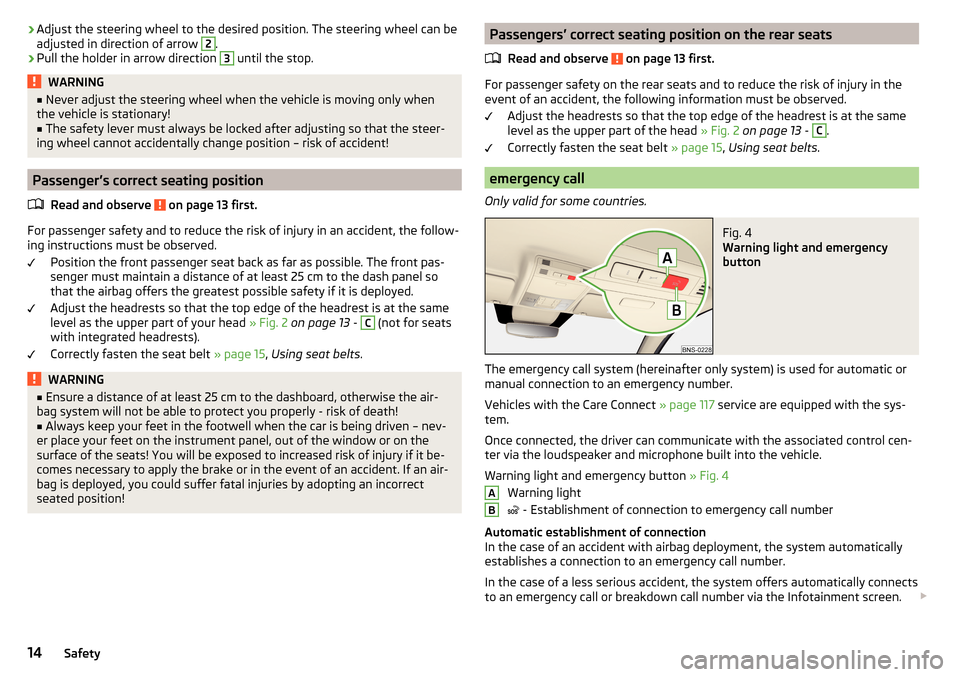
Fig. 4
Warning light and emergency
button
The emergency call system (hereinafter only system) is used for automatic or manual connection to an emergency number.
Vehicles with the Care Connect » page 117 service are equipped with the sys-
tem.
Once connected, the driver can communicate with the associated control cen-
ter via the loudspeaker and microphone built into the vehicle.
Warning light and emergency button » Fig. 4
Warning light
- Establishment of connection to emergency call number
Automatic establishment of connection
In the case of an accident with airbag deployment, the system automatically
establishes a connection to an emergency call number.
In the case of a less serious accident, the system offers automatically connects to an emergency call or breakdown call number via the Infotainment screen.
AB14Safety
Page 24 of 344
Airbag deactivation
Introduction
This chapter contains information on the following subjects:
Deactivating airbags
22
Deactivating the front passenger airbag
22
Deactivating airbags
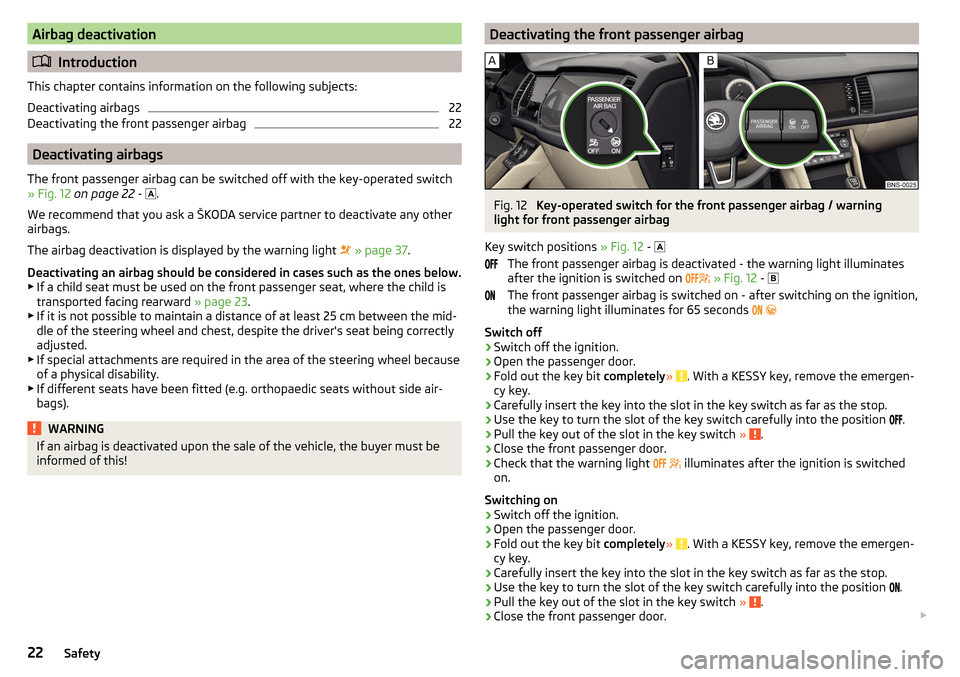
The front passenger airbag can be switched off with the key-operated switch
» Fig. 12 on page 22 -
.
We recommend that you ask a ŠKODA service partner to deactivate any other
airbags.
The airbag deactivation is displayed by the warning light
» page 37 .
Deactivating an airbag should be considered in cases such as the ones below. ▶ If a child seat must be used on the front passenger seat, where the child is
transported facing rearward » page 23.
▶ If it is not possible to maintain a distance of at least 25 cm between the mid-
dle of the steering wheel and chest, despite the driver's seat being correctly
adjusted.
▶ If special attachments are required in the area of the steering wheel because
of a physical disability.
▶ If different seats have been fitted (e.g. orthopaedic seats without side air-
bags).
WARNINGIf an airbag is deactivated upon the sale of the vehicle, the buyer must be
informed of this!Deactivating the front passenger airbagFig. 12
Key-operated switch for the front passenger airbag / warning
light for front passenger airbag
Key switch positions » Fig. 12 -
The front passenger airbag is deactivated - the warning light illuminates
after the ignition is switched on
» Fig. 12 -
The front passenger airbag is switched on - after switching on the ignition,
the warning light illuminates for 65 seconds
Switch off
›
Switch off the ignition.
›
Open the passenger door.
›
Fold out the key bit completely» . With a KESSY key, remove the emergen-
cy key.
›
Carefully insert the key into the slot in the key switch as far as the stop.
›
Use the key to turn the slot of the key switch carefully into the position .
›
Pull the key out of the slot in the key switch
» .
›
Close the front passenger door.
›
Check that the warning light
illuminates after the ignition is switched
on.
Switching on
›
Switch off the ignition.
›
Open the passenger door.
›
Fold out the key bit completely» . With a KESSY key, remove the emergen-
cy key.
›
Carefully insert the key into the slot in the key switch as far as the stop.
›
Use the key to turn the slot of the key switch carefully into the position .
›
Pull the key out of the slot in the key switch
» .
›
Close the front passenger door.
22Safety
Page 34 of 344
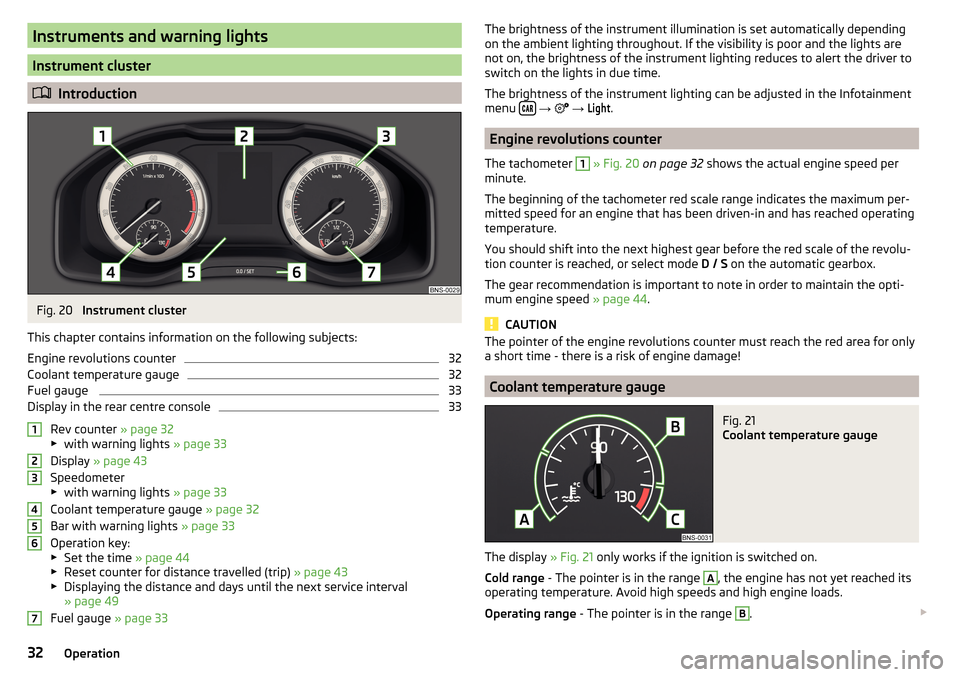
Instruments and warning lights
Instrument cluster
Introduction
Fig. 20
Instrument cluster
This chapter contains information on the following subjects:
Engine revolutions counter
32
Coolant temperature gauge
32
Fuel gauge
33
Display in the rear centre console
33
Rev counter » page 32
▶ with warning lights » page 33
Display » page 43
Speedometer
▶ with warning lights » page 33
Coolant temperature gauge » page 32
Bar with warning lights » page 33
Operation key:
▶ Set the time » page 44
▶ Reset counter for distance travelled (trip) » page 43
▶ Displaying the distance and days until the next service interval
» page 49
Fuel gauge » page 33
1234567The brightness of the instrument illumination is set automatically depending
on the ambient lighting throughout. If the visibility is poor and the lights are
not on, the brightness of the instrument lighting reduces to alert the driver to
switch on the lights in due time.
The brightness of the instrument lighting can be adjusted in the Infotainment
menu
→
→
Light
.
Engine revolutions counter
The tachometer
1
» Fig. 20 on page 32 shows the actual engine speed per
minute.
The beginning of the tachometer red scale range indicates the maximum per-
mitted speed for an engine that has been driven-in and has reached operating
temperature.
You should shift into the next highest gear before the red scale of the revolu-
tion counter is reached, or select mode D / S on the automatic gearbox.
The gear recommendation is important to note in order to maintain the opti-
mum engine speed » page 44.
CAUTION
The pointer of the engine revolutions counter must reach the red area for only
a short time - there is a risk of engine damage!
Coolant temperature gauge
Fig. 21
Coolant temperature gauge
The display » Fig. 21 only works if the ignition is switched on.
Cold range - The pointer is in the range
A
, the engine has not yet reached its
operating temperature. Avoid high speeds and high engine loads.
Operating range - The pointer is in the range
B
.
32Operation
Page 36 of 344
Fuel reserve38 Lane Departure Warning (Lane Assist)38
Turn signal system
38
Trailer turn signal lights
38
Fog lights
38
Speed regulating system / speed limiter
38
Brake pedal (automatic gearbox)
38
Auto Hold function
39
Main beam
39
Automatic gearbox
39
Rear seat belt warning light
39
Generator
39
Coolant
39
Engine oil pressure
40
Engine oil level
40
AdBlue ®
(diesel engine)
40
Lamp failure
41
Diesel particle filter (diesel)
41
Windscreen washer fluid level
41
High-beam assistant
41
START-STOPsystem
41
Display of a low temperature
42
Water in the fuel filter (diesel engine)
42
Adaptive Cruise Control (ACC)
42
Front Assist
42
Front assist
42
Economy mode
42
OFF ROAD mode
42
Adaptive Chassis Control (DCC)
42
Service
43
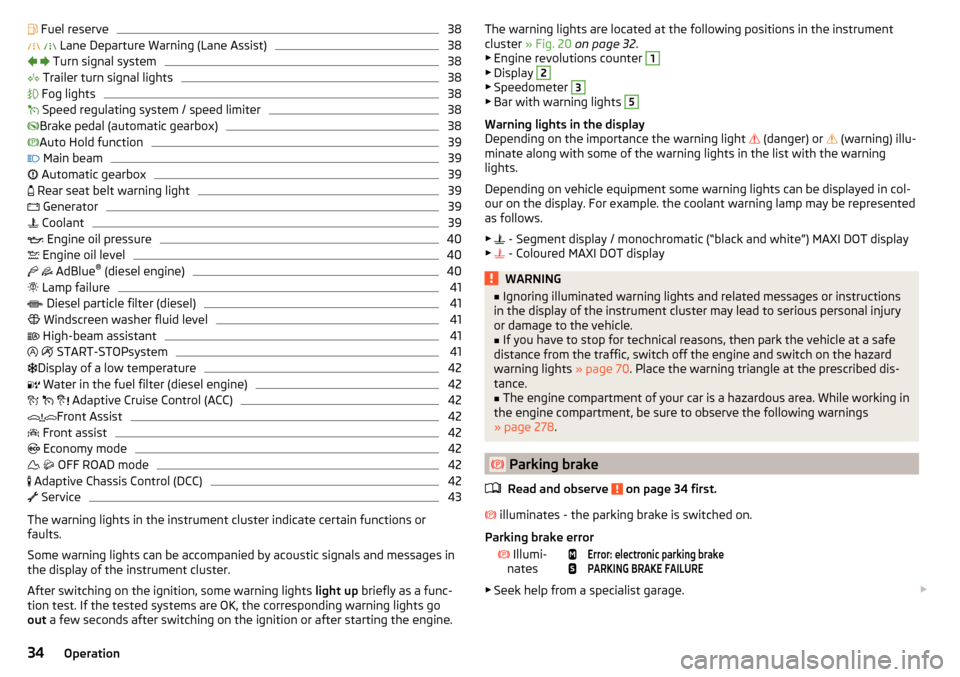
The warning lights in the instrument cluster indicate certain functions or
faults.
Some warning lights can be accompanied by acoustic signals and messages in
the display of the instrument cluster.
After switching on the ignition, some warning lights light up briefly as a func-
tion test. If the tested systems are OK, the corresponding warning lights go
out a few seconds after switching on the ignition or after starting the engine.
The warning lights are located at the following positions in the instrument
cluster » Fig. 20 on page 32 .
▶ Engine revolutions counter 1
▶Display
2
▶Speedometer
3
▶Bar with warning lights
5
Warning lights in the display
Depending on the importance the warning light
(danger) or
(warning) illu-
minate along with some of the warning lights in the list with the warning
lights.
Depending on vehicle equipment some warning lights can be displayed in col-
our on the display. For example. the coolant warning lamp may be represented
as follows.
▶ - Segment display / monochromatic (“black and white”) MAXI DOT display
▶ - Coloured MAXI DOT display
WARNING■
Ignoring illuminated warning lights and related messages or instructions
in the display of the instrument cluster may lead to serious personal injury
or damage to the vehicle.■
If you have to stop for technical reasons, then park the vehicle at a safe
distance from the traffic, switch off the engine and switch on the hazard
warning lights » page 70. Place the warning triangle at the prescribed dis-
tance.
■
The engine compartment of your car is a hazardous area. While working in
the engine compartment, be sure to observe the following warnings
» page 278 .
Parking brake
Read and observe
on page 34 first.
illuminates - the parking brake is switched on.
Parking brake error
Illumi-
nates
Error: electronic parking brakePARKING BRAKE FAILURE
▶ Seek help from a specialist garage.
34Operation