light SKODA OCTAVIA 2005 1.G / (1U) Owner's Manual
[x] Cancel search | Manufacturer: SKODA, Model Year: 2005, Model line: OCTAVIA, Model: SKODA OCTAVIA 2005 1.G / (1U)Pages: 315, PDF Size: 11.8 MB
Page 249 of 315
Inspecting and Replenishing
248
Opening the bonnet
– Unlock the bonnet ⇒page 247, fig. 189 .
– Ensure that the arms of the windscreen wipers are correctly in place against the windscreen before opening the bonnet
otherwise damage could occur to the paintwork.
– Pulling on the handle ⇒page 247, fig. 190 will lock the bonnet
fully.
– Grip with the hand under the radiator grille and lift up the bonnet.
– Take the bonnet support out of its holder and set it in the opening designed for it ⇒page 247, fig. 191.
Closing the bonnet
– Lift the bonnet slightly and unhook the bonnet support. Press the bonnet support into the holder designed to hold it.
– Allow the bonnet to drop from a height of about 30 cm into the lock - bonnet do not press down on it !
WARNING
•Never open the bonnet if you see that steam or coolant is
flowing out of the engine compartment - risk of scalding! Wait long
enough until the steam or coolant has stopped escaping.
•For safety reasons, the bonnet must always be properly closed
when driving. One should therefore check that the lock has in fact
engaged properly after closing the bonnet.
•Stop your vehicle immediately whil e driving if you notice that
the lock is not properly engaged and close the bonnet properly -
risk of an accident!
Caution
Never open the bonnet using the handle - danger of causing damage.
Working in the engine compartment
Particular care is required when carrying out any work in
the engine compartment!
There is a risk of injuries, scalding, accidents and fire when working
in the engine compartment, e.g. inspecting and replenishing oil and
other fluids. For this reason, it is essential to comply with the
warning instructions stated below and with the general applicable
rules of safety. The engine compartment of your car is a hazardous
area ⇒ .
WARNING
•Never open the bonnet if you see that steam or coolant is
flowing out of the engine compartment - risk of scalding! Wait long
enough until the steam or coolant has stopped escaping.
•Switch off the engine and pull out the ignition key.
•Apply the handbrake firmly.
•If your vehicle is fitted with a manual gearbox, move the gear-
shift lever into Neutral, or if it is fitted with automatic gearbox,
move the selector lever into position P.
WARNING (continued)
s24s.book Page 248 Thursday, November 24, 2005 12:27 PM
Page 253 of 315
Inspecting and Replenishing
252
Oil level within range
– You may top up the oil. It is possible that the oil level may then
be within range after doing this.
Oil level within range
– You must top up the oil ⇒page 252. It is sufficient, once this
is done, to keep the oil level is within range .
It is normal for the engine to consume oil. The oil consumption may be as
much as 0.5 l/1 000 km depending on your style of driving and the condi-
tions under which you operate your vehicle. The oil consumption may be
slightly higher than this during the first 5 000 kilometres.
One should therefore check the oil level at regular intervals, preferably
every time after the fuel tank is filled or after driving for long stretches.
We recommend maintaining the oil level within the range if the engine
has been operating at high loads, for example during a lengthy motorway
trip during the summer months, towing a trailer or negotiating a high
mountain pass, but not above this .
The warning light in the instrument cluster* will indicate ⇒page 38,
“Engine oil level* ” whether the oil level is too low. In this case, check
the oil level as soon as possible. Top up with an appropriate quantity of oil.
Caution
•The oil level must on no account extend beyond the range . Danger
of damaging the catalytic converter.
•Do not continue your journey if for some reason it is not possible
under the conditions prevailing to top up with oil. Switch of the engine
and contact and obtain professional assistance from a specialist
garage.
Replenishing engine oil
– Inspecting the engine oil level ⇒page 251.
– Unscrew the cap of the engine oil filler opening.
– Pour in a suitable grade of oil in portions of 0.5 litres ⇒page 250, “Engine oil specifications”.
– Inspect the oil level ⇒page 251.
– Carefully screw on the cap of the filler opening and push the dipstick in fully.
WARNING
•Avoid dripping oil onto hot parts of the engine when topping up
will oil - a risk of fire!
•Read and observe the warning notes ⇒ page 248, “Working in
the engine compartment” before working in the engine compart-
ment.
For the sake of the environment
The oil level must on no account be above the range ⇒page 251. Oil
will otherwise be drawn in through the crankcase ventilation and may pass
through the exhaust system to atmosphere. The oil may combust in the
catalytic converter and damage it.
Ab
Aa
Ac
Ab
Aa
Aa
Aa
s24s.book Page 252 Thursday, November 24, 2005 12:27 PM
Page 255 of 315
Inspecting and Replenishing
254
Coolant
The cooling system is filled at the works with coolant (purple in colour),
which complies with the specification TL-VW 774 F.
We recommend that you use the same coolant additive - G12 PLUS
(purple in colour).
Please contact your Škoda dealer if you have any questions regarding the
coolant or if you wish to fill up with a different coolant.
Your Škoda dealer can also supply you with the correct coolant additives.
Caution
•Other coolant additives may cause operational problems which,
in particular, involves significantly reducing the anticorrosion effect.
•Any faults or problems resulting from corrosion may cause a loss
of coolant and, as a consequence of this, result in major engine
damage.
Inspecting the coolant level
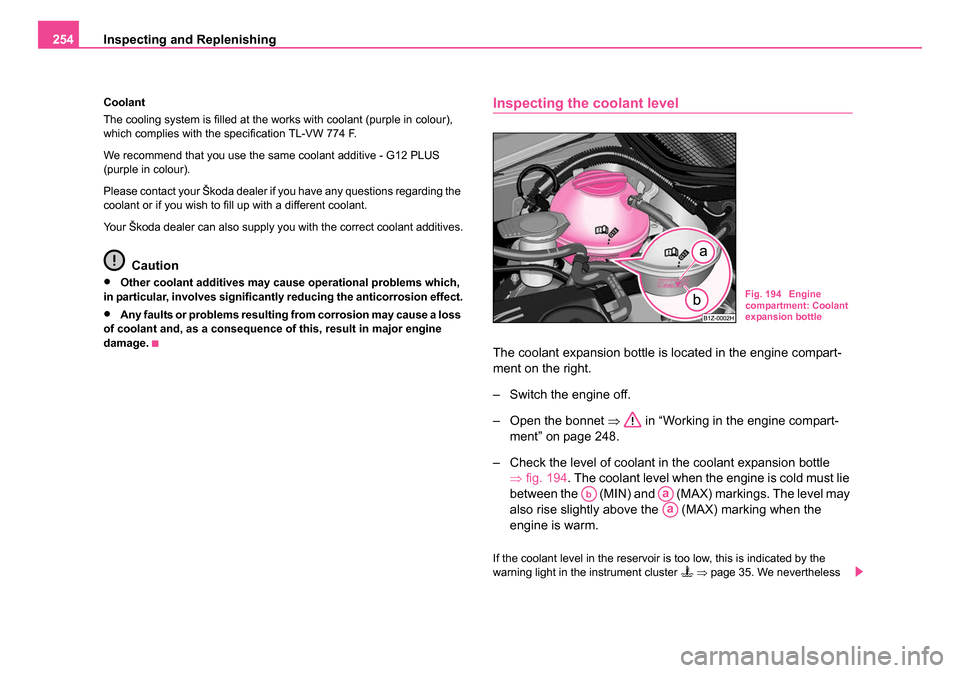
The coolant expansion bottle is located in the engine compart-
ment on the right.
– Switch the engine off.
– Open the bonnet ⇒ in “Working in the engine compart-
ment” on page 248.
– Check the level of coolant in the coolant expansion bottle ⇒fig. 194 . The coolant level when the engine is cold must lie
between the (MIN) and (MAX) markings. The level may
also rise slightly above the (MAX) marking when the
engine is warm.
If the coolant level in the reservoir is too low, this is indicated by the
warning light in the instrument cluster ⇒ page 35. We nevertheless
Fig. 194 Engine
compartment: Coolant
expansion bottle
AbAa
Aa
s24s.book Page 254 Thursday, November 24, 2005 12:27 PM
Page 257 of 315
Inspecting and Replenishing
256
Caution
Do not continue your journey if for some reason it is not possible
under the conditions prevailing to top up with coolant. Switch of the
engine and contact and obtain professional assistance from a specialist
garage.
For the sake of the environment
Do not re-use coolant if it is necessary to drain the coolant in the system.
It should be collected and disposed of in compliance with environmental
protection regulations.
The radiator fan
The radiator fan may switch on suddenly.
The radiator fan is driven by an electric motor and controlled according to
the coolant temperature.
The radiator fan may continue running for up to 10 minutes after the
engine has been switched off - even if the ignition is also off. It may also
switch on suddenly after a certain time, if
•the coolant temperature has risen because of an accumulation of heat
or
•the warm engine compartment is heated up additionally by strong
sunlight.
WARNING
You must therefore be aware when working in the engine compart-
ment that the fan may switch on suddenly - risk of injury!
Brake fluid
Inspecting the brake fluid level
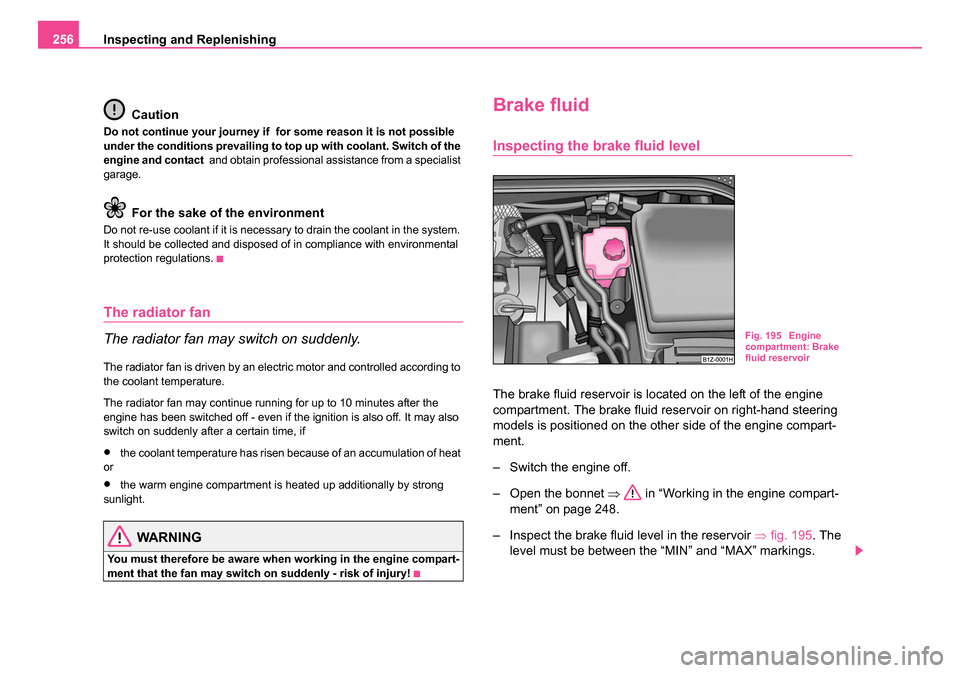
The brake fluid reservoir is located on the left of the engine
compartment. The brake fluid reservoir on right-hand steering
models is positioned on the other side of the engine compart-
ment.
– Switch the engine off.
– Open the bonnet ⇒ in “Working in the engine compart-
ment” on page 248.
– Inspect the brake fluid level in the reservoir ⇒fig. 195 . The
level must be between the “MIN” and “MAX” markings.
Fig. 195 Engine
compartment: Brake
fluid reservoir
s24s.book Page 256 Thursday, November 24, 2005 12:27 PM
Page 258 of 315
Inspecting and Replenishing257
Using the systemSafetyDriving TipsGeneral MaintenanceBreakdown assistanceTechnical Data
A slight drop in the fluid level results when driving due to normal wear-and-
tear and automatic adjustment of the brake pads, and is perfectly normal.
There may be an indication of a leak in the brake system, however, if the
fluid level drops significantly within a short time or if it drops below the
“MIN” marking. A situation where the brake fluid level is too low is indi-
cated by the warning light
lighting up in the instrument cluster
⇒ page 40. In this case stop the car immediately and do not drive any
further! Contact a Škoda Dealer to obtain professional assistance.
WARNING
•Read and observe the warning notes ⇒page 248, “Working in
the engine compartment” before working in the engine compart-
ment.
•If the fluid level has dropped below the “MIN” marking, do not
drive any further - risk of accident! Contact a Škoda dealer to obtain
professional assistance.
Replacing brake fluid
Brake fluid absorbs moisture. This causes the fluid to absorb moisture
from the surrounding air over a period of time. Excessive water in the
brake fluid may be the cause of corrosion in the brake system. The water
content also lowers the boiling point of the brake fluid. This is why brake
fluid must be replaced every two years.
One may only use new genuine brake fluid from Škoda Auto. The specifi-
cation for the brake fluid is “FMVSS 116 DOT 4”.
We recommend that you have the brake fluid replaced by a Škoda dealer
as part of an Inspection Service.
WARNING
•Using old brake fluid can result in severe stress on the brakes
because of the formation of vapour bubbles in the brake system.
This greatly impairs the braking efficiency and thus also the safety
of your vehicle.
•Brake fluid is toxic! It must therefore be kept safely in closed
original containers and well away from children and unauthorized
persons.
Caution
Brake fluid damages the paintwork of the vehicle.
For the sake of the environment
In view of the problems involved with proper disposal of brake fluid, the
special tools and the professional knowledge required, you should have
the brake fluid replaced by a Škoda dealer.
s24s.book Page 257 Thursday, November 24, 2005 12:27 PM
Page 260 of 315
Inspecting and Replenishing259
Using the systemSafetyDriving TipsGeneral MaintenanceBreakdown assistanceTechnical Data
•It is prohibited to work with a naked flame and light, to smoke or
to carry out any activities which produce sparks. Avoid creating
sparks when working with cables and electrical devices. Strong
sparking represents a risk of injury.
•Before carrying out any work on the electrical system, switch
off the engine, the ignition as well as all electrical components and
disconnect the negative cable (-) on the battery. If you wish to
replace a bulb it is sufficient to switch off the appropriate light.
•Never charge a frozen or thawed battery - risk of explosion and
caustic burns! Replace a frozen battery.
•Never use a battery which is damaged - risk of explosion! Imme-
diately replace a damaged battery.
Caution
•You must only disconnect the battery if the ignition is switched on,
otherwise the electrical system (electronic components) of the vehicle
may be damaged. When disconnecting the battery from the electrical
system of the vehicle, first disconnect the negative terminal (-) of the
battery. Then disconnect the positive terminal (+).
•When reconnecting the battery, first connect the positive terminal (+)
and only then the negative terminal (-) of the battery. You must on no
account connect the cables wrongly - risk of a cable fire.
•Ensure that battery acid does not come into contact with the vehicle
body otherwise damage could occur to the paintwork.
•Do not place the battery in direct daylight in order to protect the battery
housing from the effects of ultra-violet light.
For the sake of the environment
A removed battery is a special type of waste which is harmful to the envi-
ronment - contact your specialist garage regarding disposing of the
battery.
Note
Please also refer to the guidelines ⇒page 261, “Disconnecting and recon-
necting the battery”, also after connecting the battery.
Battery with a charge level indicator, the so-called
magic eye
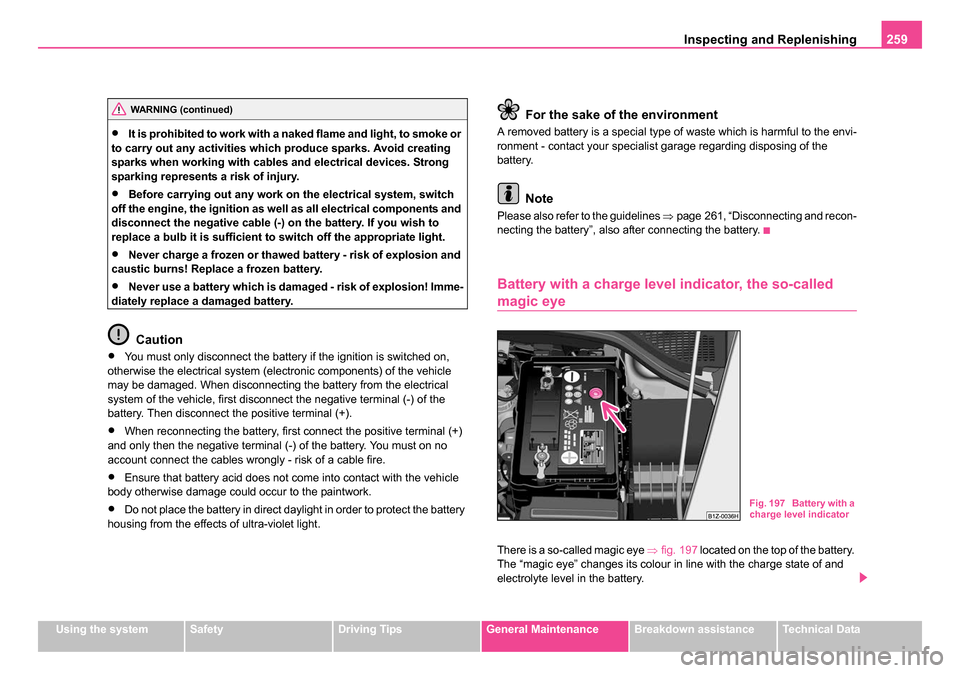
There is a so-called magic eye ⇒fig. 197 located on the top of the battery.
The “magic eye” changes its colour in line with the charge state of and
electrolyte level in the battery.
WARNING (continued)
Fig. 197 Battery with a
charge level indicator
s24s.book Page 259 Thursday, November 24, 2005 12:27 PM
Page 263 of 315
Inspecting and Replenishing
262
We recommend that you only have an old battery disposed of by your
Škoda dealer since it does require special disposal.
For the sake of the environment
Batteries contain poisonous substances such as sulphuric acid and lead.
They must be disposed of in accordance with local environmental protec-
tion regulations and on no account as domestic waste.
Windscreen Wiper and Washer System
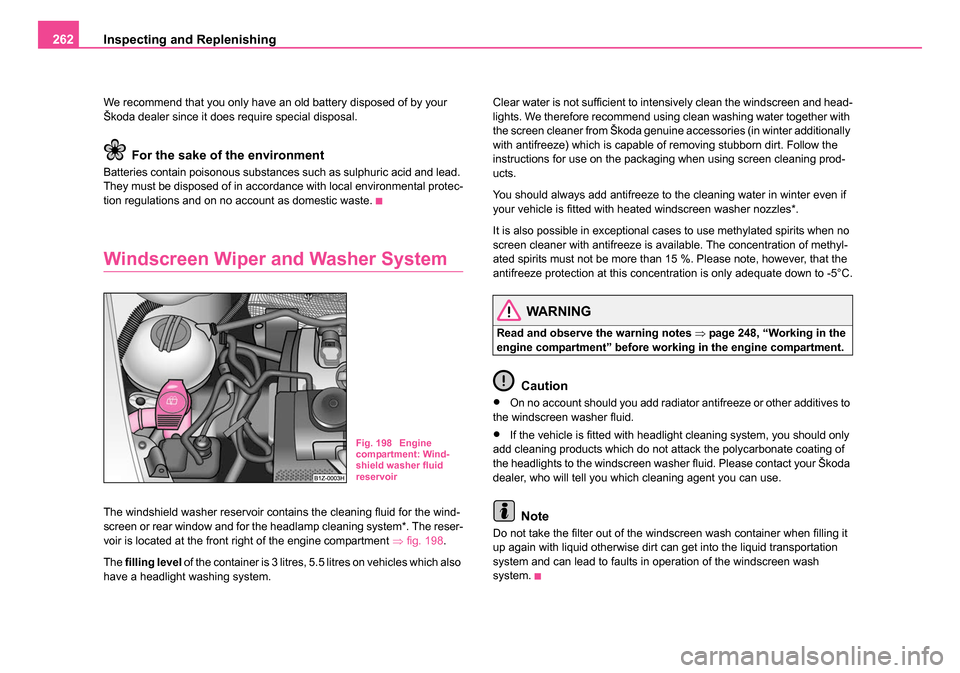
The windshield washer reservoir contains the cleaning fluid for the wind-
screen or rear window and for the headlamp cleaning system*. The reser-
voir is located at the front right of the engine compartment ⇒fig. 198 .
The filling level of the container is 3 litres, 5.5 litres on vehicles which also
have a headlight washing system. Clear water is not sufficient to intensively clean the windscreen and head-
lights. We therefore recommend using clean washing water together with
the screen cleaner from Škoda genuine accessories (in winter additionally
with antifreeze) which is capable of removing stubborn dirt. Follow the
instructions for use on the packaging when using screen cleaning prod-
ucts.
You should always add antifreeze to the cleaning water in winter even if
your vehicle is fitted with heated windscreen washer nozzles*.
It is also possible in exceptional cases to use methylated spirits when no
screen cleaner with antifreeze is available. The concentration of methyl-
ated spirits must not be more than 15 %. Please note, however, that the
antifreeze protection at this concentration is only adequate down to -5°C.
WARNING
Read and observe the warning notes ⇒
page 248, “Working in the
engine compartment” before working in the engine compartment.
Caution
•On no account should you add radiator antifreeze or other additives to
the windscreen washer fluid.
•If the vehicle is fitted with headlight cleaning system, you should only
add cleaning products which do not attack the polycarbonate coating of
the headlights to the windscreen washer fluid. Please contact your Škoda
dealer, who will tell you which cleaning agent you can use.
Note
Do not take the filter out of the windscreen wash container when filling it
up again with liquid otherwise dirt can get into the liquid transportation
system and can lead to faults in operation of the windscreen wash
system.
Fig. 198 Engine
compartment: Wind-
shield washer fluid
reservoir
s24s.book Page 262 Thursday, November 24, 2005 12:27 PM
Page 268 of 315
Wheels and Tyres267
Using the systemSafetyDriving TipsGeneral MaintenanceBreakdown assistanceTechnical Data
risk of accident! Approval and li
cencing of your vehicle on public
roads may also become void as a result.
•You must on no account drive at a higher speed than is permis-
sible for your tyres - risk of an accident resulting from tyre damage
and loss of control over your vehicle.
•Tyres which are 6 years old or more should only be fitted in
exceptional cases and when adopting an appropriately cautious
style of driving.
•Never fit tyres which have already been used without having
adequate knowledge of their previous history. Tyres age even if
they have not been used at all or only very little. A spare tyre must
only be used in exceptional cases and only then when adopting an
appropriately cautious style of driving.
•Do not, where possible, replace individual tyres but at least
replace them on both wheels of a given axle at the same time.
Always fit the tyres with the deeper tread depth to the front wheels.
For the sake of the environment
Old tyres must be disposed of in conformity with the appropriate regula-
tions.
Note
It is not normally possible to fit wheels from other models of cars for tech-
nical reasons. This may also apply in certain circumstances to the wheels
of the same type of vehicle.
Wheel bolts
Wheels and wheel bolts are matched to each other in terms of design.
Each time you fit other wheels - e.g. light alloy wheels or wheels with
winter tyres - you must therefore also use the matching wheel bolts of the
correct length and shape of spherical cap. This is essential to ensure that
the wheels are tightly fitted and that the brake system operates properly.
If you retrofit wheel trims (or have this done), please also ensure that an
adequate flow of air remains assured for cooling the brake system.
Škoda dealers are instructed in the technical possibilities which exist
regarding converting or retrofitting wheels, tyres and wheel trim.
WARNING
•In case of incorrect treatment of the wheel bolts, the wheel can
loosen when the car is moving - risk of accident!
•The wheel bolts must be clean and must turn easily. However,
they must never be treated with grease or oil.
•If the wheel bolts are tightened to a too low tightening torque,
the rim can lossen when the car is moving - risk of accident! A tight-
ening torque which is too high can damage the bolts and threads
and this can result in perman ent deformation of the contact
surfaces on the rims.
Caution
The prescribed tightening torque of the wheel bolts for steel and light alloy
wheels is 120 Nm.
WARNING (continued)
s24s.book Page 267 Thursday, November 24, 2005 12:27 PM
Page 277 of 315
Breakdown assistance
276
•Do not drive with this spare wheel at more than 80 km/h - risk of acci-
dent. Avoid accelerating at full throttle, sharp braking and fast cornering.
•The inflation pressure for this spare wheel is identical to the inflation
pressure of the standard tyres. The temporary spare wheel R 18 must
have an inflation pressure of 420 kPa (4.2 bar)!
•Use this spare wheel only to reach the nearest specialist garage as it
is not intended for continuous use.
•No other summer or winter tyres must be mounted on the rim of the
spare wheel R 18.
Changing a wheel
Preliminary work
The following steps should be carried out before actually
changing the wheel.
– If it is necessary to change a wheel, park the vehicle as far away as possible from the traffic flow. The place you choose
should be level.
–Have all the occupants get out. While changing a wheel, the
occupants of the vehicle should not stand on the road (it is
better behind a crash barrier).
– Apply the handbrake firmly.
– Engage 1st gear or if your vehicle is fitted with an automatic
gearbox, position the selector lever into position P .
– If a trailer is coupled, uncouple it. – Take the
vehicle tool kit ⇒ page 274 and the spare wheel
⇒ page 275 out of the luggage compartment.
WARNING
•If you find yourself in flowing traffic switch on the hazard
warning lights system and place the warning triangle on the side of
the road at the prescribed distance from your vehicle while
observing all national legal provisions. In this way you are
protecting not only yourself but also other road users.
•Never start the engine with the vehicle sitting on the raised jack
- danger of suffering injury!
Caution
If you have to change a wheel on a slope first block the opposite wheel
with a stone or similar object in order to secure the vehicle from unexpect-
edly rolling away.
Note
Comply with the national legal regulations.
Changing a wheel
Always change a wheel on a level surface as far as possible.
– Take off the full wheel trim* ⇒page 278 or the caps
⇒ page 278.
– In the case of light alloy wheels remove the wheel trim cap ⇒page 279.
s24s.book Page 276 Thursday, November 24, 2005 12:27 PM
Page 278 of 315
Breakdown assistance277
Using the systemSafetyDriving TipsGeneral MaintenanceBreakdown assistanceTechnical Data
– Slacken the wheel bolts ⇒page 279.
– Jack up the vehicle until the wheel to be changed is clear of the ground ⇒page 280.
– Unscrew the wheel bolts and place them on a clean surface (cloth, paper etc.).
– Take off the wheel.
– Fit on the spare wheel and tighten the wheel bolts slightly.
– Lower the car.
– Tighten the wheel bolts firmly, alternately and diagonally using the wheel wrench ⇒page 279.
– Mount the full wheel trim/wheel trim cap or the caps.
Note
•All bolts must be clean and must turn easily.
•You must never grease or oil the wheel bolts!
•When fitting on unidirectional tyres, ensure that the tyres rotate in the
correct direction ⇒page 263.
Subsequent steps
After changing the wheel, you must perform the following steps.
– Stow and attach the replaced wheel in the spare wheel well.
– Stow the vehicle tool kit in the space provided. –
Check the tyre pressure on the spare wheel just mounted as
soon as possible.
– Have the tightening torque of the wheel bolts checked with
a torque wrench as soon as possible. Steel and light alloy
wheels must be tightened to a tightening torque of 120 Nm.
– Have the defective tyre repaired as soon as possible.
WARNING
It is necessary to observe the guidelines given on ⇒page 266, “New
tyres and wheels” if the vehicle is subsequently fitted with tyres
which are different to those it was fitted with at the works.
Note
•If you find, when changing the wheel, that the wheel bolts are corroded
and difficult to turn, the bolts must be replaced before checking the tight-
ening torque.
•Drive cautiously and only at a moderate speed to a workshop where
the tightening torque can be checked.
s24s.book Page 277 Thursday, November 24, 2005 12:27 PM